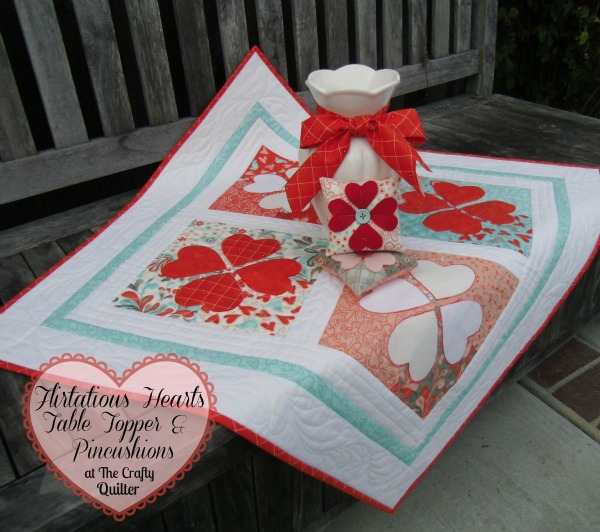
Heart Sachet Tutorial
 It’s February (where did January go?) and I thought it would be a good time to share a fun tutorial on how to make a heart sachet. I originally got this idea from the Moda Bake Shop. I used Moda layer cakes for mine and made it a little bit smaller than the original version. So let’s get started:
Step 1: You will need 6 layer cakes (10 ” squares) of coordinating fabric. This will be enough to make 4 heart sachets. You’ll also need some polyester stuffing and lavender oil.
Take two of the layer cakes and from each cut (1) 2″ wide strip, (1) 8″ square and (1) 2″ x 8″ rectangle as shown below.

Step 2: From the remaining layer cakes, cut (1) 2″ x 10″ strip from each. Subcut the remaining piece (which should now be a 8″ x 10″ rectangle) into (4) 2″ x 8″ rectangles. Arrange those 2″ x 8″ rectangles (including the ones from previous step) into sets of five as shown and sew together with 1/4″ seam. Press seams to one side. You should have a total of 4 strip sets that measure 8″ x 8″ square.

Step 3: Cut the 8″ square strip sets on the diagonal as shown. Do the same thing with the two 8″ plain squares from step 1.
Step 4: With right sides together, sew a pieced triangle to a plain triangle, leaving a 2″ gap along the center of the long side. Clip corners bluntly and turn right side out.

Step 5: Stuff the triangle with polyester stuffing. If you want to make it smell pretty, add a few drops of lavender oil to the stuffing first. You don’t need the stuffing to reach too far into the two points of the triangle since this will get sewn together eventually to form the top of the heart.
Step 6: Sew the opening closed. I do this by machine (lazy me). Next, you want to take the two long triangle points and overlap them to form the handle for your heart. Stitch across the overlap to secure – again I did this by machine. It should begin to look like a heart shape by now (hurray!)


Step 7: Make the bow for the heart by taking (2) 2″ x 10″ rectangles and draw a 45 ° diagonal line on each end as show in picture. Sew 1/4″ all the way around, leaving a 2″ opening along one long side. Trim points bluntly and turn right side out. Press. Stitch opening closed.

Step 8: Assembly your cute heart sachets! Tie the bow around the heart handle and adjust until it looks just right.
Don’t you love it? Hearty goodness that smells nice too!

Hi Julie…even 10 years later I still refer back to some of your beautiful projects for inspiration. I remembered I did not make myself one of these hearts, but I did for friends and family-So I am making myself one now. As a quilter I think this is a great idea to use scraps and make for gifts for the ladies at our annual quilt retreat. You have other heart projects that were made by you that I have made and still enjoy. Thanks and Happy New Year.
Thank you, Monica! That warms my heart to that.
I have been wary of joining wadding pieces but found your instructions user friendly and helpful. I now have a piece of wadding large enough for my grandson’s quilt and am eager to join other off cuts of wadding for future projects. Thank you so much.
I love your many creative ideas and the easy to follow directions! Can’t wait to try them all!!!
Thanks for the great tutorial! Perfect for Valentine’s Day and so cute!