Holiday Mug Rug Tutorial
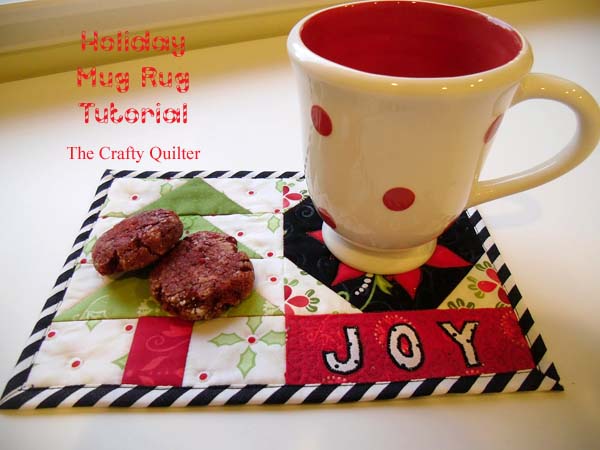
It’s official! The holidays are here and I have a Holiday Mug Rug Tutorial to get you in the Christmas spirit! I love this design because it allows you to add some personalization:
or your own words:
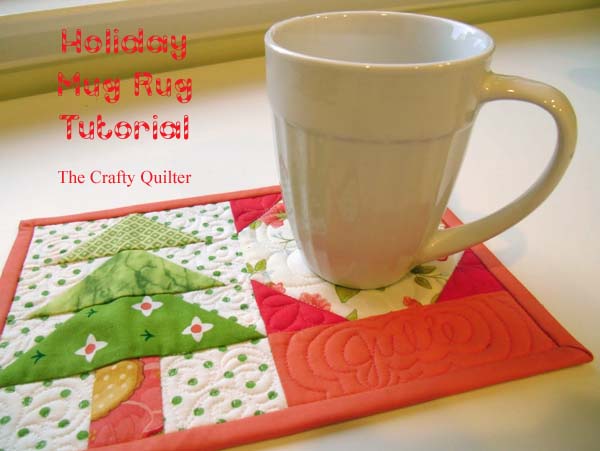
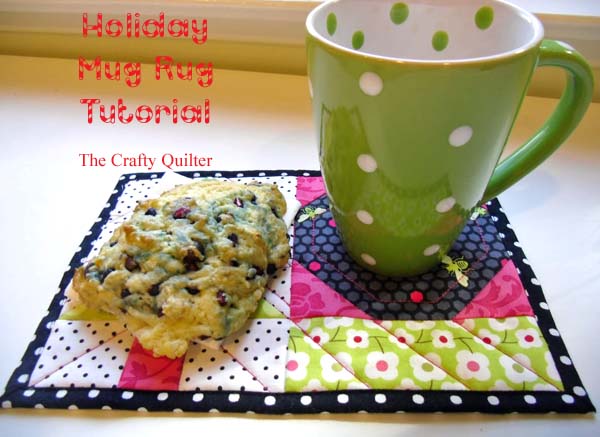
or just some cute fabric:
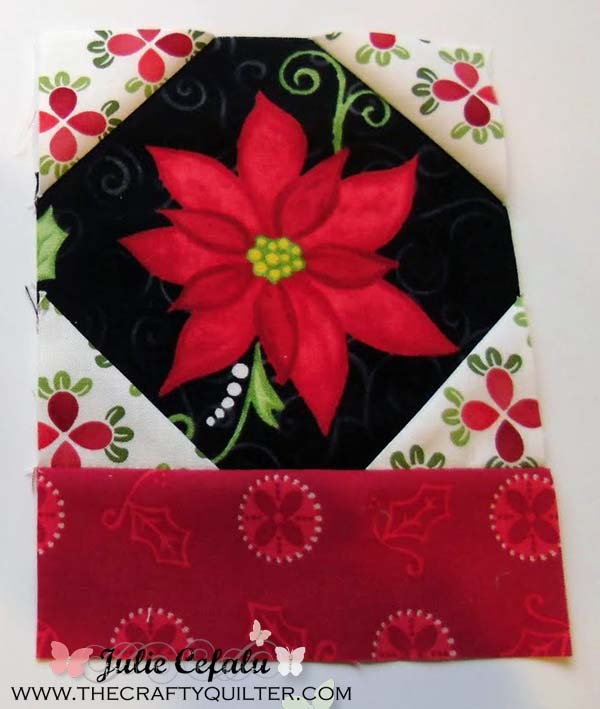
And you can also fussy cut (so that a design or motif is centered in the cut) the snowball block:
So here’s what you need to get started (revised 12/3/12):
Assorted fabric scraps for mug rug and 9″ x 12″ piece of batting and backing
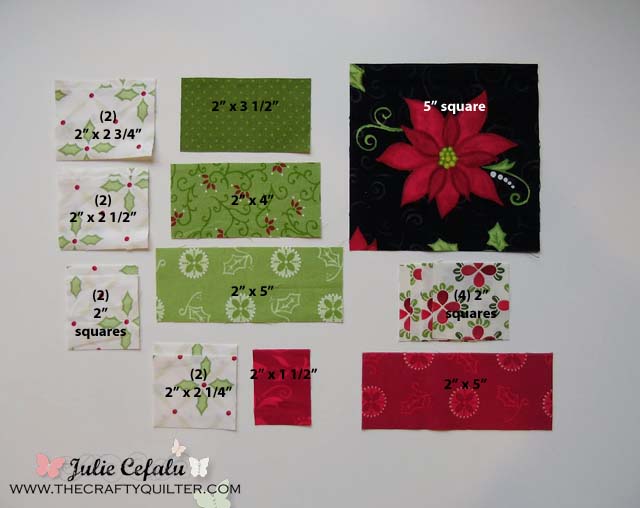
You’ll need to cut the following pieces:
- (1) 5 ” square (snowball center)
- (4) 2″ squares (snowball corners)
- (1) 2″ x 5″ rectangle (bottom of snowball unit)
- Tree pieces: (1) 2″ x 3 1/2″ rectangle, (1) 2″ x 4″ rectangle and (1) 2″ x 5″ rectangle
- (1) 1 1/2″ x 2″ rectangle (tree trunk)
- Tree background pieces: (2) 2″ squares, (2) 2″ x 2 1/4″ rectangles, (2) 2″ x 2 3/4″ rectangles (2) 2″ x 2 1/2″ rectangles
Finished size of mug rug: 6 1/2″ x 9 1/2″
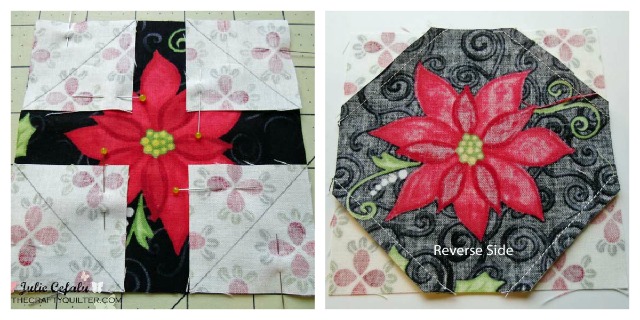
Step 1: Make the snowball: Draw a diagonal line on the (4) 2″ snowball squares and pin to each corner of the 5″ square. Stitch just to the right of the drawn line. Press towards the outer corners and trim.
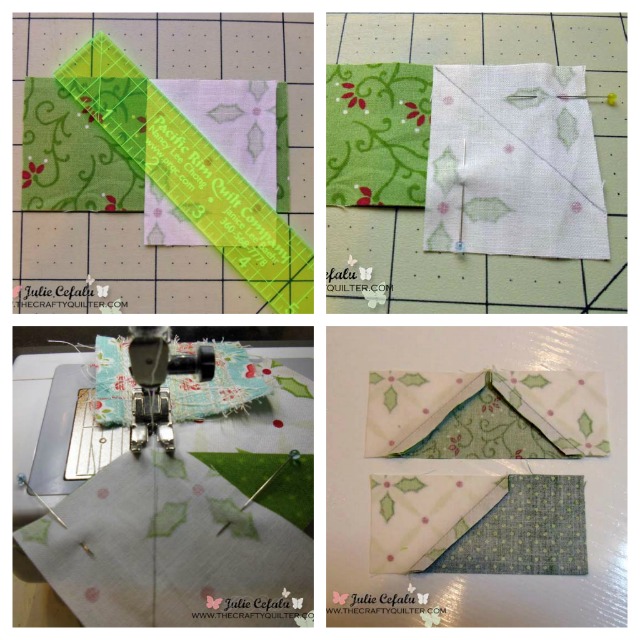
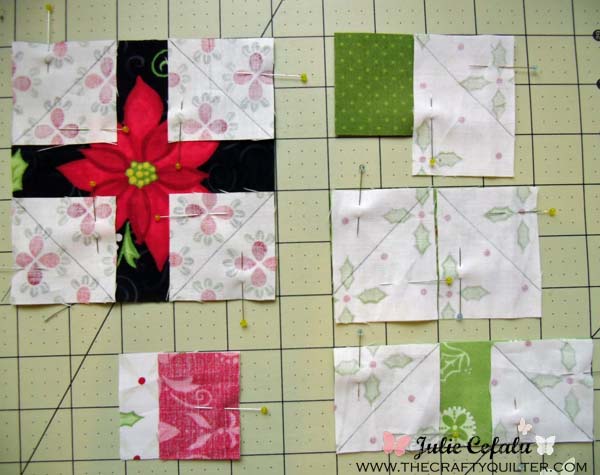
Step 2: Make the tree. Draw a diagonal line on the remaining background squares/rectangles. For the rectangles, place the background rectangle on top of the green rectangle so that the top edges line up and you can see where the bottom edges intersect. Draw the line from top corner to bottom intersection as shown:
Pin in place so that raw edges are even and stitch just next to the drawn line. Press towards the tree fabric (this makes the tree pop out a bit) and trim. Each tree rectangle should measure 2″ x 5″.
To make things efficient, I drew all of my lines and pinned the pieces together first and then chain pieced:
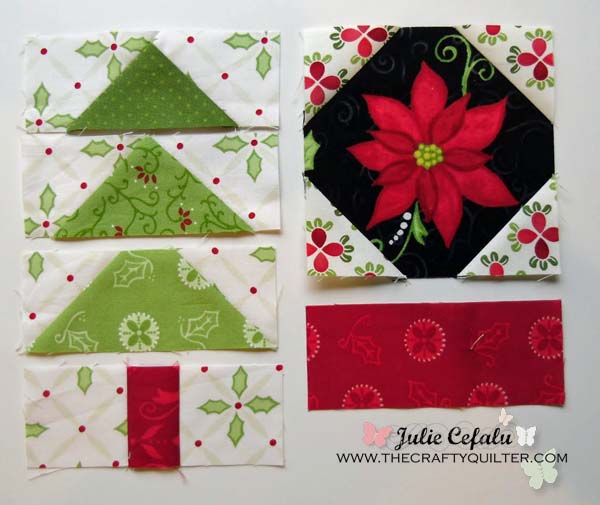
Step 3: Assemble the mug rug unit. Arrange the tree rectangles in order as shown below as well as the snowball unit and 2″ x 5″ rectangle. Stitch together the tree pieces. Press seam of tree trunk unit up towards tree. The other tree seams can be pressed either way.
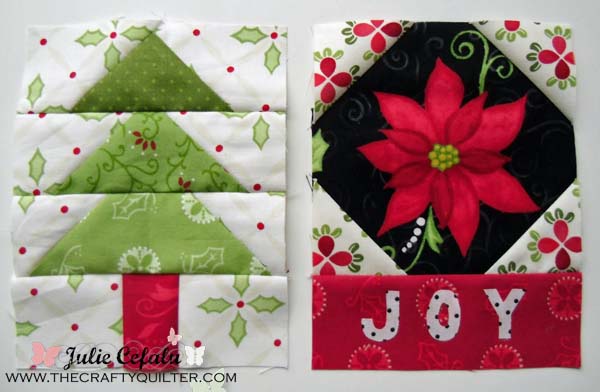
Stitch the snowball unit and rectangle together and press seam down towards rectangle.
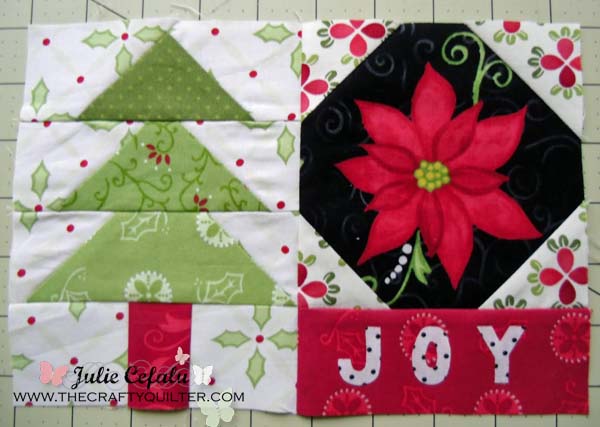
Step 4: Stitch the two halves together, nesting the lower rectangle seams and pinning first. Press seam to either side.
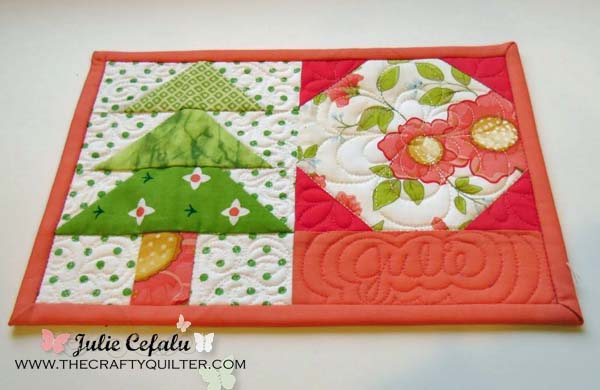
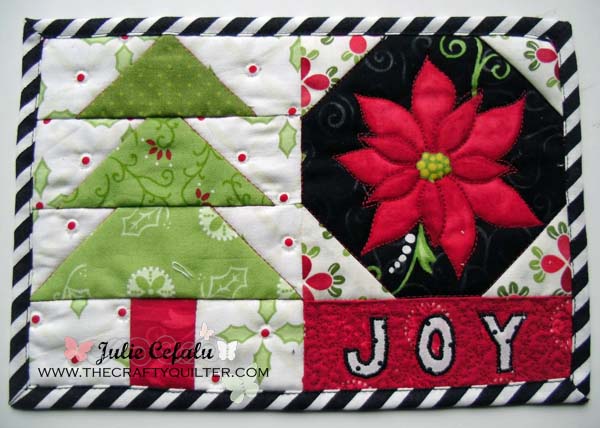
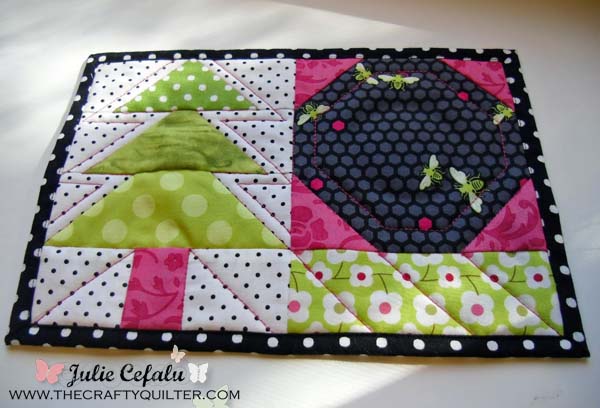
Step 5: Layer top, batting and backing together and quilt as desired. I used Pellon Thermolam for my batting; I like the stability and thermal properties it has. I stitched in the ditch along the tree and snowball. Then I free motion quilted around the poinsettia and the “JOY”. (I’m not thrilled with how the JOY came out – I should have left well enough alone!) On the pink mug rug, I outline stitched the tree and snowball and added some diagonal lines, and on the peach mug rug, I free motion quilted everything.
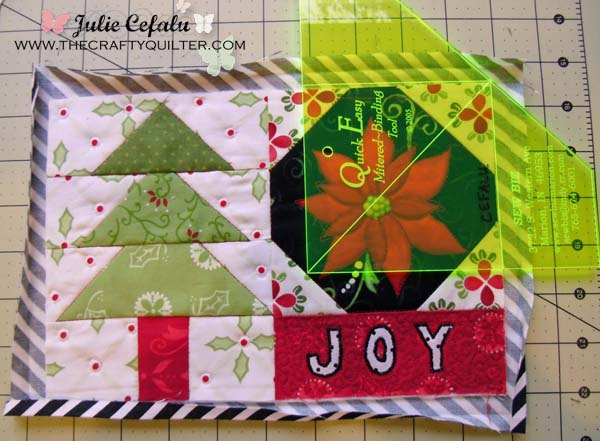
For the binding, I decided to wrap the backing fabric around the edges to form the binding. I used the Quick Easy Mitered-Binding Tool and you can find my tutorial for that here.
I like the way it came out – especially with the diagonal stripes. On another example, I used traditional binding and I like it as well, but I think I’ll stick with the wrap around model.
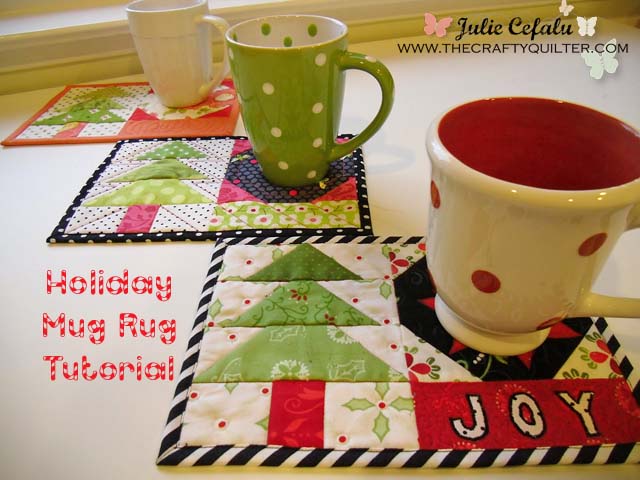
I found all of these cute mugs at the Goodwill. What a deal!
Depending on the fabric you use, these can be as holiday’ish as you like. If you have a charm pack laying around (who doesn’t?) this would work perfectly as well.
These make great hostess gifts as well as gifts for co-workers, friends, teachers…. one day of mass production and you’re good! Add some tea or homemade cookies to the deal and oh my goodness! I, personally, would be thrilled to receive such a gift (I’m just sayin’).
I hope you all had a wonderful Thanksgiving and perhaps you’ve saved some sewing time for this long weekend. Instead of shopping on Black Friday, I like to get a head start on my Christmas cookie baking. So much more peaceful and fun!
Happy sewing (and baking)!
~Julie

I just made the mug rug The instructions you gave for the Christmas tree is excellent. Thank you.
Hi, thank you for this nice pattern. I am Norwegian and just made two mug rugs
I love the mugs rugs and the tutorial. Thanks for sharing,.
Sorry- another question.. My trunk row is just a little bit shorter then the other rows.. when I add the width’s up, it is a little shorter..
The tree rows all = 9
2+5+2=9
2.5+4+2.5 = 9
2.75+3.5+2.75 = 9
but the trunk row only equals 6?
2.25+1.5+2.25 = 6
Brand new quilter and have a question on step 1.. when you say “Stitch just to the right of the drawn line”.. would that always be to the inside or outside of the square? or does it matter as long as I am consistent?
Julie, you are AMAZING!! So talented and inspirational. I always look forward to your tutorials. You have such beautiful fabrics over there in the States too! Thank you!!
Thank you so much for sharing your talent! Your site is an inspiration.
Julie! I pinned one of your patterns long ago, without realizing it was you! I came today to get the instructions for one of your mug rugs, and am delighted to see your success here. I hope all is well with you and yours.
Very nice! I just wish I could down load
I love the ease in which it goes together and i have an endless variety to choose from thank you
Thank you so much for having this pattern available. It has so many possibilities and I absolutely love it!
I love your work! I am truly inspired!
Thanks bunches…Very cute. I am using the tree portion on a wall hanging, but I will be making more of these too.
Oh my goodness! Impressive artkcle dude! Thank you so much, However
I aam experiencing troubles ith your RSS. I don’t understand
why I cannot subscribe to it. Is there anybody having the same RSS problems?
Anybody who knows the answer will you kindly respond?
Thanks!!
Such a cute pattern….best I’ve seen. I made 20 from various Christmas charm packs for family this year. Everyone loved them. Now maybe I’ll have time to make them for my husband and myself.
Thank you for the last minute tutorial, Happy Christmas !
I love your darling mug rugs! I would like to try the wrap around binding method. What size did you cut the backing to to the wrap around binding method?
quick question-which tree piece–2″x 3 1/2″, 2″x4″, &2″ x 5″ gets sewed to the background pieces-2″, 2″x2 1/4″, &2″x2 1/2″
The 2″ x 2 3/4″ background goes to the 2″ x 3 1/2″ tree piece. The 2″ x 2 1/2″ background goes to the 2″ x 4″ tree piece. The 2″ square background goes to the 2″ x 5″ tree piece. The 2″ x 2 1/4″ background goes to the 2″ x 1 1/2″ trunk piece. Enjoy!
How Fun! Thank you for sharing this pattern and for your blog. I can’t wait to make a couple of these!!!
Grace
thanks for the tutorial-such a cute mug rug -am going to try to make one (or maybe more)-happy holiday time to you
This is a great tutorial. details are listed and shown, love the fussy cutting, can’t wait to checkout your other tutorials……..
what a wonderful tutorial – amazingly easy to follow. Thank you so much and I am inspired to make some too. Love the polka dot mugs. I never see anything that cute at my local thrift stores.
I LOVE this! thank you for sharing your pattern.
Oh, I love this mug rug tutorial so much! Thanks!
Thank you for this tutorial, it looks like great fun. I will try this out later down the track.
Merry Christmas and a Happy New year to all.
I made one this week and blogged about it here:
http://asimplelifequilts.blogspot.com/2012/12/christmas-is-coming.html
I love it, Deb! Thank you for sharing!
I make my version here – http://loveitsewit.blogspot.com/2012/12/winter-theme-mug-rug.html
So cute! I love seeing everyone’s version! Thanks for sharing.
Thank you so much for this pattern; so stinkin adorable. I’m really limited with my budget this year and I’m able to use a lot of scraps I already have without having to spend money on more. Blessings!
These are FANTASTIC. Love the material. Especially the black with the red pointsettia. I assume it’s Moda. Where did you buy the material if I may ask? By the yard? Charm pack?
Thanks. Cheryl
It’s several years old. It’s a Henry Glass line called “At Home for the Holidays” by Heather Mulder Peterson (Anka’s Treasures).
Thanks so much for getting back to me about the material.
Thank you for sharing this tutorial. I needed a small gift for my sons teacher and classroom assistants tomorrow so this afternoon whipped up 3 of these in no time and they look fabulous. Very grateful indeed.
Can’t wait to make the rug mugs.Have a Merry Christmas!
I’m a huge fan of mug rugs, and yours are really sweet for Christmas! Thanks for sharing!
Oh my Goodness, I needed some small projects to add with a Christmas gift. These will be so perfect. thank you
Cute and pretty as can be. Thank you for sharing.
Wow , super cute,thanks for the tutorial ,very good Christmas gift :*
Hugs
sabrina
So very cute. I love mug rugs ; )
Hi Julie, I’ve featured your Mug Rug tutorial today…
http://threadingmyway.blogspot.com/2012/12/threading-your-way-features.html
Those are adorable!
Such a fabulous mug rug! Just perfect for gift giving. Thanks for showing how you made your it… clear and easy to follow.
“made your mug rug”…
super cute!
I love this mug rug! I pinned it and +1’ed it! Saw the link on SewManyWays. Looking forward to reading your blog.
Beautiful. Thanks for the tutorial!
Beautiful mug rugs! thanks for the tutorial!
What a gorgeous little mug rug! Perfect for a Christmas gift. I have made some for my daughter’s teachers. (PS We have met before, I am aka Sarah Sews, Quilt Candy is my new venture and blog 🙂 )
These look great. I love the one with the black and white binding. Can I have a cookie?
Hi. I’m over from Sew Many Ways. I tried to leave a comment but don’t think it went through the first time so here I go again. Just wanted to thank you for the tutorial. I love mug rugs and yours is beautiful.
Hi I’m over from Sew Many Ways. Your photo didn’t show up but the mention of mug rugs sent me clicking over. So glad I did. You mug rug is beautiful. Thanks for the tutorial.
I love mug rugs and these are just darling! I like to take the mugs (I also do the thrift shopping!), fill them with candies and gift the mug, the rug and the treat. My DGD told me she’s still waiting for hers…. guess what she’ll get in her stocking 🙂
Thanks so much for this tutorial.
Beautiful mug rugs, Thanks for the tutorial.
Your mug rugs are so festive and nicely done !
Thanks for sharing. 😉
Visiting from ‘Sew Many Ways’.
Rose
Genius!! Thanks for sharing a great idea.
Wow,Super cute.Can´t wait to try one.
Have a fun weekend!
So cute! I love the mugs also. Very fun Julie! Any chance you might bring one of your mug rugs for our holiday gift exchange???
Julie ~
What a great, “quick” idea for a Christmas gift! I can use my mountain of fabric scraps! These are adorable….thank you!
Hugs,
Liz =-)
Oh my gosh ~these are so stinkin’ cute! You give great step by step directions and I can’t wait to try to make one or several – lol.
Thanks so much!
Tanya