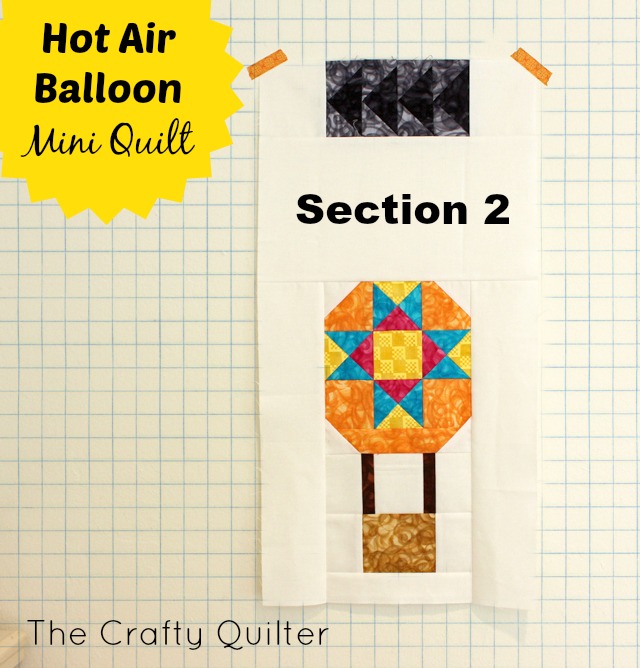
Hot Air Balloon Mini Quilt Tutorial – Section 2
We get to work on the center section of the Hot Air Balloon Mini Quilt today. This section includes an Ohio Star Balloon and some flying geese.
Section 1 instructions can be found here: Hot Air Balloon Mini Quilt Tutorial Section 1.
Section 3 instructions can be found here: Hot Air Balloon Mini Quilt Tutorial Section 3.

Materials for entire quilt:
- Background: 1/4 yard white fabric
- Balloons: assorted scraps of rainbow-colored fabrics
- Flying geese, trees and baskets: black, gray, tan, brown and green scraps
- Binding: 1/4 yard fabric
- Backing: 3/4 yard or 25″ square of fabric
- Batting: 25″ square
Section 1 Cutting Instructions:
Hot Air Balloon:
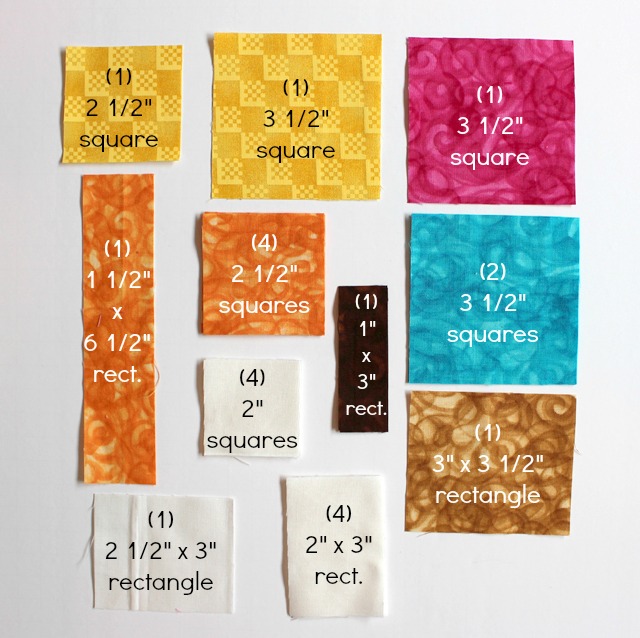
- Aqua: (2) 3 1/2″ squares
- Yellow: (1) 3 1/2″ square and (1) 2 1/2″ square
- Orange: (4) 2 1/2″ squares, (1) 1 1/2″ x 6 1/2″ rectangle
- Pink: (1) 3 1/2″ square
- Dk. Brown: (2) 1″ x 3″ rectangles
- Brown: (1) 3″ x 3 1/2″ rectangle
- White: (4) 2″ squares, (4) 2″ x 3″ rectangles, (1) 2 1/2″ x 3″ rectangle
Flying Geese (no-waste method – over-sized)
- Black: (1) 4 1/2″ square (corrected)
- Gray: (4) 2 5/8″ squares
OR: Flying Geese (stitch & flip method)
- Black: (4) 2″ x 3 1/2 rectangles
- Gray: (8) 2″ squares
Background:
- White: (1) 6 1/2″ x 11 1/2″ rectangle, (2) 3″ x 13 1/2″ rectangles, (1) 1 1/2″ x 6 1/2″ rectangle, (2) 3″ x 3 1/2″ rectangles
Hot Air Balloon Construction:
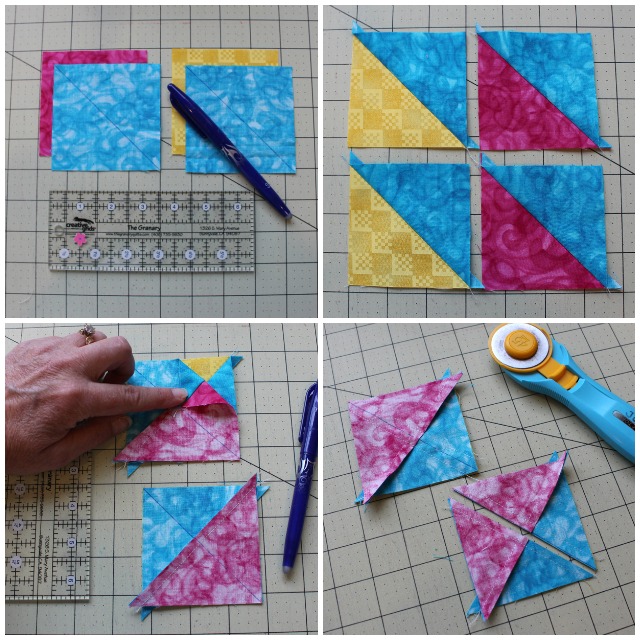
Ohio Star Balloon: Make quarter square triangles (QST’s) using the 3 1/2″ squares of aqua, pink and yellow.
- Draw a diagonal line on each aqua square, and pair each with a pink and yellow square.
- Stitch 1/4″ on each side of the diagonal line. Cut apart on the diagonal line and press towards the aqua to get 4 half-square triangle (HST) units.
- Place a yellow/aqua HST and a pink/aqua HST right sides together (opposite colors together), nesting the diagonal seams. Draw a new diagonal line that is perpendicular to the seam.
- Stitch 1/4″ on each side of the line. Cut apart on the diagonal line and press.
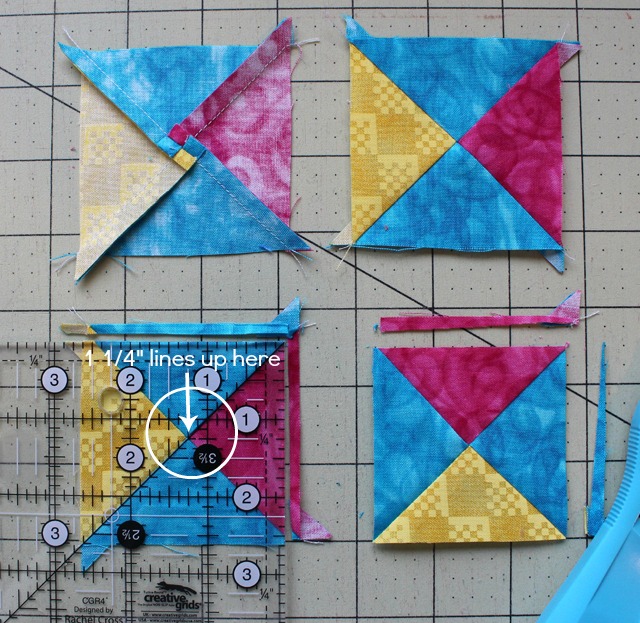
The QST’s are oversized and need to be trimmed down to 2 1/2″ square.
- You need a square ruler that is 2 1/2″ or larger. Place it so that the diagonal line of the ruler is along one of the diagonal seams of your QST.
- In order to trim the same amount equally from all four sides (so that the center seam stays in the center), place the 1 1/4″ intersection of the ruler at the center seam as shown below. Trim along the top and right side.
- Rotate the QST and trim the remaining two sides. You should now have a perfect 2 1/2″ QST!
- Arrange the QST’s, orange corner squares, yellow center square and orange rectangle to form the block.
- Stitch into rows. Press towards the plain squares.
- Sew the rows together being careful to match the seams. See Perfect Quarter Square Triangles for more tips.
- Mark a diagonal line on each 2″ white square. Place one on each corner and stitch on the diagonal line.
- Trim seam and press towards the corner. The balloon should measure 6 1/2″ x 7 1/2″.
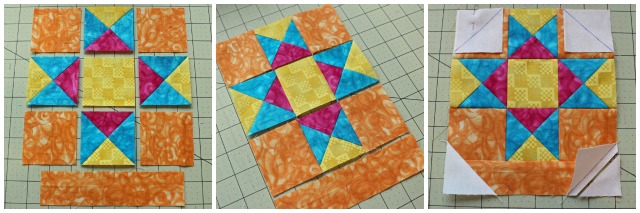
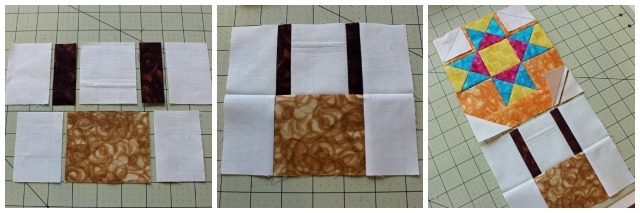
Arrange the basket parts and background pieces as shown below. Stitch the units into rows. Sew the rows together. (You’ll notice that I could have used a single rectangle on each side of the basket/rope section instead of the two small rectangles. My bad.) The hot air balloon unit should measure 6 1/2″ x 12 1/2″.
Flying Geese Construction:
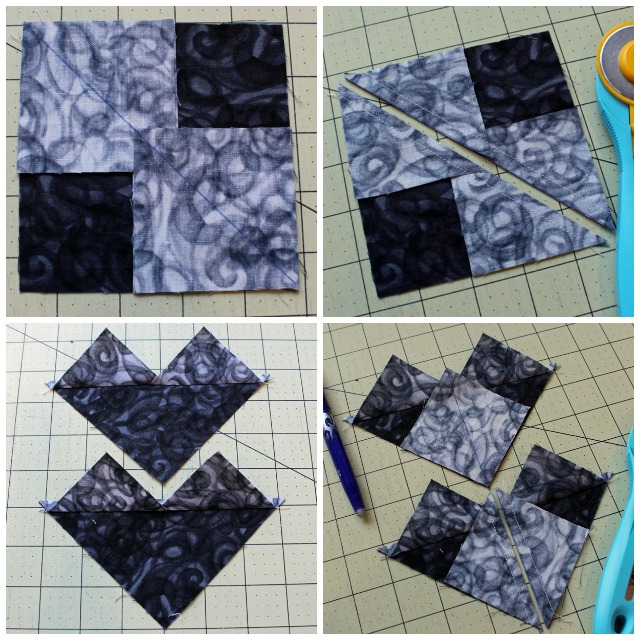
No-waste method. Note: The way I’ve done this technique uses over-sized pieces and the resulting flying geese need to be trimmed down to 2″ x 3 1/2″ rectangles.
- Mark a diagonal line on each of the 2 5/8″ squares. Place one square on opposite corners of the large square. They will overlap in the center.
- Stitch on each side of the diagonal line and cut apart.
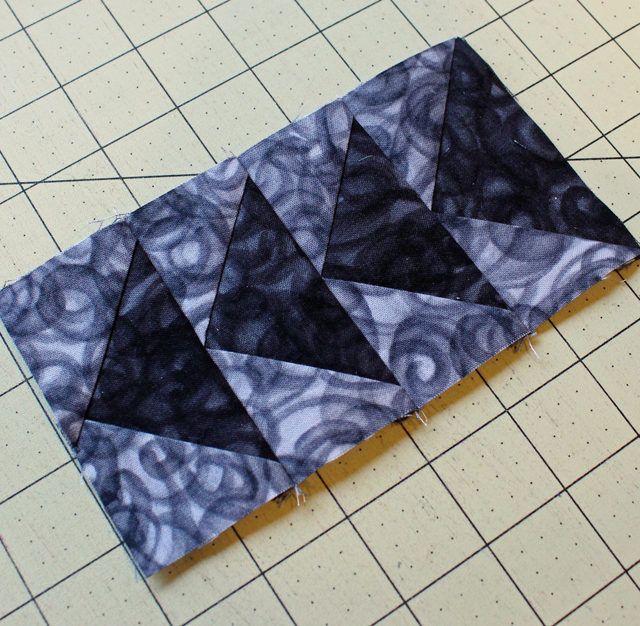
- Press the small triangles up. They will look a little like a heart.
- Place the remaining squares on the corner of the “hearts”. Stitch on each side of the diagonal line and cut apart.
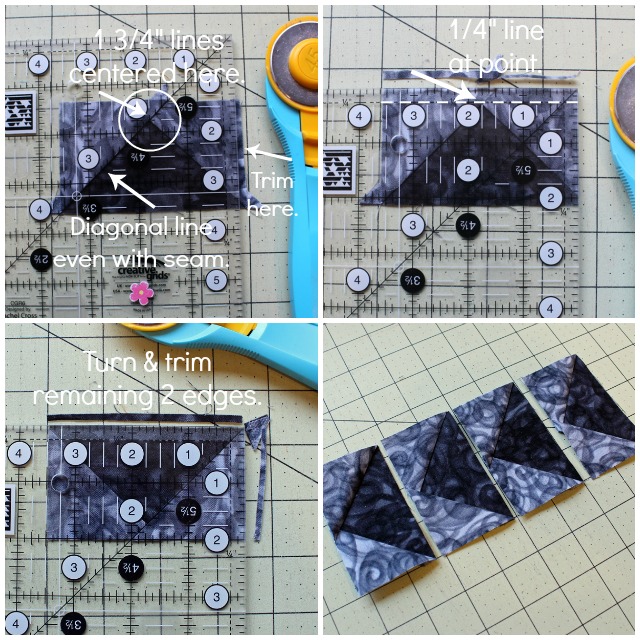
- Press towards the corner. You now have four flying geese units that need to be trimmed.
- Trim by placing the diagonal line of a square ruler along the seam line, and the 1 3/4″ lines of the ruler should intersect at the point of the flying geese. Trim the right side only.
- Move the ruler down so that the 1/4″ line of the ruler is on the point and the right side remains even with the cut edge. Trim the top edge only.
- Turn the flying geese and trim the remaining two sides so that it measures 2″ x 3 1/2″.
Note: You may use the stitch & flip method to make the flying geese instead of the no waste method. For detailed instructions, see the tree from Section 1. Create four flying geese units using (4) 2″ x 3 1/2″ rectangles and (8) 2″ squares.
Sew the flying geese together to form a 3 1/2″ x 6 1/2″ rectangle.
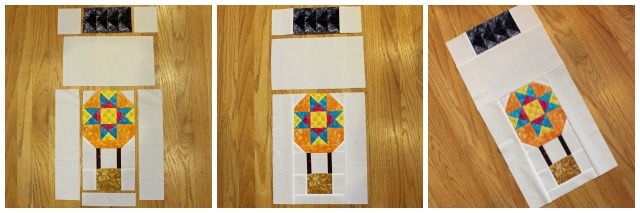
Section 2 Assembly:
Arrange the background pieces, hot air balloon and flying geese as shown below. Remember that the large background piece is a great place to personalize this with a name or saying. Stitch the units together. Section 2 should measure 11 1/2″ x 22 1/2″.
Only one more section to go and your mini quilt will be complete. I’ll have that ready for you next Friday. Remember, you can use the “print friendly” button to create a pdf that you can download and/or print the instructions. Have a great weekend!


Jullie, Do you have a pattern for your “Watch Out for Those Geese” Quilt? I love the mini wallhanging and suppose I could figure out how to make it a tad larger into a baby quilt but love the larger quilt. Thanks.
many thanks saving the links as machine poorly and to be honest not much motivation to stitch at the moment so I suppose good time for machine to be broken!
These are absolutely THE best tutorials available online! The instructions are so well defined and clear and the pictures help tremendously. Thank you SO much!
Thank you!!