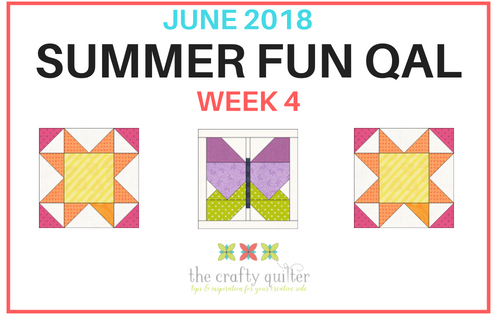
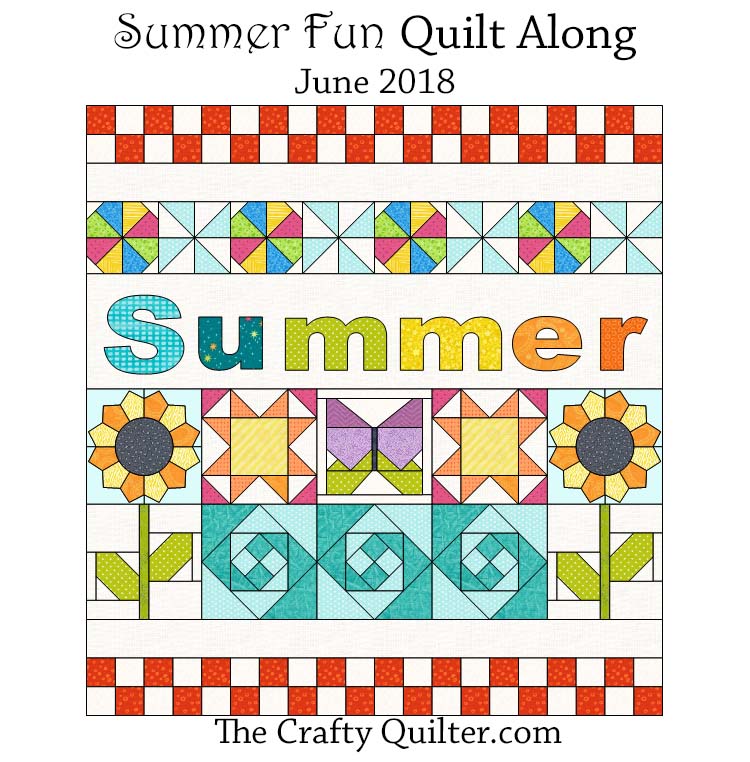
Summer Fun Quilt Along, Week 4
Thanks for joining me for week 4 of the Summer Fun Quilt Along! We are going to have some fun making two sunny stars and a pretty butterfly.
In today’s lesson, I’m going to share a few different ways to make flying geese units. There are four of them in each Sunny Star block. I want you to be able to use the technique that works best for you. One of the methods requires a special ruler, but I’ll show you how to complete it without the ruler, too.
Here are the techniques we’ll be working on this week:
- Making flying geese four at a time, over-sized and/or true-to-size
- Batch sewing for quicker and more efficient piecing
- Working with mirror images
- Half-square triangle units, eight at a time (the same as week 2)
Quilt size: 30″ x 32″ Sunny Star and Butterfly block size: 6″ finished
All seams are made with 1/4″ seam allowance.
The simplified pdf instructions will be available on Sunday, 6/24 (if not before). I apologize, but I have had a busy week! are here: Summer Fun Part 4
Supplies needed for the Sunny Star and Butterfly Blocks:
- 1/8 yard each (or large scraps) of yellow, orange and magenta fabric for the Sunny Stars
- Large scraps of green, light purple, dark purple and black for the Butterfly block
- 1/4 yard (or fat quarter) of background fabric for the Sunny Star and Butterfly blocks
- Wing Clipper trim down tool for Flying Geese Units
(optional)
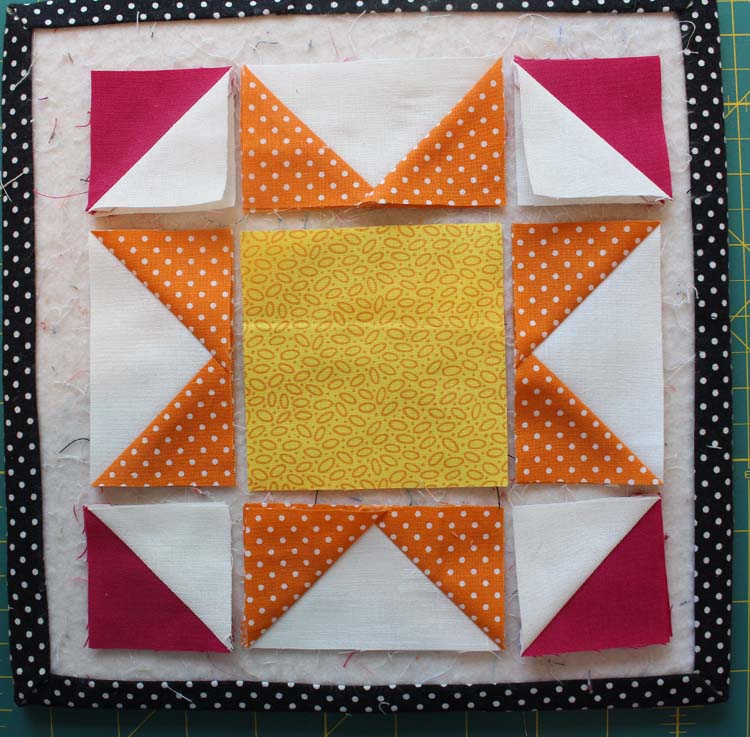
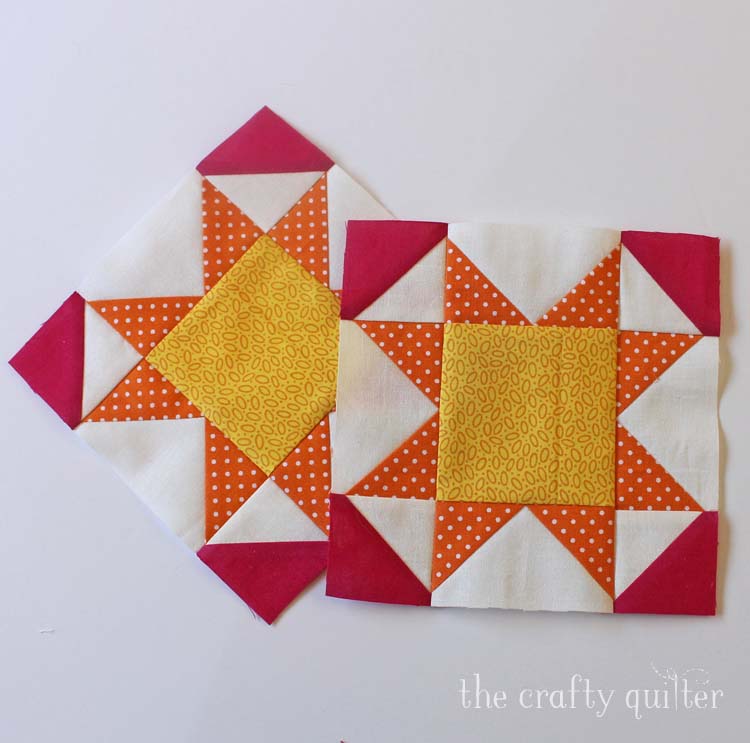
Sunny Star Blocks, 6 1/2″ unfinished

Cutting Instructions (for 2 blocks):
- Yellow: Cut (2) 3 1/2″ squares (center square)
- Orange: Cut (8) 2 5/8″ squares (over-sized) OR (8) 2 3/8″ squares (true size)
- Magenta: Cut (1) 5″ square (HST’s)
- White: Cut (1) 5″ square, (2) 4 1/2″ squares (over-sized) OR (2) 4 1/4″ squares (true size)
Assembly Instructions
Half-square triangle units: Draw a diagonal line in both directions on the white 5″ square. Place right sides together with the magenta 5″ square. Stitch 1/4″ from both sides of the drawn lines. Cut apart on the center diagonal lines and then cut the square in half vertically and horizontally (use the 2 1/2″ line on the ruler). Press toward the magenta.
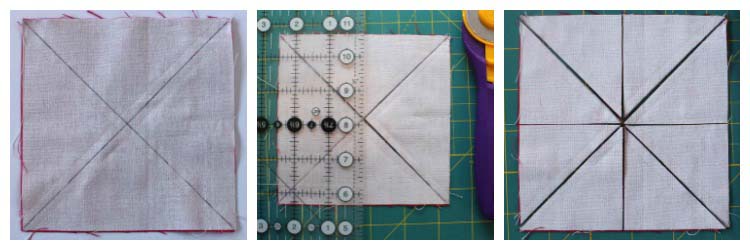
Trim the HST’s to 2″ square. I like to trim them on all four sides. Use a square ruler and make sure the diagonal line of the ruler is lined up with the seam before trimming. Make (8) 2″ square HST’s.
Flying Geese Units: The most common way of making a flying geese unit is to start with a base rectangle (in this case 2″ x 3 1/2″). Then use two squares (2″) and draw a diagonal line onto each. Place one square, right sides together, onto the base rectangle and stitch on the diagonal line. Trim and press. Repeat with the remaining square on the other end.
This technique takes a little more time and there is a little more waste than the method I’m about to show you. It also can produce wonky flying geese units if you’re not really careful.
Another good method of making flying geese units is often called the no-waste method. My most favorite method is the (almost) no-waste method. These two methods are very much the same process, but the later starts out with over-sized pieces and is then trimmed down to perfection. I like to use Deb Tucker’s Wing Clipper Tool for this, but I’ll show you how to use other rulers, too.
Flying geese, almost no-waste method
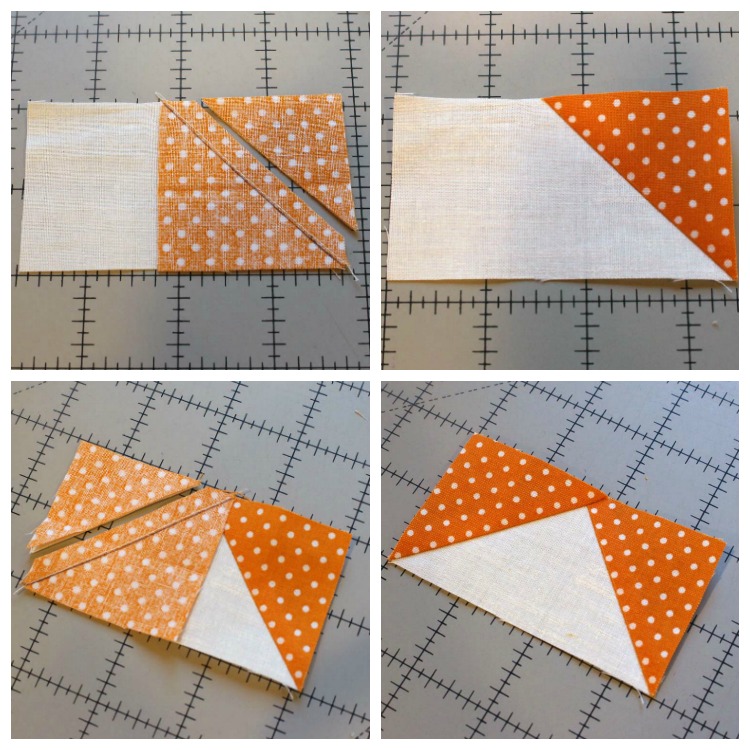
- Draw a diagonal line on the orange 2 5/8″ squares. You can also draw stitching lines 1/4″ on each side of the center diagonal if you choose to.
- With right sides together, place a square on two opposite corners of a white 4 1/2″ square. The squares will overlap in the center.
- Stitch 1/4″ on each side of the drawn line.
- Cut apart on the center diagonal line.
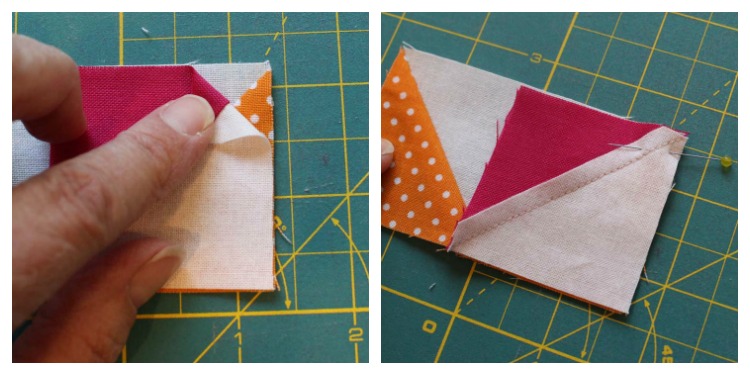
- Press towards the orange. It will look like two hearts.
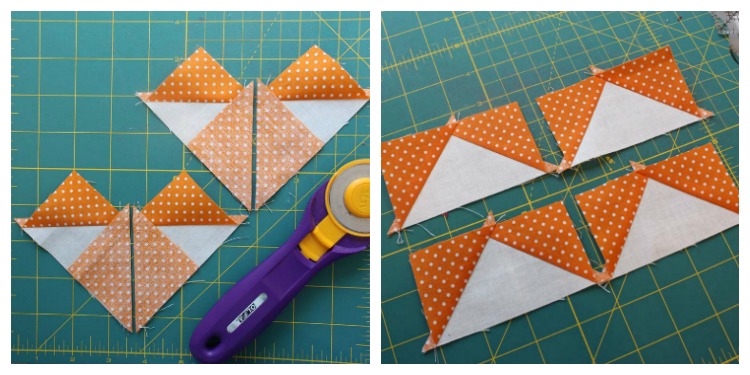
- Place the remaining orange 2 5/8″ squares on the opposite corners and stitch 1/4″ from both sides of the drawn line.
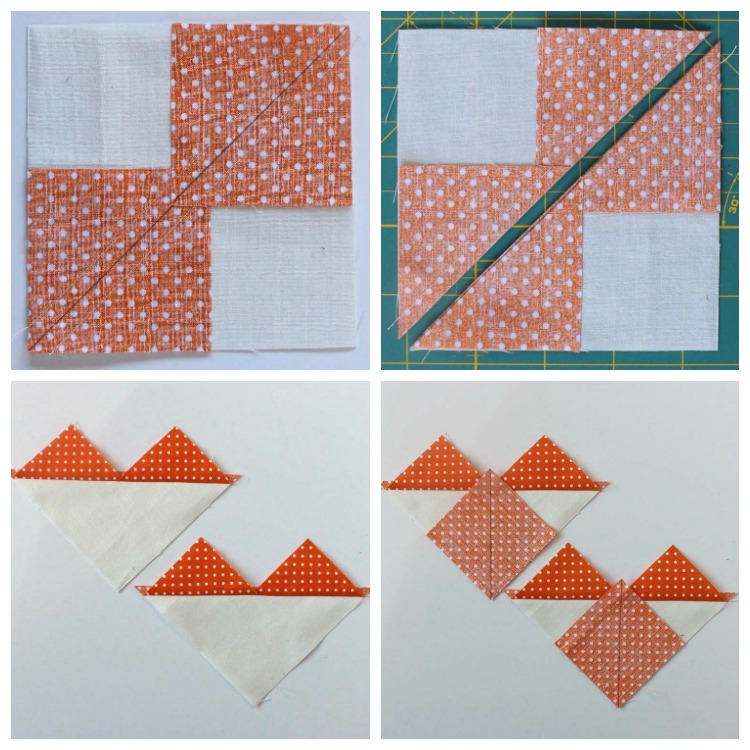
Cut apart on the center drawn line. Press towards the orange. You will have four flying geese units that need to be trimmed.
Trimming instructions using the Wing Clipper ruler (I’m right-handed):
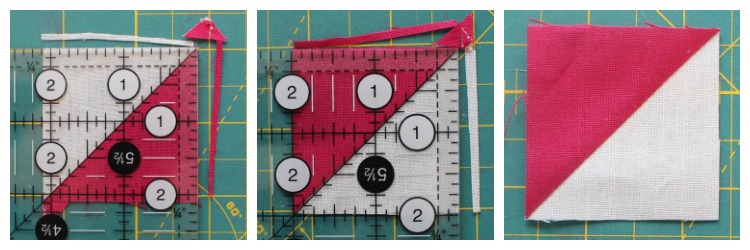
Place the flying geese unit so that the “V” or valley is facing downward. Line up the diagonal lines of the ruler on the seams. Make sure you’re using the correct cut sizes (2″ x 3 1/2″). Trim along the right and upper edges.

Rotate the flying geese unit 180 degrees (the”V” or valley will be facing upward). Reposition the ruler so that the “x” at the top falls on the intersection of the seam and the previously cut edges line up with the correct size marks of the ruler. Trim both remaining sides.
Trimming instructions using a square ruler
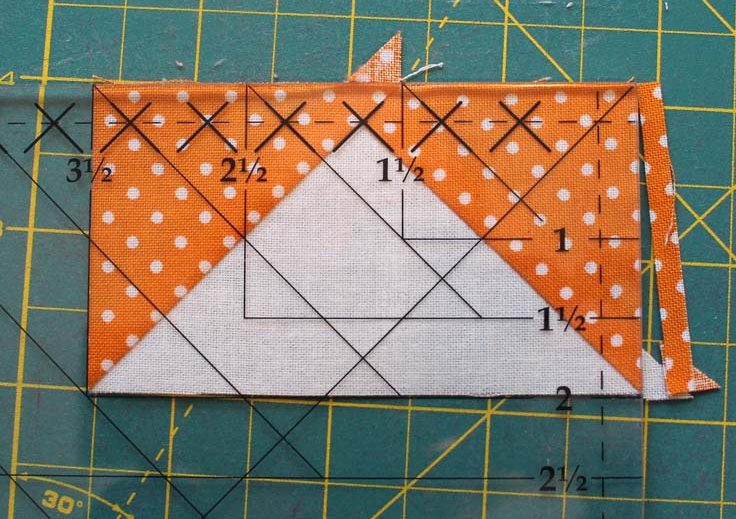
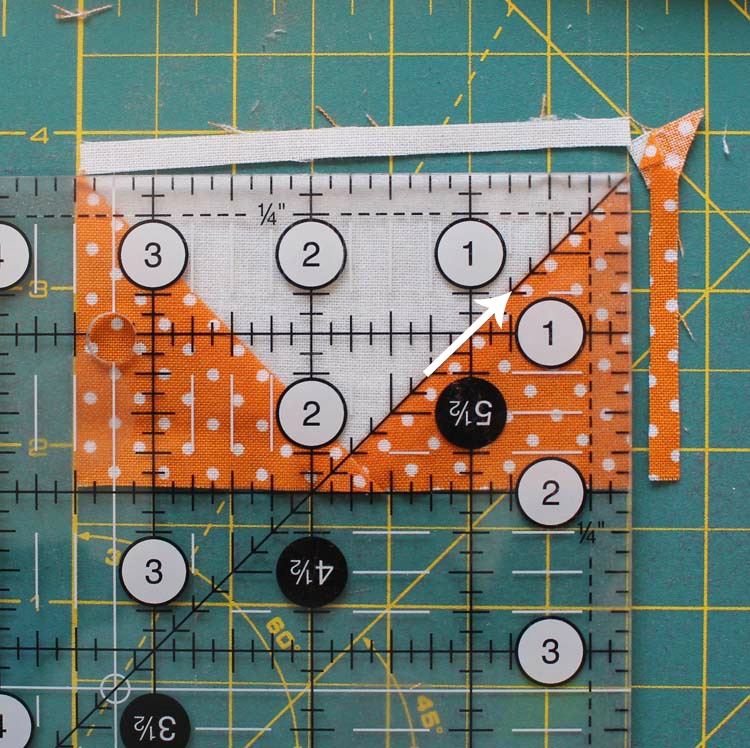
Place the flying geese unit so that the “V” or valley is facing up. The 1/4″ line of the ruler and the 1 3/4″ line should be on the center seam. The 2″ and 3 1/2″ lines of the ruler should fall on the bottom diagonal seams. Trim the right and top edges.
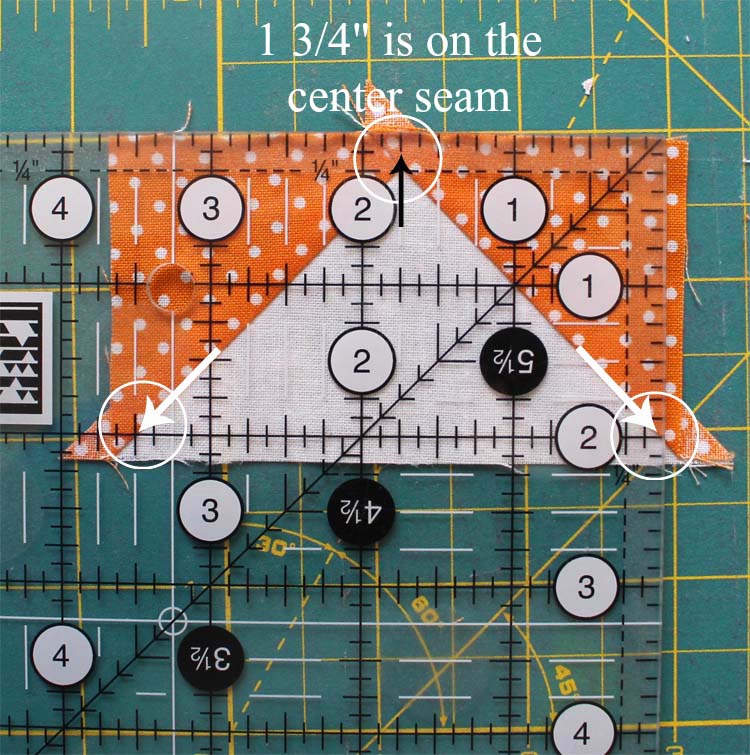
Turn the unit and place the diagonal line of the ruler on the seam. The previously cut edges will line up with the 2″ and 3 1/2″ lines of the ruler. Trim the remaining two edges.
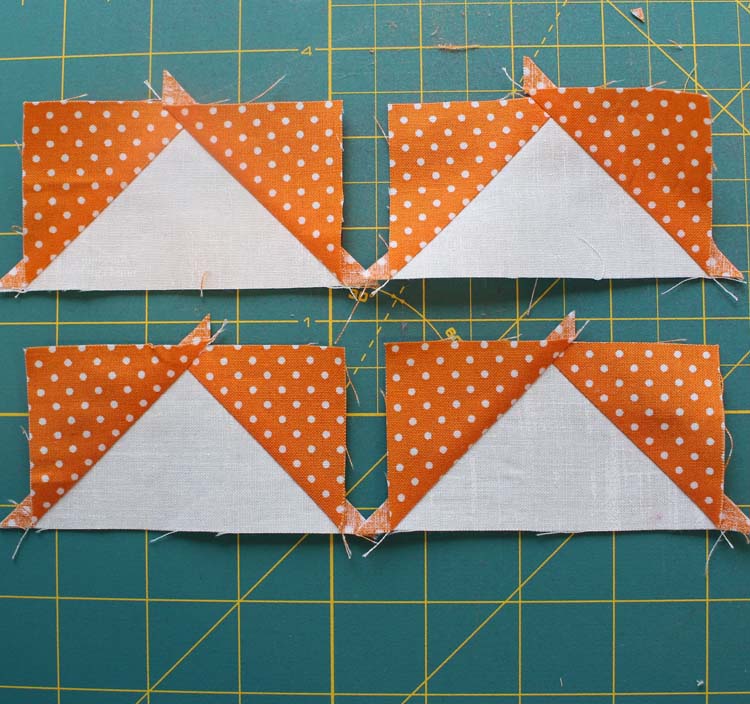
Make 8 flying geese units that measure 2″ x 3 1/2″, unfinished.
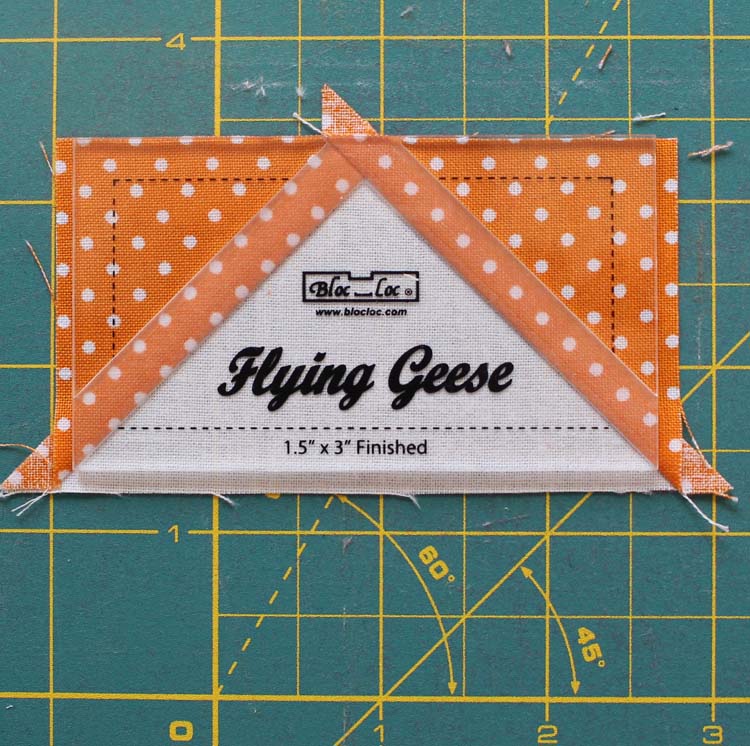
There are other rulers to trim down flying geese such as the Flying Geese Bloc Loc ruler. This ruler is size-specific. You would need the 1 1/2″ x 3″ finished size. It’s a ruler that’s easy to use because the bottom of the ruler has grooves that lock into place along the seam. The draw-back is that it’s expensive. But if you have it, use it (the ruler, not the money 😉 ).
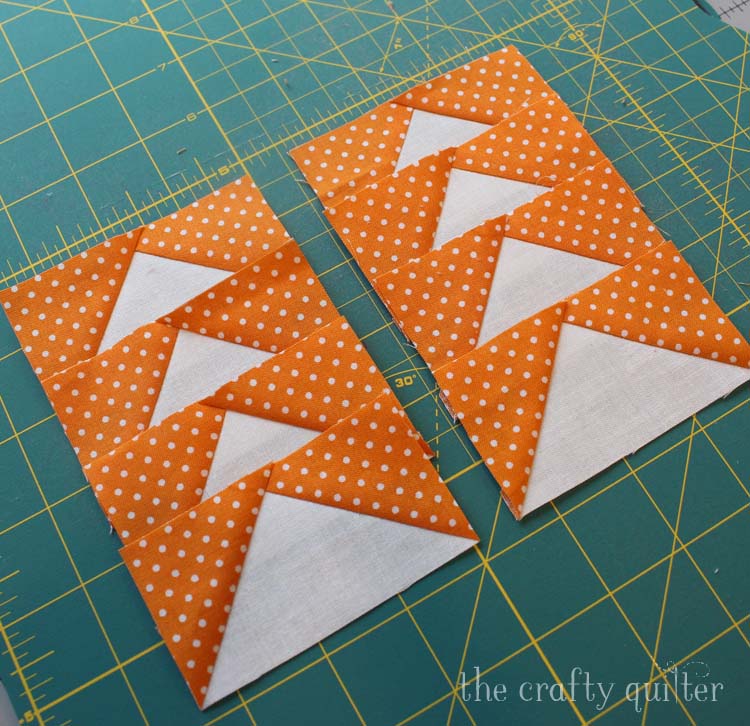
If you decide to make the flying geese true-to-size, the process is exactly the same as the almost no-waste method. Use the true cutting sizes given at the beginning and a scant 1/4″ seam allowance when sewing 1/4″ on each side of the diagonal lines. You won’t be trimming these down afterward, except for the dog ears. Here are what mine looked like using this method (not perfect, that’s for sure):
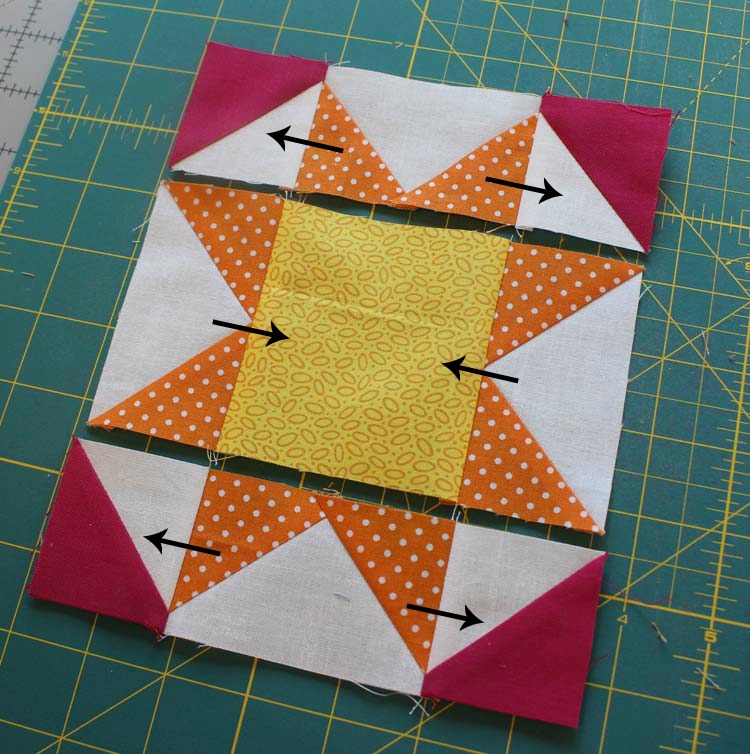
Arrange the HST units, flying geese units and yellow 3 1/2″ center square as shown below.
Make sure to nest and pin the diagonal seams at the star points.
Sew the units into rows. Press the center row to the middle and the top and bottom rows to the outside.
Sew the rows together, nesting seams and pinning intersections.
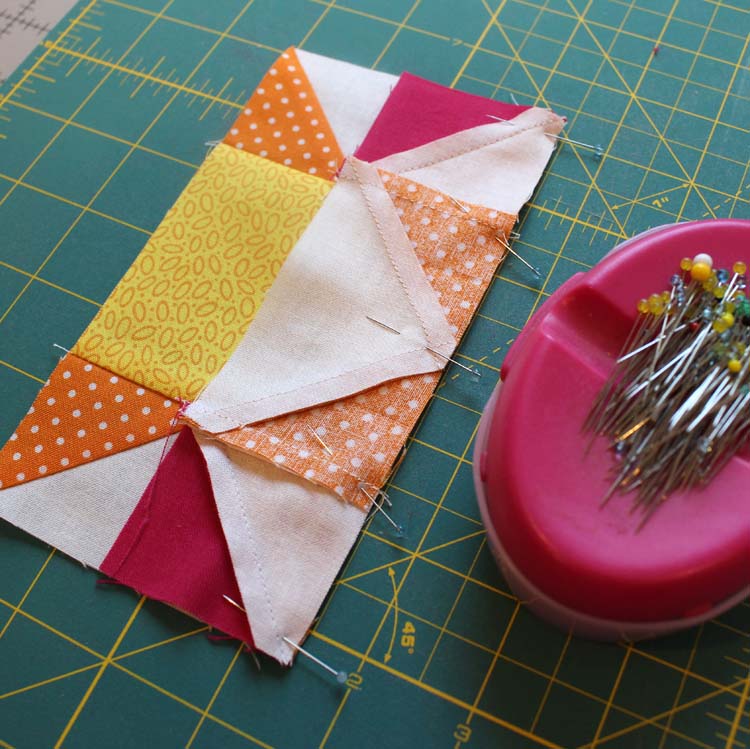
Press the row seams toward the center. Your Sunny Star block should measure 6 1/2″ square. Make 2.
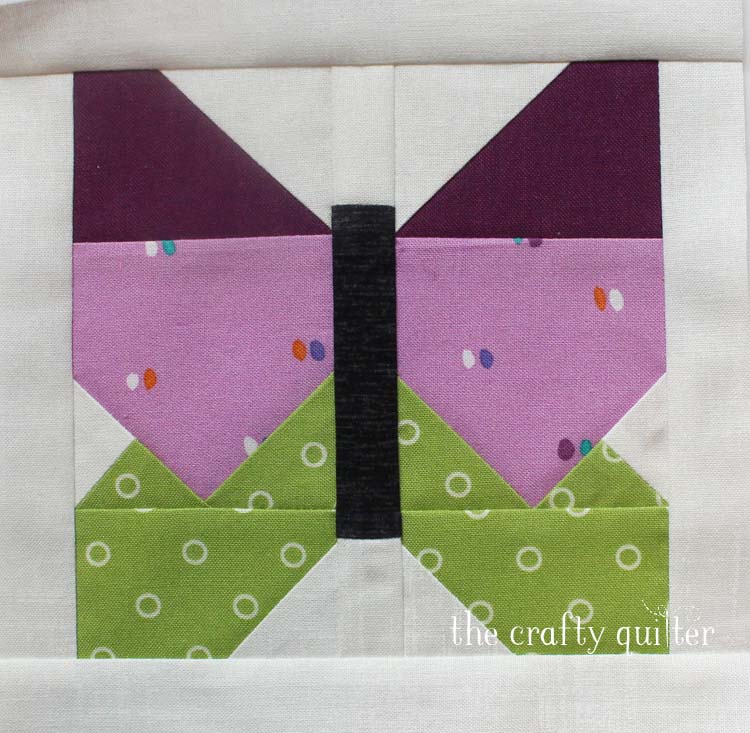
Butterfly Block, 6 1/2″ unfinished
We’re going to do some “batch” processing on this block. That means we group tasks that are alike and assembly line sew.
Cutting Instructions
- Light purple: Cut (2) 2 3/4″ squares
- Dark purple: Cut (2) 2″ x 2 3/4″ rectangles
- Green: Cut (2) 1 3/4″ x 2 3/4″ rectangles, (2) 1 5/8″ squares, (1) 2 1/4″ square
- Black: Cut (1) 1″ x 3 1/4″ rectangle
- Background: Cut (2) 2″ squares, (1) 2 1/4″ square, (2) 1 1/2″ squares, (1) 1″ x 1 3/4″ rectangle, (1) 1″ x 1 1/2″ rectangle, (2) 1″ x 5 1/2″ rectangles, (2) 1″ x 6 1/2″ rectangle
Assembly Instructions
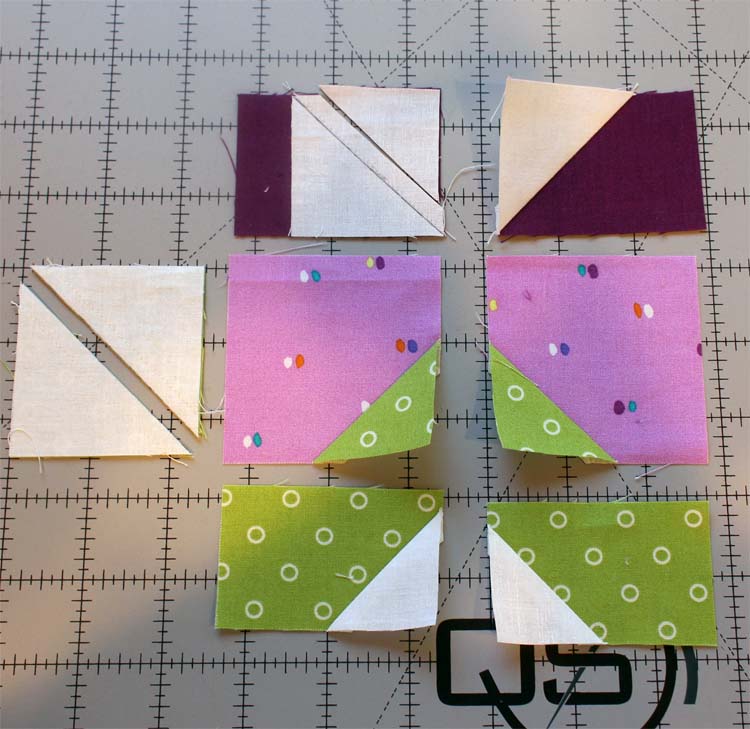
Draw a diagonal line on the following pieces: green 1 5/8″ squares, white 1 1/2″ squares, white 2″ squares, and white 2 1/4″ square.
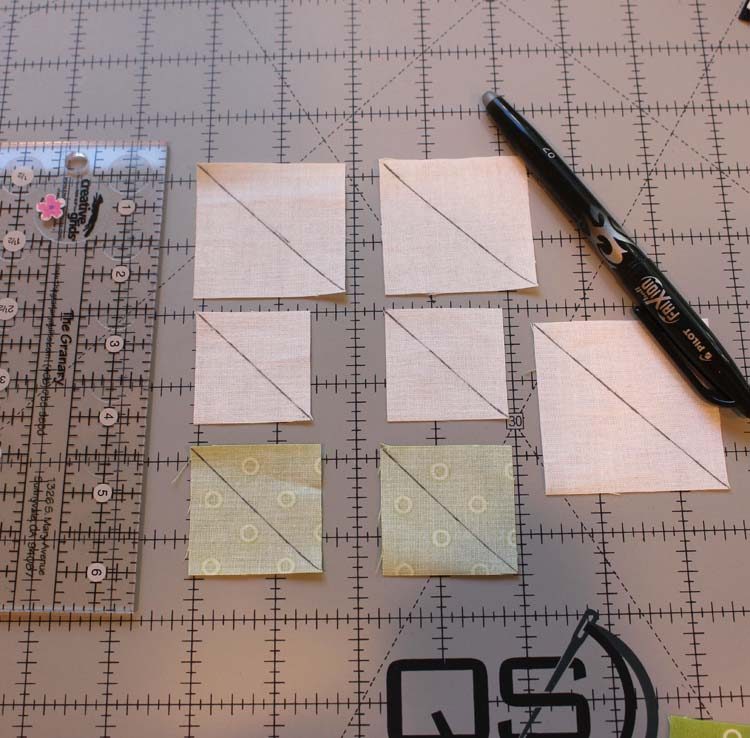
With right sides together, place a
- white 2″ square on each dark purple rectangle, mirror imaging each other
- green 1 5/8″ square onto the lower corner of each lt. purple square, mirror imaging each other
- white 1 1/2″ square onto the lower corner of each green rectangle, mirror imaging each other
- white 2 1/4″ square onto a green 2 1/4″ square
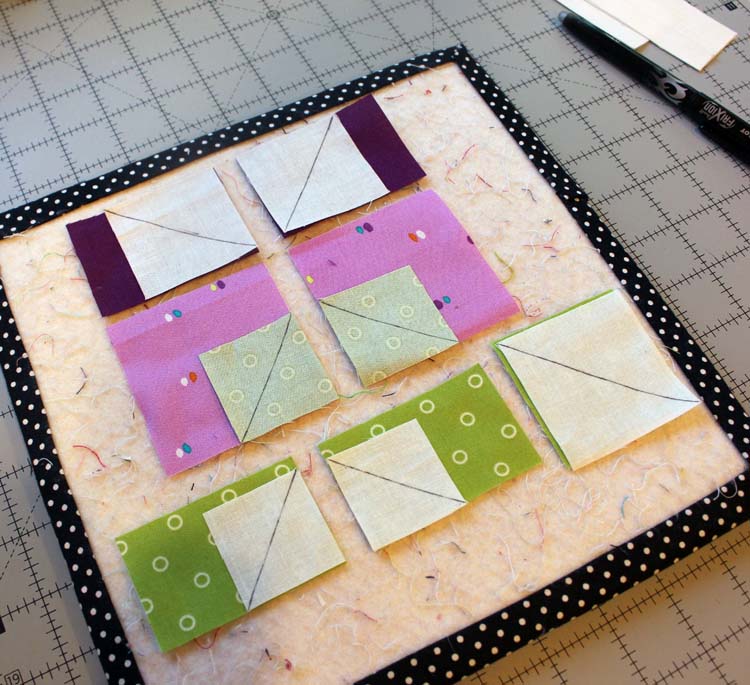
I use a small design board to place my pieces onto. (Lori at Bee in My Bonnet has a great tutorial on how to make one). Then I take this to my sewing machine and start stitching. It’s a nice way to keep things organized from cutting station to sewing machine to ironing board.
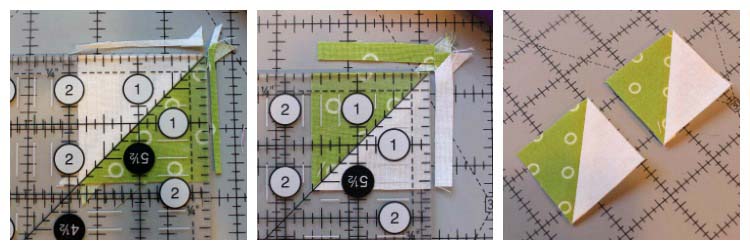
- For the 2 1/4″ green and white squares, stitch 1/4″ on each side of the diagonal line to create two half-square triangle units.
- For the remaining squares, stitch on the diagonal lines – or just next to the diagonal line (the outside corner side) to allow room for the thread and the fold-over of fabric.
- Cut the 2 1/4″ green and white square in half, on the diagonal line and press towards the green.
- Trim the remaining seam allowances and press to the corners.
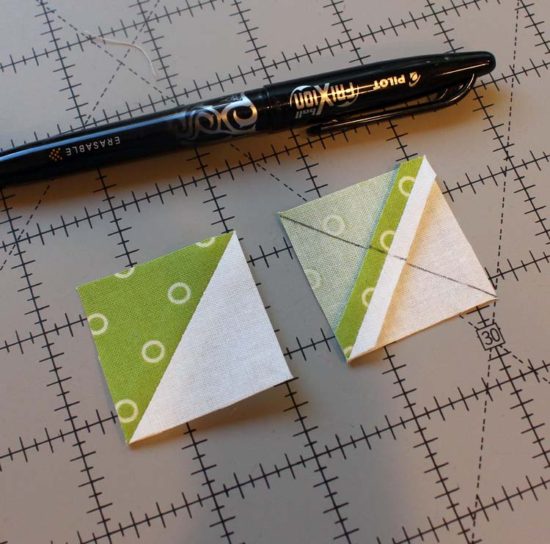
Trim the half-square triangle (HST) units to 1 5/8″ square. Remember to trim all four sides if necessary to create a perfect square.
Draw a diagonal line on each 1 5/8″ HST that is perpendicular to the seam.
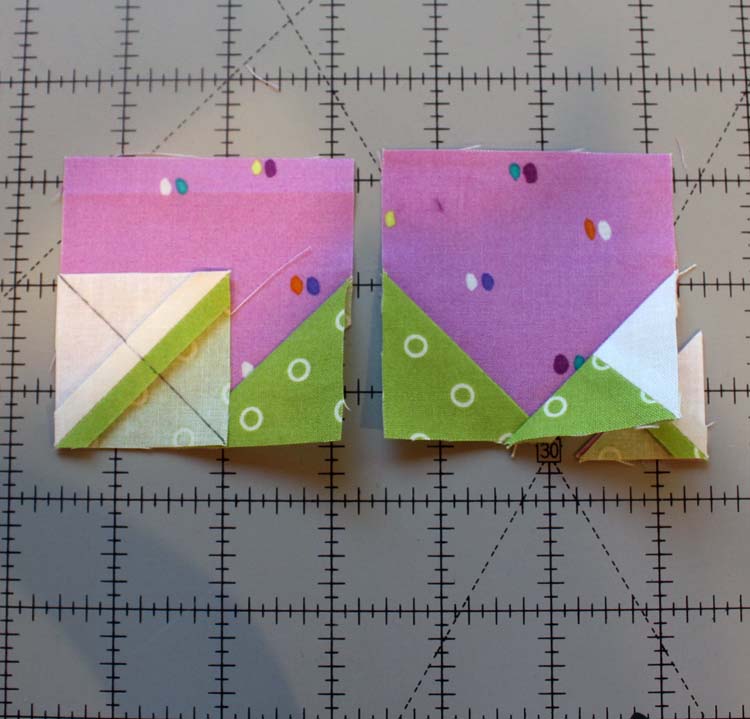
Place each marked HST unit onto the remaining lower corner of the light purple unit. Make sure they are a mirror image of each other. Stitch just next to the drawn line, trim and press.

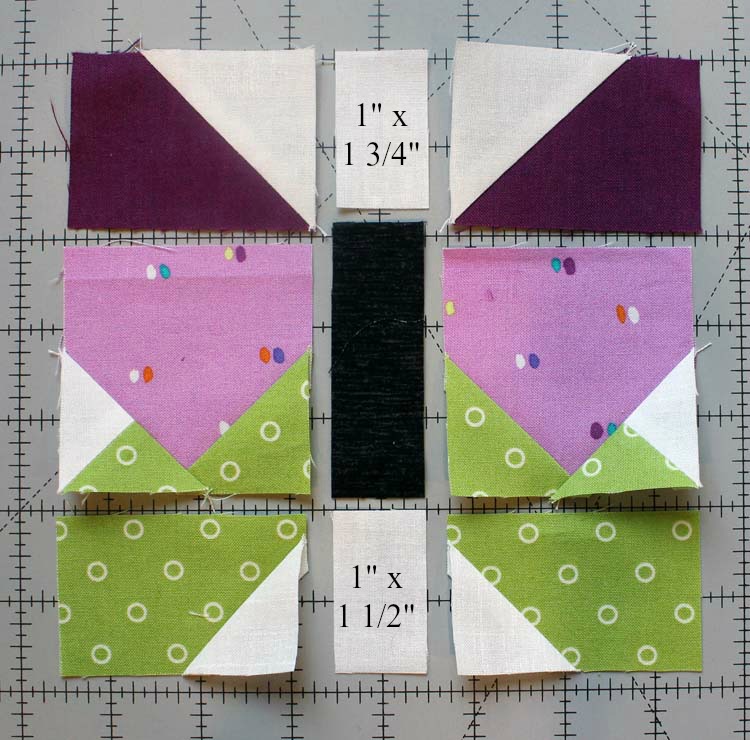
Arrange the upper, middle and lower butterfly units and the butterfly center pieces as shown. Note: the black rectangle below is not shown in the correct size. It should 1/4″ longer (3 1/4″).
Stitch the wing units and the center units together. Press the wing units down and the center units toward the black.
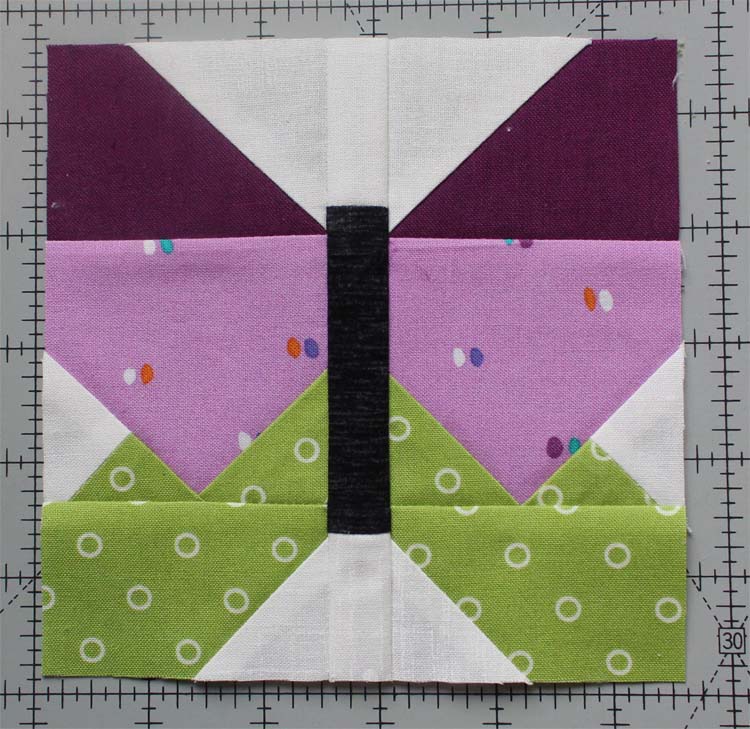
Sew the wing units to the center butterfly. It should measure 5 1/2″ square.
Add the white 1″ x 5 1/2″ border strips and then the 1″ x 6 1/2″ border strips. Note: the photo below shows strips that were cut too wide (my mistake).
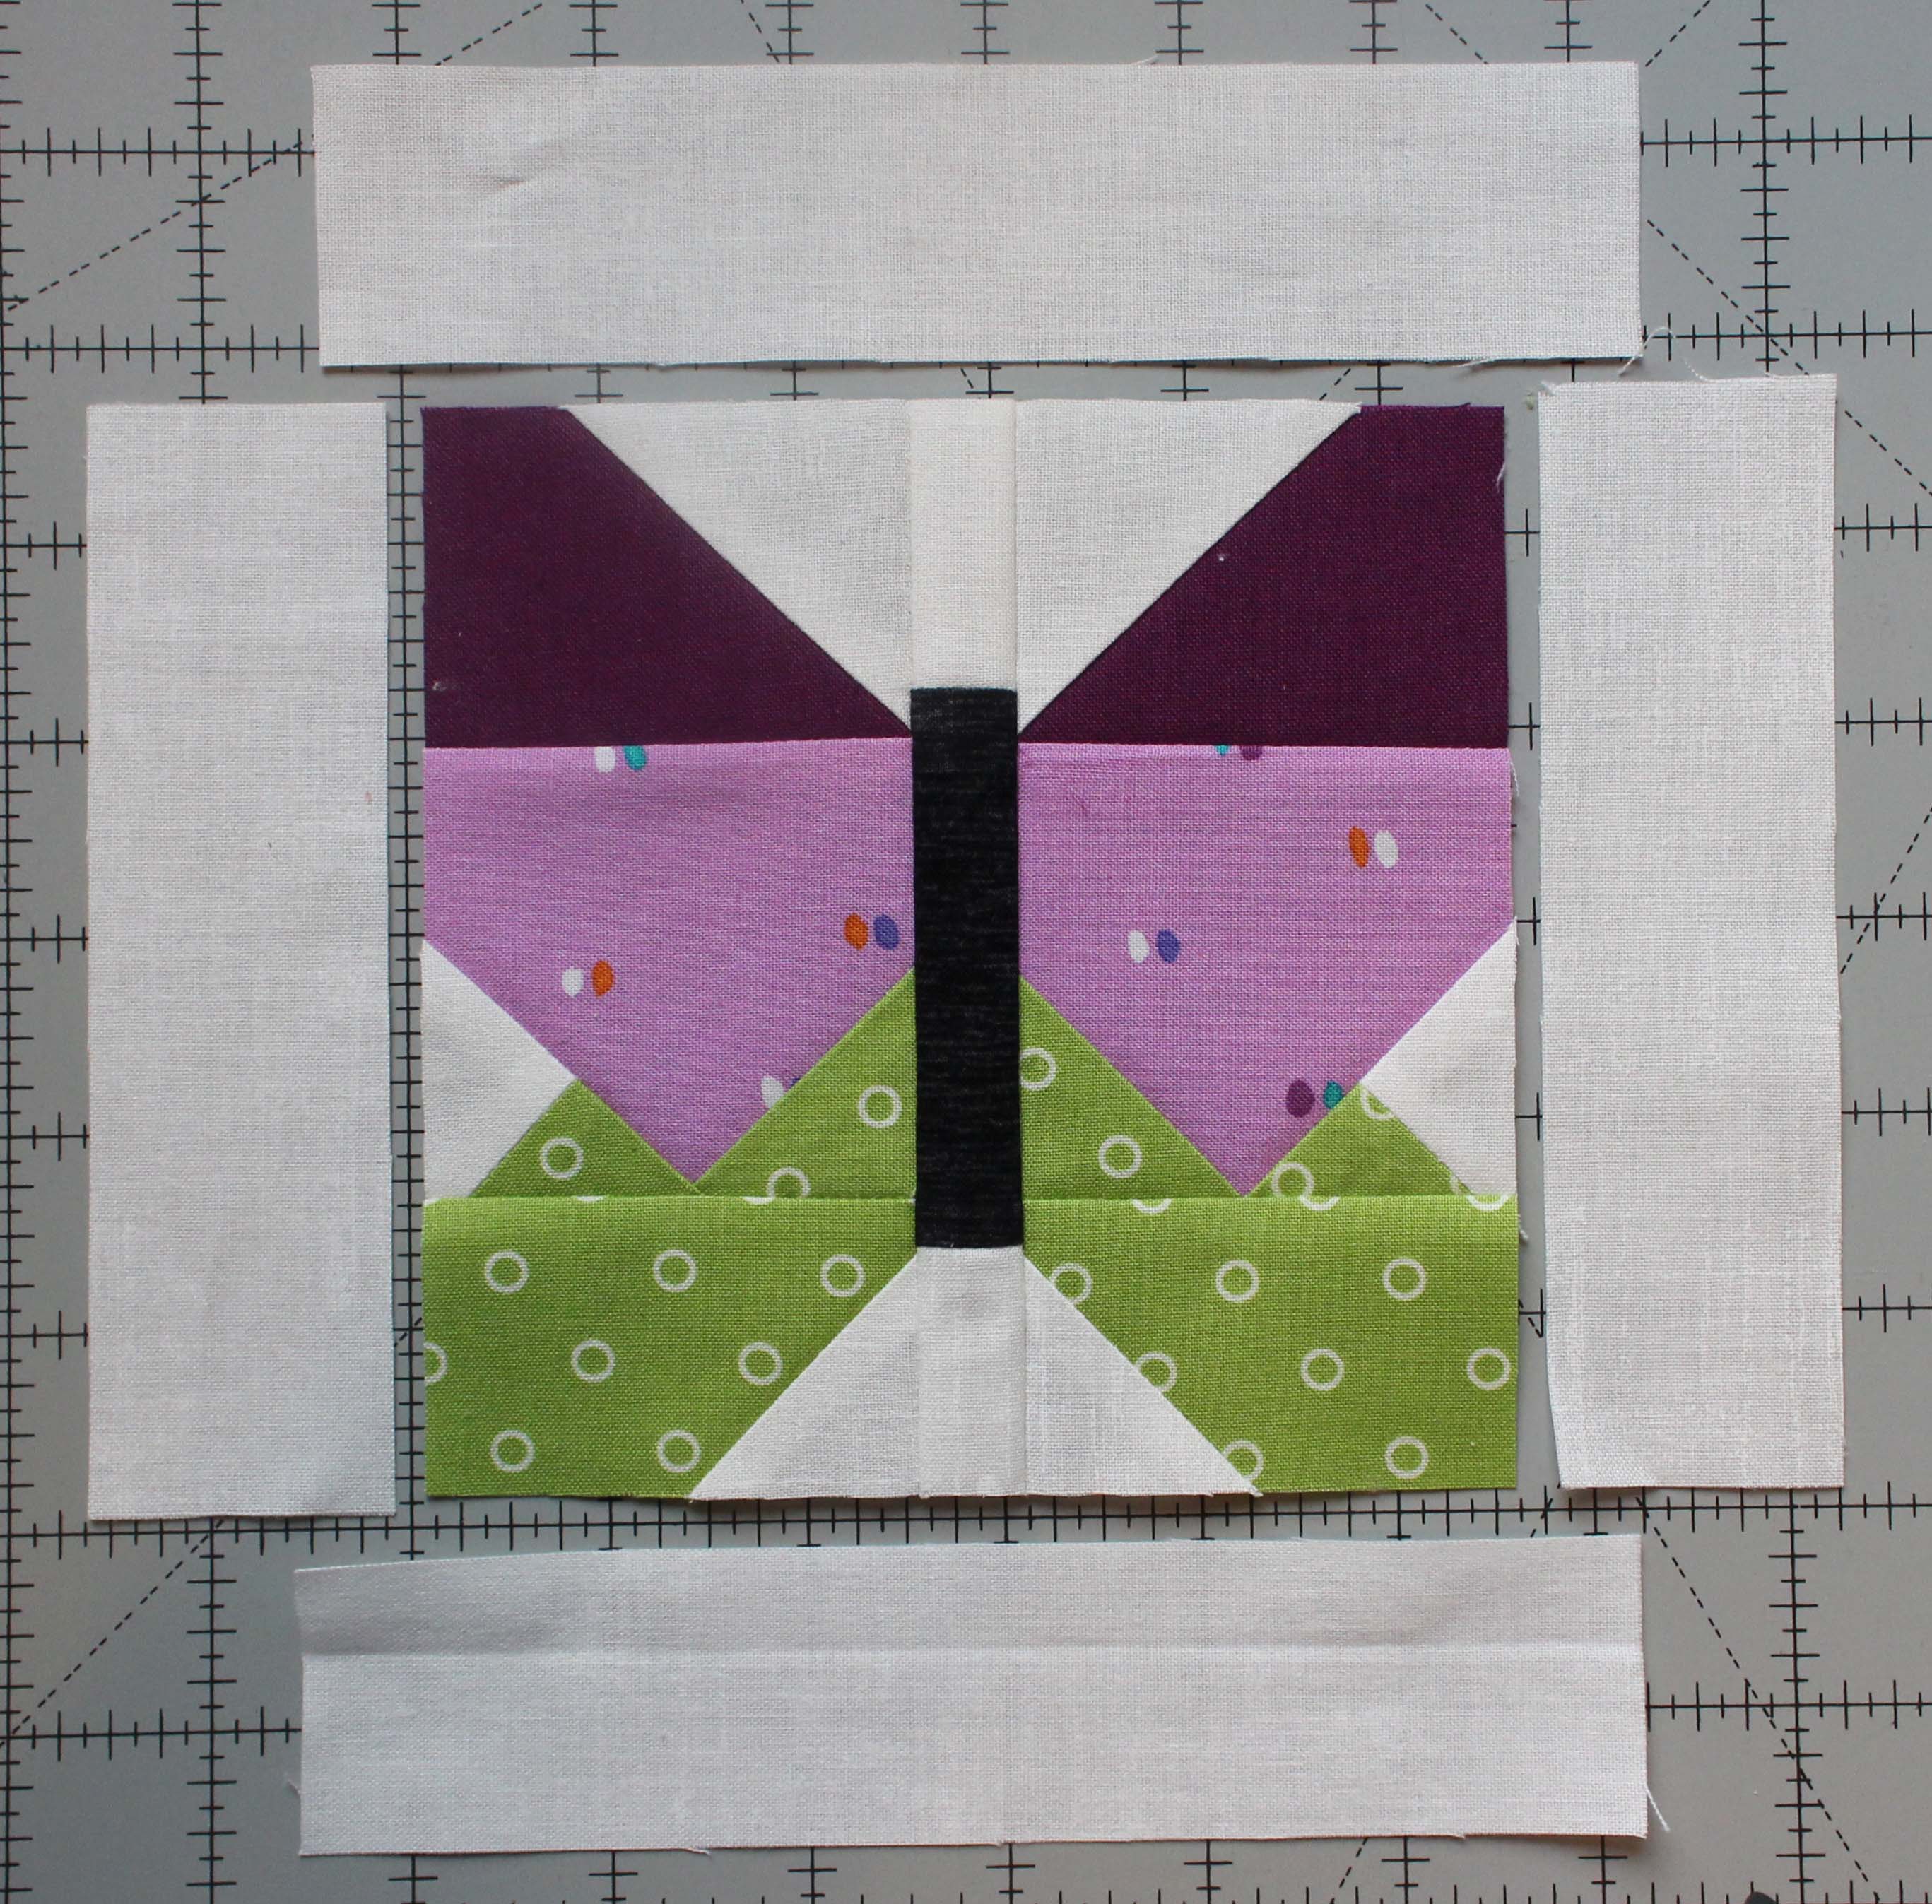
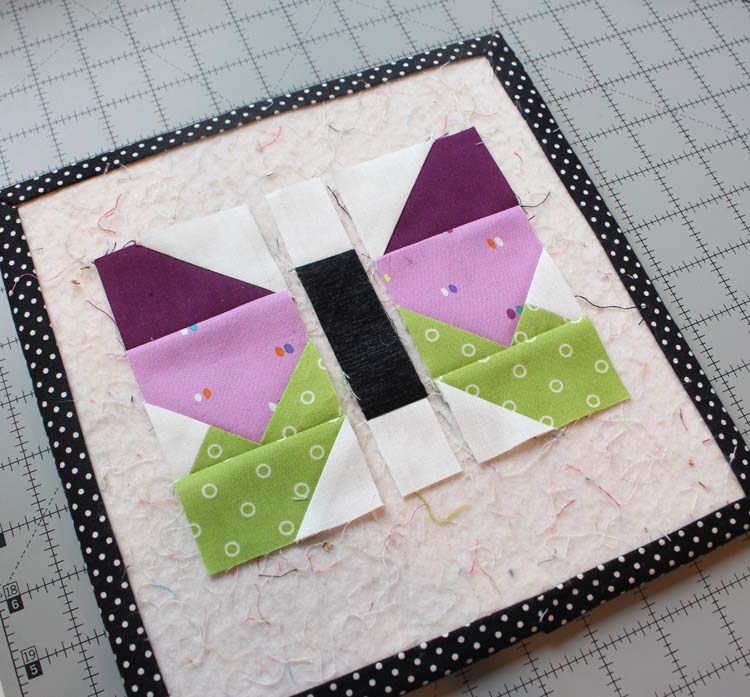
The Butterfly block should measure 6 1/2″ square.
That’s all for today. That was a long tutorial, but I hope it was informative! Have a great weekend and thanks for joining me.
Remember to use the hashtag #summerfunqal if you’re using social media (Instagram).


I don’t know if the photograph of my Summer Fun Quilt Along has arrived to you well….because I don’t see any message to confirm it. I put 6 ladybugs on each letter of de word SUMMER ;)) I love ladybugs. Ha sido muy divertido hacer el quilt y queda muy alegre y bonito. Gracias Julie por los tutoriales. Que tengas muy buen verano.
Finally all caught up , love the lessons I have learned so much my flying geese turned out right the first time round!!
Thanks for such wonderful tutorials!!
Can’t wait for next lesson
Thanks Julie! # 4 is on the table and I’m ready for it. This is so much fun.
These blocks are great, I love the sweet butterfly!
I love your tutorials – am busy doing some caregiving but don’t ever miss your tutorials, thanks so much!
So happy to say that I completed my stars and butterfly. Awesome instructions, even without the pdf. Have a great weekend and thanks once again for this wonderful sew along.