Arrow Stone QAL Week 3
I’m excited for Week 3 of the Arrow Stone QAL because we get to start making HST’s (half-square triangle units)! I also like to establish some good piecing practices this week that will act as guidelines throughout the quilt along. Even if you’re not participating, you’ll find some great tips here. Let’s get started!
If you’re just now joining us, all of the past content for the Arrow Stone QAL can be found below:
Week 3
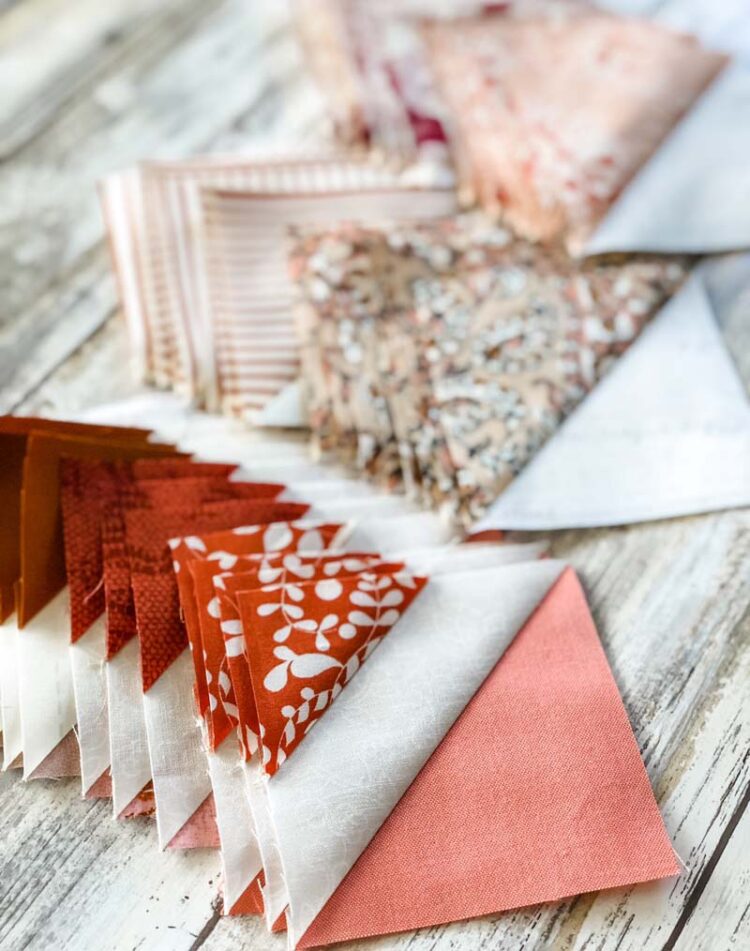
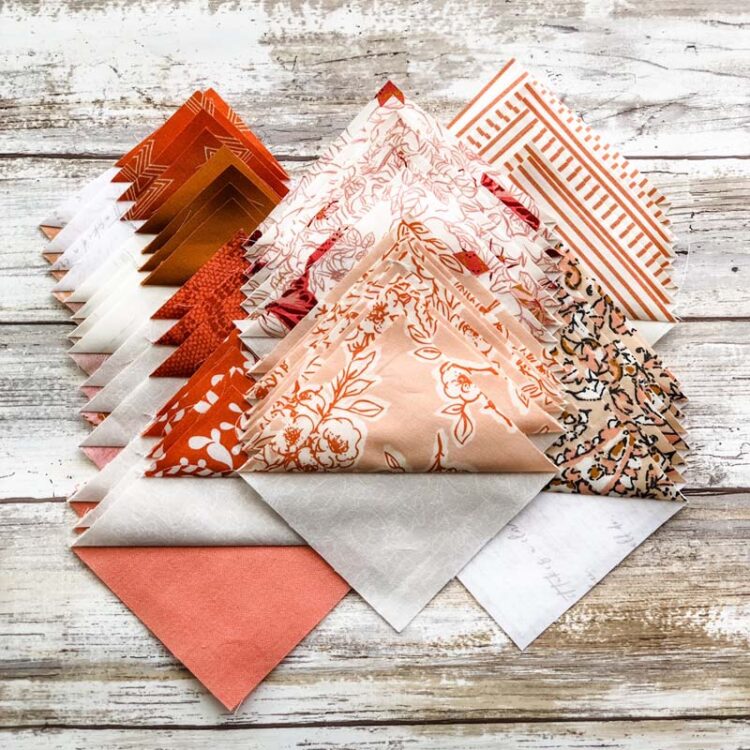
This week we will making two different sets of half-square triangle units (HST’s). The first set is made 8-at-a-time for some speedy piecing. They will be over-sized, so you’ll need to trim them to the correct size shown in the pattern. The second set of HST’s are made 2-at-a-time (also over-sized). Once these are trimmed down, there is an additional step of adding a stitch and flip square to one corner. I’ll share some tips for that in a bit.
Piecing Tips
Before we get started making the HST units, let’s go over some basic piecing tips.
Make sure to use an accurate 1/4″ seam allowance. You’ve probably heard of the term scant 1/4″ seam allowance. This means that your stitching line is just a thread-width less than a full 1/4″. This allows space for the fabric that folds over itself when the seam is pressed (open or flat) and for the space the actual thread takes up. Variables that can affect your scant 1/4″ seam allowance are the thickness of fabric and the weight of thread being used. It’s a good idea to test your seam allowance just to make sure it’s accurate.
I feel like I could write a whole blog post on seam allowance. Guess what? I already have! For more detailed explanations, machine set up and specific tools, check out The Perfect 1/4″ Seam Allowance.
Use a leader/ender when piecing. These are small squares of fabric that are used to start and end your sewing on. It works similar to chain piecing. When you get to the end of your chain piecing, you stitch onto the fabric scrap so that you always have a scrap under you presser foot ready for the next chain piecing session. Leaders/enders prevent a thread nest from forming at the beginning of your seam; help maintain a consistent (straight) seam allowance; prevent fabric from getting sucked down into the needle hole; force you to clip your thread tails and more. You can read my full blog post, Efficient Quilting with Leaders and Enders, if you want more details.
My typical machine set-up is shown below. I have Diagonal Seam Tape in front of my feed dogs. This helps guide my 1/4″ seam allowance and my diagonal seams. I always have thread snips close by and I have my leader and ender scraps ready to go. I’m sewing on a Baby Lock Crescendo (and it’s wonderful).
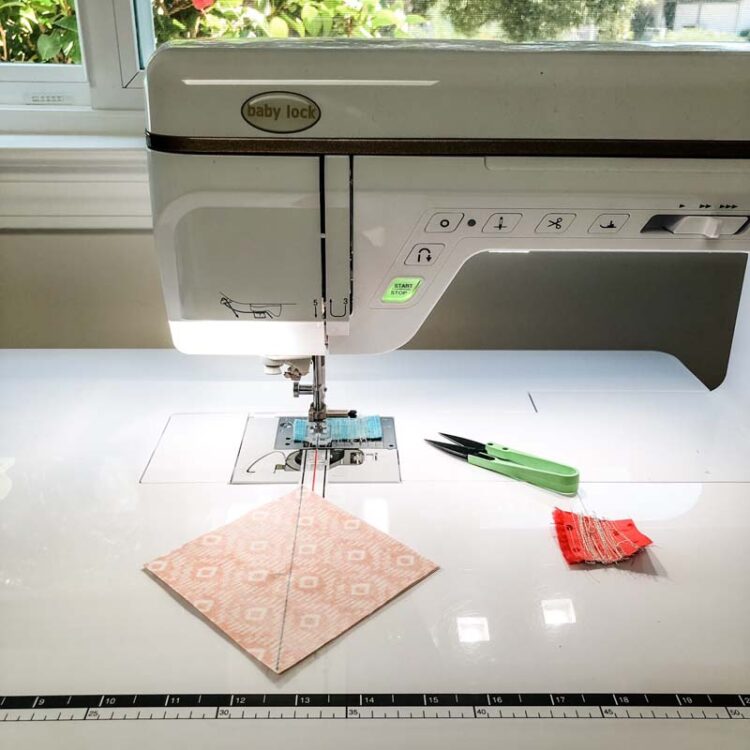
Another set-up that I like for my machine uses a Sew Steady Grid Glider on the extension table of my sewing machine. It has a cut-out for the feed dogs and secures to the table with micro-suction technology. I like having the grid close by to measure anything when needed, and I like the 1/4″ guidelines that act similarly to the Diagonal Seam Tape. Plus, it has a slick surface that is great for free motion quilting.
My stitch length is generally between 1.5 and 2.0, depending on whether I’m pressing open or to the side (1.5 for open seams).
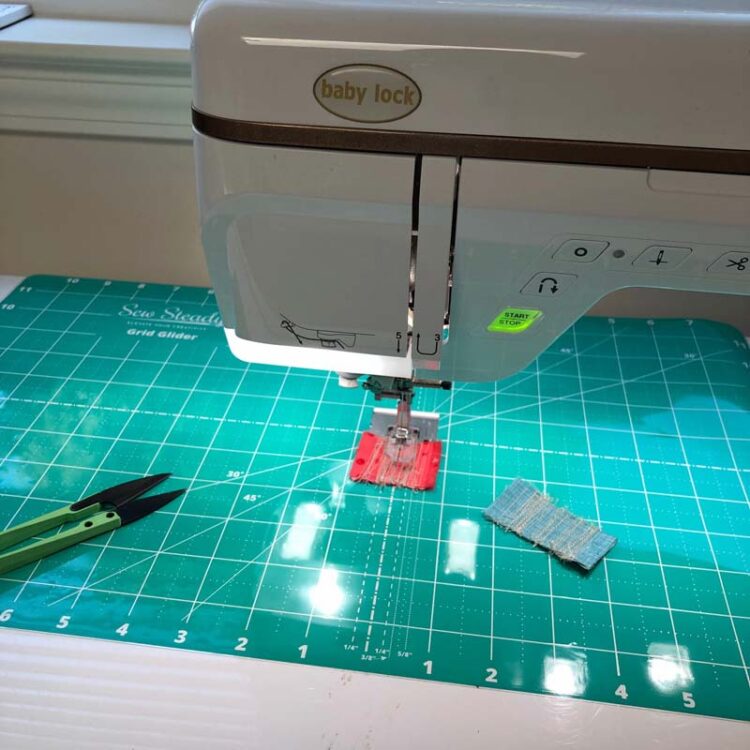
Chain piece when you can. This is a fast and efficient way to sew lots of units in one sitting. To snip your units apart, use a Bladesaver Thread Cutter by Purple Hobbies (one of our sponsors). It’s a genius tool that uses an old rotary blade as a cutter.
Press seams carefully. I like to “set” the seams first by pressing them flat (just as they were sewn). This sinks the stitches into the fibers and relaxes them, getting rid of any puckers. Now they’re ready to press to the side or open, and I don’t use steam (personal preference). In general, I press seams to the side so I have nested seams. When I want to avoid bulky seams due to the construction of the block, I will press them open. I tried to include pressing instructions in the pattern that follow those guidelines.
I also like to use a wool pressing mat and a tailor’s clapper. A wool pressing mat absorbs heat quickly and then releases it, so it’s like pressing your fabric from both sides. It also has a fuzzy surface that keeps your quilt block/fabric in place (no sliding around). The tailor’s clapper helps to keep your seams flat. It’s made of hardwood and it also absorbs heat and has some weight to it, strengthening its ability to flatten seams.
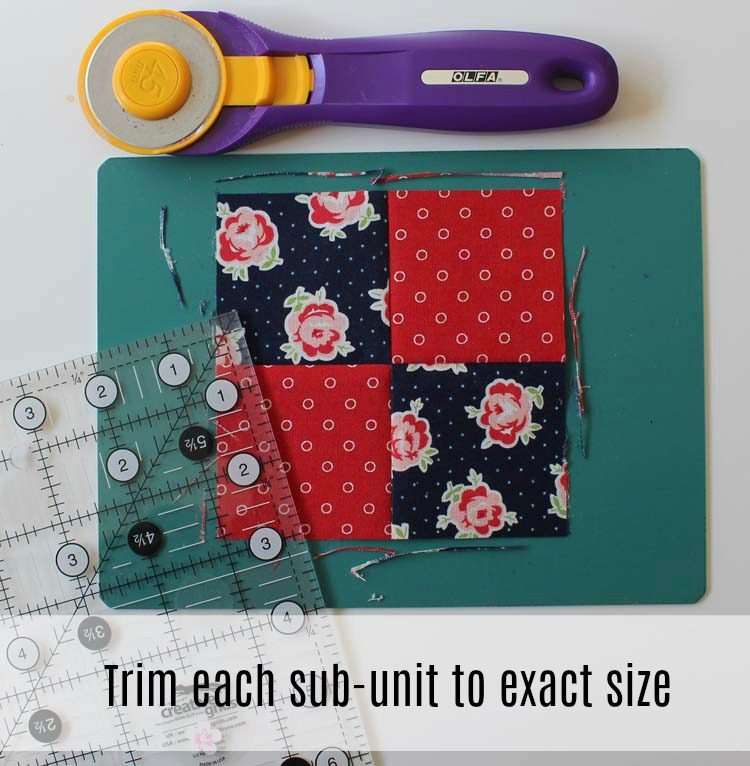
Trim units as you go along. I check the size of my units as I make them. For instance if a pattern has you make 4-patch units for the corners of a block, I make sure they measure the correct size before proceeding to the next step. Even if there’s just a few threads to trim, I trim them. This step really helps all of the units fit together within a quilt block. It also tells me if my seam allowance is accurate.
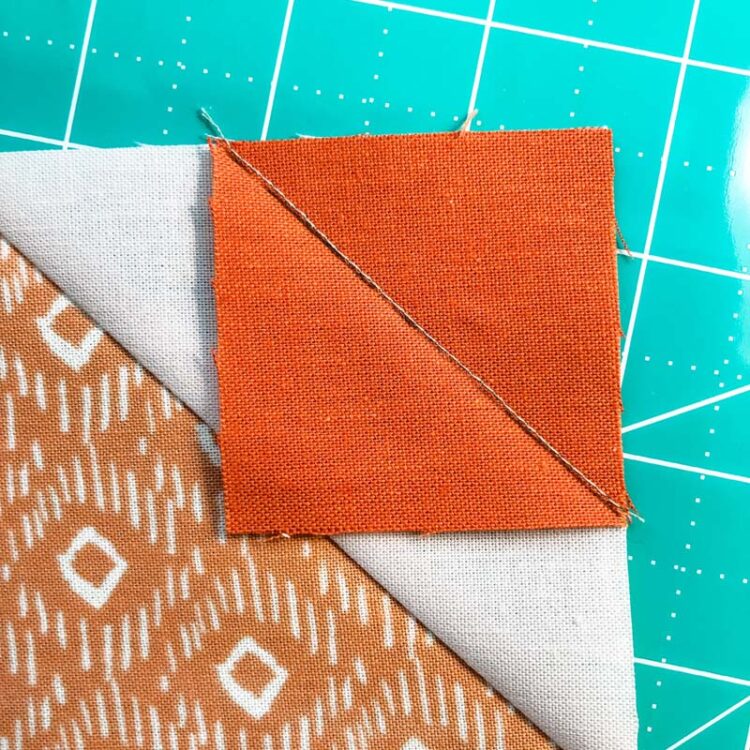
Half-square triangle units
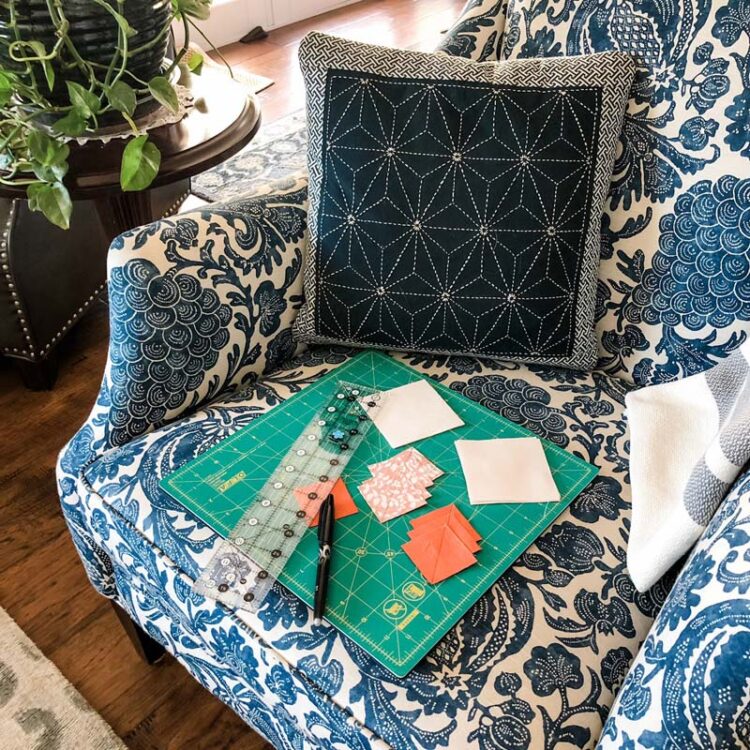
The first thing you’ll do to make the HST’s is draw diagonal lines onto the wrong side of the B1, B2 and G squares. I like to use a Frixion pen for this because it will disappear once the units are pressed. Something I’ve been doing lately is to place all of my squares, ruler and pen on a small cutting mat and bring it into the living room. While I watch TV, I get all of my diagonal lines drawn!
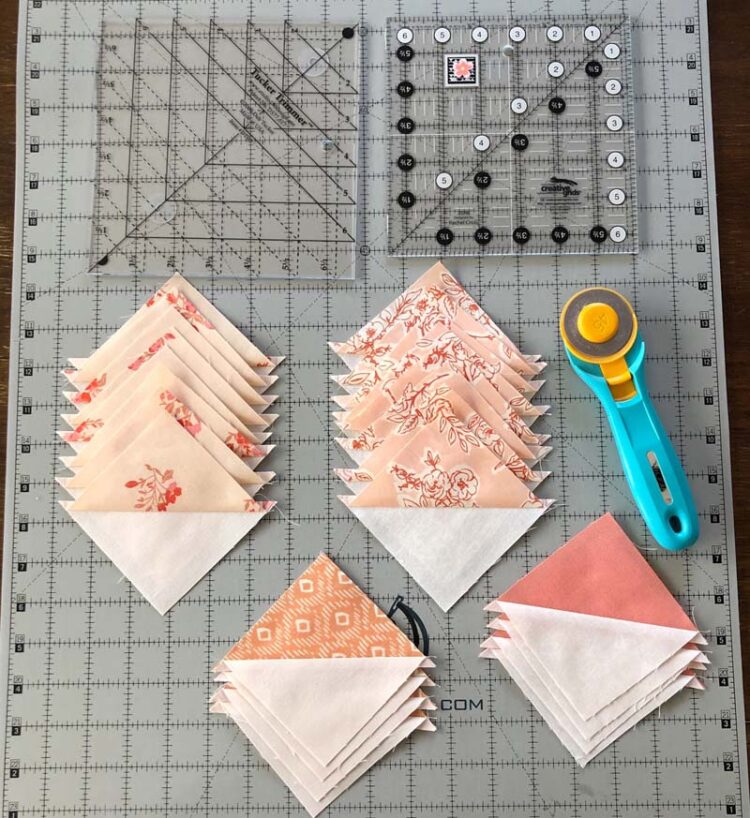
Once you’ve done all of the stitching for the HST’s, it’s time to trim them. I trim on all four sides using a square ruler or the Tucker Trimmer 1. The main thing is to place the diagonal line of the ruler directly on the seam and then trim. Depending on the size quilt you’re making, there will be a lot of HST’s to trim. Take your time; don’t try to do them all in one session.
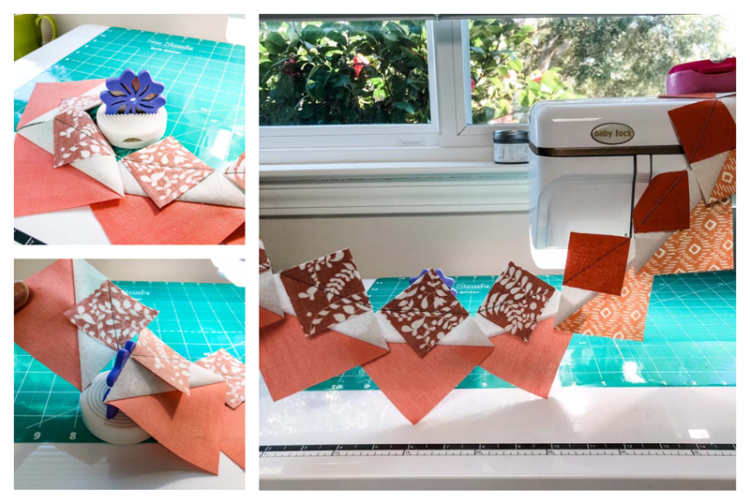
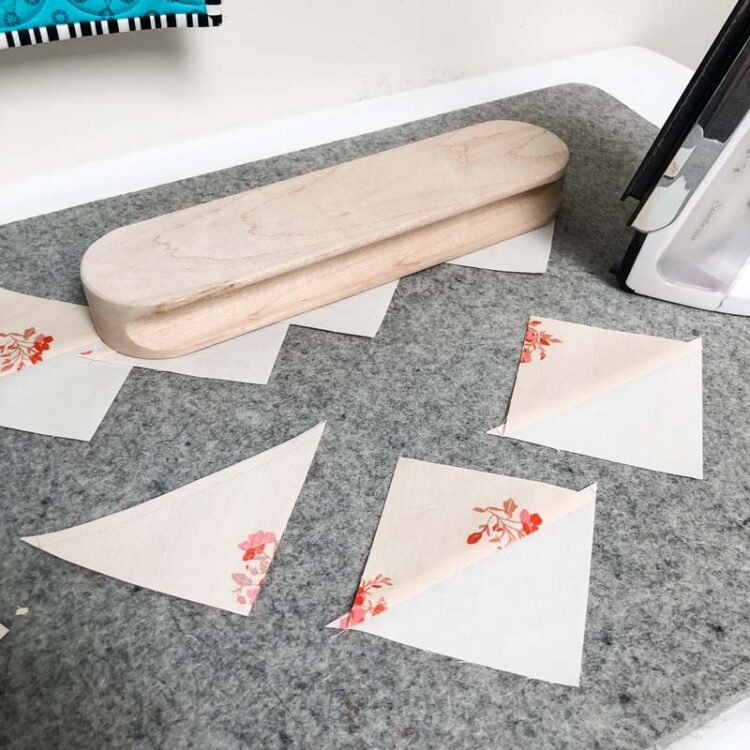
Stitch & flip corner
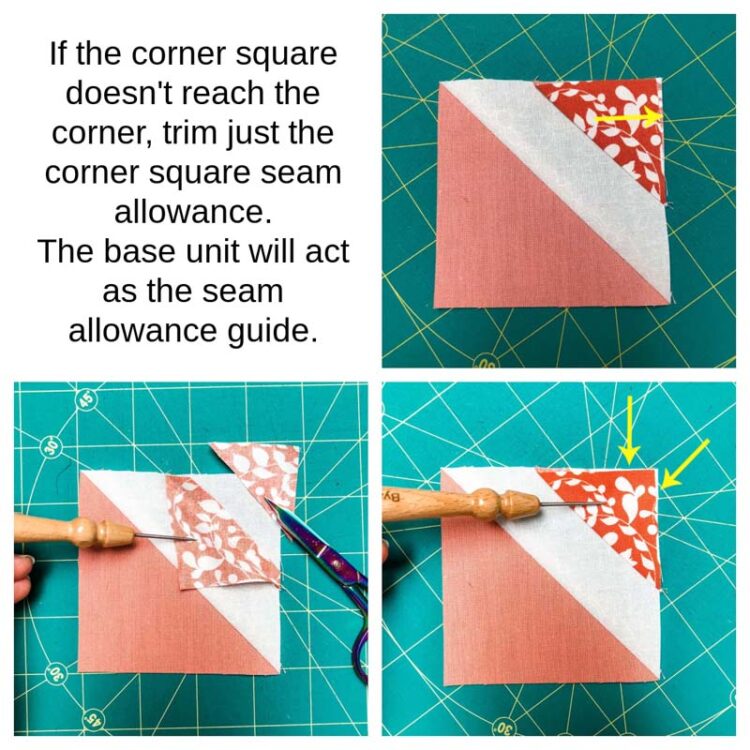
For the H/B2 units, there is one additional step of a “stitch and flip” corner square. I have some tips specifically for this step. It’s important that these are done well so this unit matches up just right to the one next to it.
When you place the marked square onto the HST unit, make SURE it is exactly lined up with the corner and pin it in place.

Stitch one thread-width to the right of the diagonal line.
Before trimming the seam allowance, press the corner out to make sure it covers the base unit. If it’s not big enough to reach the corner, trim only the G square seam allowance and leave the base unit in tact. This will act as a guide for your 1/4″ seam allowance.
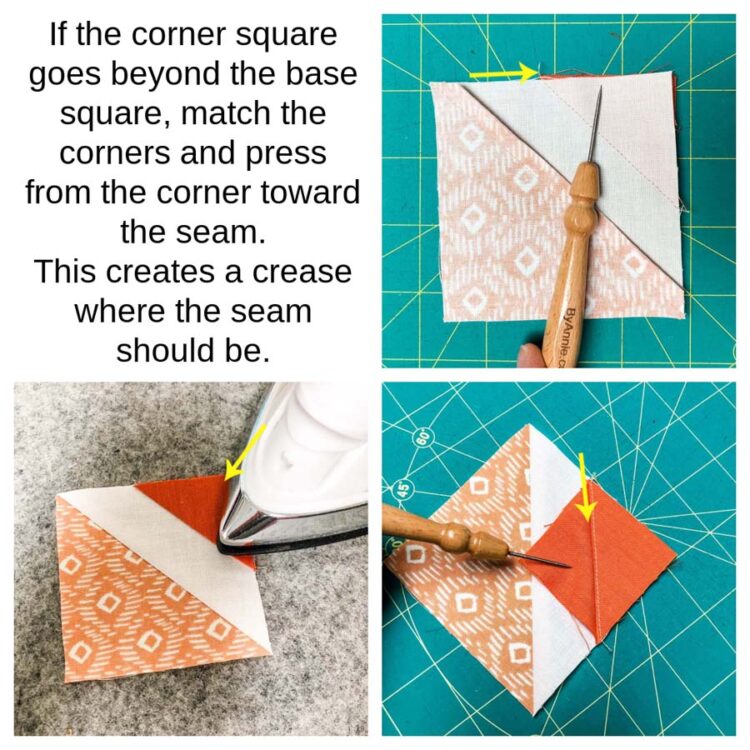
If the corner G square goes beyond the base unit, match the corner of the G square with the corner of the base unit. Then press starting at the corner and moving toward the seam. This will create a crease where the actual seam should be. It’s a nice trick to “fudge” a seam. You can see in the bottom right photo, the crease is to the left of the stitching (the correct placement of the seam). Hopefully that makes sense!
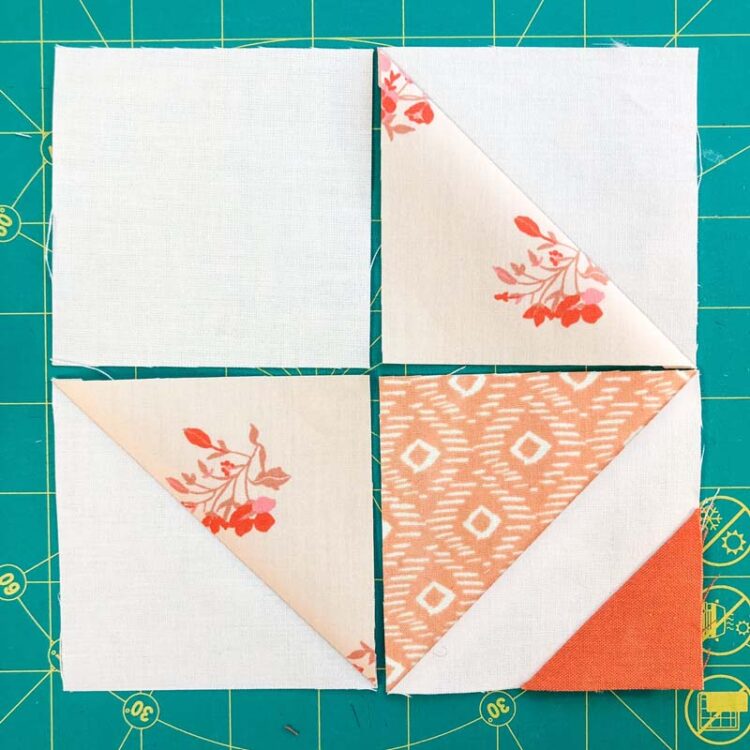
Check these units again to make sure they are square and trim if necessary. ALSO, you should see the 2″ lines of a square ruler intersect right at the seam of the G square. That’s the sweet spot.

If you want to work ahead, you can build the corner units (bottom of page 4). It might be a good idea to make one corner unit first and check the size to make sure everything is accurate. This is a similar theory to making a test block. It prevents you from repeating the same mistake over and over!
Week 3 Sponsors & Prizes
There are two prizes this week! The first prize is a $45 gift certificate to Plain Janes & Co. Quilt Shop! The second prize is a Blade Saver Thread Cutter from Purple Hobbies! Thank you to both sponsors for your support!
Giveaway rules:
- Post a photo of your HST’s on Instagram using the hashtag #arrowstoneqal
- Deadline is Saturday, March 21, at midnight (PST).
- Your Instagram account must be public (otherwise I won’t be able to see it).
- Giveaway is open to US residents only due to shipping costs.

Week 2 Winner
The winner of the Creative Grids Stipology XL Ruler is Beverly Mark @capquilter. Congratulations Beverly! If you didn’t receive my direct message, please send me an email so I can get you your prize!
Thank you Creative Grids for sponsoring our quilt along!
I love seeing your progress on Instagram. Leave a comment if you have any questions and I’ll answer you here and in a separate email. Have a great week!


Hi Julie! I have a problem that I hope you can solve for me. I signed up for the Arrow Stone QAL quilt and have bought the pattern. But I’m not able to make the quilt right now. Will your weeks 1,2,3 etc. still be here when I AM able to do it? I’m reading each one now, but I know I will forget all these good tips and information by the time I can make the quilt. Please tell me they will still be accessible to me. You are one of the most clear instructors I have ever seen! Thank you for your time and effort you put into these posts.
Julie, THANK YOU for your tips on flipping corners! Mine are usually wonky, and I dread those patterns that use them, and more and more patterns feature them. Your ‘corrections’ make so much sense, and will help me keep my pieces squared to the right size.
You rock!