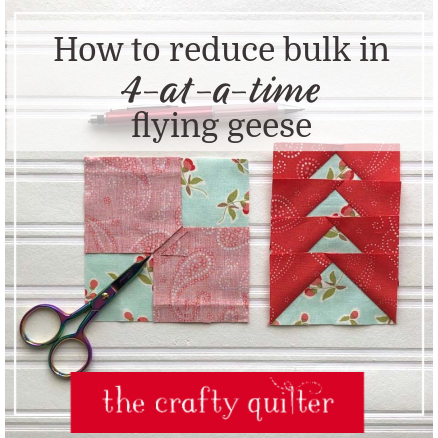
How to reduce bulk in 4-at-a-time flying geese
My favorite way to make flying geese is with the 4-at-a-time method. It’s a fast and efficient technique, but I recently discovered that it creates two extra layers of fabric in the seam allowance. Today, I’m going to show you how to reduce the bulk in 4-at-a-time flying geese. It’s a simple solution that you’ll want to use right away!
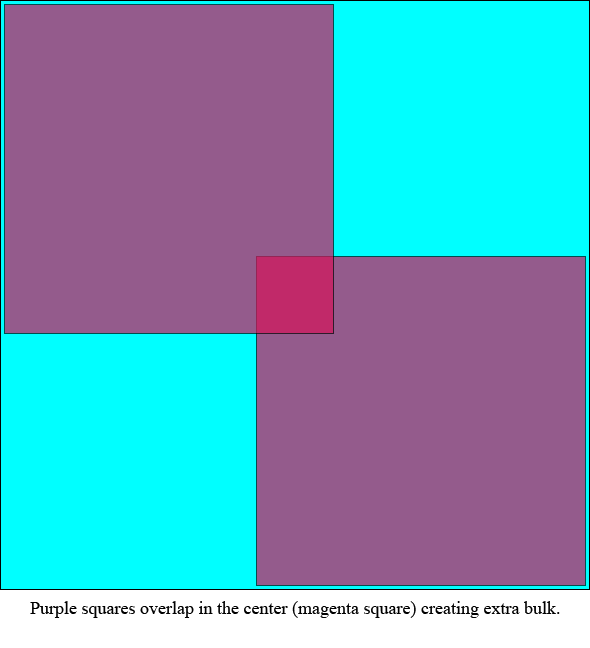
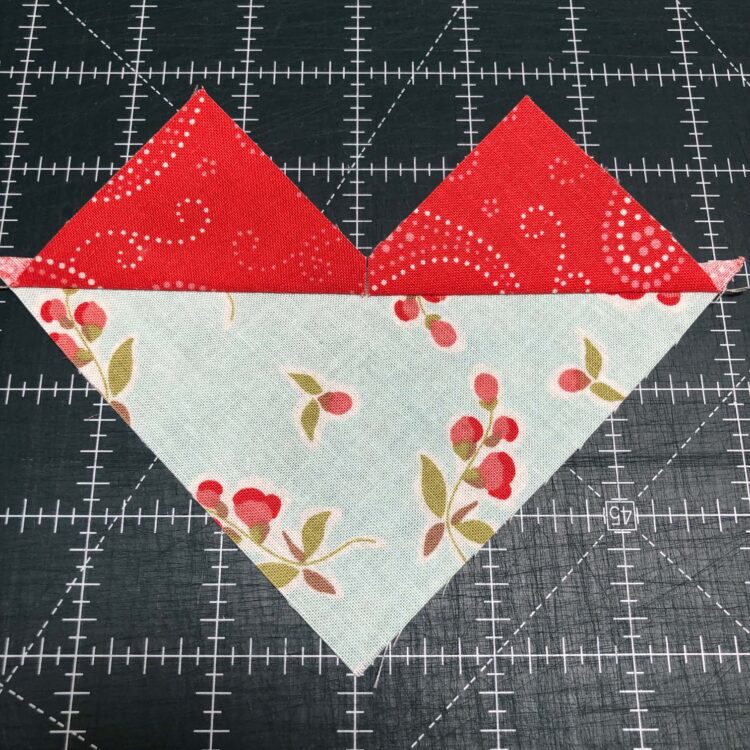
Let’s dive into this idea a little deeper. This 4-at-a-time method starts with one large square for the flying geese body and 4 small squares for the wings. You place the two small squares on opposite corners of the large square (right sides together). The small squares overlap in the center. This is where the extra layers come from.
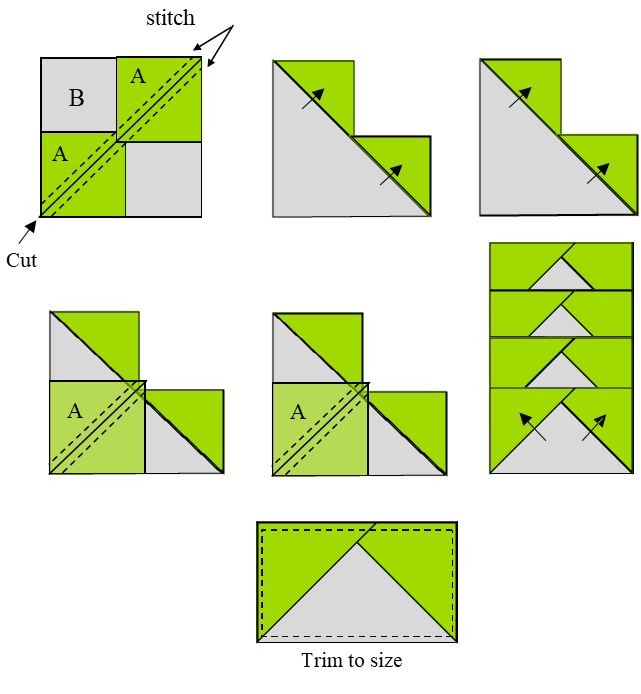
The steps for this method are show in the image below:
When you make flying geese with the traditional method using one rectangle and two squares, you don’t get this extra bulk at the point. They’re still bulky in this area because there are five layers of fabric, but this is unavoidable.
How to reduce bulk in 4-at-a-time flying geese
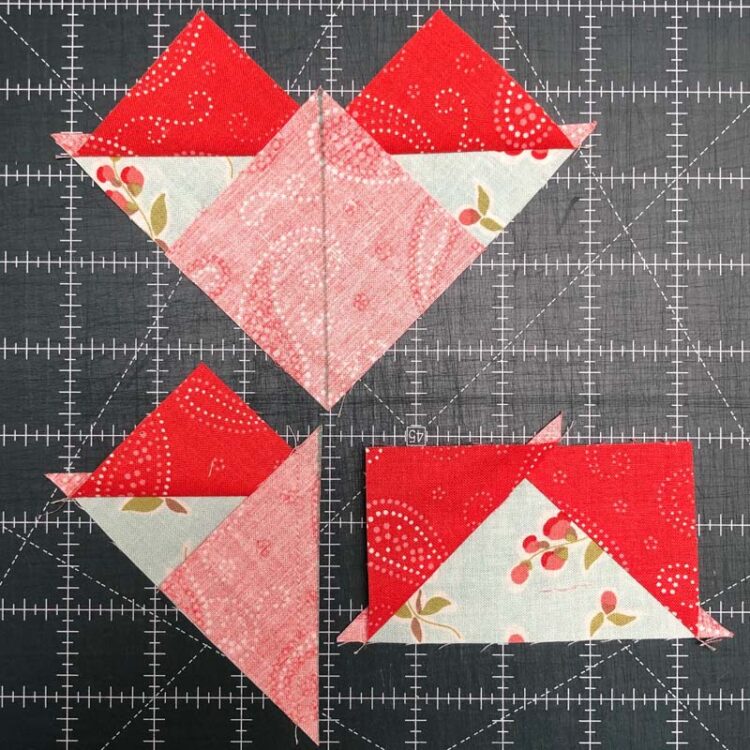
It’s really easy to reduce bulk in 4-at-a-time flying geese. Just follow these steps.
- Draw a line from corner to corner where the top two squares overlap (shown by the arrows below.)
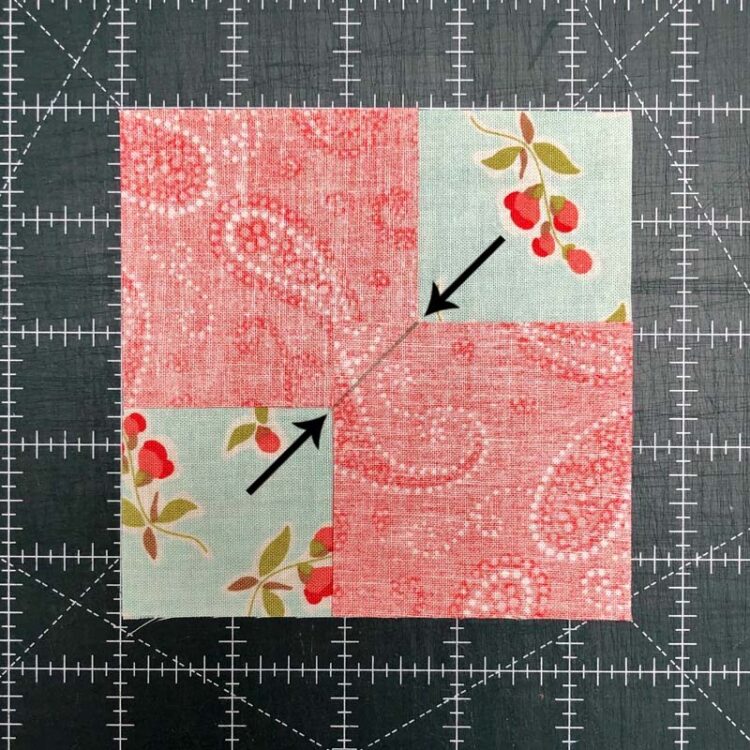
- Cut through both top squares on the line. Make sure you don’t catch the large square while you cut. Discard the extra pieces (triangles). The two squares now butt up against each other with no overlap.
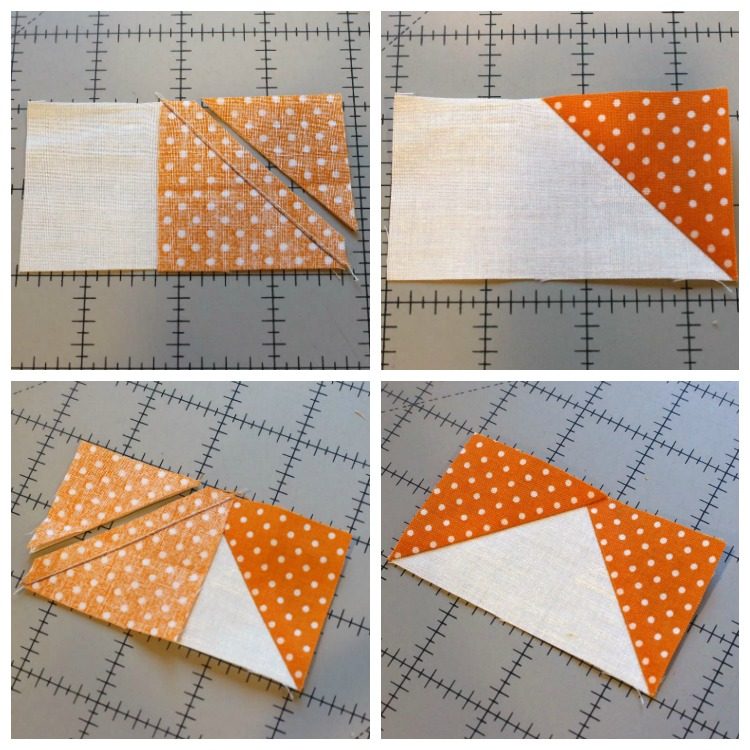
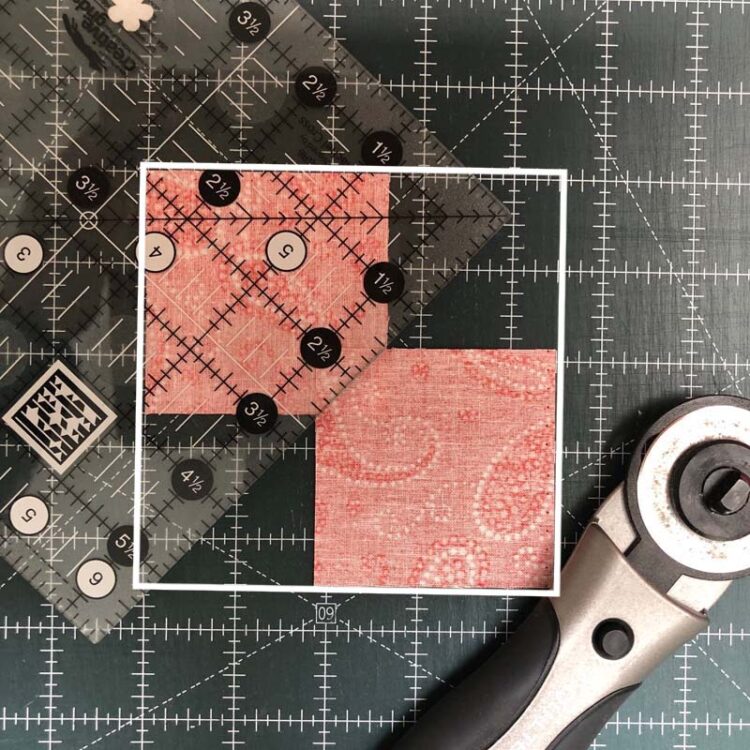
- You can also do this step with a rotary cutter and mat. Place the squares on the mat inside of a square grid that is the same size as the large flying geese square (shown as a white square below). Place a ruler along the overlap intersections and cut.
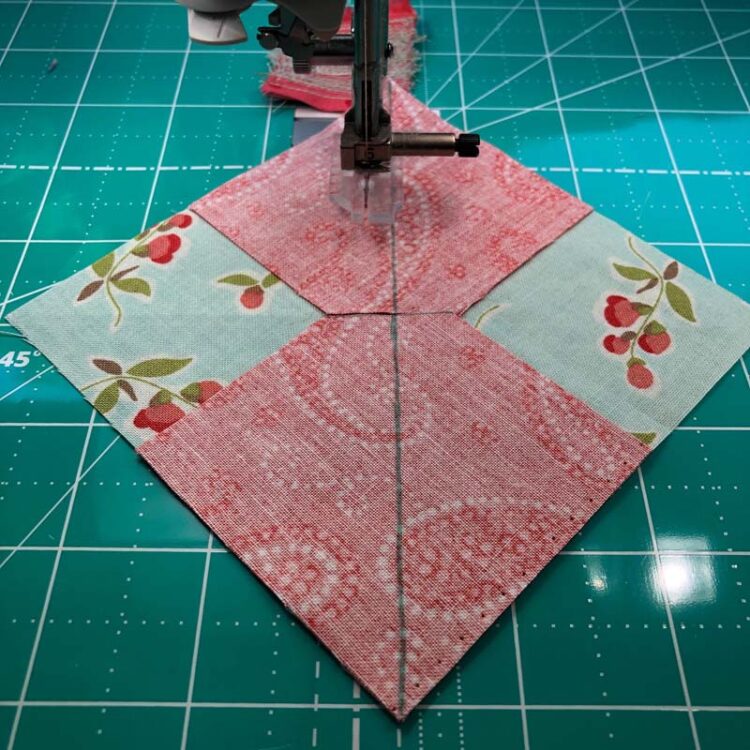
- Continue as usual with the flying geese 4-at-a-time method. You will NOT clip the remaining two squares.
More details
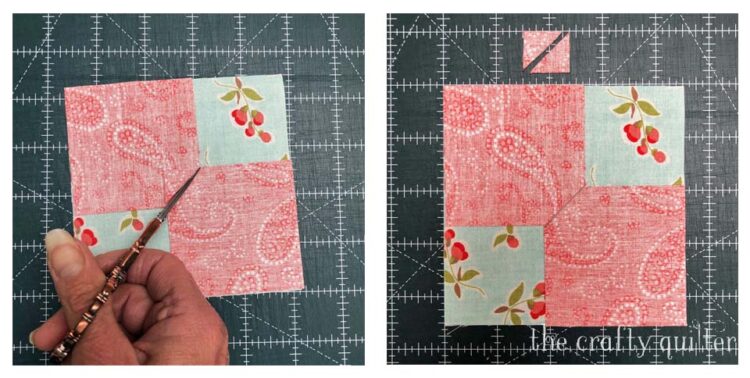
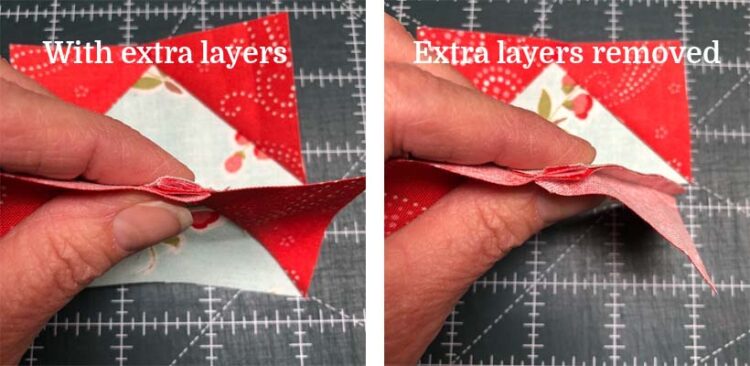
I took some photos of the cut-away pieces so you can see where the extra bulk would land. Below you can see the small triangle that was cut away.
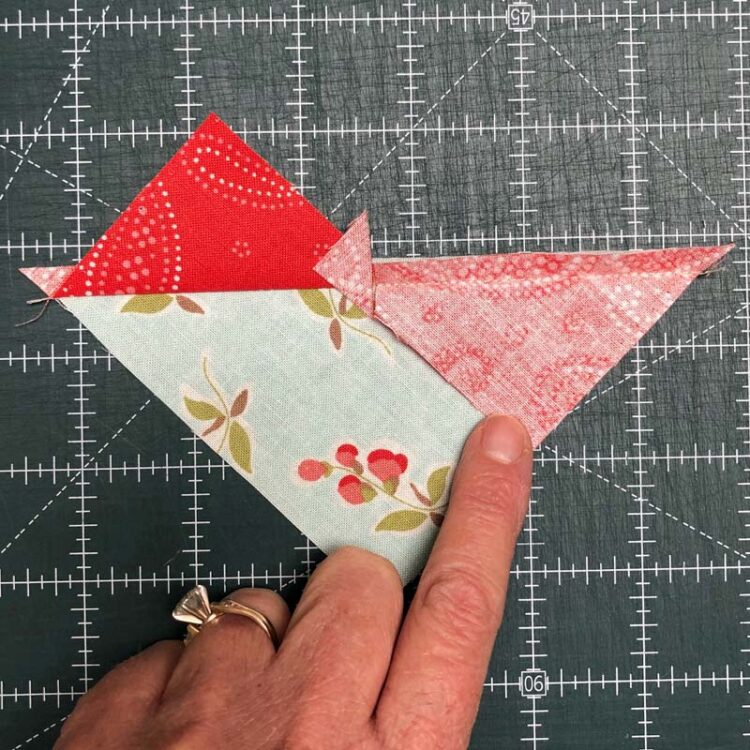
In the image below, you can see how that piece would look had it been sewn into this step. It gets folded over itself to create the extra two layers.
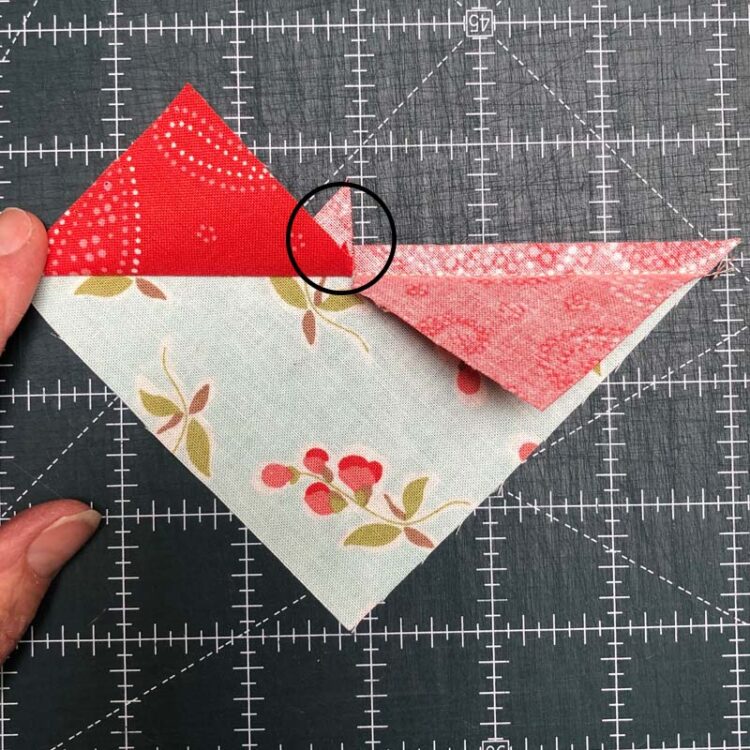
Below, you can compare two flying geese; one made with the extra layers and the other made by cutting away the overlap. It’s definitely less bulky once the extra layers are removed.
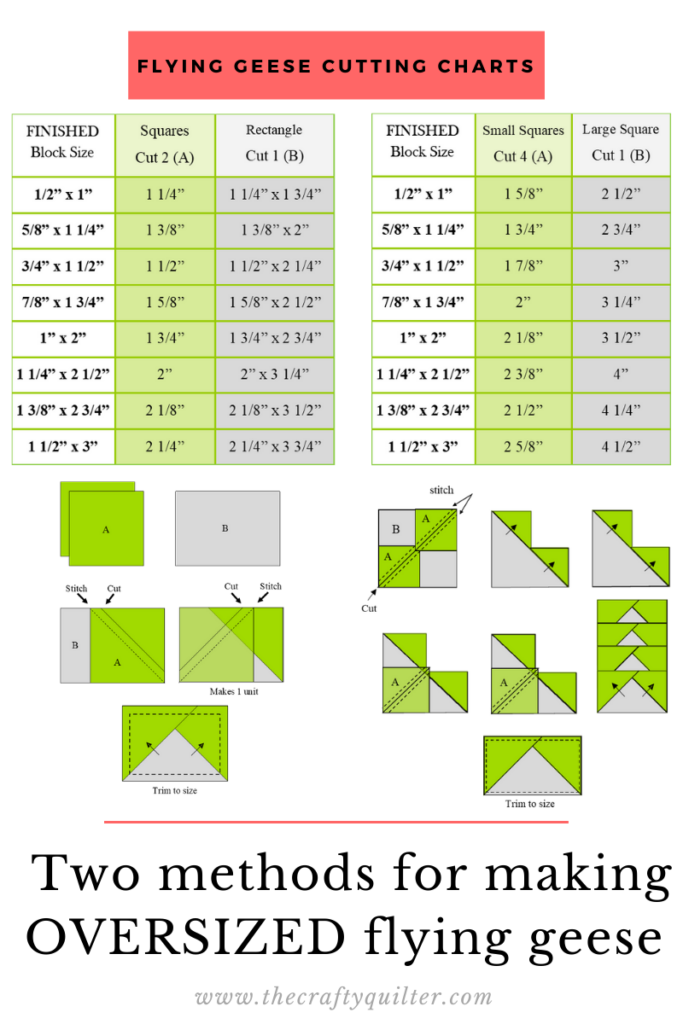
Making flying geese 4-at-a-time is a great technique, but I also like to oversize them so I can trim them perfectly to size. You can find a full tutorial for my favorite way to oversize flying geese along with cutting charts here.
Don’t forget the Passport to Quilting Event goes live tomorrow! Sign up below to get a free bundle of patterns from some of your favorite designers!

Thanks for visiting! I hope you try this little trick the next time you make flying geese 4-at-a-time. Happy quilting!


I have researched flying geese extensively, and 4 at a time especially. You are the only person I have come across to reduce the bulk! Thank you so much. I tried it, and it worked perfectly!
is it overstatement to say this is life changing? This, AND the stitch NEXT to the paper, for the square in square foundation blocks. Shaking my head at how long I’ve been fumbling along without this knowledge. thankyou!
Thank you for not only this wonderful tutorial but also for your great blog and superb patterns
Wow! Awesome tip. Thank you.
What a fantastic idea, Love it, thank U
Fantastic idea – any time you can reduce the “bunchies” is a plus ! Thanks for sharing.
This is a great idea, will definitely try it!!
This is genius, Julie…thanks for the great tip!
Sharon
The first and only time I did four-at-a-time geese, I had to undo some of the stitching and pull out the extra layers. This is a great tip and I have bookmarked it.
Thank you for sharing this — what a great idea! I appreciate you taking the time to create such a clear and thorough demonstration, and I am bookmarking this page for future reference.
When I go into Passport site I see that I am logged in and today is the beginning date of the passport but I don’t see where the designs are.
Thank you
Kitty Letsch
Sent from my iPad
[email protected]
Clever tip, Julie! Thanks for sharing! 🙂
Very clever, Julie! This is genius. Thank you so much. Now I hope I don’t forget about it when the time comes to use it.
Perfect solution!!! Now to put it in practice.
This is actually some thing I’ve wondered about. Great tip. Thanks!
I gave up making the 4-at-a-time Flying Geese for this very reason! Would love to see a video of how you do this to reduce bulk.
Thank you! I avoid flying geese because of the bulky bump they create. I straight-line quilt my own quilts on my regular sewing machine so bulky seams become a problem. I will try making a pillow with this tip/trick to see how it goes – I’m sure it will open up many new possibilities for me! Thank you, thank you.
What a great tip! It never occurred to me to trim those away. Thanks!!
Julie,
Clever, clever! Good thing I don’t have to come up with these tricks – it would never happen!
Carol