The Crafty Quilter - Quilting tips and inspiration
  • Instagram
  • Pinterest
  • RSS
  • BlogLovin
  • Twitter
  • Flickr
  • Email
Menu
Skip to content
  • Home
  • About Me
  • Versatile Face Mask Pattern
  • Tutorials
    • Holiday / Seasonal
    • Quilts
    • Home Accessories & Decor
  • Tips & Techniques
  • My Patterns
  • Arrow Stone Quilt Along
  • Disappearing 9-patch QAL
  • Summer Fun Quilt Along
  • Christmas Once a Month
  • Recipes
  • Privacy Policy

Arrow Stone QAL Week 4

3 / 20 / 223 / 20 / 22

I’m back with Week 4 of the Arrow Stone QAL, and we’re changing up the schedule a bit. Originally I had quarter-square triangles in the lesson plan, but we’re going to make flying geese this week! Since that’s the next step in the pattern, logically that’s what I’ve been working on (because I don’t even look at my own schedule)! I’ve heard from a few of you that flying geese have been your “mountain to climb”. We’re going to take it one step at a time and you’ll be conquering that mountain with ease! Again, even if you’re not participating, you’ll find some great tips here. Let’s climb!

If you’re just now joining us, all of the past content for the Arrow Stone QAL can be found below:

  • Introduction Post
  • Week 1 – Choose fabric
  • Week 2 – Cutting and organizing fabric
  • Week 3 – Making HST’s and piecing tips

Week 4

This week we are going to make flying geese units (FG’s). There are several ways of constructing these units and my favorite is the 4-at-a-time technique. If you’ve never made them this way, I guarantee you will become a fan. However, no matter what technique I use for FG, they’re always prone to turn out just a bit wonky. The solution for that is to make them oversized and then trim them down to perfection. So, we’re going to make them oversized and 4-at-a-time!

Flying Geese Tips

There always seems to be room for error no matter how hard we try. Fabric, thread, sewing machine, lighting, even the pins we use, can all affect our quilting. Throw in not-enough-sleep, diagonal seams, bias edges and not enough (or too much) coffee, and things start to go downhill. Today, I have some simple tips to combat those negatives and help you perfect the art of making flying geese.

Week 4 of the Arrow Stone QAL is all about flying geese.  You'll find great tips so they turn out perfect every time - at The Crafty Quilter

Slow Down. This might be the root of all evils in my own quilting experience. I’m always in a hurry because I have so many projects in the que! Take a deep breath and allow yourself time to focus. This usually keeps the seam ripper quiet, too!

Draw diagonal lines accurately. Even though I have Diagonal Seam Tape and a laser beam guide (built into my machine), I still like to draw a diagonal line on the small squares of the flying geese. Make sure to draw the line exactly from corner to corner. This is your 1/4″ stitching guide. If you don’t have a 1/4″ presser foot or you would rather stitch directly on a line, you could also draw your 1/4″ stitching lines. There are rulers made specifically for that. They have a center line and measure 1/4″ on each side of that. Shown below is the Quilter’s Magic Wand Ruler, but any quilting ruler with 1/4″ markings will work.

Align pieces exactly before sewing then pin in place. This is where the right pin comes in handy. I like my pins thin and sharp so they don’t distort the fabric. I use Clover Fine Patchwork Pins for all of my piecing.

Stitch with precision. Turn down the speed and you’ll be able to sew a straight line. Watch the beginning and ending of your stitching line. That’s where I see the most wobble take place.

Press gently. The seams of flying geese units are on a diagonal. Bias edges are easy to distort. If you jam your iron into the seam, it can take it out alignment and create an arc. I use my fingers to flatten the seam in front of the iron.

Pick your trimming ruler.

  • I love my Bloc Loc Flying Geese Ruler for trimming FG. There is no guessing at what to line up and where. I just nudge it into place so that it locks into both seams and then I trim! It is my go-to ruler for FG. (See tip farther down). The only drawback is that it requires a different ruler for different sizes which can get pricey. But I think it’s worth it. You might be the lucky winner of your own Bloc Loc Flying Geese Ruler if you post a picture of your FG on Instagram! (Read the Sponsor section).
  • Another ruler option is the Wing Clipper 1 Tool by Studio 180 Designs. The advantage of this ruler is that it trims 10 different sizes of FG in one tool.
  • Use a square ruler. Don’t fret if you don’t have a “fancy” ruler. A square ruler can be just as effective. Step 1: Make sure the “V” seam is at the 1/4″ line of the ruler and at the center measurement for the size you’re trimming to (1 3/4″ in this case). Also make sure the bottom diagonal seams are lined up with the cut measurements for the size you’re trimming to ( 2″ and 3 1/2″) for this block. Step 2: Rotate the block and place the previously cut edges on the size you’re trimming to. The diagonal line of the ruler should line up with the diagonal seam of the FG.
Week 4 of the Arrow Stone QAL is all about flying geese.  You'll find great tips so they turn out perfect every time - at The Crafty Quilter

Trim carefully. Know the size you need to trim to. Make sure everything is lined up where it needs to be. Measure twice, cut once!

A tip if you’re using the Bloc Loc ruler: Position the FG unit and ruler so that the “V” is at the bottom, then trim the right side and top edge (if you’re right handed). Then rotate and trim the other two side. Whenever I start with the “V” at the top, I end up pushing too hard into the seam allowance and it skews my cut just a bit. The other way works much better for me.

Week 4 of the Arrow Stone QAL is all about flying geese.  You'll find great tips so they turn out perfect every time - at The Crafty Quilter

Try a small rotary cutter (28 mm) for cutting small units. I find this helps with my accuracy.

Conclusion

When your HST units, FG units, and QST units are all exact, the final block will be much easier to put together. The units will fit together, the diagonal seams will line up and the block will measure the correct size. Happy dance!

For a deeper dive, check out my original blog post, Two Methods for Oversized Flying Geese, that includes a PDF chart of cutting dimensions for 16 different sizes of flying geese units.

Two methods for making over-sized flying geese along with cutting charts @ The Crafty Quilter

Week 4 Sponsors & Prizes

There are two prizes this week! The first prize is a $50 gift certificate to Fat Quarter Shop! The second prize is a Bloc Loc Flying Geese Ruler from Bloc Loc! Thank you to both sponsors for your support!

Giveaway rules:

  • Post a photo of your Flying Geese units on Instagram using the hashtag #arrowstoneqal
  • Deadline is Saturday, March 28, at midnight (PST).
  • Your Instagram account must be public (otherwise I won’t be able to see it).
  • Giveaway is open to all.
Week 4 of the Arrow Stone QAL is sponsored by Bloc Loc Rulers and Fat Quarter Shop!

Week 3 Winner

The winner of the Gift Certificate to Plain Janes & Co. Quilt Shop is MaryJo Shuler @mdwviewqltr.

The winner of the Bladesaver Thread Cutter from Purple Hobbies is Chris Behme @chrisknitz.

Congratulations to both winners!

If you didn’t receive my direct message, please send me an email so I can get you your prize!

Thank you to Plain Janes & Co. Quilt Shop and to Purple Hobbies for sponsoring our quilt along!


I love seeing your progress on Instagram. Leave a comment if you have any questions and I’ll answer you here and in a separate email. Have a great week!

Week 4 of the Arrow Stone QAL is all about flying geese.  You'll find great tips so they turn out perfect every time - at The Crafty Quilter
6 Comments
Share
  • Pin it
  • Share
  • Tweet
  • Share
  • Email
  • Print

National Quilting Day Events 2022

3 / 16 / 223 / 16 / 22

It doesn’t take much for quilters to celebrate their favorite pastime, so why not dedicate a whole day, weekend or month to quilting! I want to share some National Quilting Day Events that are taking place this Saturday, March 19, 2022. The entire month has been labeled National Quilting Month, but we’re kicking it up a notch on Saturday!

National Quilting Day Events

The first National Quilting Day was held on the third Saturday of March, 1992, by the National Quilting Association (now terminated). That was thirty years ago! Since then it’s taken on a global reach that has spread world wide. You can visit Quilt Alliance to see if there are any special events happening in your neighborhood. Two simple activities they have suggested to celebrate are (1) Label a quilt, and (2) Display a quilt outside your home (weather permitting).

National Quilting Day is the third Saturday of March!

Fat Quarter Shop is celebrating Worldwide Quilting Day with a challenge to our community of quilters to sew something from 10” squares. The Layer Cake Lotto is a fun challenge with a $100 gift card giveaway and everyone is invited! You can get all of the details at their blog, The Jolly Jabber.

Celebrate National Quilting Day with Fat Quarter Shop and their Layer Cake Lotto!

If you’re a cross stitcher, Fat Quarter Shop has you covered there too. They’re hosting a stitch along to make this adorable Quilt-O-Graphy cross stitch pattern to celebrate our favorite pastime. Read all about the stitch along at The Jolly Jabber.

Worldwide quilting Day is being celebrated at Fat Quarter Shop with a stitch along.

The Quilt Show is celebrating big with International Quilting Weekend! It starts this Friday, March 18, and continues through the entire weekend. They’ll have free shows, exciting Live classes, fun contests, and lots more! This is a great opportunity to see what The Quilt Show is all about. Plus, you can enter their raffle for a chance to win a Bernina 570 QE sewing machine and lots of other great prizes (over $12,000 worth)!

The Quilt Show is celebrating International Quilting Weekend with free shows, live classes and a raffle to win a Bernina sewing machine!

Missouri Star Quilt Co. is celebrating all of March for National Quilting Month! You can download their “Quilt Is…” postcard and fill in what quilting means to you. Post it on social media using #QuiltingIS. They’re also having a National Quilting Month Sale starting March 18, 2022 at midnight CST.

Show what "Quilting Is" to you with this downloadable postcard from Missouri Star Quilt Co.

Ideas to celebrate National Quilting Day

I thought I’d share a few ideas to help you celebrate this Saturday in your own quilt-y way!

  • Finish a UFO or WIP.
  • Visit your favorite local or online quilt shop.
  • Clean and organize your sewing space.
  • Learn a new quilting technique.
  • Watch a quilting video.
  • Share the love of quilting by teaching a friend or relative the basics.
  • Clean and/or service your sewing machine.
  • Read a quilt magazine or quilt book.
  • Join a quilt along – Arrow Stone Quilt Along anyone?
  • Listen to a quilting podcast.
  • Refold and organize your quilts.
  • Decorate a favorite area with quilts or wall hangings.

Julie celebrates National Quilting Day in 2021 in her sewing room with Cooper.
National Quilting Day in 2021

I hope your weekend is full of ideas and inspiration to celebrate National Quilting Day! Happy quilting everyone!

1 Comment
Share
  • Pin it
  • Share
  • Tweet
  • Share
  • Email
  • Print

Arrow Stone QAL Week 3

3 / 13 / 223 / 13 / 22

I’m excited for Week 3 of the Arrow Stone QAL because we get to start making HST’s (half-square triangle units)! I also like to establish some good piecing practices this week that will act as guidelines throughout the quilt along. Even if you’re not participating, you’ll find some great tips here. Let’s get started!

The Arrow Stone QAL Week 3 @ The Crafty Quilter involves making HST units plus my best piecing tips!

If you’re just now joining us, all of the past content for the Arrow Stone QAL can be found below:

  • Introduction Post
  • Week 1 – Choose fabric
  • Week 2 – Cutting and organizing fabric

Week 3

This week we will making two different sets of half-square triangle units (HST’s). The first set is made 8-at-a-time for some speedy piecing. They will be over-sized, so you’ll need to trim them to the correct size shown in the pattern. The second set of HST’s are made 2-at-a-time (also over-sized). Once these are trimmed down, there is an additional step of adding a stitch and flip square to one corner. I’ll share some tips for that in a bit.

The Arrow Stone QAL for week 3 is all about making HST units plus lots of piecing tips!  The Crafty Quilter.

Piecing Tips

Before we get started making the HST units, let’s go over some basic piecing tips.

Make sure to use an accurate 1/4″ seam allowance. You’ve probably heard of the term scant 1/4″ seam allowance. This means that your stitching line is just a thread-width less than a full 1/4″. This allows space for the fabric that folds over itself when the seam is pressed (open or flat) and for the space the actual thread takes up. Variables that can affect your scant 1/4″ seam allowance are the thickness of fabric and the weight of thread being used. It’s a good idea to test your seam allowance just to make sure it’s accurate.

I feel like I could write a whole blog post on seam allowance. Guess what? I already have! For more detailed explanations, machine set up and specific tools, check out The Perfect 1/4″ Seam Allowance.

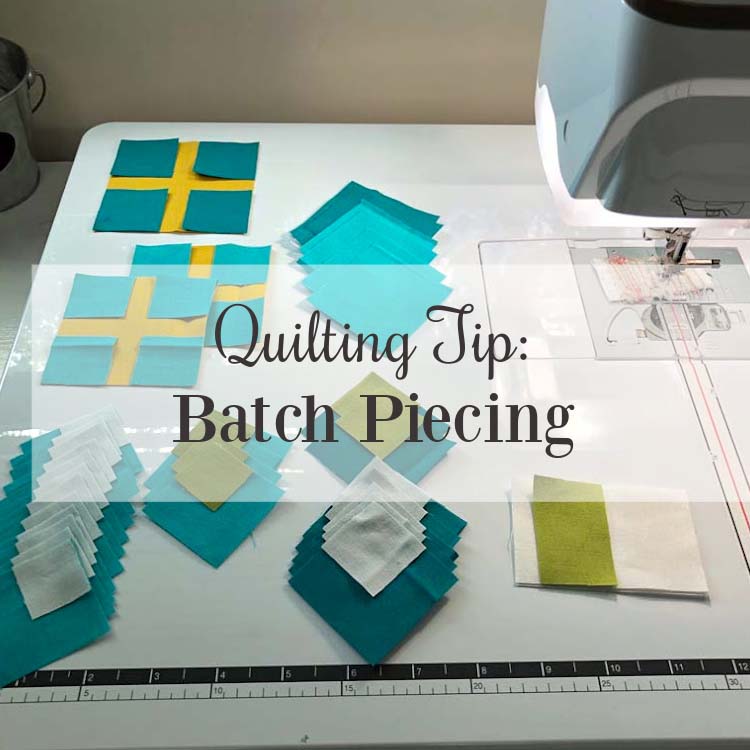
Use a leader/ender when piecing. These are small squares of fabric that are used to start and end your sewing on.  It works similar to chain piecing.  When you get to the end of your chain piecing, you stitch onto the fabric scrap so that you always have a scrap under you presser foot ready for the next chain piecing session. Leaders/enders prevent a thread nest from forming at the beginning of your seam; help maintain a consistent (straight) seam allowance; prevent fabric from getting sucked down into the needle hole; force you to clip your thread tails and more. You can read my full blog post, Efficient Quilting with Leaders and Enders, if you want more details.

My typical machine set-up is shown below. I have Diagonal Seam Tape in front of my feed dogs. This helps guide my 1/4″ seam allowance and my diagonal seams. I always have thread snips close by and I have my leader and ender scraps ready to go. I’m sewing on a Baby Lock Crescendo (and it’s wonderful).

Another set-up that I like for my machine uses a Sew Steady Grid Glider on the extension table of my sewing machine. It has a cut-out for the feed dogs and secures to the table with micro-suction technology. I like having the grid close by to measure anything when needed, and I like the 1/4″ guidelines that act similarly to the Diagonal Seam Tape. Plus, it has a slick surface that is great for free motion quilting.

Sew Steady Grid Glider makes FMQ easy and piecing more efficient.

My stitch length is generally between 1.5 and 2.0, depending on whether I’m pressing open or to the side (1.5 for open seams).

Chain piece when you can. This is a fast and efficient way to sew lots of units in one sitting. To snip your units apart, use a Bladesaver Thread Cutter by Purple Hobbies (one of our sponsors). It’s a genius tool that uses an old rotary blade as a cutter.

Chain piecing is my favorite way to go.

Press seams carefully. I like to “set” the seams first by pressing them flat (just as they were sewn). This sinks the stitches into the fibers and relaxes them, getting rid of any puckers. Now they’re ready to press to the side or open, and I don’t use steam (personal preference). In general, I press seams to the side so I have nested seams. When I want to avoid bulky seams due to the construction of the block, I will press them open. I tried to include pressing instructions in the pattern that follow those guidelines.

I also like to use a wool pressing mat and a tailor’s clapper. A wool pressing mat absorbs heat quickly and then releases it, so it’s like pressing your fabric from both sides. It also has a fuzzy surface that keeps your quilt block/fabric in place (no sliding around). The tailor’s clapper helps to keep your seams flat. It’s made of hardwood and it also absorbs heat and has some weight to it, strengthening its ability to flatten seams.

Trim units as you go along. I check the size of my units as I make them. For instance if a pattern has you make 4-patch units for the corners of a block, I make sure they measure the correct size before proceeding to the next step. Even if there’s just a few threads to trim, I trim them. This step really helps all of the units fit together within a quilt block. It also tells me if my seam allowance is accurate.

Half-square triangle units

The first thing you’ll do to make the HST’s is draw diagonal lines onto the wrong side of the B1, B2 and G squares. I like to use a Frixion pen for this because it will disappear once the units are pressed. Something I’ve been doing lately is to place all of my squares, ruler and pen on a small cutting mat and bring it into the living room. While I watch TV, I get all of my diagonal lines drawn!

Once you’ve done all of the stitching for the HST’s, it’s time to trim them. I trim on all four sides using a square ruler or the Tucker Trimmer 1. The main thing is to place the diagonal line of the ruler directly on the seam and then trim. Depending on the size quilt you’re making, there will be a lot of HST’s to trim. Take your time; don’t try to do them all in one session.

Stitch & flip corner

For the H/B2 units, there is one additional step of a “stitch and flip” corner square. I have some tips specifically for this step. It’s important that these are done well so this unit matches up just right to the one next to it.

When you place the marked square onto the HST unit, make SURE it is exactly lined up with the corner and pin it in place.

Stitch one thread-width to the right of the diagonal line.

Before trimming the seam allowance, press the corner out to make sure it covers the base unit. If it’s not big enough to reach the corner, trim only the G square seam allowance and leave the base unit in tact. This will act as a guide for your 1/4″ seam allowance.

If the corner G square goes beyond the base unit, match the corner of the G square with the corner of the base unit. Then press starting at the corner and moving toward the seam. This will create a crease where the actual seam should be. It’s a nice trick to “fudge” a seam. You can see in the bottom right photo, the crease is to the left of the stitching (the correct placement of the seam). Hopefully that makes sense!

Check these units again to make sure they are square and trim if necessary. ALSO, you should see the 2″ lines of a square ruler intersect right at the seam of the G square. That’s the sweet spot.

If you want to work ahead, you can build the corner units (bottom of page 4). It might be a good idea to make one corner unit first and check the size to make sure everything is accurate. This is a similar theory to making a test block. It prevents you from repeating the same mistake over and over!

Week 3 Sponsors & Prizes

There are two prizes this week! The first prize is a $45 gift certificate to Plain Janes & Co. Quilt Shop! The second prize is a Blade Saver Thread Cutter from Purple Hobbies! Thank you to both sponsors for your support!

Giveaway rules:

  • Post a photo of your HST’s on Instagram using the hashtag #arrowstoneqal
  • Deadline is Saturday, March 21, at midnight (PST).
  • Your Instagram account must be public (otherwise I won’t be able to see it).
  • Giveaway is open to US residents only due to shipping costs.

Week 2 Winner

The winner of the Creative Grids Stipology XL Ruler is Beverly Mark @capquilter. Congratulations Beverly! If you didn’t receive my direct message, please send me an email so I can get you your prize!

Thank you Creative Grids for sponsoring our quilt along!


I love seeing your progress on Instagram. Leave a comment if you have any questions and I’ll answer you here and in a separate email. Have a great week!

HST units for the Arrow Stone QAL at The Crafty Quilter.
2 Comments
Share
  • Pin it
  • Share
  • Tweet
  • Share
  • Email
  • Print

5 Spring Quilt Projects

3 / 10 / 223 / 10 / 22

I’m starting to see signs of Spring when I take Cooper for his afternoon walk, and I can smell the scent of blossoms in the air. This is the perfect time to share 5 Spring Quilt Projects that are on my blog. Often these tutorials get buried, forgotten or never seen (I’m talking to you, newcomers). Check out these sweet quilt designs and start planning your next project!

Enjoy these 5 Spring Quilt Projects from Julie Cefalu @ The Crafty Quilter.  They're small and perfect for decorating your home!

5 Spring Quilt Projects

Patchwork Peter Rabbit is one of my earlier tutorials (2014) and still one of my favorites. He was inspired by my daughter’s preschool art project and he turned out super cute! It has simple patchwork and some applique that makes this wall hanging so adorable.

Patchwork Peter Rabbit designed by Julie Cefalu @ The Crafty Quilter Designs
Patchwork Peter Rabbit Wall Hanging

I hosted a Spring Petals Quilt Along in 2015 and it includes a free PDF pattern that you can download. This table topper has a unique design and uses orange peel applique to give it that Spring look. There are lots of tips in this QAL for applique, quilting, piecing and binding. If you’re a new quilter, you’ll appreciate the extra information and photos.

Spring Petals Table Topper is one of 5 Spring Quilt Projects by The Crafty Quilter.
SPRING PETALS TABLE TOPPER

The Front Porch Flower Pillow will brighten up your porch or any room in your house with it’s cute design. This project is a lot easier than it looks and a great way to use fat quarters and a charm pack.

This Front Porch Flower Pillow is one of Five Spring Quilt Projects by Julie Cefalu  @ The Crafty Quilter.
FRONT PORCH FLOWER PILLOW

You’ll love making these Blossom Quilt Blocks! There is a free PDF pattern that includes instructions for three different size blocks. The blog post has ideas on how to use them and it includes a cute Blossom Pillow Tutorial.

Make a Blossom Quilt Block for a Spring Quilt Project.  Free pattern included @ The Crafty Quilter.
BLOSSOM QUILT BLOCK
Blossom Pillow is made with the free Blossom Quilt Block pattern from The Crafty Quilter.

Get your table ready for Spring and Easter with this Spring Bunny Table Runner Tutorial. It has lovely gingham accents and the cutest bunny applique in the center. If you’re not a fan of applique, you could use a large floral or novelty print in that center square. There’s something for everyone!

Spring Bunny Table Runner Tutorial @ The Crafty Quilter
SPRING BUNNY TABLE RUNNER
Enjoy these 5 Spring Quilt Projects from Julie Cefalu @ The Crafty Quilter.  They're small and perfect for decorating your home!

I hope you feel inspired with these 5 Spring Quilt Projects. I can’t wait to show you the latest Spring design I’ve been working on!

In the meantime, I took some photos on a recent afternoon walk. The weather doesn’t always know that it’s Spring, but it certainly has been Spring-like in the Bay Area of California.

Thanks for spending a little time with me today. We don’t always like change, but Spring is certainly one I welcome!

Image Source: Good Housekeeping
5 Comments
Share
  • Pin it
  • Share
  • Tweet
  • Share
  • Email
  • Print

Arrow Stone Quilt Along Week 2

3 / 6 / 223 / 6 / 22

Welcome back for Week 2 of the Arrow Stone Quilt Along. This week, we’re going to cut all of the pieces for our quilt. Of course, I have some great tips for you when it comes to cutting fabric and keeping it organized.

Arrow Stone Quilt Along Week 2 is all about cutting your fabric and staying organized!

If you’re seeing this for the first time, it’s not too late to join us! All of the past content for the Arrow Stone QAL can be found below:

  • Introduction Post
  • Week 1 – Choose fabric
Arrow Stone Quilt Along Schedule @ The Crafty Quilter

First Tip: read the pattern first

Before cutting any fabric, there’s one thing you should always do. READ THE PATTERN INSTRUCTIONS FIRST. Every pattern will tell you to do that, but who pays attention to those words? I do. Why? Because I want to know the techniques used in the pattern; I want to know if the units have been over-sized; and I want to know if there are any special rulers or tools I’ll need. Plus, there are basic quilting abbreviations that will be used throughout the pattern and possibly some other information that will come in handy. This is what you’ll see in the Arrow Stone pattern.

One of the main things I glean from reading the pattern first is whether or not I need to change any of the cutting instructions to suit my preferred piecing techniques. For example, I like to make units bigger and then trim them down perfectly whenever possible. I also prefer the 4-at-a-time method of making flying geese. So, if a pattern doesn’t include those things, I need to adjust the cutting dimensions to match my methods.

Organize your fabric

The next thing you should do is organize your fabric for the project. Your color palette is most likely different than the pattern’s colorway. What does Color 1 or Fabric A look like for you? If there’s space on the pattern, you can write in the fabric/color you’ll be using for each. If you’re making a scrappy version (like I am), you can still write in the color values or color family you’ll be using.

Arrow Stone Quilt Along fabric and pattern

If you’re working on a pattern that doesn’t have space to write in your color choices, then take an index card and write down the title for each fabric used. In other words, if the pattern refers to a certain fabric as Color 1 or Fabric A or Background or a specific color, write that down. Cut a small rectangle from the fabric you’re using for that color and tape it next to the title. Now when the pattern refers to a specific fabric or color, you’ll know exactly what fabric to grab.

To help you stay on track and keep your fabric organized, I made an Arrow Stone QAL Check List & Fabric Swatch Organizer that you can download and print! As you progress throughout the quilt along, check off the box as you complete it. At the bottom, you’ll see a space for you to attach your own fabric swatches so you’ll know what fabric to use along the way.

Arrowstone QAL Check ListDownload

If you’re making a scrappy version of Arrow Stone (like I am), you can group your fabrics together for each block. Keep them stacked in the same order (color 1,2,3, etc). Color 5 is the same for all of my blocks so that’s not included in each stack – it’s the floral print in the middle of the photo below.

Stacks of fabric for each block of scrappy version

Cutting fabric

Now that your fabric is organized (and pressed from Week 1), we’re ready to cut! Here’s a few things to be mindful of when cutting fabric:

  • Make sure you have a fresh blade in your rotary cutter. It makes a huge difference! Dull blades cause you to press down harder than you normally would which might make your ruler slide out of place.
  • Try not to “see-saw” back and forth with your cutter. You’ll end up shredding the cut edge of your fabric.
  • Always try to cut your fabric on-grain. This is achieved by making your cuts perpendicular to the selvage (or sometimes parallel to the selvage for border strips). For yardage, fold your fabric in half, matching the selvage ends. Make sure there are no ripples or creases; it should lay flat or hang straight (if you’re holding it up in the air). For fat quarters or large scraps, I usually fold them in half, making sure the fold is parallel to the selvage.
  • Hold your ruler securely. Your fingertips should be spread out and place your pinky off the edge of the ruler to prevent movement.
  • Make your first cut (I call it the clean-up cut) so that it’s perpendicular to that fold.
  • Whenever possible, use your ruler to measure and cut instead of the cutting mat. Don’t place your fabric on the cutting mat and count the inches on the mat to determine where to place the ruler. Find the measurement required on the ruler and place that line directly on the cut edge of your fabric. Then make your cut. This is more accurate and much more time effective than lining everything up with the cutting mat.
Arrow Stone Quilt Along includes tips for cutting fabric for Week 2 @ The Crafty Quilter.
  • If you’re using yardage: after cutting several strips, double check that your cut edge is still perpendicular to the fold. Fabric is a fluid material and it may shift as you cut. Make a new clean-up cut if necessary.
  • Once your strips are cut, you’ll be making sub-cuts. Follow the directions in the pattern and check off the cuts as you go along.
  • Group or stack your sub-cuts, for example: all Color 1 (A) squares in one pile.
  • If you’re making a scrappy version, follow the diagram/instructions on page 2.

If you want detailed rotary cutting tips, visit my earlier blog post, Rotary Cutting Tips. It includes lots of photos and a video all about rotary cutting that I did for The Quilt Show.

Rotary Cutting Tips @ The Crafty Quilter

My favorite rulers

I love me a good ruler! I thought I would share what works well for me, but don’t feel like you have to go out and buy a new ruler. My favorite ruler for much of my rotary cutting is Creative Grids 8 1/2″ x 24 1/2″ ruler followed by the 8 1/2″ x 12 1/2″ ruler. These rulers have anti-slip circles on the back that grip the fabric and help prevent it from shifting.  I also appreciate the frosted 1/4″ and 1/2″ edges on the ruler which are great for trimming up pieced units.  You should definitely own a square ruler as well – the 6 1/2″ square is one of my most used. You can find Creative Grids rulers at most local quilt shops.

Creative Grids is my favorite brand of ruler for quilting.

A recent addition to my ruler collection is the Creative Grids Stripology XL Ruler (affiliate link). This ruler is a game changer if you’re cutting lots of strips. It makes the process super fast and accurate! It has slots for your rotary cutter to fit into, and there are markings on the ruler for two of the most popular strip cuts: 2 1/2″ and 1 1/2″. It makes it easy to find the slot for your next cut. You can also cut 1/4″ increments and the instructions include a handy chart which makes that so easy.

The Stripology XL Ruler is designed large enough for cutting yardage, but can also be used with fat quarters or scraps. For yardage, you just need to fold the fabric so that you have four layers. After lining up the folded edges on the “0” line, you make your first cut and then choose the width for the next cut. This design makes the cutting process more accurate because you’re less likely to mis-cut and your strips are exact every time. Once you have your strips cut, you can easily layer the strips and then subcut them into rectangles or squares.

I used my Stripology Ruler when I was cutting my fabric for the cover quilt of Arrow Stone. I didn’t take any pictures at the time (unfortunately), but it sure did expediate that whole process! It’s shown below with fabric I used for a different project, so you can get an idea of how it’s used.

Project Organization

I don’t know about you, but I love tips on how to stay organized. With that being said, I’m not the most organized chick in the henhouse! But, I have learned from others and from experience along the way.

  • Print out your pattern. To save paper, print it double-sided.
  • Keep all fabric and the pattern in a designated container. I love clear plastic storage bins, but even a shoebox will do.
  • Label your fabric and your cut pieces. I’m using Pinnable Quilt Block Markers from Purple Hobbies (one of our sponsors).
Arrow Stone Quilt Along Week 2 is all about cutting your fabric and staying organized!

Week 2 Sponsor & Prize

We have an awesome prize this week thanks to our sponsor, Creative Grids! One winner will receive the Creative Grids Stripology XL Ruler! Woo Hoo!

Giveaway rules:

  • Post a photo of your fabric cuts on Instagram using the hashtag #arrowstoneqal
  • Deadline is Saturday, March 12, at midnight (PST).
  • Your Instagram account must be public (otherwise I won’t be able to see it).
  • Giveaway is open to US residents only due to shipping costs.

Week 1 Winners

  • The winner of the $50 gift certificate to The Quilt Show’s online store is Janie Kemp @isabellaswhimsey.
  • The winner of the annual membership to The Quilt Show is Sherry Desort @desortshe.

Thank you TQS for sponsoring our quilt along and congratulations to both winners! If you didn’t receive my direct message, please send me an email so I can get you your prize!


I hope you have a great week, and good luck cutting your fabric for the Arrow Stone Quilt Along. Take your time with it and show your progress on Instagram, #arrowstoneqal so we can see what you’re up to!

Arrow Stone Quilt Along Week 2 is all about cutting your fabric and staying organized!
12 Comments
Share
  • Pin it
  • Share
  • Tweet
  • Share
  • Email
  • Print

Posts navigation

Previous Page 1 2 3 4 5 … 174 175 Next Page

About me…

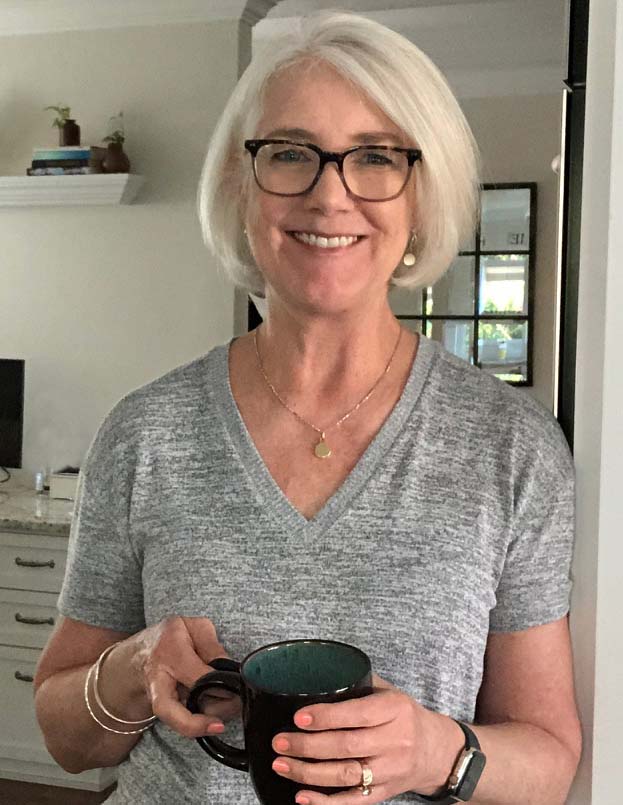
Hi there! Welcome to The Crafty Quilter. I'm Julie Cefalu, and this is where I get to express my creativity to a larger audience. I love to share quilting tips and tutorials along with the latest creative happenings in the blogging world. Thanks for visiting, and I hope you come back soon!

If you would like to subscribe via email, enter your email address below:

Join 8,468 other subscribers

Follow on Bloglovin


My Classroom on The Quilt Show!

Latest on Instagram

thecraftyquilter

Whew! That was a solid day’s work - I mean play! Whew! That was a solid day’s work - I mean play! 🤭
.
When you think about how many decisions are made while free motion quilting, it boggles the mind. Do I want pebbles here or swirls? Should I fill in this space next or go over here? Turn right or go left? 🤔 You definitely need to take breaks! 
.
Pattern: Spring is for the Birds - coming soon!
Thread: Aurifil 50 wt. cotton by @aurifilthread 

.
#freemotionquilting #freemotionapplique #fmqfeathers #fmq #fmquilting #appliquequilt #applique #springquilt #wallhanging #thecraftyquilter #quilting #grafittiquilting #fmqondomesticmachine #babylockquilting #aurifilthread
Did you know there are two extra layers of fabric Did you know there are two extra layers of fabric in the point of flying geese made with the 4-at-a-time (no waste) method? The good news is it’s easy to fix!
.
➡️Draw a line from corner to corner where the two smaller squares overlap.
➡️Cut the top two layers on that line. ✂️
➡️Now the smaller squares will butt up against each other. Continue as you normally would.
➡️Do NOT trim the remaining small squares.
➡️Now you have 5 layers of fabric in the seam allowance at the FG point instead of 7! 😃
.
More photos and details are in today’s blog post (link in profile).
.
#quilttips #4atatimeflyinggeese #flyinggeese #flyinggeeseblock #quilt #thecraftyquilter #quilting #quiltblock #quilttutorial #lovetoquilt #quiltteacher #nowasteflyinggeese #nowasteflyinggeesetips
It’s been a long time since I’ve done any hand It’s been a long time since I’ve done any hand appliqué - it’s worth the extra effort. 🌼💗
.
Spring wall hanging pattern coming soon! And by soon I mean two weeks. 😁
.
#thecraftyquilter #handapplique #springwallhanging #springquilt #applique #appliqué #freezerpaperandstarchmethod #quilt #quilting #quiltdesigner #quiltpattern #appliquequilt #wallhanging
Happy Earth Day! Today on the blog I have 5 ways q Happy Earth Day! Today on the blog I have 5 ways quilters can honor Earth Day! 🌎🌱 From destashing fabric to buying with intention, there are sew many ways we can lighten our footprint on this planet. 😄
.
Fabric shown: Modern Love collection from @monalunadesign organic fabric
.
#earthday2022 #fabric #organicfabric #sustainablesewing #sustainablequilting #thecraftyquilter #modernlovefabric #monalunafabric #quilting #organicquilting #ecofriendlyliving #ecofriendlysewing #quiltwithintention #sewing #sewwithintention #earthday
A new BOM to work on! This is month 1 of #manchest A new BOM to work on! This is month 1 of #manchesterbytheseabom by @figtreeandco 😍. 
.
Currently, I’m working on three Fig Tree BOM’s! How did that happen? Wish me luck.
.
#figtreebom #thecraftyquilter #bomquilt #quiltblock #mysteryquilt #blockofthemonth #quilting #quilt #manchesterbytheseaquilt #figtreequilts
Instagram post 17941006012890110 Instagram post 17941006012890110
Load More... Follow on Instagram


I’ve Been Featured!

Sew Can She

Archives

Categories

Tags

Amelia applique baby quilt blog hop blog hops BOM bom's Christmas in July Blog Hop christmas once a month Craftsy fabric family fat quarter shop flowers free motion quilting free patterns garden giveaway giveaway winner holiday tutorials I Love Home BOM QAL's quilt along quilt alongs quilt blocks quilting quilting tips quilts quilt tips recipes sew thankful sunday splendid sampler spring spring petals qal summer fun qal Table Topper The Quilt Show tips tutorial Tutorials UFO's Valentine's Day WIP wip's WIP Wednesday

Blogs I Follow:

  • A Quilting Life
  • Amy Made That!
  • Blossom Heart Quilts
  • Celebrate Creativity
  • Free Motion by the River
  • http://summercrafter.com/
  • Meadow Mist Designs
  • Moda Bakeshop
  • Quilt Story
  • Sew Fresh Quilts
  • The Inbox Jaunt
  • The Patchsmith


Disclaimer:

Some of the links on this site are affiliate links and I may be compensated a small commission when you make a purchase by clicking on those links. I only promote products and services that I use and love myself. Your support enables me to maintain the content of this blog and I am truly grateful!

Privacy Policy

Privacy Policy

Disclaimer:

Some of the links on this site are affiliate links and I may be compensated a small commission when you make a purchase by clicking on those links. I only promote products and services that I use and love myself. Your support enables me to maintain the content of this blog and I am truly grateful!
Site made with ♥ by Angie Makes
Angie Makes Feminine WordPress Themes