Quarter-Square Triangle Tutorial
Welcome to my updated and expanded tutorial on how to make perfect quarter square triangle units. Since I first published it in 2012, this has been my most popular tutorial ever – thank you Pinterest! Now it’s 2018 and I thought it was time to give it a fresh look with better images and more detailed instructions. Plus, I’ve included a cutting chart that you can download and print out. Towards the end, you’ll find instructions on how to make the popular Ohio Star block which includes four quarter square triangle units. Enjoy!
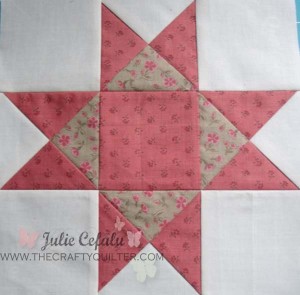
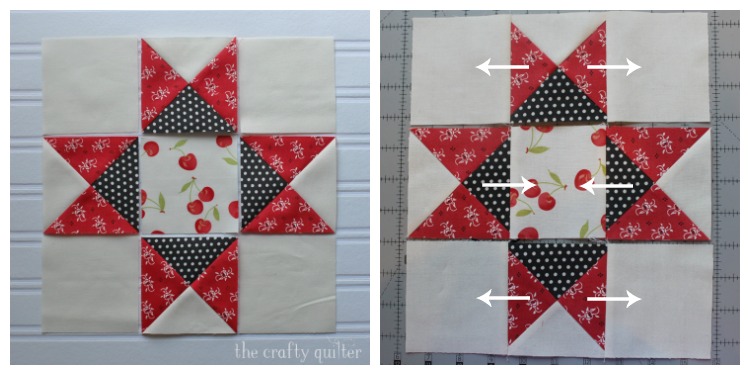
Original quarter square triangle photo used for the Ohio Star:
Quarter Square Triangle Math
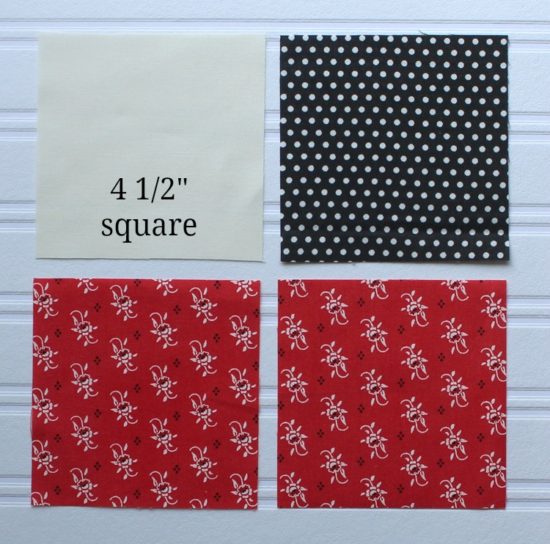
You start with four squares to make four quarter-square triangle (QST) units. First, let’s talk numbers (I know, it’s an evil necessity). In order to know the size of the squares to start with, you need to know the finished size of the unit, which is 3″ in this case (that’s because I want a 9″ finished size block). Add 1 1/4″ to that number and you have the size needed to cut your squares. So, 3″ + 1 1/4″ will give us 4 1/4″ squares.
Now, if I were a perfect quilter, I would use that number. However, things often get a little wonky on me, so I like to oversize my QST’s so that I can trim them down into the perfect size. So, I add 1 1/2″ to the finished size desired. For this unit, I will need (4) 4 1/2″ squares to start with.
Download my over-sized cutting chart for 11 different sized quarter square triangle units here: Quarter Square Triangle Cutting Chart
Quarter Square Triangle Construction
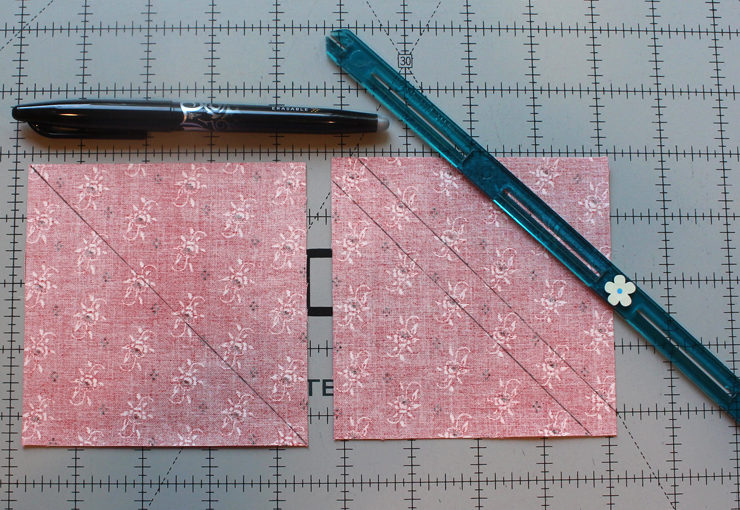
First, draw a diagonal line on the two like-colored squares from corner to corner. Use a pencil or Frixion Pen (my favorite) and a ruler to draw your line. You’ll be stitching 1/4″ on each side of the line. If you don’t have a 1/4″ foot, you might want to draw the actual stitching lines. A special ruler called the Quilter’s Rule Quick Quarter II makes this step easy. Some people find it easier (and more precise) to stitch on a drawn line instead of 1/4″ away from a line. The following picture shows both ways:
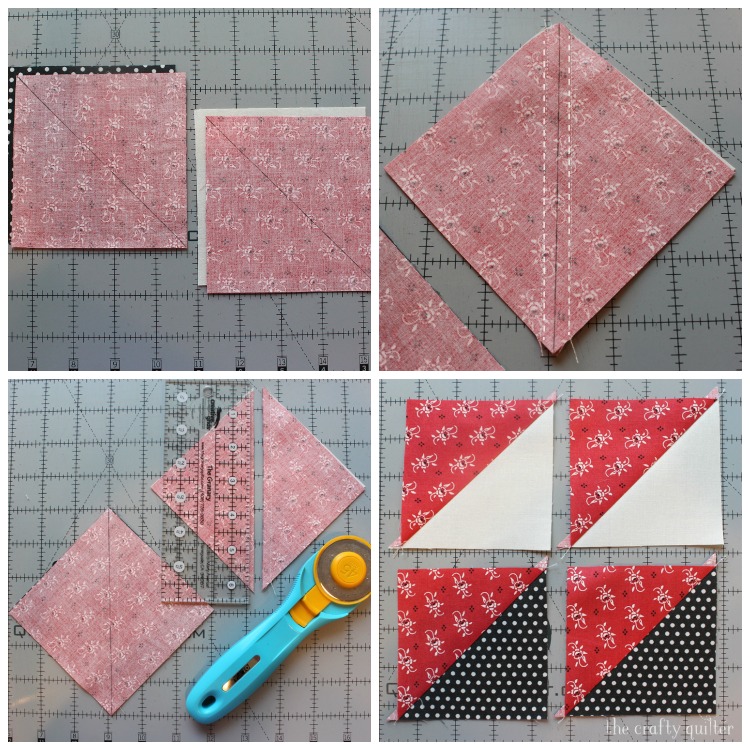
With right sides together, layer each red square with another square and stitch 1/4″ on either side of the center drawn line (or exactly on the drawn lines if you chose that method). Cut apart between stitching lines and press towards the red square. You should now have four half-square triangles (HST’s).
Next, layer two of the HST’s together so that the center seams nest together and the red colors are opposite each other.
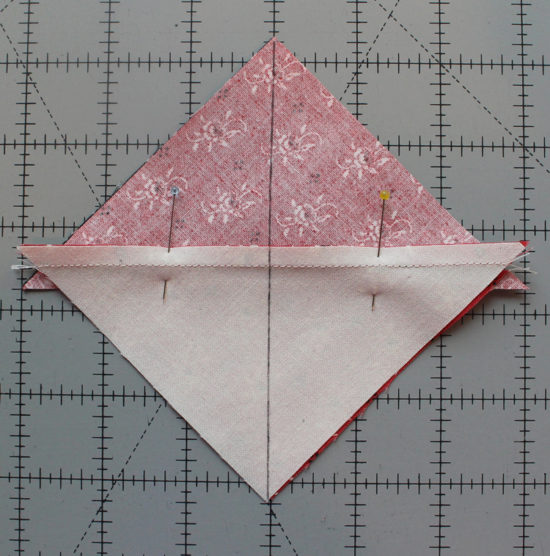
Again, you’re going to draw a diagonal line and stitch as you did in the previous step.
UPDATED TIP: It’s important to draw the line so that it’s perpendicular to the seam. Instead of only lining up the ruler with the corners, make sure to also place a line of your ruler on the seam when you mark your line. If the corners don’t line up exactly, that’s o.k.
I think it’s important to pin the seams that are nesting and to stitch with the top seam allowance facing up (towards the machine needle):
TIP: Why does it matter if the top seam allowance is facing the needle? Because if I were to start stitching at the top and the seam allowance was facing away from my needle, chances are the presser foot would push the top seam allowance down and away from the bottom seam. But because I have my seam allowance on top facing the needle, the presser foot still pushes the top seam allowance, but it pushes into the bottom seam allowance creating a more snug intersection. That’s a lot of information, but if you’re new to quilting it’s nice to know these little tricks.
Now you’re going to cut these apart between your stitching lines and, voila, you have your QST’s!
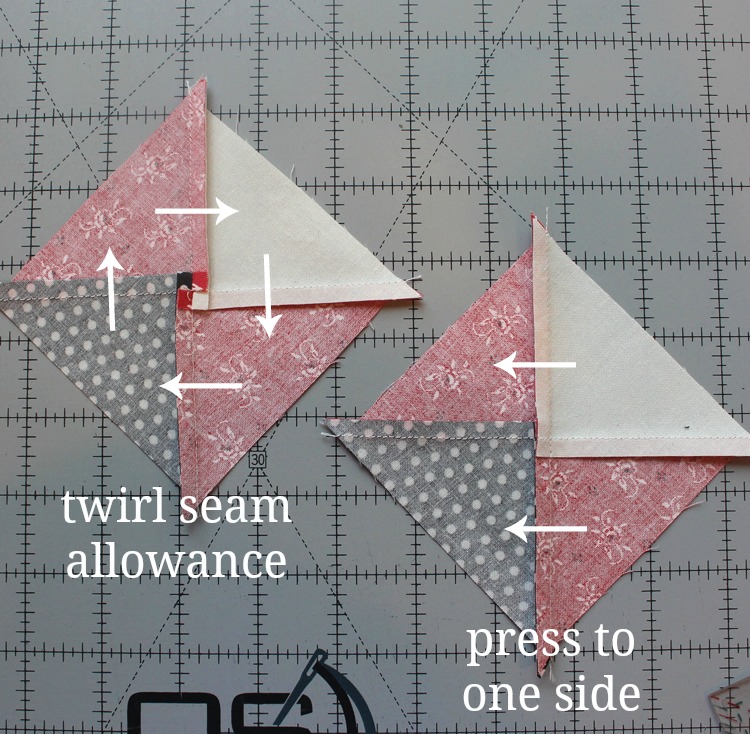
Now remember we still need to trim these units down to 3 1/2″ square. There are several ways of doing that. For the first two methods, you will need to press your seam before trimming. You can press to one side or twirl your seam allowances. I like to “twirl” my seam allowance because it makes the unit flatter and my ruler doesn’t rock when I’m cutting.
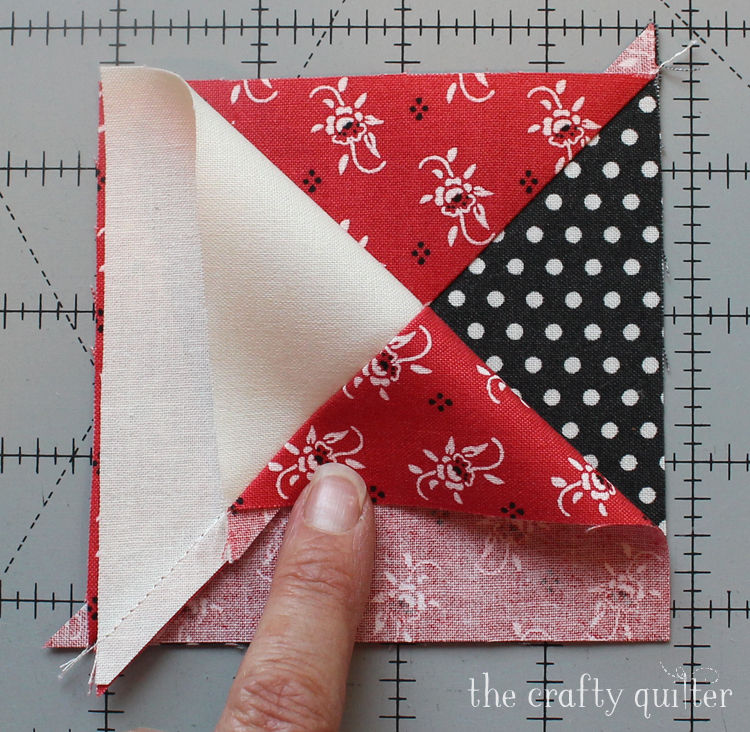
To do this, you’ll press half of the seam allowance up and the other half down. The center (where the 4 seams intersect) should pop open in the seam allowance, creating a mini 4-patch in the center of the wrong side.
Trim method 1
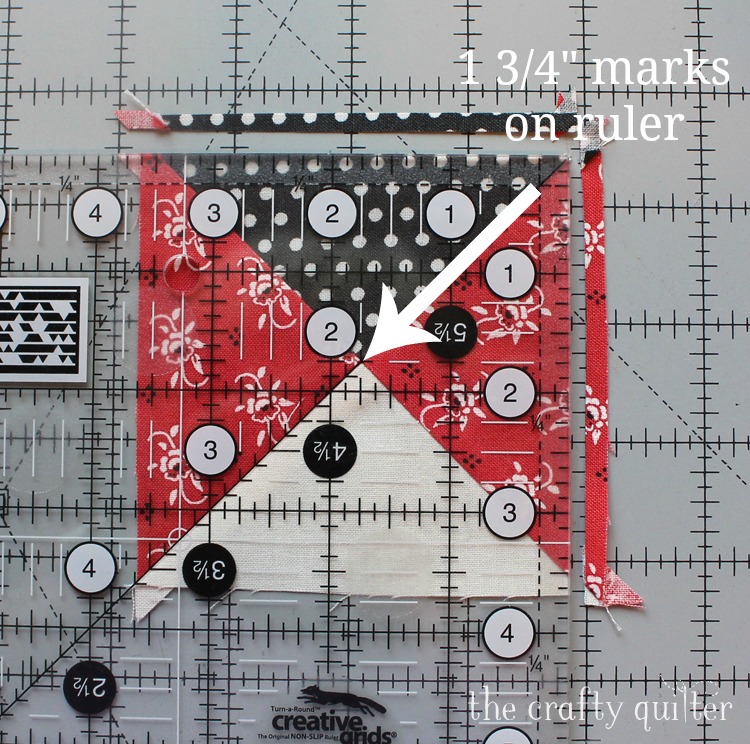
You will need a square ruler that is 3 1/2″ or larger. Place it so that the diagonal line of the ruler is along one of the diagonal seams of your QST. You need to make sure that you’re trimming the same amount equally from all four sides so that your center seam stays in the center. So, put the 1 3/4″ intersection of the ruler (that’s half of 3 1/2″) at the center seam and trim along the top and right hand side (if you’re right handed).
Now rotate the QST and line up the 3 1/2″ lines of the ruler with the previously cut edges. Trim the remaining two sides. You should now have a perfect 3 1/2″ QST.
Updated: Trim method 2
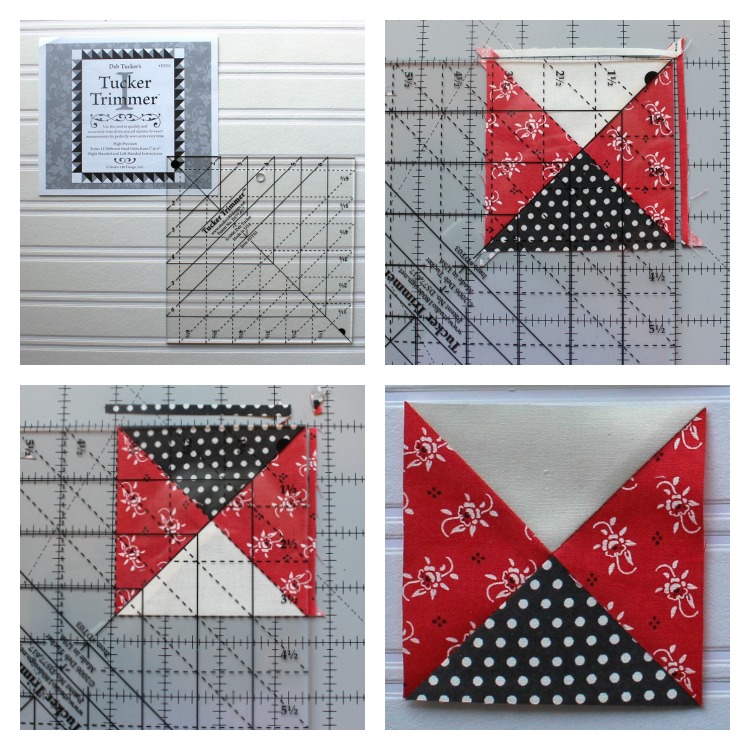
For the second method of trimming, I love the Tucker Trimmer 1 by Studio 180 Design. This ruler does a fantastic job of trimming down pieced squares accurately and easily. It can be used on HST’s and QST’s. There are two diagonal markings to line up with the seams on the QST which takes the guess work out of the ruler placement.
Trim method 3
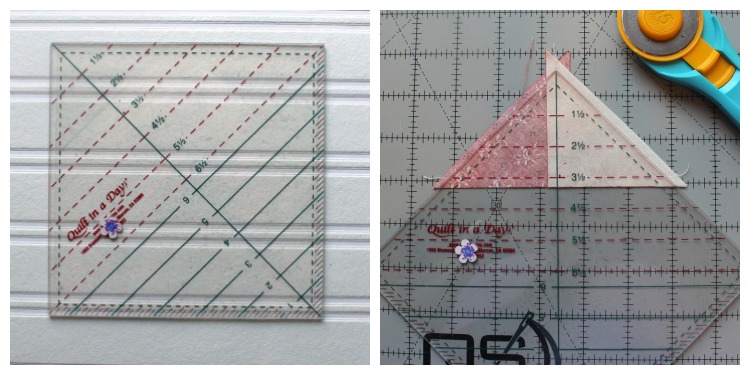
This method uses a ruler that I’ve had for a long time – Quilt In A Day’s Triangle Square-up Ruler. The advantage of this ruler is you trim two sides at the same time, and it has two diagonal markings for easy placement.
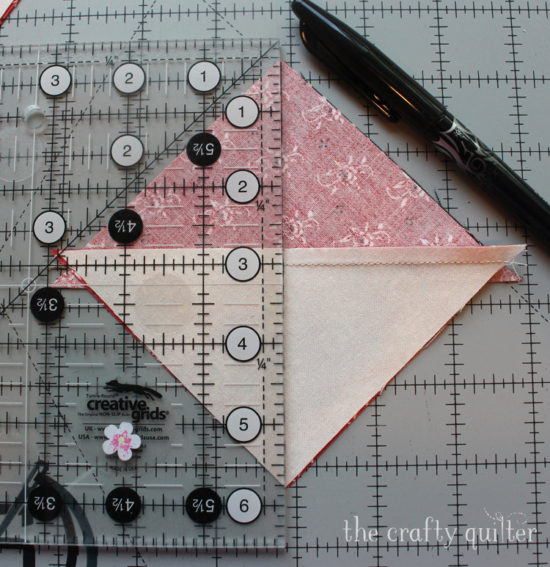
Before pressing your seam, you will place the ruler so that the 3 1/2″ red dashed line is along the bottom stitching line and the perpendicular line is placed along the center seam. Now you just have to trim the two sides and then press!
Ohio Star Quilt Block
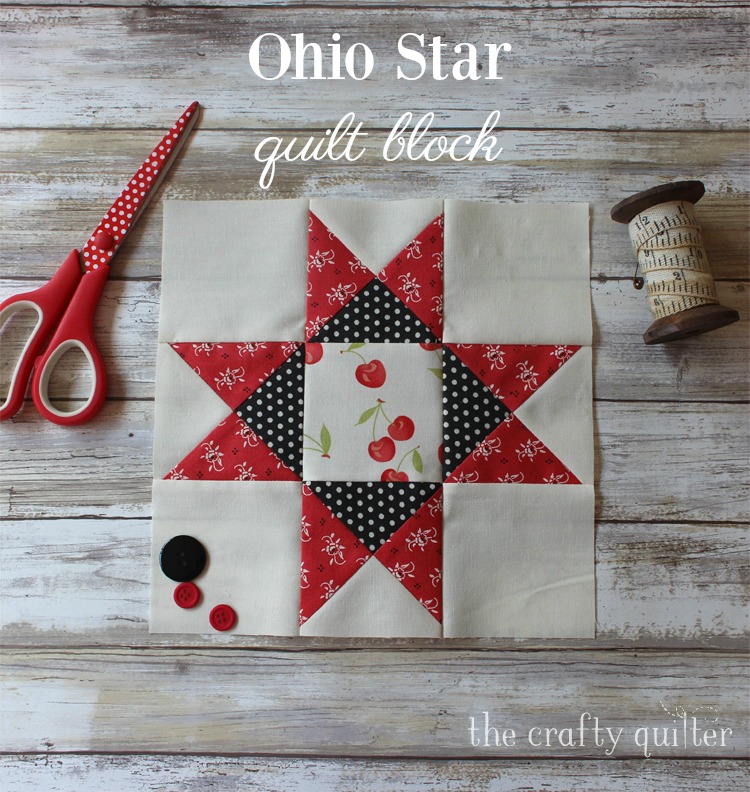
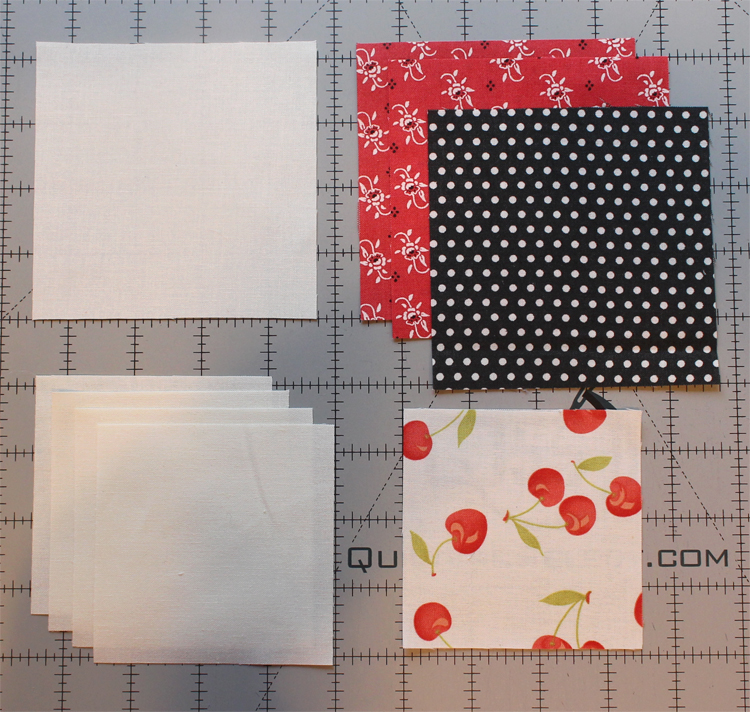
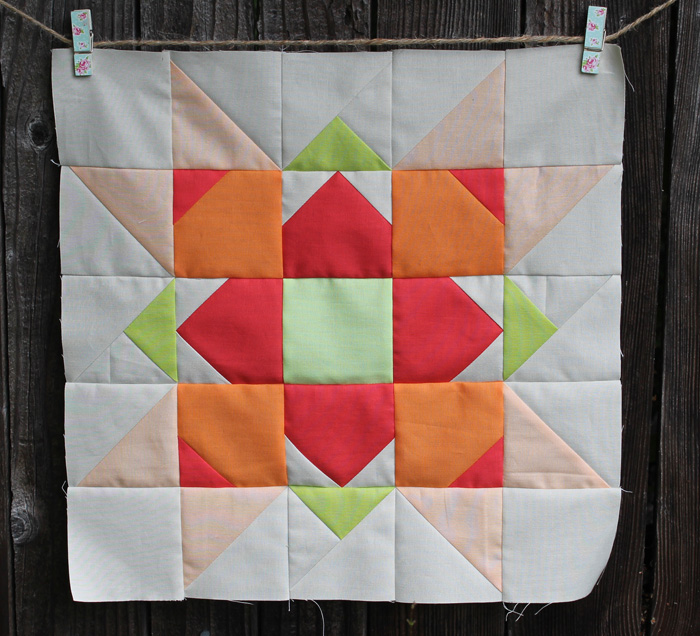
If you want to make a 9″ (finished size) Ohio Star Block, you will need (4) 3 1/2″ squares and (1) 4 1/2″ square of background fabric, (1) 3 1/2″ center square, (2) 4 1/2″ squares of medium fabric, and (1) 4 1/2″ square of dark fabric. (You can also interchange the medium and dark fabrics.) I’m using fabric from the Farmhouse collection by Fig Tree for Moda.
First, make the 4 quarter-square triangle units using the instructions above. Then arrange your squares as shown below and sew them into rows. Press seams toward the plain squares.
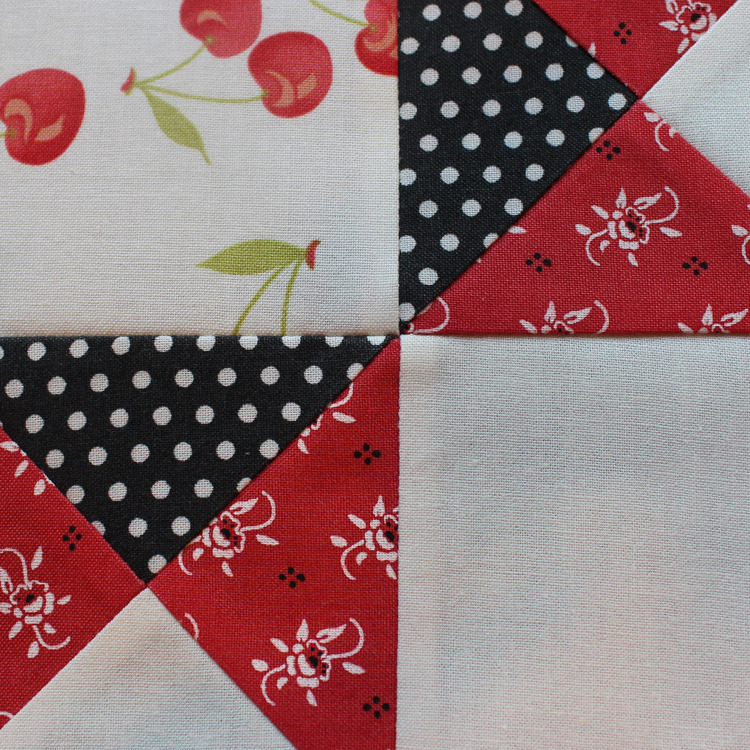
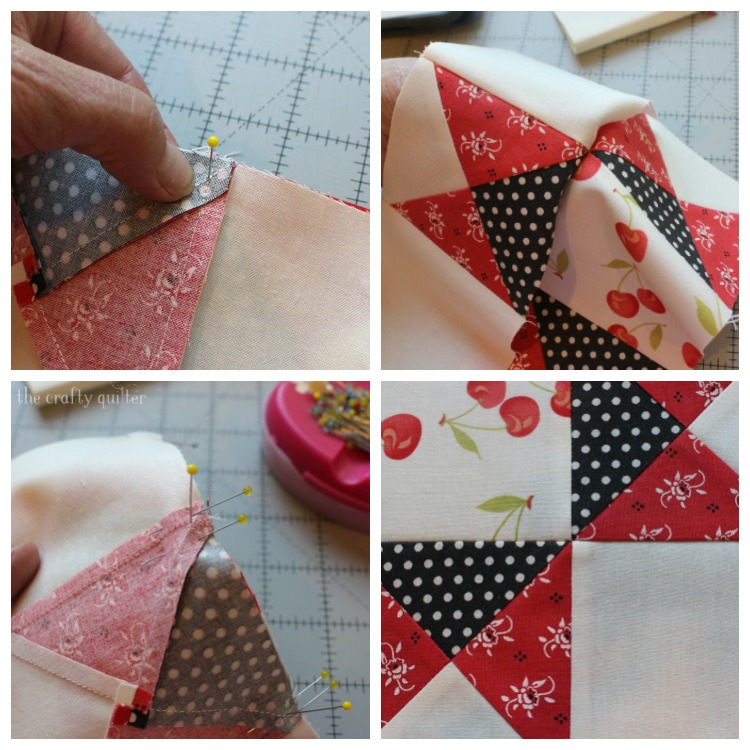
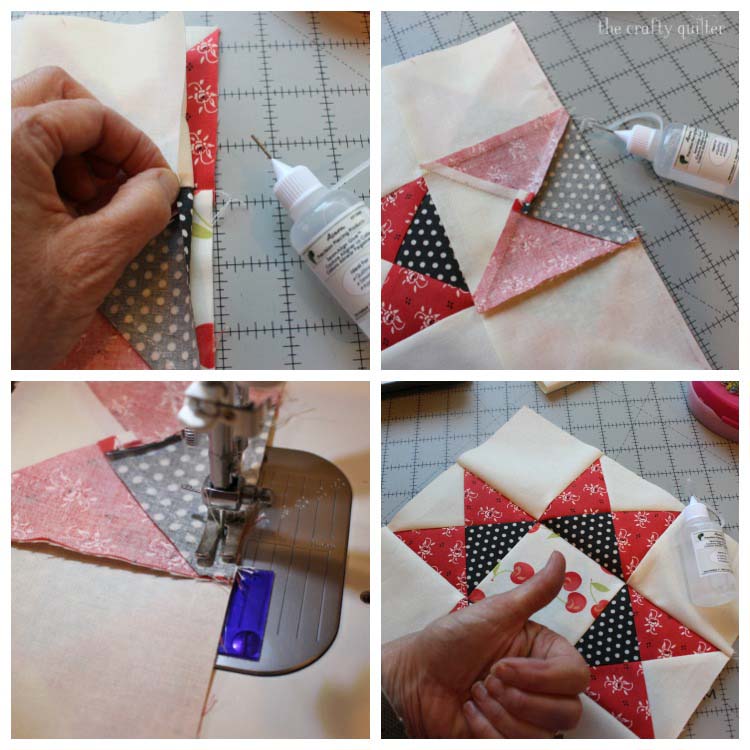
Now join the rows together. When pinning the rows together, make sure to use a setting pin at the intersections so that your diagonal seams will match and there will be a visual straight line as shown below.
Here’s how a setting pin works: Nest your seams together. Starting on the top seam allowance, there should be an “x” where the stitching lines are. Place your setting pin straight down through the “x” and then straight down into the bottom seam allowance’s “x”. Leave that pin straight up and down (perpendicular) to the seam. You can peak to see if the diagonal seams match up by pinching the intersection with your fingers and opening it up. Then pin on either side of your setting pin, close to the seam allowance. Remove the setting pin and sew your seam, making sure your stitching goes through the middle of the “x”.
2018 update: Using washable glue instead of pins has become very popular for matching seams. I recently purchased Seam Align Glue by Acorn Precision Piecing from The Quilt Show and I used it for this quilt block. I love it! It was easy to apply and it didn’t make the fabric stiff. My seams came out perfectly. Elmer’s Washable School glue would work also.
Your block should measure 9 1/2″ square.

I love making quarter square triangles and they’re so versatile! Maybe I’ll make enough Ohio Stars for a table runner (in my spare time!) or I might just quilt it as is and practice my free motion quilting (more likely). Thanks so much for stopping by!




Julia! You are my teacher! I made this blanket. Sheila for a whole year! Thank you for the lesson! I didn’t get it perfect, but I don’t think it’s scary
Love your tutorials! Planning on checking out the Lincoln quilt shop around the middle of Sept thanks to your mention on this blog.
thank you –so clear and the desden quilt is great. Did you get my comment on the 2018 summer fun quilt along that I just finished. It was a challenge for sure.
As a quilting newby, this tutorial solved all the issues I was having with hour glass blocks! Nesting the seams with the top seam facing the needle is spot on. Every one of the sixteen hour glass blocks came out perfect on the first try. Also, making sure your second seam is perpendicular to the first makes perfect sense. And I am now an avowed seam twirler. Many thanks!
Thank you for this very well written tutorial.
Do you have a printable version of your quarter square triangle tutorial so I may print it and file it in my “how to” file for future reference when I don’t have internet access at hand?
Excellent tutorial with many photo details and tips to make a perfect block!
Great info and pics! Thanks soooo much – I just may try this and overcome my fear of HST!
Thank you for this nice tutorial. I’m pinning it.
Hello Julie; This is an excellent tutorial! I have overcome my fear of HST and actually enjoy making them. The QST is a block that I avoid at every opportunity. Yet, it is time to put on my big girl panties and defeat this silly fear! With your brilliantly written tutorial and a lot of fabric scraps, I will have no fear of them. Thank you for sharing and have a fabulous day!
Julie, your instructions are so precise and clear even to a beginner like me! I can clearly see how to get seams to line up with the placement of pins in strategic spots not just anywhere to hold it together. Thank you for your tutorials.
PS…I love your choice of colors too. I am already looking at my material choices differently. I used to just buy material but now I am trying to buy coordinating fabrics, fabrics with little prints, fabrics with dots, etc. Thanks again.
Thank you for your “precise” tutorial. I have and will continue to learn much from you.
Wonderful information – i will be making this method a “point” to follow. Thank you!
What a wonderful tutorial! You are an excellent teacher, explaining the why’s of things. Thank you.
Wonderful tutorial.
Curse you! Simple, well done tutorials using beautiful fabrics make me feel like starting a new quilt!
This deal is a huge net loser for the NJ taxpayer. Who do you will cover the losses for Monmouth (and they will be huge). The stark reality is that running for low purses will greatly effect field size, which in turn will effect handle. Allan
Thank you. I needed to know how much bigger the quarter square triangle’s square needed to be to fit my finished square’s size.
I have a chickadee panel that measures 7 inch square and would like to make it into the Ohio star block – how big should I cut the squares to make the triangle squares and what do I cut them down to.
I have been looking at your site and really like it – I am fairly new to quilting so aren’t always sure of measurements. Thanks very much Lesley
need formula to make a (what is called) 3 patch quarter square triangle. want a finished 4″ (unfinished 4 1/2″)
thanks so much.
nancy
I would like to ask you a question? I’m making a lot of flying geese blocks and need to know the measurements for a flying geese that will be 2×3-1/2 in the quick method way. If I’m not asking in the right terms. Please contact me and I can explain better. Thank you
Mary McCormick
My phone number is 707-331-5318
I live in Santa Rosa, California
Thank you very much
Very well done and EXTREMELY helpful! A good teacher is one that is understood and you are very much that! Thanks.
where did you get you creative grid quarter square triangle ruler?
Thanks for the tutorial. Wish I had read it BEFORE I started on this block. But now I know that I need to add 1 1/2″ to size of original blocks. Thanks. I have pinned it so I won’t have to find it again.
Your tutorial is fantastic! I’m not new to this technique, but you explain it better than I’ve ever seen it explained – even a beginner should have no problem. I think its so important to know the 1 1/4″ (or 1 1/2″) rule, which sometimes gets left by the wayside. That triangle square-up ruler is totally cool – definitely now on my wish list. Thanks so much! Now I’m off to see what other great tutorials you have. Oh and thanks for your nice comment on my blog.
Bless you. Best of all I’ve searched for visual and logical, complete info. Been quilting (stashing) since mid 80s, now that I’ve retired, so many changes in techniques. I initially learned with drafting paper patterns, and scissors. Currently renewing my piecing skills. Thank you again.
I am brand new to quilting and confused with precise measurements for different sized quarter triangles please and half triangles.
Thank you,
Barbara
Sorry my message was sent in error.
I am trying to work out quarter and half triangles to get their precise measurement before putting together. Can you help with the different sizes please. I am brand new to patchworking and rather confused with the measurements for these pieces.
Thank you and sorry for previous message sent in error.
This is a gorgeous block. You’re so precise and your seams are perfectly lined up. I’ve used this pattern several times but my seams don’t look nearly as clean.
Great step-by-step and your blog is a pleasure to browse.
Thank you Julie!! Your written instructions & photos are very clear in showing “how to.” Your seam points are so precise — gives me something to shoot for.