This is my stack of quilts that have been basted, but not quilted (yet). Oh how the backlog keeps growing! What’s a girl to do when a new project comes along and you just have to start it. That’s right, your stack of unquilted quilts gets bigger!
The one on top has been basted for at least two years now! It’s actually half-way quilted, but I can’t seem to get it finished! This is an adaptation of an Alex Anderson quilt that was published in American Patchwork & Quilting years ago.
As I peel back the layers of this pile, you’ll see a quilt that has been stitched in the ditch, but now it’s time for free motion quilting. This one is from a pattern called “Snowflower” from Bread & Butter Quilts (sorry, but I can’t find the pattern anywhere!).
Here’s the detail of the proposed quilting. I love the blue water soluble pens for marking! They go on easy and come off easy, plus you can see them easy. I like easy!
This next one is a table runner that I’m hoping to submit to the Moda Bakeshop – so you’re only getting a sneak peek!
And this one is going to have to wait until next Valentine’s day:
This is a panel by Moda from a few years back and I’ve started the quilting already. Here’s a detail picture of the pumpkin seed quilting (as I call it):
Do you notice that none of my quilts have safety pins in them? That’s because they have all been spray-basted! This is my absolute favorite way of basting quilts and I’ll be doing a future post on that method can now be found at How To Spray Baste Your Quilt.
In the meantime, I’m hoping to shrink this pile of quilts!
Anne Sutton of Bunny Hill Designs! She has a beautiful website and blog and I have always loved her patterns and her fabric. She does beautiful applique work and has great tutorials.
This year she is hosting a Scrappy Plate Club. It started in January and continues for six months and when you’re done you will have a beautiful Dresden Plate quilt! Each month she will give instructions to make a dresden plate block and quilt. Here’s what my fabric stash for this project looks like:
Don’t you just love chocolate and raspberry together? Me too! I have been waiting so long to make something from these sweeties!
Anne gives great instructions on how to make these blocks. Here’s what my strand of blades looks like after the first step of sewing:
Once you have sewn the blades together, you will get a circle that looks like this:
Notice the hole in the middle? That gets covered up with an appliqued circle. I machine appliqued my first circle.
Then I tried hand appliqueing the second circle, and I think I like it better.
I love these little plates so much that I just had to try them out before making them into a quilt! Here is one as a center piece:
And here it is underneath a candle:
And of course it would look great under a vase:
My sewing basket needed a pretty nest to sit on:
And don’t forget how nice a cup of tea would look:
O.K. Please don’t judge me:
Now we’re talking:
I hope you feel inspired to join the Scrappy Plate Club and give it a try. I’ll be back again with a progress update, so keep a look out!
The perfect 1/4″ seam allowance – some people call it “the great mystery” or “the never-ending battle”. I’m going to give you some great tips so that you can call it “easy”.
I have two tools that I like to use myself and that I suggest for my beginning quilting students. The first tool is the Perfect Piecing Seam Guide.
This guide works in conjunction with the second tool, Qtools Sewing Edge, by Alicia’s Attic.
Here’s how I use them: I start with the Perfect Piecing Seam Guide and position it under my presser foot. There is a hole in the guide for your needle to go through. Once your needle is in the hole, make sure that the guide is lined up straight with your throat plate. Now, lower the presser foot.
Next, place a small piece (1″ – 2″) of Sewing Edge right next to the seam guide. Make sure it is in front of the feed dogs. If you have a top-loading bobbin case, cut a smaller piece that just covers the bobbin case cover so that you can open and close it.
I use tweezers to hold the Sewing Edge, or “purple tape” as I sometimes call it, as I put it in place. You want it to be snug and straight against the ruler.
Now you can remove the seam guide and you have a nice edge to guide your pieces as you stitch.
What we are aiming for is a scant 1/4″ seam allowance. Let me tell you why:
The thread that you use to make your stitches takes up space in the seam allowance. So does the fabric that gets folded over as you press it to one side.
So if you were to use a full 1/4″ seam allowance, your piece would shrink up just a bit because of those two factors. If you’re making a block that has lots of seams, you could end up with a block much smaller than you want. Sound familiar?
So now let’s test to see how accurate your 1/4″ seam allowance is. You will need three strips of fabric that measure 2 1/2″ x 6 1/2″.
I want you to sew the first two strips together with whatever guide you currently use to attain 1/4″ seams. I’ll be using my purple tape as my guide.
You might have noticed that I used a “starter scrap” which is that red piece of fabric behind the presser foot.
I like to start and end with one of these scraps because it does 3 things:
Tells me that my machine is working properly.
Prevents that thread nest from developing on the back of my fabric.
Forces me to clip my thread tails at the beginning and end of my piece.
Next you need to press the seam that you just made. Always start by setting your seam – pressing the seam just as it was sewn. This sinks the stitches into the fabric and smooths everything out.
With the darker fabric on top and the seam facing away from you, open the fabric up and finger press the seam before hitting it with the iron. Then use the iron to press the seam toward the darker fabric. Tip: Don’t use steam because it can distort the fabric and burn your fingers!
Now sew the other strip to the opposite side as before and press towards the darker fabric.
The back side should look like this:
Cross your fingers – you should now have a square that measures 6 1/2″!
If your square is less than 6 1/2″, then your seam allowance is too “fat”. You need to adjust your seam guide accordingly, probably a skooch to the left .
If your square is larger than 6 1/2″, then your seam allowance is too “skinny”. Again adjust as necessary, probably a smidge to the right.
Something that could also impact your final measurement is your pressing. Make sure that your seam is flat. It’s easy to have a tuck or fold at the seam if you’re not careful about your pressing.
Another thing to check is your rotary cutting. You should line up the raw edge of your fabric exactly on the desired line measurement of the ruler. The line should be straddling the raw edge, not completely on or off the fabric.
Do I sound like a person with OCD? I’m far from it! I do think little adjustments can make a big difference in your final product.
Check out my YouTube video to see how I set up my machine and more details of the perfect 1/4″ seam allowance:
I hope these tips help you to get a perfect 1/4″ seam allowance so that your blocks are accurate and to make piecing easier for you. Be patient with yourself – it took me years to get my seams just right (I’m sure you didn’t want to hear that)!
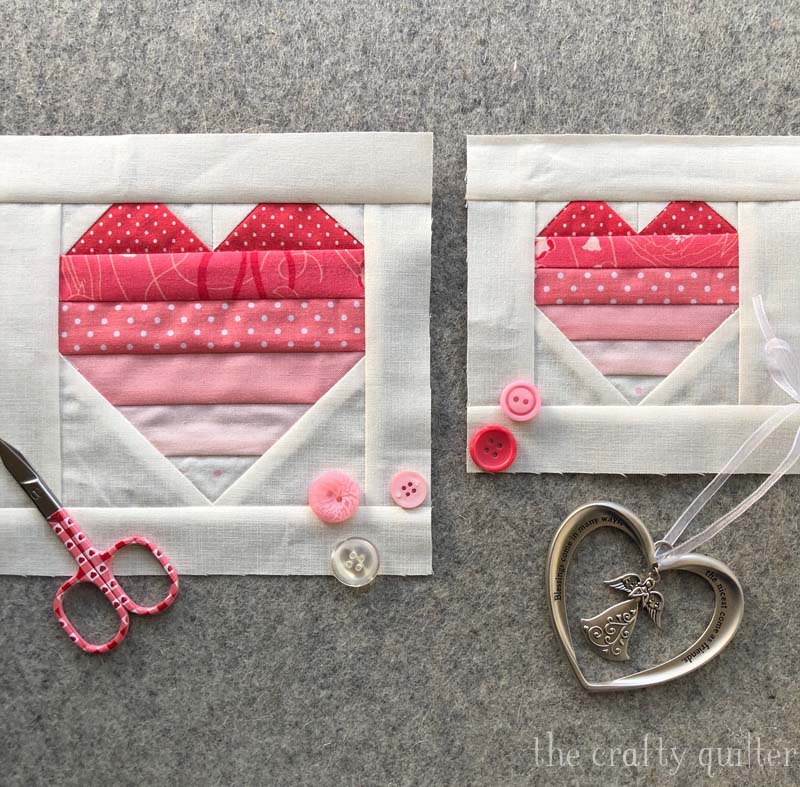
I made this quilt five years ago and it has been hanging in The Granary Quilt Shop all this time. It finally came home to me a few days ago – just in time for Valentine’s Day!
I love everything about this quilt. The fabric came from a Moda line by 3 Sisters and I love the soft yellows, pinks and greens. I also love the quilting, even if I do say so myself!
I used wool batting which really makes the quilting pop. The center heart motif came from Sue Nickel’s book, Machine Quilting: A Primer Of Techniques This is a great book if you want to learn free motion quilting.
The corner triangle hearts came from a stencil from my growing collection. I pick up new stencils whenever and wherever I can – it’s like candy, you know?
I even love the back of this quilt. I forgot that I had made this cute heart label – it made me so happy when I turned the quilt over and saw it! I really couldn’t remember when I had first made this, but now I know. Hmmm, maybe I should be more diligent about labeling everything – what a concept!
The pattern for the hearts in this sweet wall hanging came from It’s “El”ementary: Quilting Tips and Techniques (Quilt in a Day), by Eleanor Burns. This is a great book for beginning and intermediate quilters because she gives such detailed instructions and diagrams. The top of the hearts in this quilt are machine appliqued. The base of the heart is a simple log cabin variation block. The finished size of the quilt top is 23 1/2″ square. It’s a small enough project that you might be able to get one finished in time for Valentine’s Day! Yeah, in your spare time:)
Since I’m so new at blogging, I’m still trying to work out the bugs. If you have subscribed to my blog via email or an RSS feed like Google Reader, my recent posts aren’t formatting like they should be. I’m still trying to figure out why, but in the meantime, if you go straight to my website, www.thecraftyquilter.com, you will get the correct formatting. Thanks for your patience!