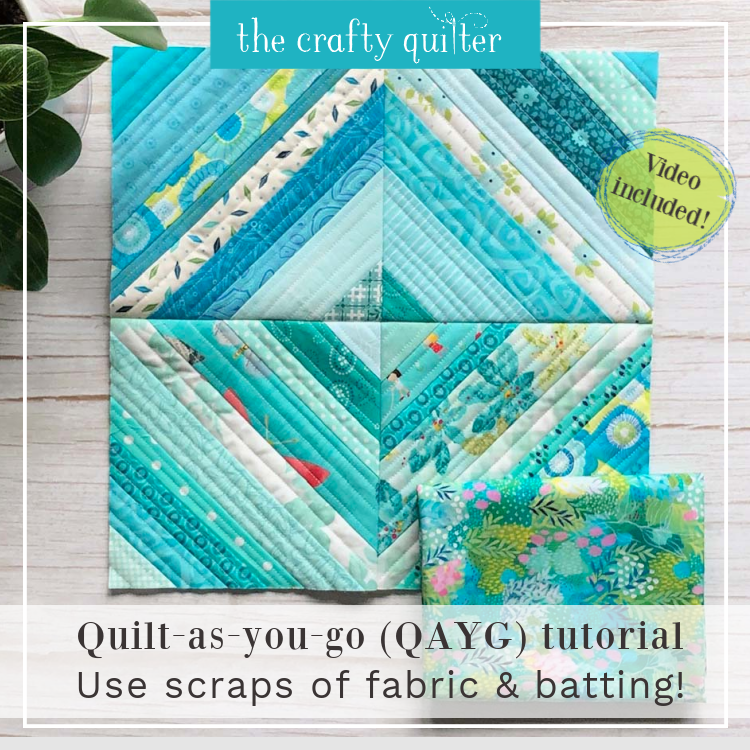
QAYG tutorial using fabric strips
I’m delving into the world of QAYG (quilt as you go), and I’m very excited to share a QAYG tutorial using fabric strips! I’ve always wanted to try this technique and I absolutely love it! I’m sure you will too.
If you’ve never tried QAYG, I think you’re in for a treat. You can go big or go small; either way, you get instant gratification after making your first block. You probably won’t be able to stop at just one!
General QAYG info
There are many types of quilt-as-you-go and ways to go about each of them. I don’t know the exact name for the method I’ll be showing, but let’s call it “Strip Pieced QAYG”. For this tutorial, I’m using a technique that uses batting scraps as a piecing foundation and strips of fabric for the piecing. It’s kind of like foundation paper piecing except you’re working with batting instead of paper as the foundation. In general, the piecing for QAYG is very simple, and you’re adding quilting lines as you go along.

The advantage of this technique is that you piece and quilt at the same time. You can add as much quilting as you like to the block, or you can just let the stitched seams do all the work and don’t add any extra quilting. Either way, it makes managing a large quilt on a domestic sewing machine super easy. Plus, you finally get to use those leftover batting scraps!
You’re probably wondering where and when the backing fabric gets added. For this technique, it’s added after the blocks are sewn together. At that point, you only need minimal basting and quilting to hold the two layers together. The binding is added just as you would any other quilt.
The exception to this is if you are making a small “single block” project such as a placemat, table runner or mug rug. Then you can start with the backing and batting as the foundation because you won’t be sewing any blocks together. It will be one big (or small) quilted piece that just needs to be trimmed and bound.

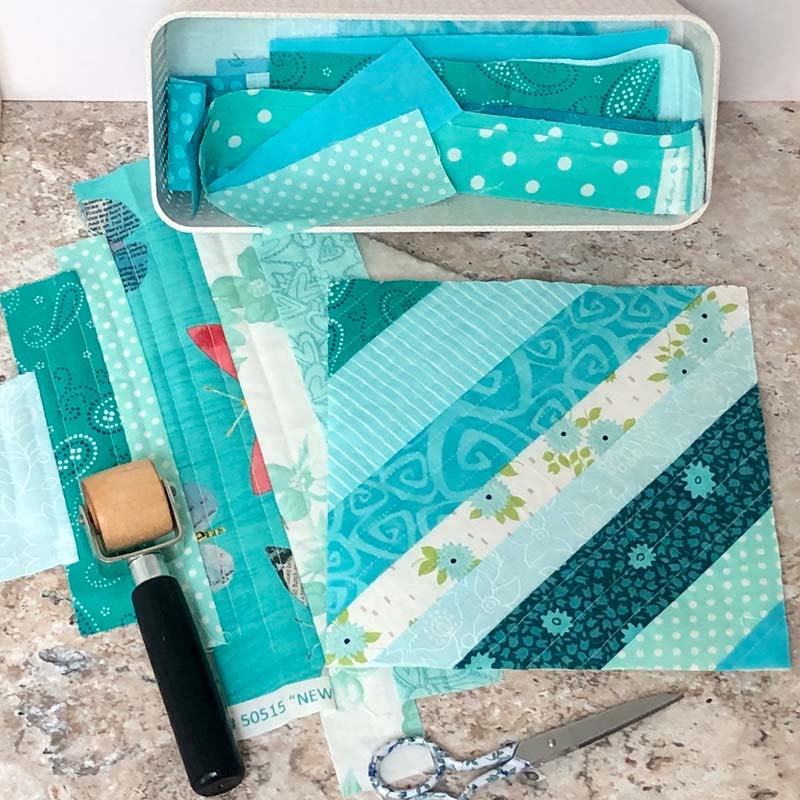
Supplies for Strip Pieced QAYG
You’ll need some basic supplies for this method of QAYG, most of which you probably have on hand.
- Batting – this is a great time to use up those scraps of batting. I’m using a cotton/wool blend by Hobb’s Tuscany.
- Fabric – this is especially perfect for skinny scraps or jelly rolls, or you can use yardage.
- Walking foot – I highly recommend using a walking foot to stitch with, but I’ve seen it done with a regular piecing foot, too.
- Seam roller – this is not necessary, but it produces flat seams without using an iron.
- Thread that coordinates with your fabric colors. This will show in your quilting stitches.
- Clover Wonder Clips are great for holding thick blocks in place as you sew them together.
- Backing fabric – similar to any backing, it can be one big piece or several smaller ones sewn together.
Strip pieced QAYG Steps
The following tutorial has detailed steps and photos for strip pieced QAYG. Feel free to skip to the end and watch a short video of the process.
Prepare the batting and fabric strips
- Decide how big you want your blocks to be. Cut the batting 1/2″ larger than the unfinished size. In my example, I’m using 8″ squares of batting that will be trimmed down to 7 1/2″ squares.
- Cut fabric into strips of varying widths and lengths. The narrowest of mine are 1″ and the widest are 3″. You’ll need some strips that are long for the diagonal center while others can be shorter toward the corners.

Piecing and quilting the strips
Note: I wanted my blocks to have the center strip be the same in width and color value. I cut my strips 1 1/2″ wide and I made sure they had a white background. This gives my blocks a strong diagonal line similar to a half-square triangle unit.
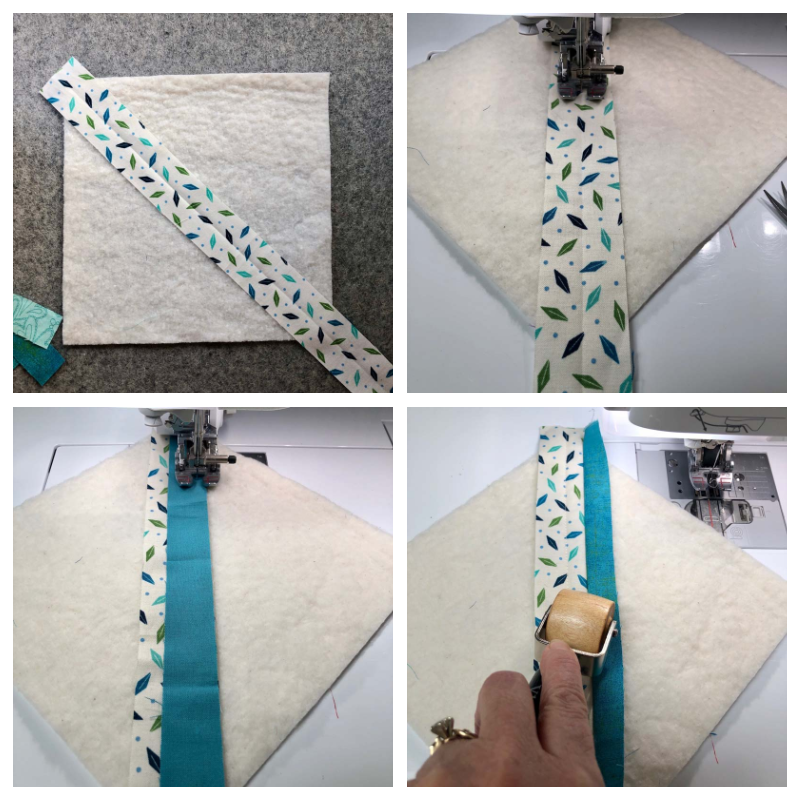
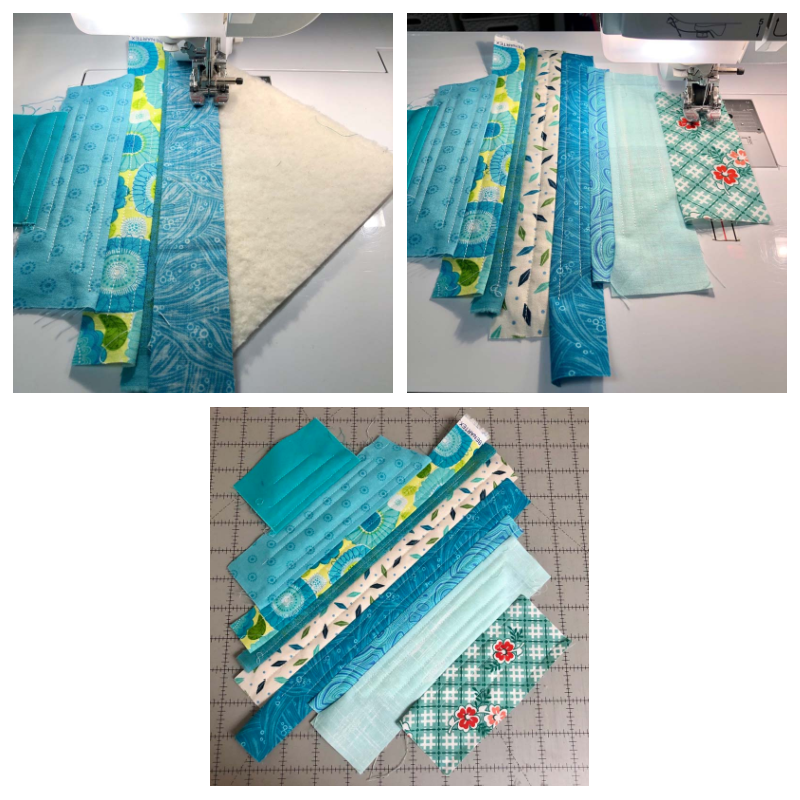
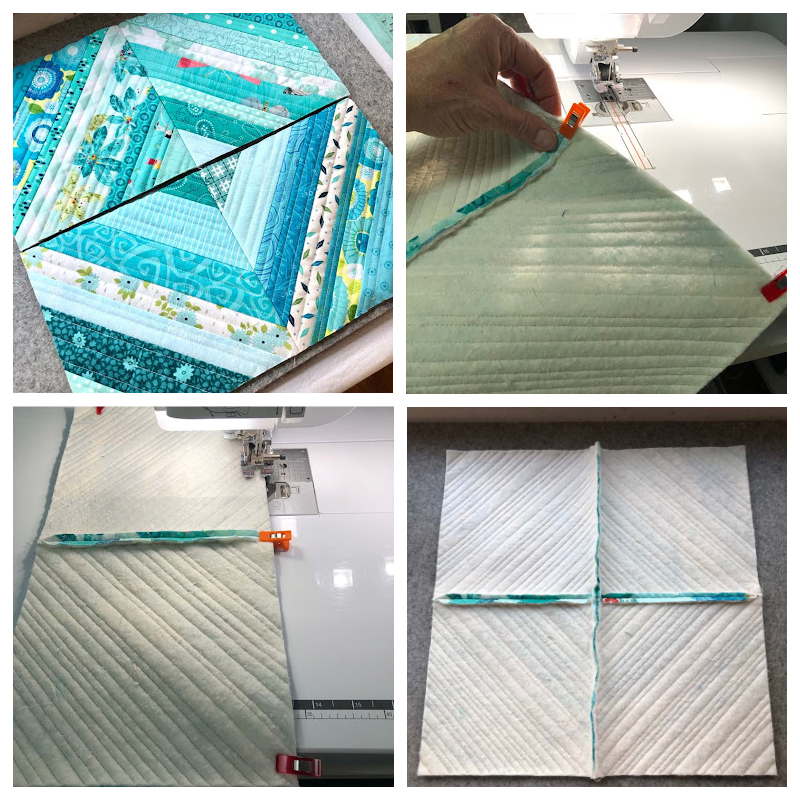
- Choose your first strip for the center and make a crease along the length. Place this on the batting, centering it on the diagonal from corner to corner.
- Stitch along the center crease. This is your first quilting line.
- Take a second strip of fabric and place it right sides together (RST) along the first fabric strip. Stitch 1/4″ seam.
- Finger press the seam or use a seam roller.
- Place the next strip, RST, onto the previous one and stitch with a 1/4″ seam. Finger press the seam.
- Add quilting lines (if desired) to the previous strip.
- Continue adding strips in the same manner until the first batting section is covered.
- Add as many quilting lines as you like. I made mine parallel to the seam and varied the spacing.
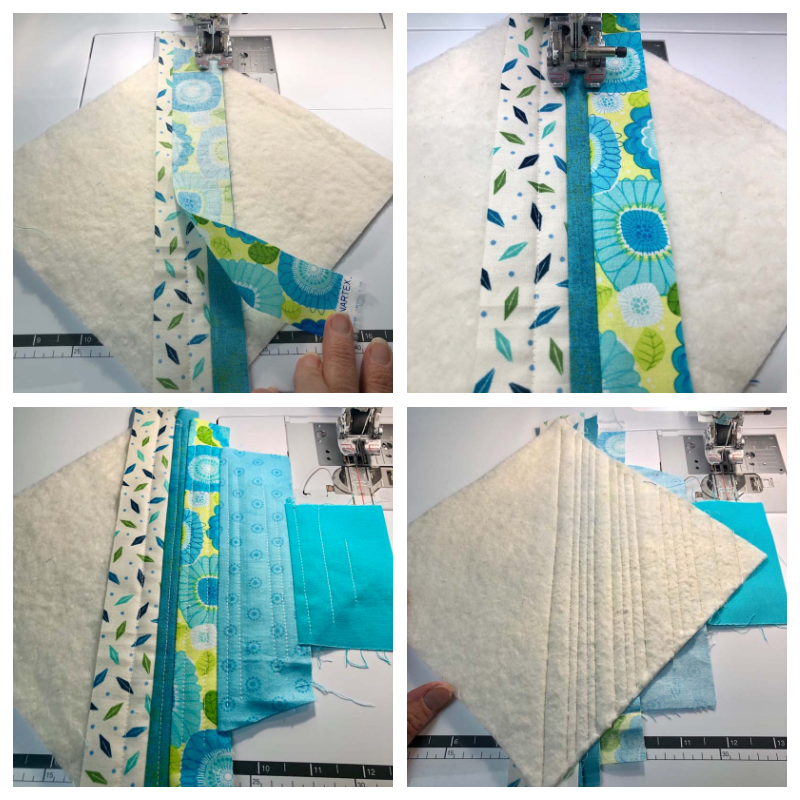
- Rotate the block and continue adding fabric strips to the remaining section.
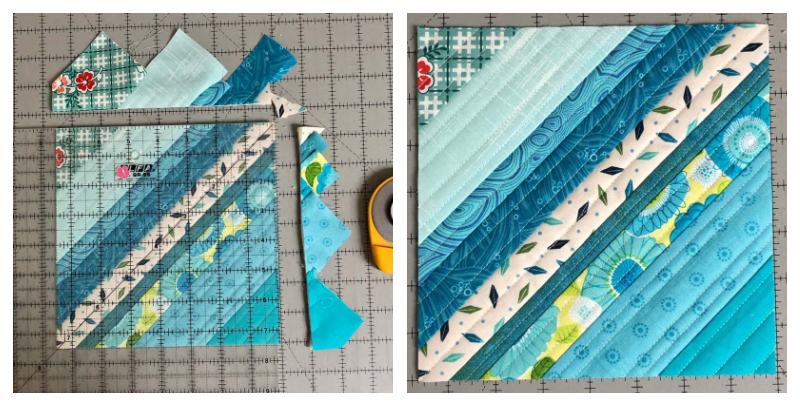
- Once the entire batting scrap is covered, it’s time to trim.
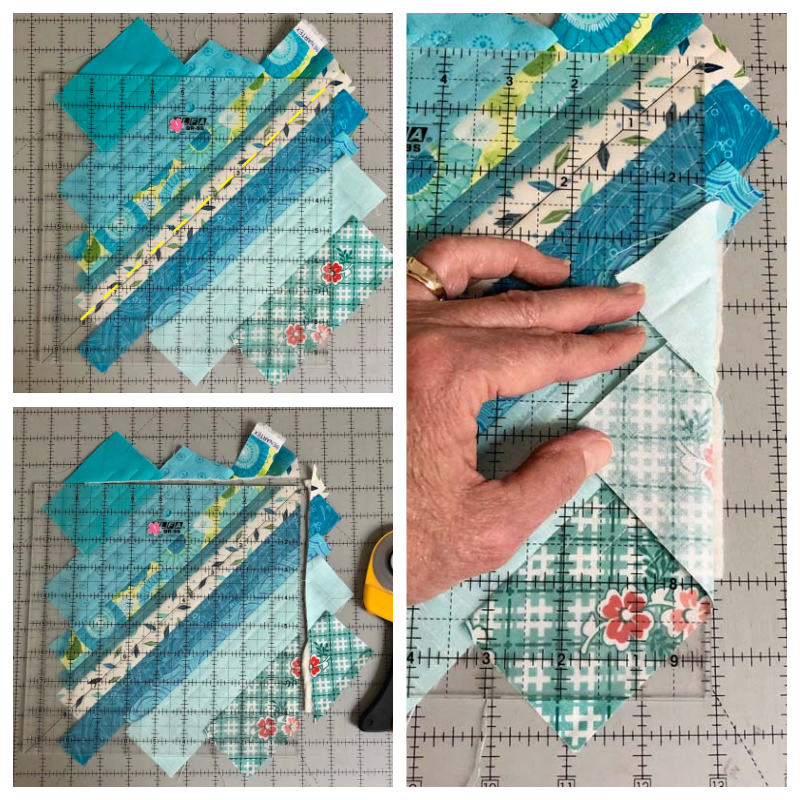
Trimming the block
- Place the diagonal line of the ruler along the center diagonal stitching line. Make sure there is a small amount of batting peaking underneath the cutting edges.
- Trim the right and top sides (the left and top sides if you’re left handed).
- Rotate the block and position the unfinished size ruler markings along the previously cut edges. For my example, this is 7 1/2″. Trim the remaining two sides.
Putting the blocks together
After you’ve made all your blocks, it’s time to sew them together. Arrange the blocks how you’d like them and sew them together into rows. For my sample, I only have four blocks made so that’s what I’m working with!
- You probably aren’t matching any seams here, but make sure to align the top and bottom block edges. Pin or clip them in place.
- Sew the blocks in each row together with 1/4″ seam allowance. A walking foot is really helpful here.
- Trim both ends of the seam allowance at an angle to reduce the bulk in the seam intersections.
- Press seams open. Be careful with this step; you don’t want to scorch the batting. Use a pressing cloth if necessary.
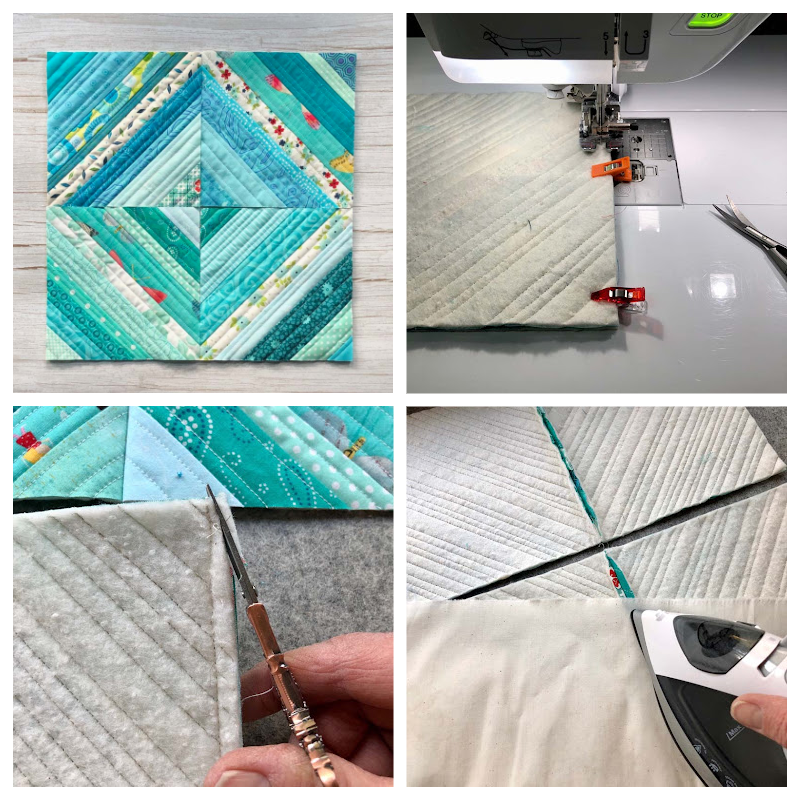
- Sew the rows together. Make sure to match the intersections and pin/clip before stitching.
- Press all seams open (not pictured).

Finish with backing and binding
Here’s where my sample photos end. I was originally going to use this as a pillow cover. In that case, I wouldn’t need to add a backing since it won’t ever show. But now I’ve decided to keep making blocks and turn this into a small quilt.
Below are the steps to finish (without any pictures to guide you).
- Cut the backing fabric two inches larger (on all four sides) than the quilted top.
- Baste the backing and quilted top together. I would use basting spray for this, but safety pins work well, too.
- Quilt the layers together. You could stitch in the ditch or 1/4″ away from the block seams. Keep it simple since most of the quilting is already done.
- Trim the backing even with the top.
- Add binding using your favorite method. See my favorite method for all-machine binding here.

Strip Pieced QAYG video
I put together a few reels (short videos) on Instagram and I joined them together for this tutorial. I have to apologize for the captions which are not uniform at all. Things got “lost in the translation” in Instagram and when editing. I’m definitely a newbie at videos and reels!
QAYG resources
If you want to learn more about quilt-as-you-go, there are some great resources available. I own three books that cover all the bases and there are some excellent videos that offer many different types of QAYG techniques.
- Quilt As You Go Made Vintage by Jera Brandvig. This is my favorite of the books. Jera offers beautiful and traditional quilt designs made with QAYG techniques.
- Quilt As You Go Made Modern by Jera Brandvig. She features improvisational techniques and fun patterns to get you started.
- Quilt As You Go by Carolyn Forster. Another favorite for its diverse and comprehensive methods of QAYG.
- Monica Poole of Pattern Poole TV has so many great QAYG videos on YouTube. They’re professionally made videos and fun to watch.

I hope you enjoyed this QAYG tutorial using fabric strips. There are so many advantages to this technique and most of all, it’s fun! I hope you give it a go!


Discover more from The Crafty Quilter
Subscribe to get the latest posts sent to your email.


I think this is very beautiful and a good way to use scraps, thank you for sharing.
Excellent tutorial and video – particularly for a beginner like me. Thank you so much!
Hi Julie. I love this tutorial and all the references. Thanks so much. I was concerned that there might be too much bulk when joining the seams of the two blocks, even if you do press them open. So, I tried a test. I use Quilter’s Dream Request batting which is a very thin batting. It worked out great. I really couldn’t notice a lot of extra bulk. I’ll be doing more QAYG in the future. Thanks again!!
BRILLIANT! … I love this 🙂
x
This is a very helpful tutorial. I will make use of it! BTW, you always use the cutest fabrics!!
Great tutorial, the video was great for enticing me to grab some scraps and get busy! Think I will start with fun fabric placemats for the great grand children! Thanks Julie, always enjoy your fun and educational shares! Raining here in the Central Valley this weekend, great time for new sewing project.
Blessings, Dawn