Ho Ho Farmhouse Pillow tutorial
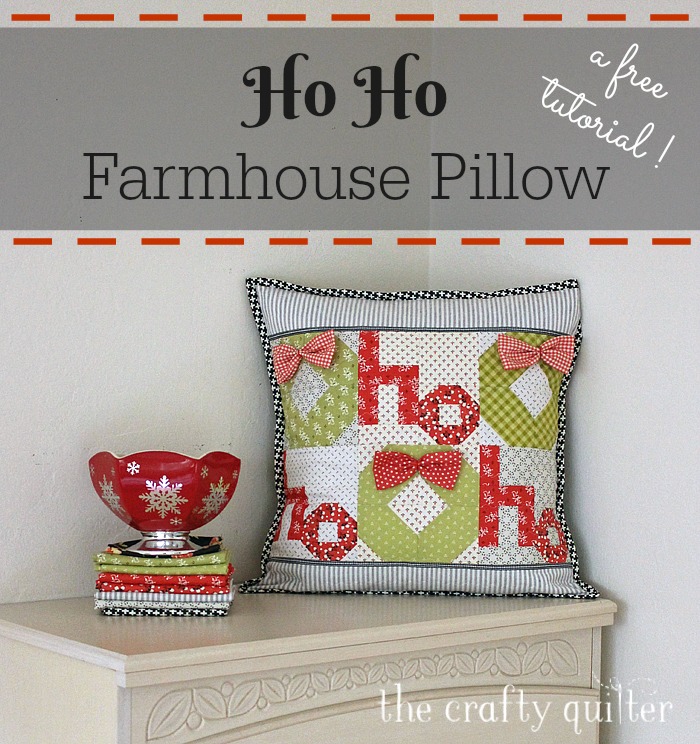
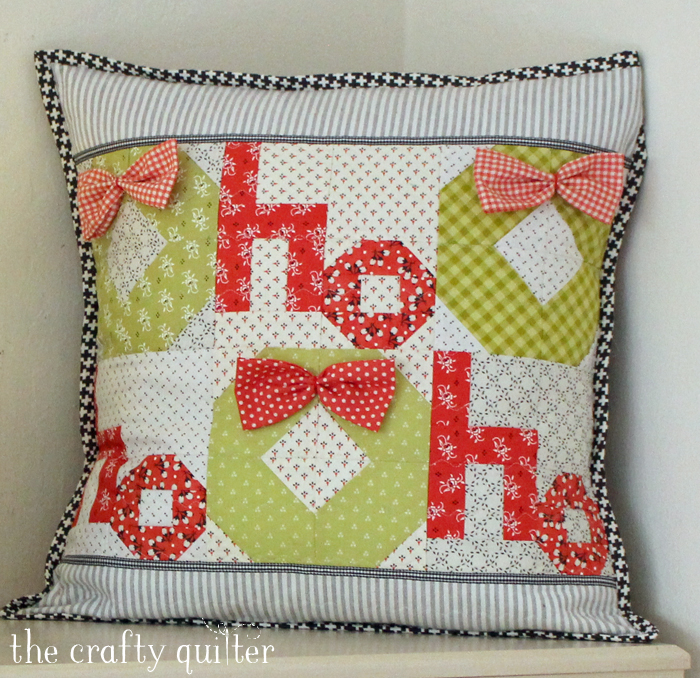
I’m so happy to share a new Christmas project with you – it’s the Ho Ho Farmhouse Pillow Tutorial! It’s just in time for holiday decorating, and I think it turned out pretty darn cute.
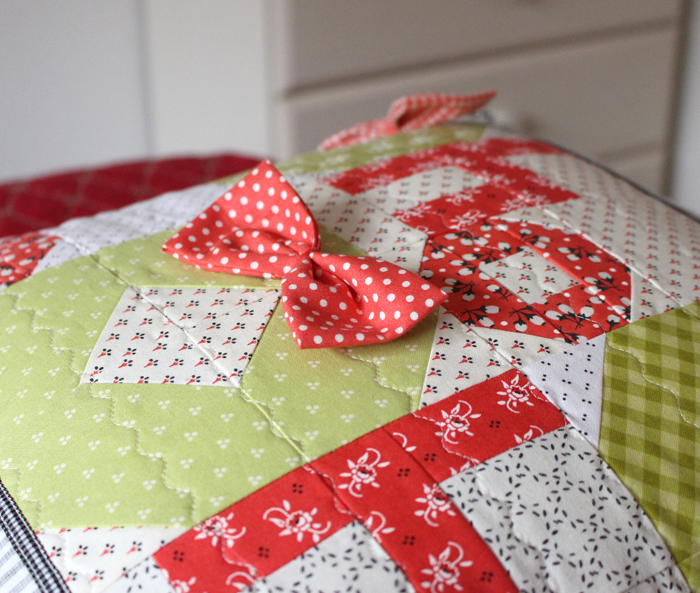
I used mostly Fig Tree fabric from the Chestnut Street and Farmhouse lines. There is some black and white striped shirting fabric (whose origin is unknown), and I think the whole thing has a real farmhouse feel. Add some dimensional bows and you’ve got a real down home pillow.
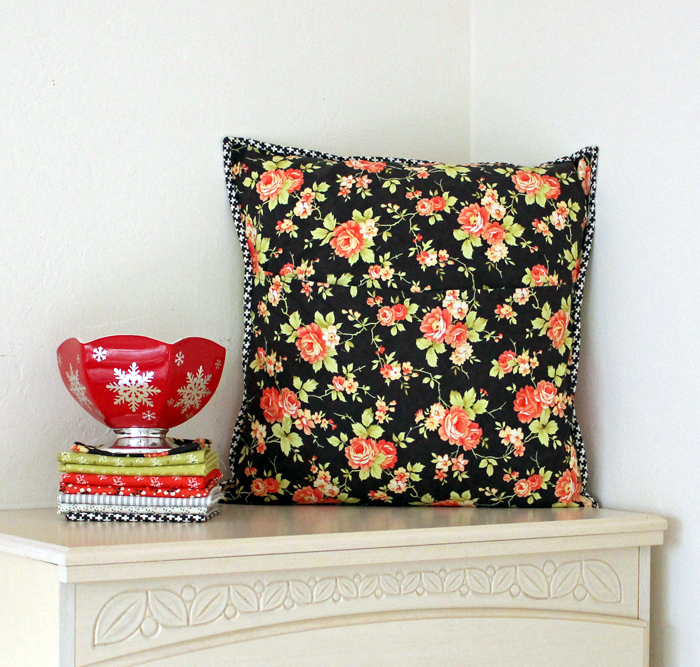
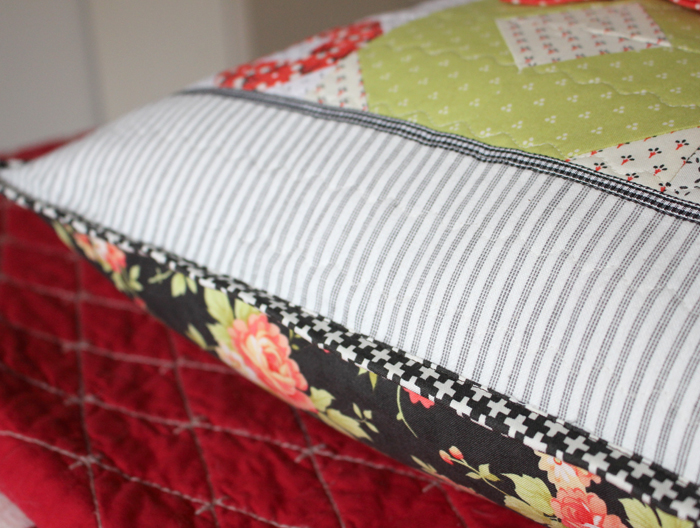
This tutorial will make one 18 1/2″ pillow. I used an envelope-style back with binding all the way around the pillow edges. Adding binding to a pillow gives it a nice accent – it almost looks like piping.
I tried to simplify the tutorial so that it’s not overly long. It assumes you have basic piecing and quilting skills. Eventually I will make this tutorial into a downloadable PDF format.
Ho Ho Farmhouse Pillow Tutorial
Finished size: 18 1/2″ square. All seams are 1/4″
Supplies:
- Background: 1/8 yd. each of 3 cream & black prints
- Red: 1/8 yd. each of 4 red prints
- Green: 1/8 yd. each of 3 green prints
- Black & white stripe: 1/8 yard
- Backing: 5/8 yard
- Binding: 1/4 yard
- Ribbon, 1/4″ – 3/8″ wide (optional): 1 1/4 yards
- Embroidery floss to match bows
- Fusible fleece or batting: 19″ square
- Lightweight fusible interfacing (optional): 1/2 yard
- 18″ pillow form
Cutting Instructions:
- Background: from each print, cut (1) 3 1/2″ square, (1) 2 1/2″ square, (1) 1 1/2″ x 3 1/2″ rectangle, (1) 1 1/2″ x 2 1/2″ rectangle, (8) 2″ squares, and (5) 1 1/2″ squares
- Red A (letter H): (9) 1 1/2″ x 2 1/2″ rectangles, and (3) 1 1/2″ x 3 1/2″ rectangles
- Red B (letter O): (6) 1 1/2″ x 3 1/2″ rectangles, and (6) 1 1/2″ squares
- Red C (1 bow): (1) 4″ x 9 1/2″ rectangle
- Red D (2 bows): (2) 4″ x 9 1/2″ rectangles
- Green: from each print, cut (4) 3 1/2″ squares
- Black & white stripe: cut (2) 3 1/2″ x 18 1/2″ rectangles
- Backing: (2) 13″ x 18 1/2″ rectangles
- Fusible fleece: 18 1/2″ square
- Lightweight fusible interfacing (optional): (2) 18″ x 12″ rectangles
- Binding: (2) 2 1/4″ x WOF strips
Piecing Instructions:
“ho” block
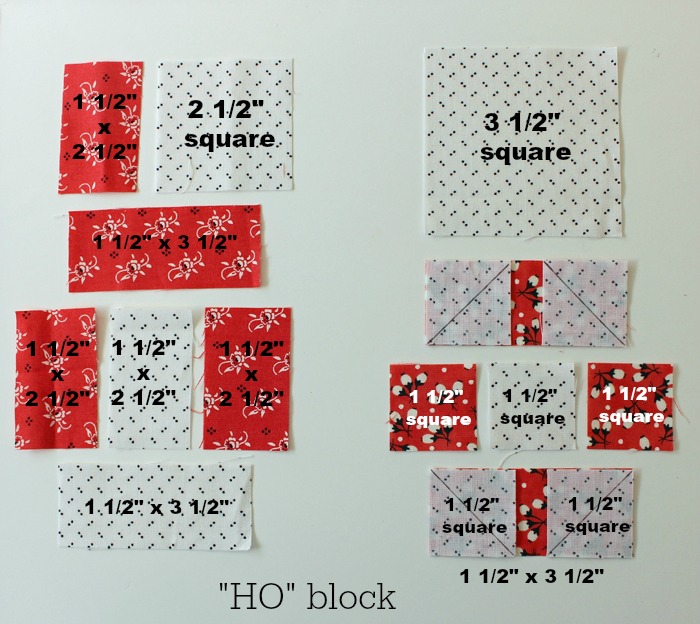
Draw a diagonal line on four of the 1 1/2″ background squares. Lay out the background fabric pieces, red A and red B pieces as shown in the photo below:
Join the units as shown in the photo below and press as indicated by the arrows. The finished block should measure 6 1/2″ square. Repeat to make a total of three “HO” blocks.
Wreath block
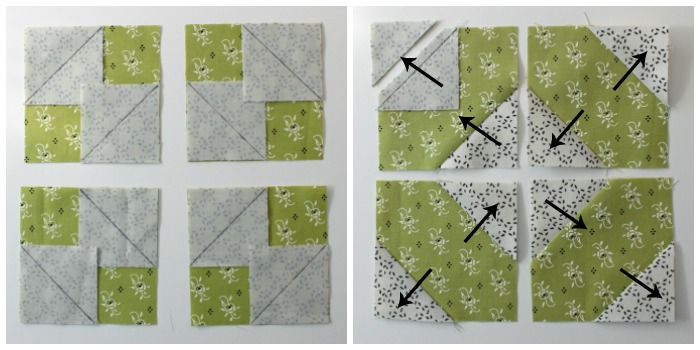
Draw a diagonal line on (8) 2″ background squares. Place them on opposite corners of the 3 1/2″ green squares and stitch just next to the diagonal line. Trim seams and press, following the pressing arrows in the photo below.
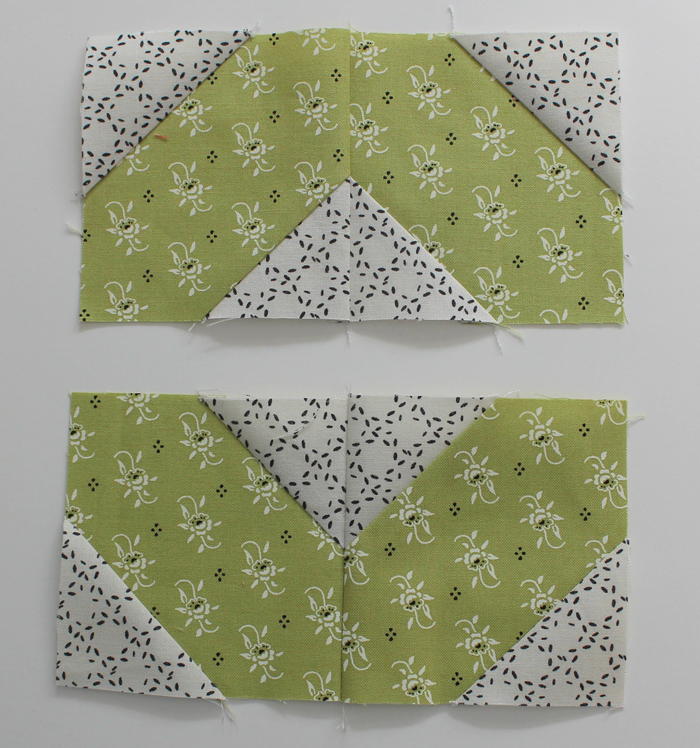
Sew the the units into pairs and press so that you have opposing seams. Sew the two pairs together to create the wreath. This block should measure 6 1/2″ square (which I forgot to take a picture of). Repeat to make a total of three wreath blocks.
Join blocks and add top/bottom border
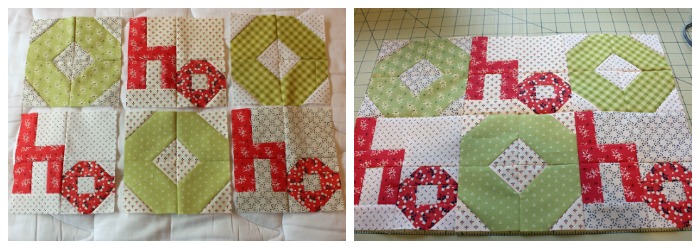
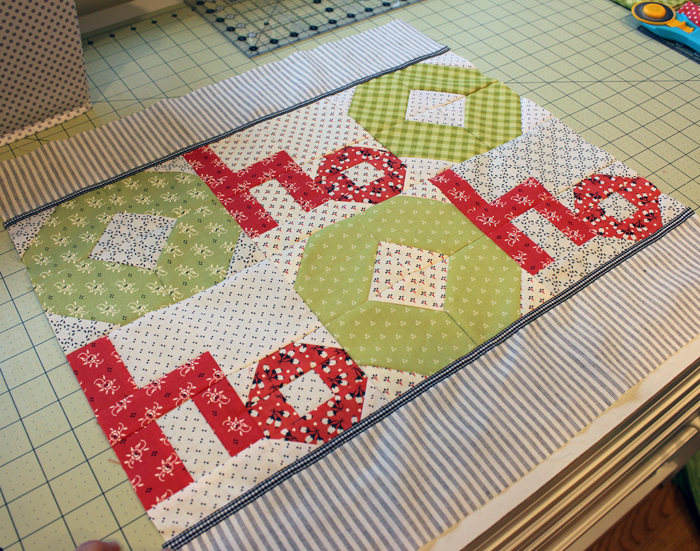
Arrange the blocks as shown below and sew them together, forming the pillow center.
Add the 3 1/2″ x 18 1/2″ black & white stripe rectangles to the top and bottom of the pillow center. Press seams toward the border.
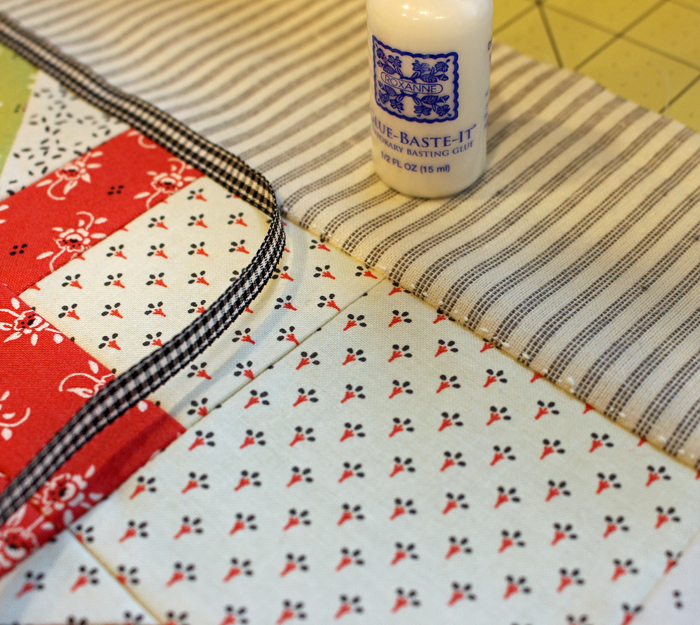
If using ribbon, glue baste it on top of the seam and topstitch close to both edges.
Cut fusible fleece the same size as pillow top. Press to the wrong side of pillow top following manufacturer’s instructions.
Quilt through both layers. I used a serpentine stitch and a walking foot to quilt mine. The bows get attached after quilting.
Now it’s time to make the bows!
Bows
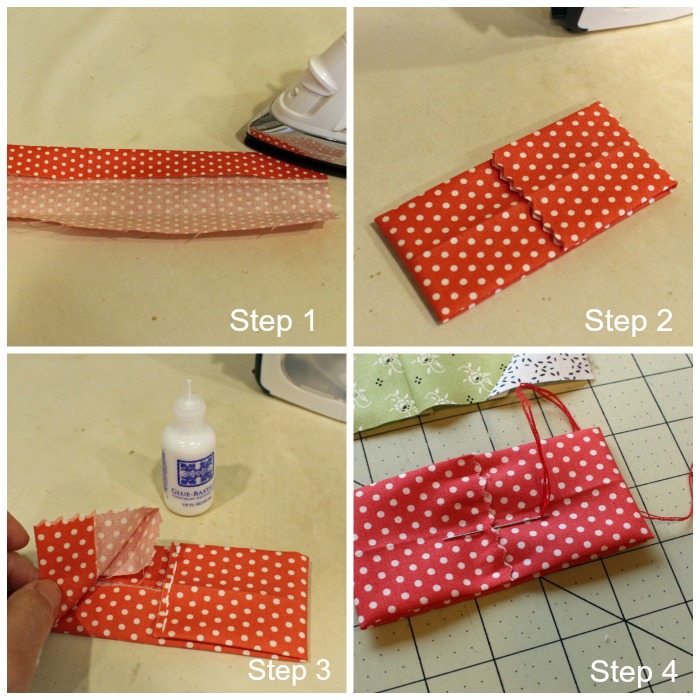
- Using the 4″ x 9 1/2″ red rectangles, gently press or crease each in half along the length. Press the two long sides to meet the center crease.
- Press the two short sides so that they overlap in the center by 1/4″. I “pinked” one of the short sides to prevent raveling.
- Glue baste or hand baste along the center overlap.
- Using 3 strands of embroidery floss, take a stitch into the overlap seam allowance.
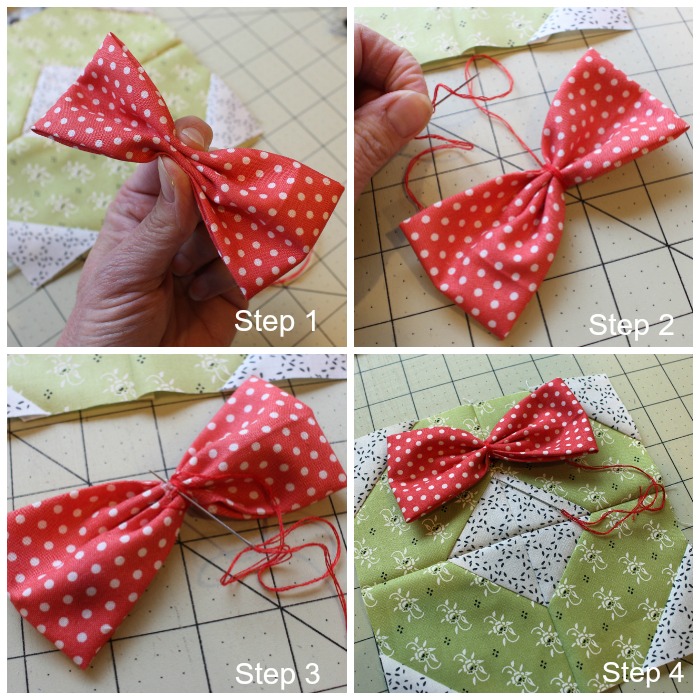
- Pinch the center of the bow so that it forms an accordion pleat.
- Wrap the embroidery floss around the bow center 3 or 4 times.
- Secure in the back with a small stitch. Don’t cut the thread yet.
- Using the same thread and needle, secure the bow to the top half of the wreath with a few stitches. Knot and cut the thread. (The photo shows this step before the block has been quilted. I think it’s a good idea to wait until the pillow top is put together and quilted).
Prepare pillow back
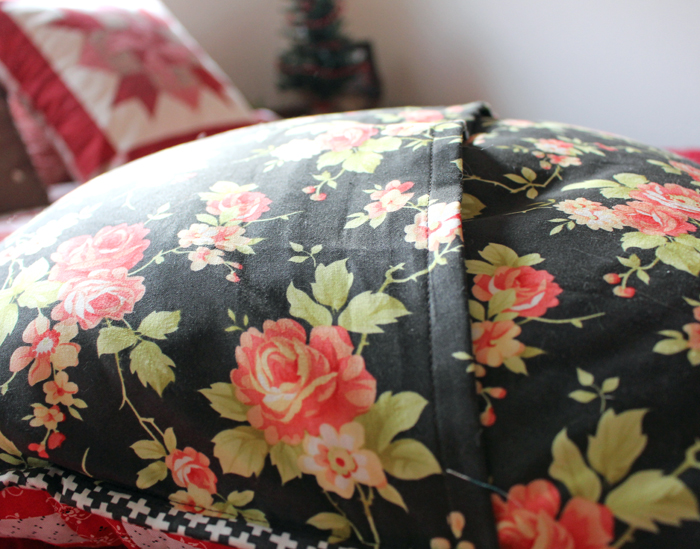
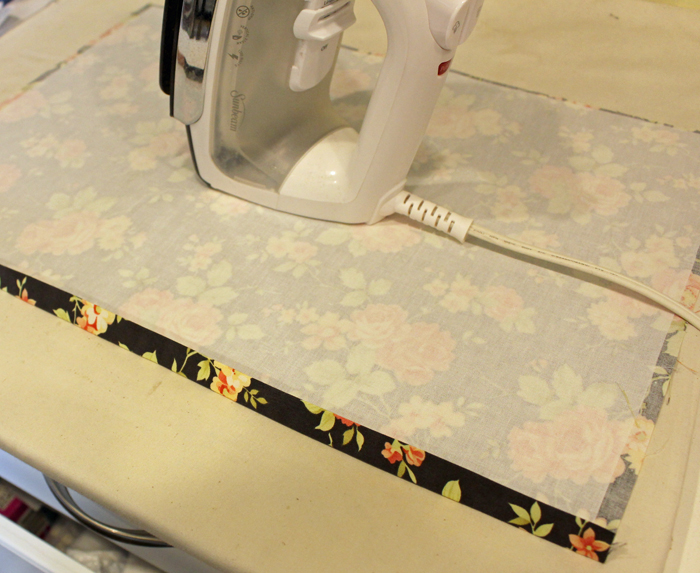
Press under 1/2″ along one 18 1/2″ edge of both pillow back pieces. Add fusible interfacing if using. Press under 1/2″ again along the same edge. Top stitch close to folded edge.
Layer and baste
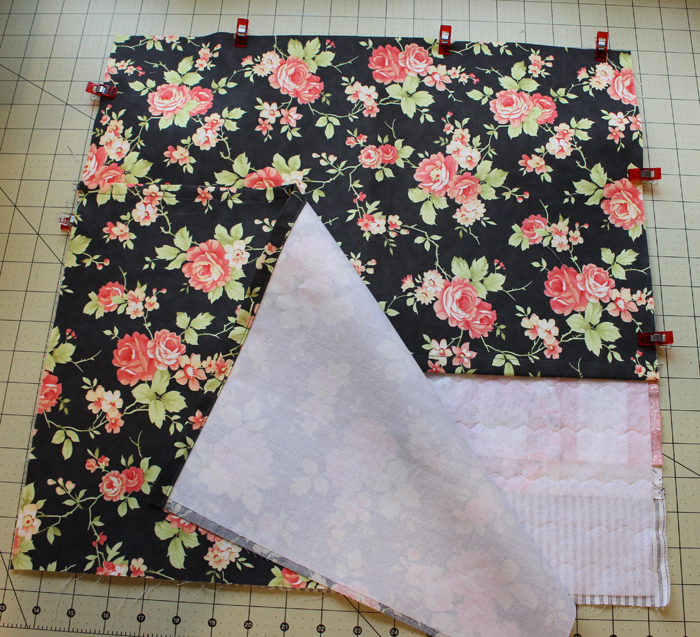
With wrong sides facing, layer the pillow top and both pillow back pieces so that they overlap in the center. There should be a 6″ overlap. Pin raw edges (or use wonder clips) and baste along all four sides.
Add binding
Make binding strips using the 2 1/4″ x WOF strips. Apply binding using your favorite method. I stitched mine to the back of the pillow and wrapped it around to the front. Then I stitched close to the folded edge of the binding on the front. Insert pillow!
Please keep in mind that this tutorial has not been tested. It is a free pattern and I welcome your feedback. This is my holiday gift to you! You can use the “print friendly” button below to print the portions that you want or save this post for future reference.
I hope you have fun making your own Ho Ho Farmhouse Pillow. Send me a picture if you do. I’d love to see it!
Happy quilting!




This is the cutest fun pillow to make! Thank you so very much for your talent of making it and sharing it with everyone, you are amazing.
Julie F
What a fun country pillow:) I am going to make this for a friend for Christmas.
Thanks sooooooooooooooooooo much for making it and sharing it with everyone.
Julie
I love your projects.
I used the outside trim idea and loved it. I have also shared your ideas(credit given) with my sewing friends. Thanks for your postings.
Joyce
Thanks Julie, once again a wonderful ‘blog’ and great cushion never thought to bind one
wishing you and yours a wonderful xmas and great new year
look forward to seeing what you have for us out here in ‘quilt’ land in 2017
Take care of yourself and family
Gayle Z
I have two tops stitched and hope to quilt them tomorrow. One must get done as it is a gift for our daughter. I just love how super easy it was and how well it went together. Great tutorial and I can’t wait to get it completed and send you a photo. Thanks for another beautiful tutorial. Merry Christmas to you and your family. Hope you get some time with that sweet grand girl.
Very Cute pillow Julie and great tutorial – thanks!
Julie, you’ve given us another great tutorial. I have extra fabric from making a quilt, and I thought a pillow would work nice. I have the pillow form, but not the know-how. Perfect timing! Have a great Christmas!
-Julie
I love this pillow! It is perfect for my gift for my sister. I am going to try to get going on this tonight after work. Thanks for sharing your talent and taking the time to create this tutorial. Merry Christmas to you and your family.
This is so cute. Thanks so much for the tutorial. I am saving it so when I get the chance, I will sew this.
such a clear tutorial thank you. So liking the piping never thought to do that on a pillow before but will certainly do it next time
What a darling pillow. I am in the process of making all my family members a pillow for Christmas this year. This one will be a perfect fit to them. I love the idea of the binding….thanks so much for sharing.
Thank you so much for this cute holiday pillow! I am always looking for newH ideas! And the bows really add a special touch. Happy Holidays to you and your family! You truly are an inspiration. Again, thank you!!
Carol
So festive and creative! The 3D bows are perfect for the the wreaths!
Good Morning Julie! Oh my goodness, I believe this is one of the cutest pillows I have seen! Thank you so much for the tutorial. I have a terrible flu, so if I finish my Wreath tutorial and get it posted on my blog today; I know I will start making this pillow for myself and my Father (he needs a few more gifts and totally loves everything I make). Thank you for sharing and have a fantastic creative day!
Couldn’t be cuter!!! Thanks for sharing! Have a very merry Christmas!
Julie,
Thank you for the darling tutorial! Merry Christmas to you and family!
What a good idea, putting a binding around the pillow. Thank you for sharing your projects. Definitely has inspired me to finish projects that I had set aside.
Merry Christmas.
I love your tutorials, they’re so easy to understand. On top of that, this is cute, cute, cute! Jadahlgr at Yahoo dot Com
Julie, your wreath pillow is adorable. Thanks for such great directions. I always get excited when I see an e-mail from you. Have a wonderful Christmas. Kay
What an adorable Christmas pillow…thanks for the tutorial!!
Super cute! I love this pillow and of course the fabrics are perfect. I have to make this pillow! Thank You for sharing this sweet project with us.
Thank you for the wonderful tutorial! I am definitely going to make one…or three!
So cute Julie. Maybe for next year. Merry Christmas. And thank you. Robin
Esta precioso, muchas gracias.
Love the pillow! Hopefully will get one (or two or three) made for next Christmas.
Thank you for the beautiful pillow tutorial. I love the binding idea. I have always done it by stitching around all edges and turning. Merry Christmas!
Julie thank you so much for a lovely pillow and tutorial I can’t wait to make it. Happy Christmas to you and your family and looking forward to reading your posts in the coming year.
Oh my goodness this is so cute. Thanks for sharing.
Julie, I love your projects – thank you for another lovely one.
Have a wonderfull Christmas.
Hi Julie,
Oh my gosh, that is so cute and the tutorial is so easy to follow. It’s definitely going on my to do list.
Thank you for sharing this great project with us. Wishing you and your family a very Merry Christmas and a New Year filled with peace and prosperity.
Chris