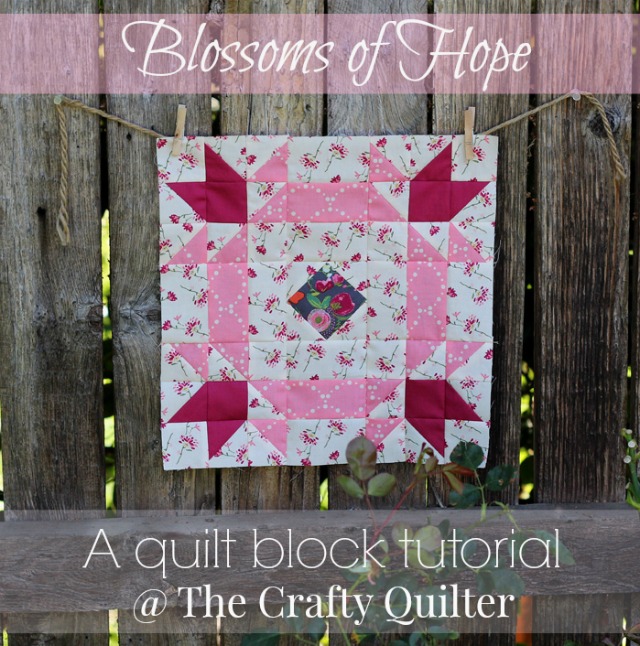
Blossoms of Hope Quilt Block Tutorial
I am so excited to share with you my new quilt block tutorial, Blossoms of Hope.
Thank you to everyone who shared their wonderful ideas for a name! It was not easy to pick just one, and I loved the theme of “hope” that so many of you suggested. In the end, I chose Blossoms of Hope which was a compilation of “Hope Blossom” from Lee, “Blooms of Hope” from Jan and “Hope Blooms Eternal” from Lisa Marie. In appreciation, I will be sending you three a thank you package next week!
I created this block as my contribution to the For Pink’s Sake Blog Hop hosted by Anna at Life Sew Crafty. You can find my turn for the blog hop here. That quilt block is being sent to Anna to be combined with others for a charity quilt to raise funds for a special breast cancer patient.
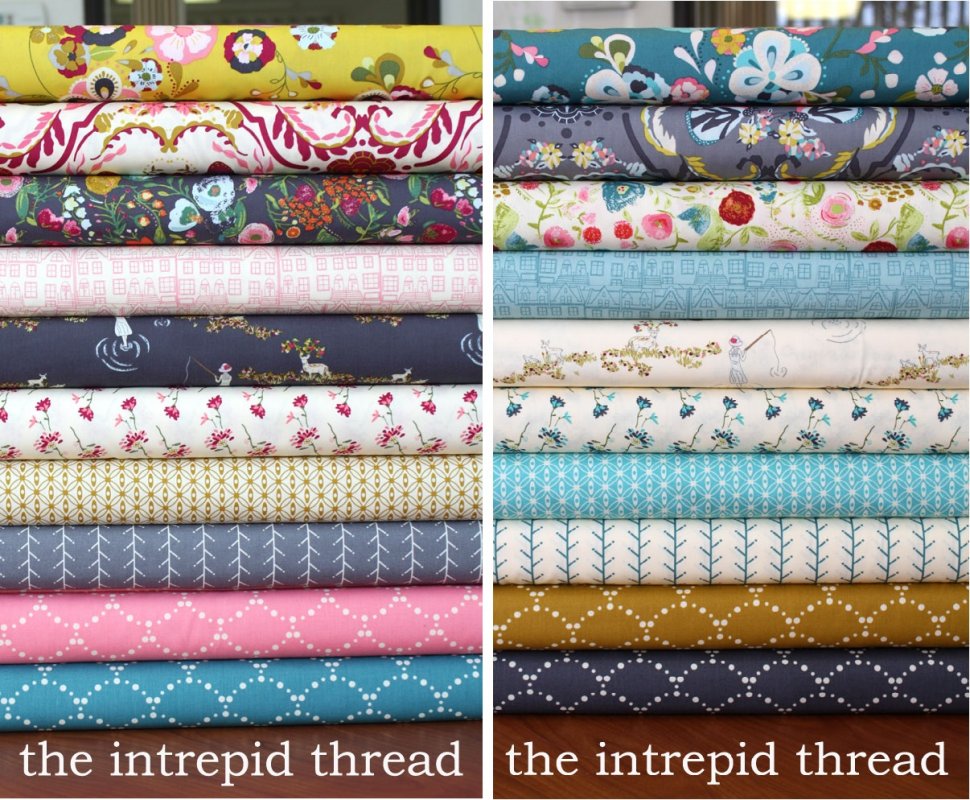
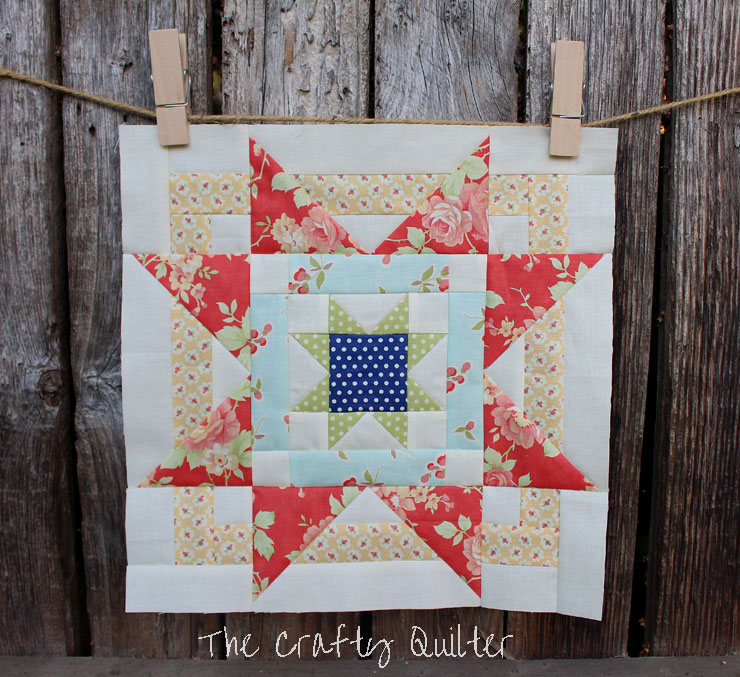
The fabrics I’m using for today’s block are from Emmy Grace by Bari J. for Art Gallery Fabrics. I love the sweet sophistication of these fabrics. I’m thinking of making more blocks for a baby quilt for a little girl that will be here any day now.
So let’s get to the tutorial!
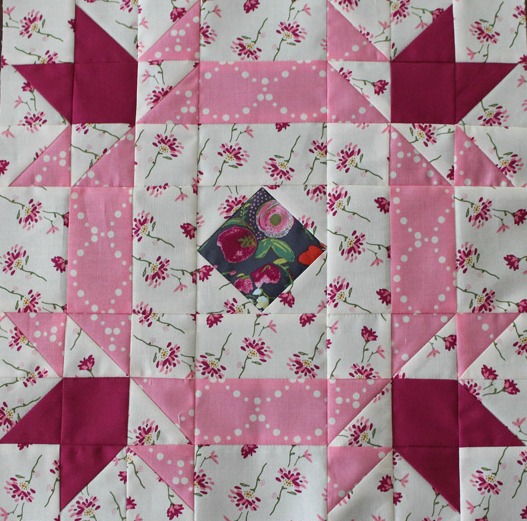
Blossoms of Hope Quilt Block, finished size: 12″
Fabric requirements:
- Background: (1) fat quarter
- Medium (pink): (1) fat eighth or scraps
- Dark (magenta): 10″ square or scraps
- Center (grey floral): 5″ square (more if you’re fussy cutting)
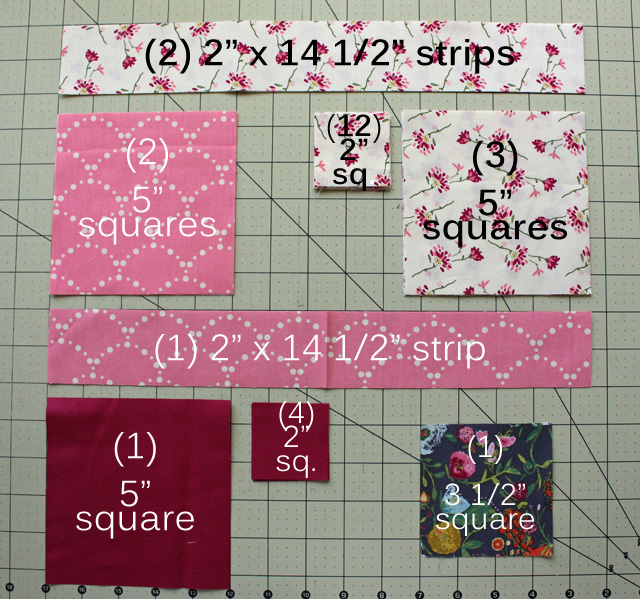
Cutting Instructions:
- Background: (2) 2″ x 14 1/2″ rectangles, (3) 5″ squares, (12) 2″ squares
- Medium: (1) 2″ x 14 1/2″ rectangle, (2) 5″ squares
- Dark: (4) 2″ squares, (1) 5″ square
- Center: (1) 3 1/2″ square
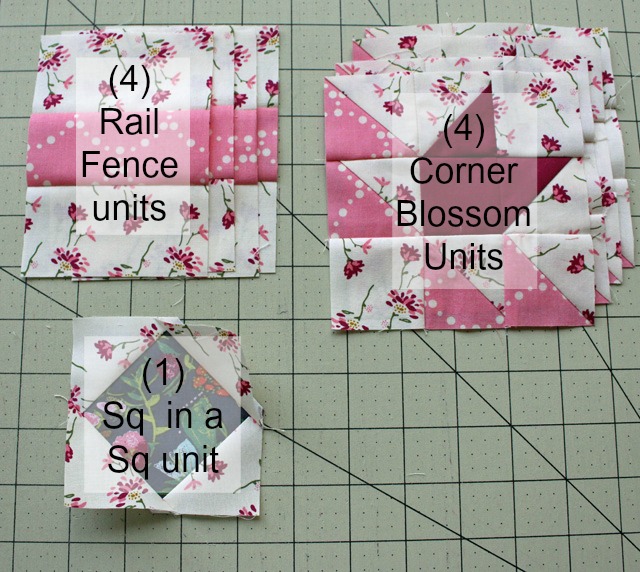
You will be creating three different units for this block: rail fence, corner blossom, and square-in-a-square.
 Piecing Instructions:
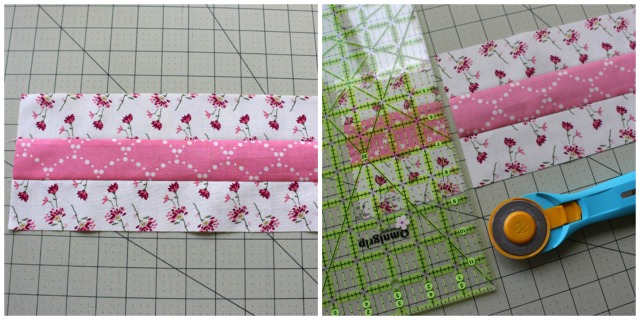
Rail Fence Units:
- Stitch together the (2) 2″ x 14 1/2″ background strips to each side of a 2″ x 14 1/2″ medium (pink) strip. Press seams toward center strip.

- Cut into (4) 3 1/2″ segments. Your units should measure 3 1/2″ x 5″.
Center Square-in-a-Square Unit:
- Draw a diagonal line on wrong side of (4) 2″ background squares. Place one square on each corner of the 3 1/2″ center square and stitch on the drawn line.
- Trim seam allowance and press toward corners. It should measure 3 1/2″ square.
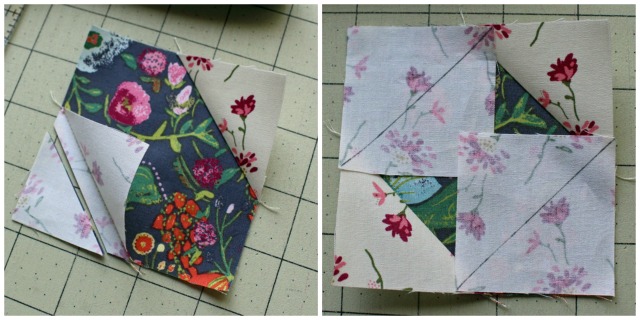
Corner Blossom Units:
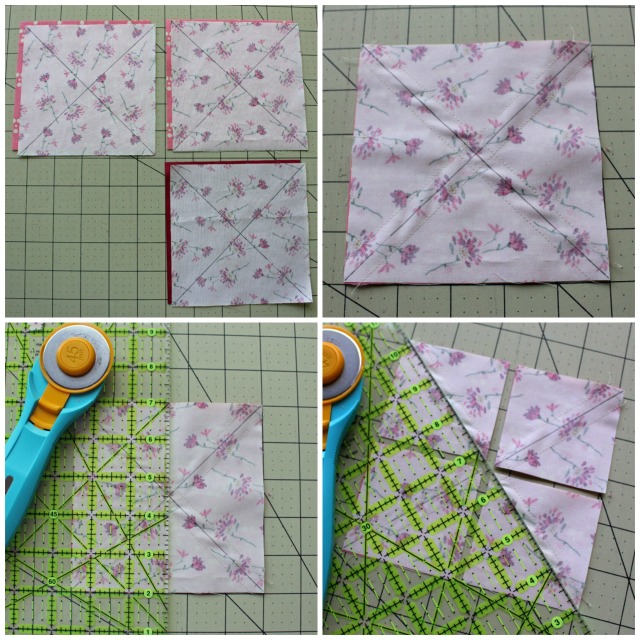
- Make (8) half square triangle (HST) units from (1) 5″ background square and (1) 5″ dark square, and make (16) HST units from (2) 5″ background squares and (2) 5″ medium squares: draw an “X” on the wrong side of each background square. With squares right sides together, stitch 1/4″ on each side of the drawn line.
- Cut each square in half vertically using the 2 1/2″ line on your ruler as a guide. Repeat on the horizontal line.
- Now cut along the diagonal lines.

- Press dark/background HST’s toward dark. Press med/background HST’s toward background.
- Trim to 2″ square.
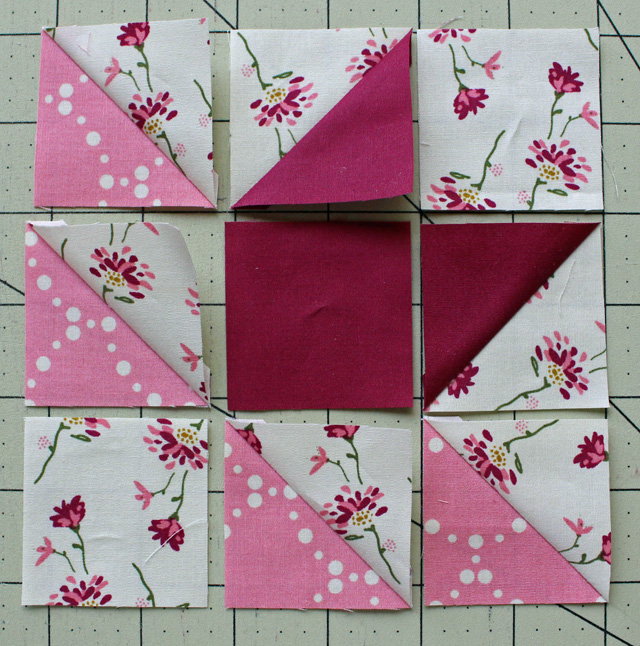
- Create corner units by arranging (4) medium HST’s and (2) dark HST’s, (1) 2″ dark square, and (2) 2″ background squares as show below.

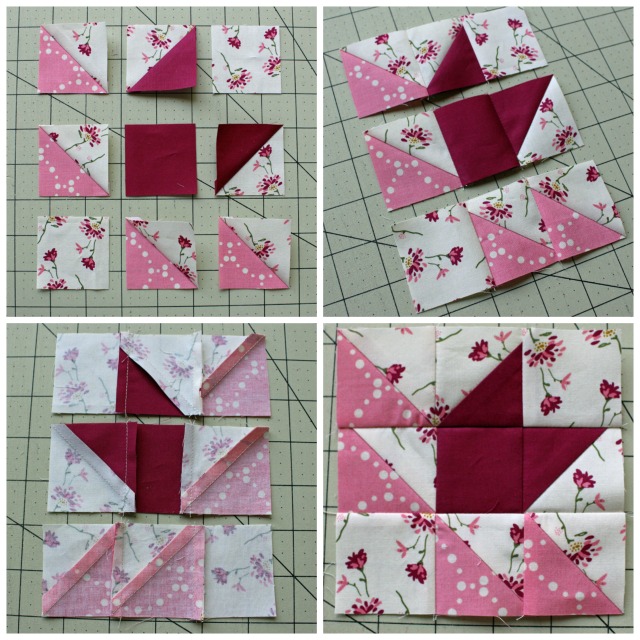
- Stitch pieces into rows. Press center row towards middle. Press top/bottom rows towards outside.
- Stitch rows together, matching seams. Press rows to outside. This unit should measure 5″ square. Make 4.

Block Assembly:
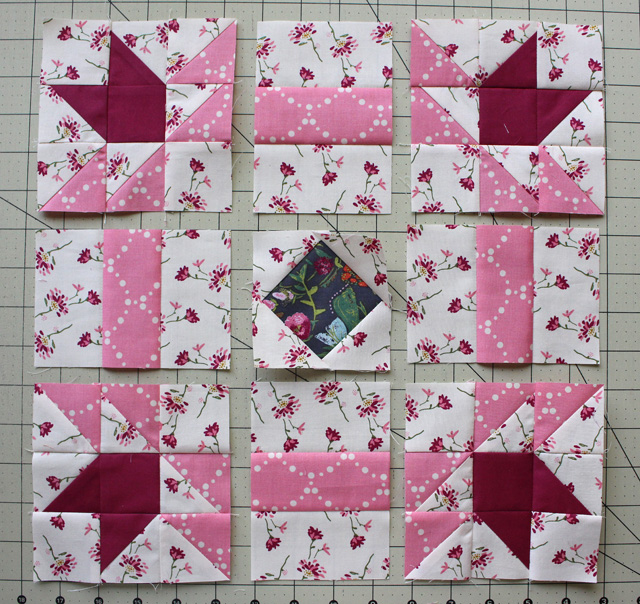
- Arrange rail fence units, corner blossom units and center square-in-a-square unit as shown below:

- Matching seams, stitch units together to form a row. Press the center row towards the outside and the top/bottom rows toward the middle.

- Stitch rows together. Press to the outside.

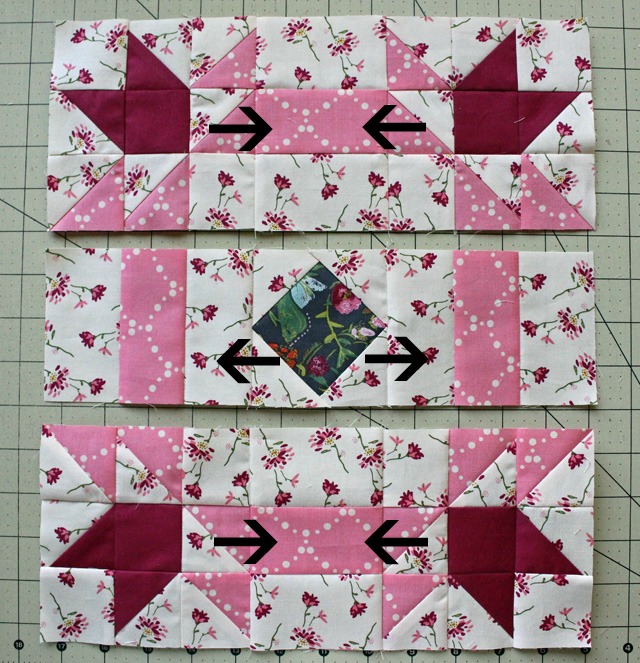
Your block should measure 12 1/2″ unfinished.
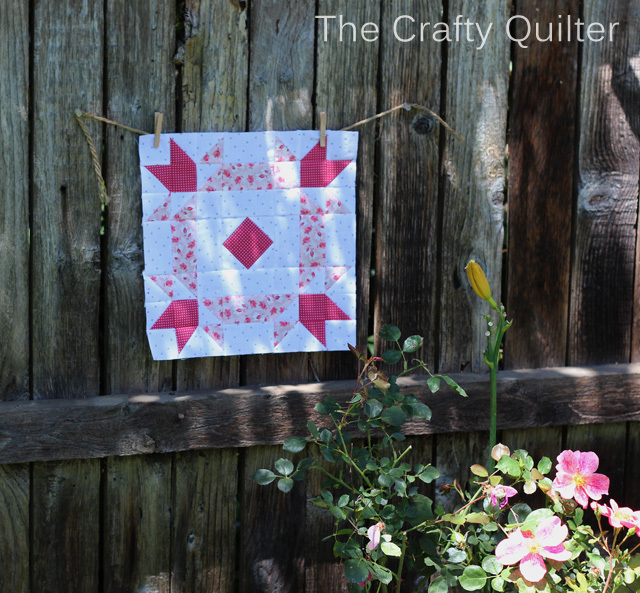
You can play with the color placement of your fabrics. The original block that I made had 3 fabrics total. For this block, I wanted to sneak in this amazing floral fabric, so I used it in the center square unit.
Now, go play with your fabric stash and make some Blossoms of Hope quilt blocks and then send me a picture! I would love to see them.
I could schedule a “quilt along” using this block as the core of a quilt. We could make a quilt together and I would walk you through the steps with lots of tips along the way. And we could each make one extra block for breast cancer fundraising. Does that sound interesting to anyone? Let me know, and I’ll start planning!
Please note that I haven’t had this pattern tested by anyone but me. (You’re all my guinea pigs!) If you find any errors or if something doesn’t make sense, please let me know. Thanks everyone for joining me, and have a great day!


Discover more from The Crafty Quilter
Subscribe to get the latest posts sent to your email.


I truly love this quilt block. I live in Australia. I had a double mastectomy in 2021, so this is something very special to me. Thank you
Wonderful fabric design. I love this!
This is still one of the sweetest blocks I’ve seen! Thank you for sharing, even though it’s been so long ago you put this out there.
Greetings Julie,
I just wanted to say I am a relatively new quilter of 2.5 years. I just found your blog. I love EVERYTHING you have posted from colors to patterns! I was looking for a pattern for a baby girl quilt & when I found your block, Blossoms of Hope, I knew this was IT!! Thanks so much for sharing & I will be trying many of your patterns & working my way through your tutorials. Please don’t stop sharing your fabulous ideas & projects. Now I must get busy- I have company ready to show up on my doorstep & can do nothing but read your blog! Haha. Sincerely, Sandra
Wonderful block tutorial! Thanks for linking up.
Julie,
I’ve had a chance to make this block. I made it difficult as I was twisting the HS blocks when pinning! If you continue w/ this block, the “tulip” corners make a beautiful secondary pattern !
Julie,
I’ve made this block, yet I had difficulty piecing the “tulip” squares. I kept getting them wrong! The top 2 “tulip ” blocks are different than the bottom 2 in layout. Hope this helps.
I am a big fan of you. I love the block and the colors, fabrics as well. Your tutorials are fabulous. Only on this one I could not
follow what you did at the corner to get the very dark fabric (black)
in place. Would love to do a quilt a long with this project. However, I will be in a cast as of Friday, for three months.
I look forward to what you will do next.
Would love to join you on a quilt along. Thanks for the great directions for the quilt block!
I love this block. I am trying to tackle points and triangles. I tried it in blue and I would love to show it to you. I am new to this facebook stuff. How do I put it up?
This is a lovely block. I’ve never participated in a quilt-along, but it sounds like fun. Where, or to whom, would the donated blocks go?
It’s a beautiful block in lovely colors. Thanks for the tutorial. I think a quilt along is a nice idea.
Your block is so very beautiful! The instructions are so easy to follow…hope to make a few of these!
Love this fabric and the block! My only Granddaughter’s name is Emma Grace and I call her Emmy Grace!!!! I HAVE to have this fabric!!
Blessings
Jane Hillis
Your #1 fan!!
What a beautiful block. I love your tutorials as they’re are always so well written. Thank you so much.
What a wonderful name for your block! I love it! Thank you for making the instructions clear ~ step by step so it is easy for a new quilter – like me – to follow. I work our high school and in NYS, today is the last day. YAY! So, Happy Summer! I can’t wait to get to my sewing room.
I always love your tutorials! They are so informative and very professional. Thank you so much. I would love to participate in the QA…
Happy quilting,
Dawn : )
Blossoms of Hope is an adorable block! You did a wonderful job on this tutorial. I can’t wait for a chance to dig through my stash for some fabrics for this that are as good as your selections.
Gorgeous quilt squares! 🙂
Thanks so much for the great tutorial. This such a lovely block. I can’t wait to try it.
I would love to join a quilt a long for this block!
Julie, this is one of the best, most comprehensive tutorials I’ve seen!! Great job. I look forward to giving it a try. I would be very interested in a QAL. What a great project.
Hi!
Thanks for sharing. I’ll enjoy making this block. Kisses from Venezuela!
Would like to participate in a QAL for this block. Your instructions are very easy to follow and its a beautiful block.
A QAL sounds like fun. I am a breast cancer survivor myself.
Will try this block, great instructions and a good cause. A QAL would be fun!
Will try this block and would be interested in a QAL, great instructions and a good cause…
Thank you very much for the very clear instructions! A special thank you for including how to press the individual parts of the block so it goes together with the minimum of “bumps” to avoid when quilting later
thanks for a very clear tutorial for your beautiful block, will have a go and see what happens! if successful yes I would be interested in doing a quilt along with you.
Great idea a group quilt along. I would love to join in.
Thank you for sharing your block with us.
I’m going to give this block a try.
Thank you.
Count me in for the quilt-along. It’s a beautiful block! It will be fun to make.
I would love to participate in a group sew a long. Please notify me if you chose to arrange one! BTW, I love the block and your instructions are incredible!
I would love to participate in a group sew along. If you arrange one, please contact me!
I would LOVE a quilt along!!! My sister is a breast cancer survivor (eleven years now!) so I am in! Thank you for the quilt block tutorial. It is beautiful.
That is a beautiful block….I want to make one….My printer is down so I can copy right now…But I can still use a pencil….
I love the block. What is the solid red? Is it part of this collection. I am also seeing this as a baby girl quikt.