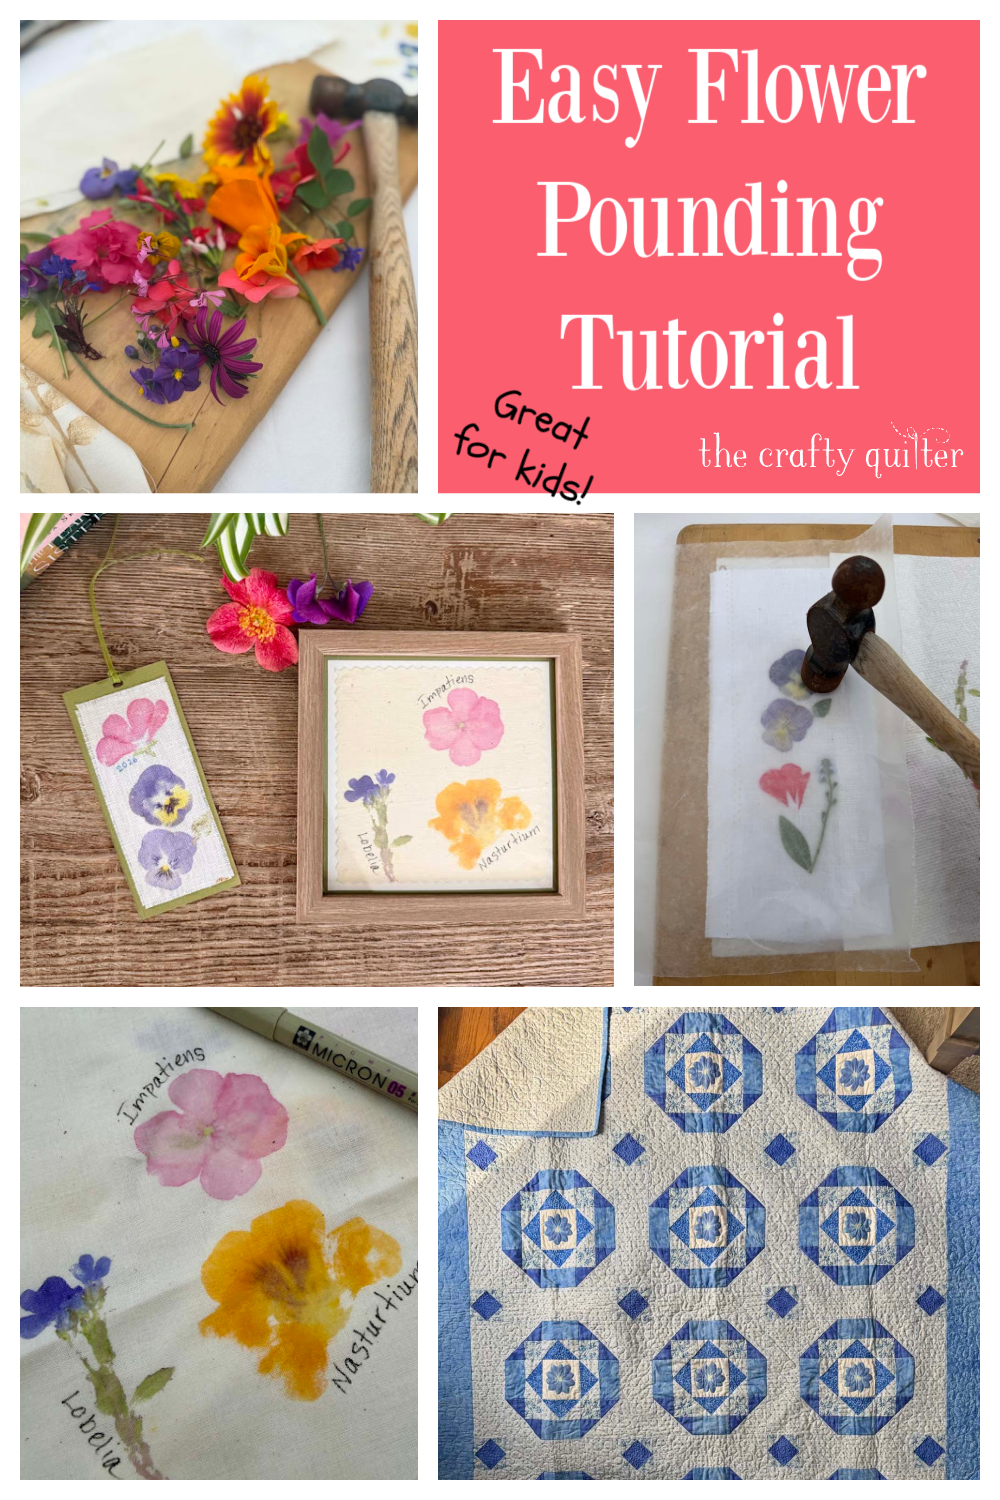
Flower Pounding on Fabric: A Beginner-Friendly Guide to Nature Printing
As someone who loves to both garden and work with fabric, there’s something very satisfying about combining fabric and nature. I was introduced to flower pounding over 20 years ago and I spent several years experimenting with different flowers and techniques. The process is so simple (perfect as a kid-friendly activity) and the results feel a little bit magical. Flower pounding is one of those techniques that looks almost too pretty to be real, but it’s surprisingly easy and requires very few supplies.
If you’ve never tried it before, think of it as nature’s way of printing. Fresh flowers and leaves release their natural pigments directly onto fabric, creating soft, organic designs that are completely one-of-a-kind.
In this tutorial, I’ll walk you through the step-by-step process for flower pounding on fabric, share a few tips for success, and give you ideas for turning your finished nature prints into fun and beautiful projects.

What is flower pounding on fabric?
Flower pounding is very much like it sounds—fresh flowers and leaves are placed on top of fabric, covered with a barrier material and then pounded with a hammer or mallet until the pigment is released onto the fabric. This technique originated in Japan as a natural dyeing technique known as Tataki-zomé which translates into “hammering dye”.
Can the pounded images be washed? Will they fade?
Although flower pounding creates beautiful images, they are not color-fast. The pigments will fade over time and washing in liquid is not recommended. I’ve read that you can dry clean hammered art with good results.
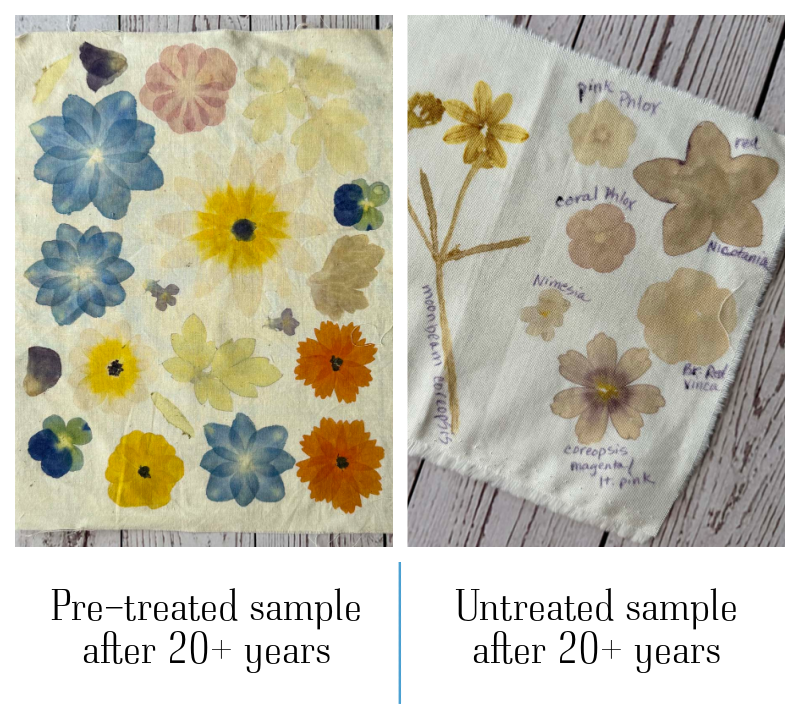
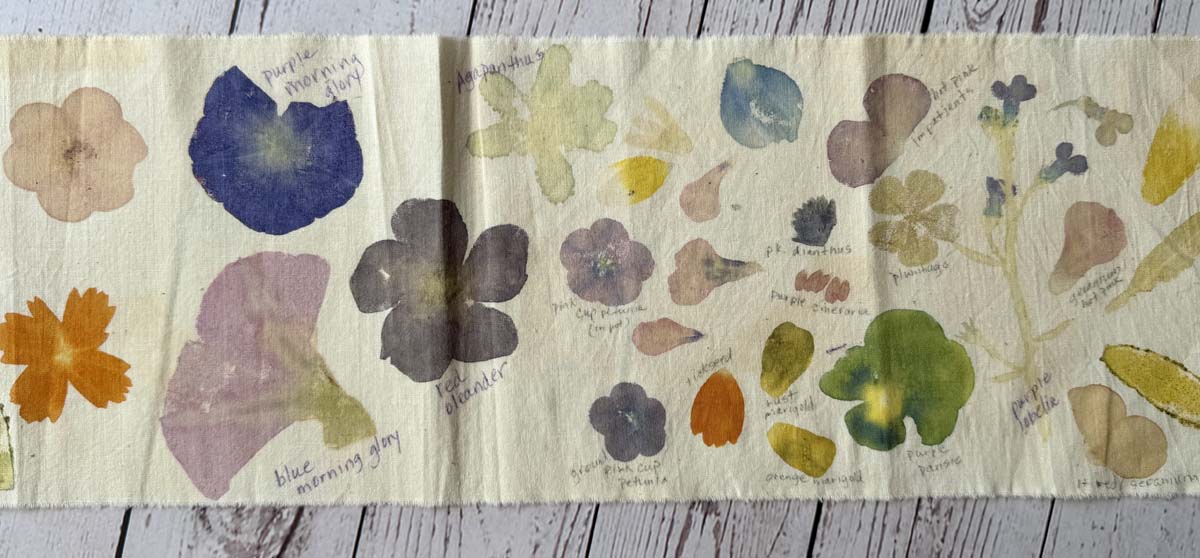
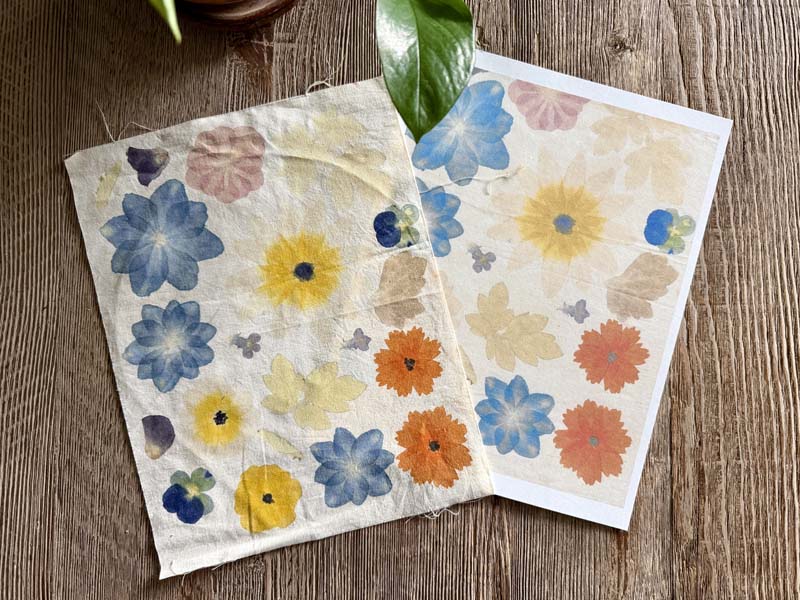
If you want to ensure vibrant and long-lasting colors, you can pre-treat fabric with a mordant. Even with pre-treated fabric, it’s still possible for the images to fade or change color. I found the samples below in a sealed plastic bag in a drawer. They had been there for 20 years or so. Most of the flower images on the left are still vibrant. The ones in the right sample have faded.
Transferring the images with iron-on transfer paper is one way to make them permanent and washable. More information about the transfer process can be found in the Duplicating for lasting beauty section.
If you’re going for the experience of flower pounding and not necessarily a finished product that will last for decades, you can forgo pre-treating fabric. Otherwise, you can follow the instructions for making an alum mordant bath in Step 1.
Supplies you’ll need
- Fabric (natural fibers like cotton or linen work best). I prefer to use plain 100% cotton muslin.
- Watercolor paper or handmade paper is an alternative option that works well.
- Alum for pre-treating fabric (optional)
- Fresh flowers and leaves
- Hammer or mallet
- Hard surface (like an old cutting board or concrete slab)
- Paper towels
- Parchment paper or Wax paper
- Scotch tape
Step 1: Prepare your fabric
Start with clean, pressed fabric. This helps the plant pigments transfer more evenly and gives you a smoother surface to work on.
Lay a paper towel on your work surface. Place the fabric on top of the paper towel.
Pre-treating fabric (optional)
If you want your nature prints to last, pre-treating fabric with an alum mordant bath will ensure colorfastness and vibrancy. Alum can be found in the spice isle of most grocery stores or online for larger quantities. Work with 1-2 yards of fabric at a time.
- Before pre-treating the fabric, wash it thoroughly by machine or by hand to remove any manufacturing finishes (do not use fabric softener).
- Place the clean, wet fabric in a large bucket, tub or sink.
- Gloves are recommended when working with alum to avoid any skin irritation.
- Dissolve 4 tablespoons of alum in 4 cups of hot water and pour over the wet fabric. Add just enough hot water to cover the fabric and mix with gloved hands to incorporate.
- Allow to soak for several hours or overnight.
- Remove fabric and rinse thoroughly.
- Hang fabric to dry and once it’s still slightly damp, press to remove any wrinkles.
- Cut into desired sizes for your project.
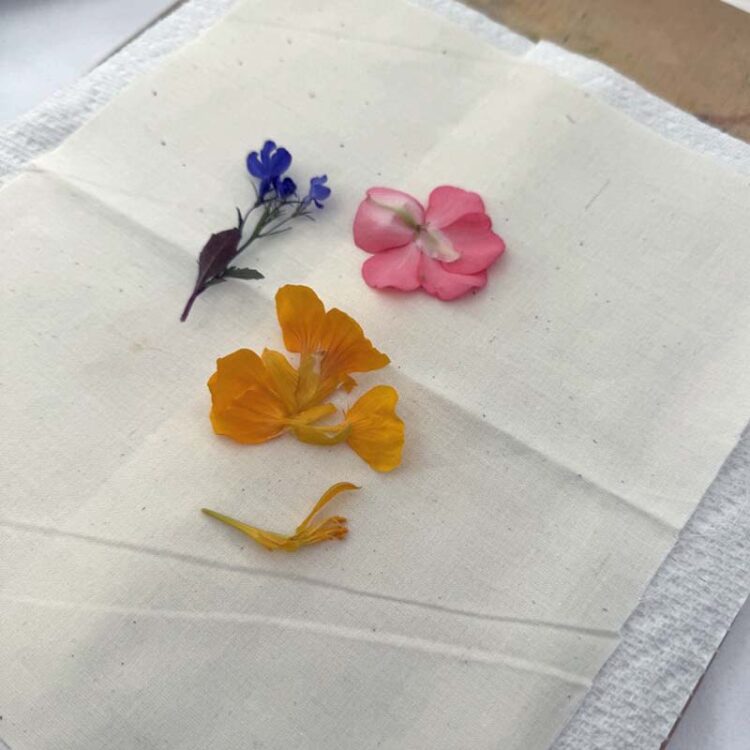
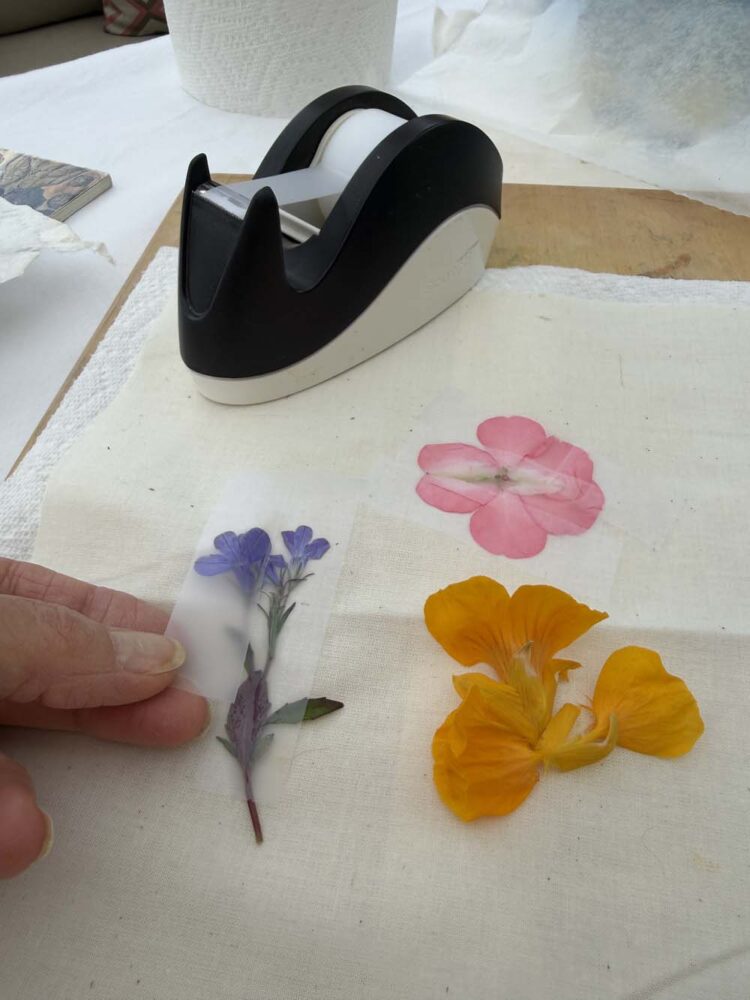
Step 2: Arrange your flowers and/or leaves
Place your flowers and leaves face down directly onto the fabric, in the design you want. If a flower has many overlapping petals such as a chrysanthemum, you will have to separate the petals first and then reassemble them on the fabric. If you hammer the entire flower head, you will end up with a big blob of color. See the section on best flowers for flower pounding for more guidance.
Design options:
- Create a loose, scattered look
- Arrange them in rows or repeats
- Build a more intentional composition
Keep in mind that the shapes will soften as you pound, so simple designs tend to work best.
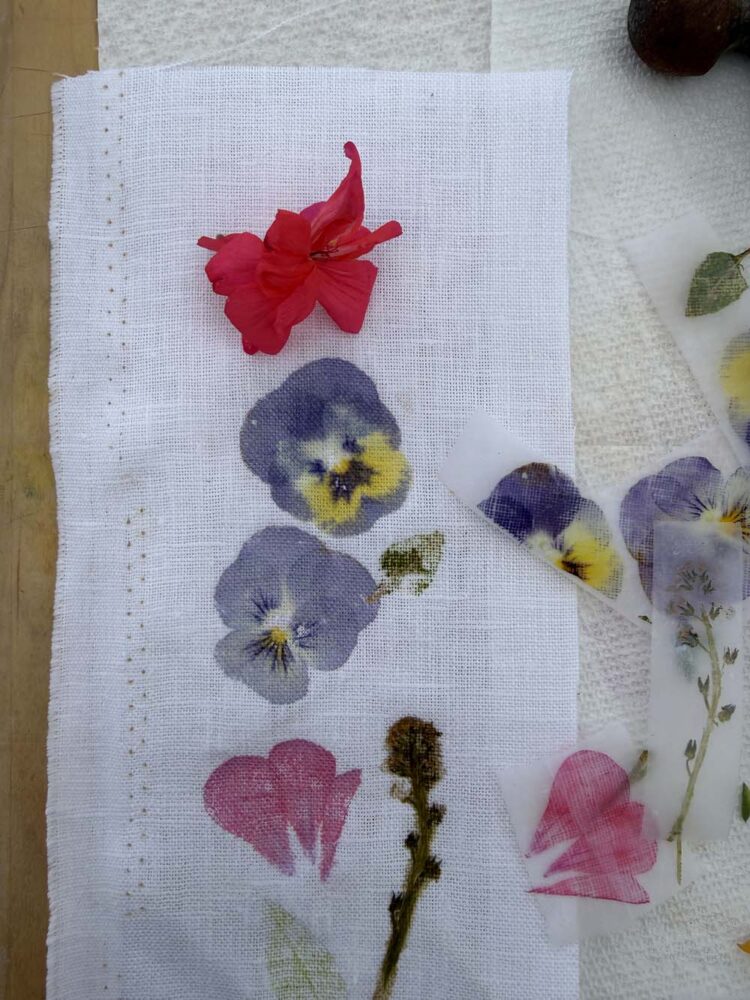
Step 3: Cover and secure
I’ve found that using clear tape to keep the flowers in place works best. This also makes it easy to remove the excess plant material from the fabric after pounding.
If you’re working on watercolor paper or handmade paper, use a paper towel instead of tape and work carefully to keep flowers in position.
- Cover each flower or leaf entirely with tape.
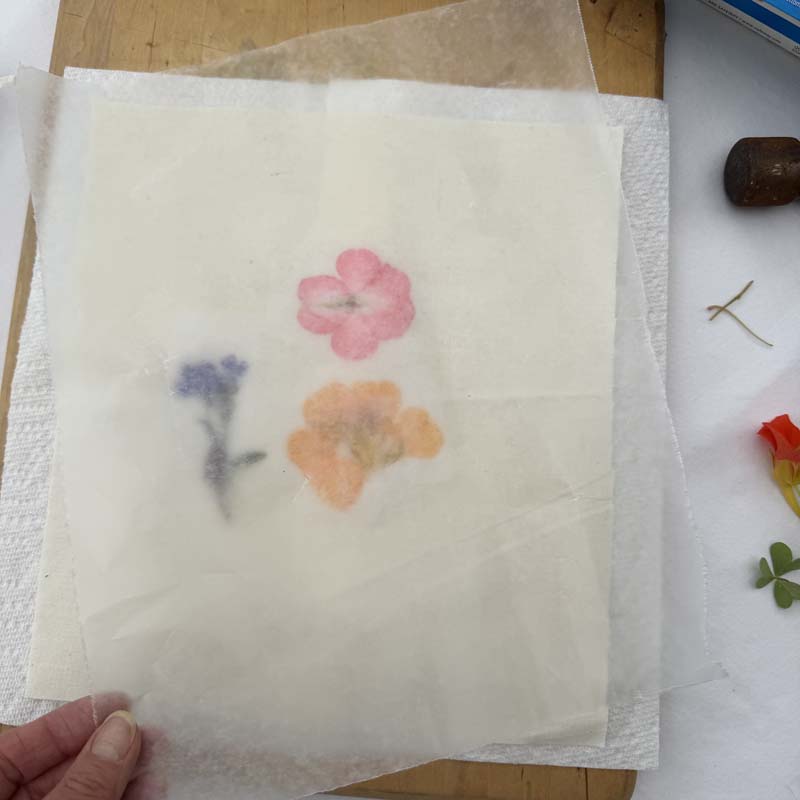
- Cover the prepared flowers with wax paper or parchment paper to protect the fabric. I prefer wax paper because I can easily see the flowers underneath.
Alternatively, you can use another layer of paper towel on top or a combination of sparse tape and a paper towel.
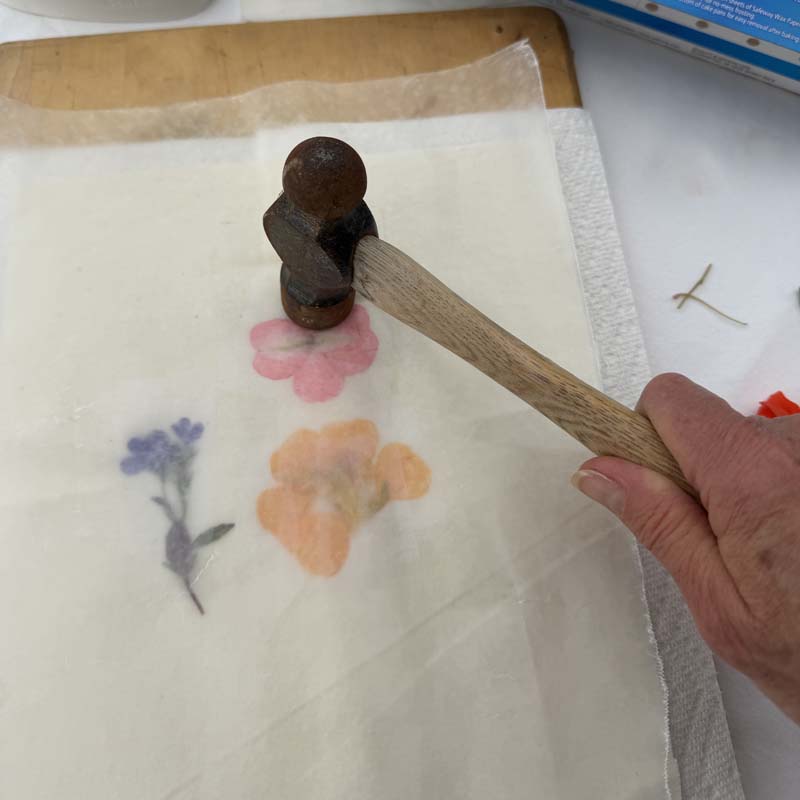
Step 4: Start pounding
Now for the fun part!
- Using a hammer or mallet, gently tap over each flower and leaf.
- Make sure to hit all parts of the plant material.
- Start light, then increase pressure as needed.
- Work evenly across the surface.
- Gently turn the fabric over to see if you’ve missed any places with the hammer. If so, turn the fabric back over and hammer those spots again.
Step 5: Reveal the print
Carefully lift the tape and remove the plant material. Be careful as the pigments are still wet and can smear easily.
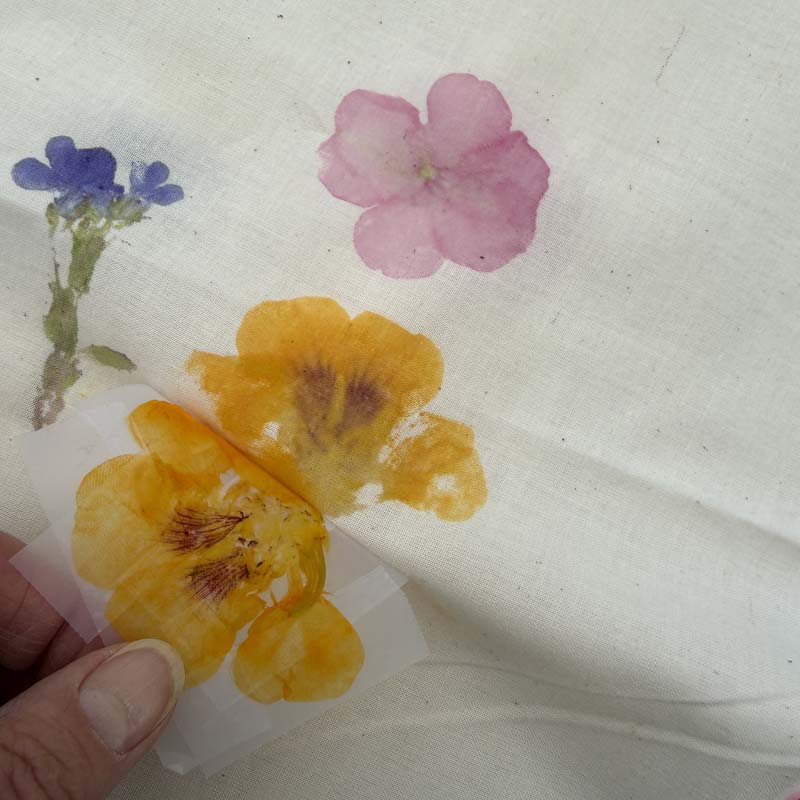
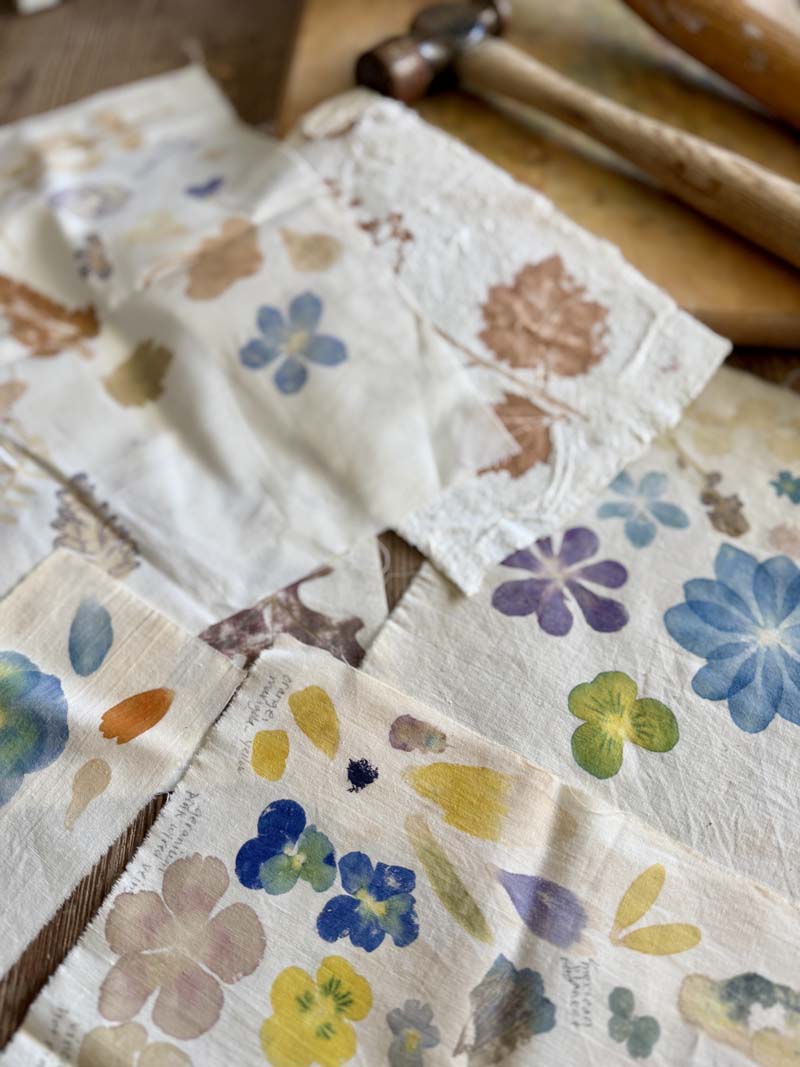
What’s left behind is a beautifully imperfect print—soft, organic, and completely unique. Some flowers leave bold color, while others create more subtle impressions. Some flowers leave behind a different color once pounded. That variety is part of the charm.
Step 6: Dry and set
Allow your fabric to dry completely. To help preserve the design, you can heat set with a warm, dry iron for a few seconds.
Keep in mind that these are natural pigments, so some fading over time is normal (unless you pre-treat your fabric)—and part of the handmade look.
Best flowers for flower pounding
There are so many flower choices for botanical fabric art, but not all of them will hammer with equal beauty. Look for flowers that are fresh and perhaps avoid overly “juicy” ones such as lilies and tulips for your first attempt. Experiment and have fun!
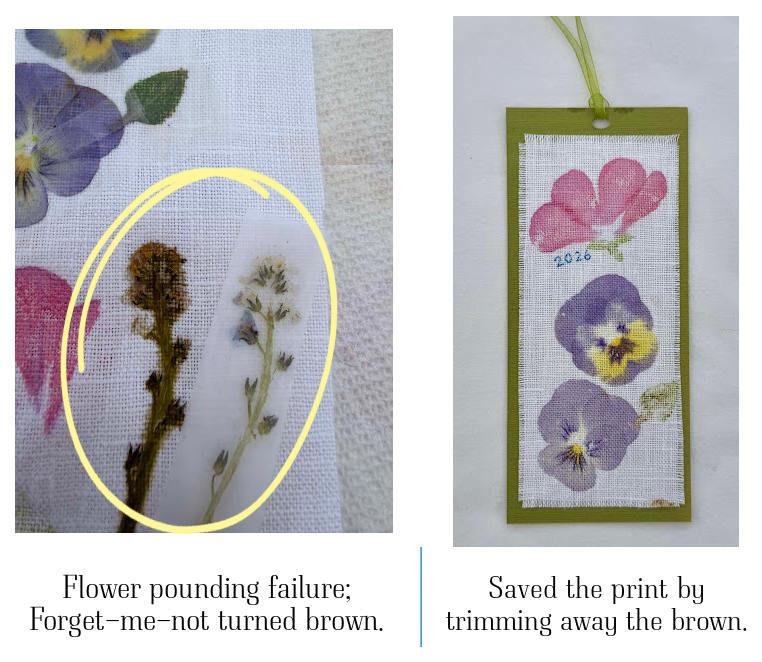
Experiment with different flowers and have fun! I like to make a test strip using the same material that will be in the project. I write down the name and color of each pounded flower next to its print for future reference.
I’ve found the following flowers to be reliable choices.
- Pansy
- Coreopsis (tickseed)
- Lobelia
- Impatiens
- Daisy
- Cosmos
- Marigold
- Dianthus
- California Poppy
- Gerber Daisy
- Nasturtium
- Larkspur
- Pink Oxalis
- Periwinkle
- Primrose
- Vinca
- Rose
- Phlox
- Petunia
- Zinnia
- Fern
Flower pounding – a kid-friendly activity
I first learned of creating this type of nature print from a Parent Magazine article in the late 1990’s. It was featured as an outdoor activity for kids while camping or exploring during the summer months. The article suggested collecting leaves and wildflowers, then using a flat rock to pound them onto fabric or watercolor paper. It was meant to provide a nature journal of a child’s summer explorations.
As a mother of four, I loved this idea and put it to use with my own kids. I even brought flower pounding to the preschool classroom I taught in. And I’m still having fun with it, but now it’s with my grandkids! On a recent visit, they each made a flower pounded fabric square.
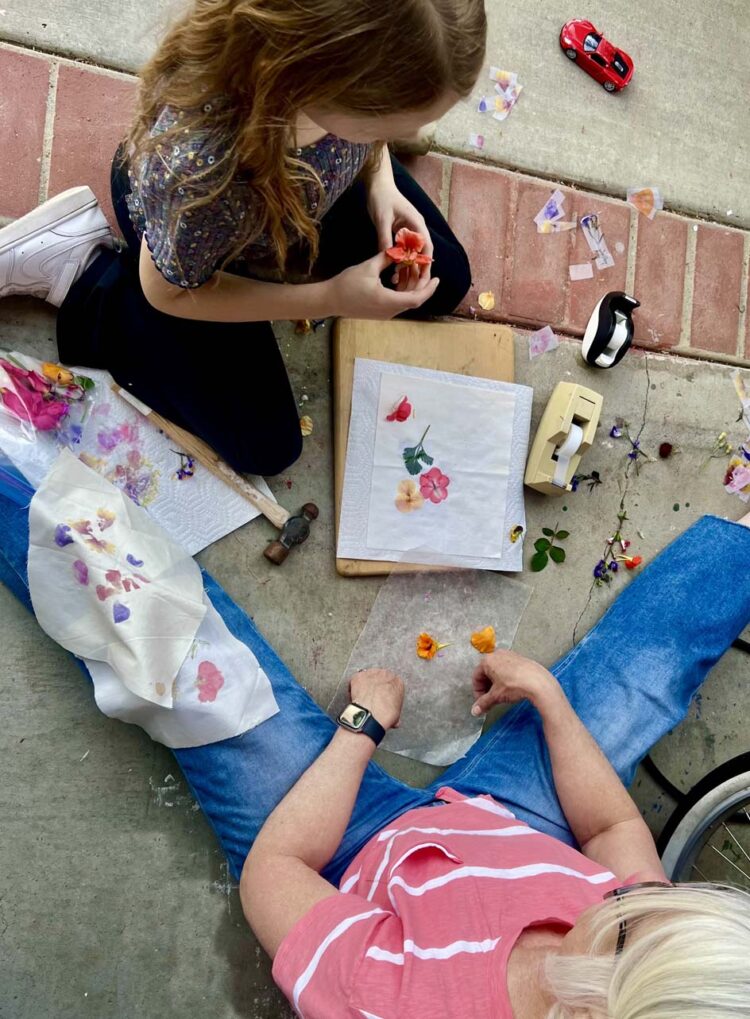
Always supervise children when using a hammer or mallet. A flat rock could also be used in place of a hammer. This is best done as a one-on-one activity!
Ways to use flower-pounded images in projects
Once you’ve created your flower-pounded image, the real fun begins. Even a small piece can be turned into something special, and I’ll share a few of my favorite ways to use these botanical prints in projects.
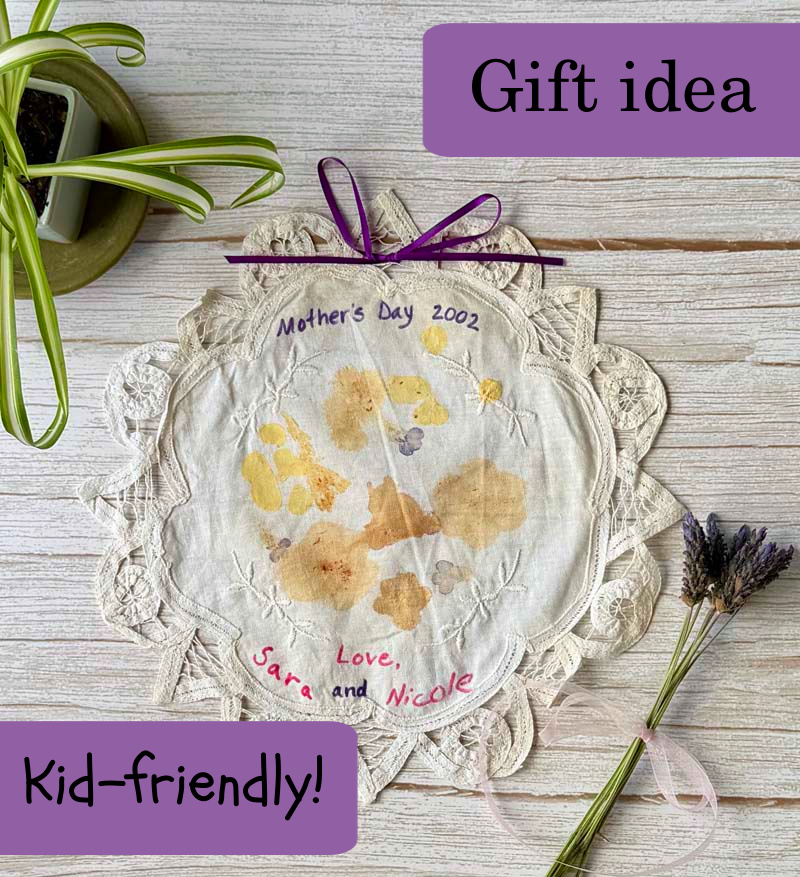
Mother’s Day Doily
Below is a Mother’s Day gift that two of my daughters created for my mom using a doily purchased from the dollar store. Since it was made over 23 years ago, the flower prints have faded and perhaps changed color. That is the nature of this project – since it wasn’t pre-treated, it will fade over time.
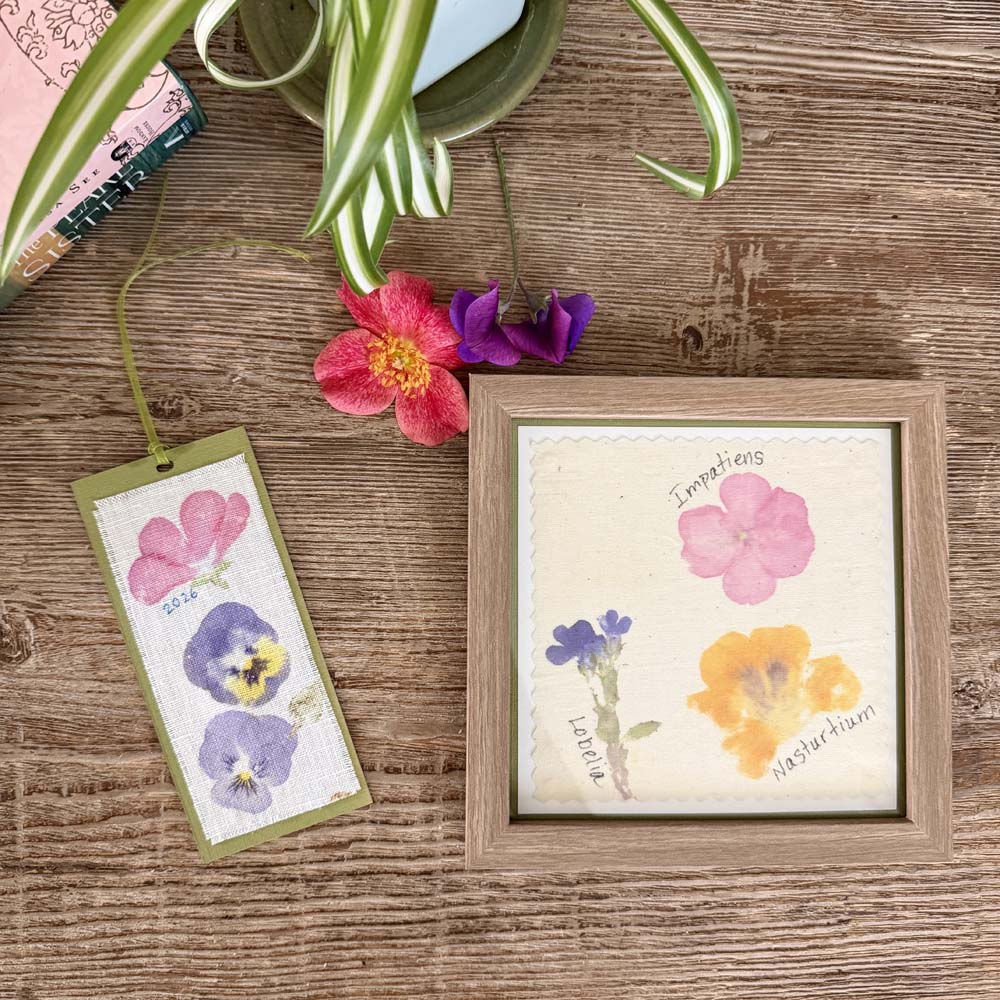
Bookmarks
Bookmarks provide a great foundation for flower prints and they make great gifts!
Linen fabric works well for this project because the edges can be frayed evenly for a nice effect. Cotton fabric would work equally as well, just make sure to “pink” the edges to prevent unintentional fraying.
- Once the flowers have been pounded onto the fabric and heat set, cut it into a rectangle sized for a bookmark.
- Cut a rectangle of cardstock 1/2-inch larger than the fabric.
- Use double sided tape (Scor-Tape works well and is acid-free) and adhere the fabric to the center of the cardstock.
- Punch a hole at the top of the bookmark.
- Cut a 8″ length of ribbon and loop it through the hole and secure with a knot.

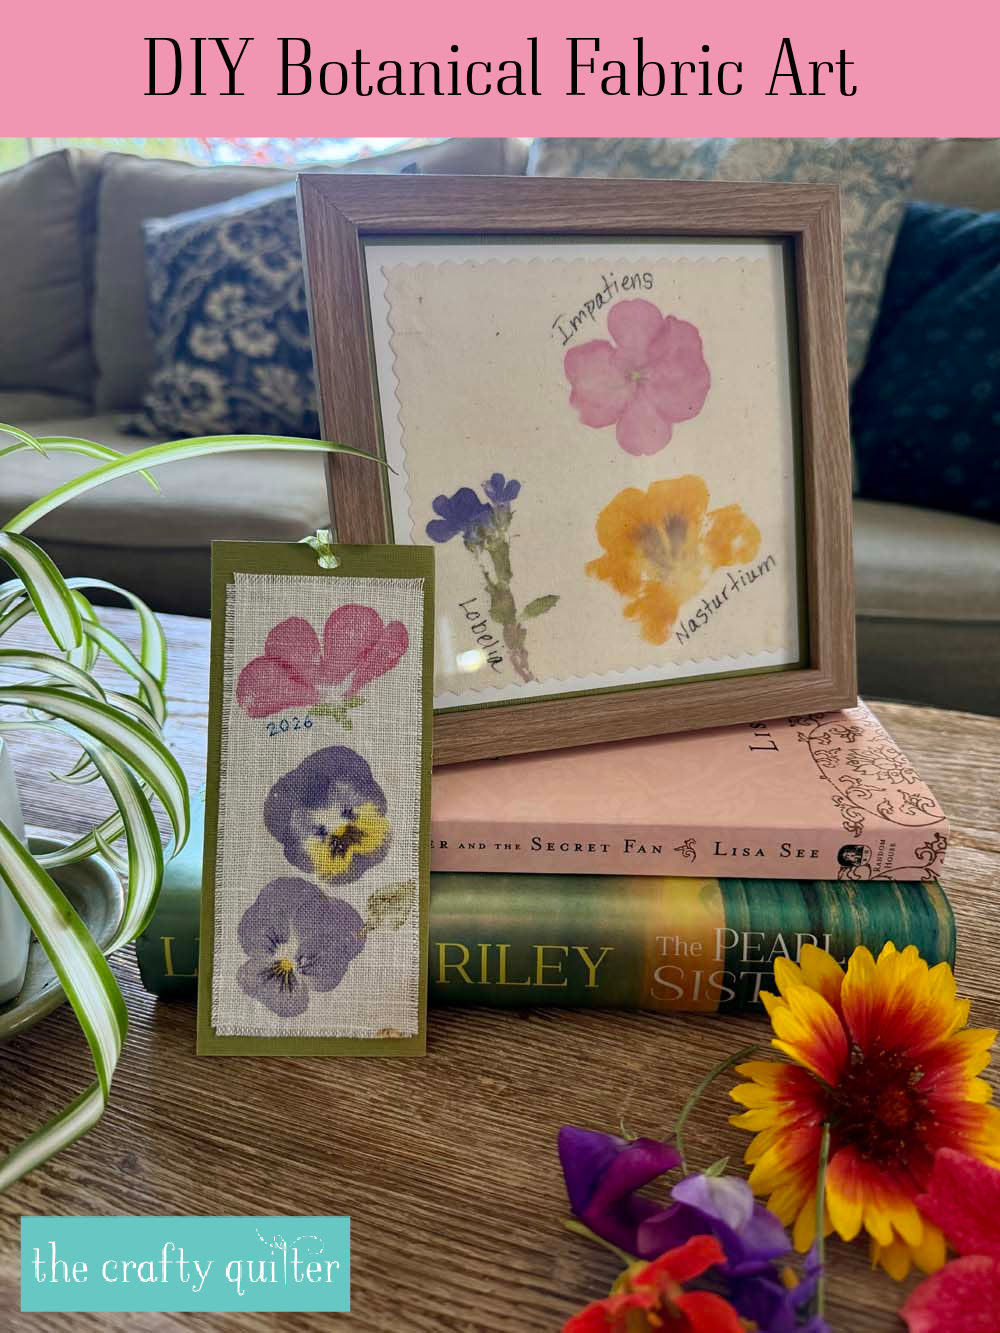
Framed art
It’s easy to turn your botanical image into framed art. Picture frames come in a range of sizes and colors giving you lots of design choices.
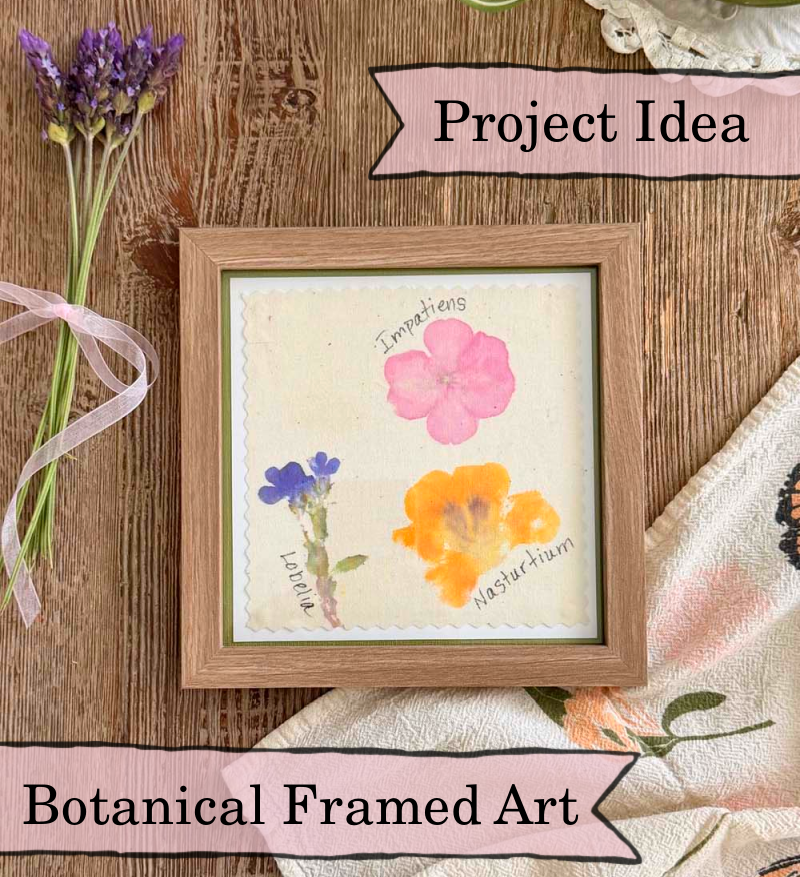
- Once the flowers are pounded and set, you can add words or embroidery stitches to embellish the image.
- I chose a black Micron pen and wrote the botanical name next to each flower.
- Pink the edges of the fabric if desired. This step isn’t necessary since it’s encased in glass, but I liked the look of the edge this way.
- Adhere the fabric onto mat or cardstock and set into the glass frame.
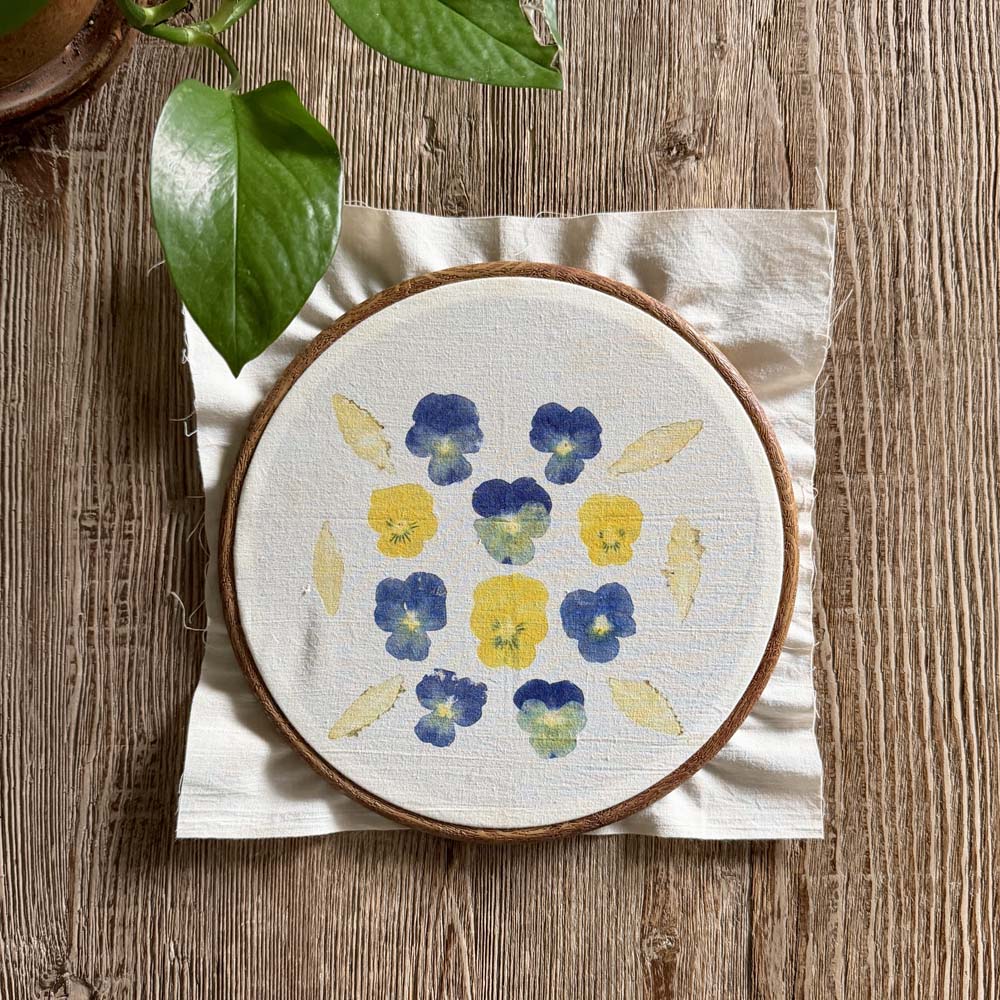
Embroidery hoop framed art
A natural frame for flower pounded fabric is an embroidery hoop. You could take it a step farther and add embroidery details to the image for an extra special touch. I have yet to try that, but I’d love to experiment!
Duplicating the images for lasting beauty
The images you create with flower pounding can be copied onto paper or cardstock using a color copier. This option allows for numerous paper-based craft activities.
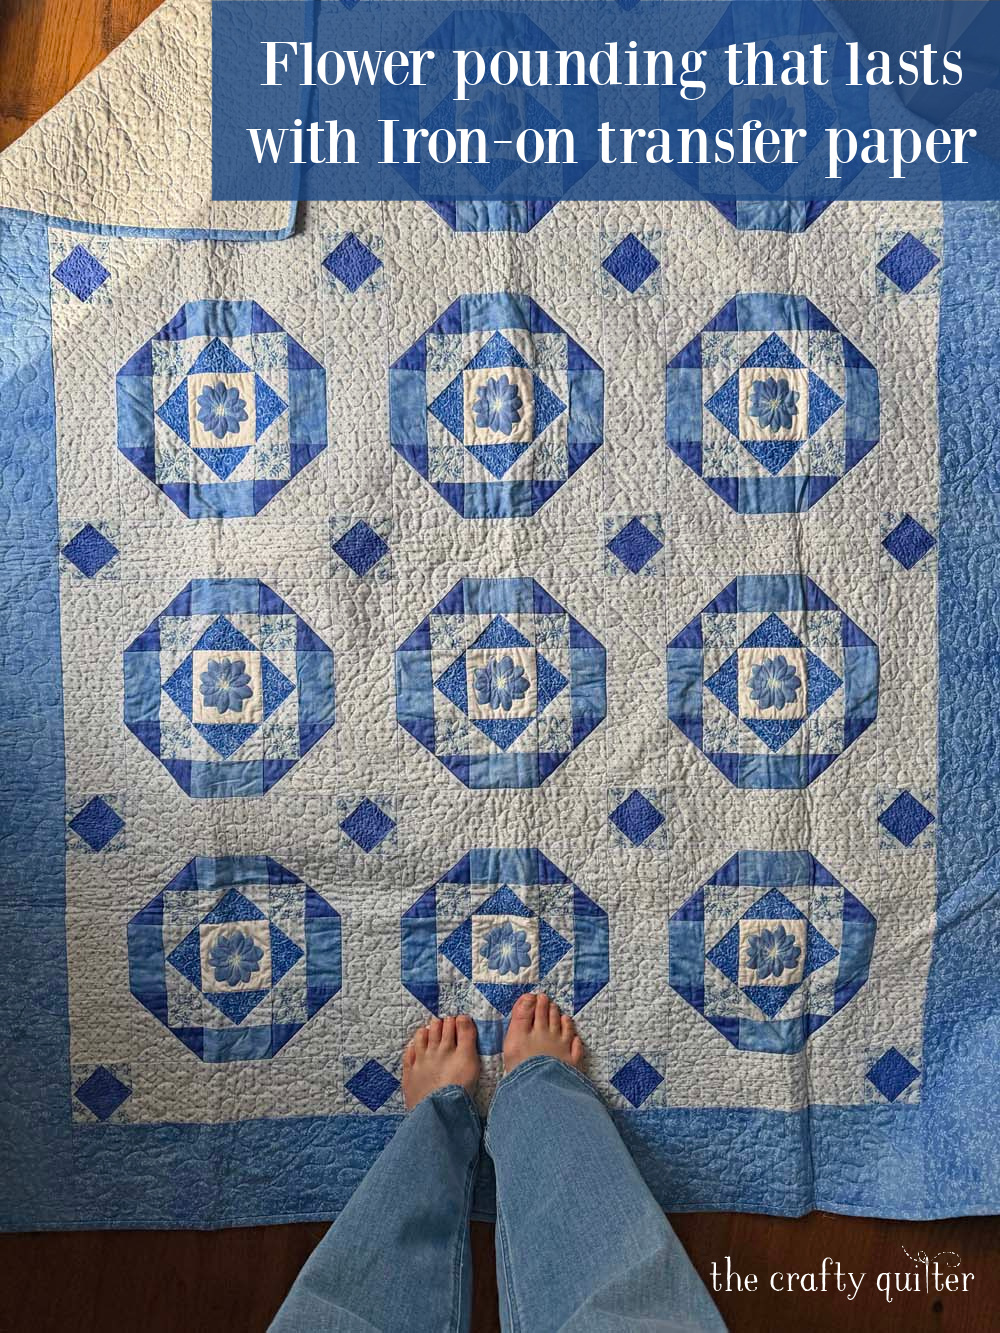
As a quilter, I was excited to turn my flower-pounded fabric into a quilted wall hanging—until I realized the design would gradually fade over time. A simple solution is iron-on transfer paper. This method allows you to capture your flower-pounded image and make it permanent, so it can be used in quilts, t-shirts, bags, and more. Iron-on transfer paper works with an at-home printer (an inkjet is most common) and is then applied to fabric using an iron or heat press.
Recommended product: Avery Printable DIY Fabric Transfers
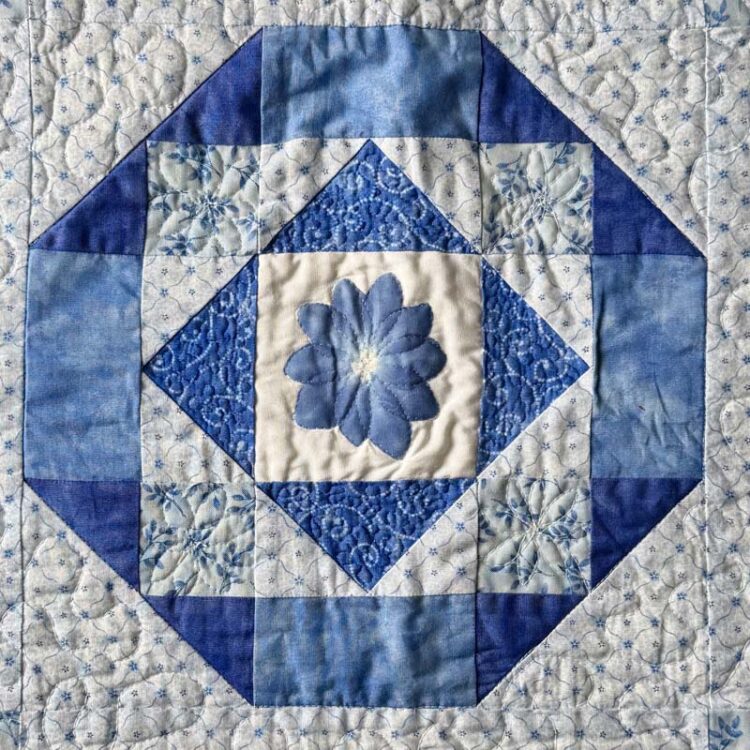
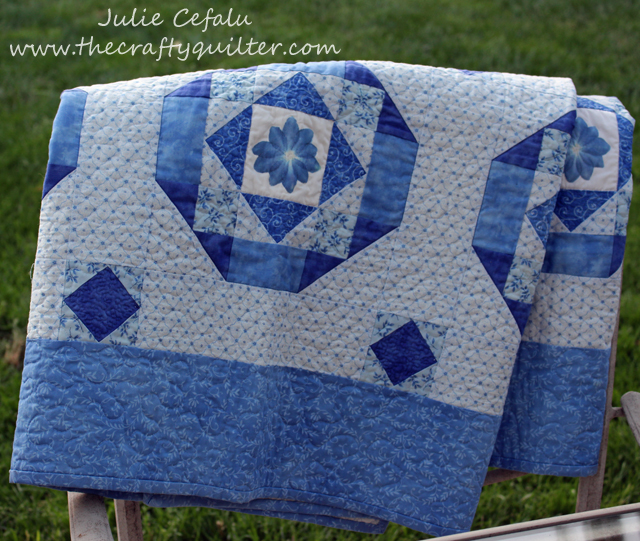
A great example of this technique can be found in my Blue Delphinium quilt that I made 26 years ago. I used iron-on transfers to transfer a flower pounded blue delphinium onto small fabric squares. These were used as the center of each quilt block.
Now I have a quilt that I can cherish for many years to come.
Tips for the best results
Flower pounding is simple, but a few small adjustments can make a big difference in your final results.
Choose fresh, vibrant flowers
The fresher the flowers, the better the pigment transfer. Look for blooms with rich, saturated colors—these tend to leave the strongest impressions. If a flower looks a little tired, it probably won’t produce much color. If you need to pick flowers before using them, store in a plastic container lined with a wet paper towel in the refrigerator.
Test before you commit
Not all flowers behave the same way. Some produce bold prints, while others barely leave a mark (or surprise you with unexpected colors!). Ask me how I know (see below). Try a few test swatches before arranging your final design.
Stick with natural fabrics
Cotton and linen absorb plant pigments much better than synthetic fabrics. If you’re a quilter, this one’s easy—just reach for your quilting cotton. 😃
Use a protective layer
Parchment/wax paper or a paper towel helps prevent splattering especially if you don’t use tape. It also keeps your hammer clean and can help hold delicate petals in place while you work.
Pound evenly and thoroughly
It’s tempting to rush this step, but even coverage is key. Make sure you tap across the entire surface of each flower or leaf so you don’t miss any detail. Check the backside of the fabric to verify the pigment has released entirely.
Don’t overcrowd your design
Give each flower a little breathing room. Overlapping can create muddy colors instead of clear, defined prints.
Avoid sun exposure and water
To preserve the bright colors in your image, avoid sunny locations. Don’t let your project get damp or wet as this can dilute the colors. Even though the colors may naturally fade over time, think of it as part of the handmade charm—soft, organic, and always evolving.
Final thoughts
Flower pounding is one of those simple techniques that invites you to slow down and notice the beauty in the details. No two prints are ever the same, and that’s part of what makes it so special. It’s also a wonderful activity to share with kids – hands-on, creative, and just a little bit magical as they watch the colors appear right before their eyes. Whether you use your finished fabric in a quilt, a small handmade gift, or simply enjoy it as a creative experiment, it’s a beautiful way to blend creativity, nature, and stitching.


Discover more from The Crafty Quilter
Subscribe to get the latest posts sent to your email.


Would laminating the paper preserve the colors indefinitely?
I’ve always wanted to do this. Thankyou for all your tips and advice, they are greatly appreciated! I love your delphinium quilt. I’ll have to try that too as I am a quilter!
It was really neat to see photos of your flower pounding from 20 years ago. I did try that years ago and it was fun. Your Blue Delphinium quilt is also beautiful.
This looks like a lot of fun. I’ll give it a try this summer.
I, too, did flower poundings 25-30 years ago and still have my poundings as well as my Flower Pounding book. I remember using a mordant and how picking flowers at different times of the day produced different colors. While pounding I made everyone crazy by singing ‘Maxwell Silver Hammer.’ lol What fun memories you gave me today!
So neat! I’d never heard of this technique – lovely results!