How to fix and prevent flipped seam allowances
Today I’m going to show you how to fix and prevent flipped seam allowances. I’m sure this has happened to every quilter at some point. You’ve nested your seams and pinned them securely. You stitch your seam like always and when you turn it over, you see the bottom seam has flipped. Oh, the frustration! But, trust me, it’s not you. It’s your sewing machine.
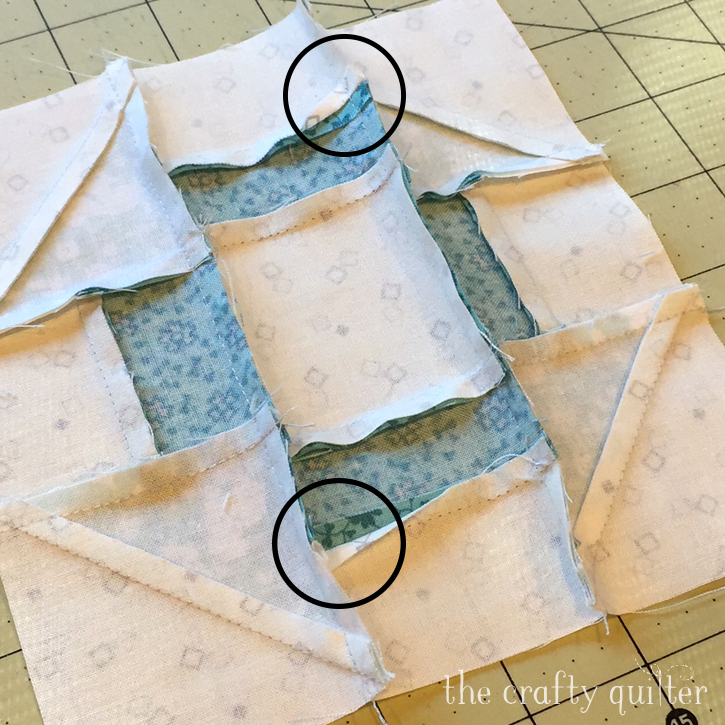
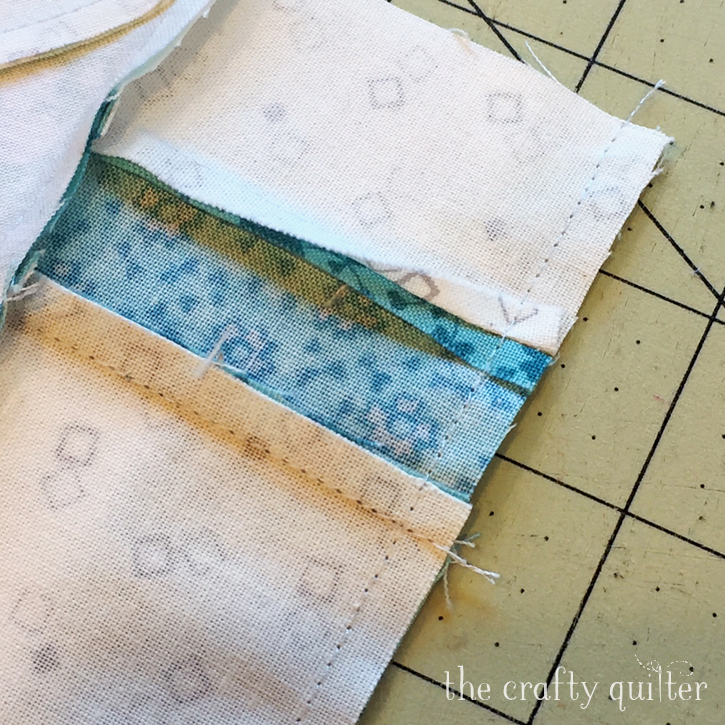
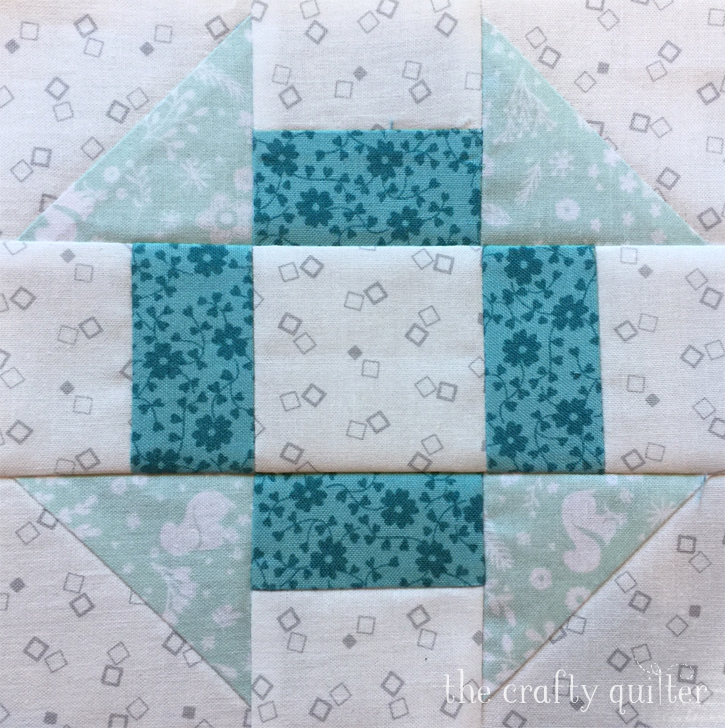
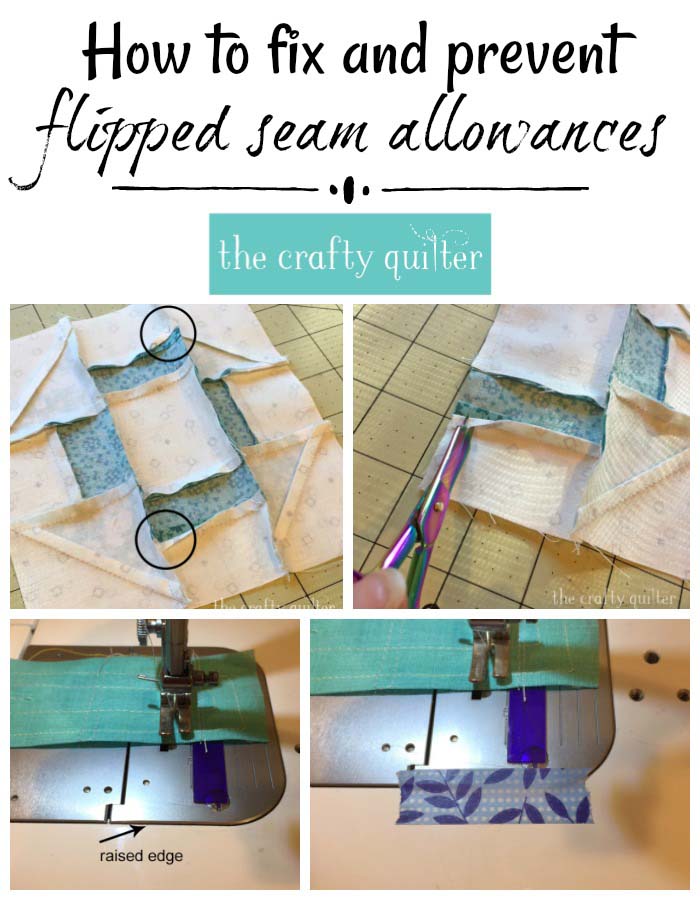
In my example above, only one half of the seam allowance has flipped over. It looks like an open seam allowance. Usually it’s the complete seam that has flipped over. I don’t have a photo of one, but I think you know what I mean.
Let’s start with how to fix this little problem. There are several things you can do.
- You could just leave it be. Iron it the way you want it to go. You’ll probably have a little twist at the seam. Nobody will ever know!
- Un-sew that small section and re-sew it again. Ugh, really?
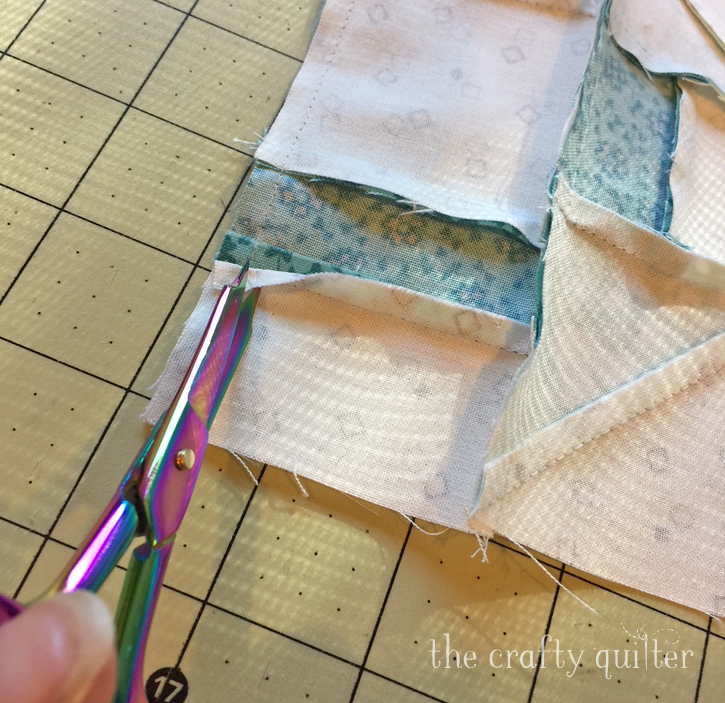
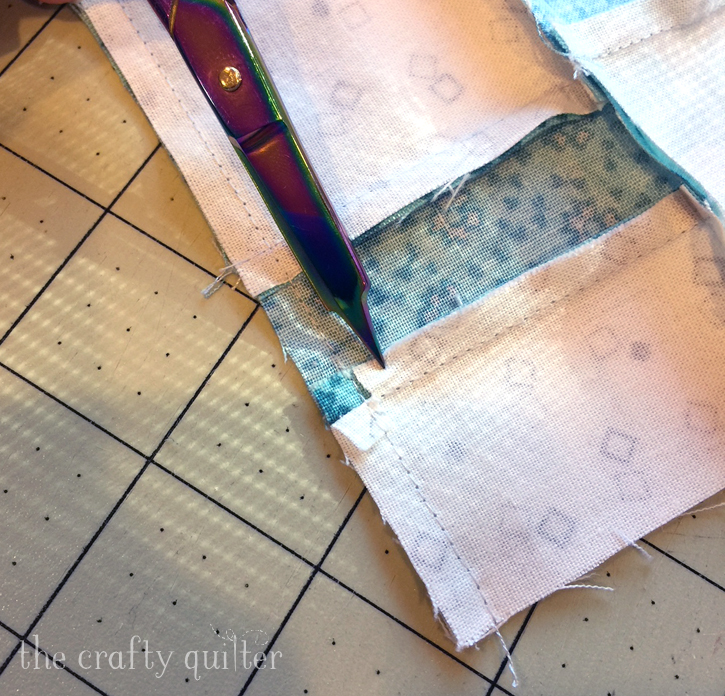
- Snip into the seam allowance just behind the seam. This allows the seam to lay flat. It’s my preferred method. Yes, I’m lazy that way.
To snip the seam allowance, you’ll need small, sharp scissors. I’m using my new Tula Pink Micro Tip Scissors. I think they have found their true purpose in life. They worked perfect for this; although most any scissors will do, but be careful with this. You just want to snip up to the seam by a few threads. Err on the side of “not too close” but close enough.
Now your seam allowances will lay flat. Pretty as a picture!

Now let’s get to the really important part of this lesson. How to prevent flipped seams from happening in the first place! It’s such an easy solution; you’re going to love it.
The reason your seams are flipping is because there is a “lip” or a raised edge on your sewing machine bed. Right where the throat plate meets the arm or extension table. When your bottom seam allowance runs across that edge, it flips over. It will only happen with the seam allowances that are facing the needle/throat plate.
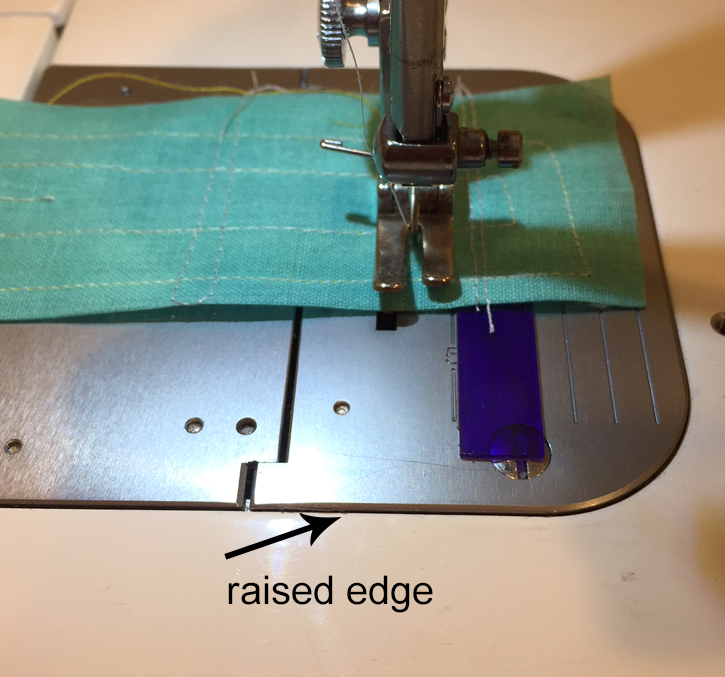
To prevent that from happening, just take a piece of tape (I’m using Washi tape because it’s cute) and place it across the raised edge. Don’t press it down too much along the raised edge. You want it to act as a bridge. This will put an end to your flipped seams.
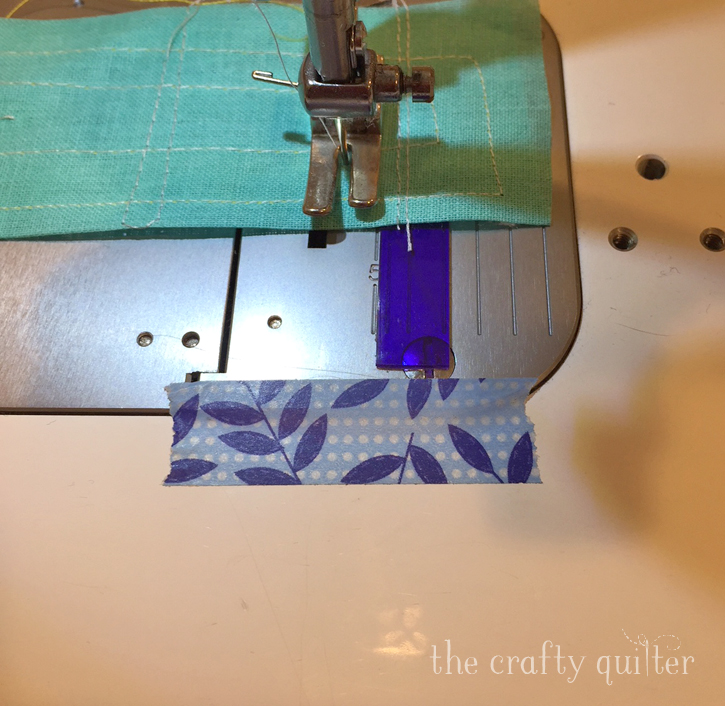
In case you’re wondering, I have a starter scrap under my presser foot and that purple, thick tape is my Sewing Edge. It gives me the perfect, scant 1/4″ seam allowance. You can read my tutorial about that here.
Of course, there is a product made specifically for the task at hand. It’s called the Betty Bridge Supreme. I have used it before, and it works wonderfully. It smooths out the height difference with a little more “oomph” than a piece of tape. But try the tape! I think you’ll find it makes a big difference.

How’s that for an easy fix? Now go forth and make beautiful seams!


This is amazing! I’ve just put washi tape on my machine. Can’t wait to try it!
Well, your Tula so called scissors are prob expensive, while I have the very same bought for less than 1 dollar on wish
Discovered this recently by accident! Have an ancient machine & drew a 1/4 inch line with Sharpie. It eventually rubbed off, so I replaced the line & covered it with clear tape. Haven’t had any ‘flips’ since!
The only problem with cutting it, is it leaves a weak spot that could eventually come apart. It only takes a few minutes to cut two threads, fold it the correct way and take a few stitches. Much stronger.
The problem is it’s a the first piecing of the block, so it would require taking the whole block apart and not only this block but all of the horizontal border blocks.
Simple n effective !
Thanks for sharing
Washi tape here I come! Thanks for the explanation. All along, I thought it was me.
Loved your easy fix! I appreciate your tips! Thanks sharing with all of us.
Great fix! Thanks Julie
Great tips! Thanks so much!
Love your blog. Where do you buy the thick purple tape? I would like to try that and the washi. I would love
to have 1/4 inch seam throughout.
Foam mounting tape from the framing department is perfect for a raised 1/4 seam allowance guide. Cover the top with Washi tape for a pop of color for contrast.
Thank you so much!!! As a relatively new quilter (just a little over a year), I’ve felt a little like a criminal ;-} for snipping flipped seam allowances. Now I know it’s “legit”. I’m also going to use the tape solution.
You’re a peach! Thanks again.
Great hint! I thought it was just me causing this problem. I had a couple of seams like that this evening! I am going to give this a try. Love your blog, TFS
Thanks for the tips. I actually have done the “fixes”, but now, I mostly just leave it the way that it is. I will try to washi tape. Love reading your blog. I sewed your Cookie Crumb catcher before Christmas. I love it!
Great ideas, as usual. Thanks so much for sharing your tips!
When I am sewing an intersection , I have a strip of 1″ wide newspaper any length and put this paper under the seam just before I get to this intersection. I do not change the length of the stitch. When I am done with the sewing, I just pull the paper off. You can also use these paper strip for the start or end of a seam.
Thank you !
Thank you, Julie. That will make such a difference for me.
Thank you for these great tips!! I appreciate it. I pinned it too.
Thanks it really works
OMG!! I just used your suggested solution for flipped seams and it worked like the proverbial charm. Who knew? thanks so very much.!
While I have ironed my down in the past, I will now use the tape. Thank you, love these simple fixes for something so frustrating.
Well, aren’t you clever? Thanks for that great tip!
Thanks, Julie! Another brilliant but simple fix from a talented quilter.
Oh, by the way. Your hair cut looks cute.
Diane
Yay! Thank you for the great idea. I am off to add Washi to my plate!!
Diane S.
You also can sew the block from the wrong side. This allows you to see which way the seams are laying.
Thanks, Julie! Been there and have always fixed it the way you have described, except with the BEST scissors EVER, by Kei !!!!!
I love this tip. I have a Triple Irish Chain that I finished but didn’t have ready for quilting for precisely this reason. I will do the snip method where it seems best and fix the rest by ‘unsewing’. However, the fact that this washi tape will help prevent this in future is one I am definitely going to experiment with. Now I just have to read the hint about the blue tape for the perfect 1/4 inch seam. Thank you so much – I love your blog and always learn from you. Dianne ( New Brunswick Canada).
Excelente, agradecida
Thank you for this great tip! I’m hitting my head saying “why didn’t I think of that?!” So glad someone did!
Mystery solved! Thanks so much!
Julie, thank you so very much for your wonderful tip. I appreciate everything you recommend to us all. Again, I thought it was me slipping up as usual. I will proceed to tape up my machine where it counts and make a difference!
And, here I thought I was the only one who did this…I’m lazy too!! But I always feel guilty doing it….I hear my Mom reprimanding me LOL. Now I can just say I’m not the only one who does this :-).
Who knew! Thanks!
Your unsewing gave me a smile. I was forever trying to carefully not say unpick. Then…revelation, the term ‘pick’ is a type of hand stitch so unpick is to take out the stitch. Now I say unpick with abandon…unfortunately it is muttered with abandon and includes swear words in my sewing room all to often…
These are wonderful hints. I’m afraid that I am guilty of leaving my flipped seam unless there is a strong reason to fix. Now I will use your fix, I love it.
Thank you- this happens to me all the time! I thought that I needed to press it better…….off to put tape on my machine!
Hello Julie; Thank you for both of these fabulous tutorial tips. I will be giving them both a try today with a project I only half way finished yesterday. So, I will snip a few a few of the flipped seams and also put some tape in front of my needle plate. I have marked my quarter inch seam with tape for many years and it works fabulous! Thank you for all of your great tip tutorials and have a fabulous day!
And all the time I thought it was me! Thanks for the tips for preventing the problem and, if it happens, fixing it. I know I’ll use both
Thanks! My new machine seems to do that quite a bit. I will try the tape!
Great Tips!!!!
Wow thanks ! Simple yet so effective, thanks for sharing