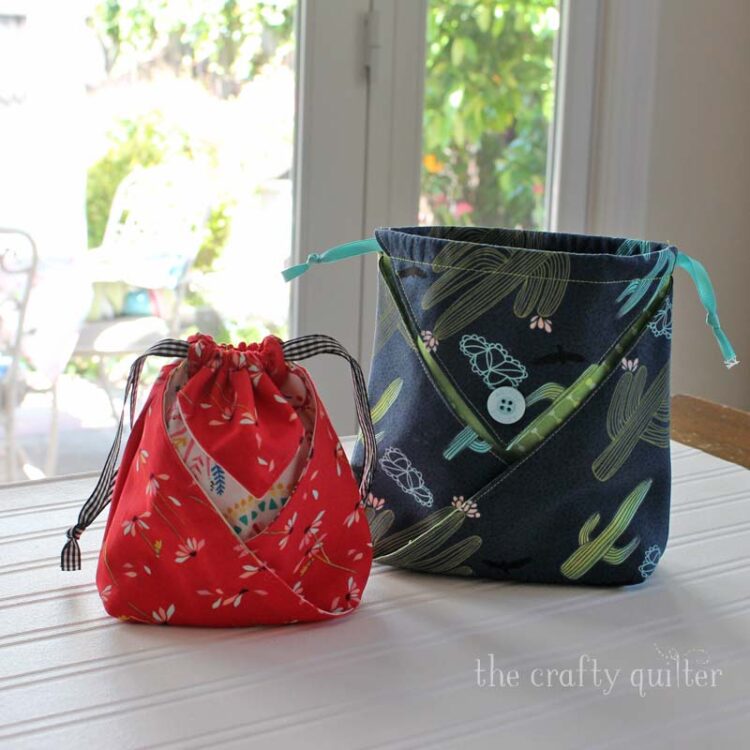
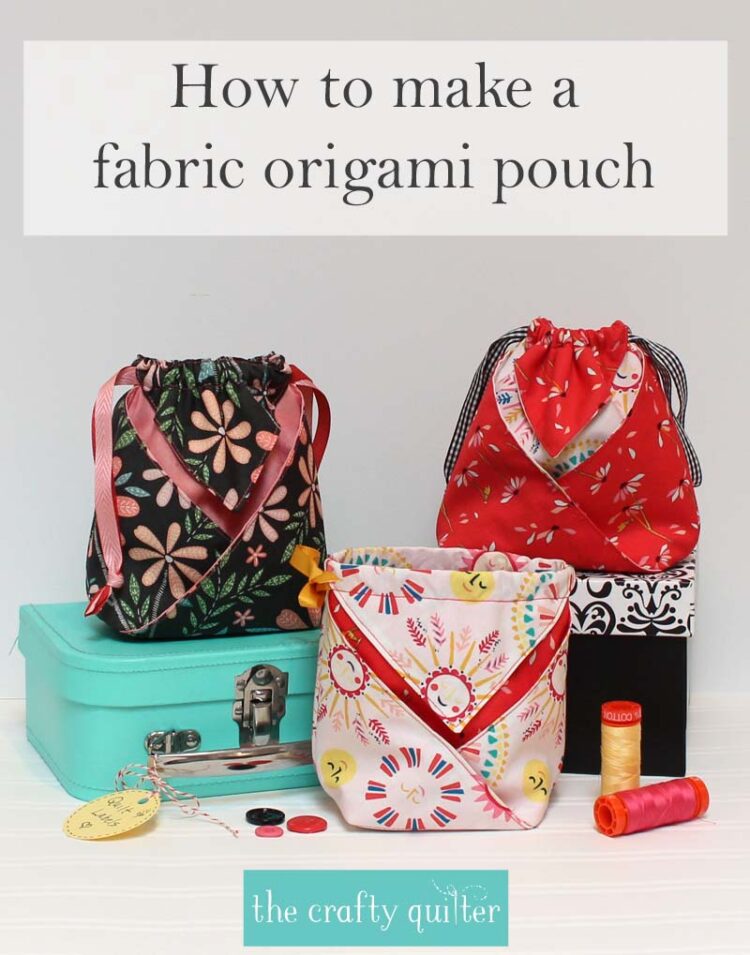
Fabric origami pouch tutorial and video
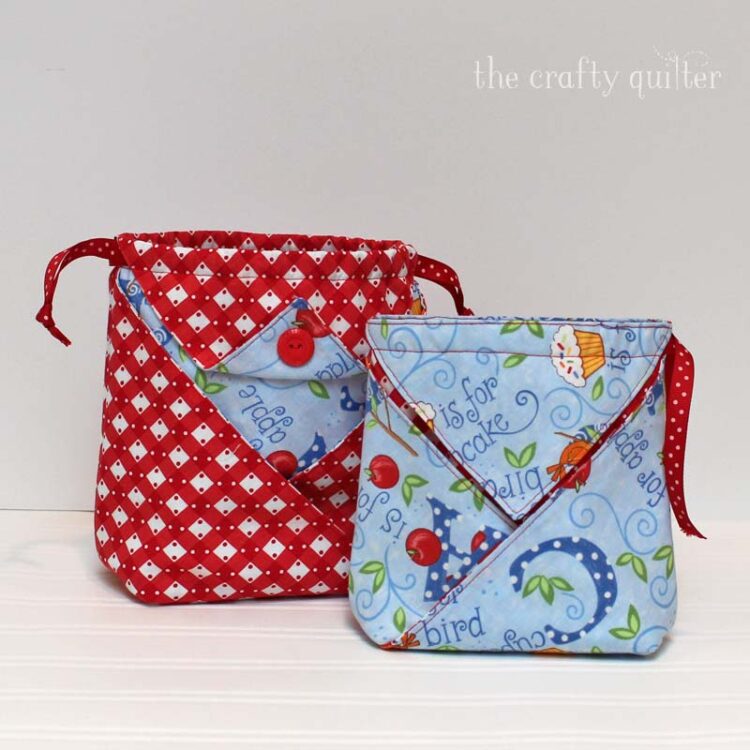
I love a good pouch. They make great gifts and they’re perfect to store those little collections we seem to accumulate. Today, I’m going to show you how to make a fabric origami pouch that you guys are going to love! Be warned, it’s highly addictive. But, it’s a great way to use up those fat quarters!

These pouches don’t require much cutting or pressing. They start with two squares of fabric and after a few folds and a few seams, you get this sweet pouch to brighten up your space. Better than that, they make a great gift bag, travel pouch or organizational bag.
Pouch sizes
You can make these pouches in a variety of sizes. I’ve been working with the following pouch sizes:
- Small: 5 1/2″ wide
- Medium: 7″ wide
- Large: 8 1/2″ wide
Supplies
- Fabric: Two squares, (12 1/2″ small) (15 1/2″ med.) (18 1/2″ large)
- 1 1/2 yards of ribbon, 1/4″ – 3/8″ wide
- coordinating thread
- lightweight fusible interfacing (optional – this makes the pouch stand upright, but it’s more difficult to cinch up the drawstring)
Fabric Origami Pouch video
I made a video that shows all of the steps to make a medium-size fabric origami pouch. You can cut to the chase and get all of the details in the video:
Steps to make a medium-size fabric origami pouch
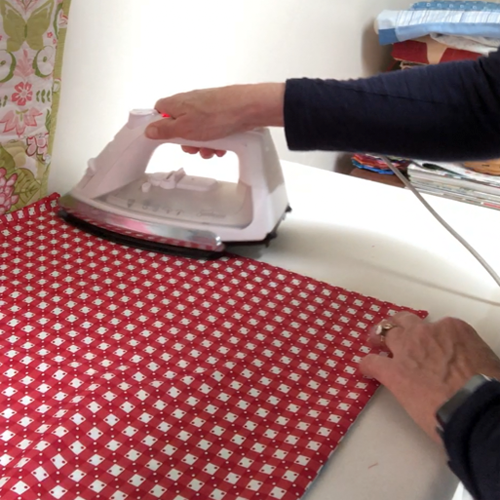
Before starting: Press and starch your fabric. If using interfacing, fuse it to the contrast fabric (the one that peaks through the front).
Note: I did not use a walking foot to stitch this project, and I was able to sew through all thicknesses without a problem. Feel free to use one, though, if you need to.
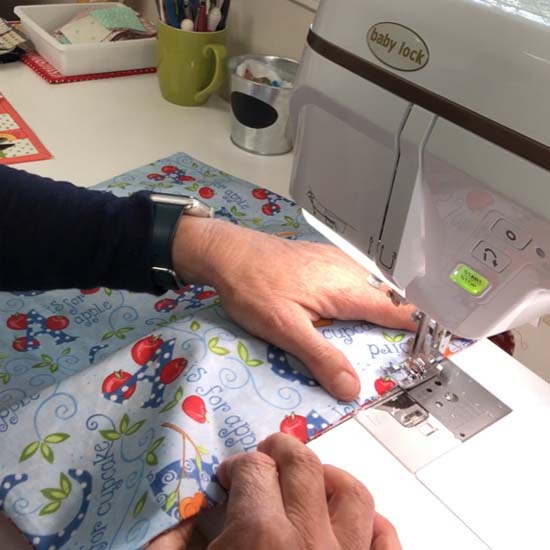
- Place fabric squares right sides together and pin around the sides.
- Stitch with a 1/4″ seam around all four sides, leaving a 3″-4″ opening on one side.
- Clip corners to reduce bulk. Turn right side out and press flat. You’ll also turn under the seam allowance at the opening and press.
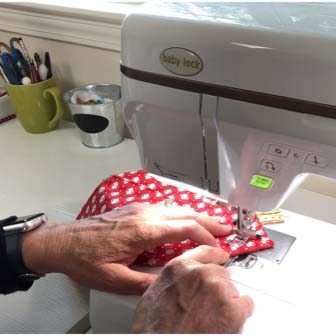
- Top stitch 1/8″ from the edge all the way around with coordinating thread. This will close the opening as well.

Step 1 
Step 2 
Step 3 
Step 4
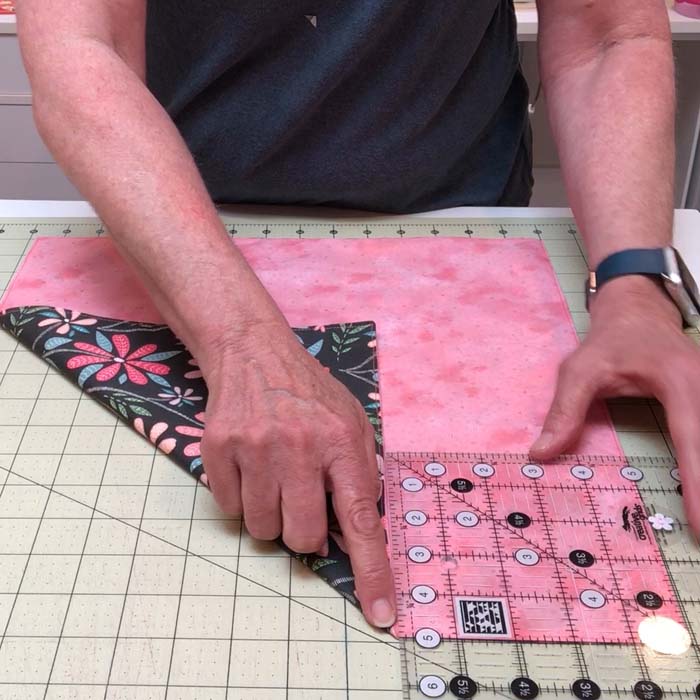
A note about the next steps. You will be folding your finished square into thirds. I intentionally chose a beginning square size that is divisible by 3 (true for all three sizes).
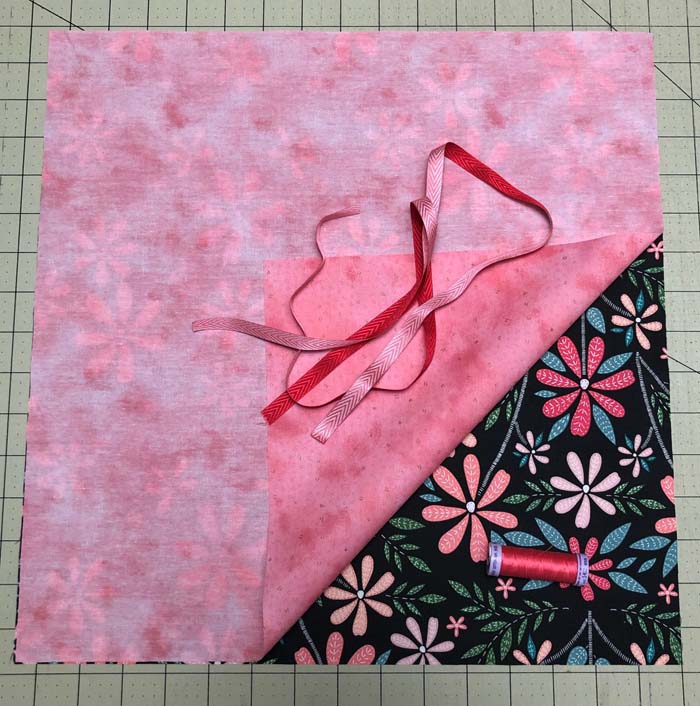
- Place fabric square with contrasting fabric face up.
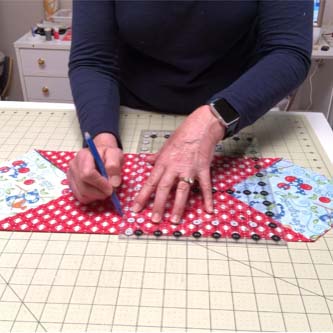
- Fold into thirds, diagonally. Here’s how I do this: If you divide 15″ (the size of the square) by 3, you get 5″. 6A: Place the 5″ lines of a square ruler on one corner of the 15″ square. Fold the adjacent corner towards the middle until the edge touches the ruler. 6B: Repeat for the opposite corner. The two open square areas (shown in pink below) should both measure the same (5″ for the medium pouch; 4″ for the small pouch and 6″ for the large pouch).
Step 6A 
Step 6B

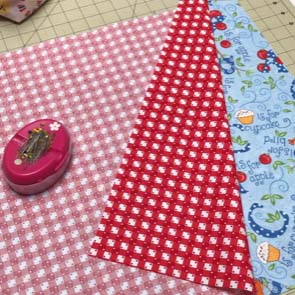
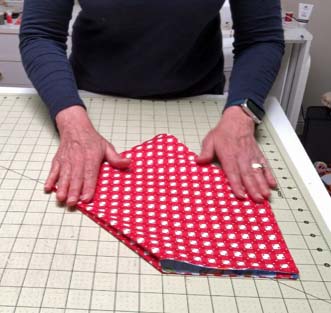
- Press the folds created in the previous step.
- Place the folded fabric face up and find the center (from point to point). The best way to find the center is to fold it in half.
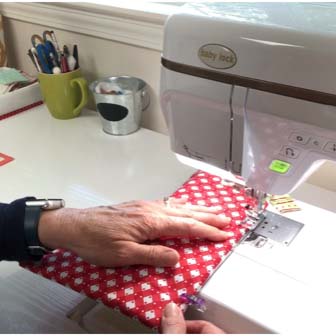
- Draw a line 1″ away from both sides of the center. This will be the side width of your pouch (2″ total). You could make it wider or narrower by adjusting the drawn line from 1/2″ to 1 1/2″ from each side of the center.
- Stitch on the drawn lines through all thicknesses.

Step 8 
Step 9
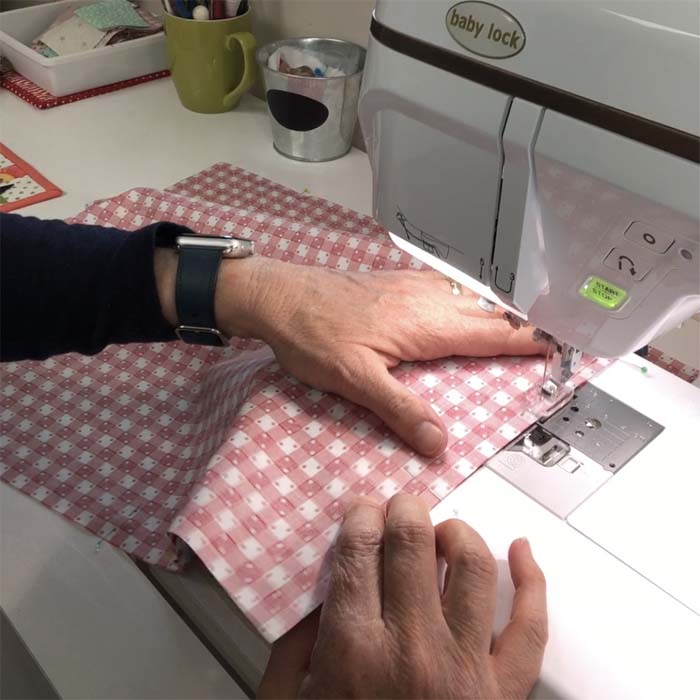
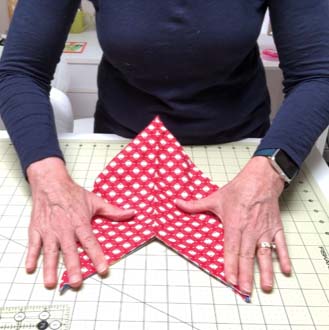
- Fold the pouch in half, matching side edges and corners.
- Stitch 1/8″ from the edge, through all thicknesses. Backstitch at the beginning and end.

Step 11 
Step 12

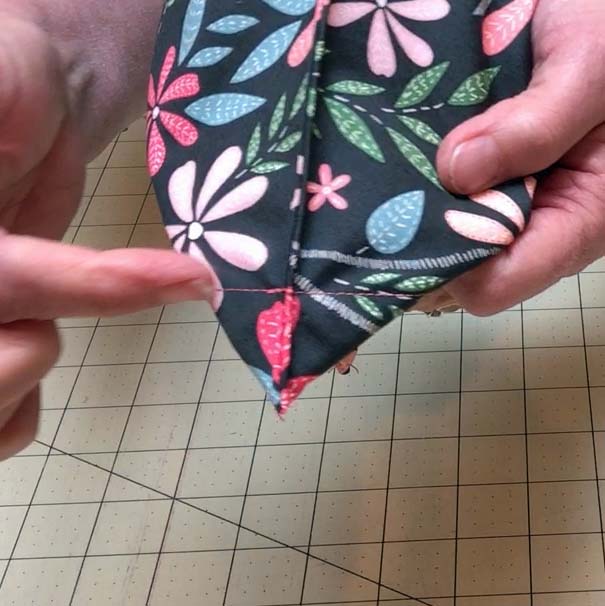
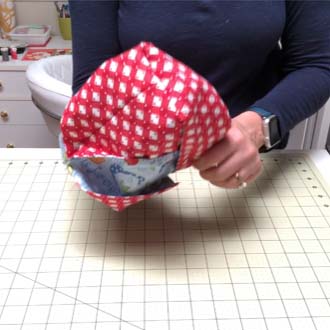
- (a) Fold the bag so the side seams meet together. The bottom corners of the bag should form a triangle and it will look like an arrow when it’s flattened. (b) The bottom stitches (from step 10) should meet and form a straight line.
- Stitch across the bottom corner triangles, on top of the previous stitching line, to form the base of the pouch (gusset).

Step 13 a 
Step 13 b 
Step 14 Step 14

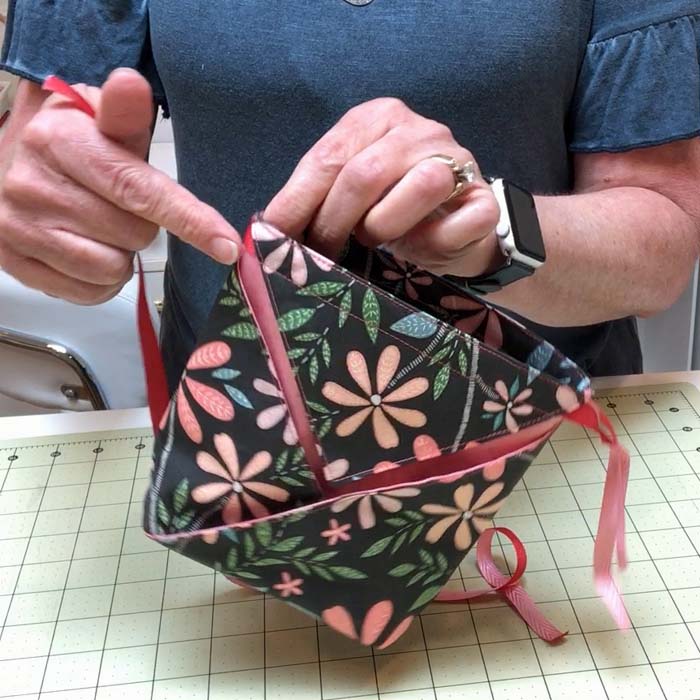
- Turn the pouch right side out, pushing out the bottom corners.
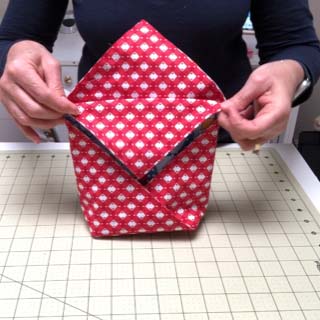
- Fold the top triangle down and press.

Step 15 
Step 16
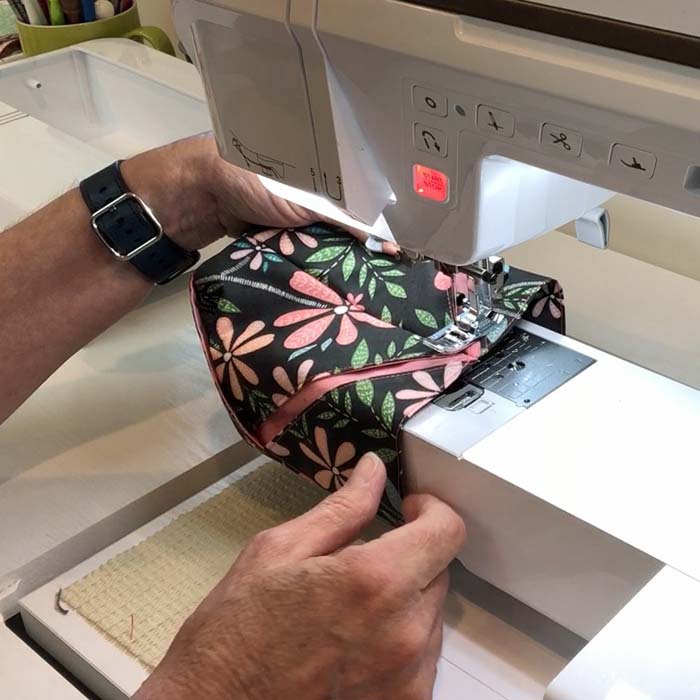
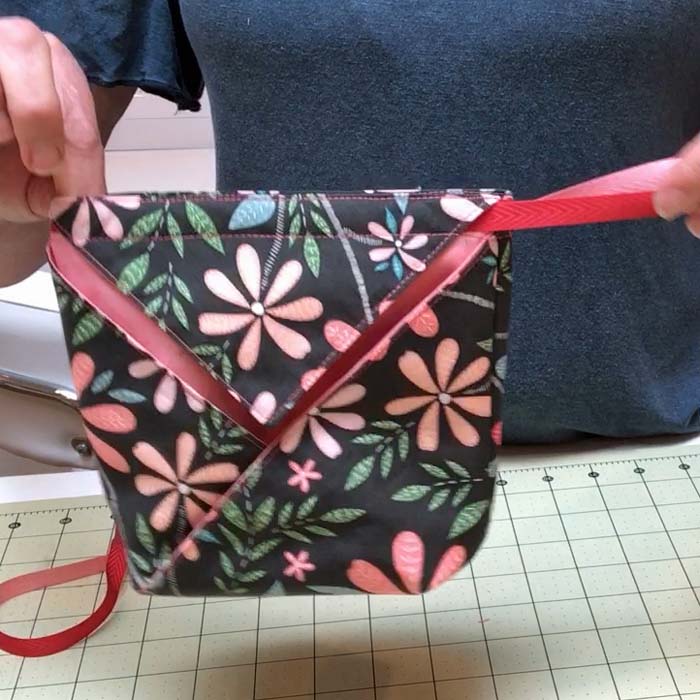
- To form the casing for the drawstring, stitch 5/8″ away from the top folded edge through all layers.
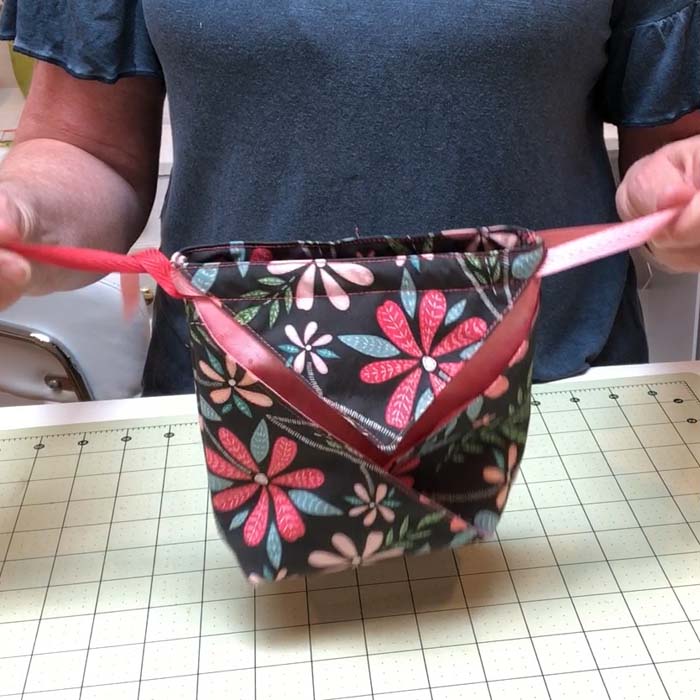
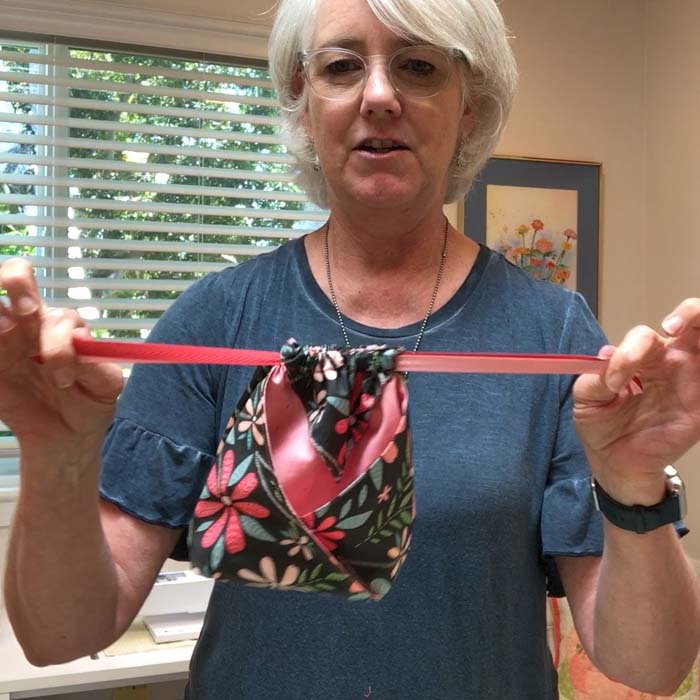
- Insert ribbon through the side opening and pull all the way through.
Step 17 Step 18 Step 18

Optional: Insert another ribbon through the other side to create a drawstring that cinches from both sides.
Option 2: Add a button!


I’ve made six of these pouches in medium and large sizes. I haven’t made a small yet. I’ve changed the side width on the medium pouch so that it’s 3″ wide. You can see the difference below.

These fabric origami pouches are really easy once you get the folding process down. After you make your first pouch, the others will go together much faster. I promise!
I’m sure you can think of many different ways to use these pouches. I love mason jar gifts, and I think this would be the perfect gift bag for them. You could even leave out the drawstring and have a free standing container (especially if you add interfacing). I’m always looking for a travel pouch and a small bag to hold my paper piecing projects. There are so many options!
With Mother’s Day coming up and summer graduations, these pouches would make a perfect gift! I’m just glad to have something to use up my endless supply of fat quarters. If you make one, use the hashtag #fabricorigamipouch and tag me @thecraftyquilter. Have fun sewing!


Discover more from The Crafty Quilter
Subscribe to get the latest posts sent to your email.


Just made small and medium bag. How would I modify the pattern to make it tall for wine bottle? I am willing to pay for pattern
Great instructions! Thx!
Hi I just made this bag. It is so cute. When you said you added 3 inches to the pattern are you now working with a rectangle? Thank you so much!
Honestly, Julie, your work is so amazing. Everything you create is
so beautiful and upbeat: the workmanship, the colors and fabrics, all of it.
I’m thrilled to see the “cheddar” quilt again. It’s been a few years. It’s an absolute favorite if mine. Everything about it is so perfectly beautiful. The pattern is awesome with those colors. I remember how unsure you were of the cheddar. There isn’t another color that could have been better. Be well. Best regards – Adrienne
Can’t wait to get home and make one!
I just watched the video and want to try one, is there a way to print the directions in a PDF as my computer is down stairs and my sewing room is upstairs. Love the way you explain things!!!
Thank you very much. I enjoy makink the bag from fabrics that i have a long time. Your explanation is very clear
Thank you for this great idea. Love it and I think it’s a nice project for our BEE group . Each year we plan a day to make Christmas gifts or things for our home.
Greetings from Belgium
Marjolein
Cute and simple! Love it – might make a good craft sale item – you could emphasize the re-usable/eco-conscious aspect. Thank you!
Hi Julie,
Thank you so much for this video. I love these pouches.
Love this pattern. Many thanks. However, I’m struggling to get ‘squares’ after folding into 1/3’s. I’ve checked that I have got a square before folding. Am I doing something wrong? Is it ‘normal’ to have to ease the fabric into shape? I can’t believe it is.
Many thanks for any suggestions
Hi Julie, I made three origami bags and quickly shipped them before Mother’s Day and now I can’t find the pattern to make more. Where can I purchase the pattern? Thank you! Dawn Lunn
Julie…
Thank you for your wonderful video and pattern for the pouches! Can’t wait to make some for Mother’s Day! I really enjoy your blog and appreciate how you make this world better place!!
These are so adorable! They would be perfect for teacher presents. Thanks for linking up to the Favorite Finishes Monthly Party!
Amazing Bags made a lot for the family and getting lots of hints from friends. Like you said once you’ve done one they are really easy!
Thank you Julie – I’m looking forward to making this. Your instructions are always so thorough.
Thanks Julie for another great tip and tutorial!!
Great video Julie, thank,you! I feel empowered to try making my own now!
I have been making this bag for several years now and it is great. Fairly quick and easy. I get comments on it each time I use it. Have made it for a few friends as well. I highly recommend it. Love it.
I love this so much I have already made one! It turned out pretty good and was easy just like you said. Thank you very very much! Many gifts in the future with this pattern.
These are great! Thank you! And I love the idea of using them for mason jar gifts!
I will be making these pouches as soon as I can drive home to my fabric stash. Love the origami look!
That you so much wonderful job on the tutorial will made great gifts. I hope to make a couple tomorrow.
Can’t wait to make these, Julie! Thanks so much for the wonderful tutorial and pics.
Thank you, Julie! I was really looking forward to this tutorial, but never expected it so soon. I have fat quarters ready and waiting! Thank you, too, for all the tips and inspiration you have provided over the years.
I love this bag but probably won’t get to it immediately. Is there a printable version of this pattern? I’d pay for the ability to print this out. Otherwise, I completely forget about it! The memory vitamins just don’t work for me!
I love your blog! It is the first one I open when you post! This is a darling bag and I can’t wait to get started making a few for Mother’s Day gifts…THANK YOU for thinking of us during these challenging days!
I can’t wait to make these. They are wonderful and look so easy. Thank you for your time and talents.
I love these precious origami pouches, Julie! I can’t wait to make some! Thank you!
-Jean ❤
Thank you so much for putting this together for all of us. I love your blog.
Those are the sweeties little pouches I have ever seen! Thank you for sharing.
Julie, they are fantastic!!! They are not the run of the mill. You added a nice twist. THANKS!!!