Sew Happy Mini Quilt Tutorial
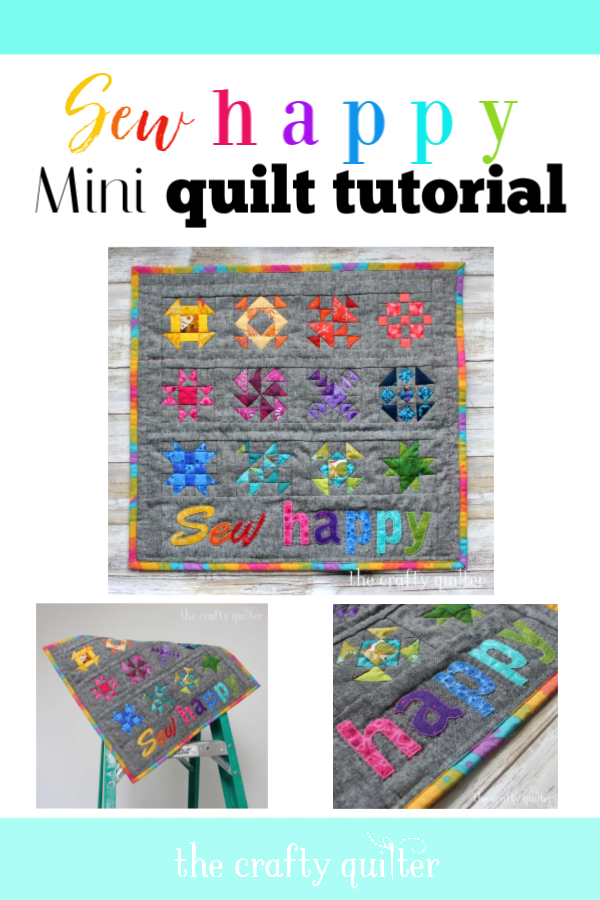
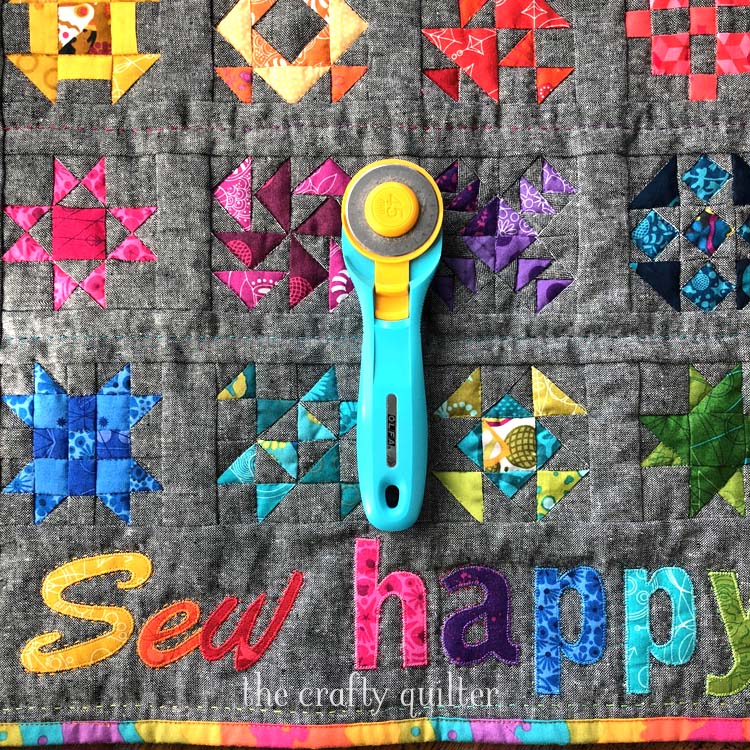
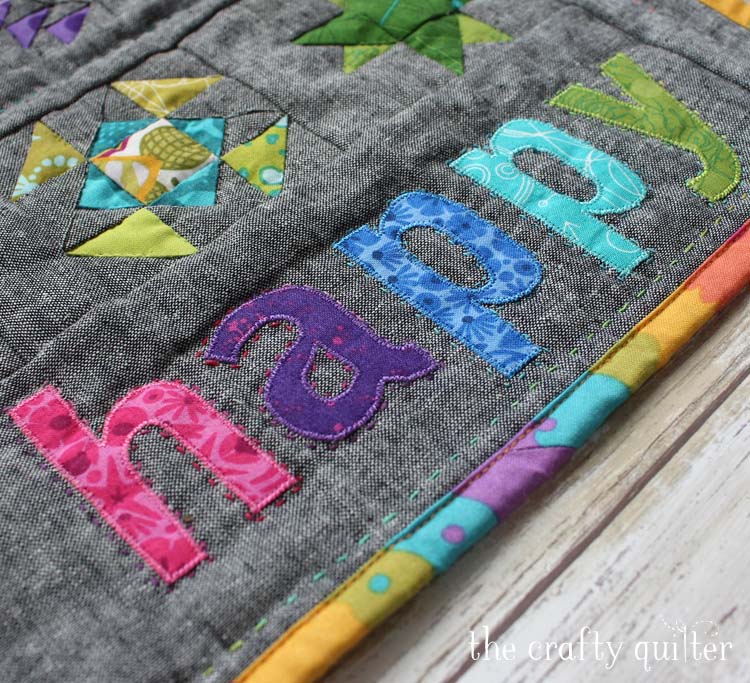
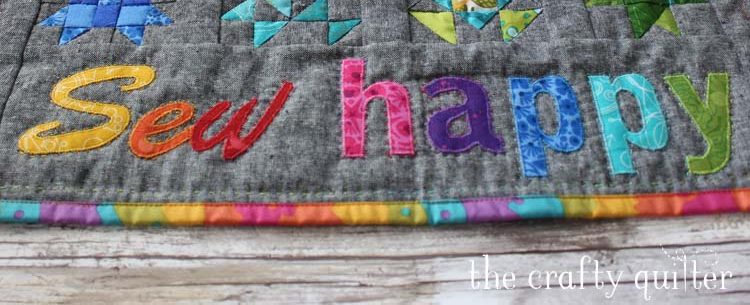
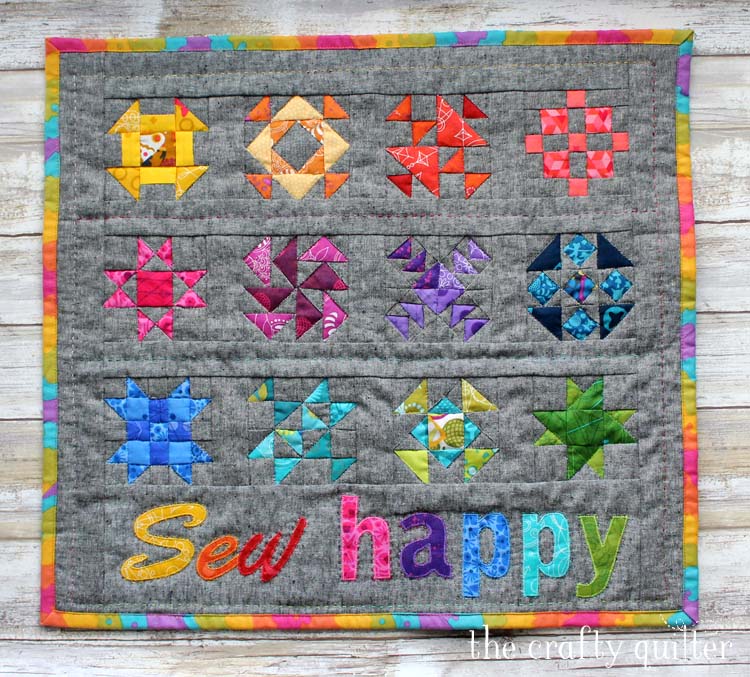
Today, I’m sharing my Sew Happy Mini Quilt Tutorial! It’s a fun little quilt that has all of that rainbow goodness in mini form. I think it would be beautiful in just about any colorway, and it’s perfect for using up scraps. Each block measures 3″ (finished) and the total mini quilt measures 18 1/2″ x 17″.
My first Sew Happy Mini Quilt was based off the instructions from The 2018 Quilter’s Planner Sew Along which included twelve 12″ quilt blocks and two layout options. These were beautifully designed by Cheryl Brickey at Meadow Mist Designs. If you want to make the original, larger quilt, I highly recommend getting a copy of the 2018 Quilter’s Planner Magazine.
As I was sewing along last year, I challenged myself to make the blocks smaller, so I thought 6″ blocks would be nice. And then I had the brilliant idea to make them even smaller, so 3″ blocks became the ultimate challenge! (I ended up making both 3″ and 6″ blocks).
The layout design of this mini quilt is completely my own. I added the appliqued words onto the bottom because I felt inspired to do so! For the sake of time and simplicity, I’ve decided to give instructions on just four quilt blocks. These are my own instructions (not copied from The Quilter’s Planner Magazine). The blocks are traditional quilt blocks and are based on a nine patch grid. You can mix and match them, or make them all with the same block. It’s up to you.
Here’s a mock up of the quilt using all churn dash blocks. Note: I couldn’t get the software to change the color of each letter, so all of these examples will have yellow words.
Here is the quilt with all four blocks used, three times each.
Sew Happy Mini Quilt Tutorial
- Finished size: 18 1/2″ x 17″
- All seams are made using 1/4″ seam allowance.
- Each set of block instructions makes one block. Repeat to make as many of each as you like for a total of 12 quilt blocks. Mix and match to your heart’s content!
Supplies
- Background fabric: 1/2 yard
- Fat 1/8th’s or scraps in a rainbow of colors for all of the blocks
- Fusible web product such as Heat ‘n Bond Lite (for applique)
- Backing: fat quarter
- Binding: 1/4 yard
I used a combination of different Alison Glass fabric collections from Andover for the quilt blocks and applique letters. The background fabric is Essex Linen Yarn-dyed in black.
Background Fabric Cutting Instructions
- (1) 5″ x 16″ rectangle (applique section)
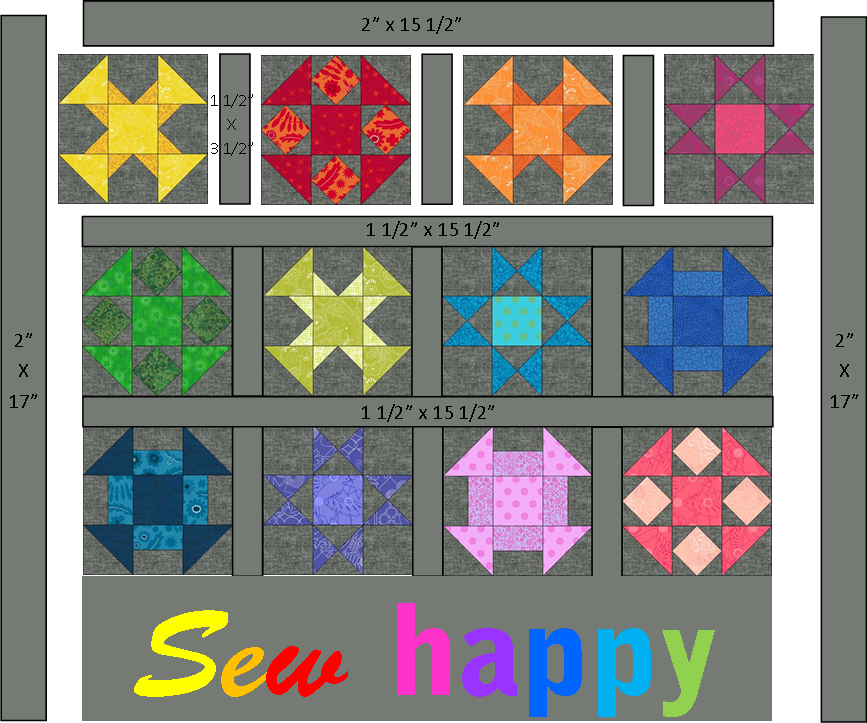
- (9) 1 1/2″ x 3 1/2″ rectangles (sashing)
- (2) 1 1/2″ x 15 1/2″ rectangles (sashing)
- (1) 2″ x 15 1/2″ rectangle (top border)
- (2) 2″ x 17″ rectangles (side borders)
Note: Remainder of background fabric will be cut per the block instructions below.
Churn Dash Block
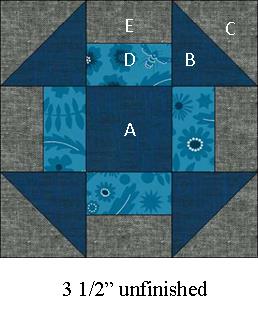
- A (1) 1 1/2” square (dark fabric)
- B (2) 2” squares (dark fabric)
- C (2) 2” squares (background)
- D (1) 1” x 7” rectangle (medium fabric)
- E (1) 1” x 7” rectangle (background)
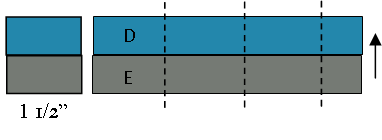
Make side units: Sew the 1” x 7” D and E rectangles together. Press towards D (or whichever fabric is darker). Cut into 1 1/2” segments. Each unit should measure 1 1/2″ square. Make 4.
Make half-square triangles (HST’s): Draw a diagonal line on the wrong side of each 2″ C background square. With right sides together, place a 2″ C square onto a 2″ B square. Stitch 1/4″ on both sides of the diagonal line. Cut apart on the diagonal line. Press towards B (or whichever fabric is darker). Trim HST to 1 1/2″ square. Repeat to make four HST’s.
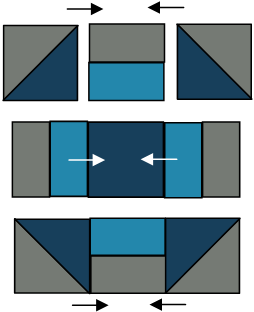
Make block: Arrange the pieced units and the 1 1/2″ A square as shown below. Sew them into rows and press as indicated. Sew the rows together to complete the block. I pressed the row seams open. It should measure 3 1/2″ square.
Ohio Star Block
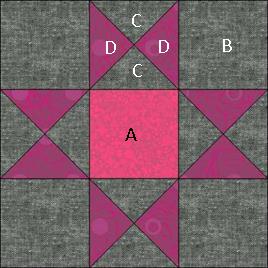
Ohio Star Cutting Instructions
- A (1) 1 1/2” square (medium fabric
- B (4) 1 1/2” squares (background)
- C (2) 2 1/2” squares (background)
- D (2) 2 1/2” squares (dark fabric)
Make quarter-square triangles (QST’s): Draw a diagonal line on the wrong side of each 2 1/2″ D square. With right sides together, place a 2 1/2″ D square onto a 2 1/2″ C square. Stitch 1/4″ on both sides of the diagonal line. Cut apart on the diagonal line. Press towards C (or whichever fabric is darker). Make four half-square triangles, and do NOT trim them at this point.
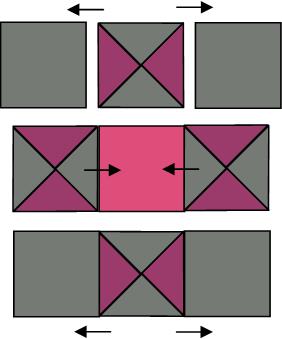
Place two half-square triangles right sides together with opposite colors facing each other and seams nesting. Draw a diagonal line that is perpendicular to the seam on one of the HST’s. Stitch 1/4″ on both sides of the diagonal line. Cut apart on the diagonal line, creating two QST’s. Repeat to make a total of four. Trim to 1 1/2″ square, making sure that the center seam stays center by trimming on all four sides.
Make block: Arrange the QST’s, 1 1/2″ B squares and the 1 1/2″ A square as shown below. Sew them into rows and press as indicated. Sew the rows together to complete the block. I pressed the row seams open. It should measure 3 1/2″ square.
Tumbled Diamonds Block
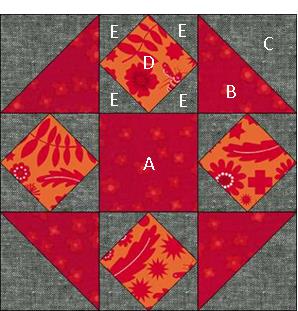
Tumbled Diamonds cutting instructions
- A (1) 1 1/2” square (dark fabric)
- B (2) 2” squares (dark fabric)
- C (2) 2” squares (background)
- D (4) 1 1/2” squares (medium fabric)
- E (16) 1” squares (background)
Make half-square triangles (HST’s): Draw a diagonal line on the wrong side of each 2″ C background square. With right sides together, place a 2″ C square onto a 2″ B square. Stitch 1/4″ on both sides of the diagonal line. Cut apart on the diagonal line. Press towards B (or whichever fabric is darker). Trim HST to 1 1/2″ square. Repeat to make 4 HST’s.
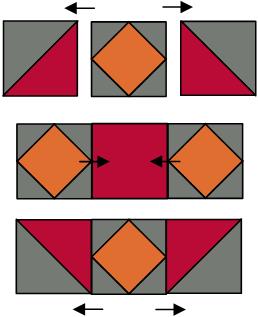
Make square-in-a-square units: Draw a diagonal line on the wrong side of each 1″ E square. With right sides together, place a prepared 1″ E square on a corner of a 1 1/2″ D square. Stitch on the diagonal line. Trim and press towards the corner. Repeat for all four corners. Make four square-in-a-square units. They should measure 1 1/2″ square.
Make block: Arrange the HST’s, square-in-a-square units and the 1 1/2″ A square as shown below. Sew them into rows and press as indicated. Sew the rows together to complete the block. I pressed the row seams open. It should measure 3 1/2″ square.
Tumbled Star Block
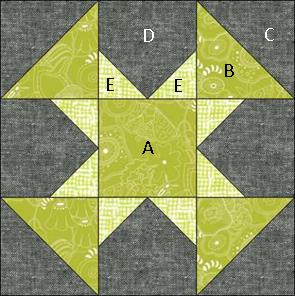
Tumbled Star cutting instructions
- A (1) 1 1/2” square (dark fabric)
- B (2) 2” squares (dark fabric)
- C (2) 2” squares (background)
- D (4) 1 1/2” squares (background)
- E (8) 1” squares (medium fabric)
Make half-square triangles (HST’s): Draw a diagonal line on the wrong side of each 2″ C background square. With right sides together, place a 2″ C square onto a 2″ B square. Stitch 1/4″ on both sides of the diagonal line. Cut apart on the diagonal line. Press towards B (or whichever fabric is darker). Trim HST to 1 1/2″ square. Repeat to make four HST’s.
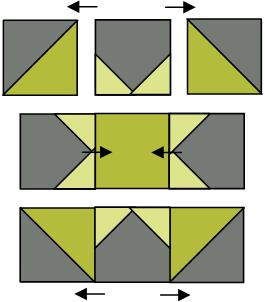
Make star point units: Draw a diagonal line on the wrong side of each 1″ E square. With right sides together, place a prepared 1″ E square on a corner of a 1 1/2″ D square. Stitch on the diagonal line. Trim and press towards the corner. Repeat on the adjacent corner. Make four star point units. They should measure 1 1/2″ square.
Make block: Arrange the HST’s, star point units and the 1 1/2″ A square as shown below. Sew them into rows and press as indicated. Sew the rows together to complete the block. I pressed the row seams open. It should measure 3 1/2″ square.
 Applique section
These instructions are for fusible machine applique. For a detailed tutorial on this technique, visit my machine applique series. Feel free to use your favorite applique technique.
- Print out the Sew happy letter templates (at actual size). They have been not been reversed for fusible applique because I couldn’t get my software to do it. You’ll need to trace them (after printing) on the back of the paper to get a mirror image or use your printer software to print out a mirror image.
- Trace the letters onto the paper side of the fusible web product.
- Cut out the letters, leaving 1/4″ around each.
- Fuse onto the WRONG side of fabric.
- Cut out each letter exactly on the line.
- Remove paper backing.
- Arrange the letters onto the background rectangle and fuse into place.
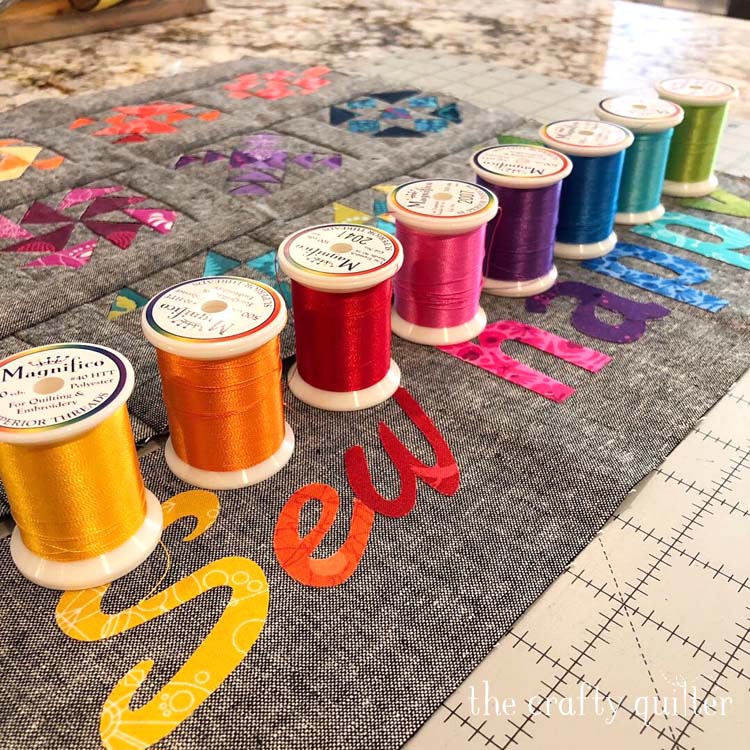
- Stitch around each letter. I used a small zig zag stitch with Magnifico thread by Superior.
- Trim rectangle to 4 1/2″ x 15 1/2″.
Quilt assembly
Arrange the twelve quilt blocks into 3 rows of four blocks each.
Place the short sashing strips, long sashing strips, applique section and border strips as shown below.
- Sew the short sashing strips to the quilt blocks in each row.
- Sew the long sashing strips to the rows.
- Sew the applique section to the quilt block section.
- Sew the top border onto the quilt, followed by the side borders.
Finishing
Layer the quilt top, batting and backing and baste together.
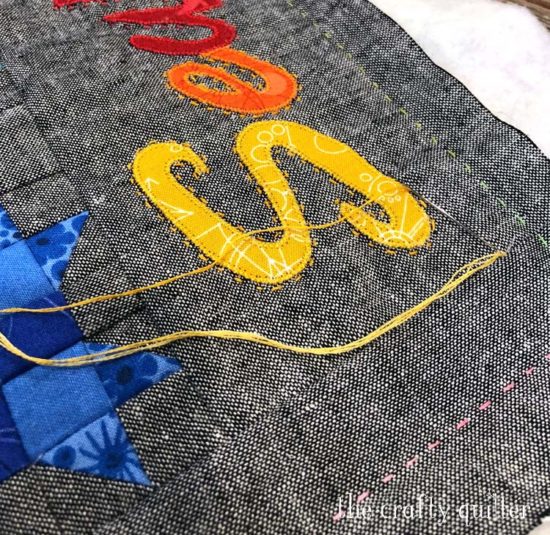
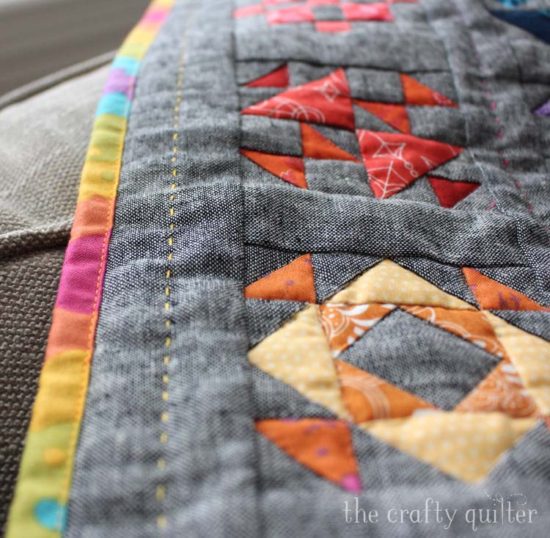
Quilt as you like. I hand quilted through the center of the long sashing strips, borders and around each letter using a variegated embroidery thread. I stitched in the ditch around each block.
Attach binding strips. You’ll need 2 strips that are 2 1/4″ x WOF.
Aren’t you feeling SEW happy right about now? Remember, this is a free tutorial, and it has not been tested by anyone other than myself. If you find any errors, please leave a comment and let me know.
I do not have a pdf version of the Sew Happy Mini Quilt Tutorial. That takes so much more time than I have right now. Maybe in the future. If you want to print out the instructions, you can use the “print” or “pdf” button at the bottom of this blog post. I believe it allows you to crop out unnecessary elements so that you’re not printing pages and pages of data.
If you use Instagram and you make this quilt, use the hashtag #sewhappyminiquilt so we can all find it.
I’m sew happy you visited today!











I made my version of the mini block and wall hanging. I love making those little blocks so much fun. Thank you for posting the instructions. I think I can make any mini blocks now. I very first mini thank you again.
Just found your website. I like it a lot. I am excited about trying the gnome mug rug to give to a friend. Thank you!
Your mini quilt is delightful. I was so impressed that I ordered the magazine. I want to make 6” blocks. Do you have directions for 6” blocks to share?
Great design! Would you consider posting instructions for your other blocks?
I’m a novice at quilting but loved this cute design, would I just double everything to make the 6” square as opposed to the 3” square pattern provided? Just want to make sure before I attempt this design. Thank you
I’m about to sandwich this delightful little quilt. Thanks so much for the tutorial! It was fun to make.
Love this mini quilt Julie. Thanks for sharing it. It has my favorite block, the Churn Dash!
What a great pattern. I love it. Your PDF button worked great. I’ve got it saved to print and make. Thank you!
Julie … Thank you so much for keeping your promise to provide us the instructions of this SUPER CUTE MINI. I am delighted! I cannot wait to get started.
This is adorable! Thank you so much for sharing your tutorial for this darling quilt.
I so enjoyed seeing the blocks as you shared them on Instagram and the finished mini here is no exception. Thanks for the tutorial!
Thank you so much! I love this mini and am taking it to a quilt retreat at the end of the month.
Thank you for the breakdown of the different blocks. It is done ‘sew’ well!
Your mini is wonderful, I love the colors against the gray background and the blocks are just so so cute!!
Thank you for this tutorial. I have been toying with the idea of a mini and this has convinced me to put it on my must do list. It’s awesome.
Thank You! I love these small blocks!
You make me sew happy!! Thank-you for sharing and I hope you are blessed many times over for your generosity and promoting quilting today.
This is so pretty!! It made me happy to se this pretty tiny quilt!
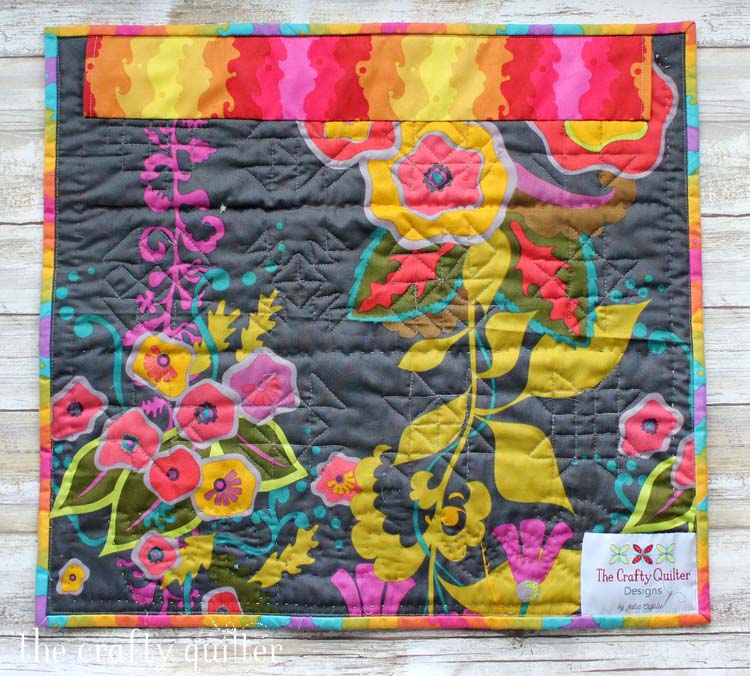
Very pretty Julie….and I love your backing, too. I’m definitely going to try this.
Thanks for the tutorial. I just love your color sense with this mini!
This is great, Julie! Thank you Sew much!
Hi Julie. Thanks so much for posting this. I’ve recently become very fond of making miniature blocks. I have even joined an online Small Quilts group on FB! I love the idea of doing these in some very bright and happy colours.
Thanks so much. I’ve enjoyed watching it come together with your other blogs. I appreciate that you share your creativity with us.
Thanks so much for the fabulous tutorial!
Thank you Julie, I am going to use this pattern to make an undercover mat/sewing machine cover for retreat!
Yes, thank you so much Julie! Just lovely!
Thank you SO much for sharing. This is absolutely adorable. Loved it from the very beginning! The mini size is just too sweet..