Dresden Plate tutorial
If I’m not mistaken, Dresden Plate quilt blocks are making a comeback. Maybe they never left! They were really popular back in the 20’s and 30’s, and I’m glad to see them being made with more variations
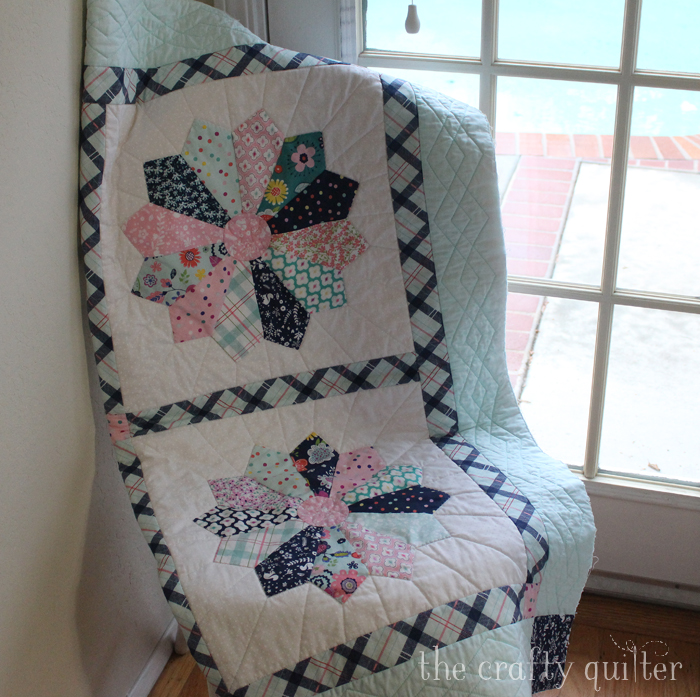
Today, I’ll share a tutorial to make a Chunky Dresden Plate that was used in my Enchanted Baby Quilt. It’s really easy and fun to make!
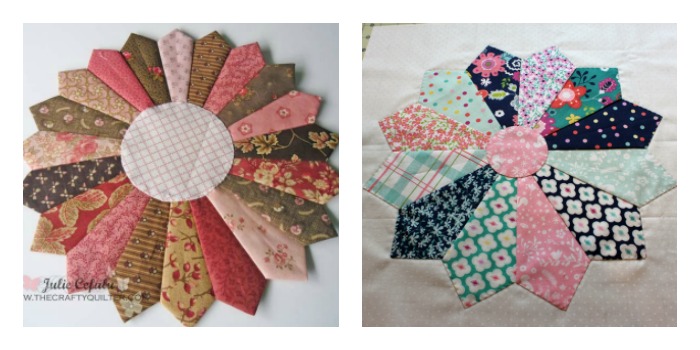
Most Dresden plates are made with an 18 degree wedge ruler that requires 20 blades to form a full circle. The math goes like this: 18 x 20 = 360 degrees.
My Dresden plate is made with a 30 degree template and it requires 12 blades. I like the chunkier look and less blades to sew! The math for mine is: 30 x 12 = 360 degrees.
I made my own template for this block and you can, too, by printing it out here: Dresden Blade Template OR if you have a 30 degree triangle ruler, you can use that instead (had I known that a month ago, I would have gone that route.)
Note: You can make Dresden plates any size you want by varying the height of the template and the width of the fabric strip. This tutorial is using a 6″ wide strip to make a Dresden Plate that is 13 3/4″ wide from point to point. I set mine on a 16 1/2″ square of background fabric.
I also find these to be precut friendly. If you have a layer cake, charm pack (for the smaller version) or fat quarter bundle, you’ll get a really scrappy (yet coordinating) block!
Chunky Dresden Plate Tutorial
Supplies for one 16 1/2″ block:
- Dresden Blade Template OR use a 30 degree ruler like this Simpli-EZ 30-Degree Triangle Ruler
OR Creative Grids Non-slip 30 Degree Triangle Ruler
.
- Fabric strips, 6″ wide by 10″ or more in length
- 1 fat quarter for background fabric, cut into a 17″ square.
- Tape (double sided or masking)
Template Instructions:
- Print out the Dresden Blade Template at actual size. Cut out the template on the drawn lines. There are 3″, 4″ and 5″ markings in case you want to make a smaller Dresden plate. See end of post for more information.
- Place tape (double sided or rolled) on one side of the template.
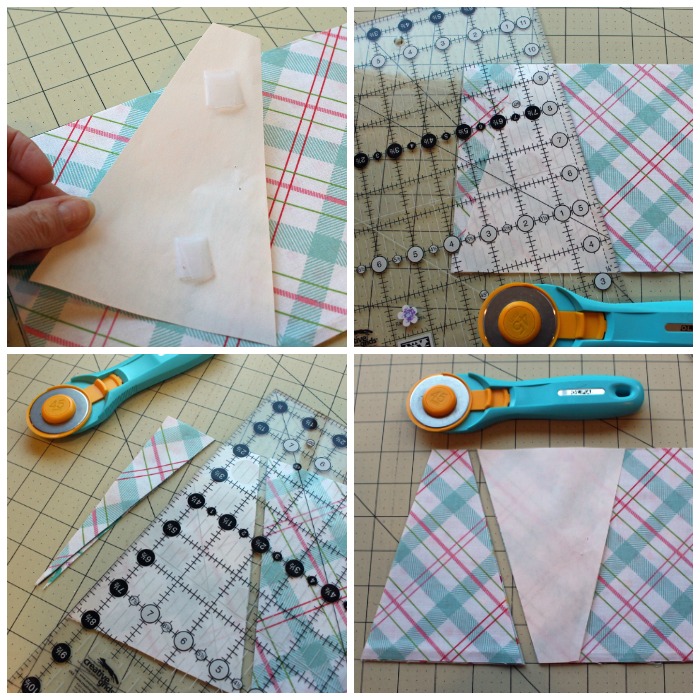
- Stack 2-4 strips of fabric. Place the template on the fabric strip so that the top and bottom edges of the template are even with the raw edges of the fabric strip.
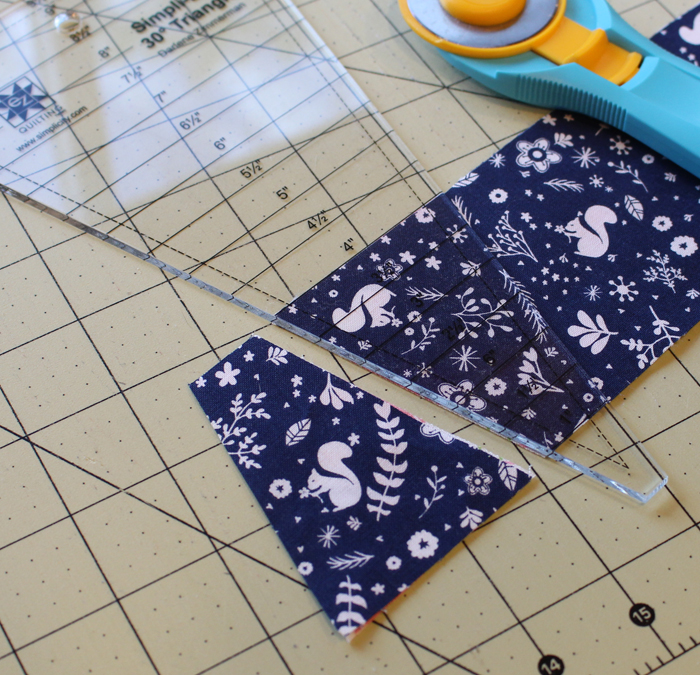
- Position the ruler so that it is even with the right side of the template. Make your first cut.
- Position the ruler on the left side of the template and cut. You might need to reposition the fabric first to safely cut the second side.
- Place the template on the fabric strip so that it’s upside down and one side is lined up with the previous cut edge. Position the ruler on the opposite side and cut the second blade.
- Continue cutting until you have 12 blades (for 1 Dresden plate)
30 degree ruler instructions:
The same as above, BUT you will be using a ruler instead of a template. Make sure to line up the ruler so that you have part of the small wedge hanging over the edge of the fabric. This will just give you a bigger hole (but not too big) in the center (and less stitching to do). The sample below is using a 3″ wide strip and makes a cute little Dresden.
Dresden blade assembly:
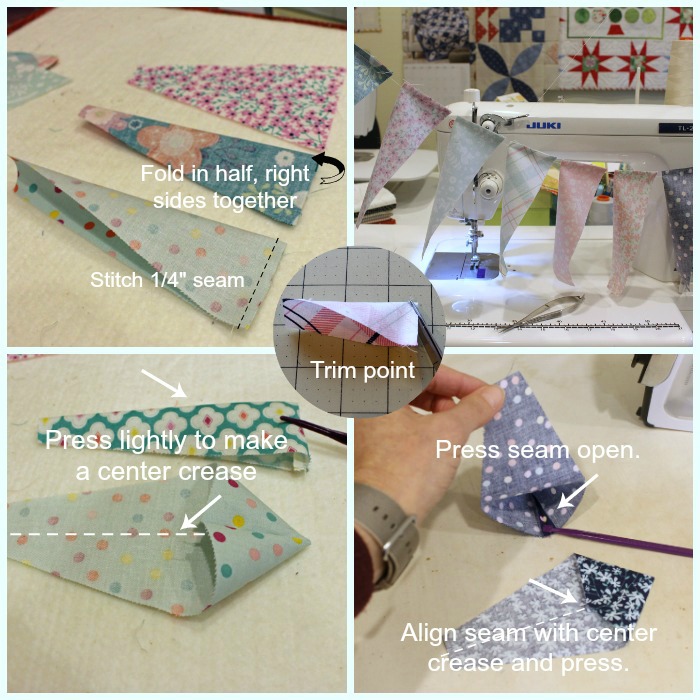
- Fold each Dresden blade in half, right sides together. Stitch the wide end with a 1/4″ seam. TIP: set your stitch length to 1.5 – 2.0 to keep your seam secure.
- Chain piece the blades through your sewing machine.
- Trim the point of the blade at an angle near the fold to reduce bulk at the point. Make sure not to get too close to the stitching – keep it 1/8″ away.
- Press the blade lightly in half to form a centering crease.
- Turn right side out and push out the point with a semi sharp object.
- Press seam open and align the seam with the center crease and press.
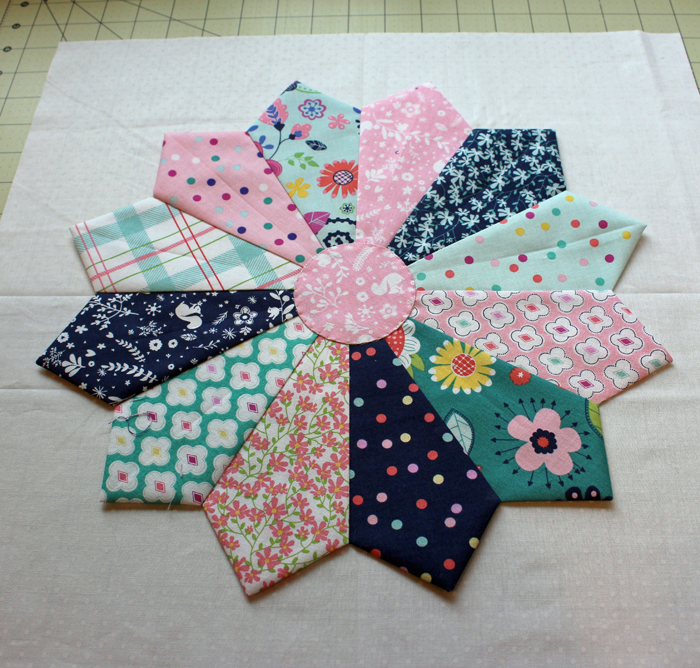
- Arrange your blades into a circle so that you’re happy with the color arrangements.
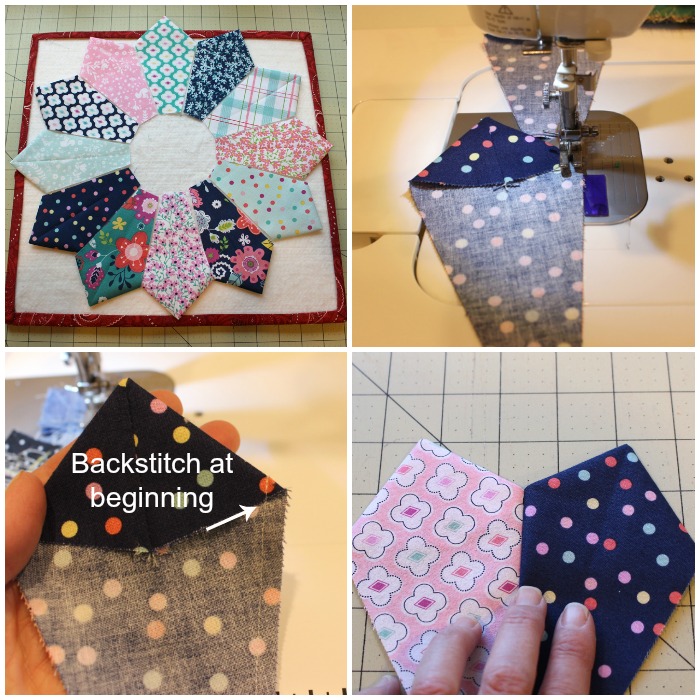
- Sew the blades into pairs, starting at the wide end. Make sure they match up well at the top and backstitch at the beginning to secure.
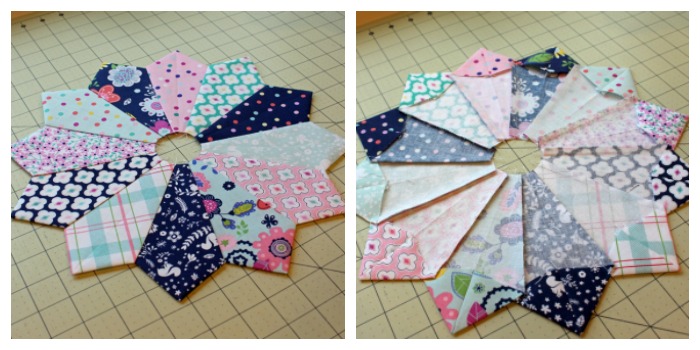
- Sew the pairs together to form a Dresden Plate.
- Don’t worry too much about the bottom (narrow) edges lining up. This will be covered up by the center circle.
- Press the seams to the side (or open if your prefer).
Center circle instructions:
There are several ways to make the center circle. Basically, you’re appliqueing the circle onto the center of the Dresden plate. You can choose your favorite applique technique for this. I like the edge of the circle to be turned under rather than a raw edge that is fused. So, I’ll show you a “freezer paper and starch method” and a hand gathered method.
The Dresden blade pattern page has two circles that you can use as the circle template. You’ll need the larger circle for the large Dresden.
Freezer paper & starch method:
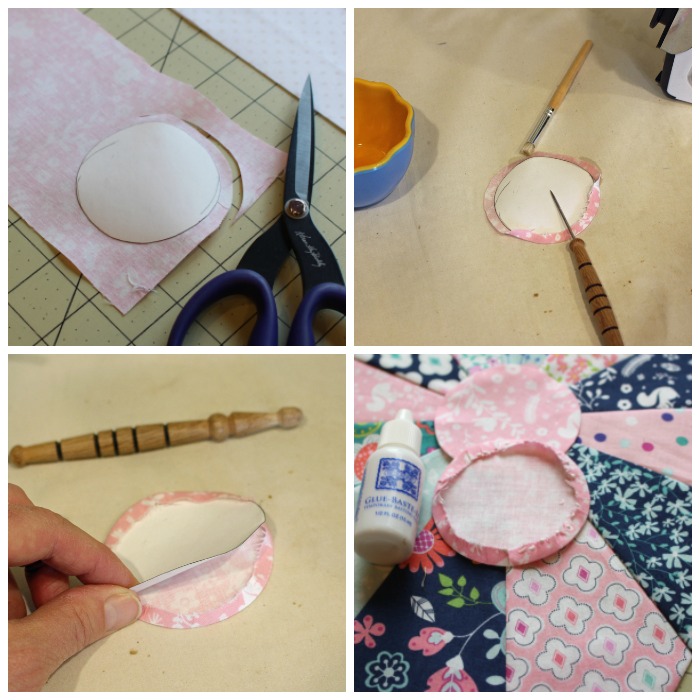
- Trace the large circle from the pattern page onto the dull side of the freezer paper. Place another piece of freezer paper (both shiny sides down, not facing each other) over this and press them together. Cut out the circle.
- Press the freezer paper circle onto the fabric and cut out the circle, leaving a 1/4″ seam allowance.
- Using a cotton swab or a paint brush, “paint” the edge of the fabric with starch. Press the fabric over the edge of the circle with an iron. I use a stiletto to guide the fabric over the circle. Ease in the fullness, so that you have a smooth circle.
- Remove the freezer paper; it can be used again.
- Use a water soluble glue like Roxanne’s Glue Baste It and glue the circle in place. Press.
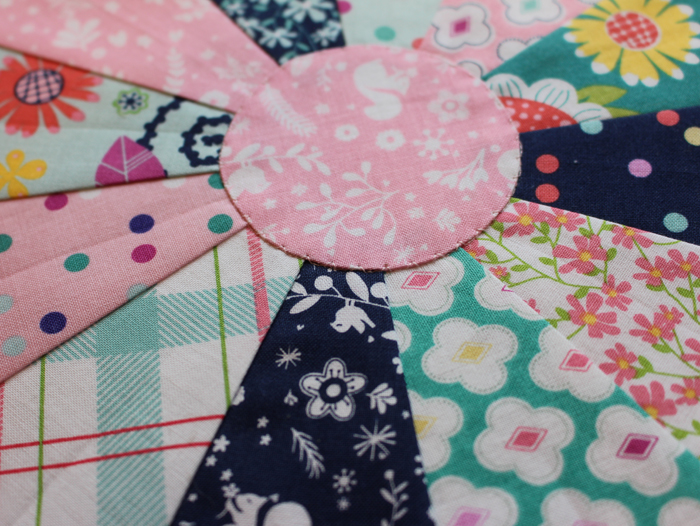
- Stitch the circle by hand or by machine.
Hand gathered method:
- Make a circle template out of cardstock or a file folder. I traced a circle using a spool that was just the right size, or you could use the pattern template.
- Trace around the circle onto the fabric. Leave a generous 1/4″ seam allowance when you cut out the circle.
- Thread a needle and take small basting stitches in the seam allowance. Leave a tail on both ends.
- Place the template on the fabric circle and pull up on the thread tails to gather the seam allowance.
- Press the seam allowance in place. Pull out the circle template and knot the thread tails.
- Glue the circle into place as in the previous method.
Finishing:
- Fold the background fabric in half and lightly press to form a crease. Repeat in the other direction.
- Center the Dresden plate so that the point OR the valley lines up with the crease.
- Glue baste or pin paste the Dresden in position.
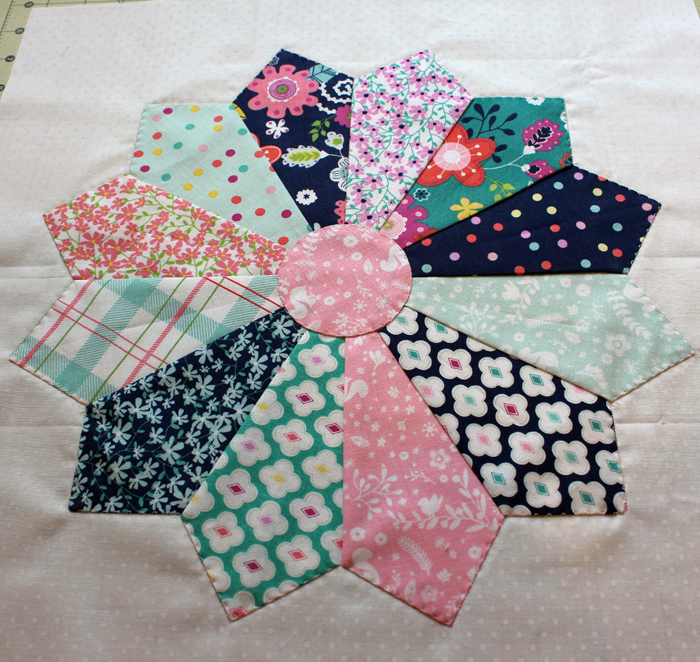
- Stitch down the edges by machine or by hand. I stitched mine by machine using monofilament thread and a narrow zig zag stitch. You could also topstitch close to the edge with matching thread and a straight stitch.
- Trim the block to 16 1/2″ square.
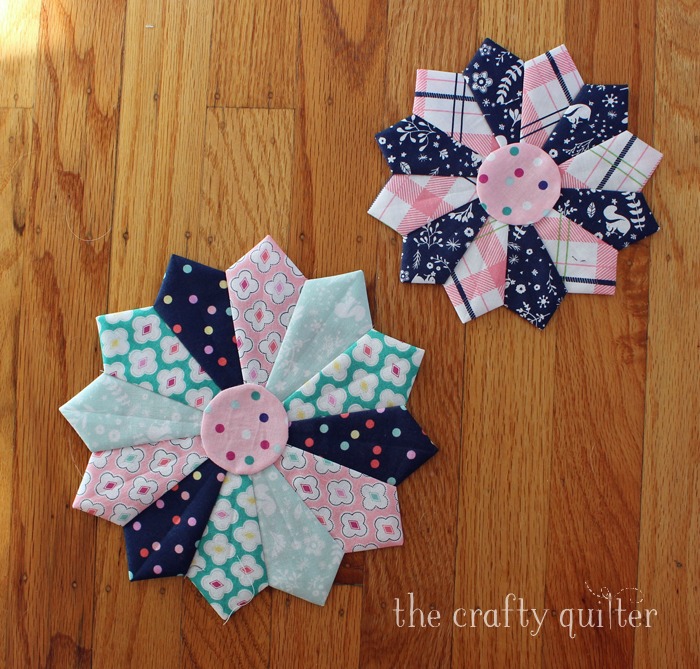
You can make any size Dresden plates by varying the width of the fabric strip used to make the blades. I used a 4″ wide strip which produced a 8 3/4″ Dresden plate, and a 3″ wide strip which produced a 6 3/4″ Dresden plate. Using just two fabrics for the blades gives you a very different look as in the small Dresden plate below.
There are lots of online resources for Dresden Plate quilt blocks and some great books, too. Here are a few:
Other Resources
Dresden Plate Block Sew Along at Sew Mama Sew
Dresden Plate Quilt block & template at Patchwork Posse.
Dresden Plate Video Tutorial by Missouri Quilt Star Co.
Dresden Plate Quilt Block Video Tutorial by Quiltmaker Magazine
Thanks for joining me today. I hope you give the Chunky Dresden plate block a try and let me know how yours turns out!








Thank you so much for sharing the beautiful Dresden Baby quilt tutorial! Also thank you for the pattern, it was
exactly what I was looking for…
Julie, I love your site. The 6″ wide pattern for your 6″ chunky template is
6 3/4″. Does connecting them together make them 6″ across the bottom?
I received my first template yesterday that I ordered on Amazon. It’s 3.5″
across the bottom and is 8″ on the side. I’ve cut out tons of blades and so
far it looks like the hole will be VERY wide. I think your chunky pattern will
have a smaller hole but I wanted to check with you about it first, as the
numbers are confusing. Thank you so much for a reply. Emilie in NC
PS: Sending this to you – it asked for a website and I don’t have a web site
but it wouldn’t go if I didn’t put in a website, so I used your. Sorry.
Love your site. Question: if I was making this as a table centre piece, how would I finish the back…….could you help me with this……thank you
I’ve been designing my own quilts with unusual ways to use Dresden Fancy Plates (alternate curved and pointed petals). I love this tutorial! I had not heard of doing them this way. It’s SOOO much easier! Thank you!
For my centers, I cut 2 circles of the same fabric, see them right sides together., Make a s small slit in one . Be careful! turn inside out.
Thank you for such a great amount of information & for the template.
Amazing amount of information! I just recently started quilting after graduating college (now I have the time). I thought the best way to get to a point i know what I am doing is do all the classics (log cabin, wedding ring, and Dresden plate). I have a goal to make everyone in the family a quilt. My daughter says she wants a sunflower quilt so the first thing I thought of is the Dresden plate. I am going to use your template (thank you) because the thought of 16 1/2 inch blocks is perfect (less petals but still full block and prettier IMO). Your choice of color coordinations are beautiful BTW.
Thank you for the free printable template. Your step by step tutorial for the chunky Dresden plate is very easy to follow . I also bought the 30 degree ruler it will come in handy . I will continue to follow your tutorials . Thank you ! Here is my very first time making 9 chunky Dresden plates I made using men’s neckties for pillow covers .
Wanted to post picture of my Dresden plates not sure how to do that ! Thanks
Thank you so much for your straightforward tutorial! I have been searching how to make a smaller version and everything else was so confusing! I’m making a sampler wall hanging and need a Dresden 🙂
What a wonderful tutorial! I had been searching for a “chunkier” Dresden plate with a template as none of our local stores carry a 30 degree wedge. I was able to make the plates for my Christmas table runner easily that lay flat and look super..
I started this project on wednesday and I have four complete. Only 12 more for my queen size quilt. I’m hand stitching the plate to the back ground fabric. So it’s taking me a bit longer to do each one. But I like the look. This is a really easy and fast block to put together. And each one is a bit different, depending on how you lay out the blades.
Thank you for an easy to understand photo tutorial. I was thinking maybe it would be easier to tape the template to a ruler? When I finally get around to making a Dresden I’ll try that method and let you know if it helped 🙂
I’ve never made Dresden Plate design. With this easy to follow instructions, now I want to try it. Thank you so much for sharing.
I really like the chunkier look of this dresden plate, thanks for the tutorial!
Thank you for sharing this tutorial on the Dresden Block! You always make everything look so fun! So easy! I really like the chunky Dresden too! Although…I just simply love Dresdens!! They are so fun & just look really nice! I’m happy to hear they are making a come back as well! ❤️❤️
I really enjoy your tutorials Julie! Thankyou for taking the time you do to share all your fun ideas! It’s greatly appreciated! I learn so much from them!
Hi Julie,
I really like the Dresden block too. So many sizes possible and such a cute way to use up scraps. Thanks for the tutorial. I always look forward to your posts, your quilts are always so pretty and you have so much great content.
Hugs and blessings!
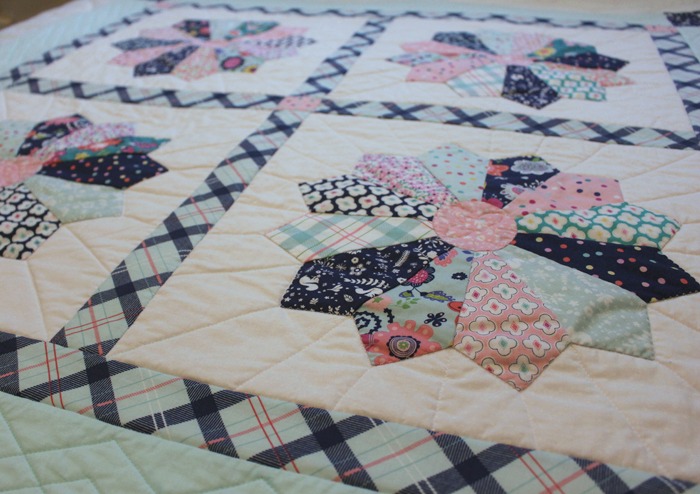
This is a great tutorial. Thank you! And I love the plaid sashing you used; it looks so nice with the dresdens.
Wonderful tutorial. Pictures and instructions are very clear. I will finally make some dresdens because of this. Good information as always.
Joan Williams
Julie, been waiting for this. Picking out my scrappy fabric today. Can’t wait to start this sweet quilt. Thank you for always being so inspirational and sharing your knowledge.
Thank you for the tutorial. I love it and now have a new pattern. Your patterns are always so easy to follow. Thanks again.
Thank you, once again, for an easy-to-understand tute with great photos!
Beautiful.. Thank you for the tutorial.
thank you for offering your expertise in how to go about doing a larger wedge type Dresden plate. It is gorgeous!
Thanks for the tutorial! I love Dresden quilts – looking forward to making a chunky one!
I love the Dresden plate. I made table toppers for my granddaughter Kaitlyn’s wedding using various purple fabrics. She loved them and the guests at their tables enjoyed taking them home.
Thank you for your teachings.
Loism
I like your chunky dresden! I was working on a variation this past Tuesday at my quilting group. I think they are always lurking in the background and peak out every now and then!
Julie, I agree with you that the chunky, twelve blade is better for some projects. I especially like that size when I want to really show off the fabrics. There is a great ruler that you can use also it is Fat Cats Acrylic Ruler by Darlene Zimmerman EZ Quilting. I have it and find it very helpful. Great tutorial as always!
Thanks for the ruler tip, Jill! I hadn’t heard of that one before now. It’s nice to have options.
Thanks so much for this tutorial. you make everything look so easy. I love your blog.
You have a real knack for describing the steps in an easy-to-follow and understand way, Julie! After reading your tutorial, I don’t feel so intimidated by this particular block! And I love the wider version that you created — thank you for this tutorial and encouragement!
Thanks so much for the template and good tutorial. I’ve made a large quilt with 20 blades which I love but would also like to make a smaller version. I didn’t know that you could buy a 30 degree ruler. Thanks for the heads up.
What a wonderful tutorial. I love the chunkier Dresden too and I am really enjoying seeing all the varieties in blogland, Instagram and Pinterest. I am glad, like you, that they have made a comeback. Thank you for this.