Fixing quilt blocks and a new tutorial coming
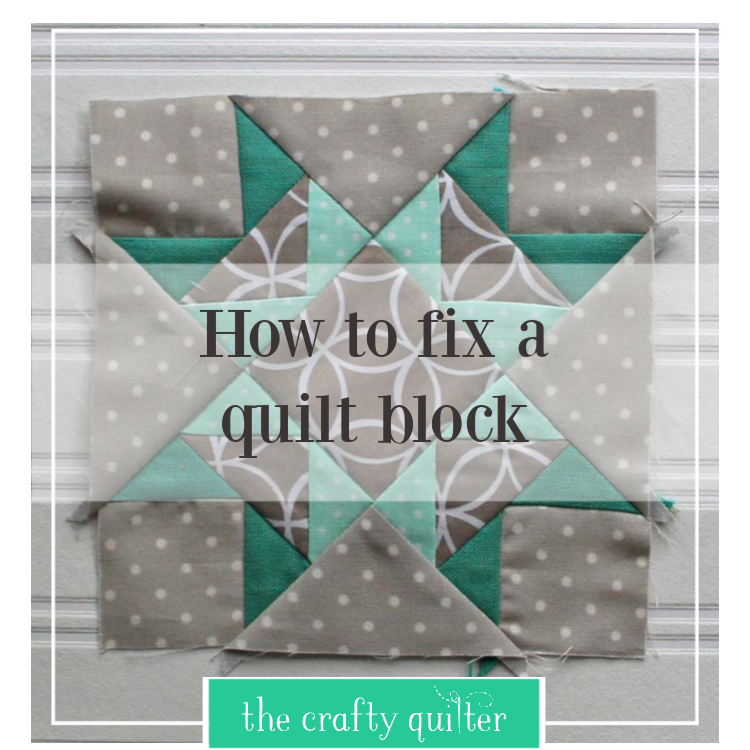
Have you ever put a lot of time and effort into piecing a quilt block only to find out that it’s too small or too big? That just happened to me a few weeks ago, and so I thought I would talk about fixing quilt blocks and making them “perfect” again.

The quilt block I made (and fixed) was for a block of the month that I’m co-teaching; I blogged about it here. This block was made the old-fashioned way with triangles and squares – no easy piecing techniques or shortcuts. The pattern did not tell you what size the smaller units were supposed to measure. When it was all put together, it was too big and a little wonky.

If I were to square-up this block, I would lose the points on some of the triangles. I decided to make it again and try to figure out where I went wrong. Here’s what I noticed:
- This time I starched my fabric really well before cutting any of the pieces.
- I took my time.
- I was really careful and exact about cutting my squares into triangles.
- I pinned my pieces before sewing any seams.
- I trimmed my units so they were “square” before continuing to the next step.
- I made sure my 1/4″ seam was just right (scant for me).
- I pressed carefully.
- I took my time. Yes, it’s that important.
Fixing quilt blocks (re-making actually) is not the funnest thing to do, but it reminded me of how important it is to be accurate and slow the heck down. My second quilt block turned out much better, even though it is still a skooch too big. At least it’s not wonky and I’ll be able to sleep at night (just kidding).

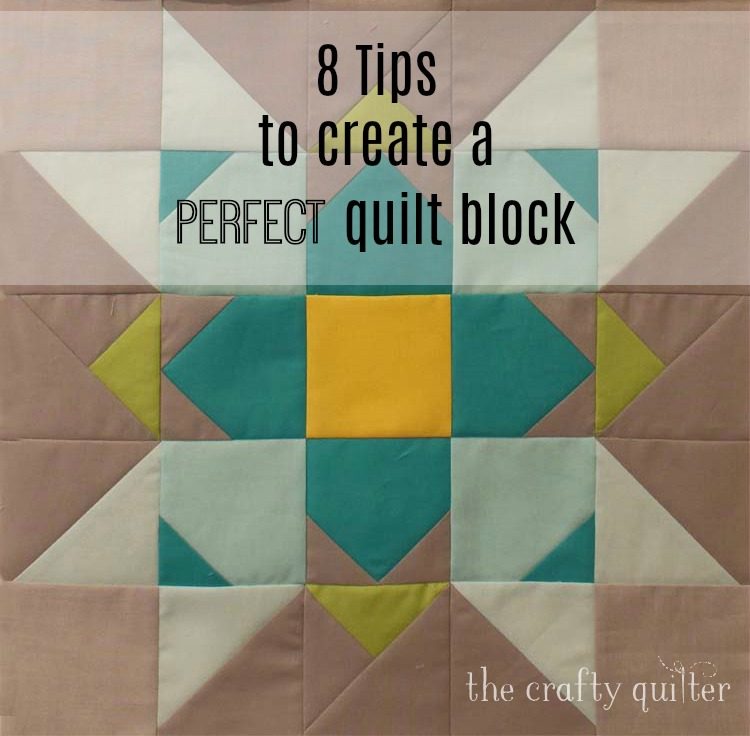
I was going to write an entire blog post on how to make a perfect quilt block when I realized that I had done that already! Check out my 8 Tips to Create a Perfect Quilt Block from 2018.
The only thing I would add to those 8 tips is to trim your units and your quilt blocks as you make them. Even if it’s just a few threads, it makes a difference. I do this religiously and it’s great habit to maintain.

Now you’re thinking I’m a perfectionist, but I’m not so much. When I want to be, I can hit the nail on the head. Other times, I’m OK with points not being perfect or seams not matching. I think it’s more important to enjoy what you’re doing and have fun with it!
Speaking having fun, I just finished the cutest little project and I can’t wait to share it with you! I’ve been making origami fabric pouches, and I’m addicted. Each pouch takes two fat quarters and a piece of ribbon or cording. I’ll have a free tutorial to make them in several different sizes, and I’m going to make a video. Some things are easier to see in action and this is one of them.

Thanks for your nice comments and compliments from my last video on how to use a seam ripper. I guess the universe has aligned in such a way that my next project requires a video, too! Have a wonderful day and thank you for stopping by.

Discover more from The Crafty Quilter
Subscribe to get the latest posts sent to your email.

Your advice about trimming units “as you go” is right on!!! You had mentioned that in one of your Granary classes & when I follow that advice it makes a huge difference in my blocks!! Thanks for sharing your knowledge & experiences.
Oh those origami bags are so cute; can’t wait!
I can really see the difference between the before and after blocks. Now I have to go back and read your tips for making the perfect block. I just made 25 or so 9 1/2″ blocks for an exchange and mine seem to be a smidgen too big but I am hoping that will be better than too small. We shall see. Need to reset my needle a bit more to the left than I originally did i think. Looking forward to the video for those origami bags. They are too darn cute and a great way to use up fat quarters that are floating around the sewing room. Thanks for all you do!
This was an amazing post with so many great links to valuable information. Thankyou for such a fun blog and email.
the origami bags look like fun. I can’t wait!
Thank you for all your tips and ideas. I enjoy your post each time.
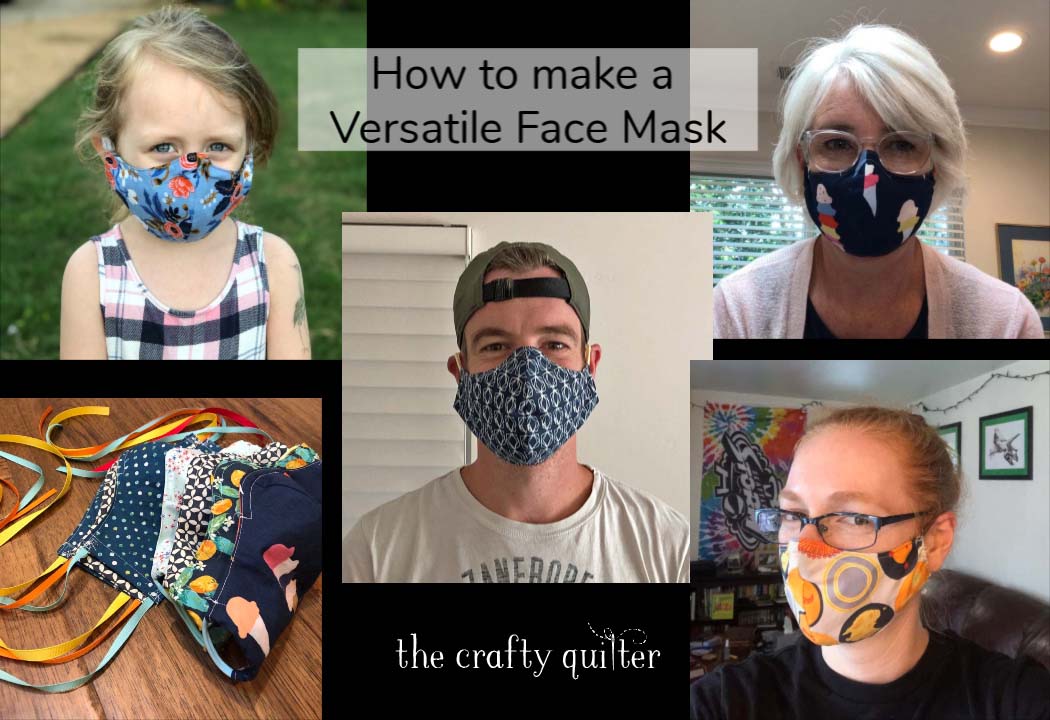
Hi Julie. I had an email from you featuring you latest project and also a face mask that I really wanted to try. I thought it was this week but am unable to find it. Could you help me out?
Thank you for the face mask pattern. I have made about 20. I added piping around the top for body and also changed the sides to include two 12 inch pieces of 1/4 inch elastic. Works much better for people with hearing aids over the ear. It fits snug and sure is pretty. Thank you again.
I can’t wait to see your video on the fabric origami pouch! And… I agree that trimming is super important. I’ve become a true believer now that I’m doing more piecing and quilt finishing.
Thank you for this post! I definitely need it! My big thing is to slow down. I can’t wait to see the pouch tutorial. They are so cute,
Always learn a lot from your tips! I learned recently about squaring up as you go and taking your time… the hard way!! Looking forward to hearing more about those cute little bags!!
J’aime beaucoup tes blocs et je suis en admiration devant tes pochettes.
J’attends avec impatience ta vidéo pour me permettre d’en réaliser.
Merci de tout ce que tu partages avec nous.
Belle journée et à bientôt.
So hoping for that new project to appear SOON
Thanks, Julie, for your link to your tips for perfect piecing. I never used to use starch, though I’ve gone through gallons of Mary Ellen’s Best Press in the past. Now I mix up liquid spray starch, varying the water, depending on how much stiffness I want. It’s really a game changer, as you know.
The fabric pouches look lovely. Stay healthy and hydrated everyone.
I loved all the tips. I never pressed my fabric before cutting or starched it. I have been using my seam ripper wrong too! I remember you told us to pin our borders so they don’t become wavy and it works. Now I am going to open your 8 tips and reread them. I am so eager to do it all before “time runs out” and now I have to learn to be more accurate because in the end, it makes a big difference! Thank you always for your help and great tips Julie. Stay well.
Looking forward to the video of the bags. You give great directions. Thanks.
Carolyn
Thank you for the tips on making perfect blocks. And the seam ripper technique! As I rarely make a perfect block. And ‘Jack the Ripper‘ comes to visit quite frequently.
I very much look forward to your messages, tutorials, and tips. Even though I have been a quilter forever, I can always learn.
Thank you.
Looking forward to the origami pouches, Julie.
I really like the origami bags too. I keep my westalee rulers in mine. They are fun to make and not very hard. You put the nicest things in your emails. Thanks.
I am looking forward to the pouch video! You always feature such good stuff!!
Thank you. Every quilter needs to review this.
Great tips and reminders for making accurate blocks. Also, Thank you for being a non-perfectionist.
I want my blocks to look great and be square. I have had to learn the quilt police won’t be examining all my blocks. I am looking forward to your tutorial/ The bags look like fun.
Isn’t it amazing what pinning and squaring up can do!!?? I am an awfully fast quilter, and slowing down really helps me as well. In my case there is never a necessary rush, so SLOW DOWN!! I loved “8 Tips”, and I cannot wait to see these little bags! I’ve got fat qs waiting!!
Thank you Julie!
-Jean
❤
I eagerly await your video tutorial for the Origami pouches! They look so cute!
Can’t wait to see your video on your origami pouches – so cute!!
Julie, I haven’t said “Hi” in a while so here goes. I always like your projects. You are an inspiration to encourage all of us to keep trying. Slowing down is often the key. I often feel like I am on the clock ⏰ Why? I don’t know ♀️. I have many, many UFOs. Maybe that’s the reason I try to turn them out too quickly.
Stay well and safe!!
I can’t wait to see the tutorail for the bags! They are so cute!
I don’t think I’ve ever starched my fabric before cutting. What was I thinking? Thanks for this and all the tips. There is always room for improvement. When I’m in a rush you can tell by looking at my work. Can’t wait to see how to make those cute bags!
Is it important to press instead of moving the iron when you iron the seams? I’ve always wondered…