
How To Make Capped Flying Geese | Fantasy Flying Geese Week 1
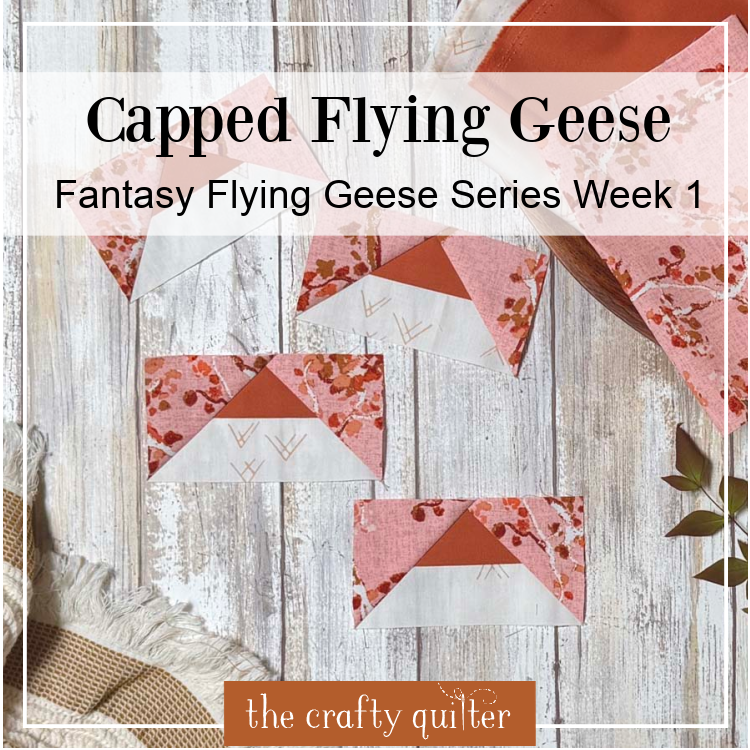
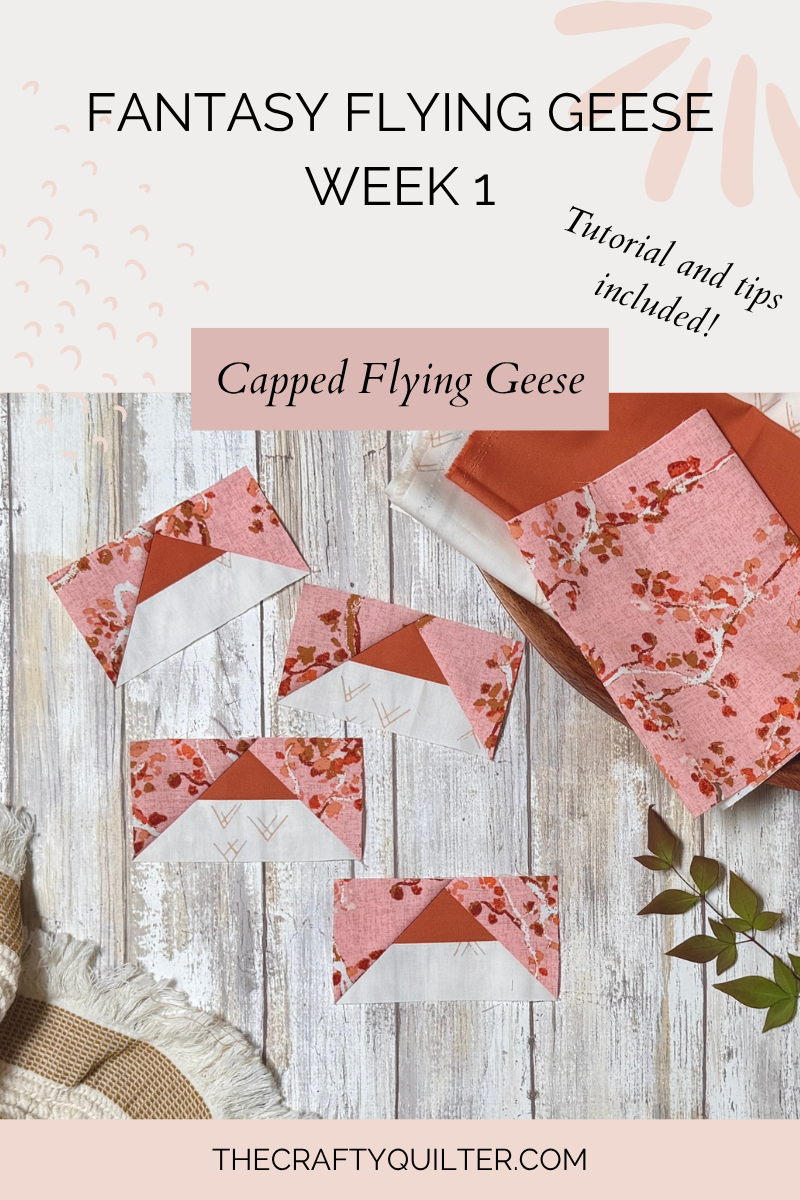
Welcome to Week 1 of my Fantasy Flying Geese Series! We’re starting with a variation I’m calling Capped Flying Geese. This variation adds an extra layer to the body section of the flying geese unit, and it’s really simple to make!
I’ll show you two ways to make Capped Flying Geese: a one-at-a-time method with tips for accurate results, plus an oversized method that allows you to trim each unit down to the exact size.
New to this series? You can find the Introduction Post here with all of the details.
About this flying geese variation
Flying geese units are comprised of one body section and two wings. The Capped Flying Geese divides the body section horizontally into two separate fabrics. It’s an easy twist to a classic block!
One-at-a-time Flying Geese
Because of the way it’s made, the construction of the Capped Flying Geese requires making them one-at-a-time instead of four-at-a-time. We’ll get to use other methods eventually!
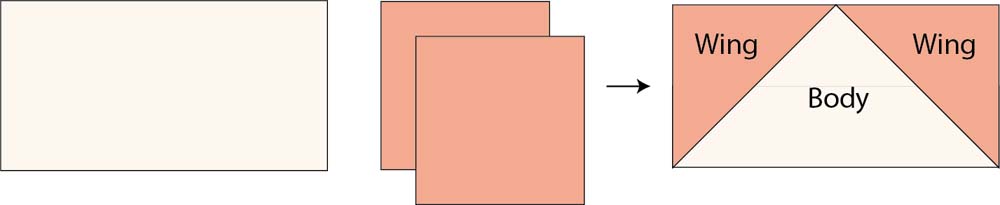
One-at-a-time means that the units are made individually. The method I use for this is “stitch and flip” where you stitch on a diagonal line and flip the fabric over to create a triangle. It starts with a rectangle and two squares. The rectangle becomes the body (large triangle) and the squares become the wings (small triangles).
General Things To Know
- Makes four Capped Flying Geese that measure 2″ x 4″ FINISHED.
- Fabric: Use large scraps or 1/8 yard each of one light, one medium and one dark fabric
- Two sets of instructions are given; one exact and one oversized
- All seams are 1/4″
- RST = right sides together
Capped Flying Geese Instructions (exact)
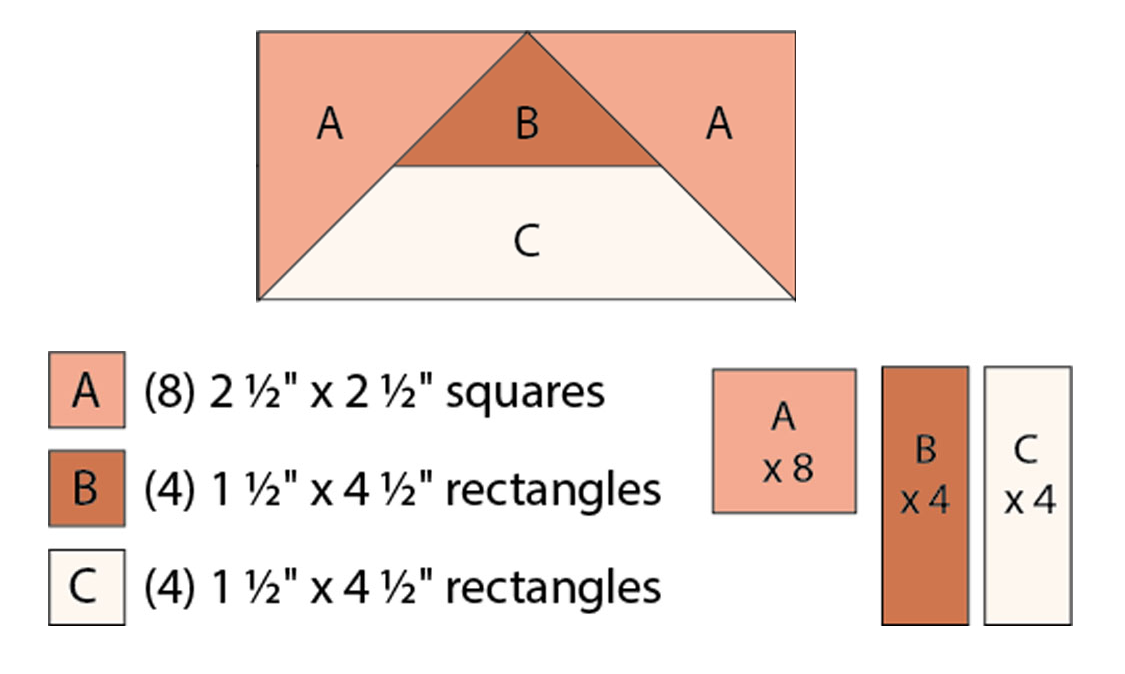
Cutting Instructions
Assembly
- With RST, sew a B rectangle to a C rectangle.
- Press towards the B fabric.
- The B/C unit should measure 2 1/2″ x 4 1/2″.
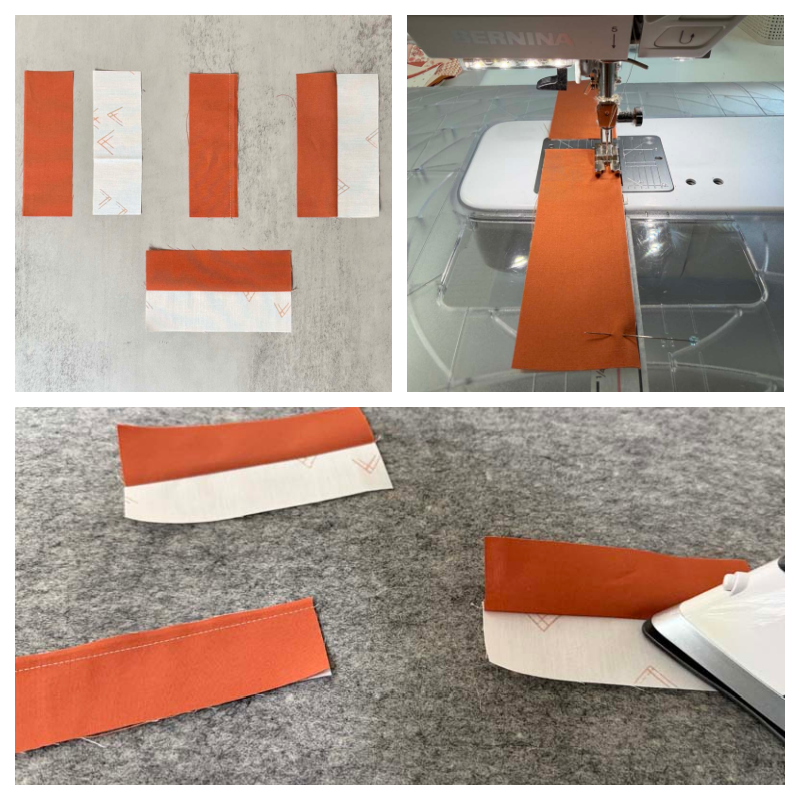
- Draw a diagonal line from corner to corner on the wrong side of each A square.
- Place an A square on the right side of the B/C unit, aligning raw edges.
- Stitch on the line. TIP: Stitch a needle-width away from the line (the seam allowance side).
- Trim seam allowance after checking to make sure the A fabric extends to cover the corner.
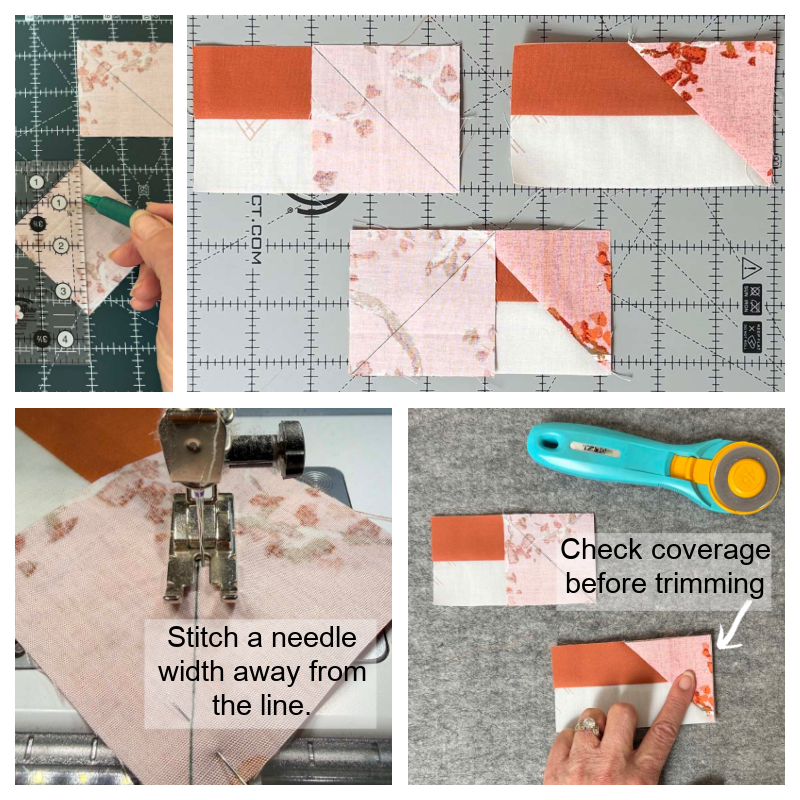
- Place another A square on the opposite side of the B/C unit. It will overlap slightly at the top.
- Stitch on the line (see tip above).
- Trim seam allowance, again checking to make sure the A fabric extends to the corner.
- Repeat all steps to make four Capped Flying Geese blocks.
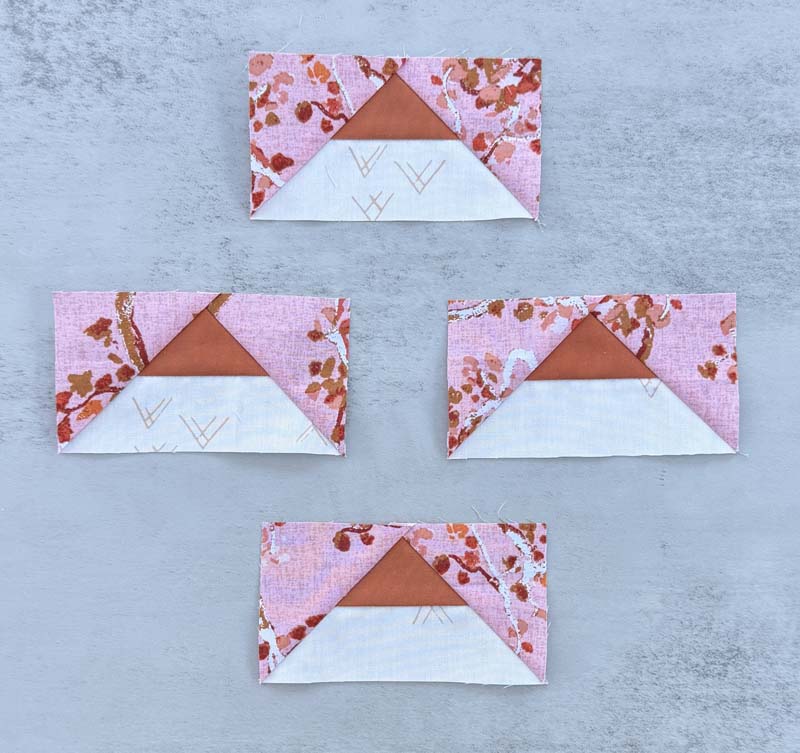
TIPS for exact construction
- Starch all fabric before cutting and sewing. This adds stability to the fibers and better accuracy.
- Draw the diagonal line carefully, making sure it starts and ends at the corners.
- Make sure the A square is lined up exactly with the raw edges of the B/C unit.
- Pin the A square in place before stitching.
- Slow down when sewing the diagonal seams.
- Sew just next to the drawn line. This allows space for the thread and fold-over of fabric.
How to oversize one-at-a-time flying geese
We’ve all been there; you take your time and you’re really careful when cutting and sewing, but the quilt block still turns out wonky. Or too big, too small, etc. When you oversize a block or unit, you make it slightly larger which allows you to trim it down to the exact size.
My favorite way to oversize one-at-a-time flying geese – made with one rectangle and two squares – is to bump up the size of the squares by 1/4″. (This works with any size flying geese block). The rectangle stays the same size. Having the squares larger will give you trimming space along the top edge of the flying geese unit. This is where most of the wonkiness occurs.
Below, you’ll find instructions to make the Capped Flying Geese block oversized AND it includes directions for strip-piecing the rectangles. Fast and efficient!
Capped Flying Geese Instructions (oversized)
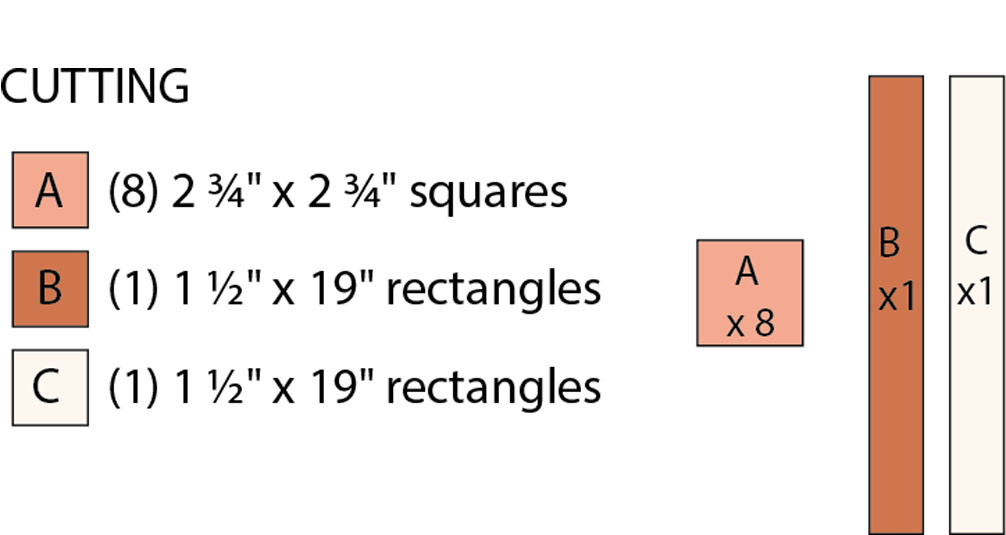
Cutting
Assembly
- With RST, sew the B and C rectangles together. Press towards B.
- The B/C strip set should measure 2 1/2″ wide.
- Cut the strip-set into segments that measure 4 1/2″ x 2 1/2″.
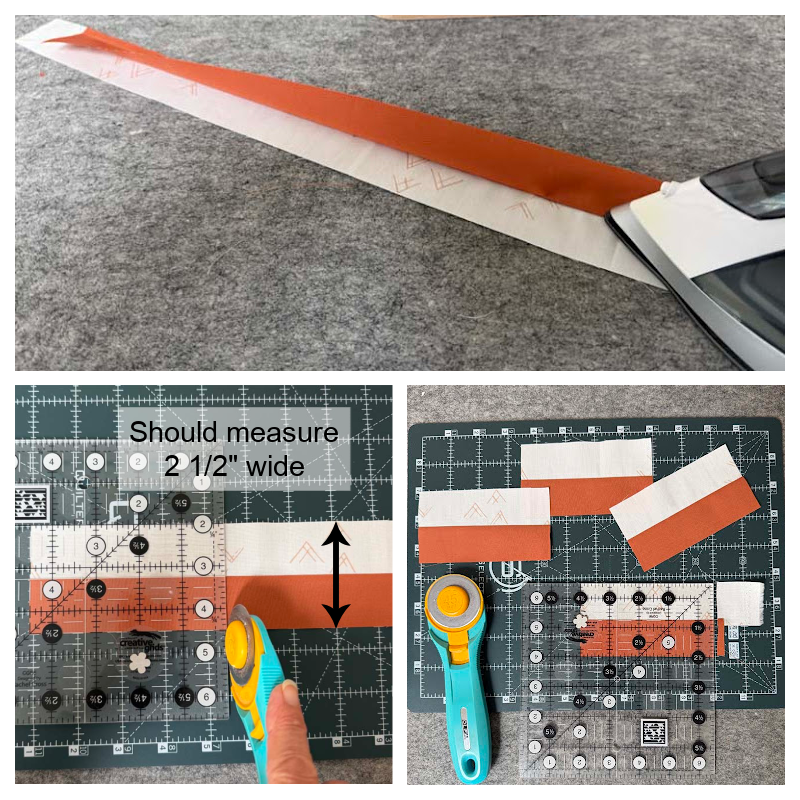
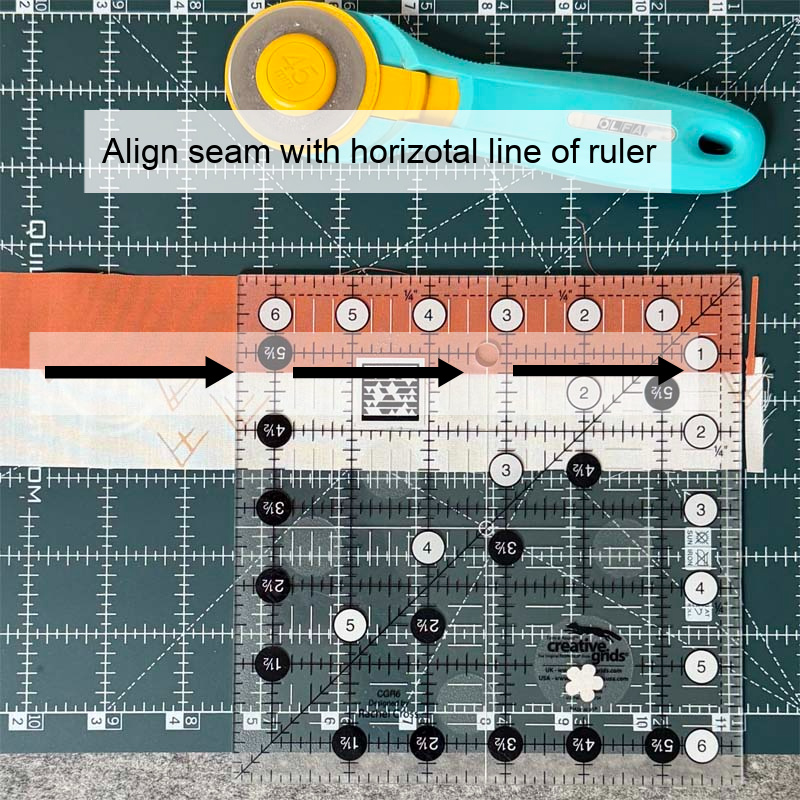
TIP: When making the first cut (clean-up cut) of a strip-set, use the seam as a placement guide for your ruler rather than the raw edges. In a perfect world, the top and bottom raw edges will also be aligned with the ruler lines, but the seam is a more consistent guide.
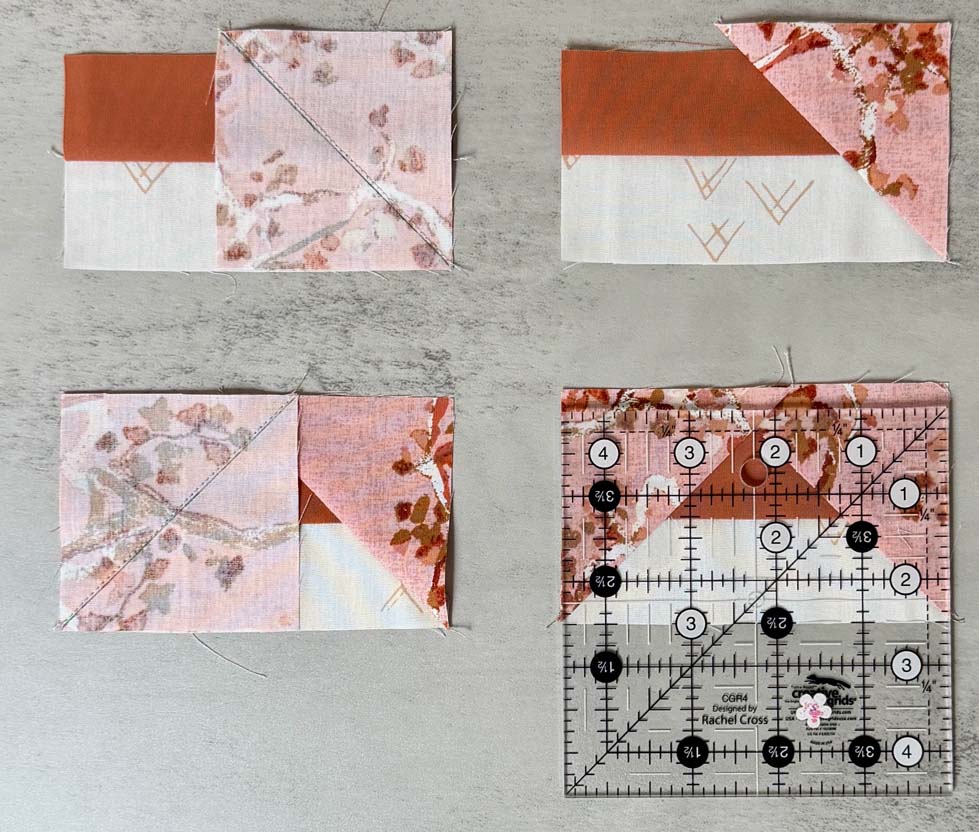
- On the wrong side of each A square, draw a diagonal line from corner to corner.
- Place an A square RST on the right side of a B/C unit, aligning the bottom and right edges. The square will hang over the top of the B/C unit.
- Stitch on the line. TIP: Stitch a needle-width away from the line (the seam allowance side).
- Press to the corner and check to see if the corner fabric is aligned to the right edge of the rectangle. It will extend beyond the top.
- Trim seam allowance.
- Repeat these steps with another A square on the left side of the unit, aligning the bottom and left raw edges. It will overlap at the top a little more than you’re used to.
- Trim the top edge, making sure the seam allowance is 1/4″ beyond the point.
- Repeat all steps to make four Capped Flying Geese blocks.
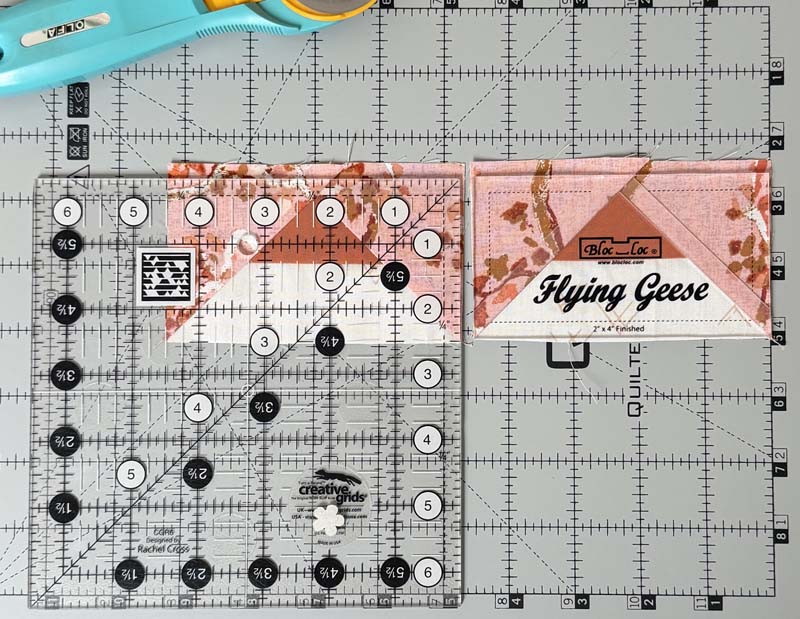
- If you have a Bloc Loc ruler, now is a great time to use it. You may need to trim a little on all four sides.
- If you’re using a square ruler, the 2 1/4″ line should land on the point. This is the center of the 4 1/2″ side. Trim the top edge first, and then check the remaining sides to see if any trimming is needed.
Tips for oversized construction
- Draw the diagonal line carefully, making sure it starts and ends at the corners.
- Make sure the A square is lined up exactly with the side and bottom raw edge of the B/C unit.
- Pin the A square in place before stitching.
- Slow down when sewing the diagonal seams.
- Sew just next to the drawn line. This allows space for the thread and fold-over of fabric.
- The diagonal seams will overlap at the top much more than you’re used to. That’s what creates the oversized unit to trim.
- You will need to trim the top edge, and if needed, any remaining sides.
Common Mistakes And How To Fix Them
My B/C unit isn’t 2 1/2″ wide
- Check your seam allowance. If your unit measures less than 2 1/2″ wide, then your seam allowance is too big. If it measures more than 2 1/2″, then your seam allowance is too small. You can adjust either of those by moving your needle position to the right (making it smaller) or to the left (making it bigger).
- Practice with different 1/4″ seam guides. Test for accuracy before continuing. Check out The Perfect 1/4″ Seam Allowance for more tips.
- Make sure you’re pressing the seam flat. There should be no folds or tucks.
My points are cut off
- This is a common problem with flying geese units. I recommend using the oversized instructions. This will give you extra space at the top for a 1/4″ seam allowance.
- Make sure you’re stitching next to the diagonal seam, not directly on it.
My block is still wonky
- Make sure the squares are lined up exactly with the rectangle and pin in place before stitching.
- You may have stitched directly on the diagonal line rather than just to the side of it. Practice stitching a needle-width away (to the corner side). Eventually, you’ll get it just right.
- Are your seams straight? Most wobbles occur at the beginning and end of a seam. Slow down and take your time.
- Make sure you’re pressing the seams well. Sometimes a little extra oomph is all you need.
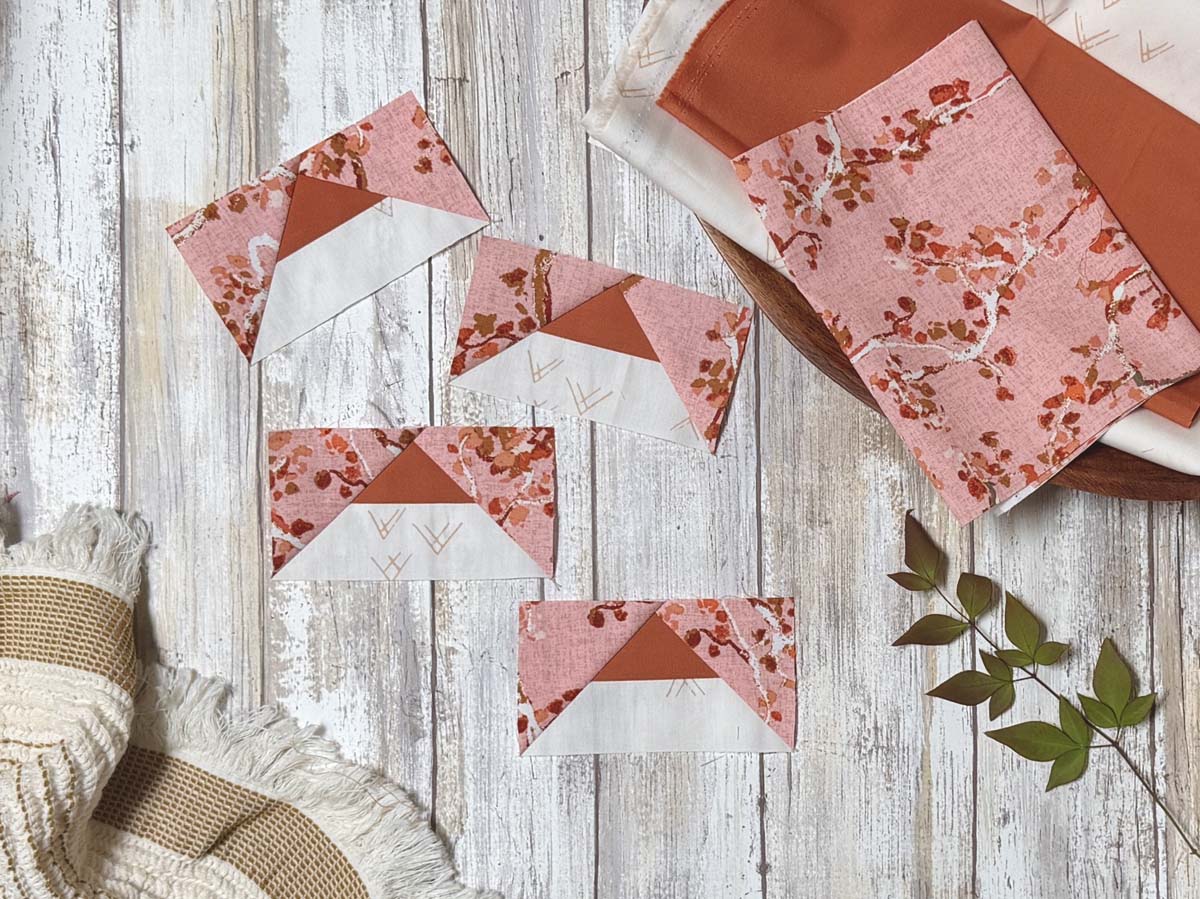
Printable Instructions
You can download the pdf below! The instructions include both exact and oversized – pick your poison. 😉
Conclusion
This is an easy variation of the flying geese block, and I hope you enjoy making it! Remember, if you want to make the sampler quilt at the end, you’ll need to make four of the Capped Flying Geese blocks. Instructions on how to put them together will be given in the sampler instructions.
If you’re sewing along, I’d love to see your flying geese variations! For social media, use the hashtag #fantasyflyinggeese and tag me @thecraftyquilter so I can be sure to see it. You can also send me an email and attach a photo. I might do a showcase at the end of the series!
Next week, we’ll be tackling the one-seam flying geese. I can’t wait to show you this one!


Discover more from The Crafty Quilter
Subscribe to get the latest posts sent to your email.
Absolute great instructions. Thank you
These are so much fun! Might just have to sew a few, and maybe use them in my SAHRR this year…we shall see.
I Love this. Thank you and I can’t wait to practice!
It’s wonderful tutorial.
I eagerly await the next one.
Julie, I am so glad to read this information. I am doing edge to edge quilting and Clear Blue Tiles on a Christmas Quilt and my flying geese are leaving a hump at the points (not your method) so my needle is catching where the corners join.
Do you have any suggestions? My next flying geese will be oversized.
Thank you, Sharon KJ
D
Julie, thank you for this wonderful tutorial. I always love the way you present ideas and newer ways of doing things.