
How To Make Mountain Top Flying Geese | Fantasy Flying Geese Week 6
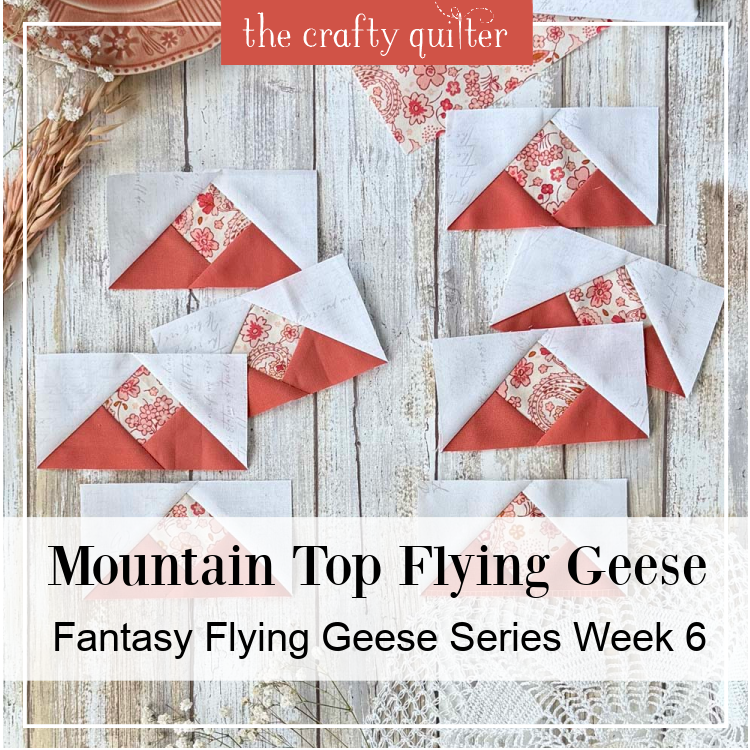
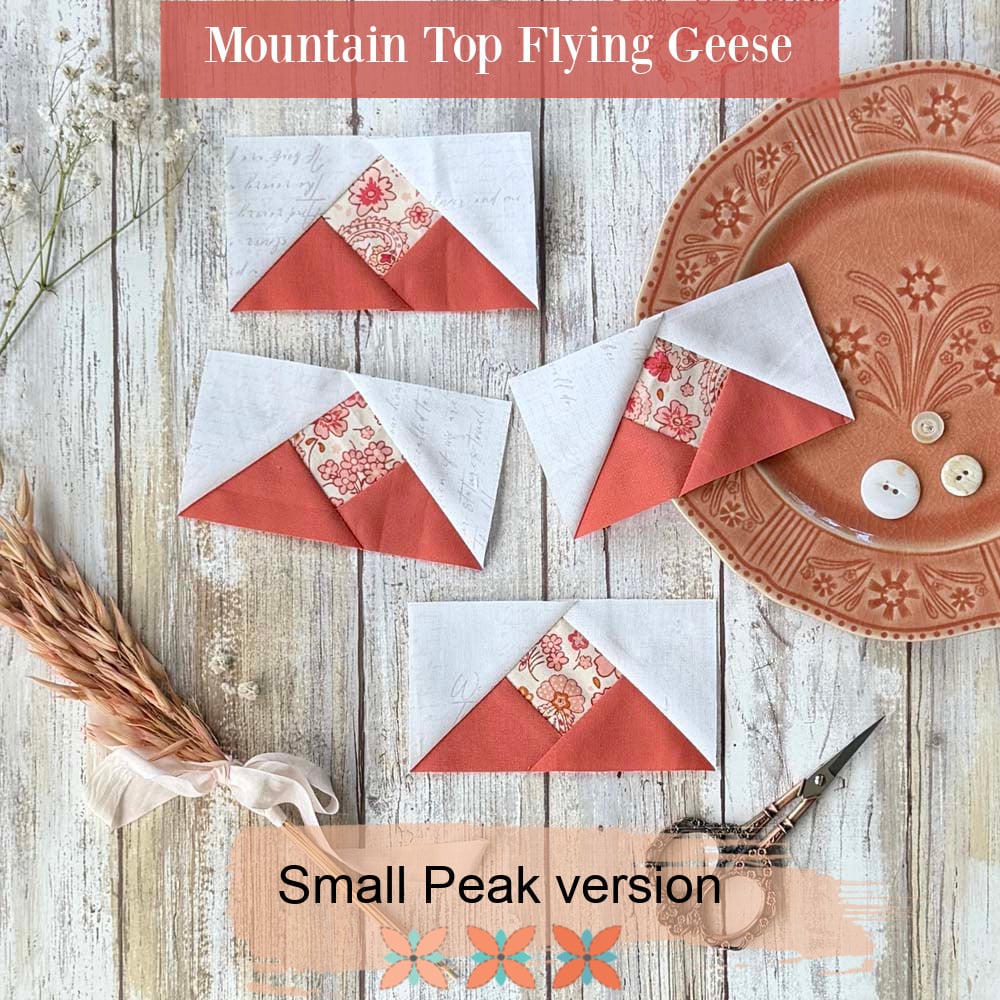
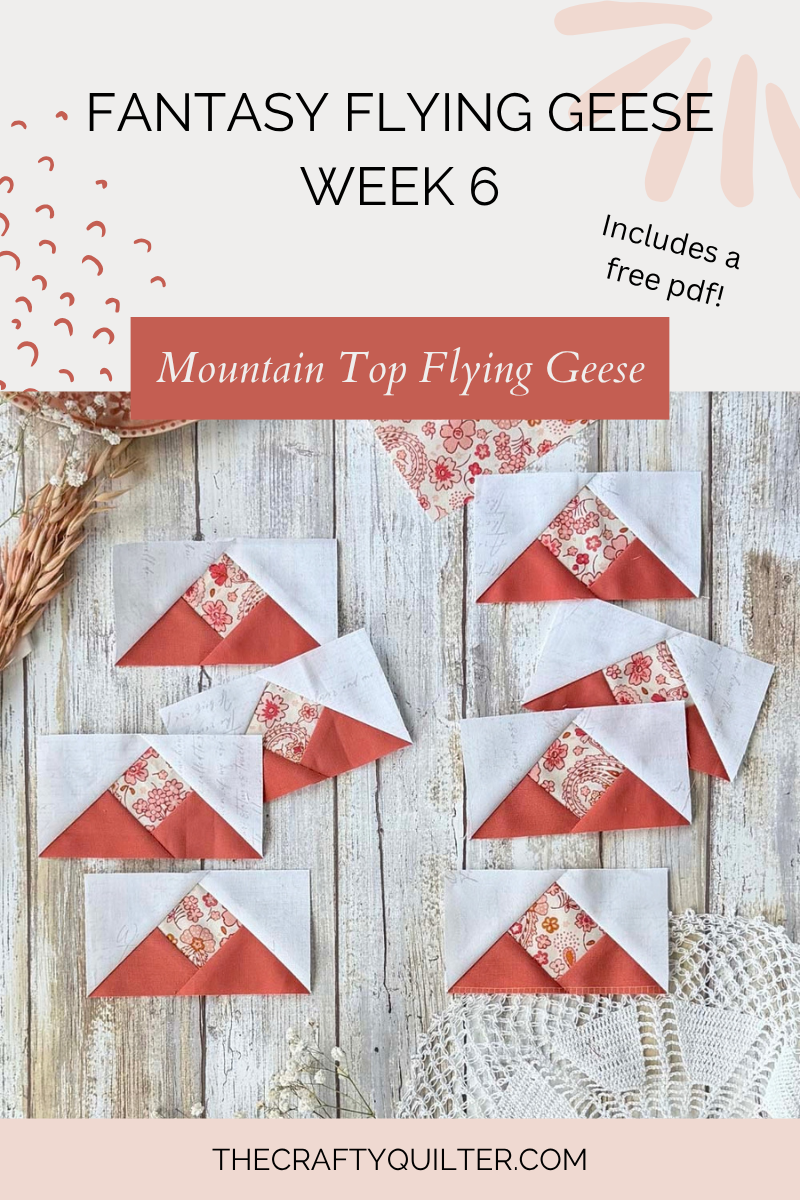
We’ve made it to Week 6 of the Fantasy Flying Geese Series! For our final variation, I’m introducing Mountain Top Flying Geese, with two different options – a small peak and a large peak. Both create a fun new look, and you’re going to love how easily they come together!
New to this series? Catch up below.
- Introduction Post – Start here to get all of the basic details.
- Week 1 – Capped Flying Geese
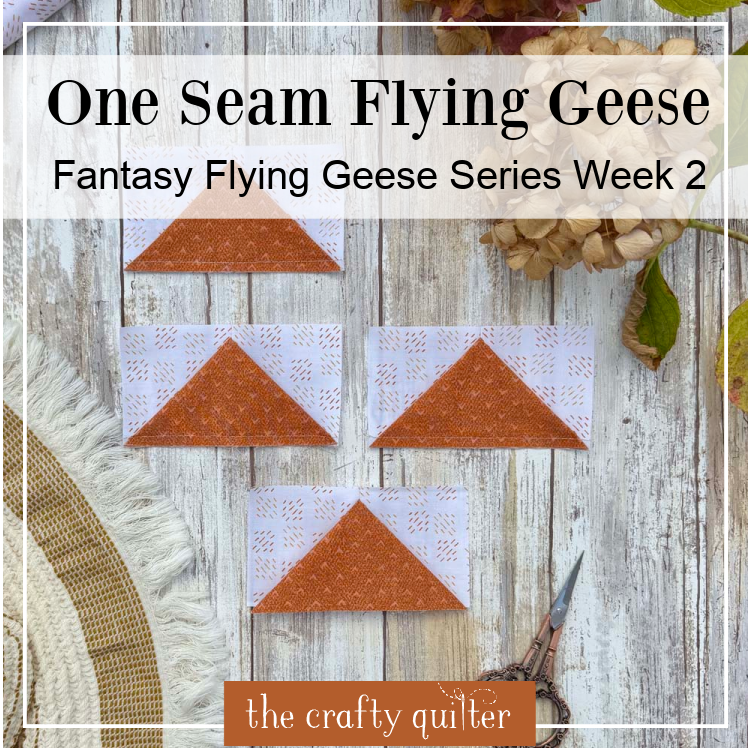
- Week 2 – One Seam Flying Geese
- Week 3 – Cat Ears Flying Geese
- Week 4 – Stroked Flying Geese
- Week 5 – Ribbon Flying Geese
About this flying geese variation
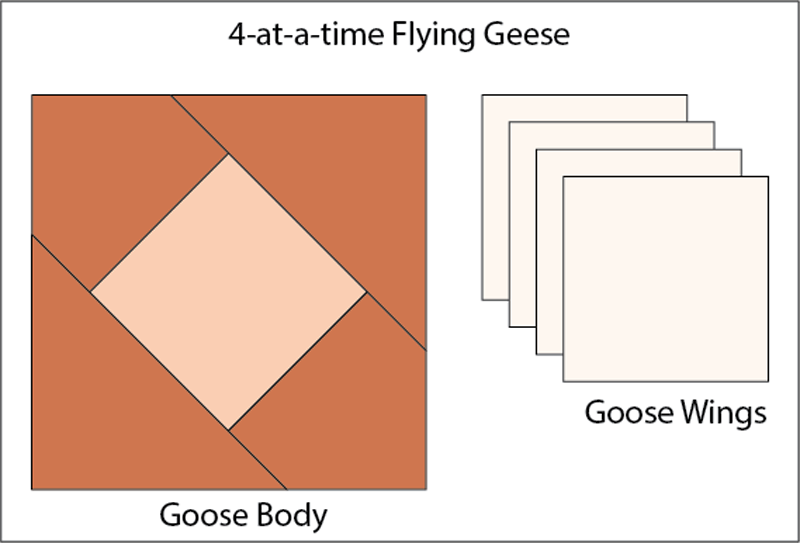
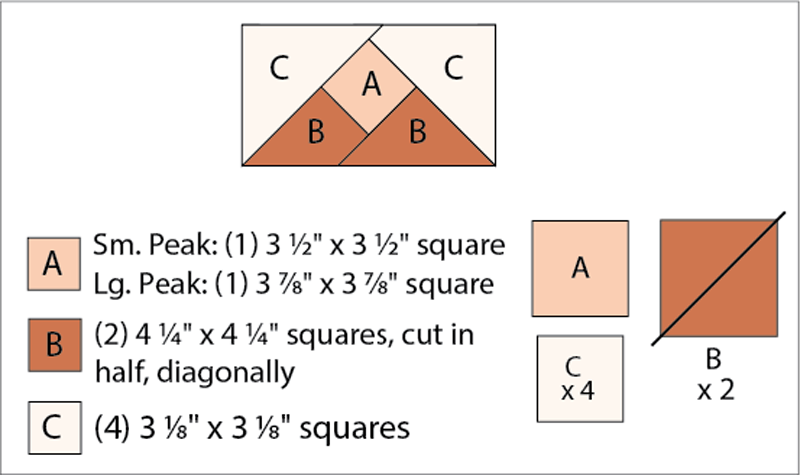
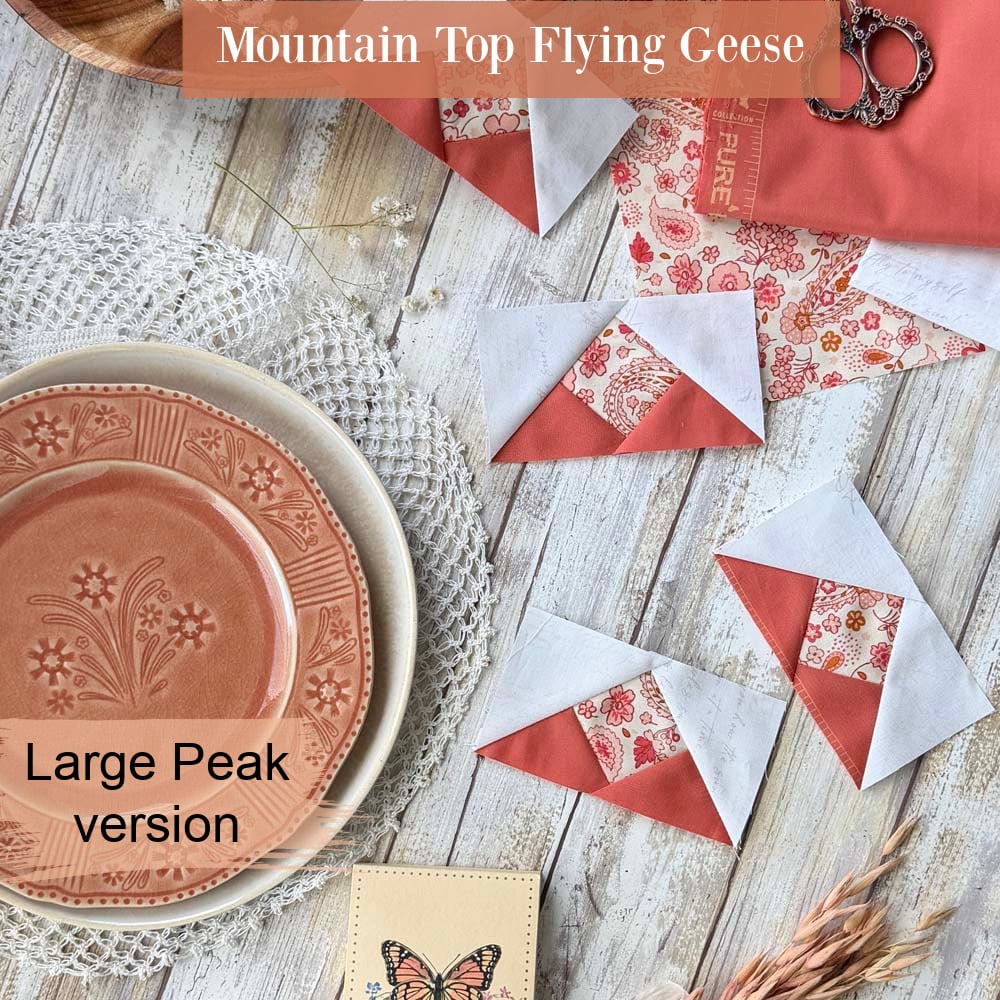
We’ve added one extra piece to our Mountain Top Flying Geese puzzle. A square sits at the top of the goose body, surrounded by two triangles and that’s what gives this variation its mountain-top look!
As I was making samples for this tutorial, I stumbled upon a better (and more clever) piecing technique than my original method. Surely I’m not the only one who has thought of doing it this way, (I’m not that clever) but it was a happy discovery nonetheless!
Using the oversized four-at-a-time flying geese method, I started with a square-in-a-square unit rather than a solid square for the large goose body. During construction, the center square gets divided into fourths, creating the small square you see inside each goose body. It will all make sense once you get into the tutorial, I promise!
The tricky part was getting the math just right. My first attempt produced an inner square that was too small. My second was a little larger, and by attempt number three, I finally got it just right.
But this Goldilocks actually liked attempt number two! That slightly smaller square looked more like a mountain peak to me, but I still wasn’t sure. So, I shared both versions on social media and asked which one you preferred. The slightly smaller square came out ahead, but plenty of you liked them both! So, you get a bonus this month of choosing between a Small Peak or a Large Peak.
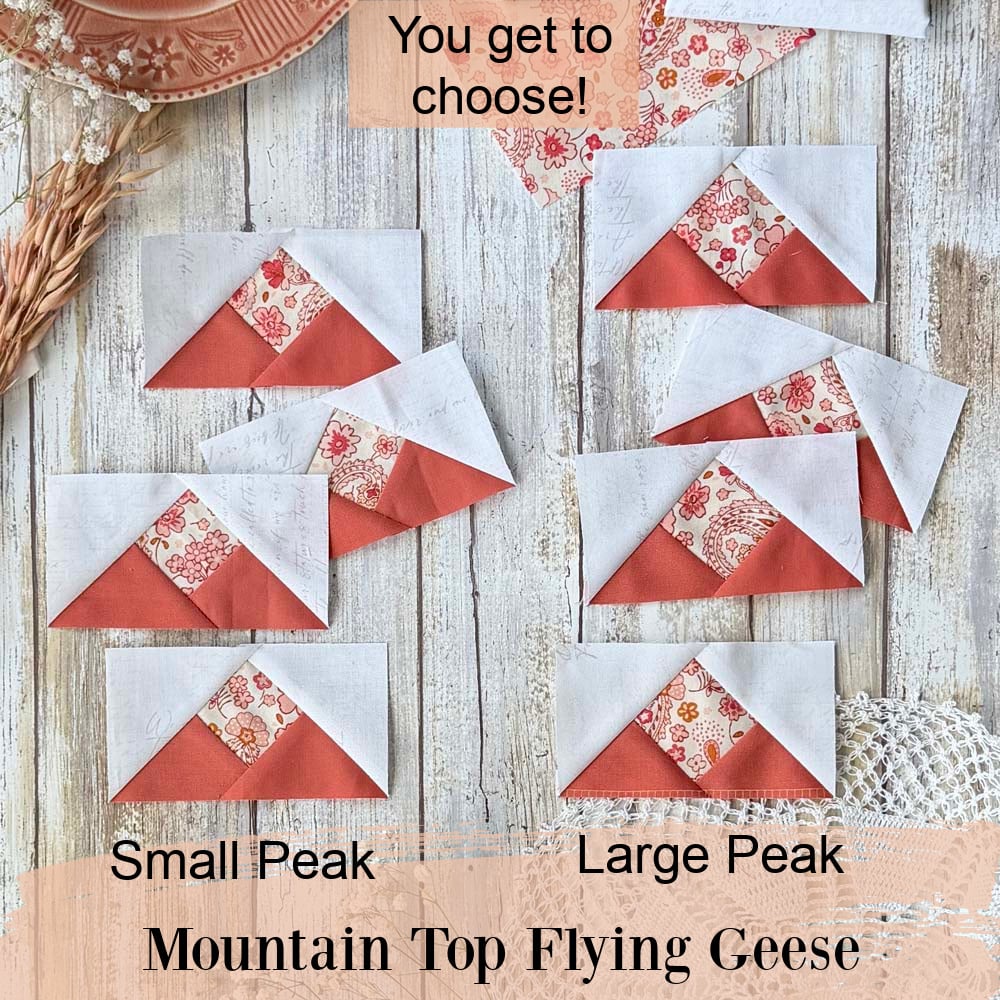
Comparison of Small & Large Peaks
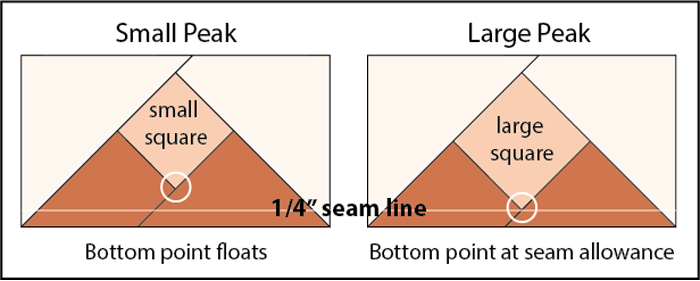
So here we are with two Mountain Top Flying Geese options: Small Peak and Large Peak. The Small Peak creates a floating point at the bottom of the square, while the Large Peak extends to the seam allowance. Both have their own look, so this time, you get to choose your favorite!
General Things To Know
- Makes four Mountain Top Flying Geese that measure 2″ x 4″ FINISHED.
- Fabric: Use large scraps or 1/8 yard each of one light, one medium and one dark fabric
- Cutting Instructions for the Small Peak and Large Peak are the same except for the A square.
- Tutorial images are shown using the Small Peak option.
- All seams are 1/4″
- RST = right sides together
- FG = flying geese
- SIAS = square-in-a-square
Mountain Top Flying Geese Instructions
Note: The Small Peak and Large Peak options are constructed the same way; only the size of the A square changes. Refer to the cutting instructions for the correct size. The step-by-step photos show the Small Peak option.
Cutting Instructions
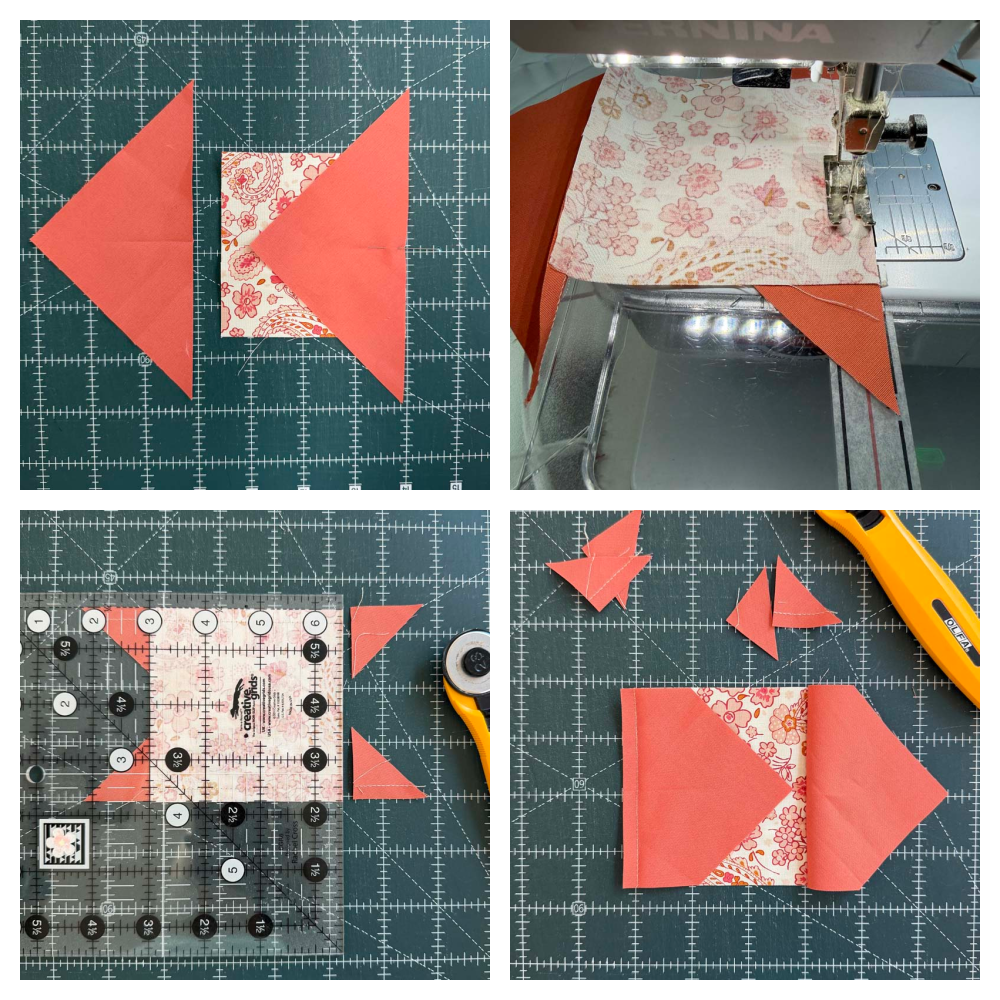
Make The Square-in-a-Square Unit
- Fold the A square and B triangle in half and make a crease to mark the center.
- With RST and matching centers, stitch a B triangle to the A square. TIP: I stitch with the square on top so this edge will act as an accurate 1/4″ seam guide.
- Repeat by sewing a B triangle onto the opposite side.
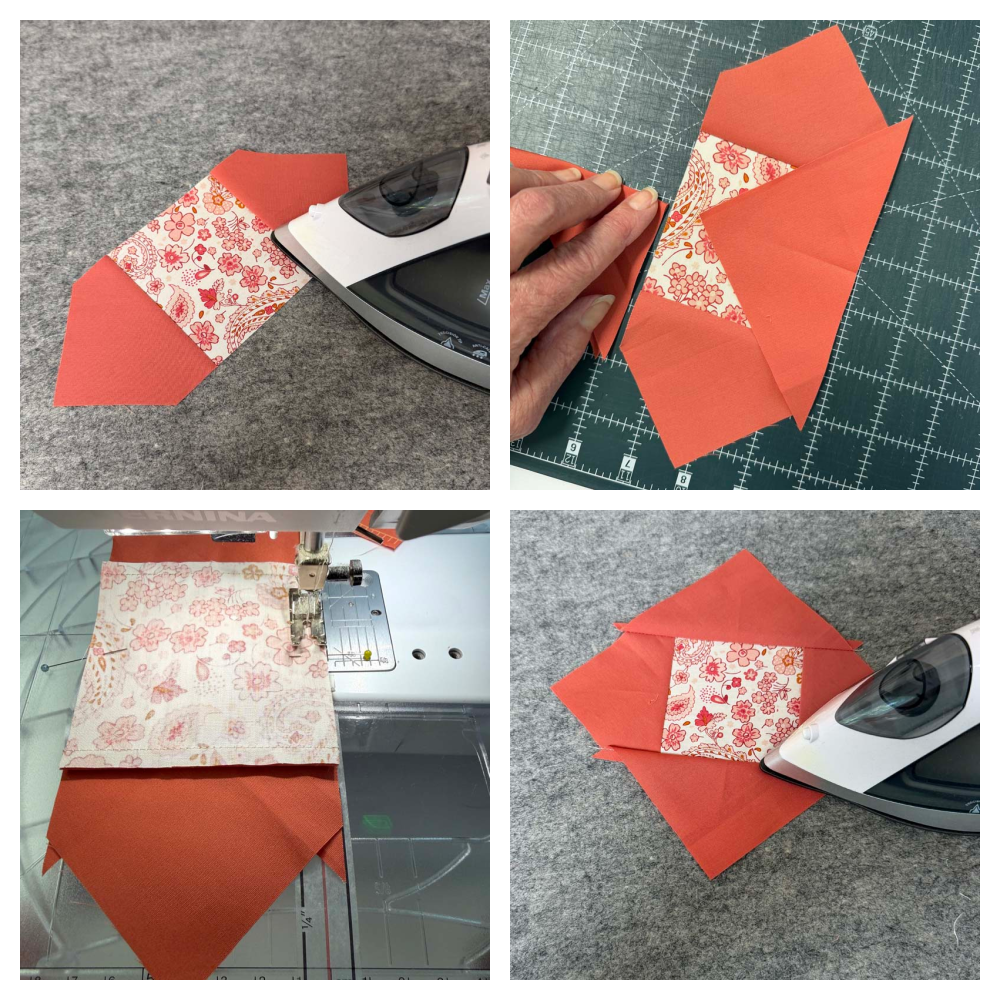
- From the wrong side, trim the excess triangles even with the raw edges of the A square.
- Press toward the triangles.
- Find and mark the center of the remaining sides of the A square and the B triangles.
- With RST and matching centers, stitch a B triangle to the remaining sides of the A square.
- Press toward the triangles.
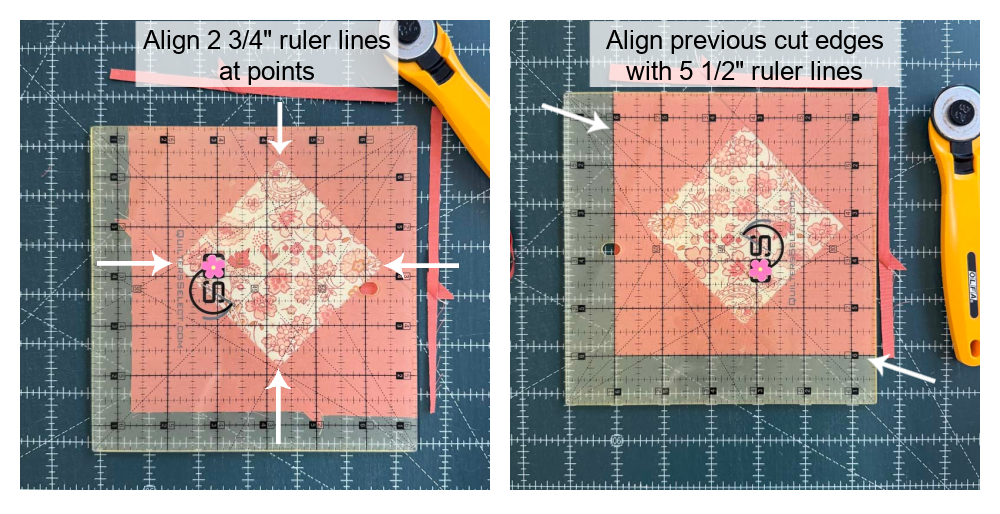
Trim the SIAS
The steps for trimming and the ruler alignment are the same for both the small and large peaks.
- Align the 2 3/4″ lines of a square ruler along the points of the interior square.
- Trim the right and top edges.
- Rotate the unit and align the previously cut edges with the 5 1/2″ lines of the ruler.
- Trim the remaining two edges.
Make 4-at-a-time Flying Geese
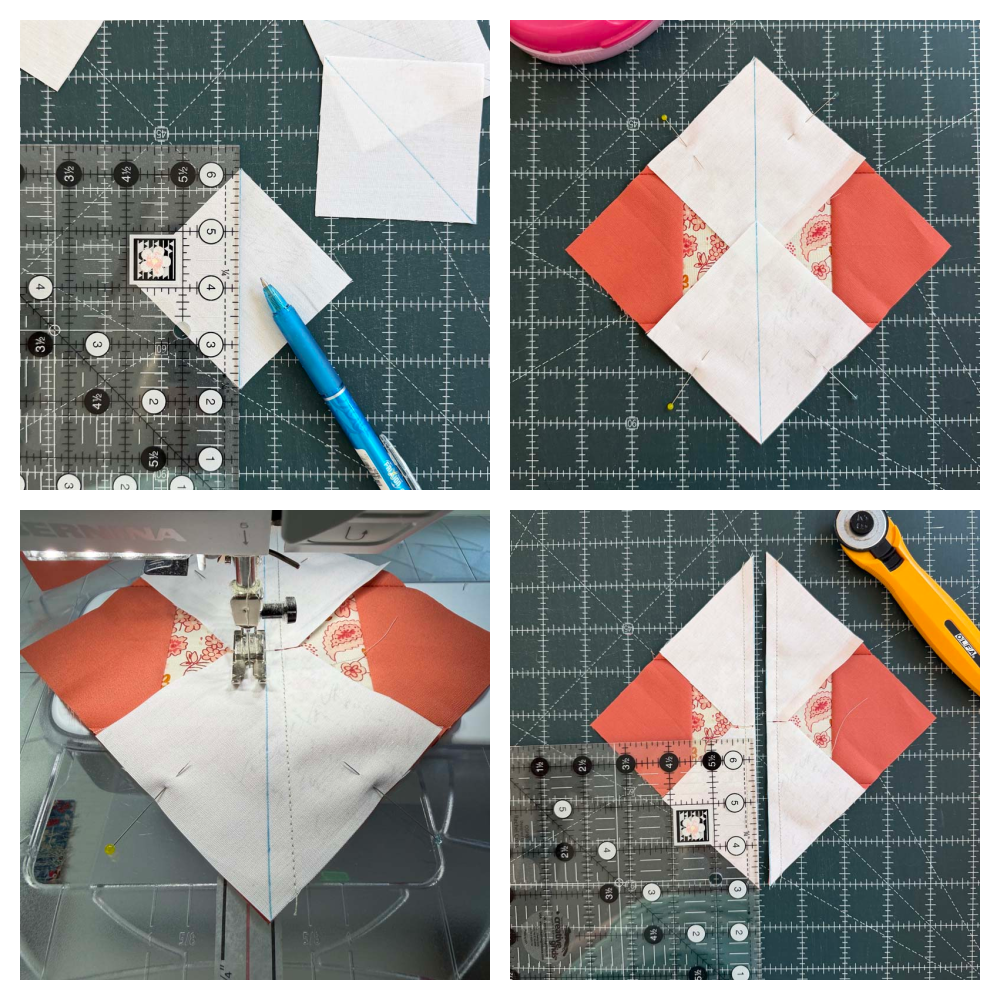
- On the wrong side of each C square, draw a diagonal line from corner to corner.
- With RST, place a C square on opposite corners of the SIAS unit. They will overlap slightly in the middle.
- Optional: Trim the overlap of the two squares. See How To Reduce Bulk in FG from last week’s tutorial.
- Pin in place.
- Stitch a 1/4″ on each side of the diagonal line.
- Cut apart on the center diagonal line and press.
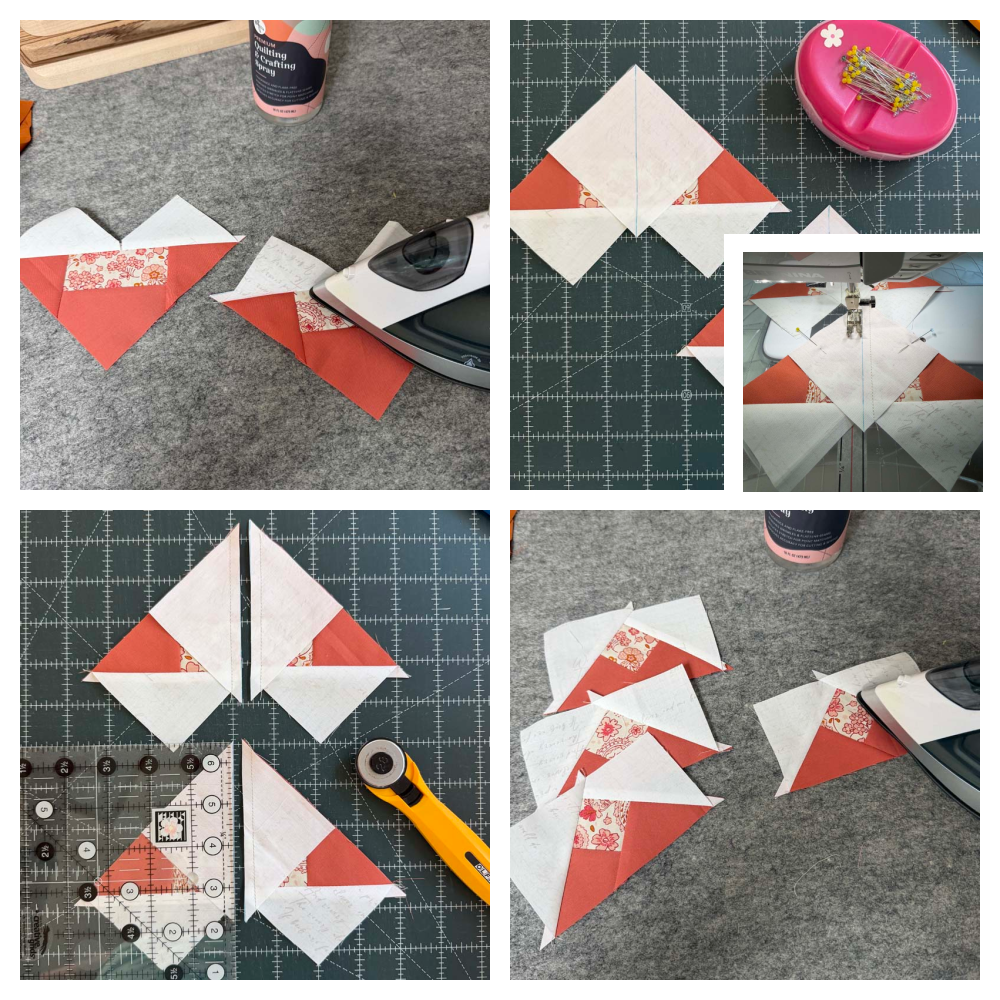
- With RST, place C square on remaining corner of the unit from above, aligning the corner edges. Pin in place.
- Stitch with a 1/4″ seam on each side of the diagonal line.
- Cut apart on the center diagonal line and press.
Trim Flying Geese
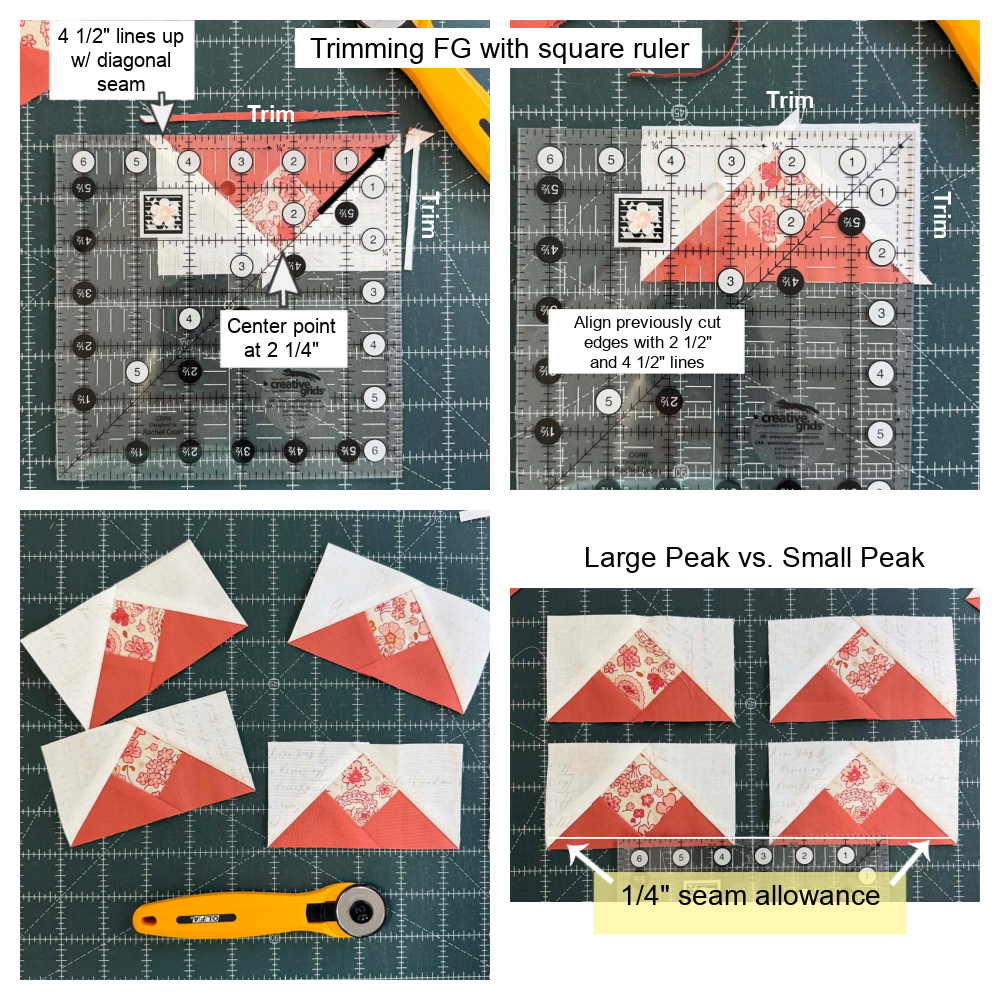
Trim each Mountain Top FG unit so it measures 2 1/2″ x 4 1/2″ using your favorite ruler/method. Below are the instructions for using a square ruler.
Note: The trimming instructions are written for right-hand orientation.
Trimming with a square ruler
- Place the FG unit with the wings facing the bottom.
- Place the diagonal line of a square ruler on the large diagonal seam (right side) and adjust the position so that the 2 1/4″ lines of the ruler intersect at the bottom point, and the 4 1/2″ line of the ruler lands on the larger diagonal seam on the left side.
- For the Large Peak (not shown), the 1/4″ line of the ruler should intersect with the top point of the inset square.
- Trim the right and top edges.
- Rotate the unit 180 degrees. Line up the 2 1/2″ and 4 1/2″ lines of the ruler with the previously cut edges. You should see the 1/4″ seam allowance beyond the center point.
- Trim the remaining two sides.
Tips For Success
- Make a test block first!
- When making the square-in-a-square unit, use the square as the seam allowance guide rather than the triangles. To do that, simply sew with the square on top and the triangle on the bottom. This allows you to see the raw edge of the square – which can be hidden and skewed when it’s underneath the triangle.
- Pin and match the centers of the A square and the triangle in place before stitching.
- The seams of the triangles will overlap much more than you’re used to. That’s what creates the oversized unit to trim.
- Trimming the square-in-a-square – if you can’t see where the 2 3/4″ lines of the ruler intersect with the points, fold the unit in half vertically and horizontally and make a crease. The intersection of the creases will be the center of the unit – this is another place to align the 2 3/4″ ruler marks.
- As always, slow down and take your time!
Printable Instructions
You can download the pdf below. The instructions include both Small Peak and Large Peak – pick your favorite!
Conclusion
Mountain Top Flying Geese are such a fun variation of the traditional flying geese block. And I can finally say – you made it! Our Fantasy Flying Geese are all complete, and what a beautiful flock they are! It’s hard to pick a favorite, but I’m leaning toward last week’s Ribbon Flying Geese, although Mountain Top is a close second. Just don’t tell the rest of them!
Next week, we’ll bring all six flying geese variations together in a mini quilt sampler. It will include six 8″ finished blocks and measure 30″ x 20 1/2″ when complete. If you’ve been sewing along with the series, you’ve already done the hard work, so the sampler should be quick and easy to put together. I can’t wait to show you how our Fantasy Flying Geese look when they’re all flying together!
Make sure to share your flying geese! For social media, use the hashtag #fantasyflyinggeese and tag me @thecraftyquilter so I can be sure to see it. You can also send me an email and attach a photo.


Discover more from The Crafty Quilter
Subscribe to get the latest posts sent to your email.

Thank you for these fun flying geese series. I really like this one. Makes me wonder if there are multiple ways of creating cool prairie points as well.
Just discovered this – thank you SO much for all your hard work & for sharing it all with us! I am going to enjoy learning each method and where I can put it to it’s best use. I really appreciate these! Deb / CA
All these variety of flying geese are interesting. Thank You