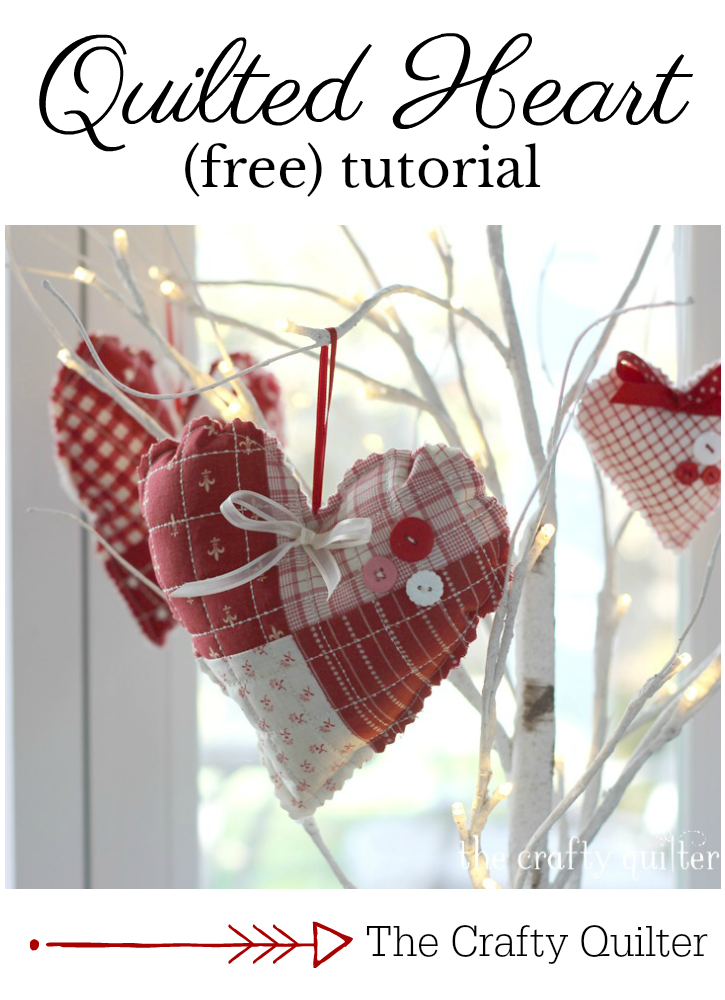
Quilted heart tutorial
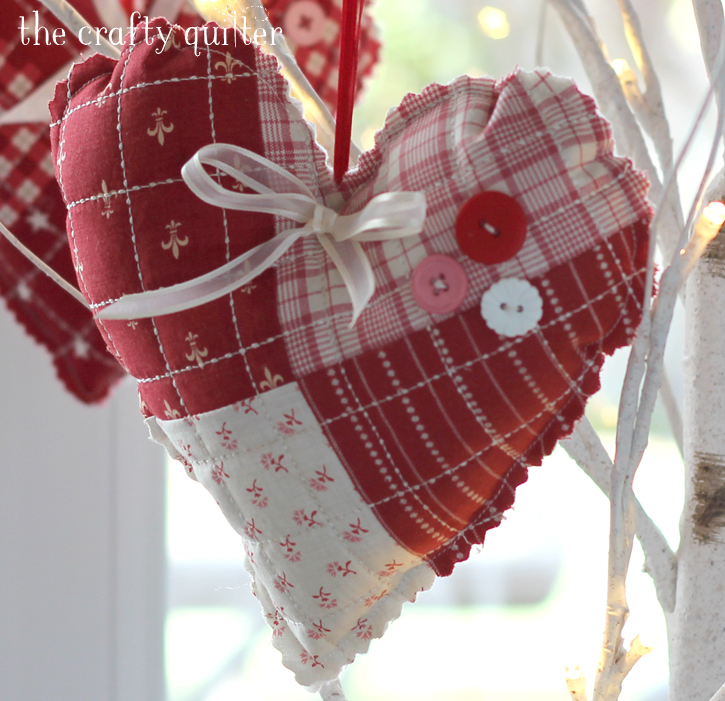
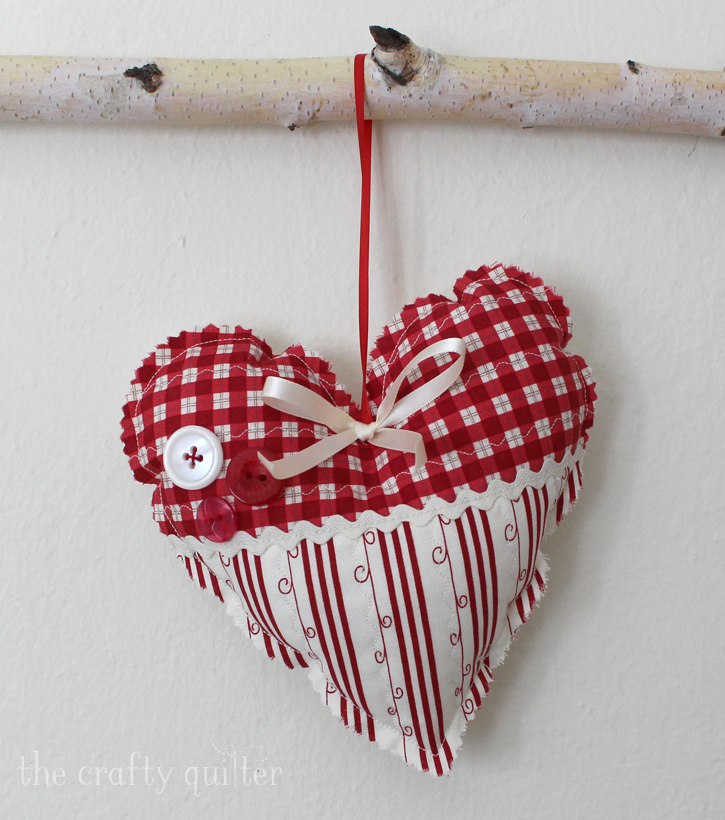
Hey everyone! The Quilted Heart Tutorial is here! Just two weeks away from Christmas and I have the perfect, quick project for you to make. These hearts are oozing with charm and a bit of nostalgia with the buttons, ribbon and vintage quilting.
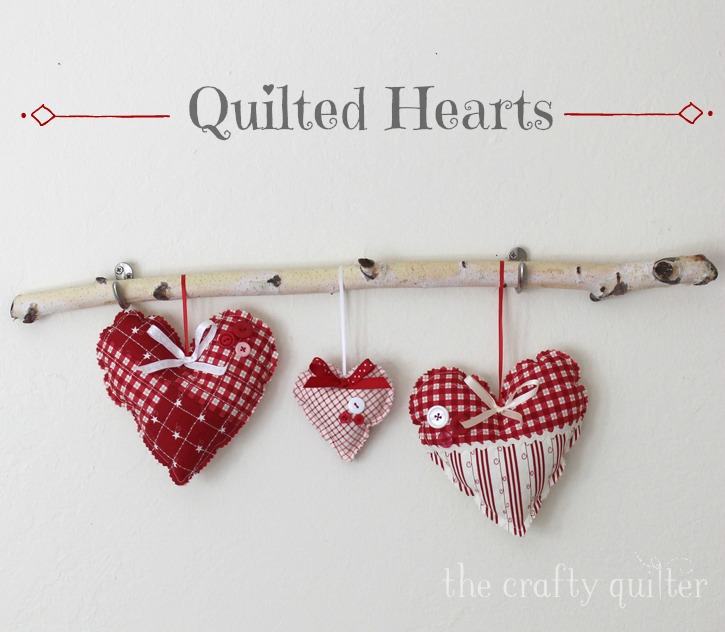
You can make them any size you want by adjusting the size of the heart. I’ve included a large and a small size in my tutorial.
Quilted Heart Tutorial
Note: The instructions are written for the larger heart.
Supplies:
- 4 coordinating 5″ squares for front
- 9 1/2″ square for back
- 10″ (or so) square batting
- polyester filling for stuffing
- 3 buttons
- 1/4″ – 3/8″ wide ribbon for bow
- 1/8″ wide ribbon for hanging
- pinking shears or rotary cutter with pinking blade
Heart:
- Print out the Quilted Heart Template at actual size. Cut the heart shapes out of paper or make a clear template using template plastic (this will make it easier to position the heart shape).
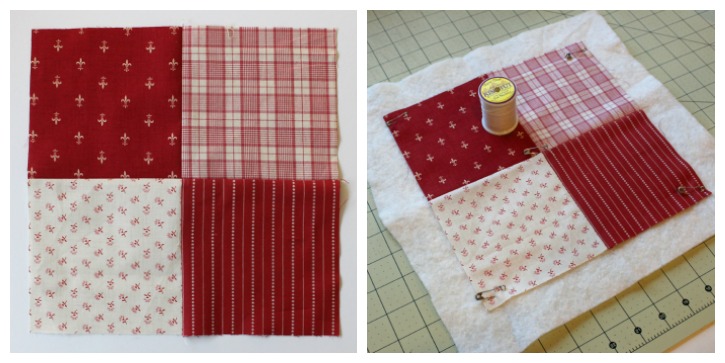
- Make a 4-patch using the 5″ squares. Use 1/4″ seam allowance.
- Baste the 4-patch and the batting together.

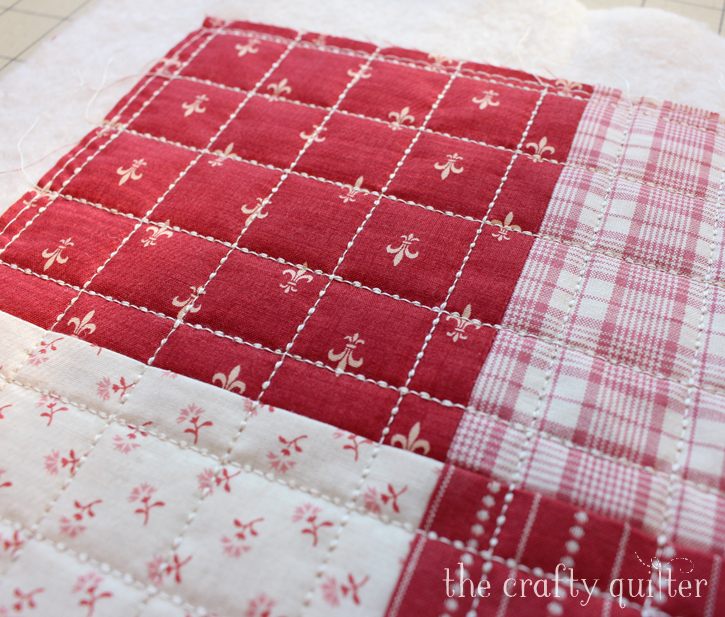
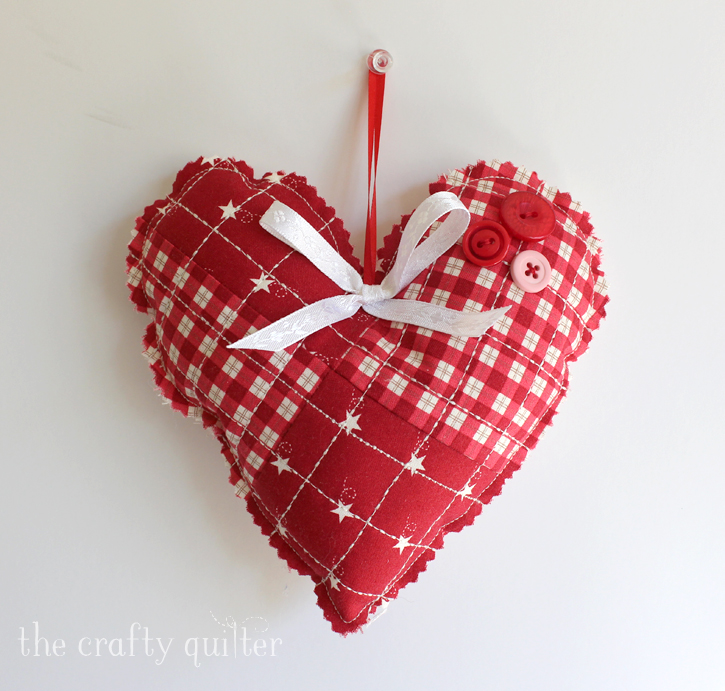
- Quilt by machine or by hand. For this example, I used a quilting stitch (#1346) on my Bernina 770. I marked a 1″ grid first. I used King Tut thread by Superior Threads for the quilting. It’s slightly heavier (40 wt.) than piecing thread and shows up nicely. I was aiming for a hand-stitched look.

- Using the template from step 1, position the heart shape on the quilted 4-patch. I like it to be off-center which adds to the charm. Trace around the heart with a temporary marker of your choice (I used a Frixion pen).
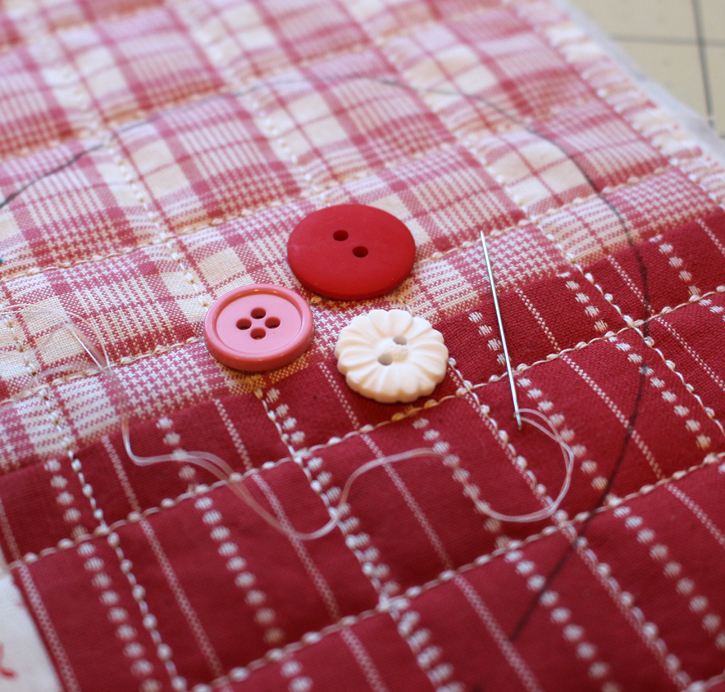
- Now sew the three buttons onto an upper lobe of the heart. Make sure to leave enough room between the buttons and the outside line.

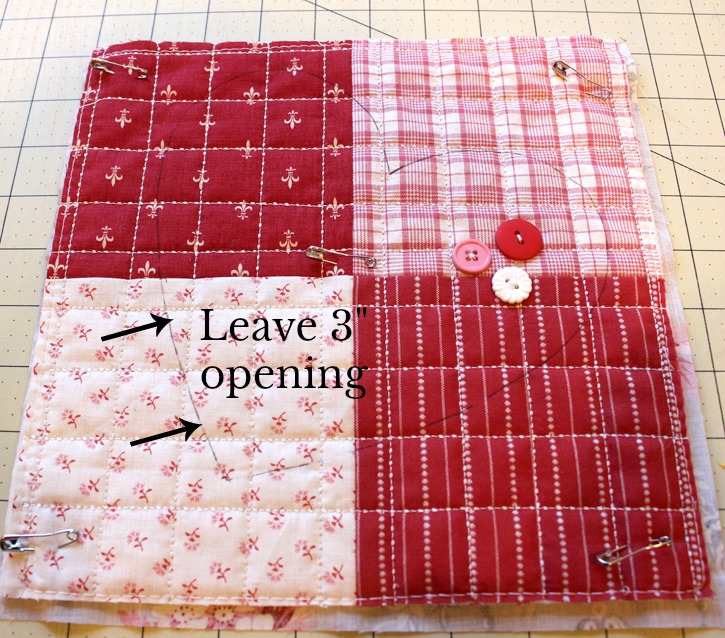
- Layer the quilted heart panel and the backing square, wrong sides together. (You will not be turning this project right side out.) Pin baste the corners.

- Stitch on the drawn line, leaving a 3″ opening for stuffing. I used a walking foot for this step and shortened my stitch length to 1.8.
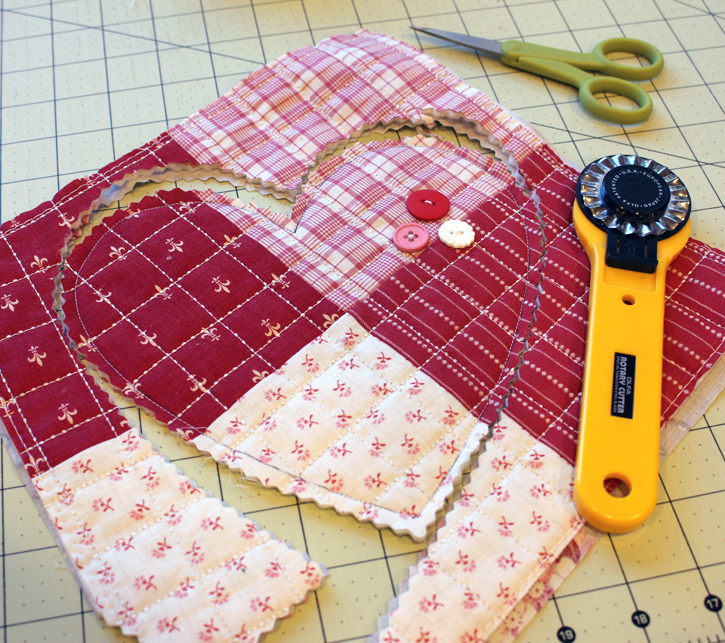
- Using pinking shears or a rotary cutter with a pinking blade, trim around the stitched heart (about 1/4″ outside the stitching.)

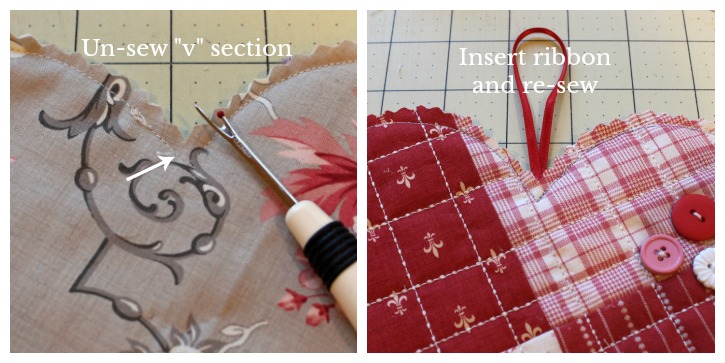
- Un-sew the center “V” of the heart just a bit. You need to create an opening for the hanging ribbon. Create a loop with the ribbon and insert into the top center of the heart. Sew the opening closed.
- Stuff the heart shape with polyester stuffing. I didn’t stuff my hearts too full. I used a Purple Thang to push the stuffing into the corners.

- Stitch the opening closed.
- Make a bow from the ribbon and attach with needle and thread.


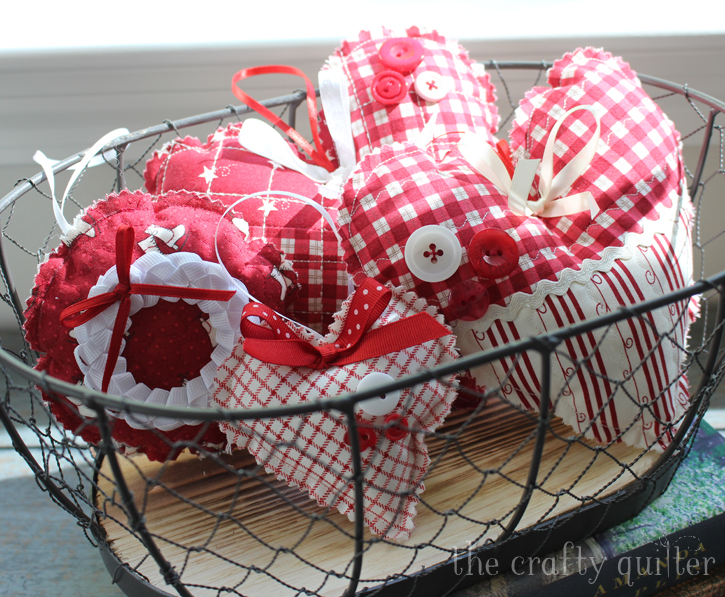
See how easy that was? Now make lots more! There are so many ways to change this up. You can use just two fabrics for the 5″ squares.
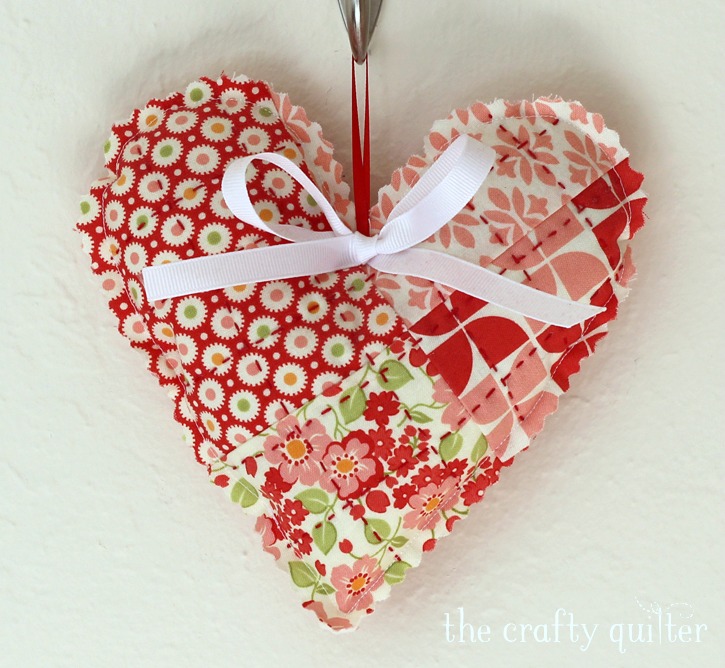
If you have a favorite designer, grab those scraps and have at it! I love Bonnie & Camille fabric, so that had to happen.
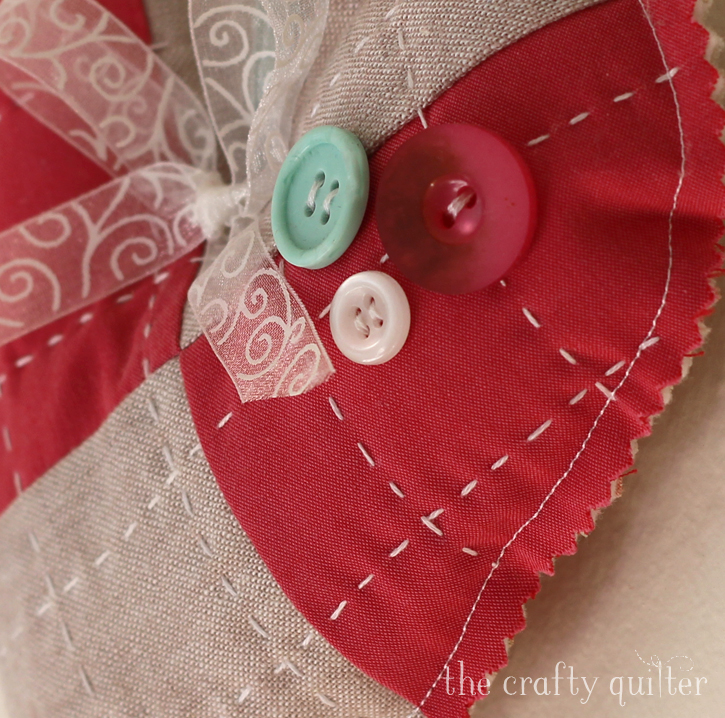
Try hand quilting for a more vintage look. I love this one made with linen and chambray.

Instead of a 4-patch, sew together two rectangles and add some rick rack along the seam.
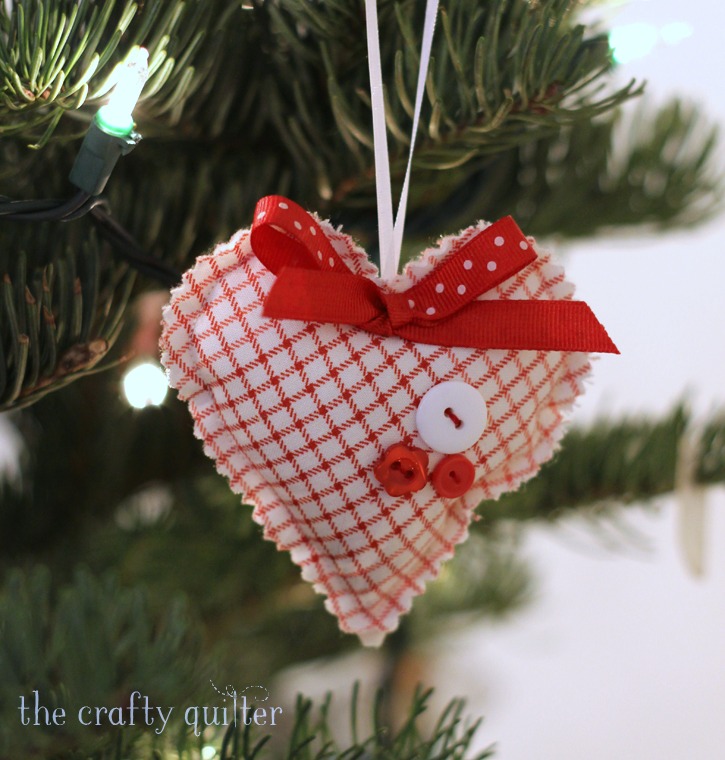
The smaller heart would be perfect for your Christmas tree or to add a special touch to a wrapped present.
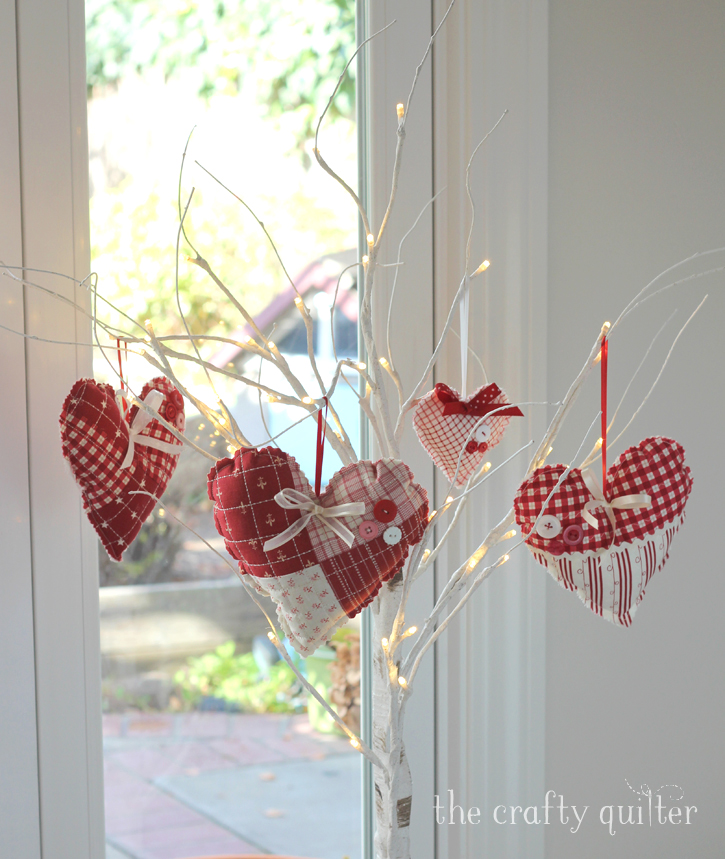
Make enough to fill a tree with. And the nice thing is… you’ll be all set for Valentine’s Day, too!
I hope your hearts are overflowing (in all kinds of good ways)!
Linking up with Tips and Tutorials Tuesday at Quilting JetGirl and Needle & Thread Thursday @ My Quilt Infatuation.


This quilted heart tutorial is fantastic! The intricate details truly showcase the artistry of quilting. For those looking to enhance their projects further, considering Embroidery Digitizing Services could elevate the design possibilities, adding personalized touches and intricate patterns that complement the quilt’s charm seamlessly.
EMDigitizer has made embroidery services more efficient and productive. In the beginning, digitizing was done manually but with the passage of time, this has now become a digital process.
Such a very useful blog. Very Interesting to read this blog. I would like to thank you for the efforts you had made for writing this awesome blog.
Make them for ifoundaquiltedheart.com
The quilted hearts are addictive! I have already made 4 and have ideas for more. Thanks, Marion Murray
thanks for sharing this awesome idea.
Logo Vector
Oh Julie, those are so sweet and so easy. Thank you for this quick gift tutorial.
I love the hearts – thanks. Have a wonderful holiday and thanks for all the wonderful quilting you teach us!
Those are adorable! Wouldn’t a tree full of them look awesome? Thanks for the tutorial too!
The possibilities with these hearts are endless! I love that there is no turning involved!
If you want to make several of these, you may wish to determine the height of your heart, cut 2 strips of fabric that height and length of fabric. Quilt and then you won’t have all that wasted fabric you quilted plus you can cut several hearts from that one strip of fabric.
Julie, these hearts are so delightful! Fresh and sweet, and each one has its own special personality. Thank you for taking the time to create a tutorial!
Thank you!
I love LOVE your ornaments- and I WILL BE making some of these. I didn’t know King Tut and Superior were the same-I will need to order some of this thread. Thanks so much for the wonderful idea. I have one more day of vacation before the holidays I will be sewing some of these for sure-but will be using this idea for Valentine’s! Thanks for your time and talents you share with us. I can’t express how much I appreciate and enjoy your blog and look forward to “what is next…”. May you and your family have a Merry Christmas and Happy New Year!
Thank you for the heart tutorial, Julie, these are sew pretty. Merry Christmas to you and to all your family.
Beautiful little hearts! Valentine’s Day will be here before we know it so the timing for these is perfect. I really like that Bernina stitch you used on the first heart, I need to try that one out.
These are lovely and in perfect timing for Christmas. Thank you so much for linking up!
So nice to come home from work each night to our home, so warmly decorated with your quilts and art work. It’s a wonderful thing being in love with you!
Mr. Crafty Quilter
Thanks for ‘your’ heart tutorial 🙂 — the half square/stripes is my favourite fabrics <3
Thank you sooo much for this sweet tutorial. These will be perfect to gift- I sure do have a lot of red! Happy holidays to you and yours!
Oh, Julie!!! You have made my old heart sing this morning!!!! Thank you for being so generous with your beautiful talent!!!! Want to borrow my Sashiko machine for the “hand quilted” look? That’s what I shall use for the quilting!
Make the larger one a bit bigger, add crushed walnut shells and call it a pincushion!!!!!
Merry Christmas to you and those you love!
These are just darling! And perfect for the “I Found A Quilted Heart” program (Facebook)
I love these! Thank you so much for the tutorial!
Beautiful hearts Julie. I love practicing my quilting and then making something useful. Thank you for such a clear tutorial.
Thank you for another lovely project, will give this a go. Happy Christmas and a happy and healthy New Year to you and your family.
These are beautiful, thanks for the share ♥ ♥ ♥ ♥
As always enjoy your quick heart project and Helen’s idea about the mug rug. Merry Christmas to you and your family with peace and love in quilting.
Thank you Julie, beautiful project and look forward to making one or two. Wishing you a very happy Christmas and look forward to looking forward to your posts in the new year
Beautiful hearts. They would make nice mug rugs also. May you have Merry Christmas and a Happy New Year.
Hello Julie; Your tutorial for these delightful hearts is fabulous! They really look like a lot of fun to make. I appreciate that you brought it to our attention that using the template plastic makes it easier to position the way you want to cut out your heart! Doing applique, I use the plastic quite often, but it still slips my mind occasionally. So thank you for the great project tutorial and the reminder tip! Have a great day!
Adorable, Julie. This would be cute for Valentines Day, too. Thanks for the tutorial.
Beautiful project, will have to try soon. Thanks for the tut and Happy Christmas to you and yours. Love your website.❤️