Binding tips: how to join binding ends with the pocket method and more
Today I’m going to show you an easy way to join binding ends with the pocket method, PLUS, I’ve got a great tip on how to get perfectly mitered corners!
There are a lot of different ways to go about joining the beginning and ending tails of the binding, and I find this pocket method to be the easiest way for a beginning quilter.
I’ve made four videos, all on different aspects of binding. These videos can all be found at my classroom on The Quilt Show. Recently, The Quilt Show has been highlighting these videos on their blog so I’ve been getting a bit more traffic here on my blog. Which I appreciate! So I thought I should make a few tutorials for my followers that piggyback the videos. And/or you could just watch the video, but sometimes you don’t want the audio!
The first video covers most of the basics – from trimming the quilt sandwich, joining the binding strips with a diagonal seam and joining the binding ends with a “pocket”. I’m going to focus today’s tutorial on the pocket method and a little trick I discovered to get perfect mitered corners.
Preparation
Prepare your binding strips as you normally would. THEN:
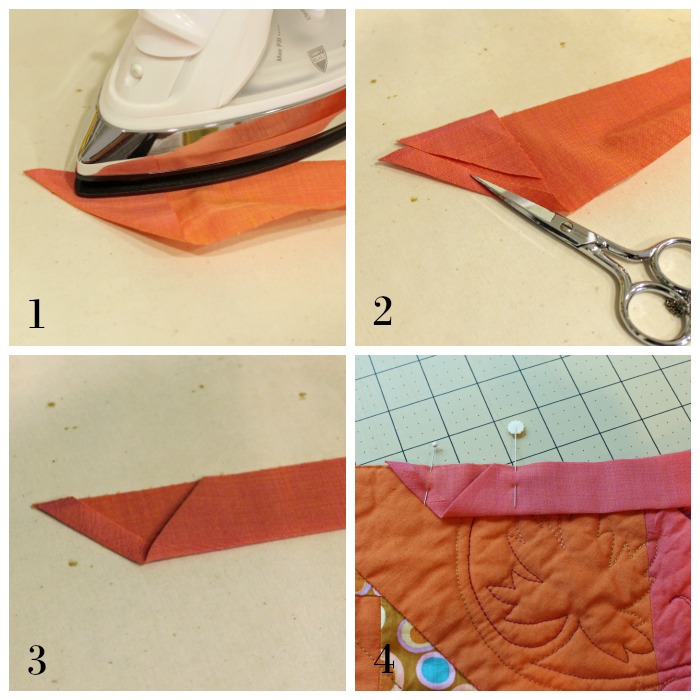
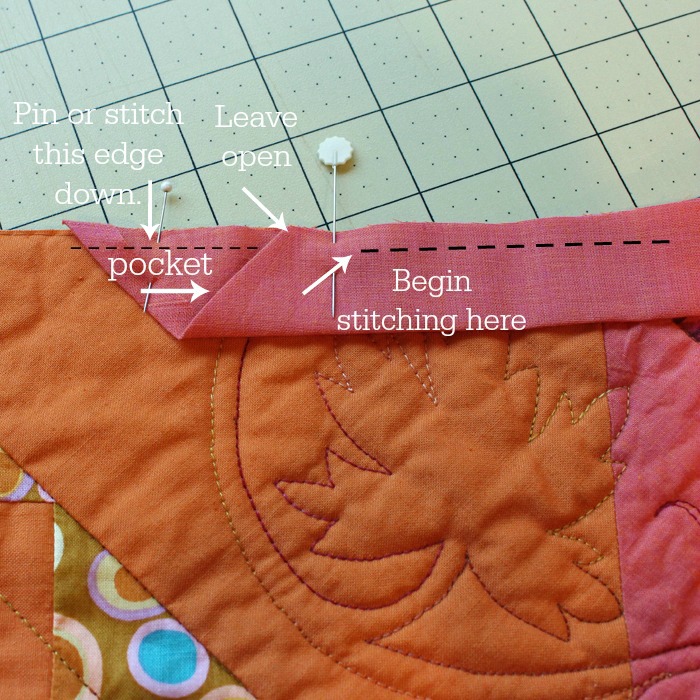
- Fold one end of the binding at a diagonal, creating a triangle, and press.
- Trim away the corner leaving a generous 1/4″ seam allowance.
- Refold the binding and press.
- Pin this end of the binding to the quilt sandwich.
Stitching
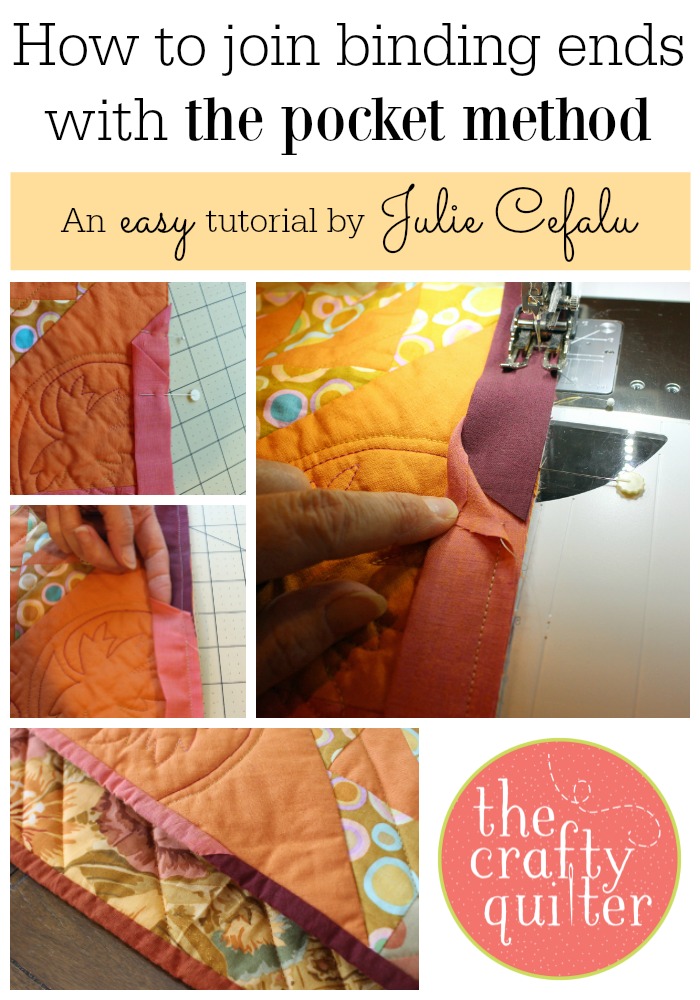
Begin stitching the binding about 1″ below the folded edge. I just pinned the end of the binding in place, but you may want to stitch the bottom edge down first.
Continue stitching the binding around the quilt sandwich, mitering each corner. See my tip at the end of this post for a perfect mitered corner.
Joining the ends
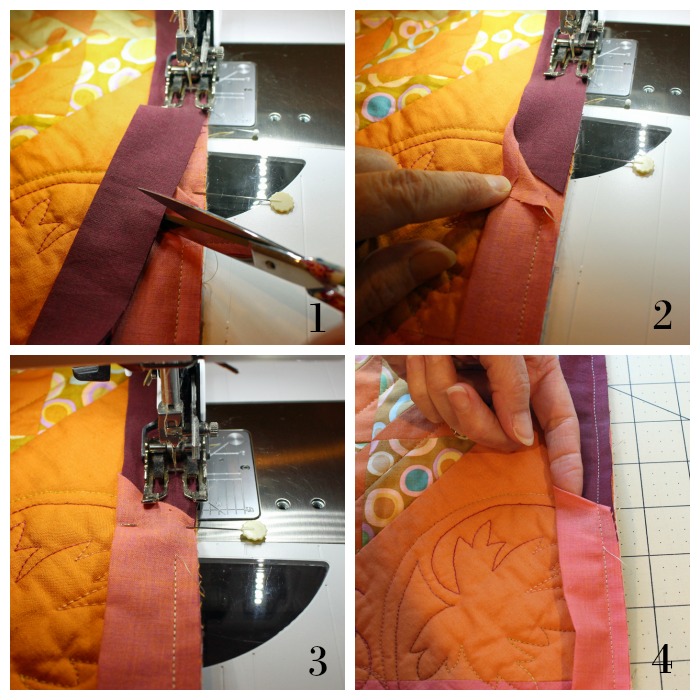
- When you come near the beginning tail of the binding, stop and cut the binding at a diagonal, about 1/2″ below the folded edge of the pocket.
- Tuck the cut end into the pocket and make sure it lies straight and flat. Pin in place.
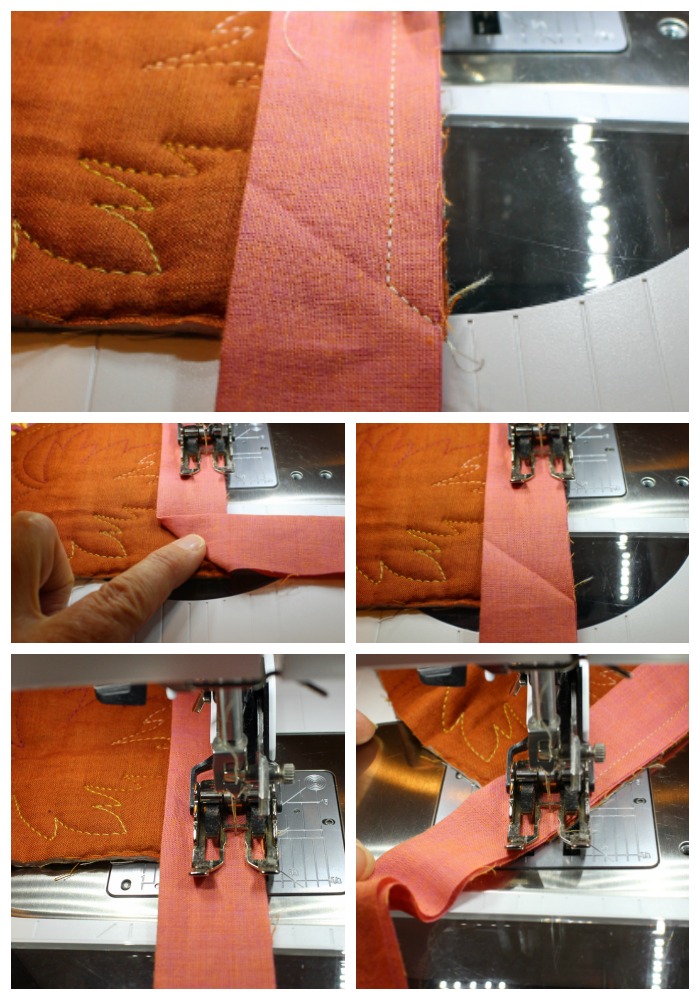
- Continue stitching until you reach the beginning, overlapping your stitches or backstitching to secure.
- The pocket can be closed with hand stitching, or you can leave it open (if you’re
lazytight on time).
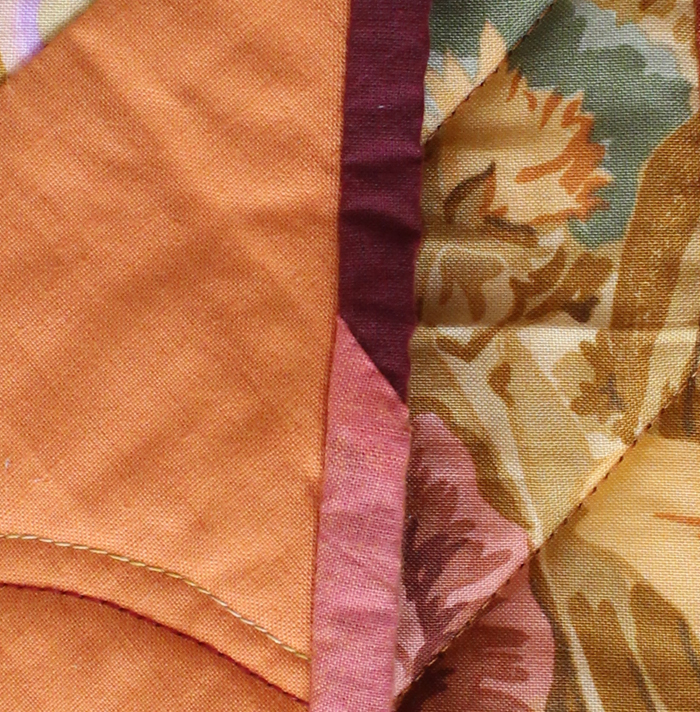
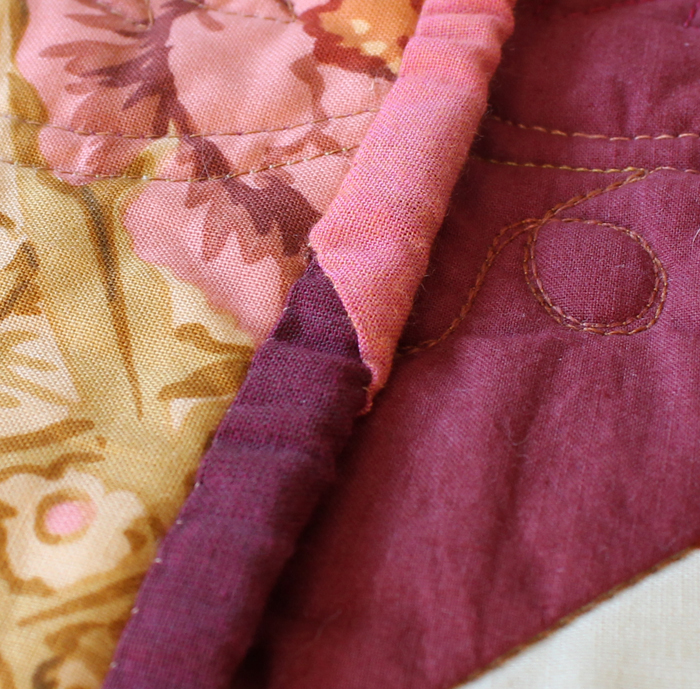
The result will look like you sewed a seam, especially when you finish the binding and close up the pocket. You don’t need any fancy rulers or tricky math equations to make this method work.
Bonus Tip
How to get perfectly mitered corners:
Knowing where to stop stitching when you reach a corner is always a guessing game, but I’ve come up with a great little trick.
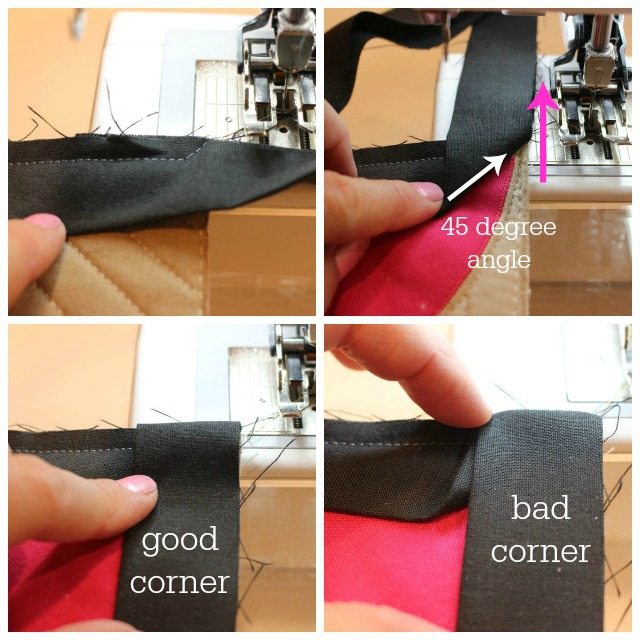
- About 5 inches before you reach the corner, fold the binding strip at a 45 degree diagonal, away from the quilt sandwich. Finger press it, making a crease.
- Stop stitching (with your needle down) when you reach the crease.
- Pivot and stitch out to the corner, following the crease.
Turn the quilt sandwich and fold the binding strip up and away from the quilt sandwich – the same way you did to form the crease. Make sure there is a visual straight line from the raw edge of the quilt sandwich to the edge of the binding.
Fold the binding back down on itself, making sure the fold on top is even with the top edge of the quilt sandwich and that it’s boxed well (as opposed to the “bad” photo, bottom right).
Continue stitching from the folded edge to the next corner.
If you follow that little method, you’ll have perky points on the corner of your quilts from now on!
There will be more binding tutorials in the next few weeks. I’ll be showing you my favorite way to join the binding ends with a seam and how to machine quilt the binding with no hand sewing involved. Stay tuned!




Thank you for the great tip, of folding and finger press the corner of the binding! <3
I’ve used your tutorial on every quilt I’ve ever made, and it’s simple, perfect, and works every single time. Thank you so much for posting this! I have never figured out how to sew the ends of the strips together, and had always just overlapped the ends and tried to hide my joins somewhere inconspicuous. No more hiding! Now my joins look as good as the rest of the quilt. 🙂
I’ve been struggling with the bulk of fabric for as long as I’ve been sewing. Thank you for helping me with explicit step-by-step instructions and great photos. I am so glad that I found you and your educational tutorial. Tomorrow morning I’ll start.
Thanks Julie.
This is the best method of joining binding ends at the final part of the binding process. I won’t have to turn myself inside out to do the other method I have seen previously!
Thanks again. Looking forward to any other binding tips you share.
Kerrie
Thanks Julie, that tutorial was great. So going to give your method ago.
Cheers Di
when making small projects-Mug rugs, pot holders, and mini quilts, i’ve used your pocket method. I love it and i always do slip stitch the joined pieces together. The mitered corner technique i always use once i came across your video awhile back. Thanks so much for sharing.
Would like to see a video to 2 on bias binding making and cutting. I’ve seen several videos and i still scares me a little and a I feel like i’m wasting more fabric then what I need and not always sure. Do you cut on the straight grain or the bias for your binding? thanks so much for sharing. I enjoy reading your posts but don’t always have time to comment.
Great video! I have been making crappy corners for a long time so will try this method! My question would be once you’ve folded your corner to sew the next seam where do you start sewing..do you measure in a1/4 inch from top edge?
Thank you so much for those binding tips,I havent come across anything that explains it as well as this!
I love to learn a new trick! Thanks!!!
Wow! Finger pressing on a 45 degree angle to know when you are a 1/4 inch from the edge. That simple little step is really going to help me. Thanks!
Thanks so much for giving such great binding tips, Julie! I love your photos and how you label them. It makes things so clear and easy to understand. I have been making the pocket in the binding, but not trimming near the fold . I can’t wait to try the mitering corner tips …”pre”- folding, to get the perfect distance from the end of the quilt!! I learn so much from your tutorials.
Thanks for all your great tips. You do such a good job-love following you.
Wonderful, Julie! Your efforts are always so very much appreciated. Thanks!
Hi Julie,
I watched your binding tutorials and I was so happy to see you showed how to get perfect corners. I have been doing this for some time, but many people don’t know about it. It produces sharp corners with far less fussing when folding the other side. It really saves time and only takes seconds. I have another tip for you. When you are hand sewing the corner to the tip, insert the needle to the other side of the quilt and catch the other side of the corner. When you get to the bottom of the corner, insert the needle all the way through to the original side and continue sewing the next side of the quilt. I hope that made sense. Warm regards, Sue Bainter