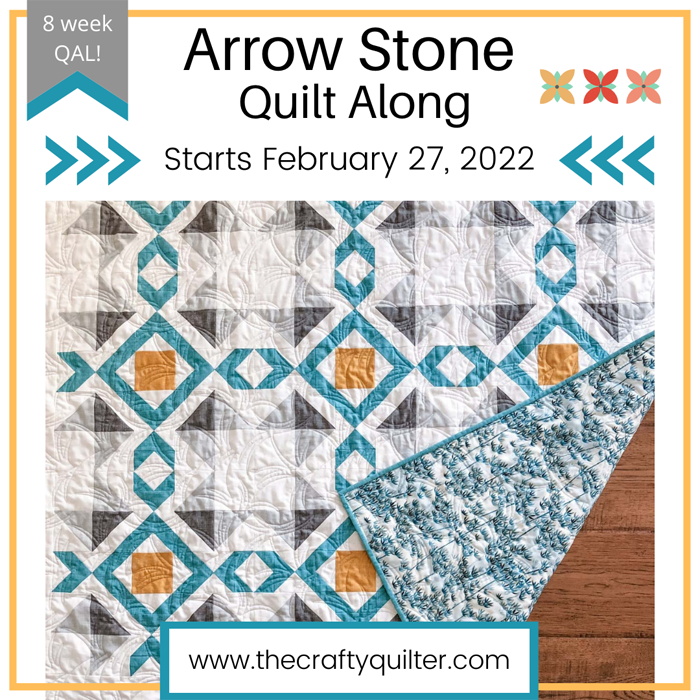
Arrow Stone Quilt Along – Week 1
Hey everyone! It’s Week 1 of the Arrow Stone Quilt Along, and we’re starting with the best part – fabric! I have lots of color inspiration and tips to make this a fun experience.
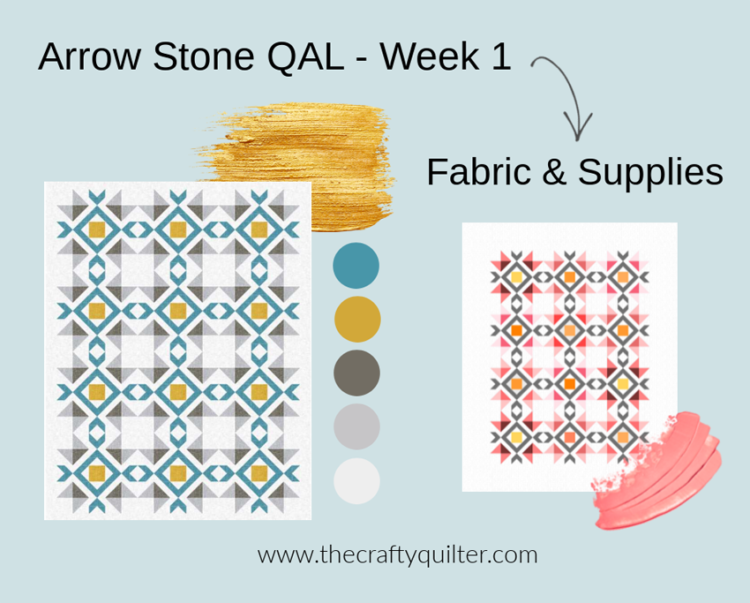
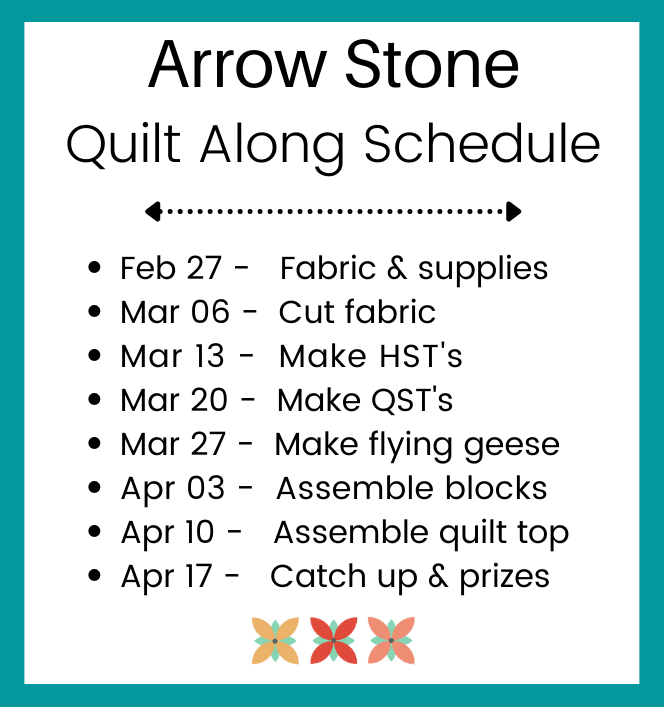
If this is the first time you’ve heard about the quilt along, you can sign up below and get all of the basic information plus a coupon code for 20% off the pattern. If you’re not participating in the quilt along, you can still read along and get lots of tips and practical information about quilting!
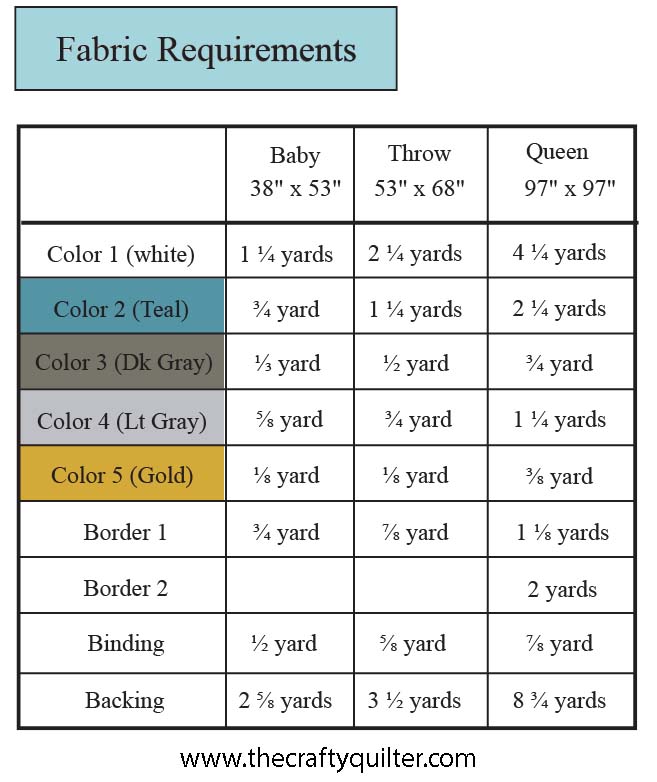
Fabric requirements
By now, you should have the Arrow Stone pdf pattern. If not, sign up above. There are two ways to approach this quilt. You can make it with yardage as shown in the fabric requirements, or you can make it scrappy using smaller fabric scraps. My patterns are fairly generous when it comes to yardage amounts. If you don’t like 1/8 yard increments, round up. If you purchase fabric online, usually it comes in 1/2 yard increments so you’ll really be rounding up. But then you’ll have extra fabric for a matching pillow or to add to your stash. 😉
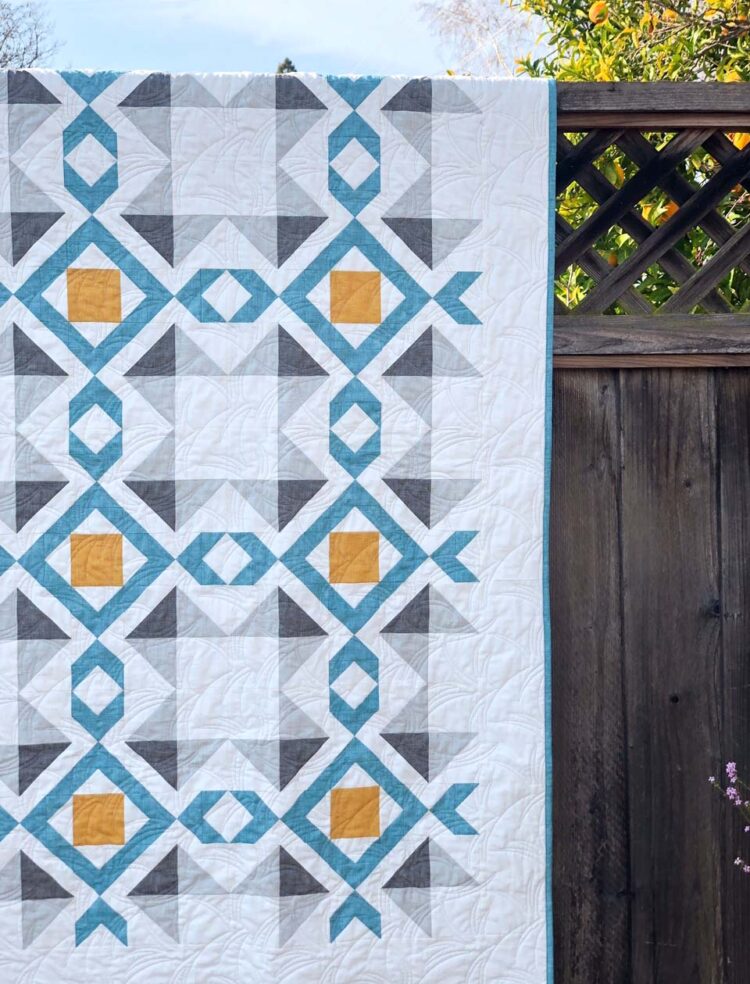
One thing to note is that the Background fabric and the Border 1 fabric are the same in the cover quilt. It gives it a modern look that way, but you can make the border a different color or use a large scale print. Just keep that in mind when purchasing fabric.
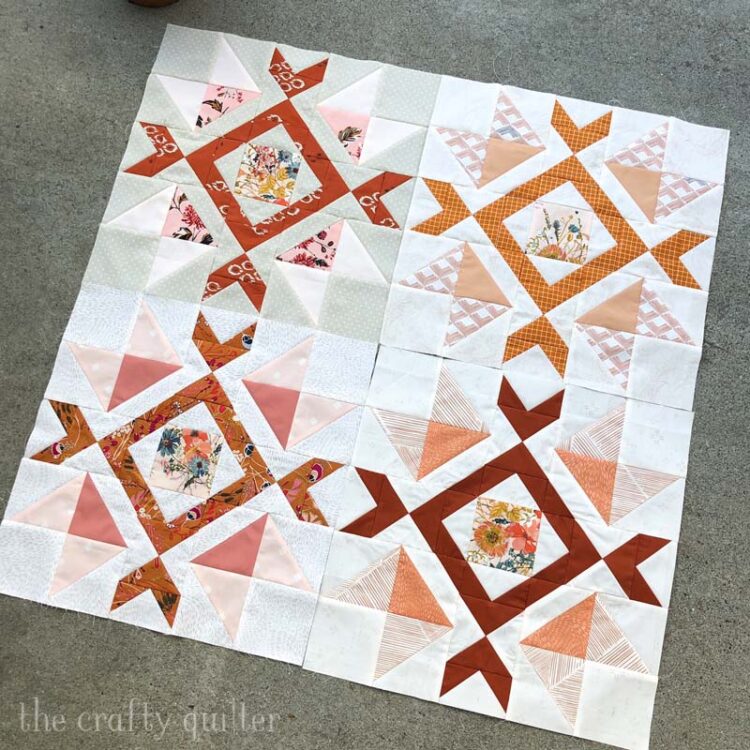
The pattern includes a chart of the pieces and amounts you would need for the scrappy version. You could pull fat quarters to start with or use smaller scraps for each block. I’m making my own version for this quilt along out of various fat quarters from my fabric stash. Here are four of my blocks; each contains different fabric but the color palette is the same.
Color Schemes
The quilt can be made with just four colors plus a background fabric as shown in the cover quilt. It can also be made scrappy with each block in a different color. There are so many options! The samples made by my pattern testers really show a variety of color combinations.
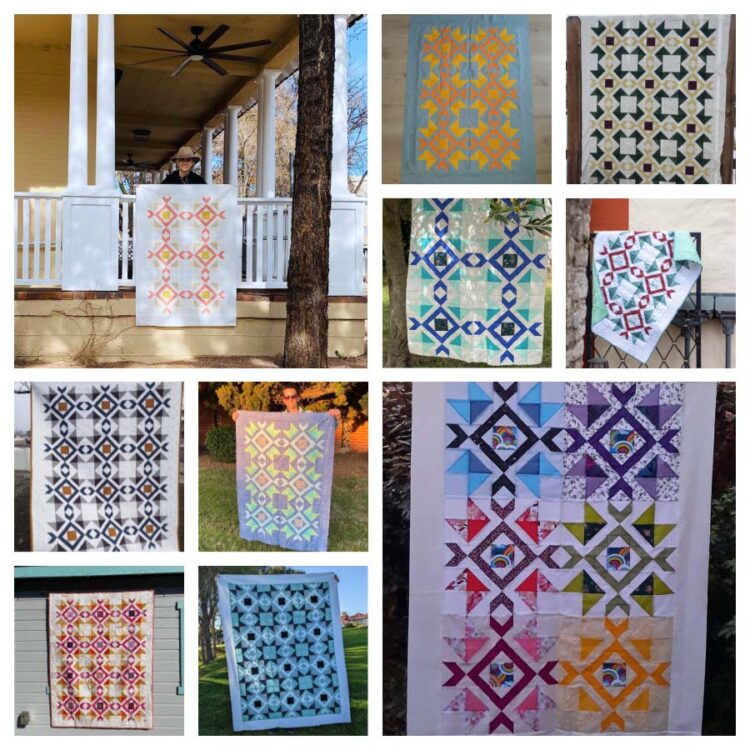
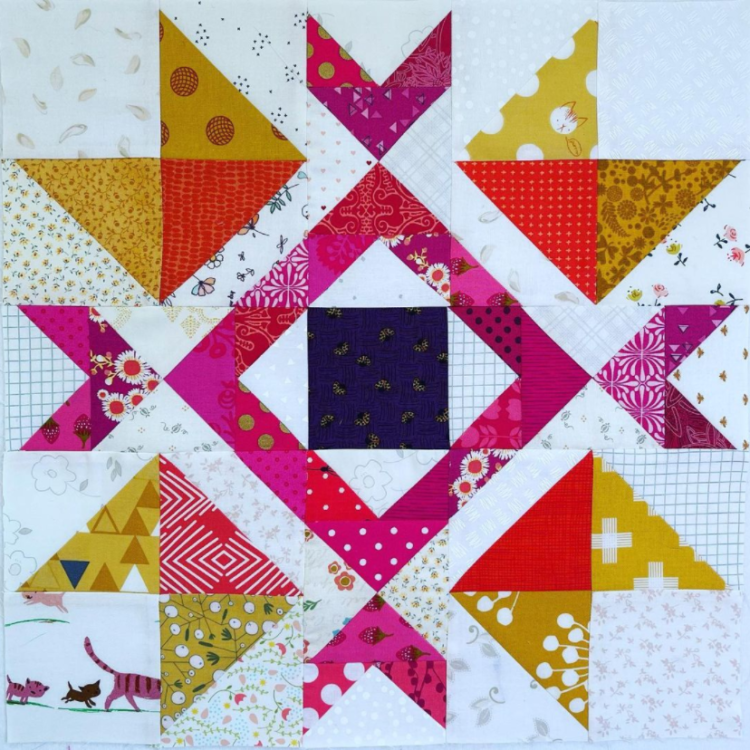
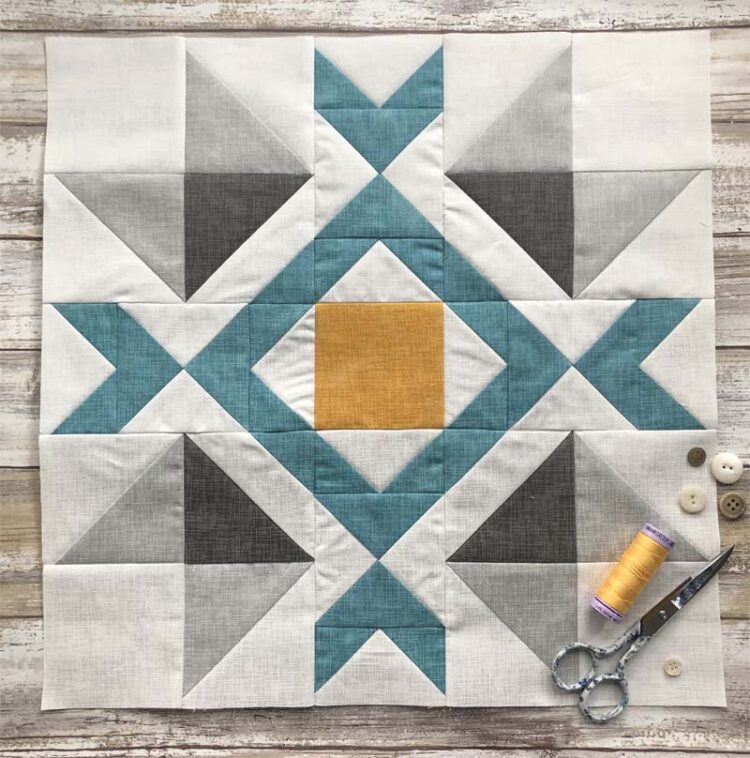
The quilt shown in the bottom right corner (made by Margaret @quiltylass) shows a scrappy version with each block in a different color. It has a beautiful rainbow effect. The quilt show in the bottom left corner (made by Jennifer @jennaquilts) is also made scrappy, but with a controlled color palette. You can see in her block below, how each unit is made with a different fabric while maintaining a consistent color scheme. Now that’s scrappy!
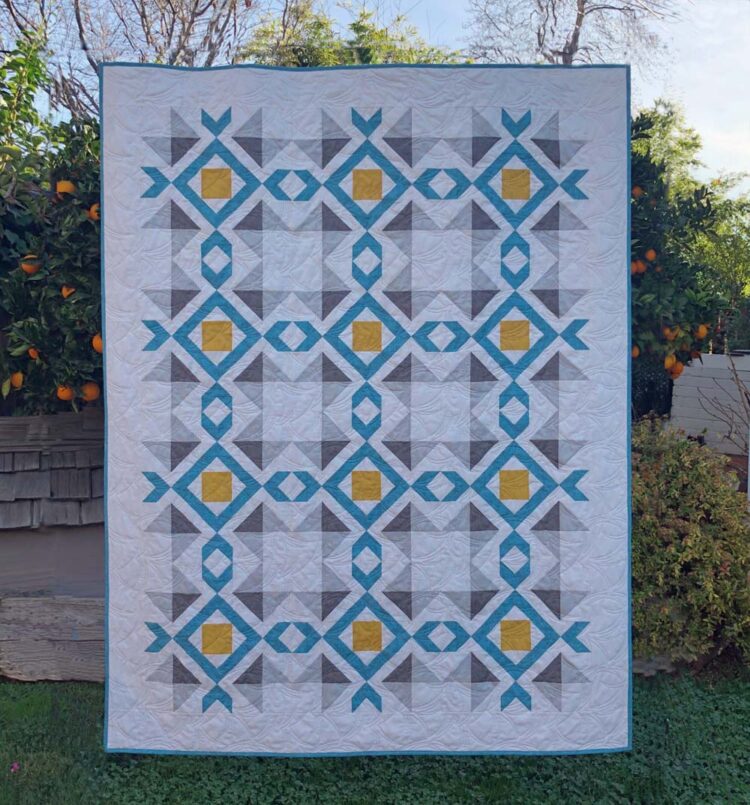
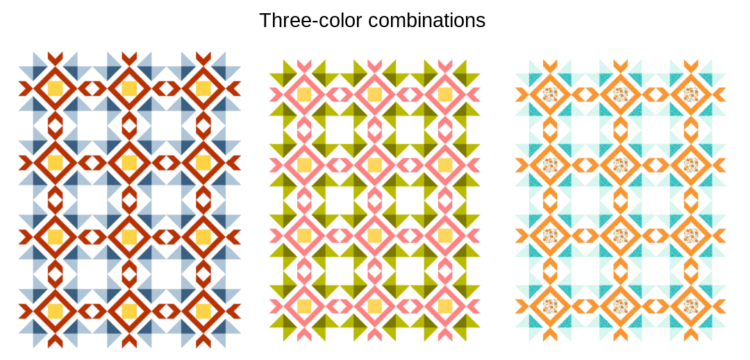
Let’s talk first about using four fabrics plus a background for the yardage requirements. I found it helpful to think of a three-color combination instead of four or five colors. For my sample I chose teal, gray and gold as my three-color combination. I picked two shades of gray and used a white (neutral) for the background. This works well and it’s easier than trying to pick four or five different colors that go together.
Here are some more examples of that three-color principle. There are so many options! You could also use a focus fabric in the center of each block for one of those colors (example on far right). Again, one of those colors gets repeated in a lighter or darker shade.
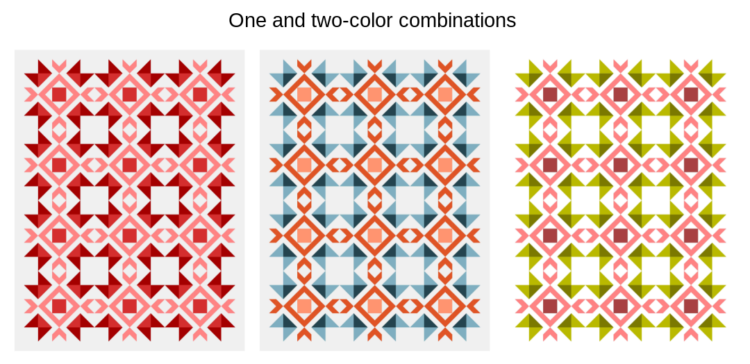
You could go one step further and choose a two-color combination. This really simplifies the process! For this, you pick two colors and then choose a lighter or darker shade for each of those colors. I mocked up a blue/orange combination and a green/pink combination below. On the far left, I created a monochromatic color scheme using different color values of red. I really like monochromatic quilts; you just need to make sure you have enough contrast in your fabrics.
Solids vs. Prints
Whether you use solids or prints for your quilt is a matter of personal preference. Both will look great! The quilt I made for the pattern cover is made out of Robert Kaufman’s Quilter’s Linen. This is not a true solid, but it reads as a solid with a little texture. The mock-ups above were made with Kona Solids. They give a clean, modern look to the quilt.
You could also start with a focus fabric and pull colors from that. A focus fabric is a medium to large scale print that contains three or more colors. They usually go together nicely and gives you a good starting point for a color scheme. This is a great trick for those of us that aren’t good with color. Below is a sample of a focus fabric (Riley Blake’s Golden Aster) and the color palette inspiration.
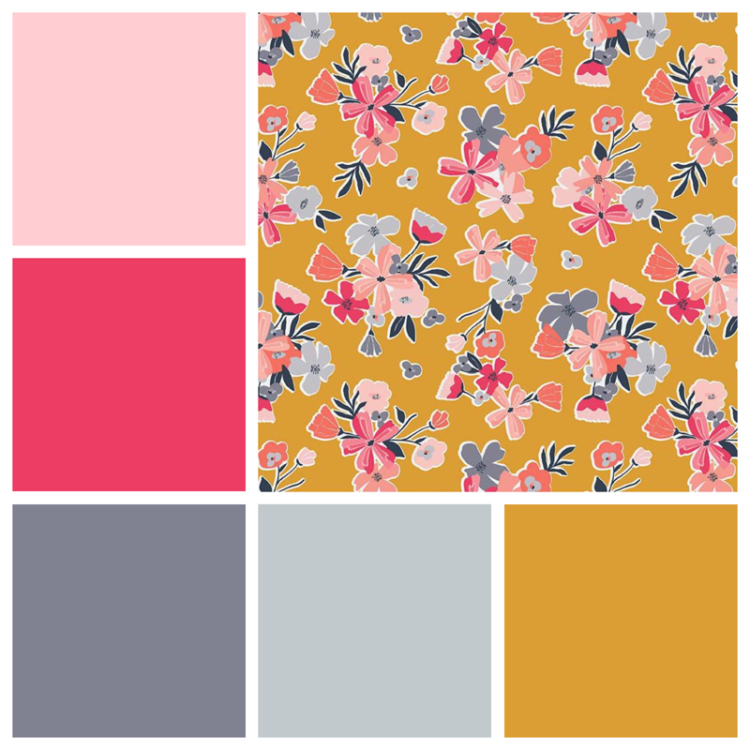
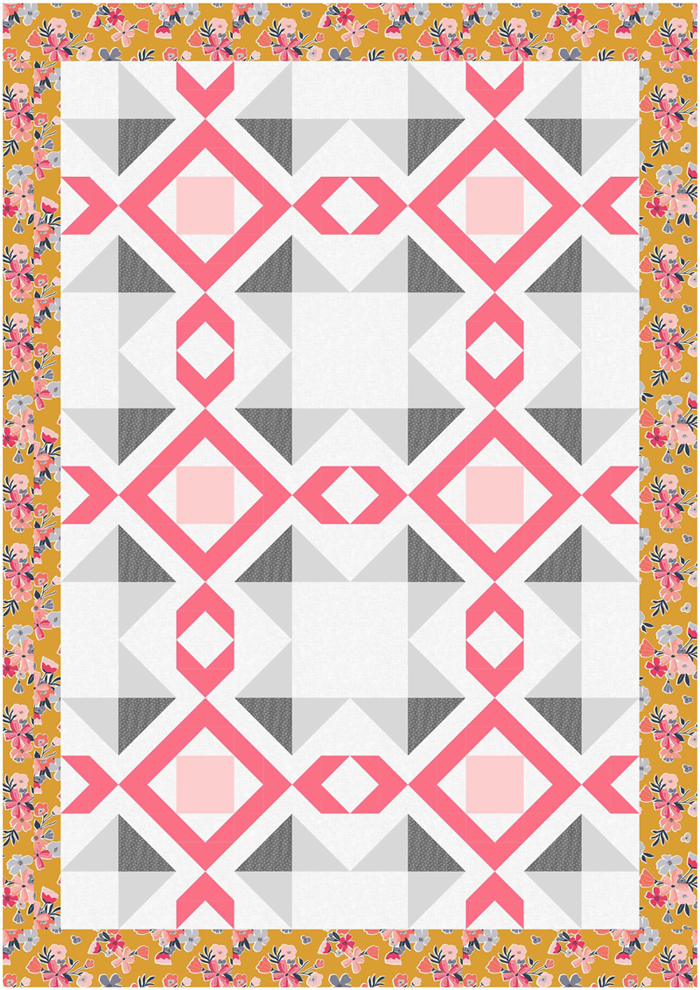
The focus fabric doesn’t even have to be used in the quilt; it can just act as your color inspiration. If you do decide to use it, a good place for it would be the border or the center square of each block. The colors that you pull from the focus fabric can be solids, small prints or blenders (meaning they have some texture or movement, but read as a solid). Here is what the color palette (above) would look like in this quilt using a combination of focus fabric, solids and blenders.
My Fabric Pull
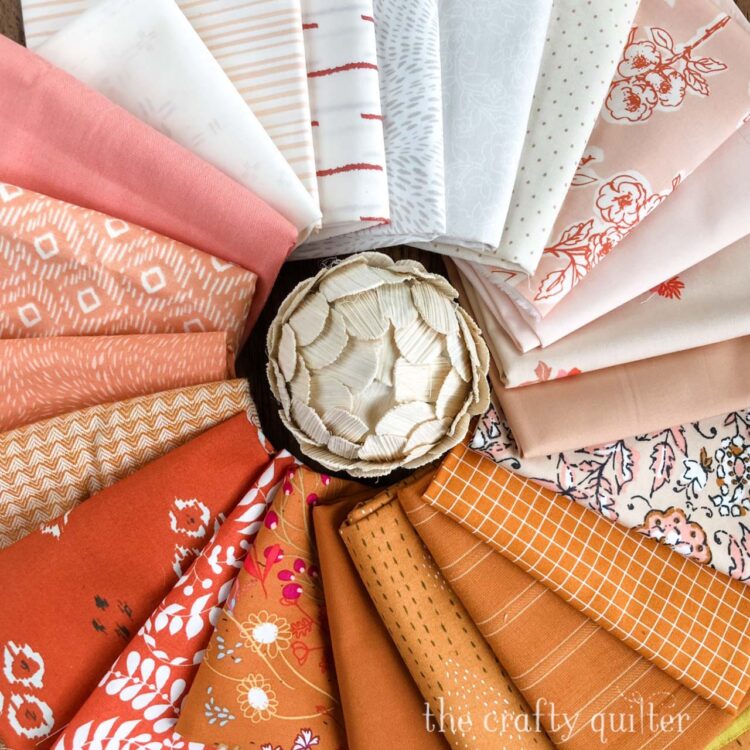
I will be using a combination of solids and prints for my quilt, but it will mostly be smaller prints and blenders. My color scheme is monochromatic – ginger would be a good name for it. I’m using a focus fabric for the center of each block and the rest of the block will be in peach/ginger/rust tones. All of the background fabric will be different for each block as well, but the color will remain a neutral cream. Below you can see the fabric that I’ve pulled from my stash. They are mostly fat quarters or half yards.
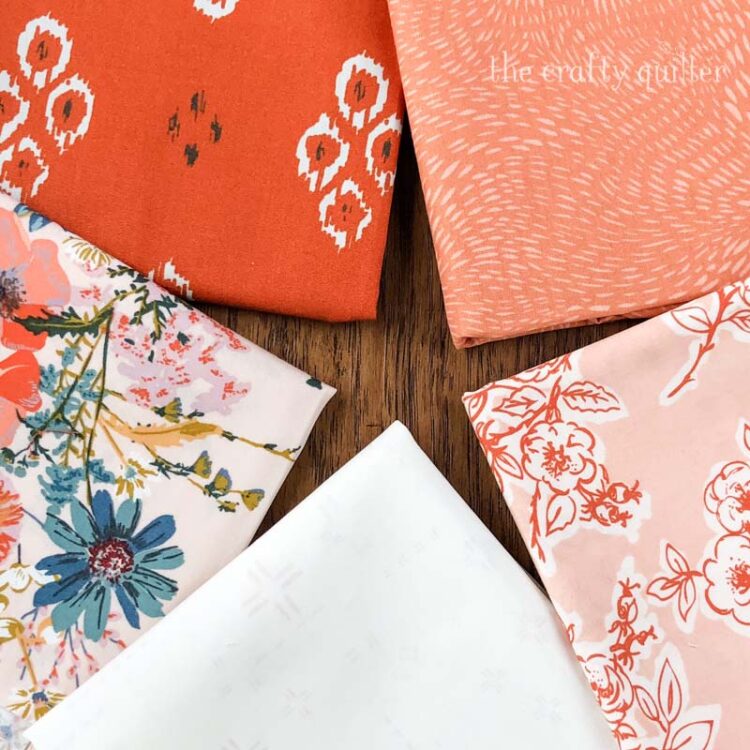
Each block will have four different fabrics, with the center square all the same (floral on the left in photo below).
Color placement
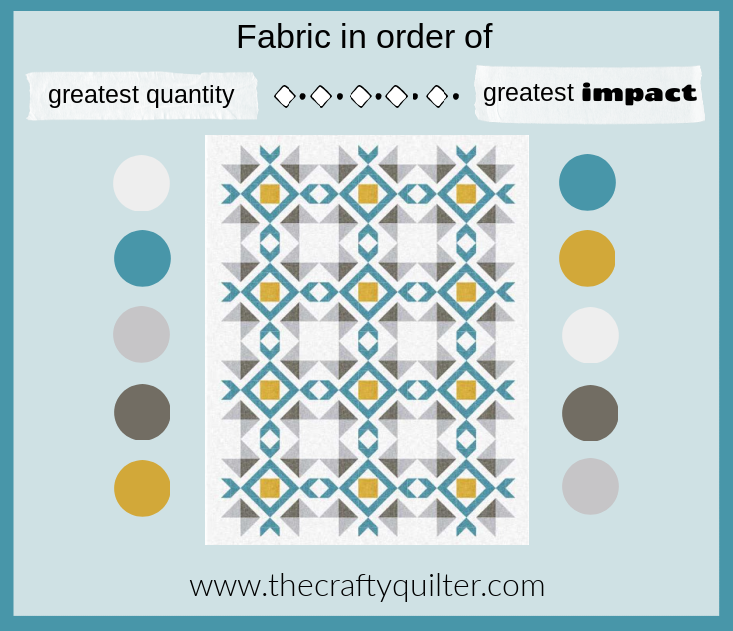
If you look at the fabric requirements, you’ll see the background (Color 1) requires the most fabric followed by Color 2 (teal). This tells you that you’ll be seeing those colors the most in the quilt. Following that line of thought, Color 4 (lt. gray) will be next then Color 3 (dk. gray) and finally Color 5 (gold) will show up least. However, when you look at color values, contrast and placement, you’ll see that the same colors have a different impact depending on where they land in the quilt. You can see the difference in the chart below. The teal and gold are very strong and draw your eye in. The other three fabrics act as supporting characters.
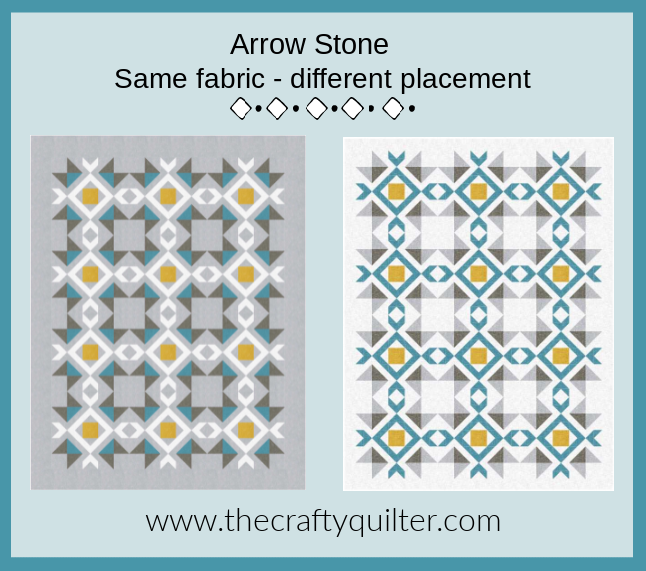
If you take those same fabrics and change where they show up in the quilt, it can totally change the look of the quilt. In the example below, I’ve moved everything around except the gold fabric. The “linked arrows” (white on the left quilt and teal on the right quilt) are prominent no matter what color they are. You can see the dark gray fabric has changed position and emphasizes a star pattern in the quilt on the left. So, where you place each color will have an impact on the quilt as well.
Test out color palettes with QuiltInk!
You’ll be able to test out different color palettes for your Arrow Stone quilt with a new web application called QuiltInk. I’m really excited about this! It’s free for users and allows you to try out different colors within a quilt. It’s like an online coloring worksheet! The pattern has to be uploaded by the designer and accepted into the program first (they pay a small monthly fee). Guess what friends – Arrow Stone is ready for you to play with!
QuiltInk currently works with solids from twelve of the major fabric manufacturers. It’s really easy to use and you can keep mixing and matching colors until you find something you like.
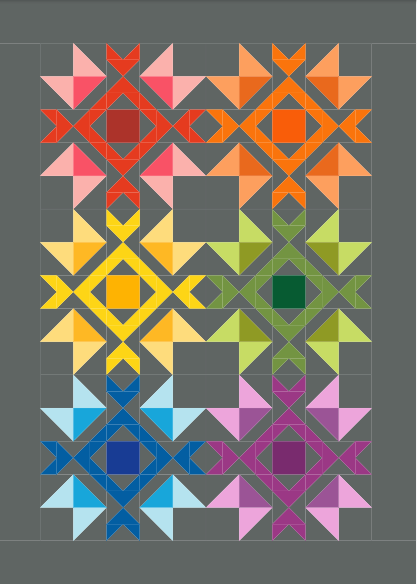
Using QuiltInk, I made a rainbow version with dark gray as the background in the baby size. I chose Kona solids for my color palette. How fun is that!
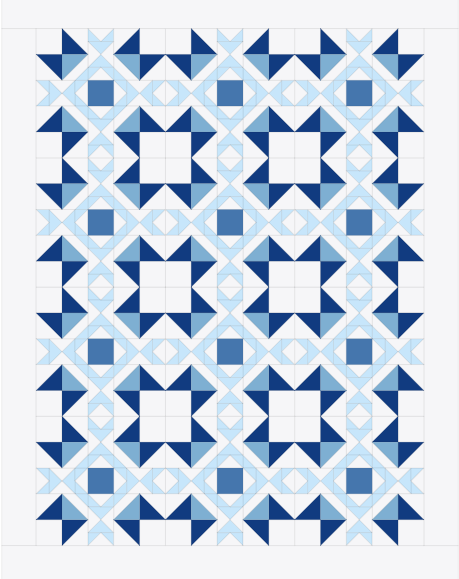
I wanted to see what a blue monochromatic version would like for the throw size. Definitely another beautiful way to go. Notice how the star points stand out because of the color value.
Ready to give it a try? Here are the steps to get started.
- Go to QuiltInk and click on “Patterns”.
- Find the Arrow Stone pattern and click on it.
- A menu will pop up to select a layout. Select the layout you wish to color (see more info about that in the next paragraph).
- A workspace will open up with the pattern ready to color. Click on a color and then click on the part of the quilt you want to add that color to.
- Once you’re done, you can save your color version IF you create a free user account. Otherwise you can just keep trying different color combinations, but nothing will save.
Currently, there are Baby and Throw Sizes of Arrow Stone available to color. It really doesn’t matter too much which size you work with; you’ll still get a good feel for different color combinations. Within each size there are different color versions: rainbow (baby size only), monochromatic, two-color, scrappy and the original (cover pattern). If you want to try out a two-color version click on that. It’s already been mapped out for two colors. If you wanted each block to be a different color combination, you should pick the rainbow version; it has the most flexibility. You’ll get the hang of it soon enough!
Kits Available
I’m so happy that there are two different kits available for the throw size of Arrow Stone! This is a great way to remove the guess work from choosing fabric. You can find the original Quilter’s Linen version at The Granary Quilt Shop. (If you don’t find the Arrow Stone kit, give it a day). I don’t have a picture of the kit, but it will have these fabrics in it: Quilter’s Linen by Robert Kaufman in colors White, Delft, Stone, Silver and Ochre.
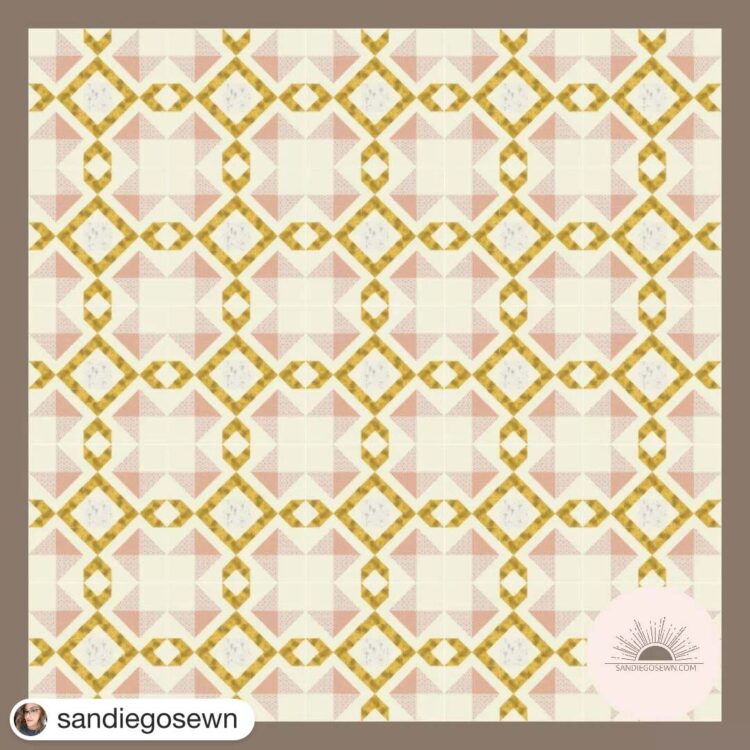
When I saw this second kit, I did a little happy dance. This one is made with Art Gallery Fabric’s Shine On collection and available at San Diego Sewn. Amanda has put together a beautiful kit in the throw size (shown as queen below). I love shopping at San Diego Sewn!
Pre-washing Fabrics
This is a big question for many new quilters and it really comes down to personal preference. Old school sewists were taught that you must always wash your fabric before cutting into them. Shrinkage and color fastness are the two main factors. Shrinkage has more relevance for garment sewing than quilting.
Modern fabric dying techniques has come a long way and really taken away the fear of color bleeding. However, that doesn’t mean it won’t ever happen (Batiks are known to be more prone to bleeding). Color Catchers are worth adding to your wash load to trap excess dyes just in case.
I rarely pre-wash my fabrics. I like working with fabric straight off the bolt; it’s crisper and more stable that way. It takes a lot of time to wash fabric, dry it and then press it. That’s one less step I need to do. I’m not concerned with shrinkage unless I’m working with flannel. Always pre-wash flannel because it shrinks more than quilting cotton.
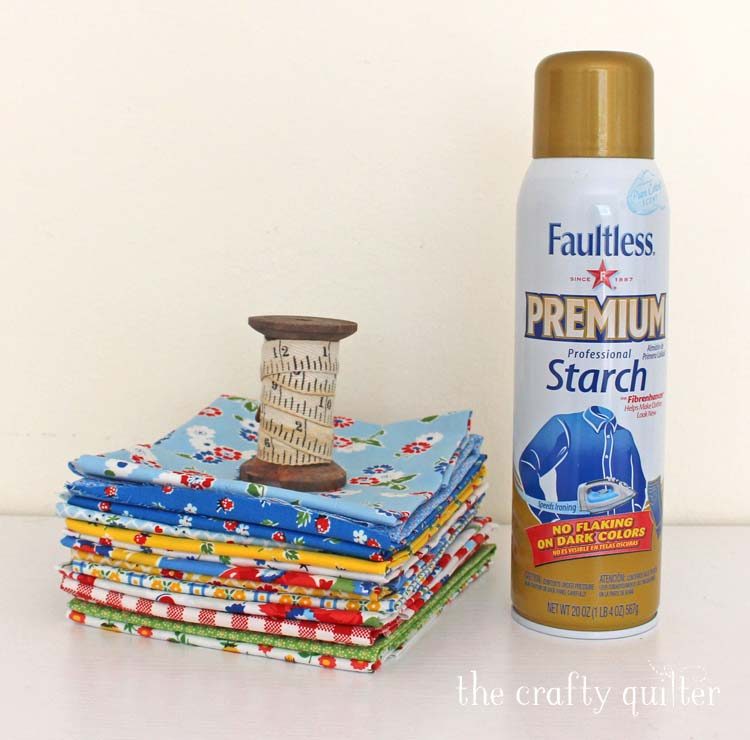
This is my personal preference. There’s certainly no harm in washing your fabrics first! I definitely recommend using a spray starch product if you prewash. I have an entire blog post dedicated to spray starch here. Most of the time I starch my fabric (whether it’s been washed or not) before cutting into it.
Other Supplies
Besides fabric and basic sewing equipment, there are a few extra supplies that you might want to think about. These are NOT NECESSARY to make this quilt, but they’re nice to have on hand. I’ll refer to them in more depth as the QAL progresses. I have provided manufacturer links for these, but it’s nice to purchase from your local quilt shop whenever possible.
- Flying Geese Bloc Loc Ruler, 1.5″ x 3″ finished size – This makes trimming the flying geese for this pattern really quick and easy.
- Wing Clipper 1 Tool by Deb Tucker – Another option for trimming multiple sizes of flying geese units.
- Tucker Trimmer 1 by Deb Tucker – I love this ruler for trimming half-square triangles (HST’s) and quarter-square triangles (QST’s).
- Stripology Ruler XL by Creative Grids – This is a great ruler for speedy cutting of multiple strips of fabric.
- Diagonal Seam Tape by Cluck Cluck Sew – I use this for stitch & flip seams and for a good 1/4″ seam allowance guide.
- Wool Pressing Mat – You can find this in many sizes from different manufacturers. It’s great for pressing seams and blocks.
Week 1 Assignment
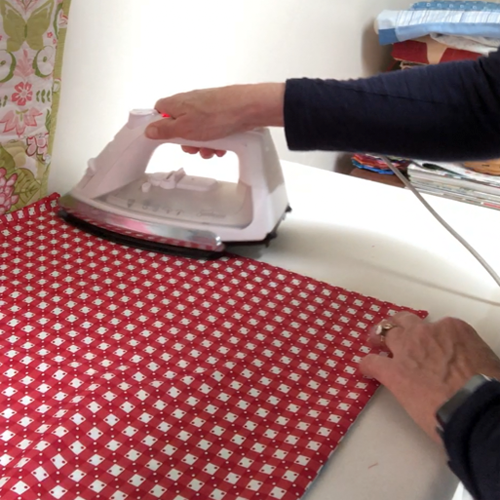
Your assignment for Week 1 is to choose your fabric. It would also be a good idea to press all fabrics so they’re ready to go for next week. You can use starch or not; you can pre-wash or not. It’s up to you.
Prizes & Sponsors
Quilt Alongs are fun because you get to sew together as a group, but they’re even better because there’s lots of chances to win a prize! I have some awesome sponsors lined up for this QAL: Shannon Fabrics, Creative Grids, Bloc Loc Rulers, The Quilt Show, Plain Janes & Co., Purple Hobbies and The Granary Quilt Shop. They have all generously offered to donate some awesome prizes. Please send them some love by visiting their shop and checking out their products.
Each week, I’ll randomly select a winner for each prize. To be eligible to win, you must post your progress for that week to Instagram using the hashtag #ArrowStoneQAL. You can add #ArrowStoneQuilt and the #thecraftyquilter plus you can tag me, @thecraftyquilter if you’d like.
Your Instagram account needs to be public so I can see it. I’ll direct message the winners and announce them on Instagram as well. If you want to work ahead in the QAL, that’s fine. Just make sure to post photos each week to be eligible to win prizes.
For the final week only, I will allow participants to email me a photo of their completed quilt top if they don’t have an Instagram account, to be eligible for the grand prize.
Week 1 Prize
Week 1 is kicking off with TWO awesome prizes from The Quilt Show (TQS)! I’m so excited about this because I love TQS so much. If you’ve never experienced The Quilt Show, you’re missing out on a rich experience. They are an online video/web TV site created just for quilters. They have a free membership that gives you access to their blog, some classrooms and free shows plus more. They also have a subscription membership that offers full access to all shows, classrooms, patterns and forums. Plus they have an online store where you’ll find everything you need for quilting.

The first prize is an annual membership to The Quilt Show! I promise you’re going to love it. The second prize is a $50 gift certificate to their online store. To be eligible to win, post a picture of your fabric pull on Instagram by March 5 with the hashtag #ArrowStoneQAL. I’ll pick two winners on March 6, 2022. Good luck!
I can’t wait to see your beautiful fabric photos this week! Fabric is what it’s all about for me. If you have any questions at all, please leave a comment and I’ll get back to you ASAP. Thanks for joining the Arrow Stone Quilt Along!


Hi Julie 🙂
Someone posted, on IG, a sheet showing the schedule, and a place to put fabric swatches; she said she got it from you. May I have it too?!
Now I have to go back and try more volor vombos!
I hope I did the instagram post correctly. I don’t know my @ from my #
Thank you for all the excellent information. As I read, it seemed as though I were sitting at a quilting session learning methods and techniques. I especially was excited to read your description of the fabric. you will be using. I have a fat quarter bundle I have been wanting to use for a project. I will be bold to give it a try. This week I will be deciding which of the fat quarters I will use plus pulling some neutrals from my stash “collection.”
I have signed up several times for arrow stone quilt along but I am not sure if it went thru. I do want to sign up. Please sign me up. I did the disappearing nine patch with you and thourghly enjoyed it. Looking forward to doing this one with you.
Got my pattern and this is great information to help me get started. Picking fabric is my worst chore. Thanks for the opportunity to learn more from you.
HELP! I just purchased your pattern Arrow Stone thru easy, but my tablet is not compatible to print pattern, can’t open download. Could you please re-send download to my desk-top at [email protected] hoping I can download and print from there. Or possibly a print pattern. Thank you. Sharon Bultman
Sew much effort, sew many suggestions, sew many “getting started on the right foot” suggestions, sew much thought. I could go on and on, but I think that you have covered every detail and answered all of our questions, even before we have thought of them . Sew much to learn, whether a seasoned quilter or a newbie quilter. Sew exciting….thank you, Julie!!
This is a super awesome post and QAL! The information here is very helpful, and the coloring program is going to be fun. I very much appreciate the thought and time you put into this! I figured out why I was drawn to your pattern and well as your colors. It goes with new furniture we recently received (but ordered 5 months ago!). The colors in the upholstered chairs, round table and area rug are practically made for it. I am interested in the Quilter’s Linen, so ordered a color card of them, which should arrive tomorrow. I’m excited to choose colors. Thank you so much for all your work.