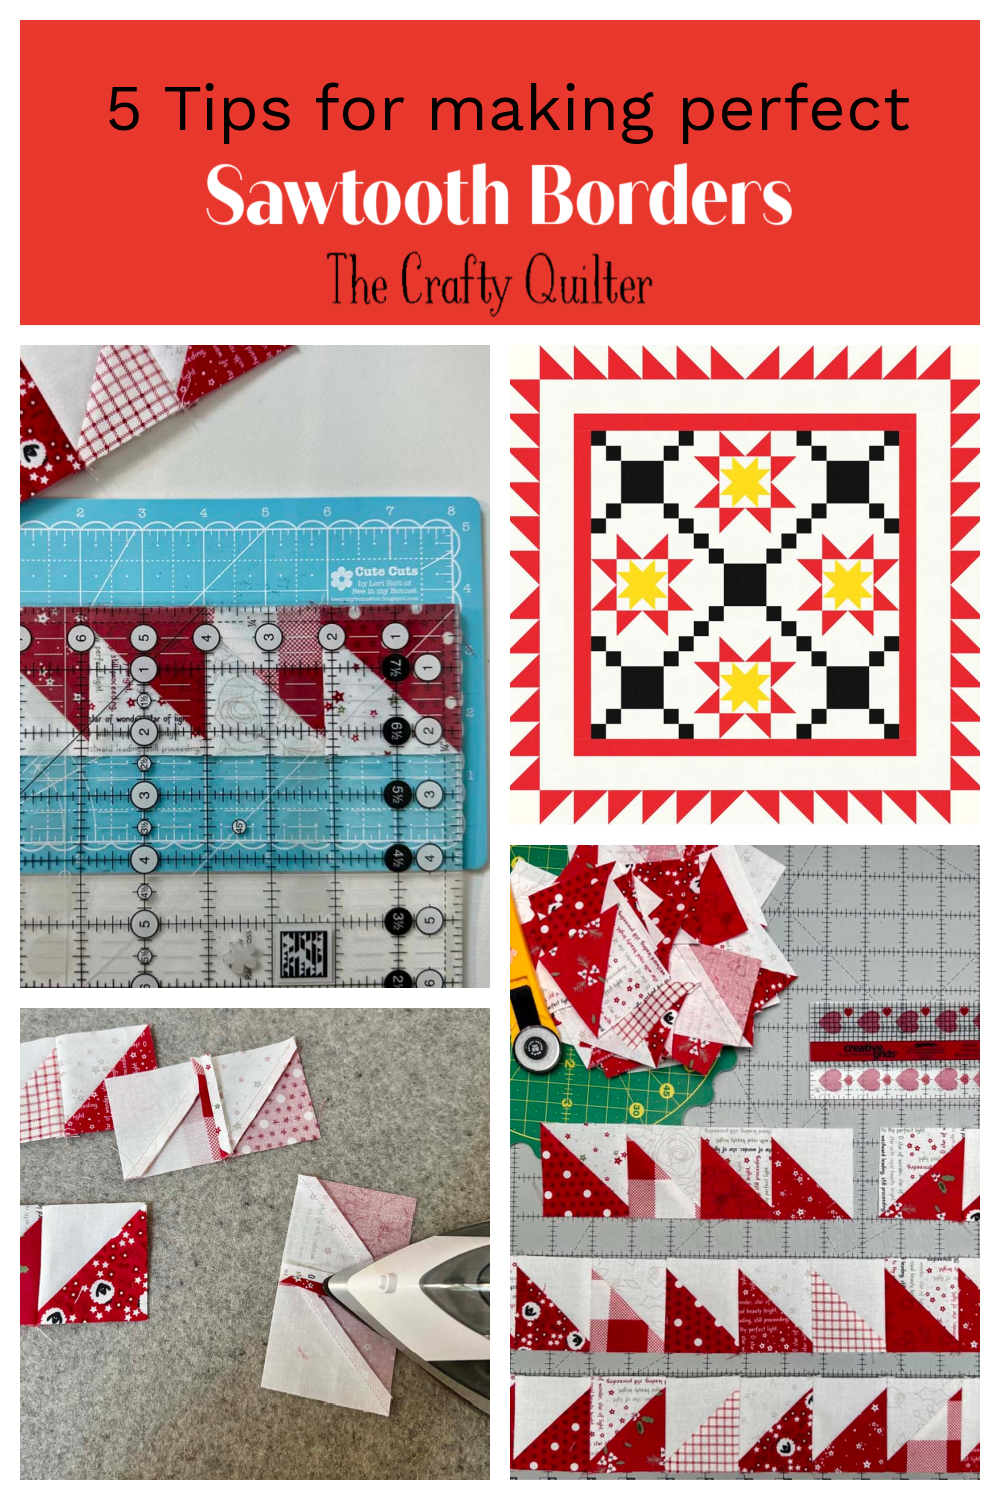
Easy tips to make perfect sawtooth borders
When it comes to border designs, there are so many to choose from. If you want to give your quilt that added sparkle, you might want to try a sawtooth border. Don’t be intimidated by this one, because today I’m sharing my best tips for making perfect sawtooth borders!
What is a sawtooth border?
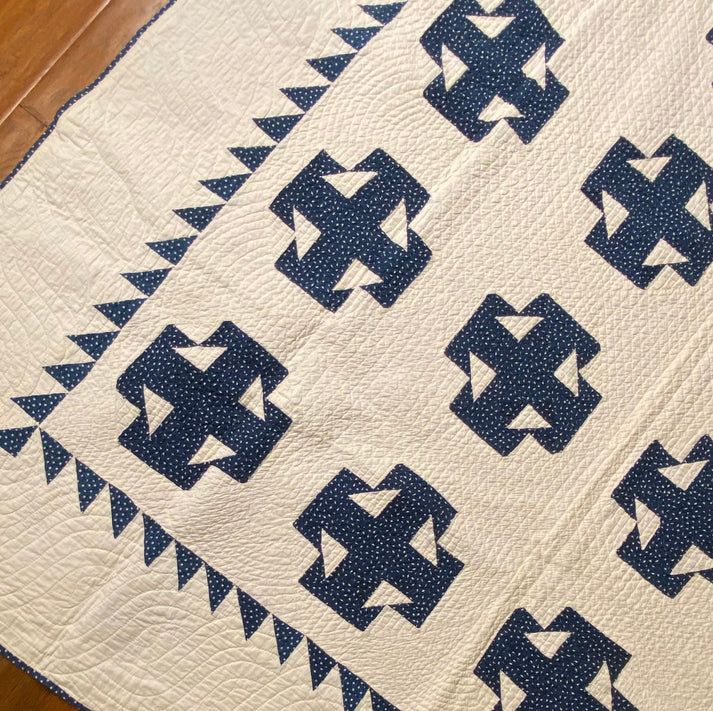
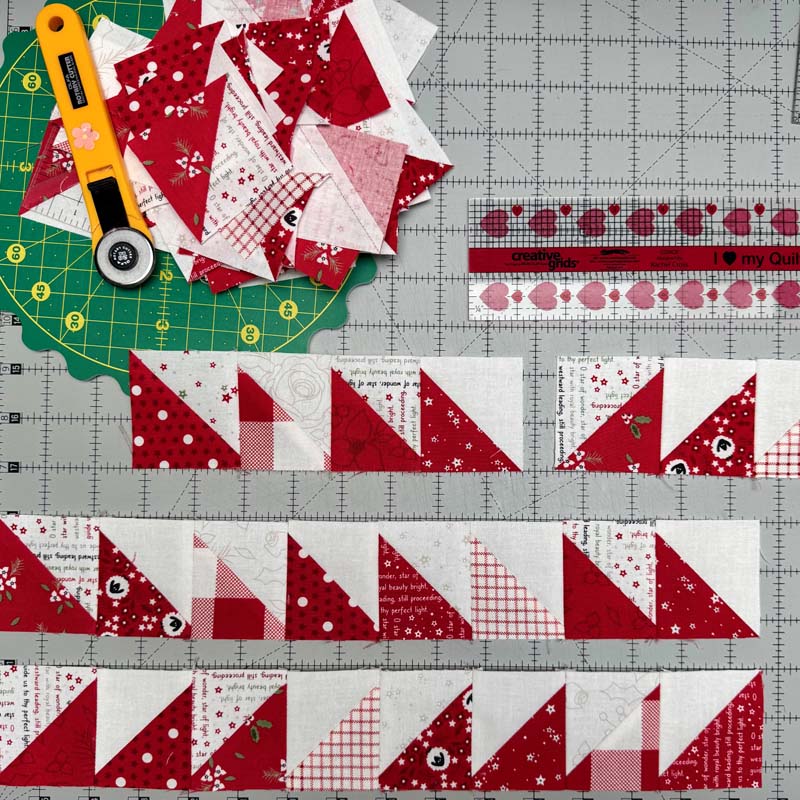
Sawtooth borders are made up of many half-square triangles sewn together in a row. The way they are arranged gives the appearance of the teeth of a saw. This border design was often used in antique quilts, but can still be found in traditional and modern quilts of today.
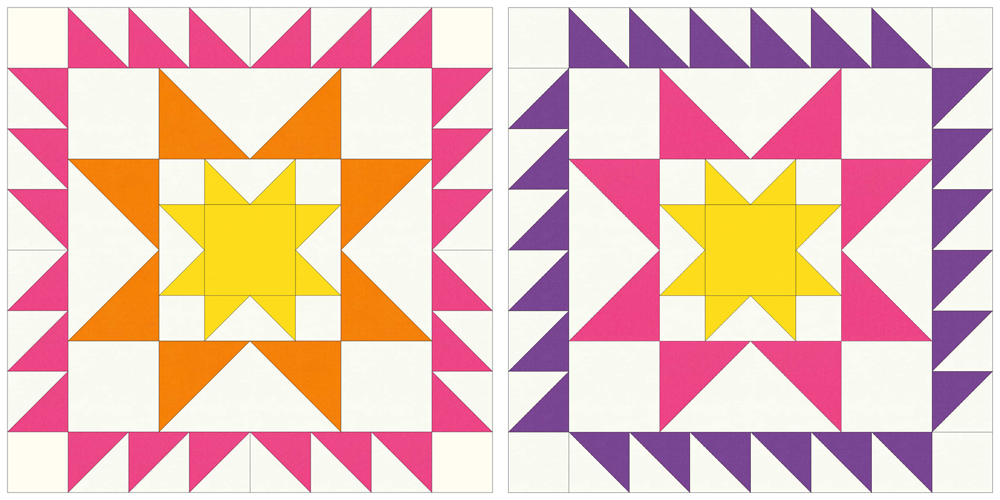
The HST’s can be arranged in different ways to create unique looks. If you rotate half of them on each side from the center, they’ll look like an exploding star (below left). If you keep them going in the same direction on all four sides, they’ll appear as a chainsaw (below right).
Make your HST’s 8-at-a-time
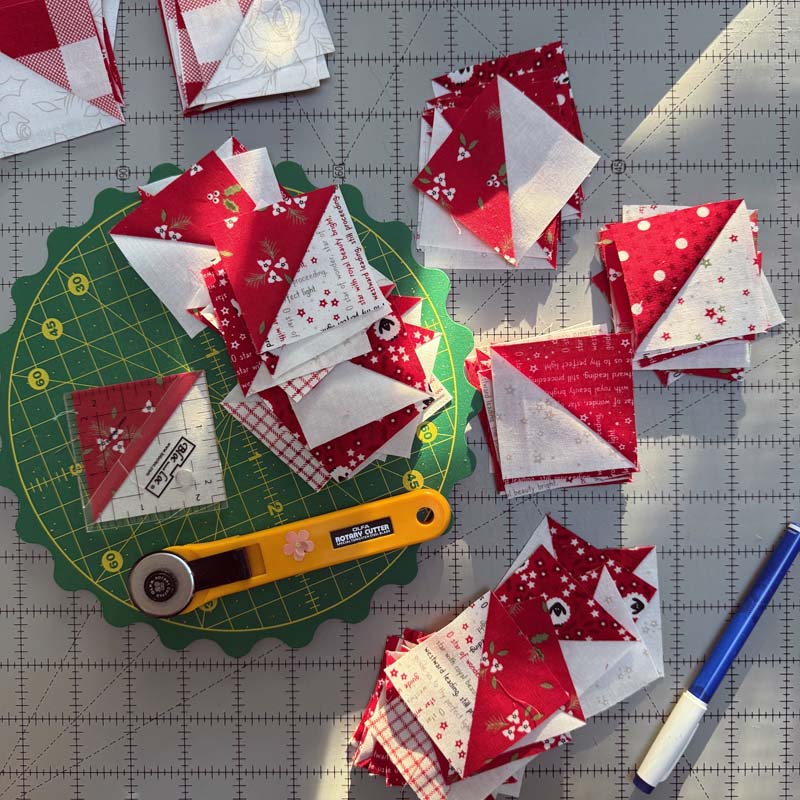
Because there are so many HST’s in a sawtooth border, you’ll want to make them as fast and efficiently as you can. I love the 8-at-a-time method for this. It starts with two larger squares that are sewn together with diagonal seams in both directions. Then you cut them apart into eight HST units.
- To get the size needed for each square, multiply the cut size listed in the pattern by two. For example, if the pattern says to cut a 4″ square, cut a 8″ square instead.
- Draw a diagonal line on the wrong side of one of the squares in both directions, forming an “X”. Then draw a vertical and horizontal line in the center.
- Stitch 1/4″ on both sides of the diagonal lines and cut along the drawn lines.
- Then press and trim.


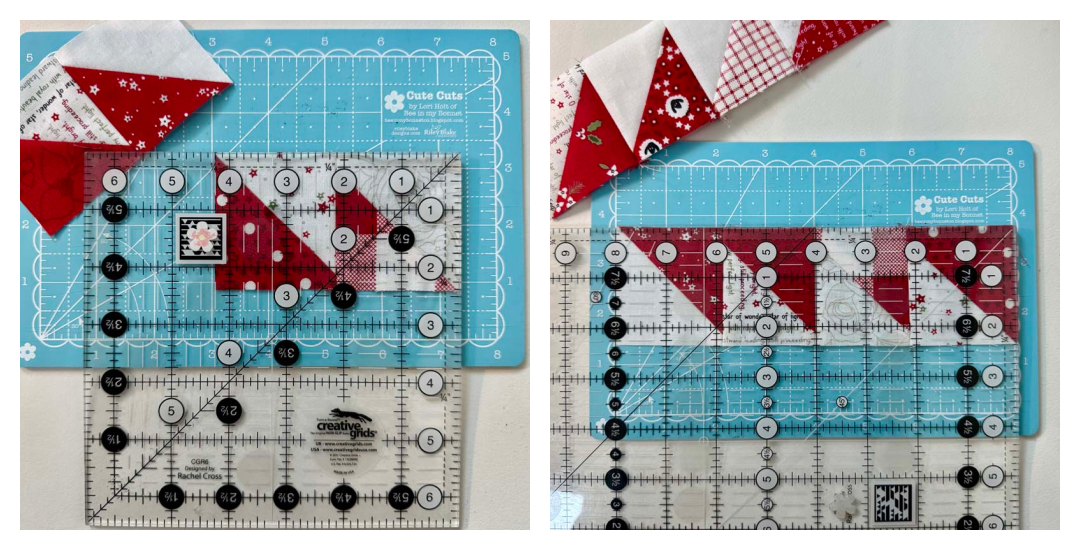
This method will give you HST units that are oversized and need to be trimmed to the needed dimensions. Notice in the photo above that I’m using a rotating mat and a Bloc Loc ruler to trim my HST’s. Make sure to read my Favorite Tools for Trimming HST’s for more information on those.
You can use this method with a variety of fabric squares if you want a scrappy look. I’m currently finishing up the Piece & Quilt Sampler and I’m using all of the leftover fabrics for the sawtooth border. It’s going to be very scrappy!
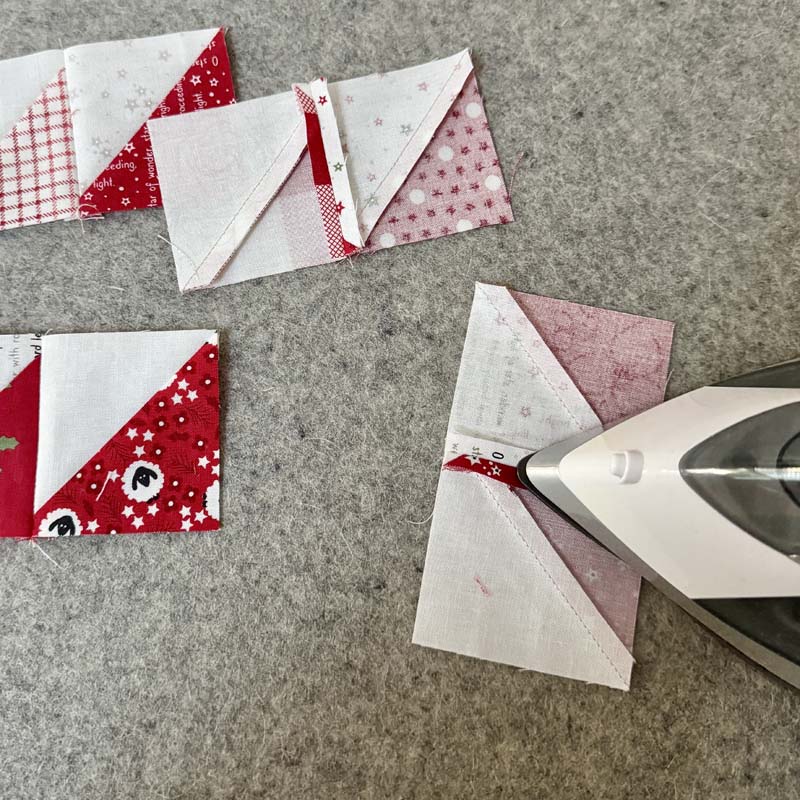
Pressing is important
How you press each HST unit and each connecting seam is important. I prefer to press the diagonal seam of each HST unit towards the darker side. This makes it easier to trim the HST units using a Bloc Loc ruler. If you use a different ruler (i.e. a square ruler) then you can press this seam open or to the side.
When sewing the HST units together, I prefer to press that seam open. It helps the border to lay flatter and more even.
Sew in pairs and use pins
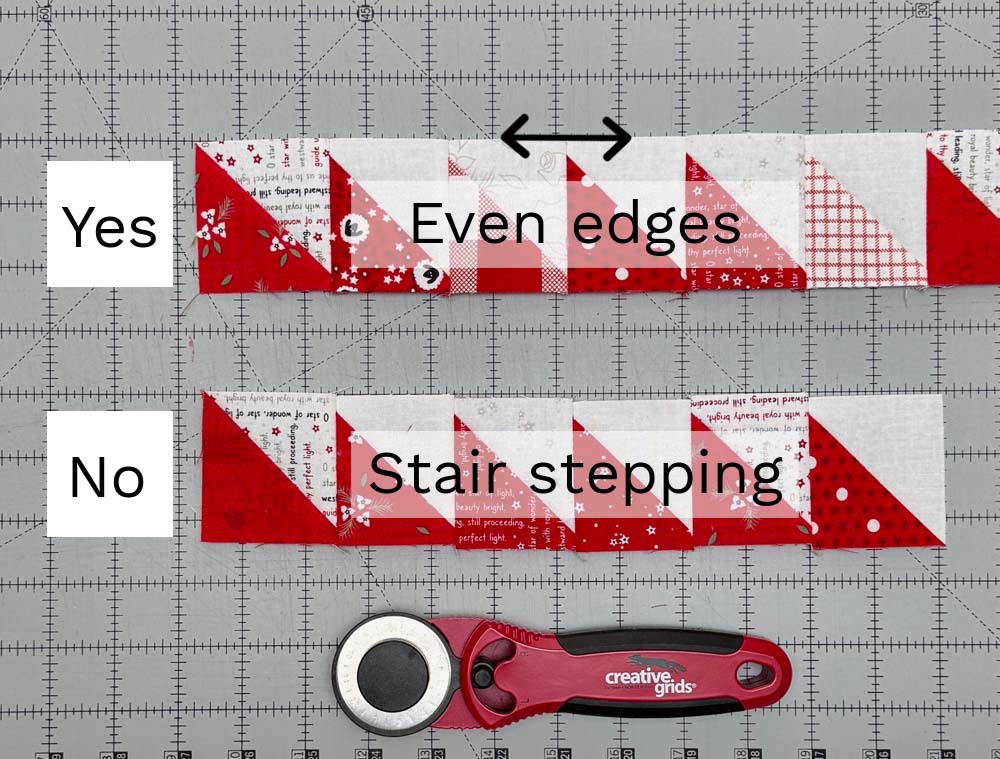
No one likes to hear this, but use a pin at the top and bottom of each paired unit. This really helps keep your pieces in place; no more shifting. There’s nothing worse than lining up the raw edges, sewing the seam and then finding out that the top or bottom piece has shifted down. This can also lead to stair-stepping which is caused by repeated units not aligning.
Another great tip is to sew the HST units into pairs. Not only is this more efficient, but it will help keep everything in line because you’re working two or four at a time. It will be more apparent when you’ve lost your straight edge. By that I mean the units won’t line up at the top and bottom edges; they will stair-step up and down.
Now you can then sew the pairs together, making a four-unit. Then sew those units together until you have the correct length.
Check your seam allowance
This is probably the most important tip for any pieced border. Make sure to check your seam allowance periodically. Whether you’re sewing plain squares together or HST units, there are likely to be a lot of seams in the border. If your seam allowance if off just a bit, it will add up exponentially in the final size of the pieced border.
I start right away by sewing two HST units together and then measure the width. It should measure 2 times the size of the FINISHED HST size PLUS 1/2″. For example, if the directions say to make 2 1/2″ HST units (that’s the unfinished size), then the finished size is 2″. So that calculates as follows: 2″ x 2 = 4″, 4″ + 1/2″ = 4 1/2″.
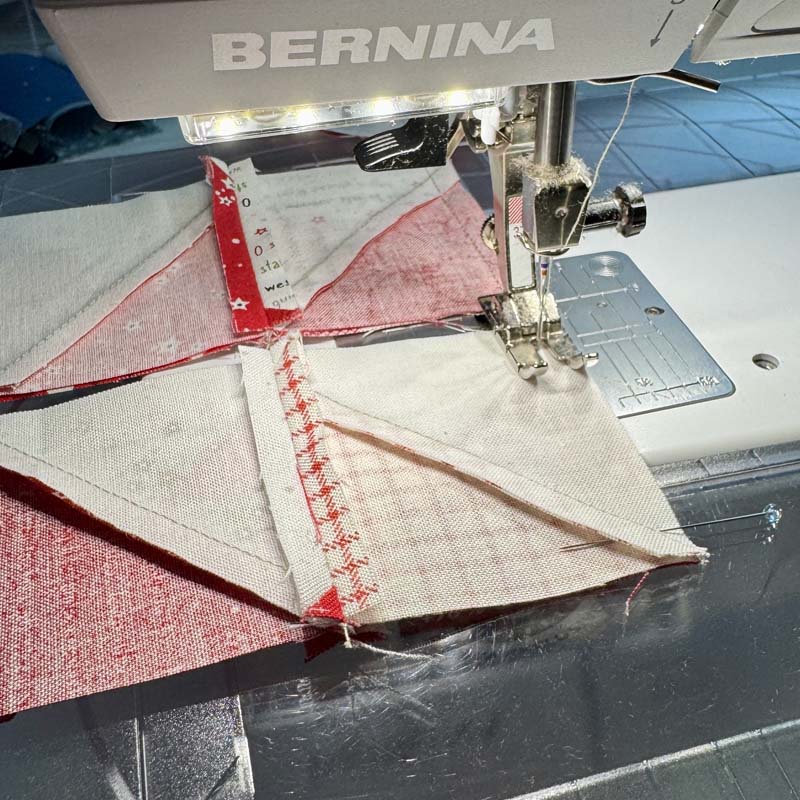
There are three factors that can influence your 1/4″ seam allowance: the fabric, the type of thread you use and whether you press the seam open or to the side. Since we’re pressing the seams open along this border, I had to adjust my seam allowance to be a little narrower. That can be done by moving the needle position to the right or following a different 1/4″ guideline.
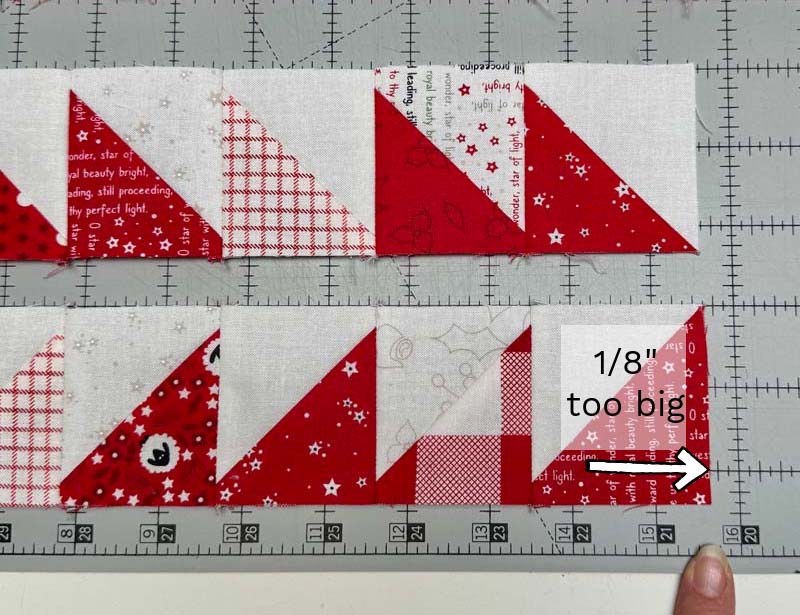
In the photo below, my first pair of units are measuring exactly what I need them to. I measured again after sewing two pairs together just to be sure. I had already taken into account my open pressing and adjusted my guideline. (My units are in 1/8″ increments, so my sizes will be different than the example given earlier).
It pays to stop and check your measurements as you go. After I had eight HST units sewn together, I checked again. I found that my piece was just 1/8″ too big. That’s good to know early on so I can still make adjustments going forward.
Ways to adjust
Even after careful pressing, pinning, sewing and measuring, your pieced border may not be the correct size. Don’t panic because there are a few things you can adjust.
If your border is too big, choose a few seams (evenly spaced along the length) and re-stitch the seam with a slightly wider seam allowance. This small adjustment will go unnoticed and you’ll have a perfectly sized border.
The same thing applies to a pieced border that is too small. Choose the seams to adjust, but make the seam allowance slightly narrower. It may take a little trial and error to get just right, but it will be worth it.

If your border is measuring 1/2″ or less too big or too small, you may be able to ease in that amount along the length just by pinning and stitching carefully. You shouldn’t have any tucks or puckers if you go slow and let the feed dogs do their job.
Ditto for all pieced borders
You can use these same tips when making any pieced border. Pressing, seam allowance and measuring will be key factors in achieving great results. Those things take a little more patience and time, but it almost always pays off. I guess that’s true for any piecing we do!
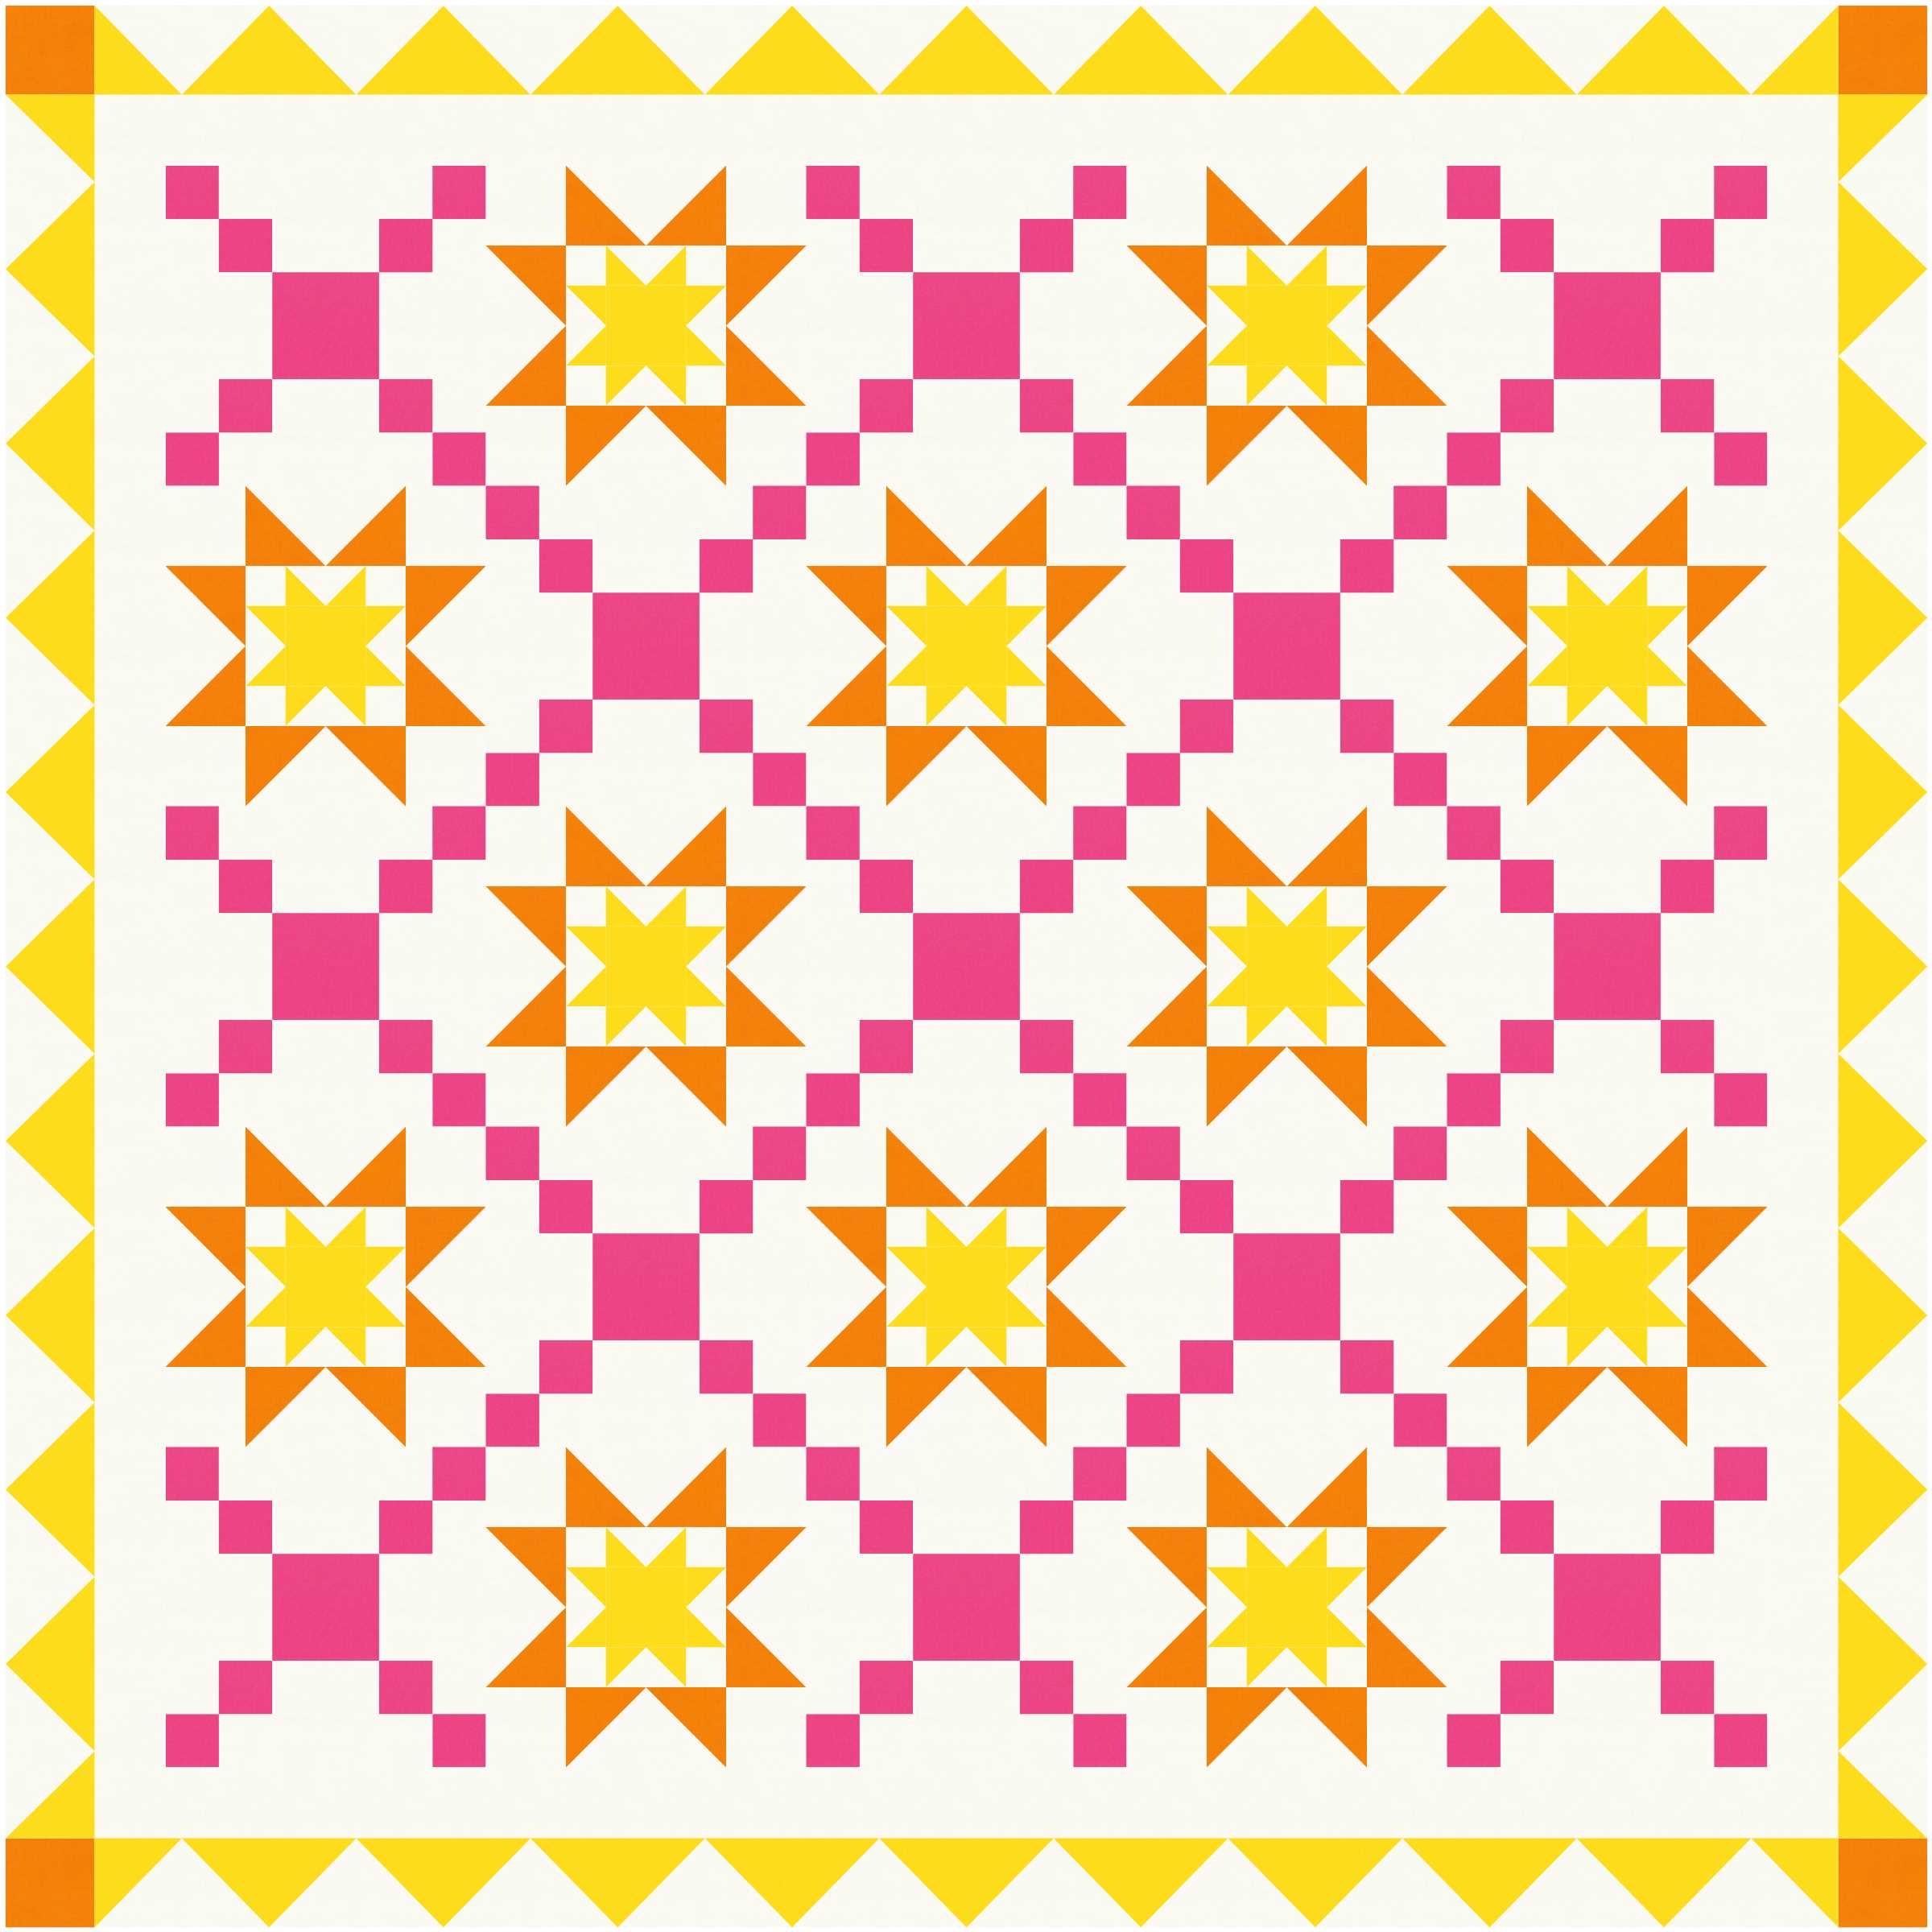
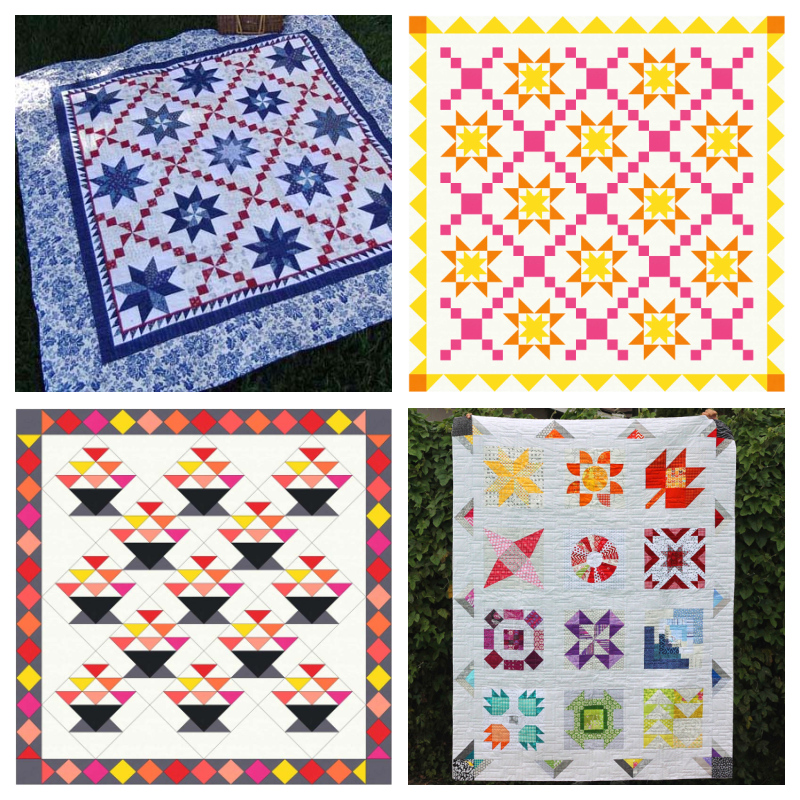
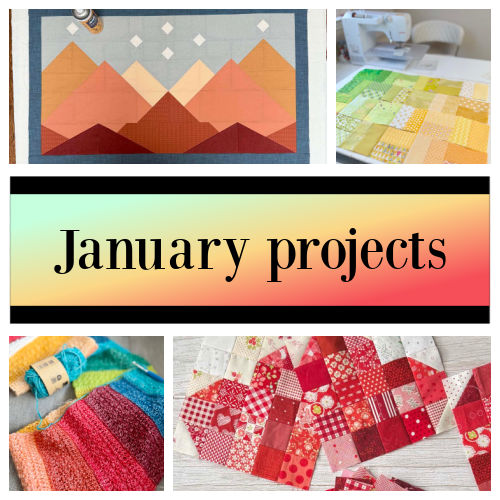
You can see examples of pieced borders below. The quilt shown in the top left is Oh My Many Stars and the bottom right quilt is Classic Meets Modern, both made by me (not designed). The other two quilts I designed using EQ8.
I love the look of sawtooth borders, and I’ve learned so much about them while making the Piece & Quilt Sampler. Even though they take more time, sawtooth borders can add another dimension to your quilt. Hopefully, these easy tips come in handy the next time you try a pieced border.
Thanks for reading and happy quilting!

Discover more from The Crafty Quilter
Subscribe to get the latest posts sent to your email.


Fabulous tutorial on these lovely borders. I pointed my blog to this today, as I am showcasing a King’s Crown block!
Hi, and thank you! I love your tips, I’ve learned a lot from reading your blog! Appreciate you!!
Julie, this is a wonderful tutorial for this type of border, Thank U so much for sharing
Very helpful article Julie. Thank you. Lee
This is my favorite way to make half-square triangles! And those saw tooth borders look like fun. I’ll have to use that in something soon. Thanks for the great tips on pressing, and the inspiration to get some sewing done.
Great tips, Julie! Thanks.
I recently got a tailor’s clapper and find it invaluable in getting my pieces extra-flat when pressing, especially with smaller pieces.
Thanks so much for the tips and photos! I’m a visual learner so the photos cemented the tips in my brain! Your quilts are just lovely!