
How To Make Ribbon Flying Geese | Fantasy Flying Geese Week 5
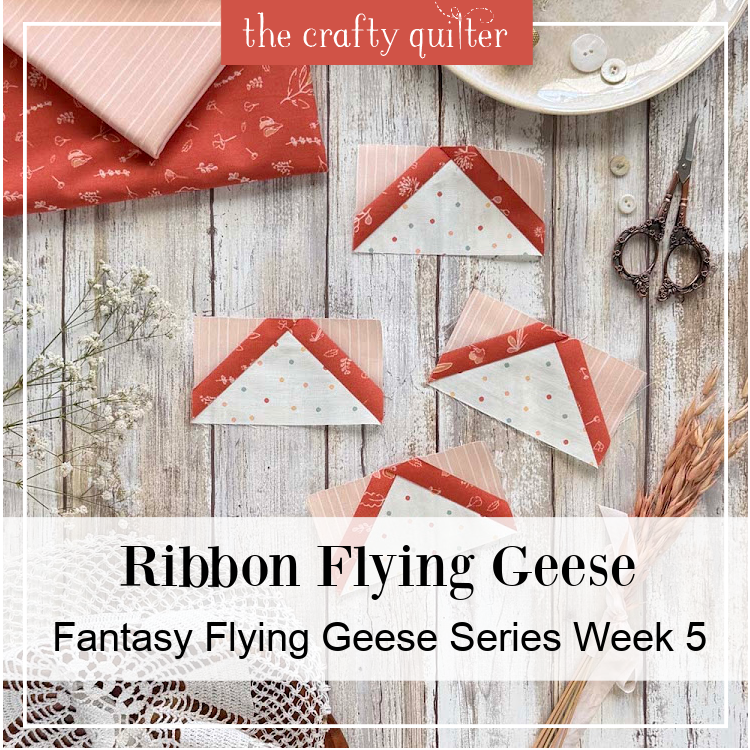
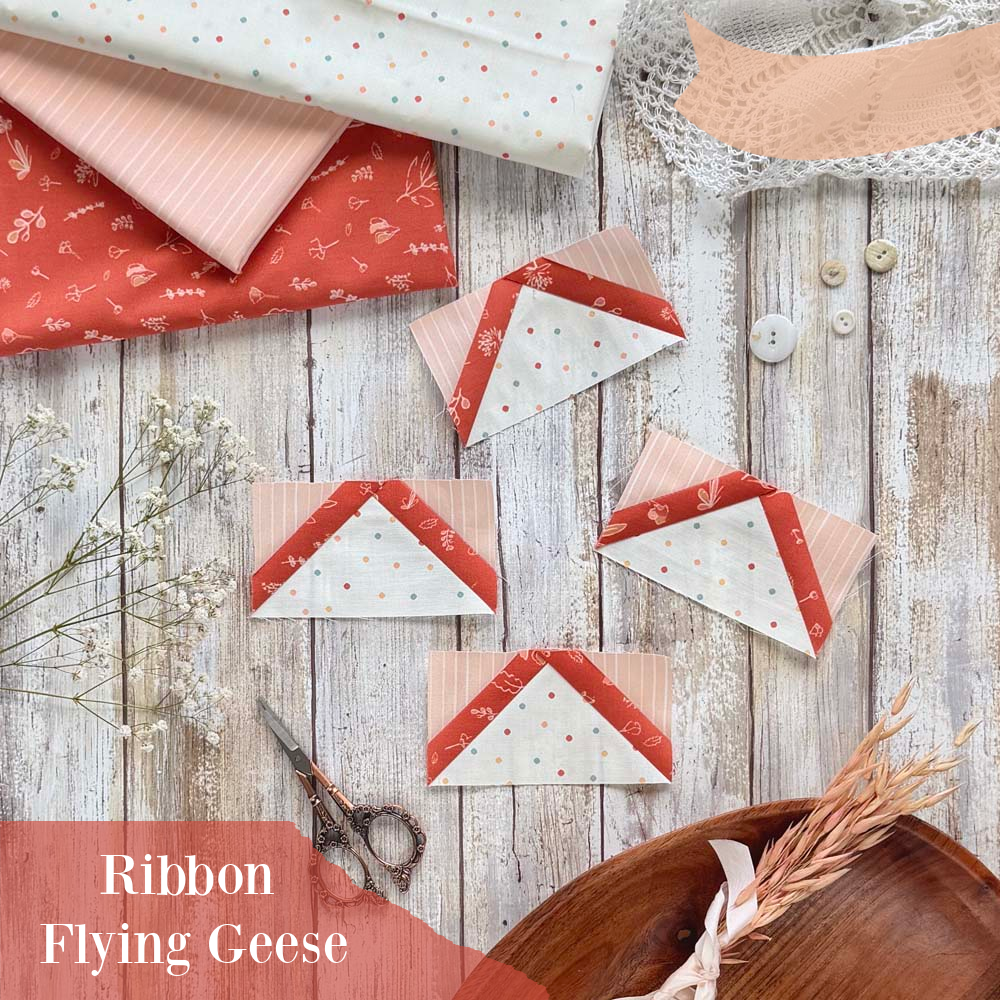
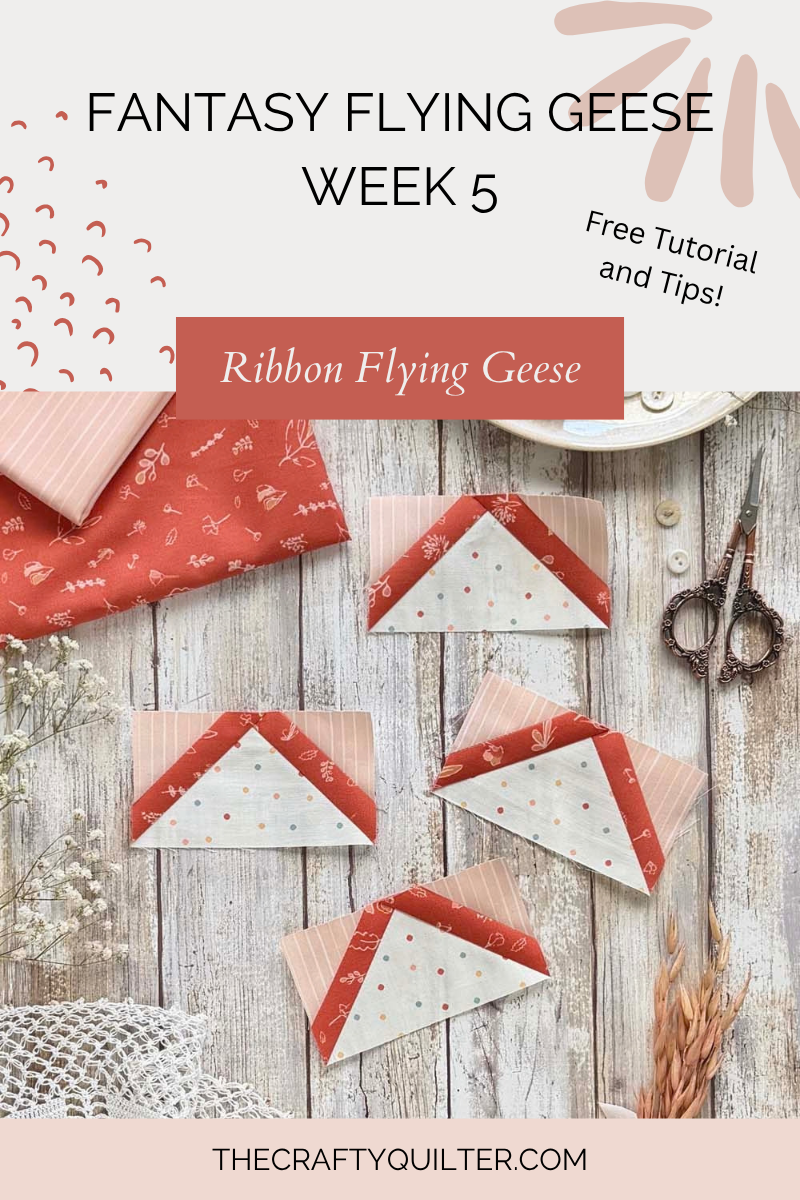
Welcome to Week 5 of the Fantasy Flying Geese Series! After some of the more intricate piecing we’ve tackled over the past few weeks, I think you’re going to appreciate this easier variation – Ribbon Flying Geese.
This week, we’re using a familiar technique known as stitch and flip (also called snowballed corners) to add a contrasting “ribbon” along the angled sides of our flying geese. It’s a simple technique that gives an ordinary flying geese unit a whole new look. Easy piecing with fun results – what’s not to love?
New to this series? Catch up below.
- Introduction Post – Start here to get all of the basic details.
- Week 1 – Capped Flying Geese
- Week 2 – One Seam Flying Geese
- Week 3 – Cat Ears Flying Geese
- Week 4 – Stroked Flying Geese
About Ribbon Flying Geese And The Stitch & Flip Method
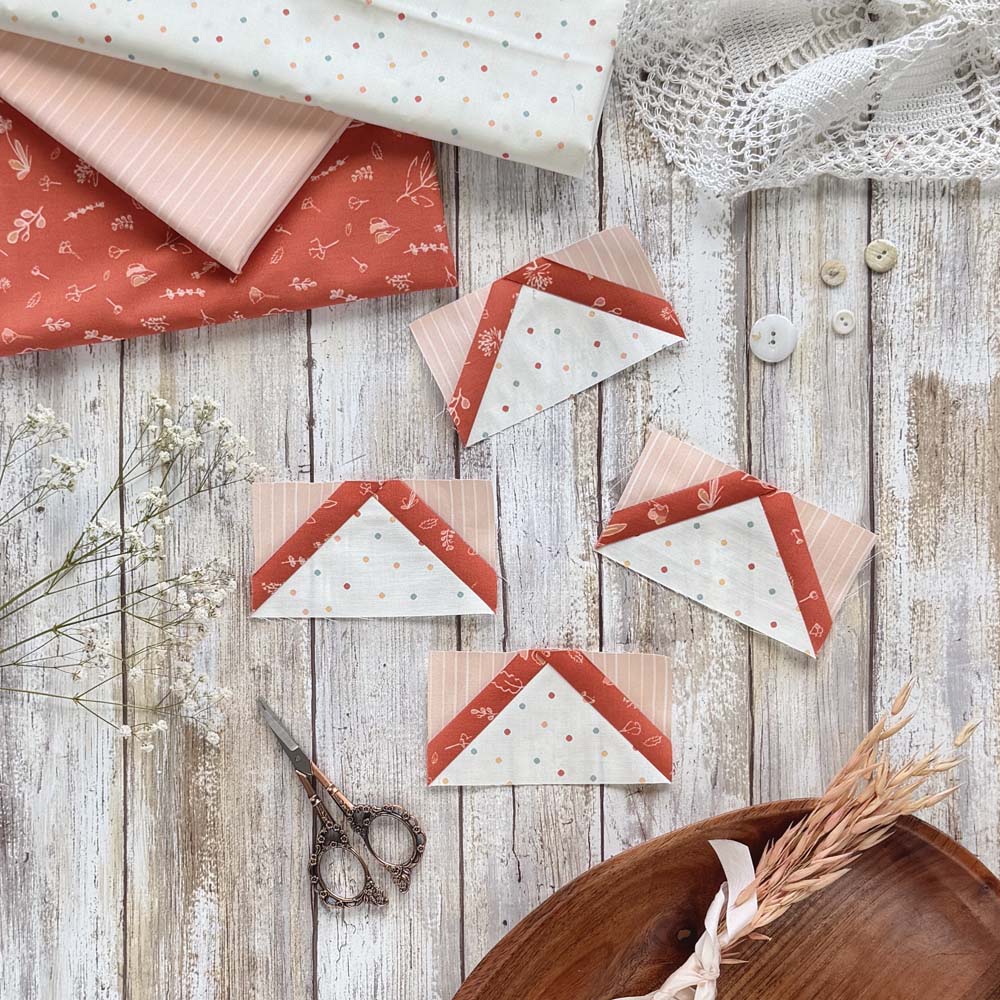
Ribbon Flying Geese begin with a traditional flying geese unit, but a simple addition gives them a completely different look. After making the flying geese using the oversized four-at-a-time method, we’ll add a contrasting band of color along each wing. That little “ribbon” is created with the stitch and flip technique and adds an extra layer of color and movement to the block.
The stitch and flip method is one of those handy techniques that can be used to create all kinds of interesting shapes in quilting. I’ll show you two of my favorite ways to use it for Ribbon Flying Geese, along with tips for accurate placement and sharp, consistent results.
Ribbon vs. Stroked Flying Geese
You may have noticed that this week’s flying geese look very similar to last week’s Stroked Flying Geese. In fact, they could almost be mistaken for twins! Both variations have accent strips that run parallel to the diagonal seams. Aside from how they’re constructed, the main difference is where those accent strips are placed.
- Ribbon Flying Geese have accent strips in the wings of the flying geese unit, on the outside of the main diagonal seams.
- Stroked Flying Geese have accent strips within the goose body, on the inside of the main diagonal seams.
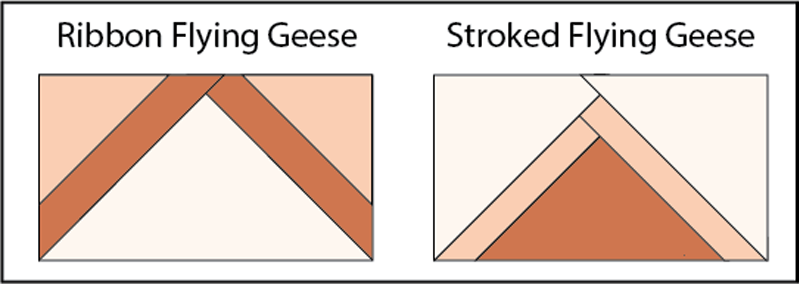
It’s a subtle difference, but it creates two distinct looks—and two very different ways of getting there!
General Things To Know
- Makes four Ribbon Flying Geese that measure 2″ x 4″ FINISHED.
- Fabric: One light, one medium and one dark fabric. Use large scraps or 1/8 yard each.
- All seams are 1/4″, unless stated otherwise.
- RST = right sides together
- FG = flying geese
How to Reduce Bulk in 4-at-a-time Flying Geese
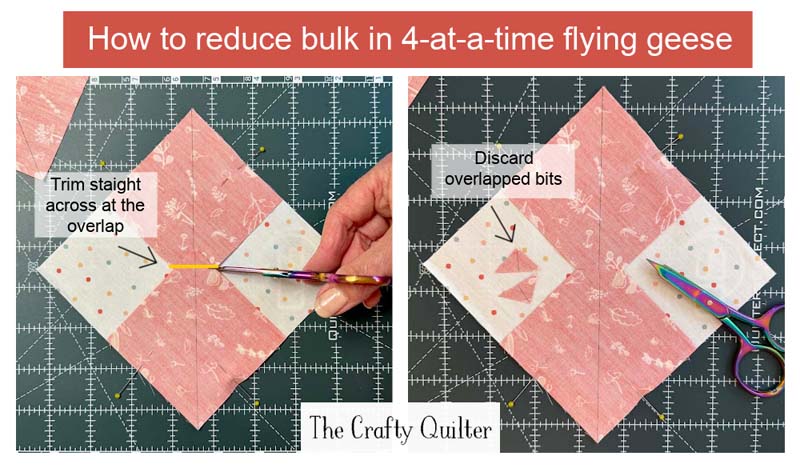
There is an easy way to reduce some of the bulk in the point of a flying geese unit. When placing the first two smaller squares on top of the larger square, trim the two squares where they overlap in the center. They will now butt up against each other with no overlap, eliminating two extra layers of fabric in the seam allowance. Check out this blog post for full details.
Ribbon Flying Geese Instructions
Cutting Instructions
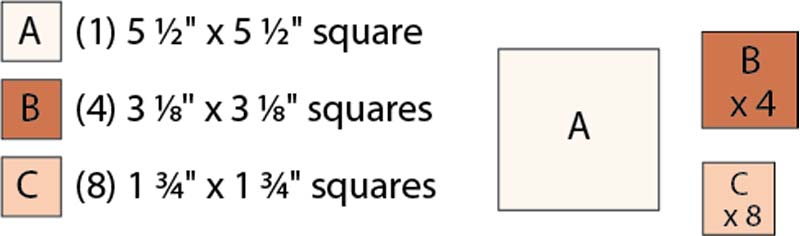
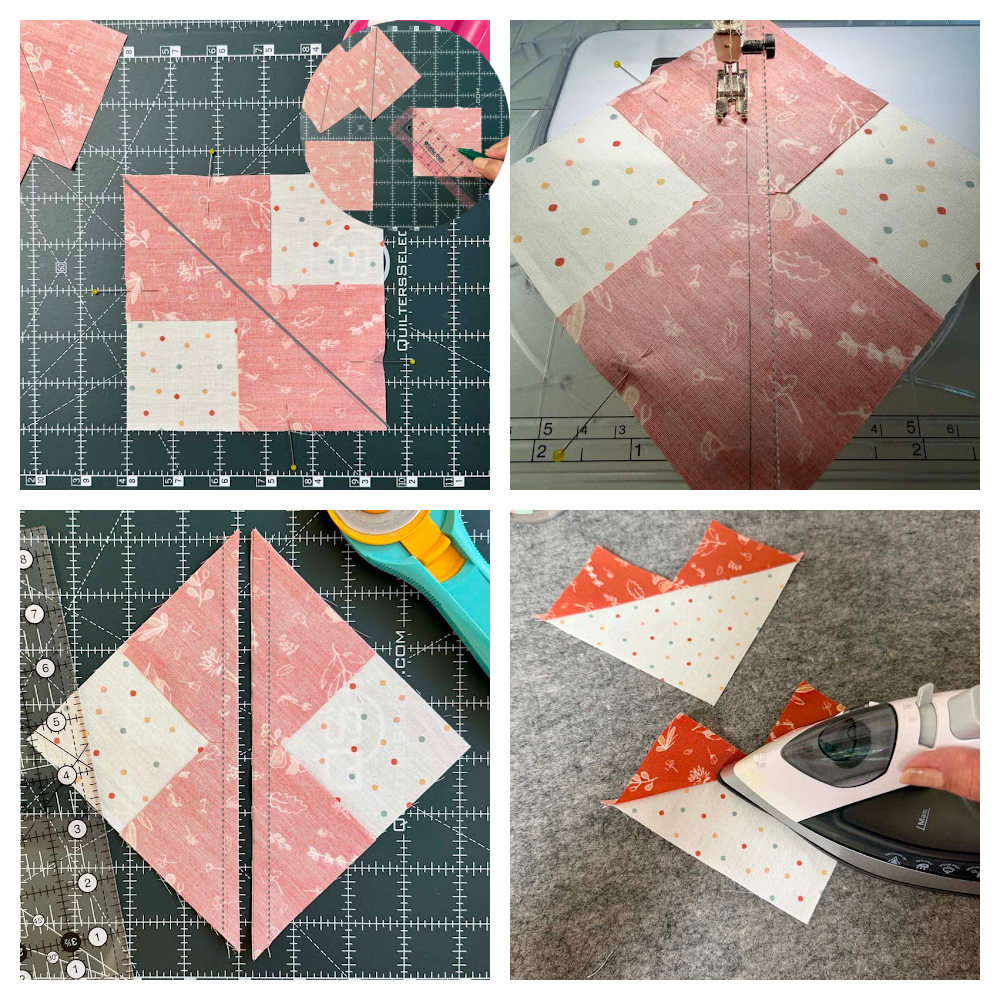
Make 4-at-a-time Flying Geese
- On the wrong side of each B square, draw a diagonal line from corner to corner.
- With RST, place a B square on opposite corners of the A square. They will overlap slightly in the middle.
- Optional: Trim the overlap of the two squares. See How To Reduce Bulk in FG in the previous section for details.
- Pin in place.
- Stitch a 1/4″ on each side of the diagonal line.
- Cut apart on the center diagonal line and press.
- With RST, place B square on remaining corner of the unit from above, aligning the corner edges. Pin in place.
- Stitch with a 1/4″ seam on each side of the diagonal line.
- Cut apart on the center diagonal line and press.
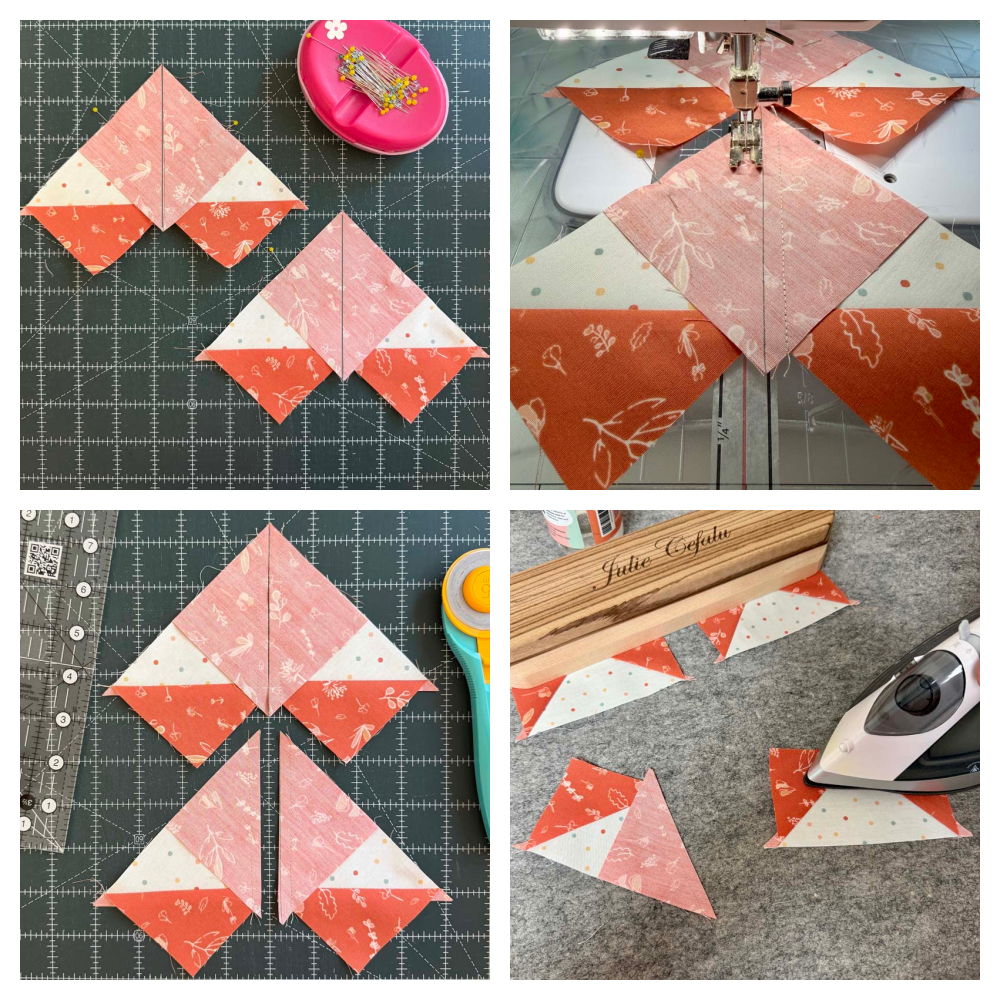
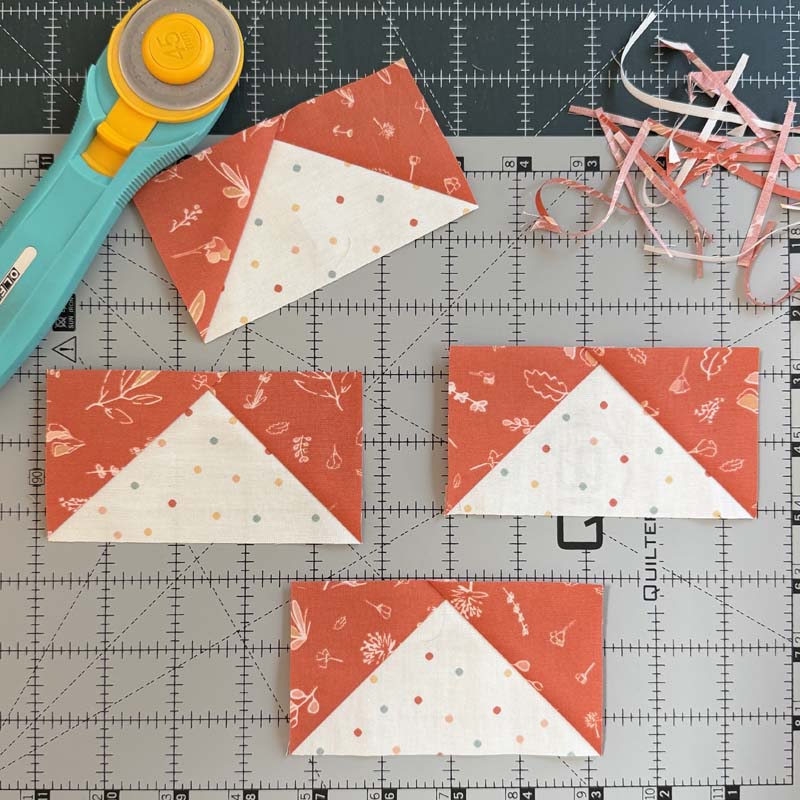
Trim Flying Geese
There are many specialty rulers available that make the process of trimming flying geese units a breeze. A square ruler will do the trick nicely (I love the Creative Grids 6 1/2″ square ruler), but my favorite ruler is a Bloc Loc Flying Geese ruler. For our series, you need the Bloc Loc FG ruler that finishes at 2″ x 4″.
For more detailed information about making and trimming oversized flying geese, you can visit this blog post. It also has free pdf cutting charts for two different methods of oversized flying geese.
Note: The following instructions are written for right handed orientation. Also, it doesn’t matter which two sides you trim first. I get better results when I start with the “V” or valley on the bottom, so my instructions are written with that in mind.
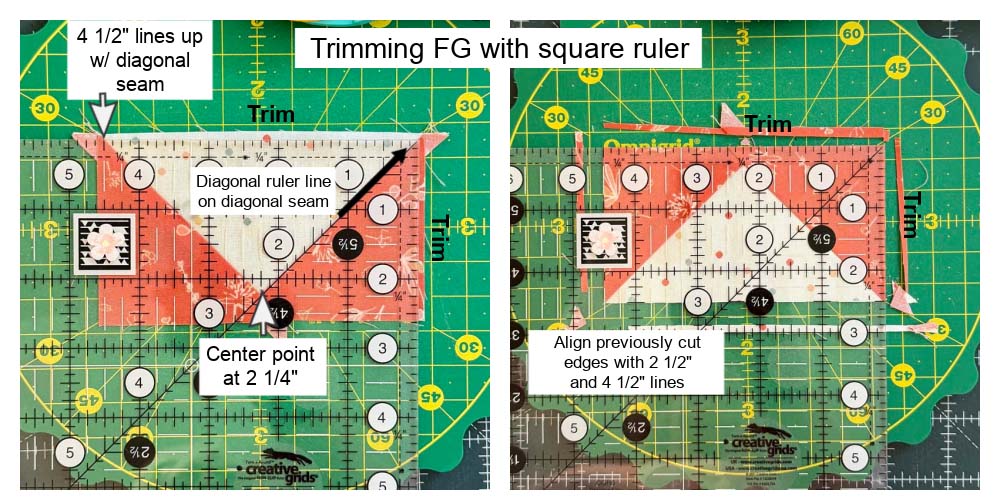
How To Trim With A Square Ruler
- Place the flying geese unit so that the “V” or valley is facing the bottom. Place the diagonal line of the ruler on the diagonal seam. Align the 4 1/2″ line of the ruler with the top left diagonal seam. Align the center point of the flying geese with the 2 1/4″ lines of the ruler.
- Trim the right and top edges.
- Rotate the unit and align the previously cut edges with the 2 1/2″ and 4 1/2″ lines of the ruler. Trim the remaining two edges.
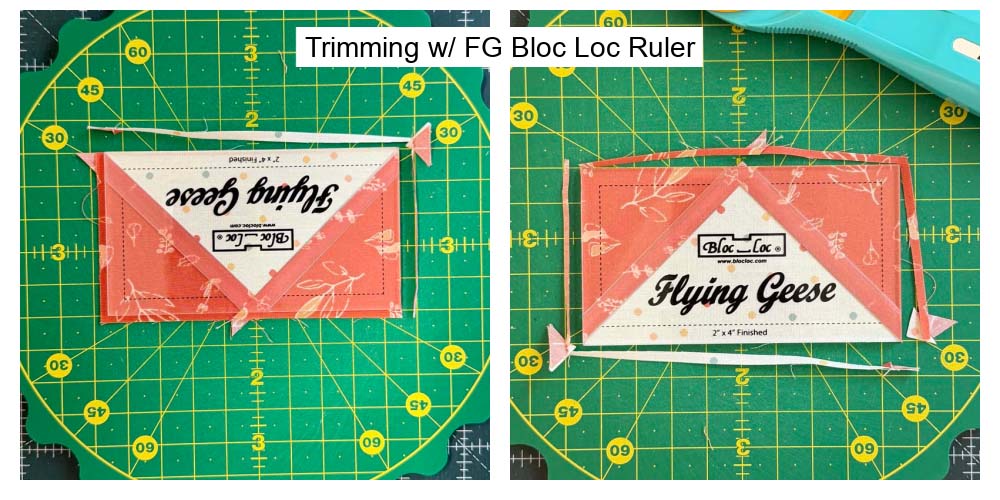
How To Trim With A Flying Geese Bloc Loc Ruler (2″ x 4″ finished size)
- Place the flying geese unit so that the “V” or valley is facing the bottom.
- Slide the groove of the Bloc Loc ruler into place along the diagonal seams.
- Trim the top and right edges.
- Rotate the unit and trim the remaining two sides.
Stitch & Flip Corners
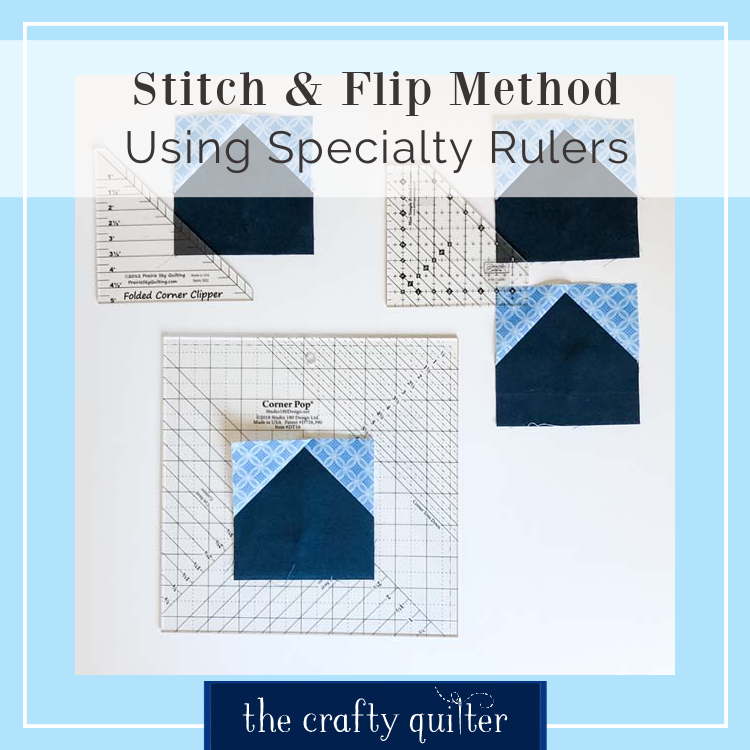
The most common way of creating a triangle corner using the stitch and flip method is by drawing a diagonal line and stitching. Another way is by using a specialty ruler for these corners. I’ll walk you through my favorite ruler below.
You can read a more detailed blog post I wrote several years ago: The Stitch & Flip Quilting Method Using Specialty Rulers.
Drawing and stitching on a diagonal line
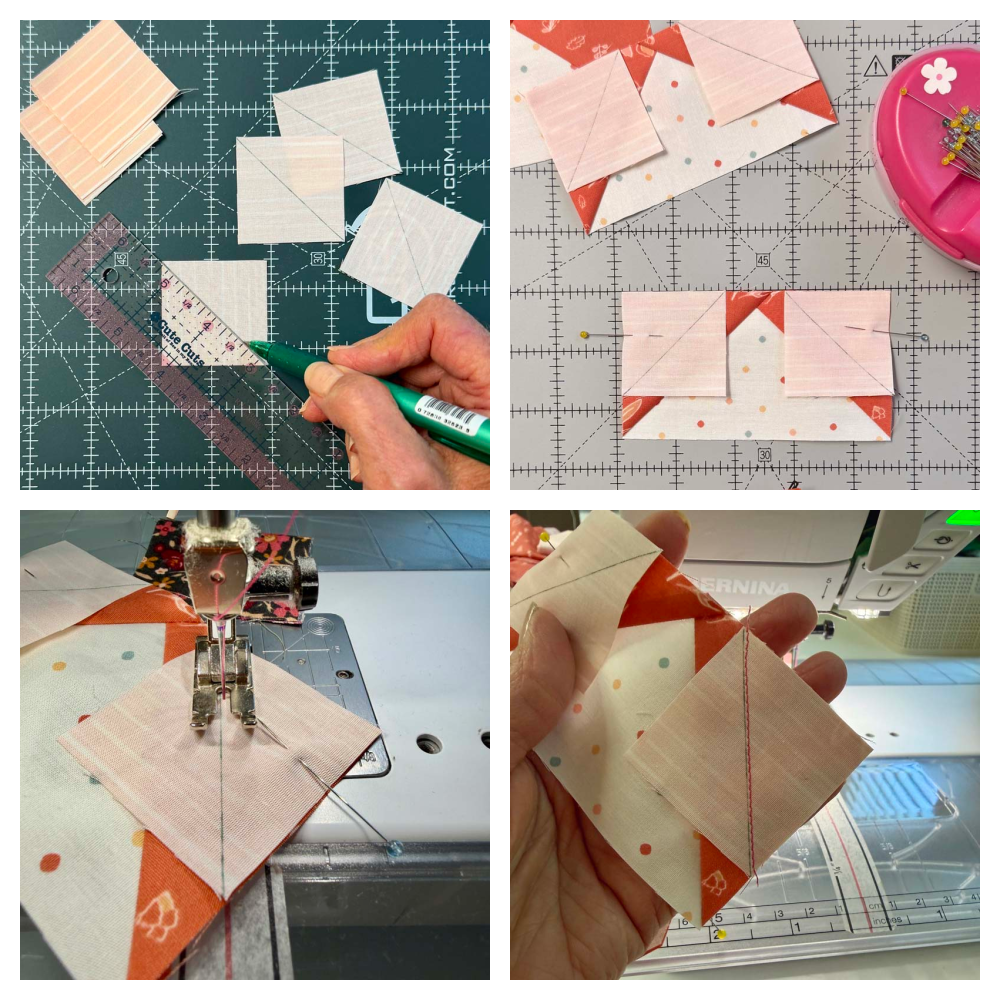
- On the wrong side of each C square, draw a diagonal line from corner to corner.
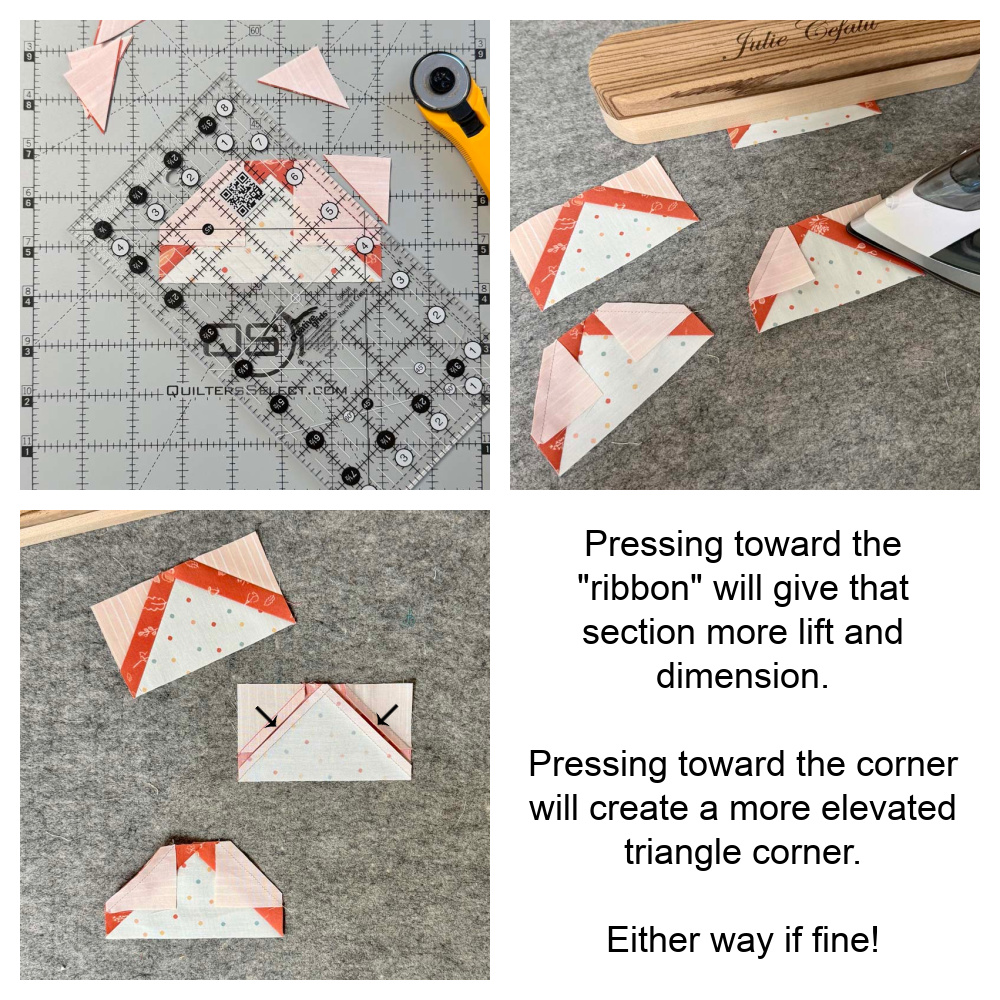
- Place a C square, RST, on the right corner of a flying geese unit, aligning the corner edges.
- Stitch on the line. TIP: sew two thread-widths to the seam-allowance-side of the marked line. This allows space for thread and the fold-over of fabric.
- Trim seam allowance and press to the corner OR toward the ribbon (see photo).
- Repeat with another C square on the opposite corner of the flying geese unit.
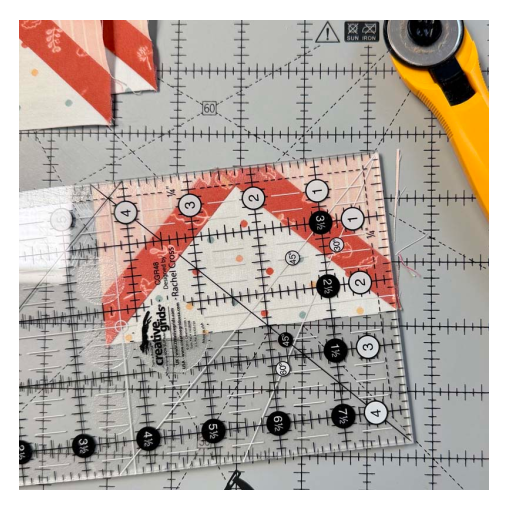
- Ribbon Flying Geese unit should measure 2 1/2″ x 4 1/2″. Trim if necessary.
Using the Folded Corner Clipper for Stitch & Flip
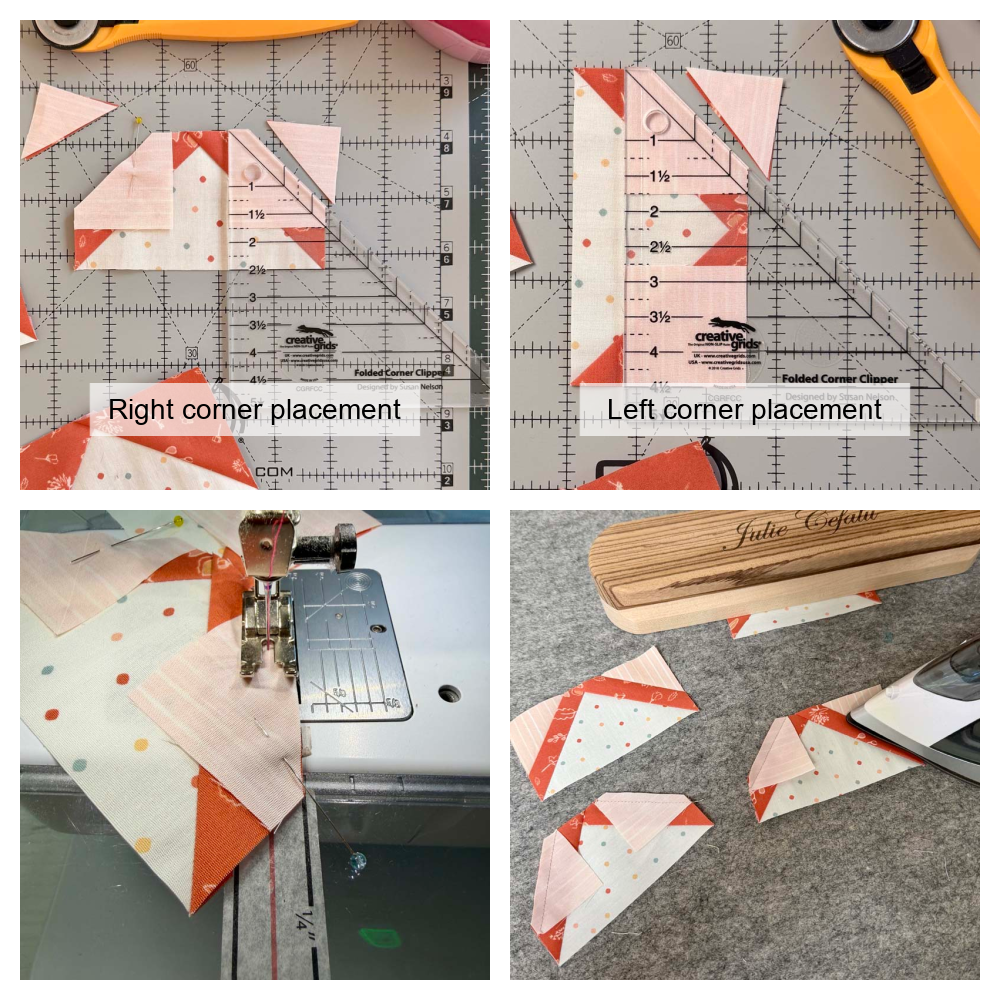
The Folded Corner Clipper is designed to trim the corner first, leaving you with a raw edge as a seam guide. The disadvantage of this is you’ll be sewing along an exposed bias edge. But the advantages are no drawing lines, no trimming seam allowances and no dog ears to clip! I was a skeptic at first, but I’ve been using this ruler for years, and it’s my favorite way to make stitch and flip corners.
- Place the C square, RST, with the upper right corner of the flying geese unit, lining up the corner raw edges.
- Place the Folded Corner Clipper on top of the corner square so that the markings on the ruler are aligned with the corner fabric. Trim.
- Stitch with a 1/4″ seam allowance, using the raw edge as a seam guide.
- Fold the corner fabric over and press the seam.
Tips For Success
- Starch all fabric before cutting and piecing. This adds stability and control to the fabric.
- When drawing diagonal lines, make sure the ruler is lined up in each corner so that the marked line begins and ends precisely at the corners.
- Slow down. Take your time and sew as straight as possible.
- Carefully press seams. This will keep the seams from bowing or curving.
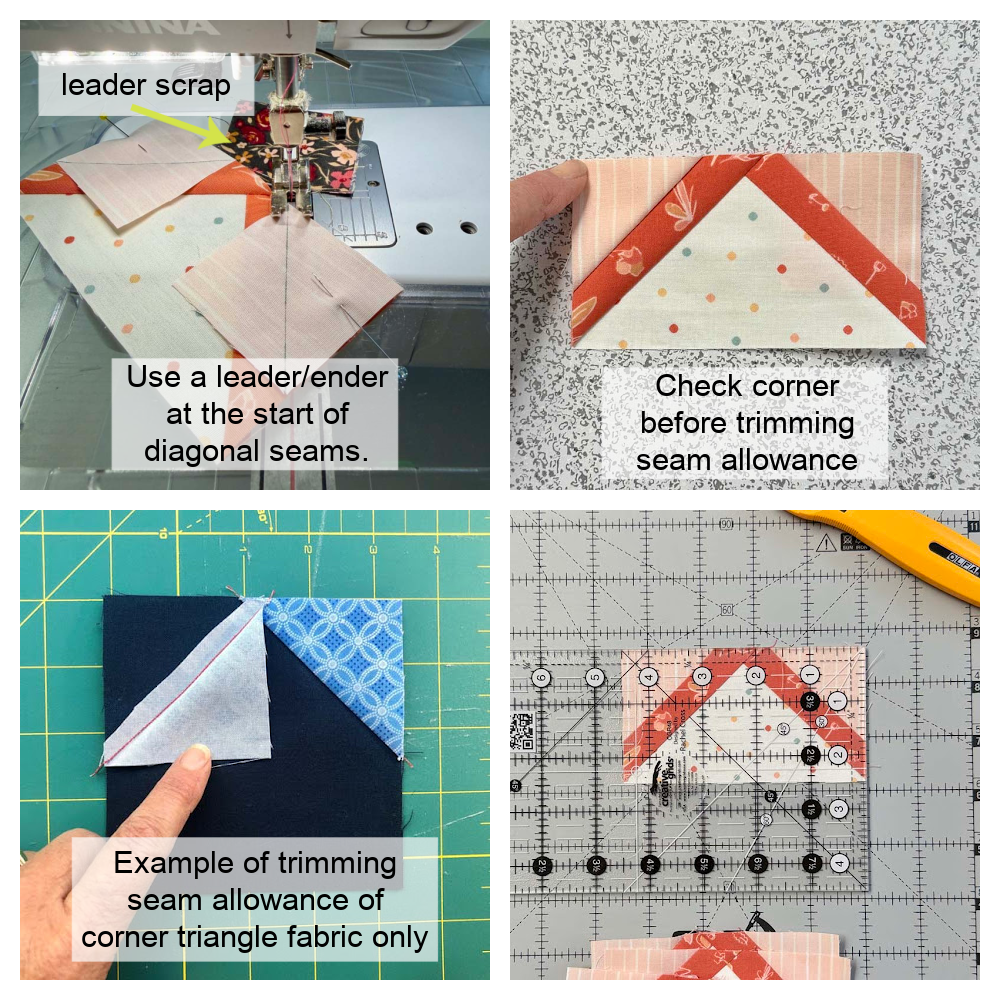
- Use a leader/ender fabric scrap (aka thread saver) at the beginning of seams to maintain even feeding. It’s especially helpful on diagonal seams to prevent the leading edge from getting drawn into the needle hole. Check out my blog post, Efficient Piecing With Leaders And Enders to get the whole scoop!
- When stitching the diagonal line of the corner squares, make sure you’re stitching next to the line and not directly on the line. This takes practice!
- Before trimming the corner squares, make sure the triangle reaches the corner of the base unit. If it doesn’t, you can trim the seam allowance of the corner square only. This leaves the base of the flying geese unit as an accurate guide for stitching.
Common Mistakes And How To Fix Them
My flying geese are too small
- This is most likely due to the corner triangles not reaching the flying geese base corner. Try the following:
- Check your corner before trimming the seam allowance.
- Try stitching a bit farther away from the diagonal line.
- If using the Folded Corner Clipper method, try a scant 1/4″ seam allowance.
- Since the base flying geese unit is made oversized, your 1/4″ seam allowance may be too generous. Try making it smaller.
- Verify the size of your cut pieces.
- Make sure you’re pressing the seam flat from both sides.
My flying geese are wonky
Wonky means that there is more than one side or corner that is skewed. It could be that the diagonal seams don’t line up with the corners or that one corner is too small and the other is too big. Generally, nothing seems quite right! We’ve all been there, so take a deep breath and try the following:
- Go through the TIP Section and apply all of them. 😉
- Make sure to pin the layers before stitching.
- Stitch slowly. The beginning and end of a seam are where the most wobbles occur. Make sure to keep the stitching line straight throughout.
- Check your 1/4″ seam allowance, and practice a scant 1/4″ seam. This is usually a “click” or two to the right of the center needle position.
As I said in a previous post – even though I like my piecing to be precise, it’s not always worth the stress. I think progress over precision is a much healthier mindset!
Printable Instructions
You can download the pdf below.
Conclusion
I hope you enjoyed this easier addition to our Fantasy Flying Geese Series! Ribbon Flying Geese are a great example of how one simple technique can transform a traditional quilt block into something new and unexpected. Have fun experimenting with different fabric combinations for the “ribbon” – a little contrast can make a big impact!
It’s hard to believe we now have five flying geese variations under our belt! There’s just one more to go before we bring them all together in our Fantasy Flying Geese mini sampler. I hope you’ll join me next week for our final variation!
If you’d like to share your flying geese variations, use the hashtag #fantasyflyinggeese and tag me @thecraftyquilter so I can be sure to see it. You can also send me an email and attach a photo.


Discover more from The Crafty Quilter
Subscribe to get the latest posts sent to your email.


Thanks so much for posting these tips. I was able to download them and create a flying geese folder.