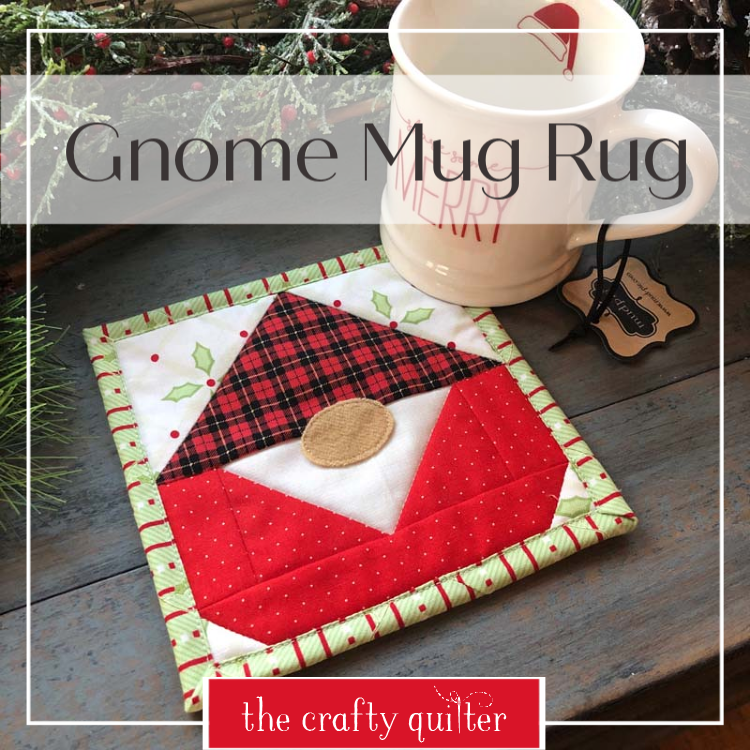
The cutest Gnome Mug Rug ever!
I have a super quick project idea for you – the cutest Gnome Mug Rug ever! He’s all ready to put a smile on your face and keep your mug safe and warm.
This little gnome is a smaller version of the free Gnome Quilt Block by Caroline at Sew Can She. Caroline has paired her gnomes with some tree blocks to make the cutest Gnome Forest Quilt!

If you need to make a last minute gift for someone, this little Gnome Mug Rug is a fast and easy project! He’s 6 1/2″ square and simple to piece together.

Gnome Mug Rug Basics
Caroline has graciously allowed me to share the cutting measurements for the smaller gnome. You’ll have to visit her tutorial to get the rest of the instructions to put him together.
The following has been updated on November 26, 2023
Cutting Instructions for 6 1/2″ Gnome block
- Red plaid (hat) – Cut (1) 3 1/2″ x 6 1/2″ rectangle
- Solid red (body) – Cut (2) 2 1/2″ squares, (2) 1 1/2″ x 2 1/2″ rectangles, and (1) 1 1/2″ x 6 1/2″ rectangle
- Solid white (beard) – Cut (1) 2 1/2″ x 4 1/2″ rectangle
- White print (background) – Cut (2) 3 1/2″ squares and (2) 1 1/2″ squares
- Tan (nose) – oval shape approximately 1 1/2″ wide and 1″ tall. Applique template included in Caroline’s tutorial.

Other supplies
- Backing fabric and batting – approximately 8″-9″ square
- Fusible web product to applique nose (unless you choose hand applique)
Assembly
This mug rug has really simple piecing. You’ll be making two flying geese units: one that measures 3.5″ x 6.5″ for the hat, and one that measures 2.5″ x 4.5″ for the beard. The bottom corners are done with the stitch and flip (also known as snowballing) technique. The rest is easy to figure out with the diagram above. For complete assembly instructions, use Caroline’s tutorial at Sew Can She.
Once you make the block, you just need to layer a piece of batting and backing fabric and add some quilting to secure the layers. I simply stitched in the ditch along the hat and beard.
Next, trim the raw edges and add binding. For this mug rug I used 2 1/4″ wide binding and sewed it onto the back, then wrapped it around to the front and machine stitched it in place along the folded edge. You could also check out my mug rug binding tips for a more delicate binding edge.

Mug rugs make great gifts, especially when you package them with a favorite tea/coffee, mug, and a little something sweet!

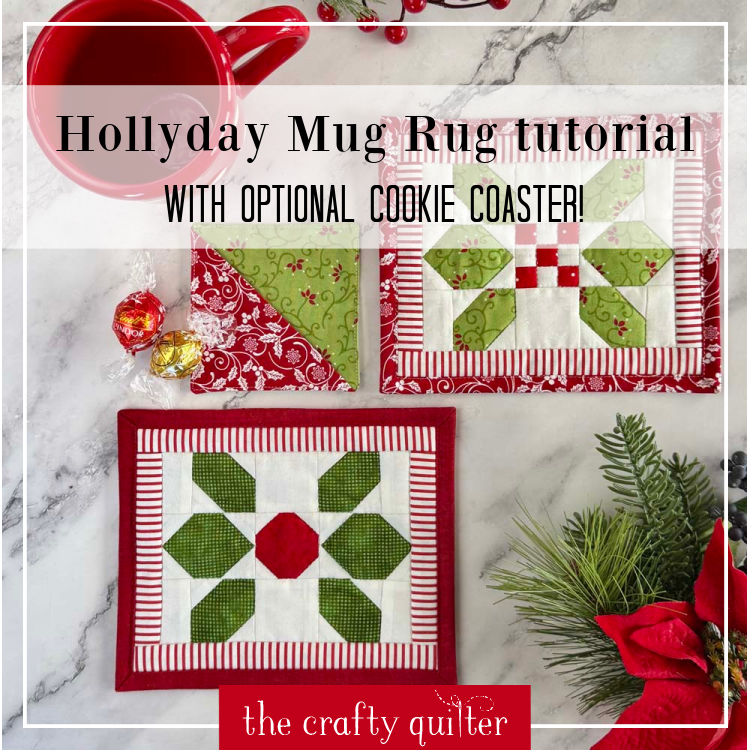
There are plenty of ideas to choose from for your holiday sewing! If you’re looking for more inspiration, you might want to check out these other Christmas sewing ideas I’ve put together:
You can also find ALL of my Christmas tutorials here, so you can decide which is YOUR favorite. Thanks for visiting!

Discover more from The Crafty Quilter
Subscribe to get the latest posts sent to your email.


There is no tutorial to connect to. Also, you don’t mention the nose. It looks like it might be felt?
I only see the directions for piecing together for the larger gnome. Am I missing something for the smaller one?
Thank you!
I agree, where is the instructions?
cant seem to get to tutorial
Me either!
I tried to join but am not having any luck. I wanted to let you know there is an error in the cutting instructions for the Gnome Mug Rug….the red strip should be 1 1/2″ x 4 1/2″, not 1/2″… I made one and it is very cute, my friend loved it.
I love this! Just made two tops and have to quilt and bind them. One is going in the mail to my Aunt and the other is for me :).
Hello, I have not been sewing/quilting for awhile, plan is to start again with simple projects to get myself reaquainted … must say this is most likely the project to get started with. Thank you so much
Too cute!!! Would also like to see a pattern for the trees that you paired with the gnomes!!!
Hi I have been looking for a cute gnome pattern. Your mug rug is ideal. I did 4 yesterday, and i know when my friends see them ,they will want some. If they sew, will direct to your site .if not ,i guess i will have to make a few extra. Now i am going to explore more of your site.
PLEASE SEND INSTRUCTIONS!
It’s on the original blog of SewCanShe. There is a link at the top of the post.
Thank you so much for sharing this adorable I am So making these !!!
Thanks for sharing this. This year I’m going to try to follow through on the pledge I make to myself every year, and work on Christmas gifts steadily all year long. I’ve engaged my neighbor–an excellent sewist–in this endeavor, so I think that will help keep me spurred on. I think this will be a fun project to start on. So cute!
It IS the cutes mug rug ever! Thanks for sharing! Merry Christmas, Julie!
Love the gnome. I’ll be making several of these. My daughter is really into gnomes this year as are a couple of friends. Thank so much for sharing the pattern.
Love this! So adorable… Makes me smile!
Super cute! I could see making placemats with gnomes too!
He is adorable, thanks so much for sharing him! I hope i can find some time to make one before Christmas but if not than I will after!
Super cute and fun! 🙂
This is so darn cute that I must make a couple for my grandsons who have recently moved from FL to NC and will be trying to acclimate to their new winter. I see hot cocoa in their future with mugs sitting on Gnome mug rugs. I did not see any reference to the gnome’s nose so I guess we need to just wing it as the one on Sew Can She would be too large. Thanks so much for posting this. Your site is interesting and inspiring.