May Day Basket Wallhanging Tutorial – Part 3
My May Day Basket Wallhanging is done – I mean quilted with binding and a hanging sleeve! Woo hoo! You can find Part 1 of this tutorial here and Part 2 is here.
Let me walk you through the final phase – adding the sashing and borders.
Supplies needed:
In addition, you’ll need 1/4 yard of binding fabric and 1 yard of backing fabric.
Instructions:
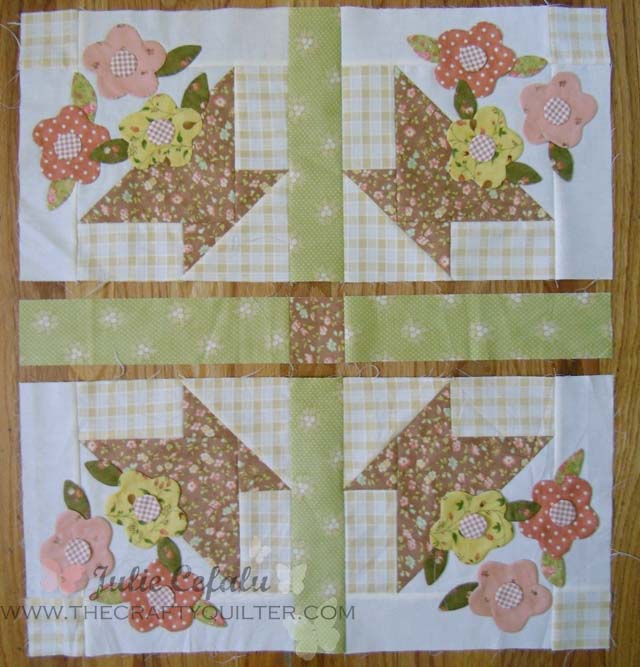
Step 1. Lay out your blocks, sashing strips, and cornerstone (center square) according to the picture below:
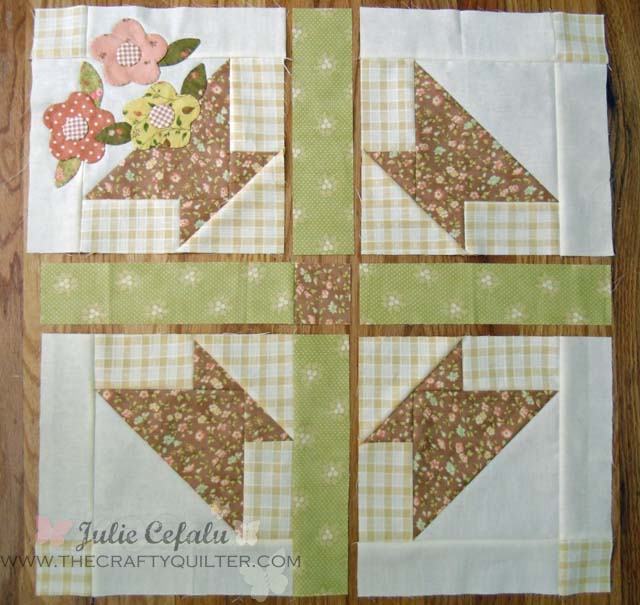
Step 2: Attach sashing to blocks and cornerstone; press towards sashing.
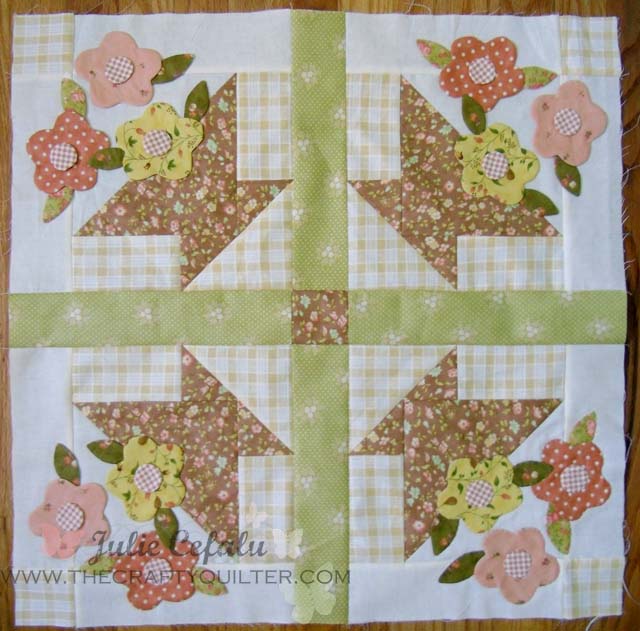
Step 3: Sew rows together; press towards sashing:
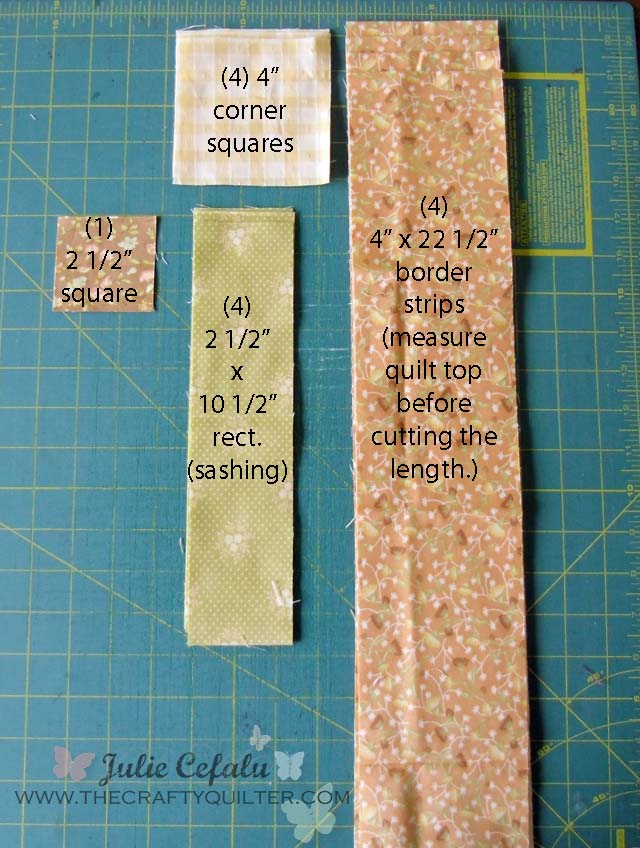
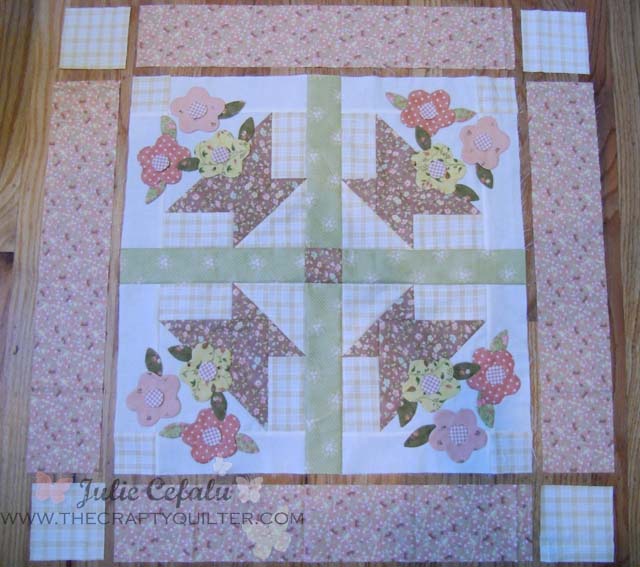
Step 4: You will be adding the border strips and corner squares next. Your strips should be 4″ wide and the length should be 22 1/2″. Before you cut them to that length, measure your quilt top through the center (vertically and horizontally) and cut your border strips to that measured length. Lay out your pieces as shown below:
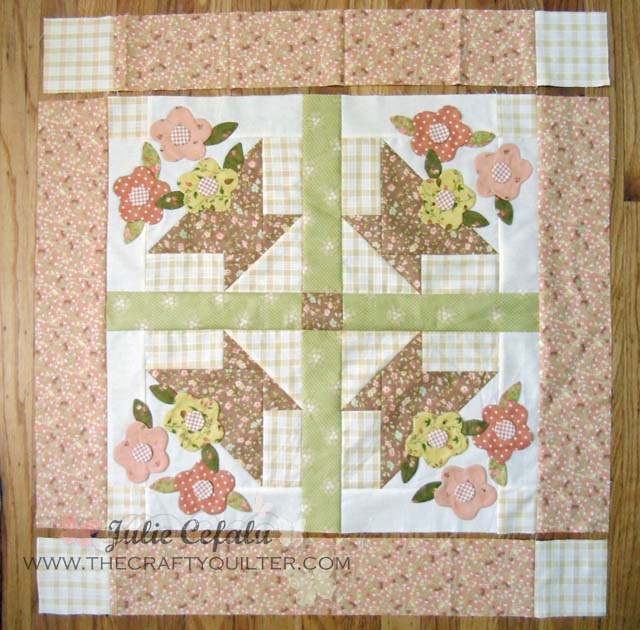
Step 5: Attach the borders to both sides of the quilt and press towards the border. Attach the corner squares to both sides of the top and bottom border strip, pressing towards the border fabric:
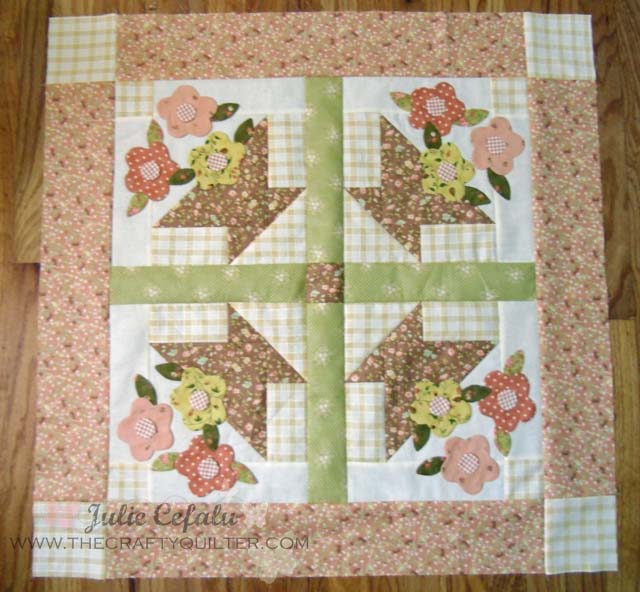
Step 6: Attach top and bottom border units, making sure to match seams and pin. Press towards border:
Now you’re done with the quilt top! You still need to quilt it and add binding. I’ll share some pictures of the quilting that I did on my wall hanging. It’s fun to quilt on small projects like this one. They’re easier to handle and they don’t take all week month to finish.
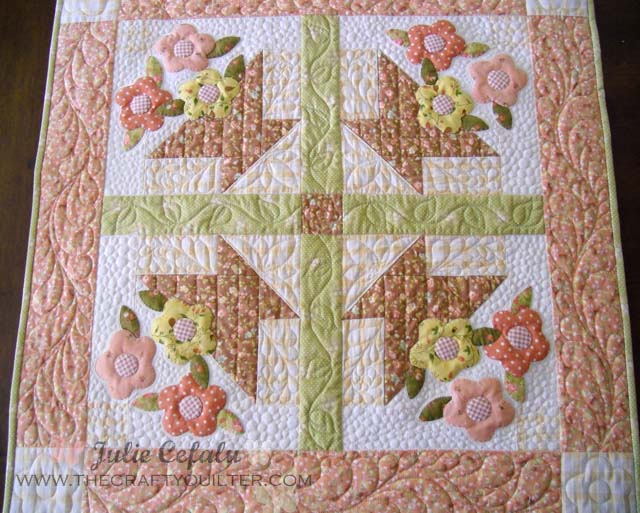
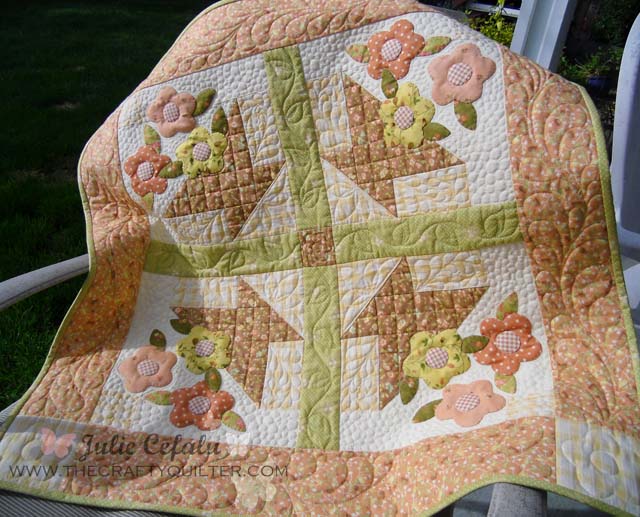
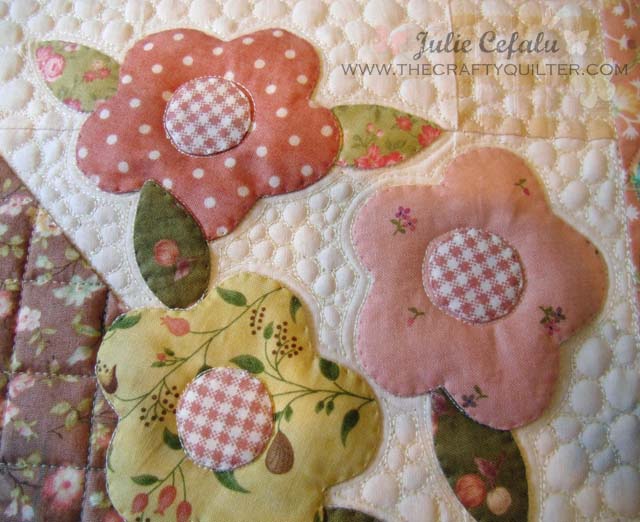
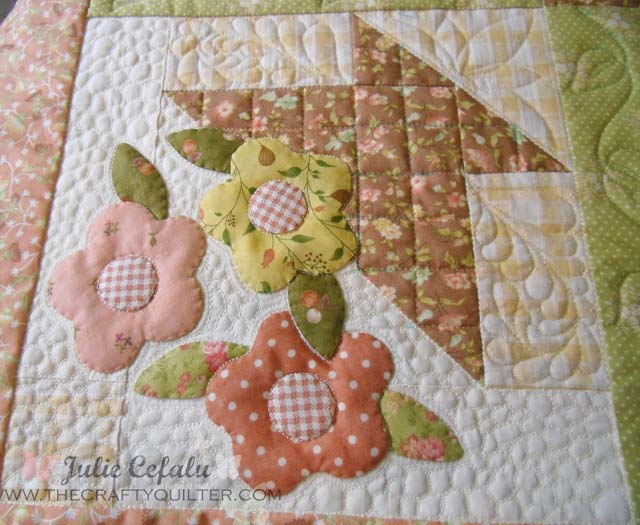
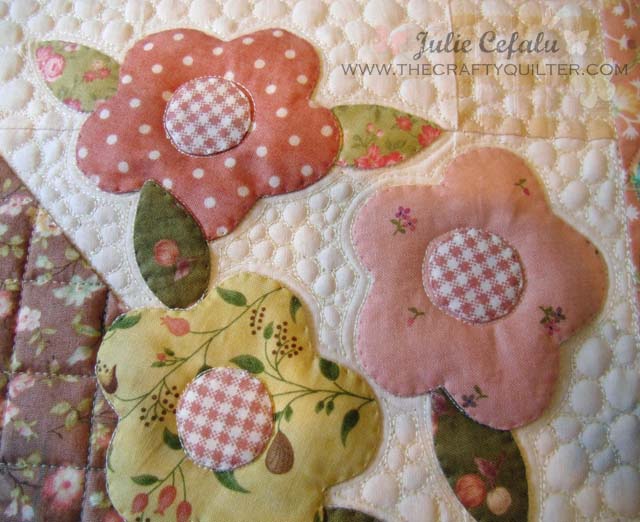
First, I stitched in the ditch along the sashing, borders and baskets. Then I added the pebble quilting around the flowers:
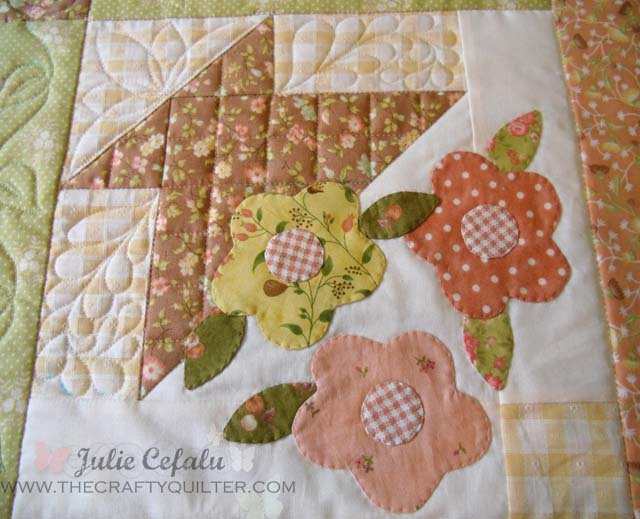
This kind of dense quilting really makes the applique pop out. Here is a picture without the quilting:
See how flat the applique is? What a difference! You can see the “invisible” machine applique stitching more before the quilting is added. Afterwards, it virtually disappears.
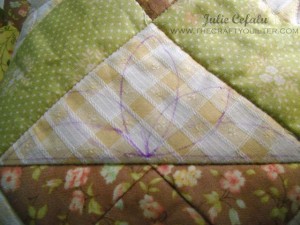
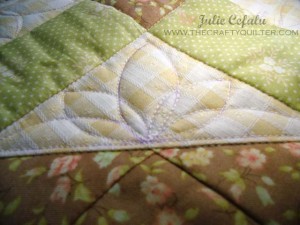
I used one stencil in this quilt (in the sashing); everything else was drawn and/or stitched free hand. Here’s an example of a section that I drew a design on with a purple air-erasble pen first and then quilted shortly after:
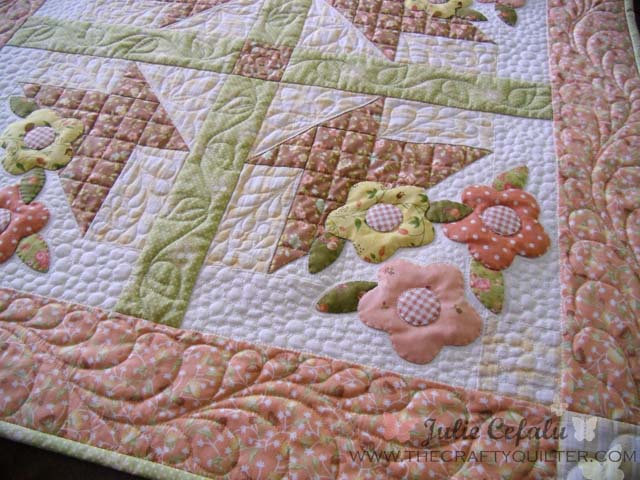
And here is the feathered border (that I drew first) and then stitched:
In the outside corner squares, I just traced the applique flower and stitched.
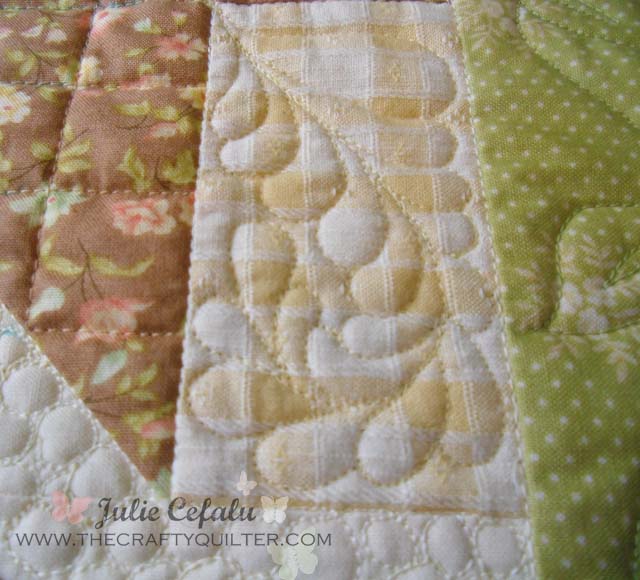
I added cross-hatching to the baskets and a little feather swirl on each side:
These were marked with a blue water-soluble pen (my favorite marking tool) and afterwards a few sprays of water from a spray bottle and they’re gone!
I used Sulky and DMC 50 wt. cotton thread for most of the quilting. For the pebbles, I used Superior’s King Tut 40 wt. and it was too heavy for such dense quilting. It’s hard to tell the difference in the pictures, but the thread sits on top of the fabric too much, instead of sinking in. So after quilting three basket blocks with it, I finally switched over to a Clover silk thread and it turned out much better!
Thanks for joining me on my May Day Basket tutorial. And I just found out that I was featured on CraftGossip.com! Check it out!


Beautiful quilt and gorgeous quilting, really makes it stand out.
So very beautiful! What a talent you have been blessed with.
This is really beautiful! Was wondering where you got the pebble quilting pattern; Or is it freehand? The feathers are a pattern right?
Your tutorial is so detailed and great for us new beginners. Your quilting is just beautiful. Thank you for your inspiration!
Hi Julie, i came across this and would like to make a mini wall hanging this year with one basket of flowers. Your quilting is beautiful. I used a stencil and did some free motion circle/swirls on my grandsons Easter basket :). it will take practice for sure, but the stencils are awesome! Thanks so much for your input on this!
amei o seu blog!! Consegui aprender o que precisa.
Seus trabalhos são simplesmente Maravilhosos!!!!!!
Estou começando agora com Patchwork e estou amando.
Vejo o seu site com frequencia e um dia tambem farei trabalhos assim lindos como os seus.
Um grande beijo e sucesso.
that is beatufull. i really enjoy doing this things and seing it
Thanks for the great tutorial. Your finished project is beautiful!
Thanks for the awesome tutorial. Your finished project is gorgeous!
I love the peach border. What a beautiful quilt!
Julie,
It’s beautiful. You are brilliant. The quilting is amazing. I am definitely going to try it but I don’t think I will be able to do the quilting part!
That is just beautiful!
You’ve finished yet another beautiful project in record time! Thanks for all the clear instructions. I’m certainly going to try this one come a rainy day. For now it will have to wait. Spring has come to Norway and my garden has endless projects awaiting! Looking forward to your next posting!
That turned out so beautiful! I hope it is being enjoyed at home where you can look at it everyday!!!!
Thanks, Annie! Yes, I get to keep this one at home:-)