Spring Petals QAL, week 3
Hello friends! The Spring Petals Quilt Along continues with week 3 – APPLIQUE. At this point, you should have your background squares sewn together and ready for the petals to be appliqued onto.
Here is the schedule for the quilt along:
- April 4 (Week 1) Pattern available as a free pdf; pick out your fabrics
- April 10 (Week 2) Cutting and piecing
- April 13 Non-applique option
- April 17 (Week 3) Applique
- April 24 (Week 4) Basting and quilting
- May 1 (Week 5) Binding
- May 8 Final thoughts and Linky Party
- June 7 Giveaway winners announced
Many of you are new to quilting and especially to the technique of applique. I will try to make this process as easy and clear for you as possible. I’m going to walk you through the steps of raw-edge machine applique using fusible web. I’ll also give you information for a turned edge technique that is also finished by machine. If you want to do hand applique, that’s o.k. too (but I won’t be giving instructions for that). I’ll sprinkle my previous tutorials throughout this lesson because they are full of more detailed information.
Supplies for raw-edge applique for petals:
- Fusible web product (my favorite is Thermoweb Heat’n Bond Lite Iron-on Adhesive)
- Fusible interfacing (only needed for the turned edge technique)
- Stabilizer (tear-away is a good option)
- Open toe applique foot (not necessary, but very helpful)
- Sharp scissors
- Iron
- Thread
- fabric
- petal and circle templates (you can find these on the last page of the pattern instructions here: Spring Petals Table Topper
Check out my Favorite tools for machine applique for more detailed information about supplies.
Applique Fusing Steps:
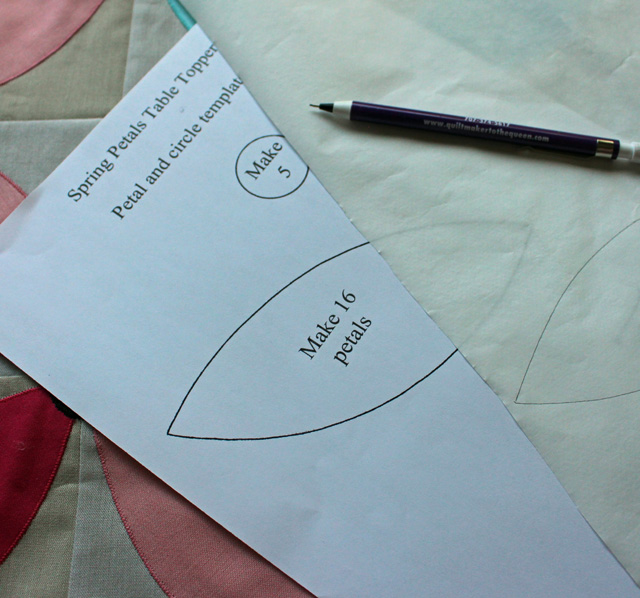
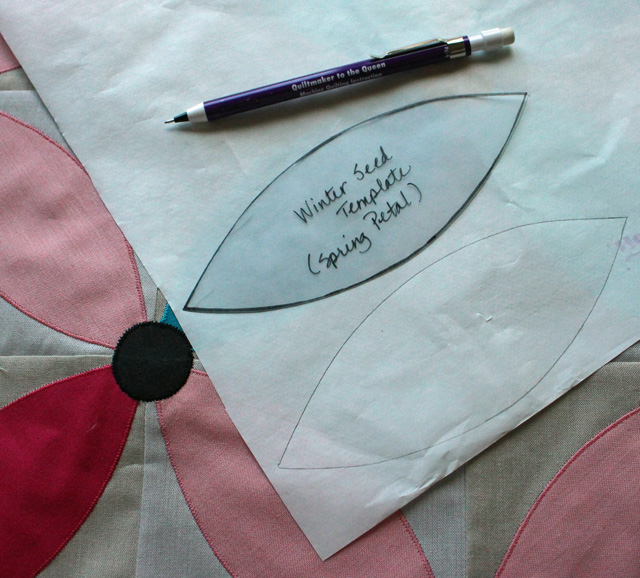
1. Trace 16 petals and 5 circles onto fusible product. When you print out the template patterns, make sure you are printing at actual size (no scaling). You can draw the petal and circle shape by placing the pattern page underneath your fusible web product and trace onto the paper side of the fusible web. Make sure to leave about 1/4″ of space between each shape.
TIP: Make a plastic template of the petal shape out of template plastic and then trace around that shape onto the paper. It’s a little bit of a hassle to make the template, but it makes the drawing process easier. (If you’re like me and you’re making 3 table toppers which equals 54 petals, then it’s totally worth it). Template plastic is a clear plastic that comes in different weights and can be found at most quilt shops. You could also use a file folder or two layers of freezer paper to make a template from.
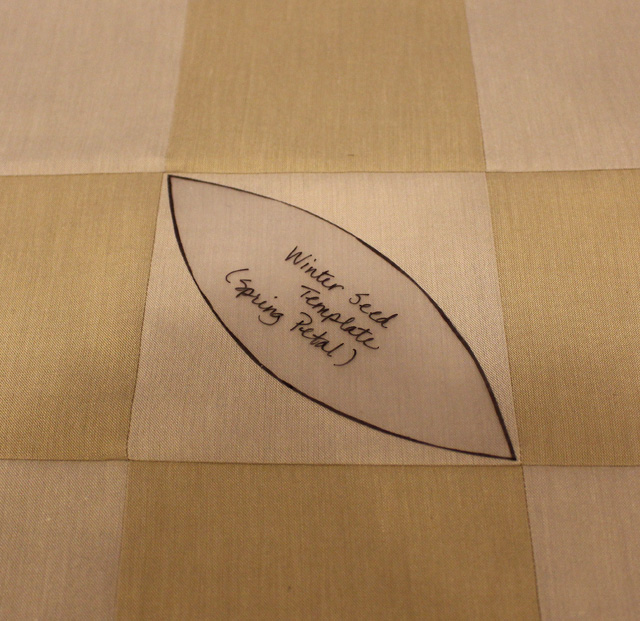
TIP: It’s a good idea to check the size of the petal to make sure that it fits inside of your background squares. It should look like this:
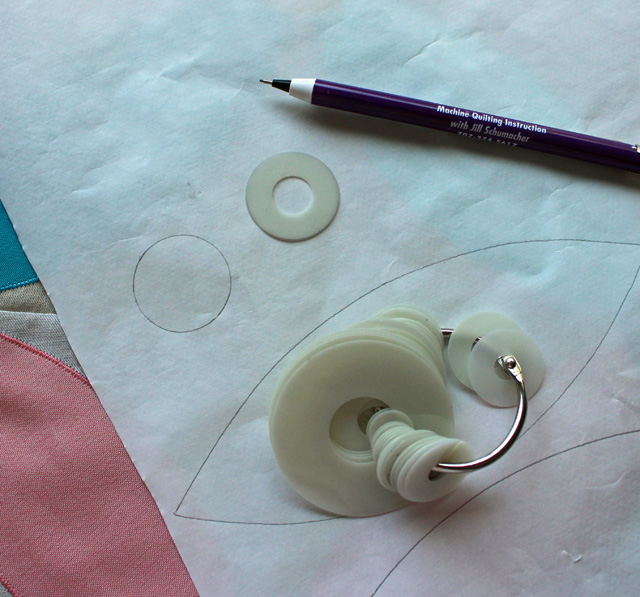
The circles are a little bit trickier because its hard to draw a perfect circle. If you happen to have a circle shape that is about the same size as the one in the pattern, then you can trace around it. There is a product called Perfect Circles by Karen Kay Buckley that I use all of the time. That’s how I got my circle shape for this pattern. They give you a choice of sizes, they’re heat resistant, and you can use them to make gathered circles as well.
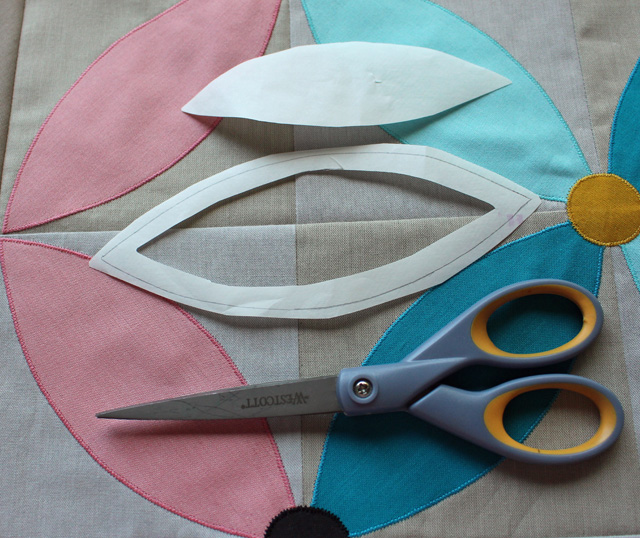
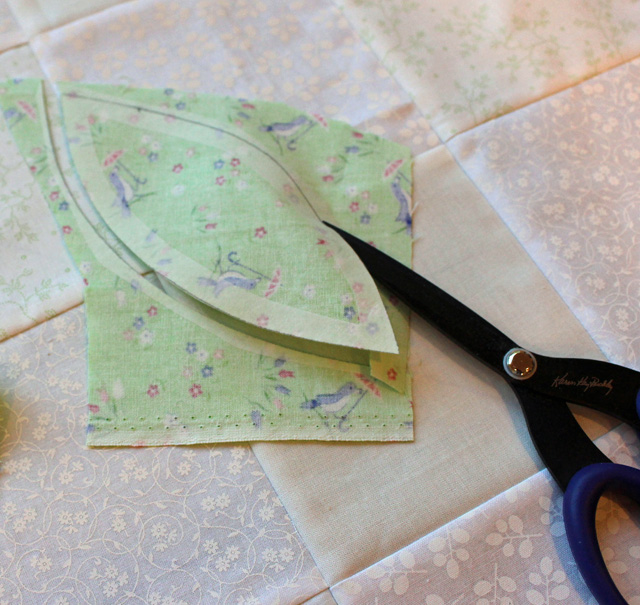
2. Cut out shapes. Cut each petal and circle shape with paper scissors, but NOT on the drawn line. Leave 1/8″ or more paper around the outside of each shape. You can also cut out the center of the petals, leaving 1/4″ around the inside of the drawn line. This will make the applique more soft and pliable. It’s o.k. to leave it whole, too. If you had a design with multiple layers of applique, then I would definitely cut out the middle of the fusible.
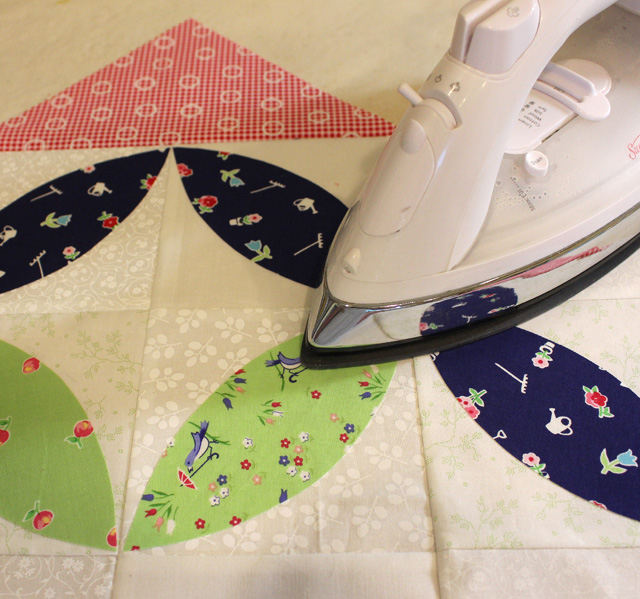
3. Fuse shapes onto WRONG side of fabric. Check the manufacturer’s instructions for the product that you are using. Usually, this step requires minimal time pressing. I press the Heat ‘n Bond fusible for 2-3 seconds using a cotton setting. If you press for too long, you can deactivate the “glue”. Make sure the fusible (shiny side) is facing down! Your iron will thank you.
TIP: Sometimes I use an Applique Pressing Sheet to minimize the chance of stray fusibles getting onto my iron or pressing surface.
4. Cut out the shapes. Use your best fabric scissors to cut the shapes out exactly on the drawn line. This will determine the finished shape, so do your best cutting (feel like you’re in kindergarten?).
TIP: I LOVE using Perfect Scissors by Karen Kay Buckley for this step. They are made for applique; they grip the fabric with a micro-serrated edge which also helps keep fraying to a minimum. Worth every penny.
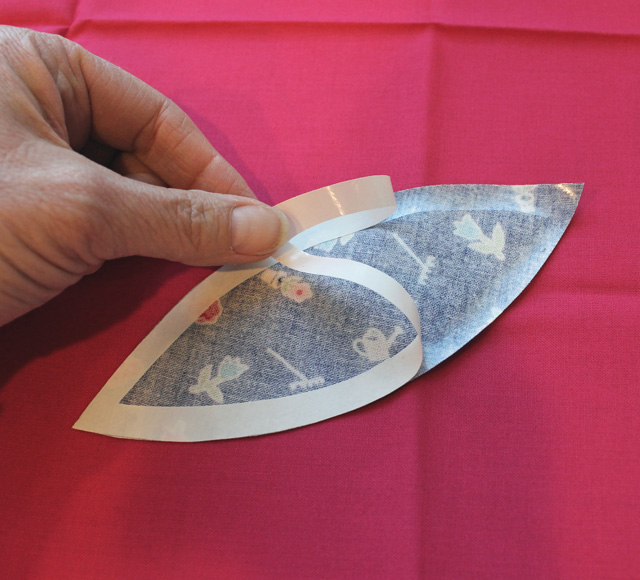
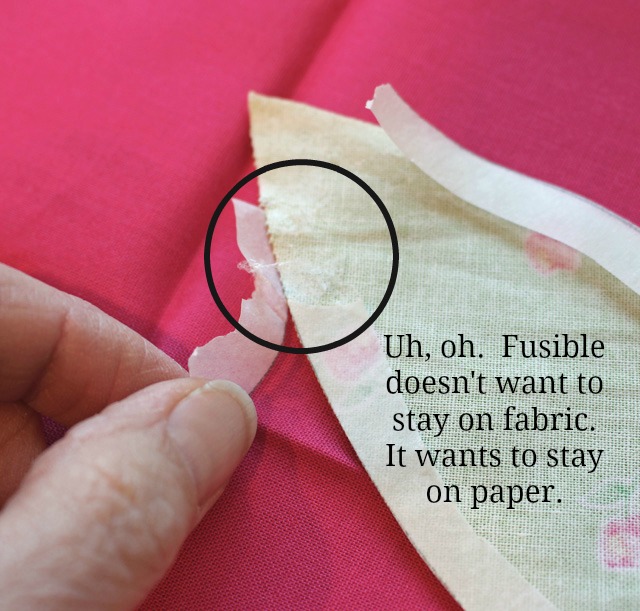
5. Remove release paper from shapes. You’re going to peel away the paper side of the fusible from each shape, exposing the fusible.
This is fairly easy to do, depending on the product you’re using. I used Wonder Under for some of my pieces (I ran out of my favorite, Heat ‘n Bond) and the peeling away part did not go well. The fusible kept coming up with the paper. I had to scrap one of my petals and start over.
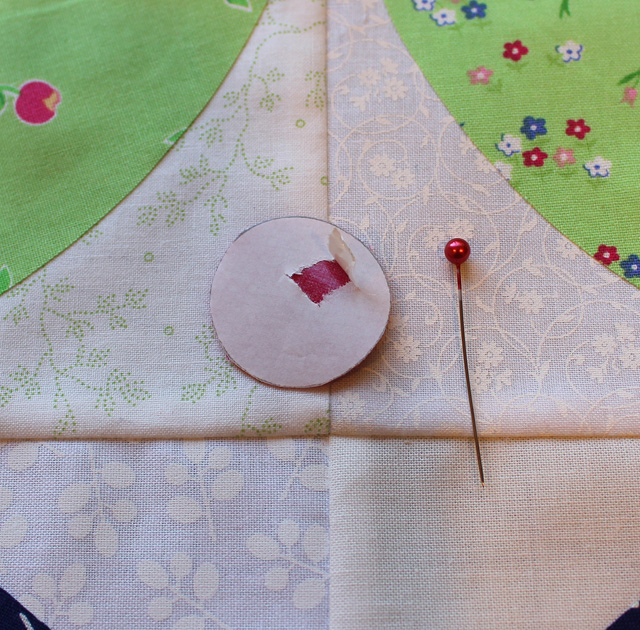
TIP: Use a pin to score the paper side of the fusible. This will make it easier to find an edge to grab onto when peeling away the paper.
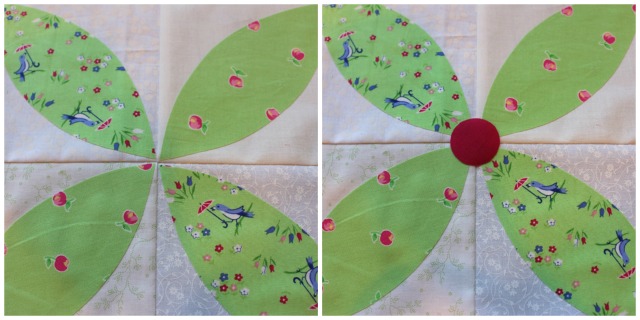
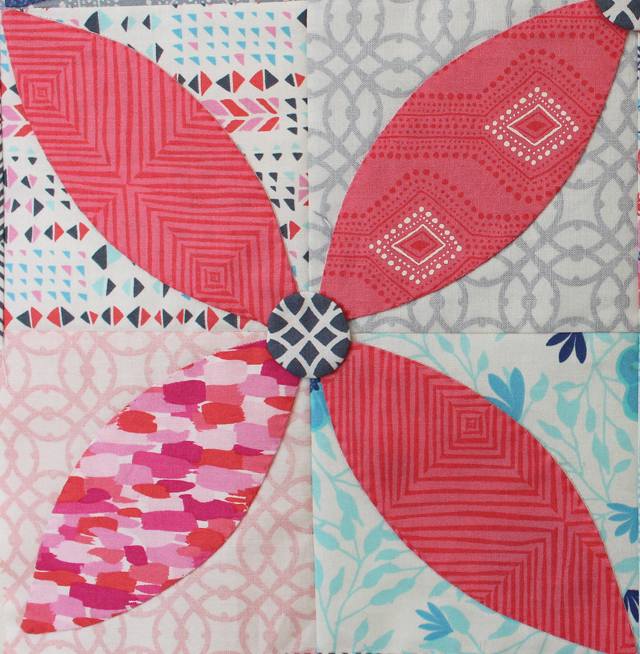
6. Fuse shapes onto the background fabric. This is the fun part. Place the petals on each background square making sure the tips of the petals meet at the center of each “flower”. Don’t worry if there’s a gap at this intersection as it will be covered by the circle.
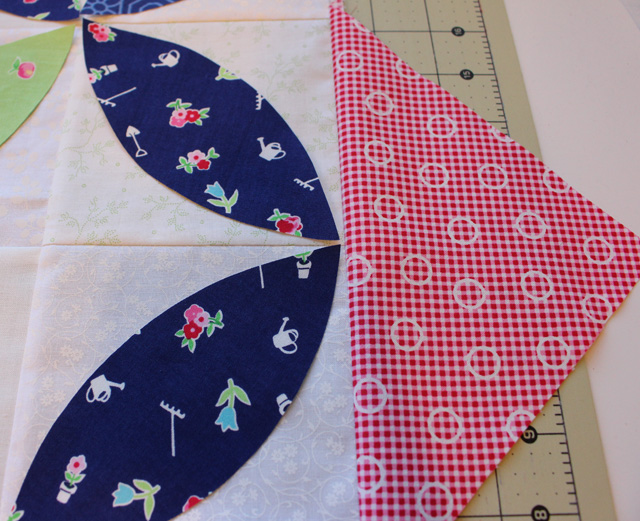
Check the petal placement along the outside edges where the tips meet. There should be a continuous curve formed from the petals.
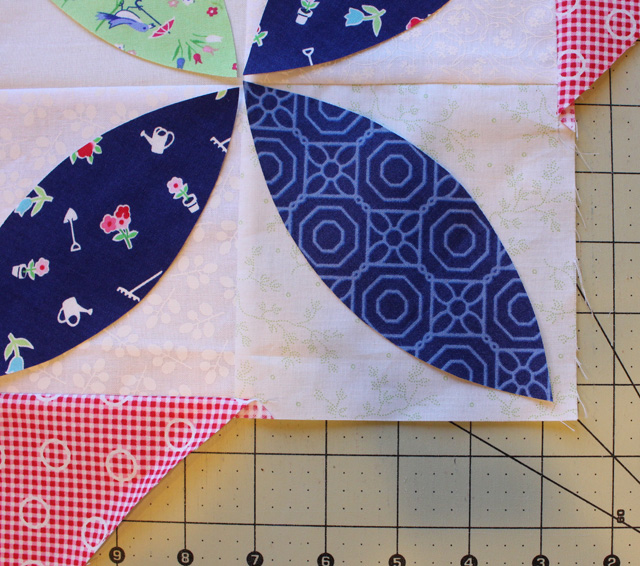
The corner petals should reach within 1/4″ from the outside corners:
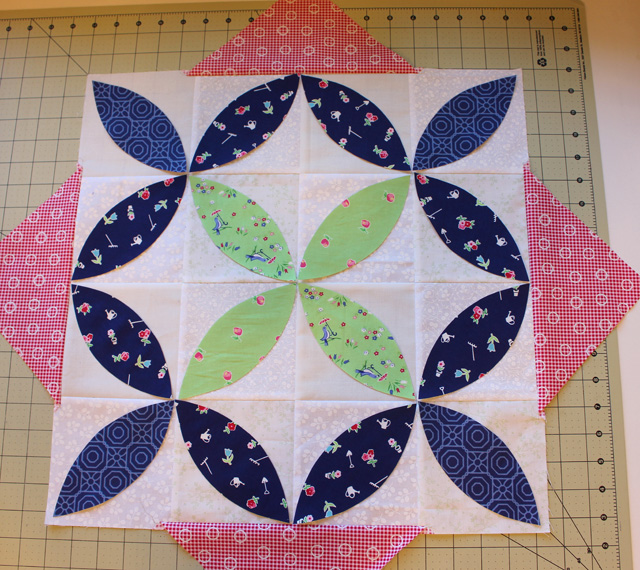
Here is what it looks like with all of the petals in place:
Fuse the petals down one section at a time. Then fuse the circles in place. Again, check the manufacturer’s instructions for your fusible web product. I press for 8-10 seconds on a cotton setting.
TIP: Be careful of the temperature setting on your iron. Too high of a heat setting will scorch your project!
You have the option of adding the circles now or waiting until after you’ve stitched the petals down. That way you can stitch the petals in a more continuous line than if you had to stop at the circles each time. However, be aware that the stitches from the applique might show through as bumps on the circles. I chose to add my circles at the same time as the petals and stitch them all at the same time.
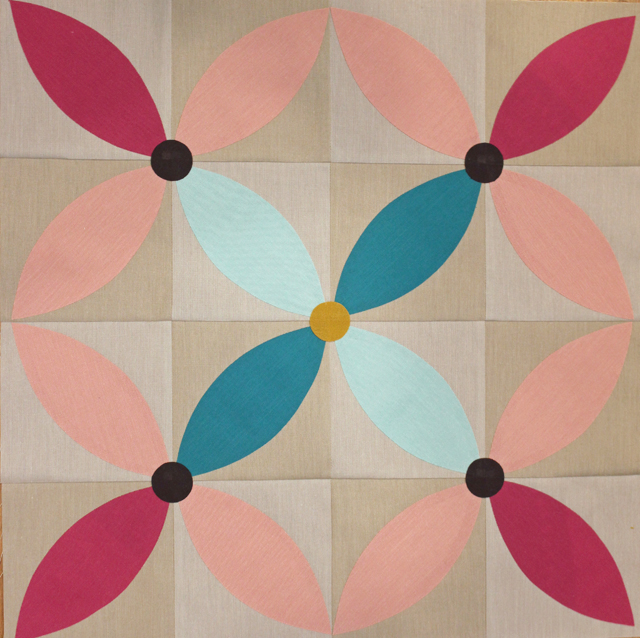
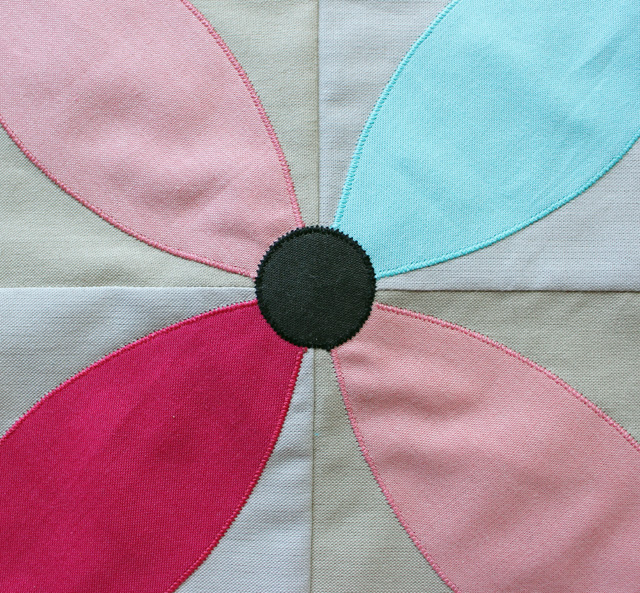
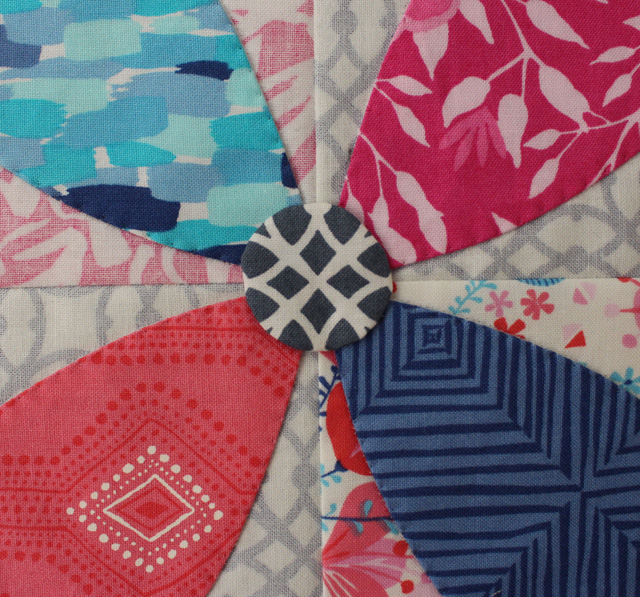
Here is my modern palette sample all fused into place:
Applique stitching
O.k. Things are about to get real. The objective here is to make your applique permanent, pretty, and long-lasting with no fraying.
For more detailed information (we’re talking nitty gritty) about the applique stitch, take a look at The Machine Applique Stitch. I made this tutorial a few years ago and I encourage you to check it out especially if anything I talk about below isn’t clear to you.
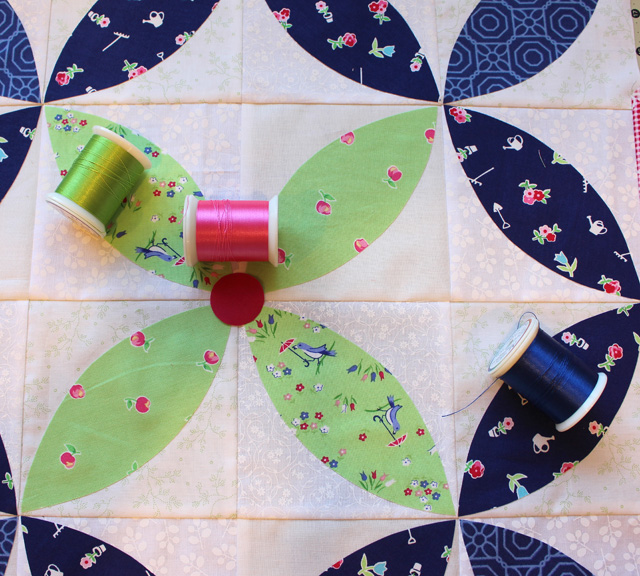
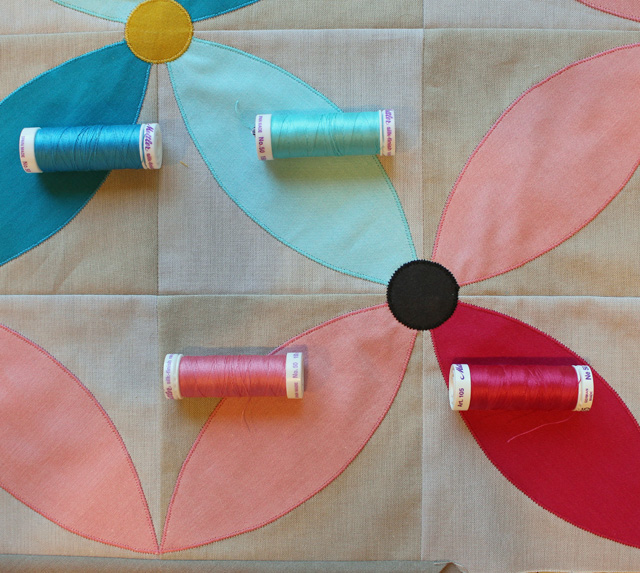
1. Choose your Thread. Your choice of thread is part of the design process. There are so many options: cotton, rayon, polyester, thick, thin, variegated, solid, etc. I chose Magnifico thread by Superior Threads for the blanket stitched sample and Mettler Silk Finish Cotton Thread (50 wt.) for the zig zag sample. Magnifico thread is a show off. It’s slightly thicker than standard thread and it has a beautiful sheen to it. It’s a great choice when you want your stitches to stand out.
I couldn’t resist adding this picture of my Magnifico thread collection:
The Mettler cotton thread seemed like a good choice for the zig zag stitches on the solid modern sample. A little more reserved and subtle, but very sophisticated.
Choose a bobbin thread that is cotton and similar in color to the top thread. If you have any issues with tension, it won’t be too obvious if your colors are the same. Check your tension before you start, so there won’t be any surprises.
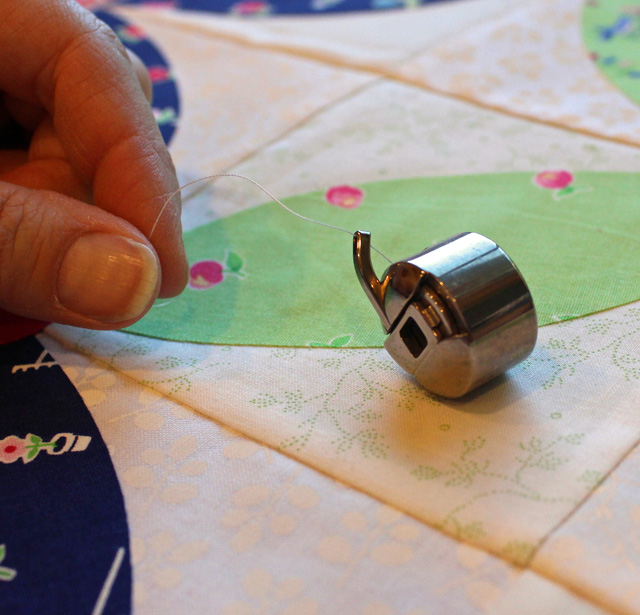
TIP: Bobbin tension. If you have a bobbin case that has a hole in the arm, you can pull your bobbin thread through that hole to add extra tension to the bobbin. I do this when I have a heavy thread on top (like Magnifico) and it helps to even out my tension.
2. Choose your stitch.
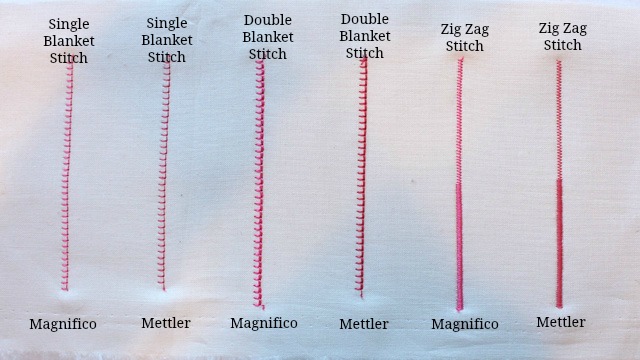
This is where a little practice first pays off. If you have never used a blanket stitch or zig zag stitch on your sewing machine, it’s a good idea to make a sample to test out the width and length settings for each stitch. You have two basic options (keeping it simple for this tutorial) for machine applique: blanket stitch or zig zag stitch. Here is a sample that I made using my chosen threads:
First of all, you can see the contrast between the Magnifico thread and the Mettler thread. Close up, there is a beautiful sheen from the Magnifico. Then, you’ll notice the two blanket stitches. Your sewing machine may have only one option, or 4 options like my Bernina 440QE. The double blanket stitch is much heavier than the single blanket stitch and it’s what I chose for my sample. It takes two stitches forward, two stitches backward, right, left, right, left. (I dream about that dance step). The single blanket stitch is just like it sounds: forward, left, right.
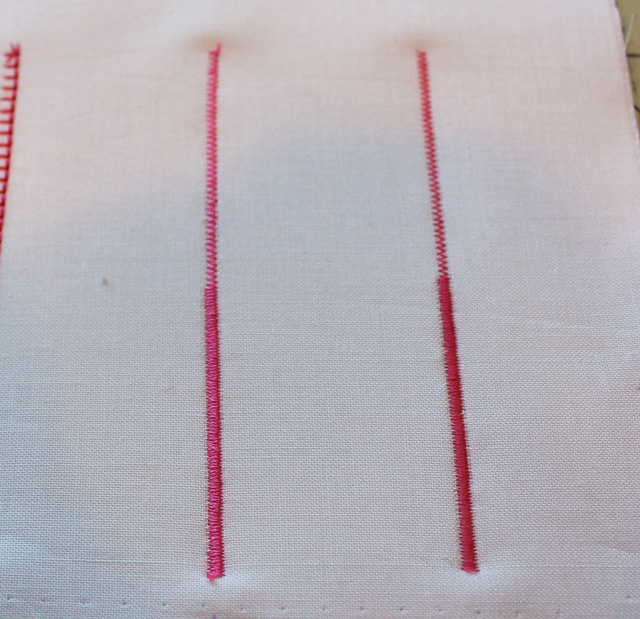
You might notice the change in look of the zig zag stitch. This comes from changing my stitch length. I started out with .6 stitch length and 1.8 stitch width. I changed to .3 stitch length and kept the width the same. The shorter stitch length gives you a satin stitch and it’s very “showy”. This was very popular “back in the day”. Now, I’m seeing more open zig zag stitches on applique projects. I chose the longer stitch length for my solid modern table topper (top half of the sample).
3. Stabilize. This step is often overlooked. I almost always use stabilizer underneath my applique. It does exactly what it sounds like – it stabilizes your work as you stitch. This is really important when I’m using a zig zag stitch; it helps prevent “tunneling”. If you find that your stitches are uneven or you’re skipping stitches, you should try a stabilizer. Instant success. Most stabilizers are meant to be removed. They will tear away or dissolve with water or heat. For the past few years, I have been using Ricky Tims Stable Stuff Poly.

It has many uses, but for applique it can be torn away easily from the outside of the design, and you can leave it in place behind the design shape. It will eventually soften to a thin layer of material that will add a slight lift to your applique.
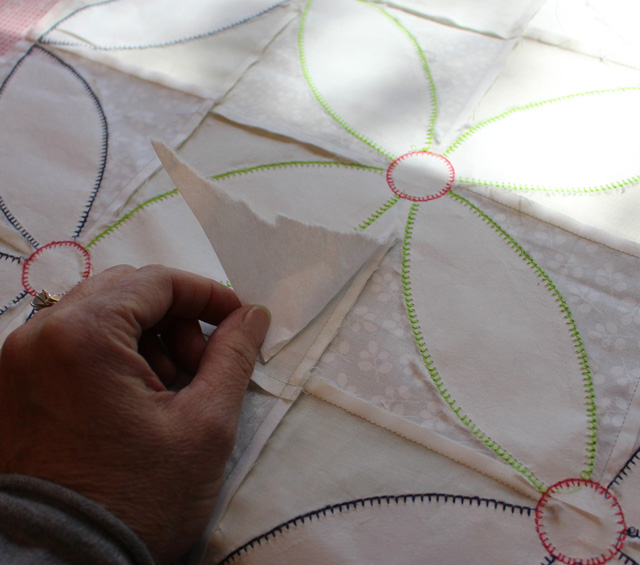
Place the stabilizer underneath your quilt top. Pin in place.
For the following steps, make sure you have the correct presser foot attached to your sewing machine. Most machines have an applique foot available. If not, use a foot that gives you the best visibility in front of the needle.
4. Bring the bobbin tail to the top. This step will prevent a thread nest from forming on the backside of your quilt. Take one stitch and only one stitch. Pull the top thread up and to the side. The bobbin thread will loop up with it. Grab the bobbin thread and pull it all the way up. Hold onto both thread tails as you start stitching.
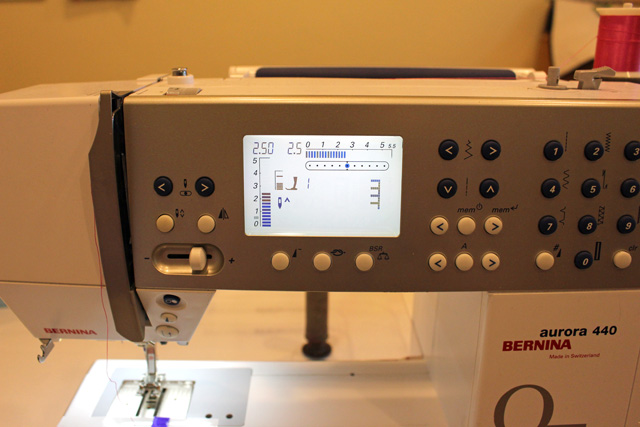
5. Blanket Stitch. (If you’re not using the blanket stitch, then skip this step and move on to step 6). I often set my stitch width and stitch length to the same setting when I’m blanket stitching. For my sample, I used a 2.4 width and 2.4 length. Every machine is different, so play with this on a practice piece first.
You will be sewing in a clockwise direction and working on the petals first. Begin at the base of the petal where it meets the circle.
Lock your stitches by using the automatic function on your sewing machine or by taking a few tiny straight stitches first (which is what I do – I set my stitch length to .3 or .4 and take 3 straight stitches).
TIP: Whenever you change stitches, your needle position changes. Be aware of this because it always gets you by surprise.
On the blanket stitch, the straight part of the stitch will fall into the background fabric right next to the applique. The “bite” will go directly into the applique shape. The picture below shows where the needle position should be on the straight stitch or right swing of the needle.
The bite should go into the applique at a right angle to the raw edge. This is the left swing of the needle:
The petal has a nice, gentle curve. You may not need to stop and pivot as you go around, but if you do, pivot on the right swing of the needle to prevent a “gap” in the stitches.
TIP: I set my needle position to the far right on my sewing machine. This way I can use the inside edge of my presser foot as a visual guide for my stitches.
It takes practice to place your stitches accurately and consistently on the applique. Take your time and breathe! If you want to practice first before sewing on your actual project, make a little petal sample to get used to this stitch.
TIP: Lower or lighten the presser foot pressure dial. If your machine has a pressure adjustment dial for the presser foot, lighten it by lowering it to a smaller number. This will help you move around curves easier.
When you get to the point of a petal, stop with the needle down and pivot. Continue down the other side.
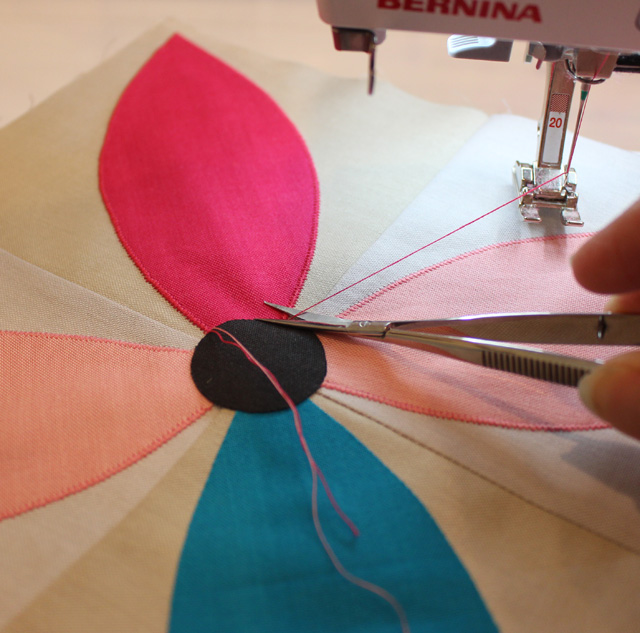
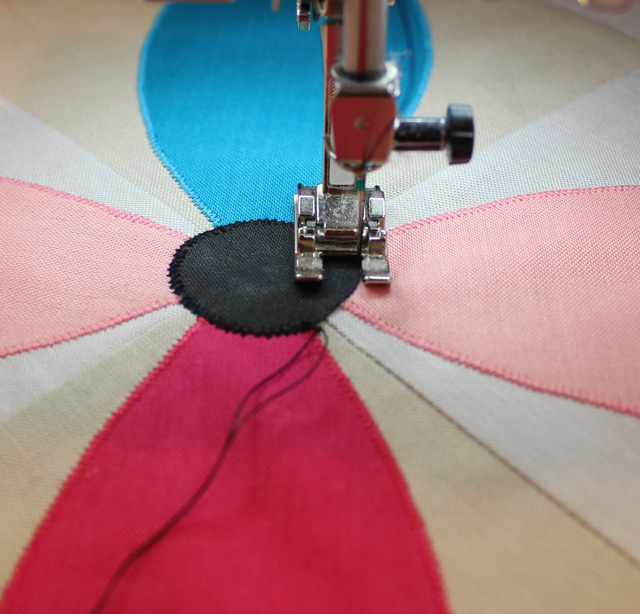
Stop at the circle and lock your stitches. Cut your thread tails close to the quilt top. You can also bring them to the back side and knot them. I rarely do this unless it’s a competition quilt (which is just a theory, so far). The picture below is the threads being clipped on the modern sample.
Repeat for all petals. Stitch the circles last. I shortened my stitch length and stitch width just a bit for the circles (2.0 length and 2.2. width). It’s easier to get a smooth curve with shorter stitches (instead of dot-to-dot looking stitches).
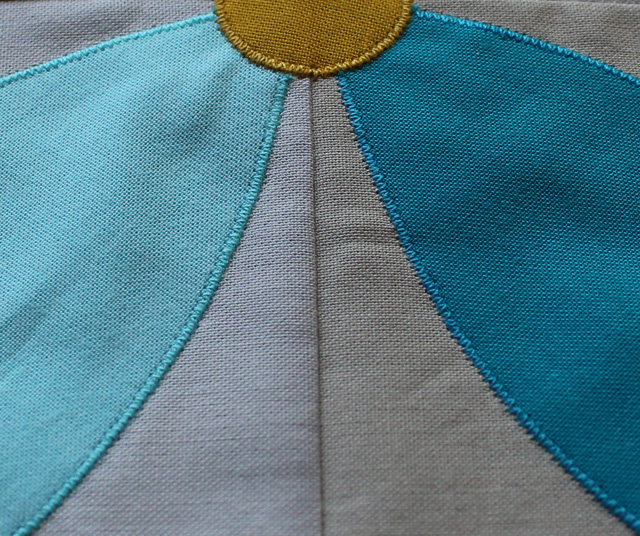
6. Zig Zag Stitch. I’m using my modern solid table topper for the zig zag stitch example. The look of this stitch is very dependent upon the stitch length and stitch width settings. I wanted this applique to look more natural and subtle so I chose a narrow stitch width (1.8) and slightly longer stitch length (.6). You can see behind these stitches as opposed to a satin zig zag stitch which is all thread.
You will be sewing in a clockwise direction and working on the petals first. Begin at the base of the petal where it meets the circle.
Lock your stitches by using the automatic function on your machine or by taking a few tiny straight stitches first (which is what I do – I set my stitch length to .3 or .4 and take 3 straight stitches). Remember, whenever you change stitches, your needle position changes. Be aware of this because it always gets you by surprise.
Most of the zig zag stitch will be on the applique shape. The right swing of the needle will fall on the background fabric right next to the applique (as shown above).
The left swing of the needle will be going completely into the applique (shown below).
As you go around the curve, make sure that you pivot with the needle down on the right swing of the needle. This will prevent a gap or “v” from occurring.
TIP: Take note of the position of your presser foot. The toes should be parallel to the raw edge of the applique. This will ensure that your stitches are perpendicular to the raw edge.
When you reach the point of a petal, stop with the needle down and pivot. Continue stitching down the other side.
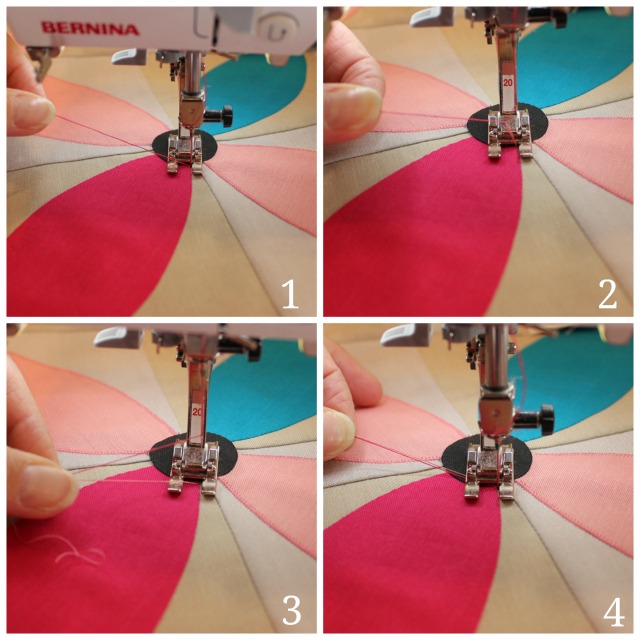
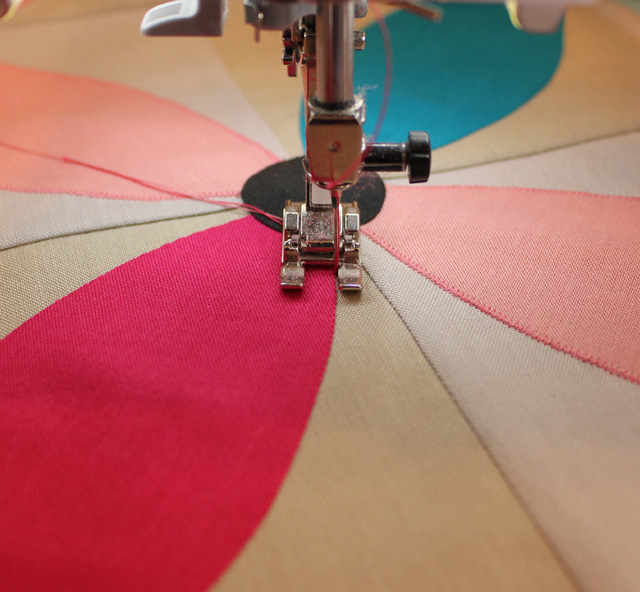
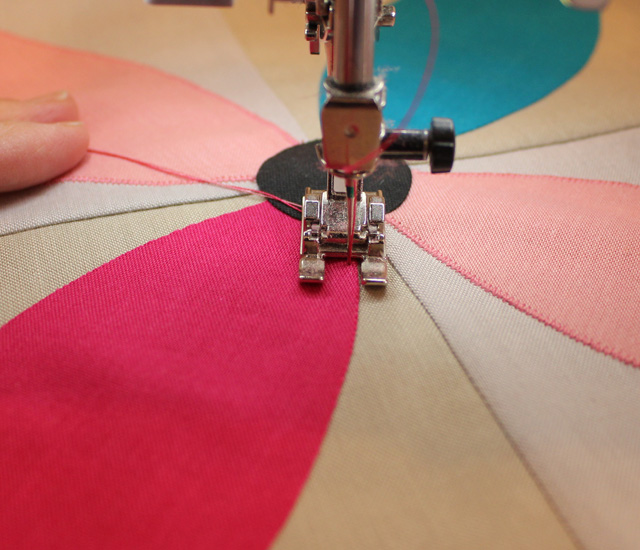
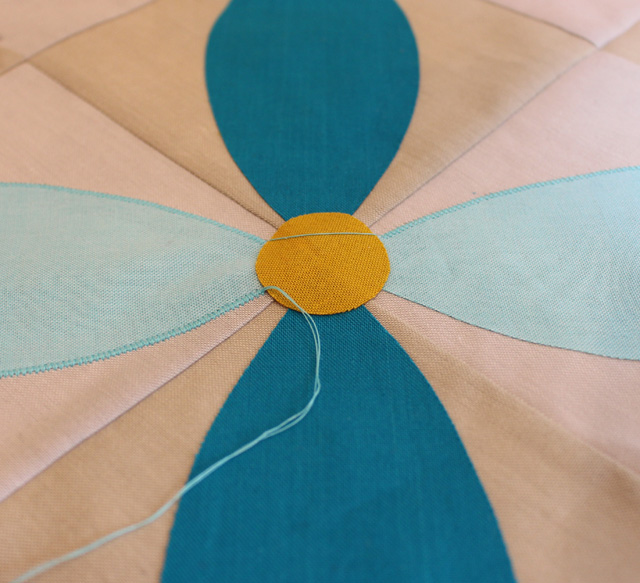
TIP: When moving from petal to petal, jump sections. This means don’t cut your thread tails between sections. Keep them connected so you don’t have to pull up your bobbin thread each time (see picture below).
Once all of your petals are stitched down, move on to the circles. These require more attention because you’ll be pivoting often. Go slow and take your time.
7. Remove the stabilizer. Once you’ve completed all of the stitching around your applique, it’s time to remove the stabilizer. If you’re using a tear-away stabilizer, be gentle when you remove it. I like to place my fingers along the stitching (from the wrong side) as I tear the stabilizer. You want to avoid pulling your stitches as you tear and possibly damaging them.
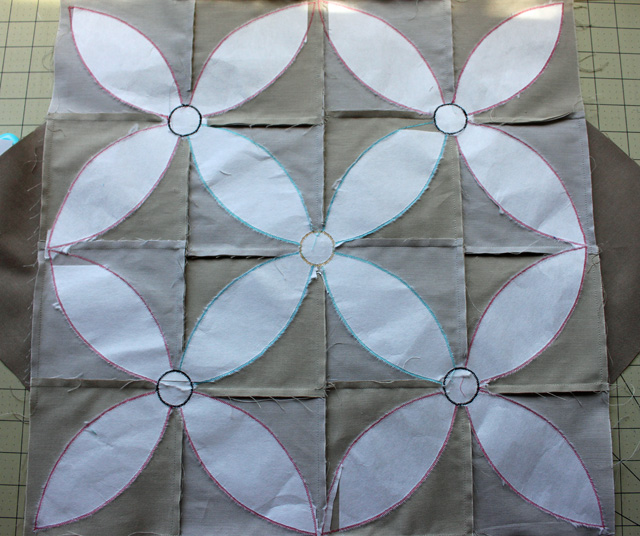
The picture below shows what the back of my table topper looks like after I’ve torn away the stabilizer from outside of the applique. I’m choosing to leave it on the inside of my shapes (only do this if you’re using the appropriate type of stabilizer such as Ricky Tims Stable Stuff Poly).
Turned Edge Applique by Machine
This project is perfect for an applique technique that creates a turned edge using fusible interfacing. The shapes are big and simple enough to make this an easy option. Once you have your shapes ready, you can fuse them onto the background fabric because the fusible side of the interfacing is on the back of the shape. This gives you just enough adhesion to keep everything in place while you stitch around the shape.
There are three advantages to using this technique:
- You don’t need to use a blanket stitch or a zig zag stitch.
- It can help minimize any shadowing that might occur if your background fabric is darker than your applique motif.
- It can look like it was done by hand if you use invisible thread for the stitching.
I’m going to show you the steps as it applies to this project. A good place to look for more detailed information is my tutorial, Turned Edge Applique. Again, nitty gritty details.
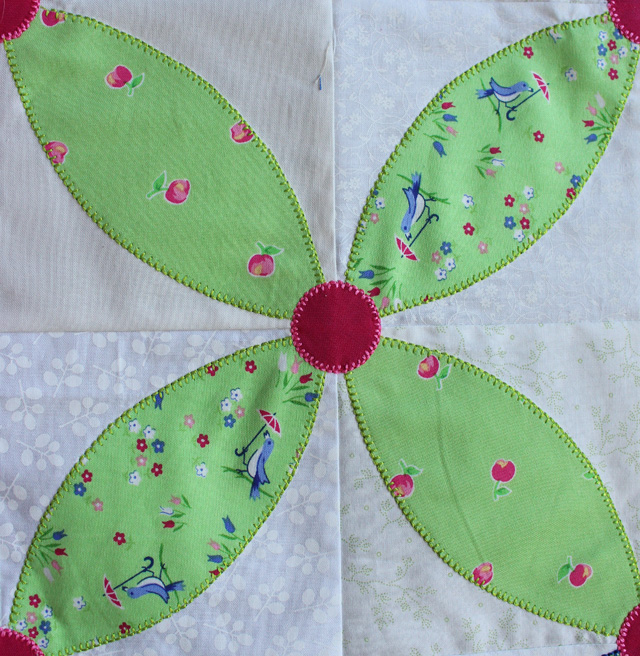
Here is what one of the petals looks like from my first Spring Petals Table Topper using this technique:
Supplies:
- Lightweight fusible interfacing
- Frixion pen (optional)
- Pinking shears
- Clear monofilament thread (optional)
- Chop stick or other soft-pointed tool (for turning)
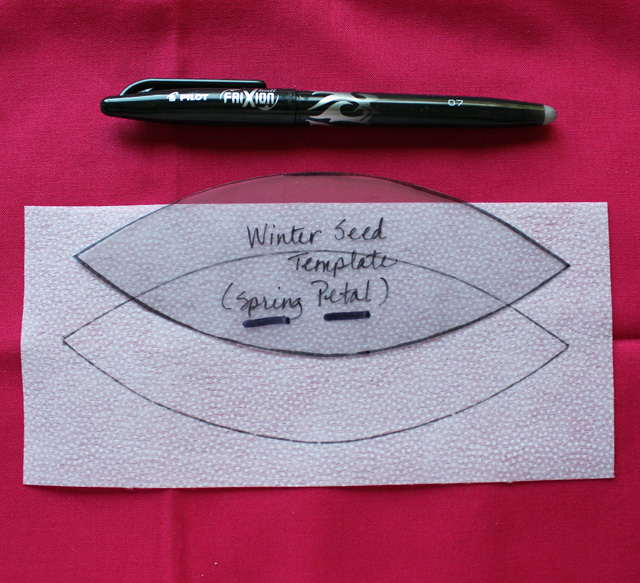
Step 1: Cut the interfacing into approximately (16) 3 1/2″ x 7 1/2″ rectangles.
Step 2: This is almost the same as Step 1 for the raw edge machine applique at the beginning of this lesson. You can trace from the pattern or make a template to trace around. You will be tracing onto the smooth side of the fusible interfacing, not the bumpy side. I like to use a Frixion pen for tracing (it will disappear when ironed) or you can use a pencil.
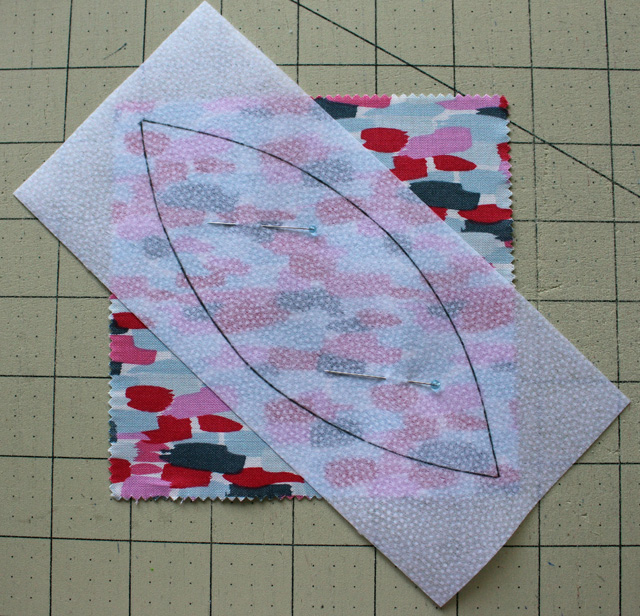
Step 3: Place the bumpy side of the interfacing against the right side of the petal fabric. The side that you drew on should be on top. Pin in place.
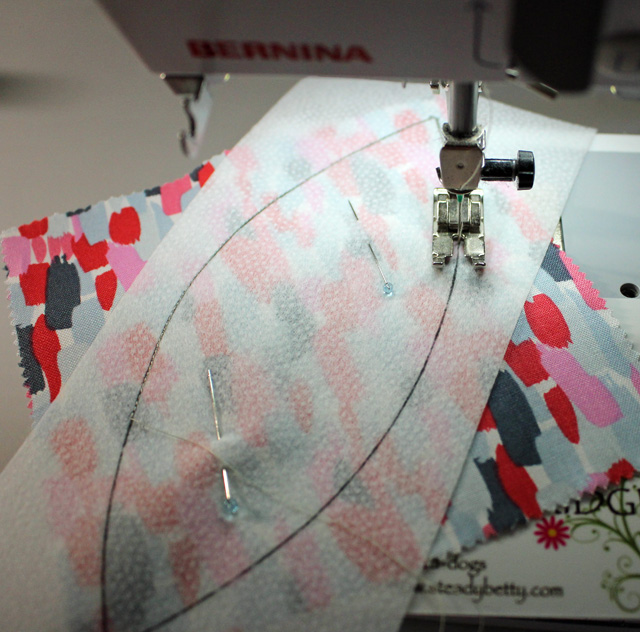
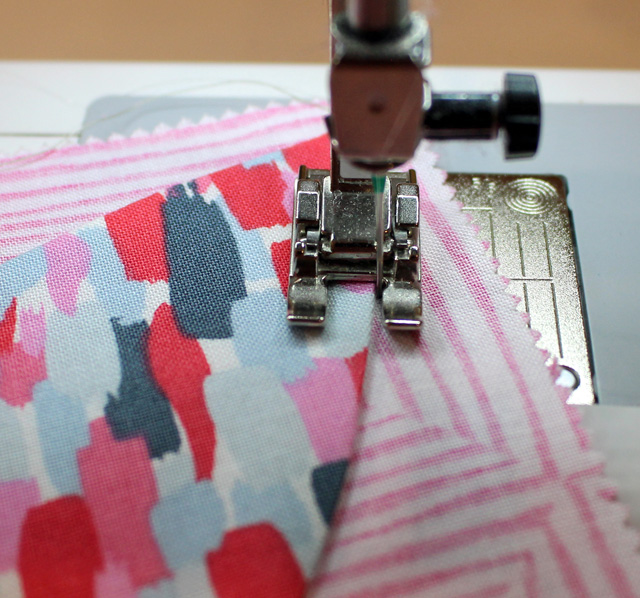
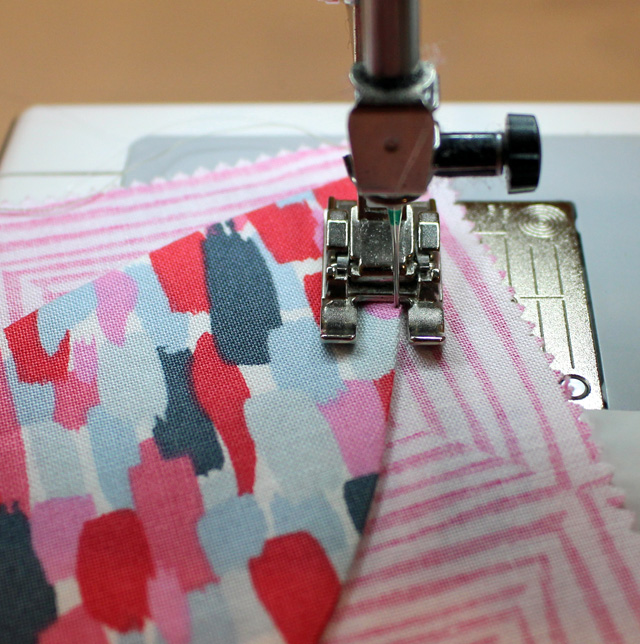
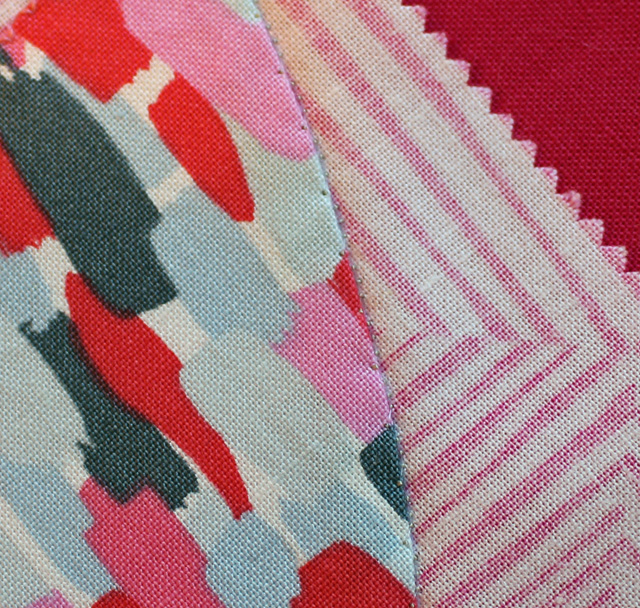
Step 4: Stitch on the drawn line using a short stitch length (between 1.5 and 1.8). Go slow and be careful. This will become your turned edge so you want it to be nice and smooth.
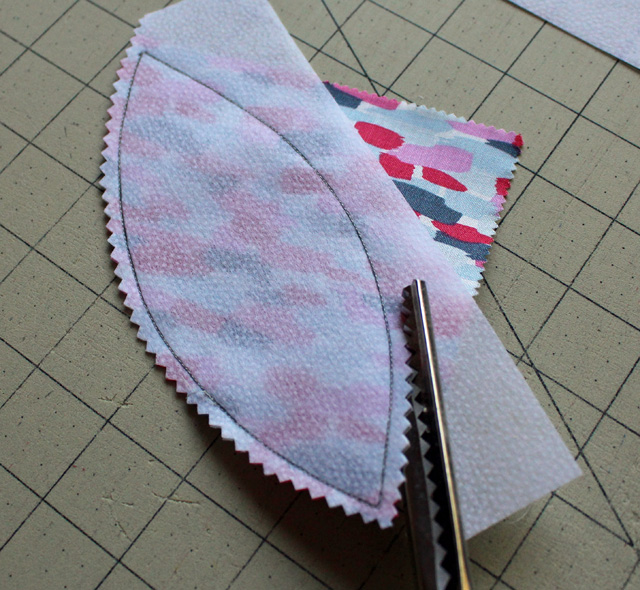
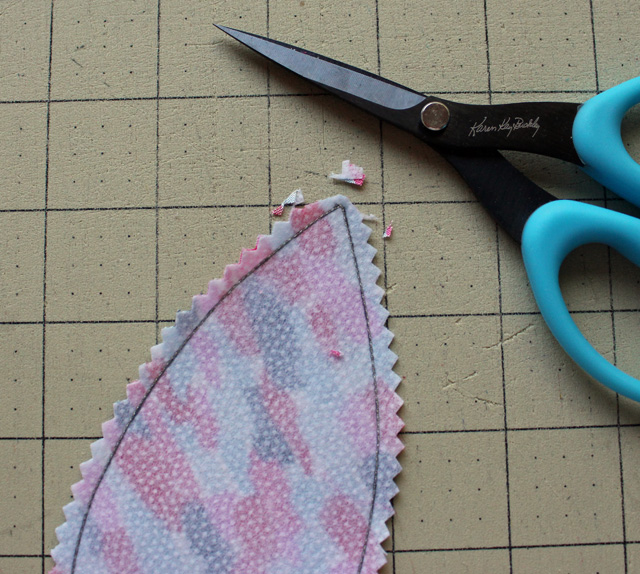
Step 5: Trim about 1/4″ from the stitched edge. I like to use pinking shears for this as it eases the fabric around the curves. If you don’t have pinking shears, then regular scissors will do.
Cut the tip of the petal close to the point (about 1/8″) to reduce bulk there.
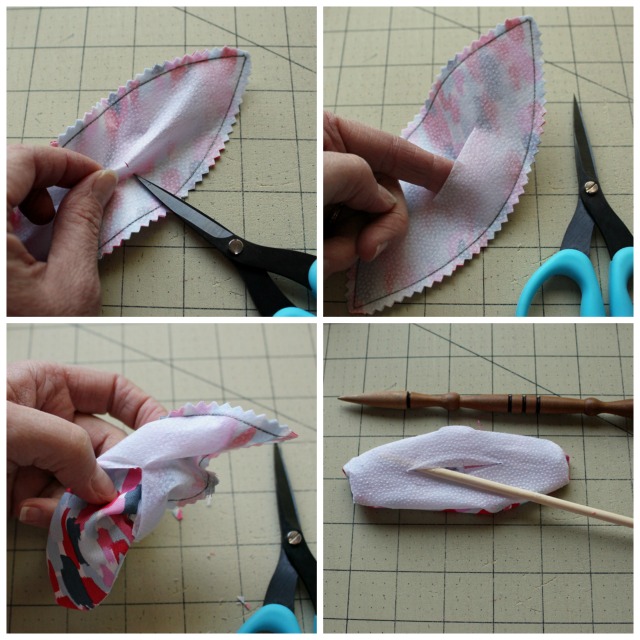
Step 6: Turn right side out: Make a small snip in the interfacing after you have pulled it away from the fabric. Then enlarge the snip into a 1″-2″ slit. Turn right side out through the slit. Run a chop stick or other tool along the inside edges to complete.
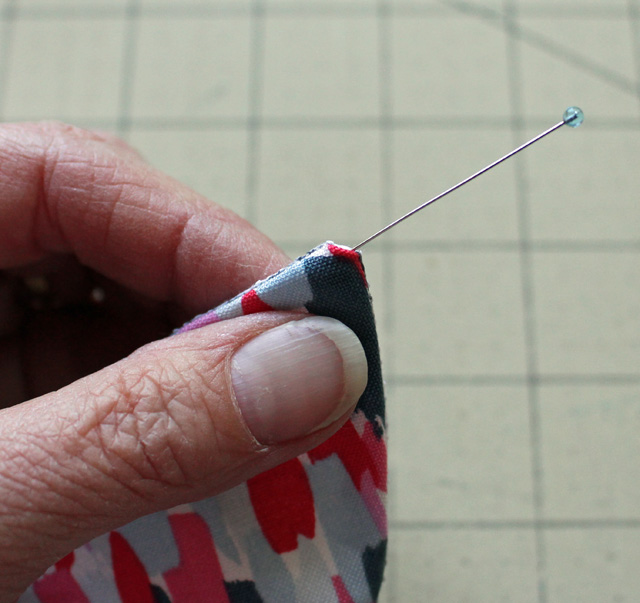
TIP: I like to use a pin to poke out the tips of each petal. But be careful, you don’t want to poke too much or you’ll end up with a hole!
TIP: Get a manicure before taking close up pictures of your fingernails!
You can use a wooden iron or your fingers to flatten or “press” the edges of the petal. Just don’t use a real iron because you’ll fuse your shape onto your pressing surface.
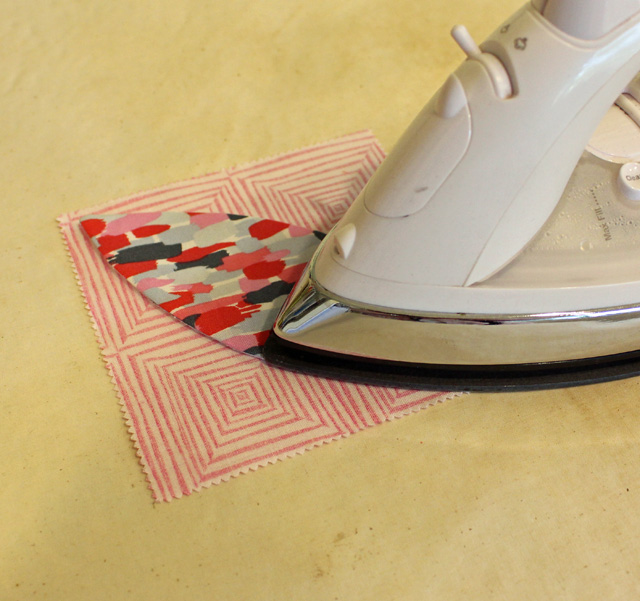
Step 7: Fuse the petals onto the background squares. I press for about 10-12 seconds using a cotton setting and then I press from the wrong side for the same amount of time. Check to make sure it has fused well. Note: The picture below shows the petal being fused onto a single square. Yours will be fused onto the square after it has been sewn together with the other squares.
Step 8: Make the circles. I like to use a different technique to get a turned edge on circles. I’m going to refer you to my previous tutorial on turned edge applique. About half way down the page of that tutorial, I show you how to use Perfect Circles by Karen Kay Buckley to make gathered circles. You can also use your own favorite method.
You have the option of adding the circles now or waiting until after you’ve stitched the petals down. That way you can stitch the petals in a more continuous line than if you had to stop at the circles each time. (I don’t recommend this if you’re using fused, raw edge applique. The stitches from the applique might show through as bumps on the circles.)
TIP: You can fussy cut fabric to make your circles stand out.
Step 9: Stitch the applique shapes down. You have several options for this step.
Option 1: To get a hand-appliqued look, you need to use invisible monofilament thread. My favorite brand is Superior Threads® – MonoPoly. It has all of the properties of invisible thread, but it’s made out of polyester instead of nylon. Some people don’t like to work with invisible thread because it really is hard to see. But that’s a good thing if you’re looking for invisibility.
TIP: Use cotton thread in the bobbin when working with monofilament thread.
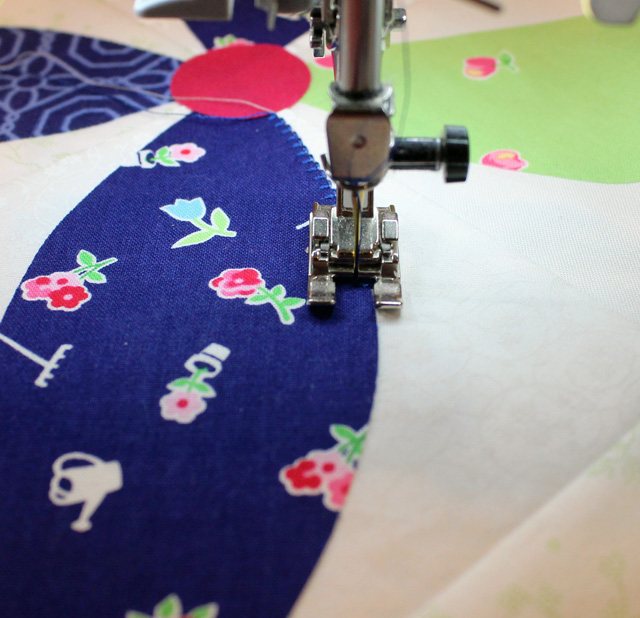
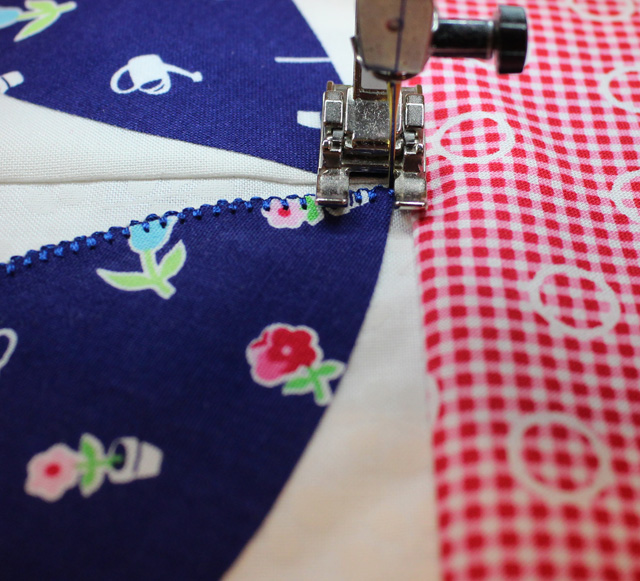
The stitch I use for this is similar to a blind hem stitch. It’s called a vari-overlock stitch on the Bernina. It takes 2-3 straight stitches followed by a “V” or bite to the right (which needs to be mirror-imaged so it bites to the left). If you can, adjust your settings so the stitch width is really narrow (for my machine that is 1.1 and my length is at 1.6) If you don’t have the vari-overlock stitch, then use a blind hem stitch. It should automatically bite to the left.
The straight stitches should fall in the background fabric right next to the applique shape.
The bite should just catch the edge of the petal.
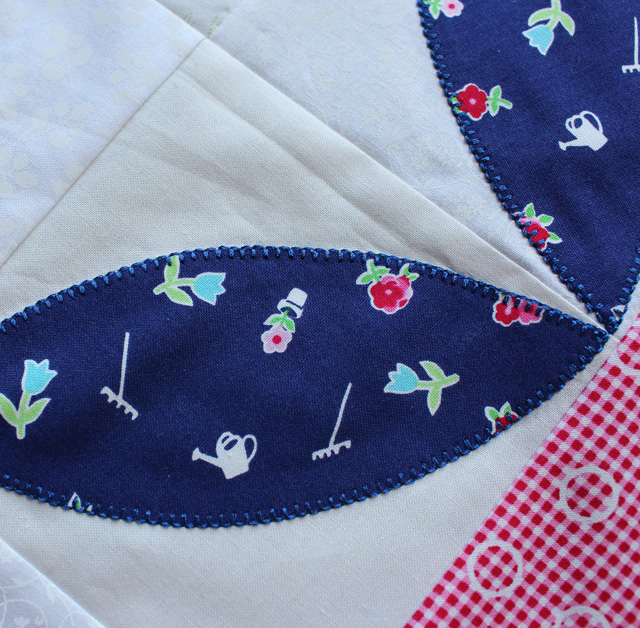
Here is a close up of the finished stitch. You can see the bobbin thread a little bit, which is a good reminder to check your tension:
Here is what it looks like from the back:
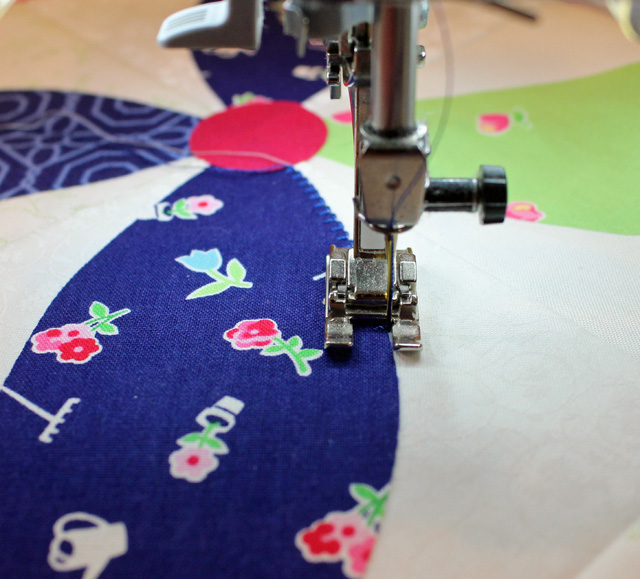
If you don’t have a blind hem stitch or your machine doesn’t allow you to adjust the width so that it’s narrow enough, you could use a zig zag stitch. With invisible thread, you won’t see it and the result will be very similar. Your zig zag stitch should be as narrow as you can allow and the length should be about 2.0. You want to just catch the edge of the applique and keep the right swing of the needle close to the applique’s edge (in the background). You can see how the stitch follows close to the edge in the picture below:
Option 2: Use a straight stitch and match the thread color to your petals. This will give your applique a more tailored look and you will definitely see your stitches. The nice thing is that it’s really easy! Stitch close to the edge of the shape and make your stitch length between 2.0 and 2.5.
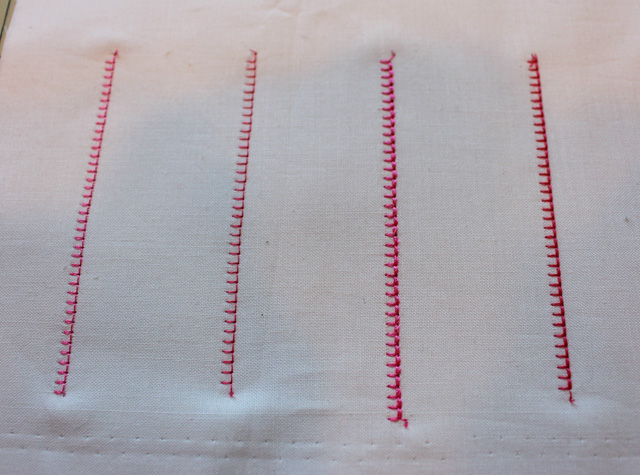
You could also use a zig zag stitch and coordinating thread. I tried that and it looks o.k., but not my favorite:
Option 3: You could stitch your applique shapes down at the same time that you quilt your project. It’s more efficient that way and very easy – especially if you’re using the straight stitch. I’m not doing this for mine because I don’t want any surprises later. Plus I needed to take pictures of the steps!
Step 10: Relax and have a glass of wine (or a cup of tea)! Whew! You made it through the very long and excruciating pleasant and extremely helpful applique lesson!
I’d love to hear which technique you end up using. As always, let me know if you have any questions. I’m sure someone else has the same question, so you’re doing us all a favor by asking it in the comment section.
Post pictures of your progress on Instagram or Flickr using the hashtag #springpetalsqal.
Thanks for sticking with me on this part of the quilt along. It’s not always the funnest part but I think it’s the most rewarding!
Disclosure: Some of the links in this post are “affiliate links.” This means if you click on the link and purchase the item, I will receive an affiliate commission. Regardless, I only recommend products or services that I use personally and believe will add value to my readers. Your support helps me maintain the content of my blog and I am truly grateful! I am disclosing this in accordance with the Federal Trade Commission’s 16 CFR, Part 255: “Guides Concerning the Use of Endorsements and Testimonials in Advertising.”









I love applique, and really appreciate all the great lessons and suggestions.
What type of stabilizer is everyone using? I have Pellon stitch and tear, and it’s very stiff-makes manuevering the top through the machine awkward when appliquéing …is it ok to leave this stabilizer inside the petals? I have removed all stabilizer from my first 2 toppers, but # 3 is underway, and I just thought I would ask! :). Thanks again, Julie, for this great project…I love it!
Update….I made a little quilted block out of scraps and left the Pellon stitch and tear inside…soaked it in cool water and put it out in the sun to dry. The Pellon stabilizer was still very stiff after it dried. The thermolam is new to me, and I was curious to see how it acted when washed! Very happy with the batting….will continue to remove the stabilizer though!
Wow Julie, thanks for all this info. I love the fact that you’re sewing on the 440 because that is my machine too. This is a absolute wealth of information; all so very good. Love it!
Julie, this tutorial is amazing. You have give such excellent instruction and photos, too. You really put masterful thought into your work. Thank you!
Wow what a great tutorial and sooo much good information. Love your posts.
Thanks So Much!!
I have been doing applicate for years and it has never been my favorite. After going thru your tutorial I have new renewed excitement and can’t wait to do it again. Can’t believe the precise details you spent soooo much time doing. You are certainly appreciated and thank you for sharing your knowledge!
Wow, a lot of effort went into this tutorial, thanks Julie!
This is the absolute best applique tutorial I have ever seen, I am bookmarking this for the next time I want to try applique, thanks!
You are such an excellent teacher! Even though I know how to do most of the things you showed it was great fun to follow along. Covered buttons would be fun but then it wouldn’t be as useful for a table topper. thanks again! Would love to take a class from you….
Great tutorial Julie – I learned lots of great tips! I will be bookmarking this post to refer to over and over. Thanks again!
Incredible tutorial, Julie! Thanks!
What a comprehensive and fabulous tutorial. I will be rereading this in order to do my applique next week. Now I would like to let you know something I learned about removing the paper from fusible webbing. Remember how to curl ribbon using your scissor blade. After ironing to fabric, run your scissors in a similar fashion along the paper layer of the fusible, and it curls to you can just peel it away. I no longer have problems removing the paper from the fusible part. Thanks again.
Linda, I have never heard of that tip and I can’t wait to give it a try! Thank you for mentioning it!
Thank you for such a wonderful project!
Thank you for this great tutorial it helped me a lot.
Thank you for the wonderful tutorial! What is the stitch number for the vari-overlock stitch on Bernina? I have the same machine (440QE) but have not been able to find the right stitch – maybe I should look harder. Also, can you iron over the Superior Threads Monopoly because it is polyester? Thank you ever so much!
The vari-overlock stitch is on the face of the machine. I think it’s on the top row, far right. It looks just like the blind hem stitch, but it’s smaller and biting in the other direction. Yes, you can iron MonoPoly thread, but I would still be careful about using extremely high heat. It’s a very fine thread and it’s still synthetic. Thanks for asking!
What a comprehensive tute on all ways to do machine applique! Although I’m experienced with MA, I picked up a few ideas new to me. Thanks Julie
Your tutorial is really the bee’s knees!
Thank you!!