Disappearing 9-patch QAL, week 3
Today I’ll be sharing a few more ideas for quilt layouts using a disappearing 9-patch block. If you’re just tuning in, there’s still plenty of time to join the quilt along. You can find all of the prior information here. The summer pace is all about taking it easy and this project fits the bill perfectly!

Last week, I showed you how to make the disappearing 9-patch block. It’s starts with the classic 9-patch and then gets cut up and divided so that it “disappears” into a new block that measures 13 1/2″ (unfinished). I started with two charm packs of Mama’s Cottage by April Rosenthal for Moda Fabrics and a junior layer cake of Moda Bella White that I cut into 5″ squares. I’ve been having so much fun making my quilt blocks that it’s hard to stop!
I know many of you are just now sewing squares together and some of you have made an entire quilt top! Wherever you are in the process, I hope you’re having fun.
Making the quilt top
As I mentioned last week, you can sew your squares (disappearing 9-patch quadrants) together by block or by row. I had a certain color layout that I was trying to achieve, so I laid all of my squares out first before assembling them. At that point, it was easier to sew them all together by rows instead of blocks. However, I did sew one section together by blocks just to be able to demonstrate how that looks. The block format is more typical for a disappearing 9-patch quilt.

If you’re sewing by blocks, you will make all of your disappearing 9-patch blocks first. Then you can lay the blocks out into whatever size quilt you’re making. You will sew the blocks together into rows and then sew the rows together.
If you’re sewing the squares (or quadrants) together by rows, you’ll want to lay them all out into the quilt size and format that you want. I placed a flat, flower-head pin in each square of the top row, identifying which column it represents (I mark the pin with a sharpie).

These identifying pins can also help put the “puzzle” back together again when your four-legged friend decides to take a nap in the middle of the project. Cooper loves fabric almost as much as I do!

I like to chain-sew the squares together as pairs by taking the second column of squares and flipping them right sides together onto the first column. Then I carefully stack the squares and bring them to my sewing machine where I chain-sew them together. I keep the thread attached that’s holding them together and place them back into the quilt “puzzle”. Then I do the same thing with the next column of pairs. Eventually, I sew the pairs together until I have a completed row.

Once the rows are sewn together, I press the seams, alternating directions of each row so that they will nest together. Then I sew the rows together until the quilt top is complete.

At this point, you can add borders to the quilt or leave it as is. I’ll talk more about borders next week and give you a few general tips.
Other quilt layout options
While I was doing research for this quilt along, I found some unique quilt layouts and different ways to sew the blocks together. I’m not giving detailed instructions for these quilt layouts, just general information and guidelines.
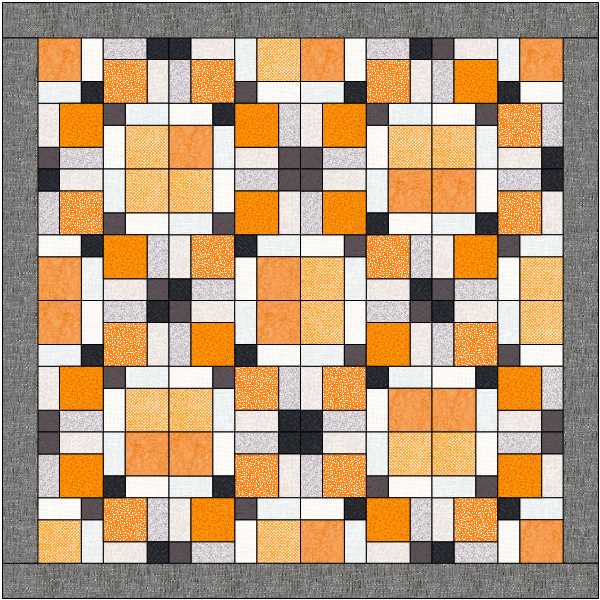
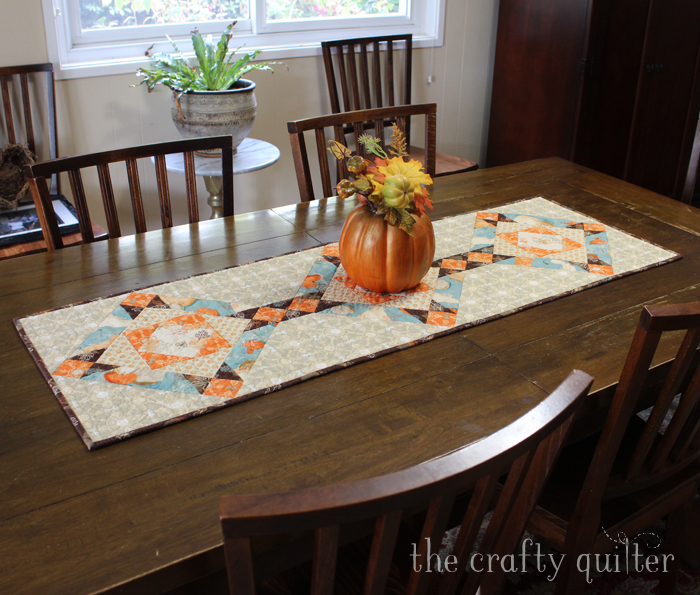
The first option would be to alternate the disappearing 9-patch block with a simple, framed block. To make the framed block, you could start with a center block that measures 10″ (hello layer cake) and add 2 1/4″ (unfinished) border/frame strips around it. The quilt would look similar to the one below:
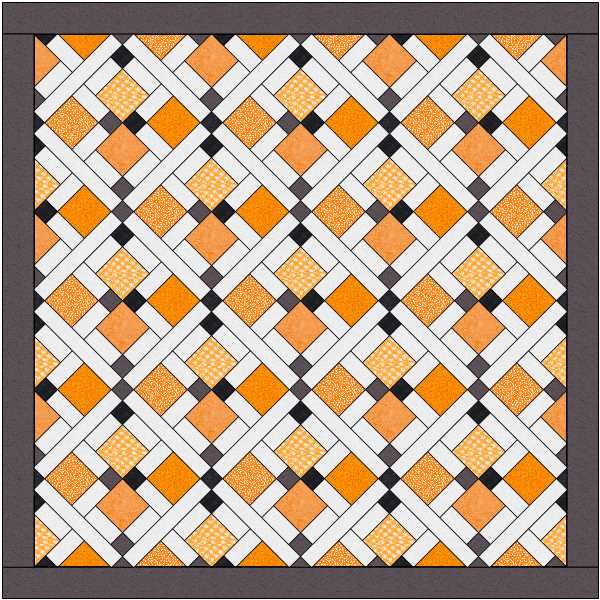
Another alternate layout is to set your blocks on-point and add sashing strips with cornerstones. This gives the quilt a very different and exciting look!
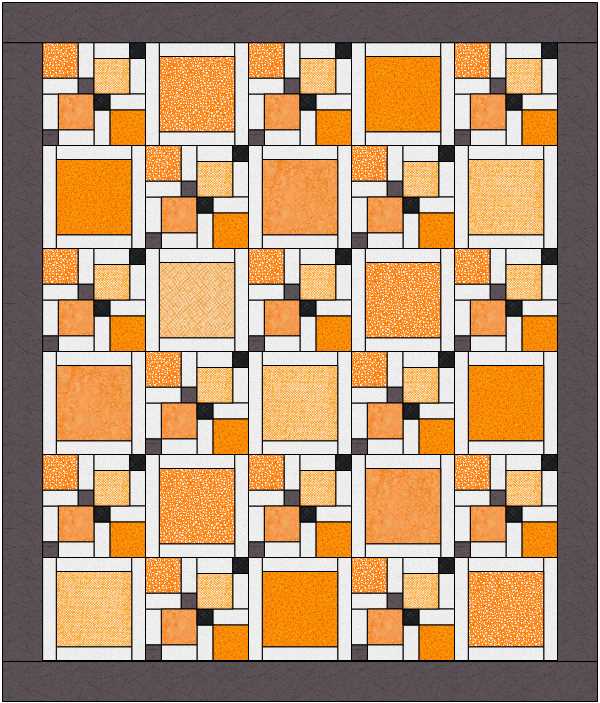
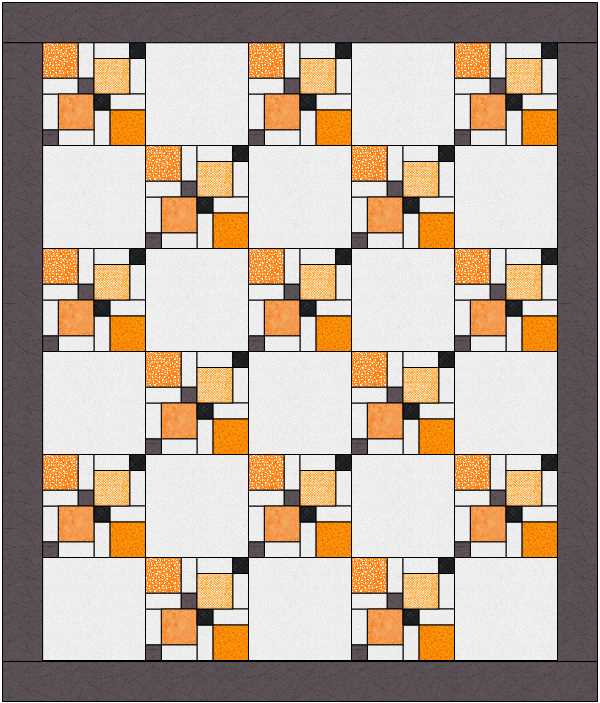
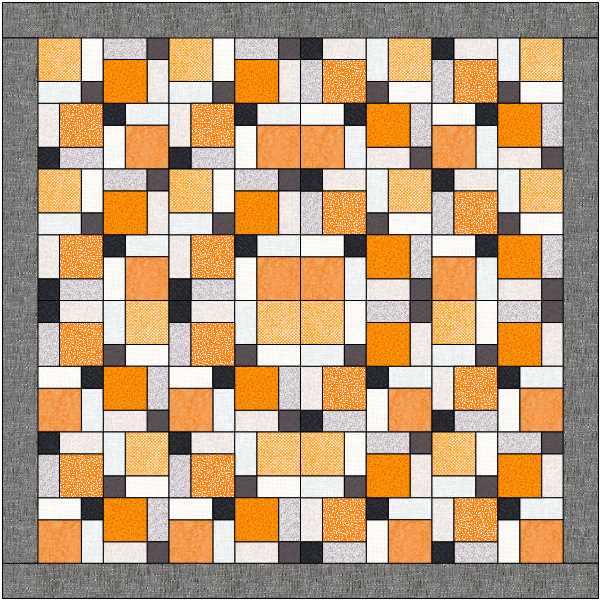
If you want to “grow” your quilt with minimal effort, you could alternate disappearing 9-patch blocks with plain squares. It’s an easy way to make a quilt bigger.
If you want to play with rotating your blocks, you could come up with even more different looks. Here are two examples:
I’m sure you could think of more ways to arrange your blocks, but this just gives you an idea of the possibilities. For now, you should sew all of your blocks together however you like. If you have any questions, please leave a comment and I’ll respond as soon as I can.

Next week, I’ll give you some tips on adding borders and perhaps some quilting ideas. I hope you’re having fun and remember to use the hashtag #disappearing9patchqal on Instagram so we can see your progress.

Discover more from The Crafty Quilter
Subscribe to get the latest posts sent to your email.


Hi, I realize this is an older post on 9 patch. Looking for some assistance.
Do you make several 9 patches (all the same pattern) and then arrange them? Or do you make every 9 patch pattern different for the whole quilt.
Thanks
Lise
I really like some of the various ways this block can go. Thanks.
I don’t seem to be able to print week three. All I really want are the three or four lay out patterns. Thank you for your help.
Oh wow you have some great layout ideas! I love the one with the added framed layer cake sqs.
Hi Julie – I just cut my 9 patch blocks this afternoon and ready to lay them out. I’m so excited as this update couldn’t have come at a better time 🙂
Cooper looks comfy laying there. Our cats do the same thing as soon as I lay blocks or a quilt top out on the floor to find an arrangement that I like.
Thanks for all the various lay out ideas!
Julie, the Quilt is looking good. The helper, not much of a helper, but enjoying the quilt in full, lucky him.
I am anxious to see the quilting options as my D9P is ready to quilt. I love the layout adding sashing on point!
I love it and your pup. Sweet pup. Pretty quilt.
We have been vacationing a lot and missed this SAL. I will be starting it today but will do it at a slow pace, vacations not over. Thank you
Hi Julie, I did as you said and put a few blocks together and low and behold, I loved it! I only got 15 blocks out of the packets, so I made three across and 5 down. I just bought my borders, and can’t wait to see my results. I love this block and intend to make others with it like the ones you just showed us. They went together so quickly too. My friend is having fun with it too. Thank you for this sew along
LOve all the layout ideas, but I think I’ll go with the original layout, in random order, although I haven’t played with them, yet. I still have six more blocks to construct for the lap size.