Disappearing 9-patch QAL, week 2
Week 2 of the Disappearing 9-patch QAL (quilt along) is here and full of helpful information. This is the one you don’t want to miss! You can find the Week 1 blog post here.

Now that you’ve rounded up all of your supplies, it’s time to get sewing! I’m going to walk you through the steps to make a disappearing 9-patch block and give you a few tips along the way. This might be a little bit lengthy, but I want to give you lots of options and tips.
Basic Instructions
- All seams are 1/4″ wide.
- Make sure your seam allowance is accurate. For more detailed information, check out my Perfect 1/4″ Seam Allowance blog post.
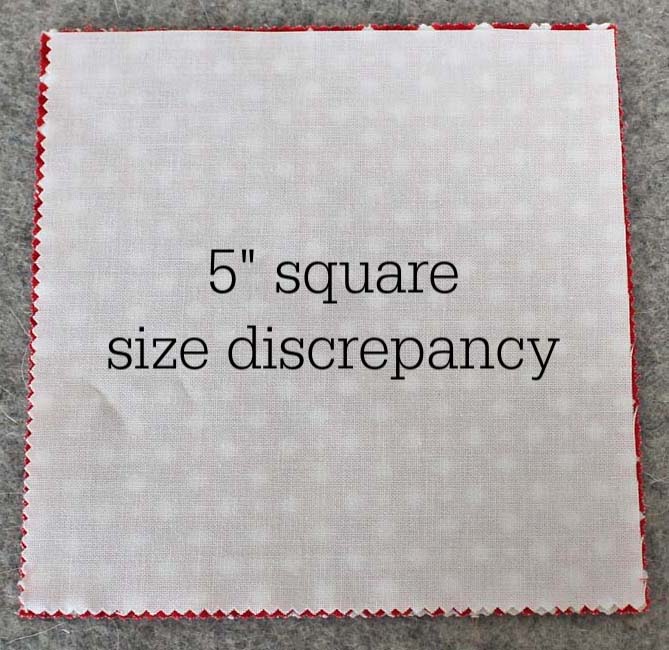
- Make sure all of your squares are the same size. I mention this because I had an issue with my squares. I used 5″ squares from two charm packs, 5″ squares that I cut from layer cakes and 5″ squares that I cut from yardage. They didn’t all measure up the same, so when I was sewing my squares together, I had to fudge a little. Which created more fudging in a different step. So, don’t do what I did (even though it all worked out).
- Read through all instructions before beginning. Seriously.
Disappearing 9-patch steps
It all starts with a basic nine-patch block. You should have decided on color placement by now. If not, you can visit this blog post for ideas. I’ve decided on white for my outer-side squares, color for my corner squares and teal blue for my center squares.
Arrange your squares for the nine patch next to your sewing machine. You can stack your squares for all of the 9-patch blocks so that you can chain piece the squares together. In the photo below, I will take the top-center, white square and flip it right sides together onto the top-left green square, stitch and continue with the rest of the squares underneath it.


Once you sew the two squares together, add the third square forming a row. Continue until you have all the rows sewn.
Press all seams. I like to press my seams to the side so that I have nested seams. I also pressed towards the darker squares. If you prefer to press your seams open, make sure to use a shorter stitch length such as 1.7 – 2.0.
Sew the rows together. Pin the seam intersections and at the beginning and end of the seam.


Press the row seams. You can press the seams to one side as shown in the photo above. You can also “swirl” the seam intersections as shown in the photo below. This creates a flatter seam intersection.

To swirl a seam, you start by pressing from the wrong side. The seams will all go in a clockwise or counter clockwise direction. To make that happen, half of the seam will be pressed up and the other half will be press down.
If you use a short stitch length to sew your seams, you may need to un-sew a few stitches to make the seam open up at the intersection. You’ll see a mini 4-patch at the seam intersection (on the wrong side).


Flip the block over and press from the right side. Make sure all of the seams are flat.

NOTE: Sometimes it’s not possible to swirl all of the seams if the first set of seams aren’t pressed in alternating directions. You can see in the photo below that it won’t be possible to swirl both sets of seams because of the direction of the original row seams. The seam allowance that connects to the two intersections needs to go down on the left and up on the right.

TIP: Now that your 9-patch is made, you should measure it and trim if necessary. The block should measure 14″ unfinished. Because of all the fudging I had to do, I needed to trim just about every block.

Next, we will cut the 9-patch into four sections. First, it’s necessary to measure the center square of your 9-patch. This will determine the cutting measurements for the next step. In a perfect world, the center square should measure 4 1/2″. If you get a “weird” number such as 4 3/8″ or 4 5/8″ then keep reading for a tip to deal with that.

Since mine measured 4 1/2″ square, I divided that in half which is 2 1/4″. That is the number I used to measure for my first cut. I measured 2 1/4″ from the long seam and cut the 9-patch down the center. This is the most accurate way to cut the 9-patch.

NOTE: You could also measure 7″ from the raw edge (assuming your block measures 14″) and cut the 9-patch in half, but I don’t think this will give you the best results.
Now cut the 9-patch in half the other way. Don’t move the fabric, move the ruler (or the cutting mat). Again measure from the long seam (perpendicular from the first), and cut.

You should now have four sections that measure 7″ square. Trim them if necessary so that they are all the same size.

TIP: If your center square measured 4 3/8″ or something not so easily divisible by 2, then you could center your 9-patch on a cutting mat so that the seams are placed equally between the lines and cut down the center.

Block options
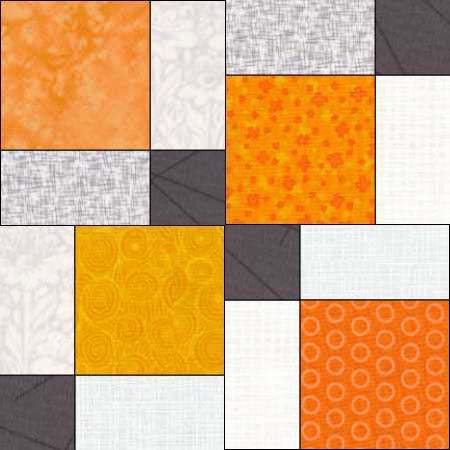
Now that you have four block quadrants, you get to play with the disappearing 9-patch arrangement. The traditional layout is to rotate two quadrants in opposite corners so that it looks like the one below.

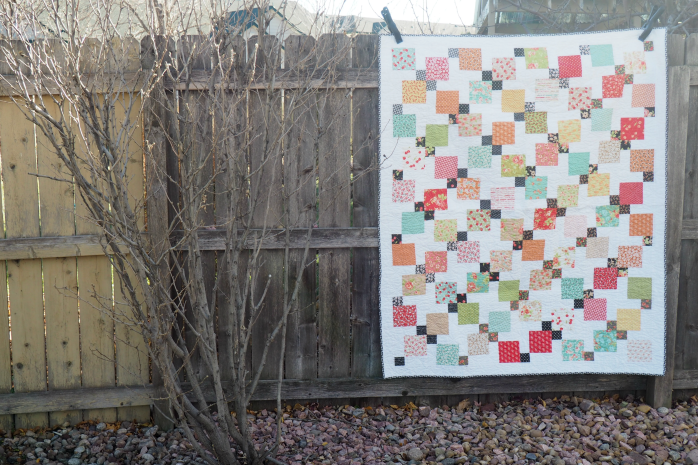
This will give you a quilt that looks similar to this:
However, you can rotate the blocks in many ways. Below are some other options that might be fun to play with.


Pretty cool, huh? When you place these blocks together, it totally changes the look of the quilt.
TIP: Some of these block layouts will have fewer (if any) seams to match. Something you might want to consider when choosing yours.
The disappearing 9-patch block should measure 13 1/2″ unfinished.
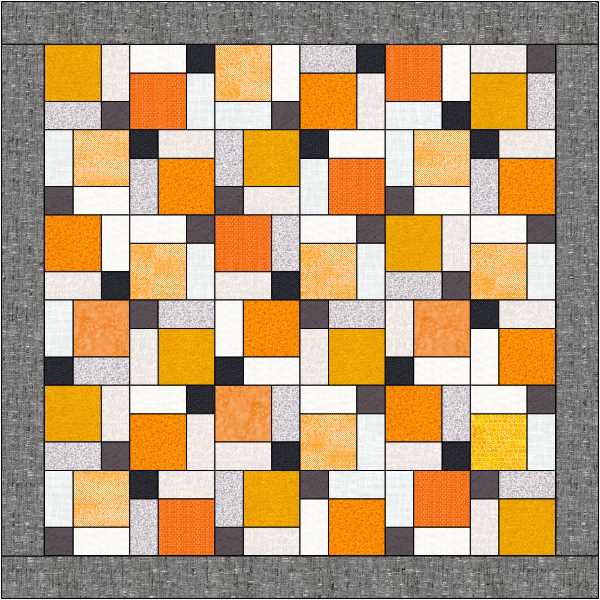
Of course, you can do a totally random grouping and make all of your blocks different. That’s kind of what I did with the random color placement version below.
For the rest of this quilt along, I will be working with the traditional layout. Please feel free to do your own thing and have fun!
More color ideas
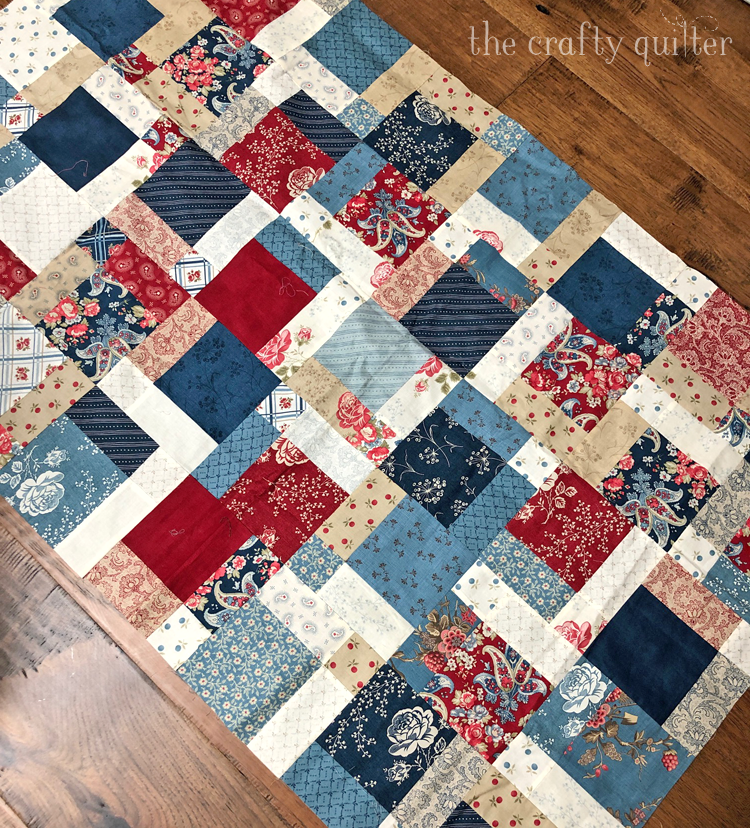
Even though I sewed my 9-patches together with various colors, I decided to play with the idea of working within color families. I stacked all of my quadrants into color groups. Then I laid them all out for the entire quilt into a flow of color from pink at the top corner to teal at the bottom. I loved this so much that I decided to keep it that way.


I don’t have a design wall, but I do have a design floor! I could have placed the colors in a more all-over, random way which was my original plan. It would probably look something like this one by Rebecca at Reba Leigh Handmade (who also uses this in her Learn to Quilt Series.)
Looking ahead… sew by rows or by blocks
The schedule for this week is to make all of the disappearing 9-patch blocks. I also want to give you options and guidelines for those that want to work ahead.
You can sew your quadrants together into blocks, or you can lay them all out and sew them into rows and then sew your rows together. Depending on your space limitations, one way might suit you better than the other. I’ll show you both ways.
To make blocks, lay the quadrants next to your sewing machine in whatever way you decide. Sew them into pairs; press the seams in opposite directions. Sew the pairs together, nesting the center seam. You can swirl the seams here as well (or press to one side).

Once your blocks are sewn together, then you can arrange them into the quilt however you choose. Sew the blocks into rows and then sew the rows together. If you swirled all of your seams, then you should have nesting seams throughout the quilt which is a huge bonus!
If you want to sew all of the quadrants separately into rows and then sew the rows together, it will be helpful to lay them all out first. There are a few ways to sew everything together, and I will cover that in more detail next week.

For now, just start making 9-patches and then cut those into fourths (quadrants). Then play with different options for the disappearing 9-patch block. If you want, sew them into blocks or keep them separate. It’s up to you.
@ The Crafty Quilter
Next week we will look at some other quilt layout ideas such as adding sashing strips and/or using a diagonal setting. Above all, don’t forget to have fun!

Discover more from The Crafty Quilter
Subscribe to get the latest posts sent to your email.

Hi Julie.
I needed a baby quilt and used your perfect instructions to make the smallest size you listed – only 9 blocks! Came out great and fast. Love it!
Kathrin
I did one proof of concept and loved it. So I did an additional 20 and have a very top made. Thank you for a wonderful challenge! I had my colors Kaskade from dark blue all the way to a very light color. Thanks for a great challenge.
I had the perfect fabric, so decided to sew along. Now that I’ve gotten started, I’m pretty excited!
Great instructions! I love the rainbow layout of the blocks you made.
Thank you for the clear instructions and pictures Julie!
I am making a 3 color baby quilt that I started yesterday. I have the 12, 9 patch blocks stitched together. I started with 4.5″ squares and they finished at 4″, so I am assuming I cut these block @ 2 inches in the center, correct?
This is my 1st time making the disappearing 9 patch pattern.
Thank you again,
Darlene
Julie, your instructions and pictures are excellent. Can’t wait to get started.
Thanks for such precise details to making this quilt. I can’t wait to start. I still have to purchase more as I am not satisfied with the layout. I guess it will all be ok once it goes together, I just can’t visualize it yet.
I just finished a disappearing 9 patch for my daughter. Her color choices were gray, black, teal and royal blue! I added white to brighten it up! Wish I could send you a picture. Thanks for your tips.
Have all my fabrics sorted and ready to sew!
UGH!! I forgot my blocks when back in Boston this week. May have to cut something up or just play catchup (it will be easy enough).
So fun! Thanks for the detailed tutorial, especially
on those swirling seams . Rock on…
Ooo! I love the rainbow traditional one! I’m ready to go with mine, Julie! Thanks!
-Jean
❤
iI’ve got all 30 nine-patch Blocks pieced, now to cut them up and piece the back together! Using black and white fabrics with jewel tone centers.
@susansquiltstudio