Ocean Waves sew along with Fat Quarter Shop
Hey everyone! Today I am joining Fat Quarter Shop, along with several other talented bloggers, for their Ocean Waves Sew Along. If this is your first time here, thanks for stopping by! I hope you enjoy your visit.

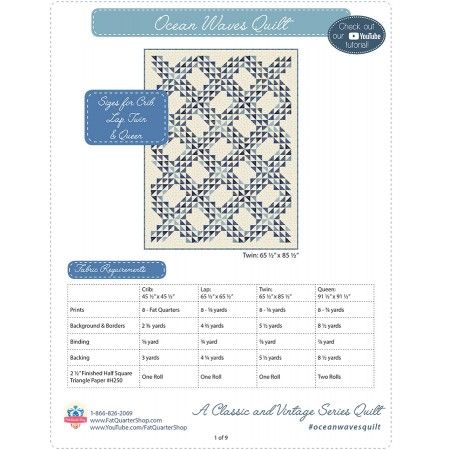
The Ocean Waves quilt block is part of the Fat Quarter Shop’s Classic & Vintage Series, where they take an old block (found in old catalogs and vintage quilts) and update it. The Ocean Waves block pattern is free as well as the video tutorial on Fat Quarter Shop’s blog, The Jolly Jabber. The full pattern with 4 quilt sizes is a paid pattern available here.
For my block, I used fabric from Desert Bloom and The Front Porch both by Sherri & Chelsi of A Quilting Life for Moda Fabrics. I think I should call my block “waves of grain” instead of Ocean Waves. I love this color combination, especially with the arrival of Fall!

This is such a fun block to make and super easy with the help of Triangles on a Roll. There are twelve half-square triangles in one Ocean Waves block. These are really quick to make with 2 1/2″ (finished) Half Square Triangle Paper by Triangles on a Roll. It’s very similar to foundation piecing and produces perfect HST’s every time.

Tips for making Ocean Waves block
I love to share tips with my fellow quilters. If you’ve never used Triangle Paper before, it’s fairly simple. Depending on the version you have, they’ll be divided into sections and you need to determine how many you’ll need for the project. For this block, I needed a total of 12 HST’s, so I cut a section that included six squares (each square makes 2). I cut my fabric 1/2″- 1″ bigger than that section of paper.
- Layer your fabric right sides together and place the Triangle Paper on top, centered. Pin it around the edges to keep it in place.
- TIP: Set your stitch length to 1.5 – 1.8. This will help perforate the paper and make it easier to remove.
- Stitch exactly on the dashed lines in one continuous line (if possible).
- Cut apart on the SOLID lines and tear the paper away.

- Press the HST’s open or to the side. I pressed mine toward the darker fabric.
- Snip off the little “bunny ears” or tips. You should have a perfectly sized HST.

TIP: For this block, there are lots of diagonal seams that need to line up. I love using a “setting pin” to make those seams meet perfectly. You can read more about setting pins in my Pinwheel Star Block Tutorial or check out my 8 Tips to Create a Perfect Quilt Block.


I made one Ocean Waves quilt block (so far), and I love how it looks. This one measures 10 1/2″ unfinished.

It’s a beautiful block all by itself, but when you put a bunch together it turns into a spectacular quilt. If you want to find out more about the Ocean Waves Sew Along, check out Fat Quarter Shop’s blog, The Jolly Jabber. They’ll have links to the other participating bloggers, the video tutorial and much more.

If you use social media, check out the hashtags #oceanwavesquilt #fqsquiltalong and #fatquartershop to see what everyone else is doing.
Happy quilting!

i never used the triangle paper and have considered buying. What size do you recommend? What size is the most versatile? For this project did you purchase 2 1/2 in paper. I get confused on the sizes…. thanks.
I have used the Triangles on a Roll and liked the ease of sewing. Tearing off the papers was relaxing in the evenings while “watching” TV. I have never made the Ocean Waves quilt, but definitely look forward to one of these days. I’ll follow and see how everyone does.
Love the pattern and the name you chose!
Can’t wait to see more
Amazing; simple half-square triangles put together in a way that creates a very sophisticated pattern! And it looks easy too.
Love your fabric choices, Julie! 🙂
Very pretty love the fabrics you used.