Christmas Once a Month – Handmade Gift Tags & More
It’s the September edition of Christmas Once a Month and today I’ll be sharing some wonderful ideas to make your own gift tags and a gift card holder. If you want to read more about Christmas Once a Month, you can start here.
 Every year I tell myself that I’m going to make my gift wrapping special by adding just a little touch of something handmade. And every year I’m frantically trying to wrap everything in time and you’re lucky if it has a bow!
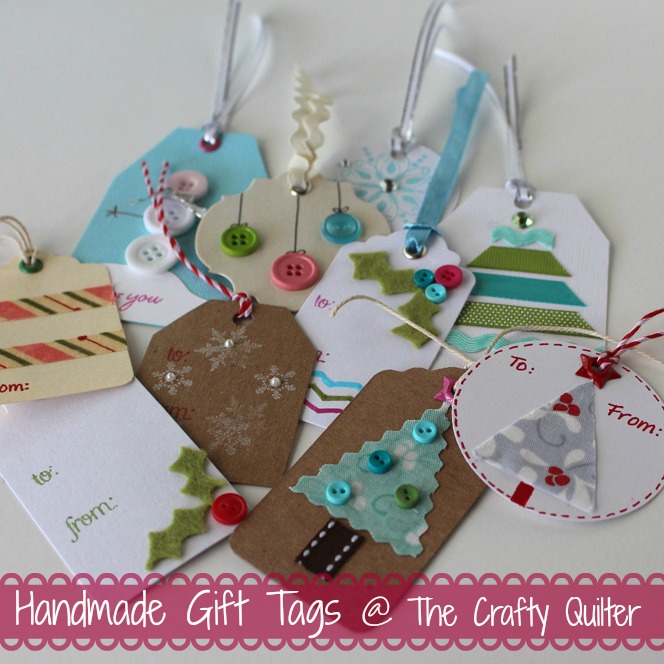
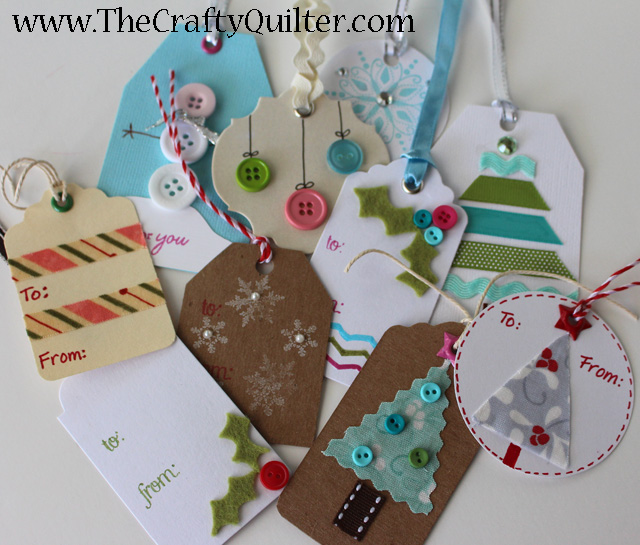
These little gift tags are a beautiful addition to any present and they are so easy to make! This is a perfect month to get started on making your own.

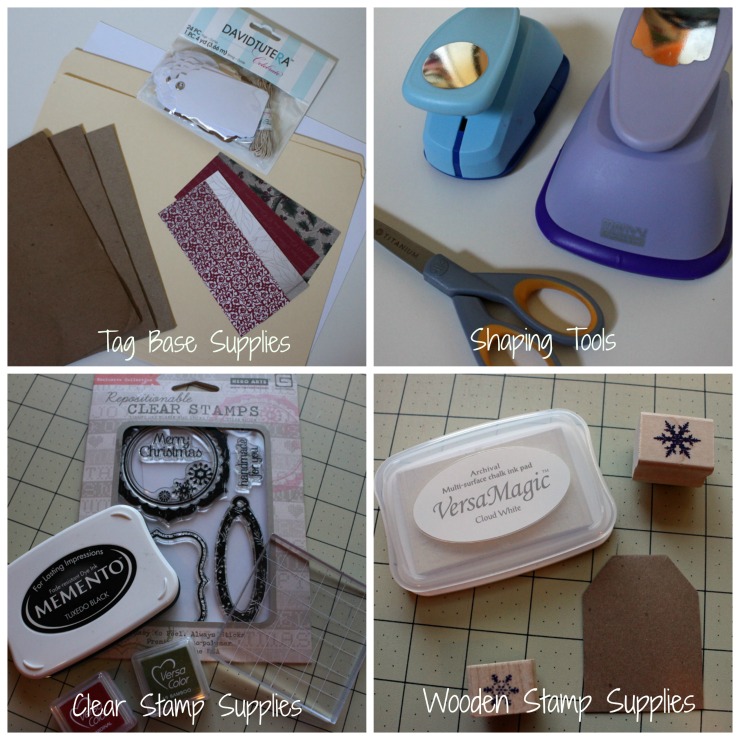
Basic Supplies:
- For the base of the gift tags you will need some heavy weight paper such as card stock, a file folder or lightweight cardboard. You can also purchase pre-cut tags.
- Scissors or craft punches to make the shapes for your tags
- Clear or wooden stamps and ink pads
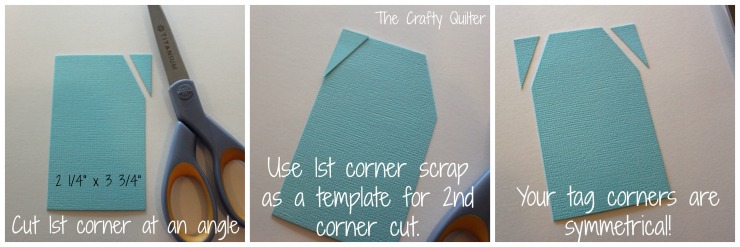
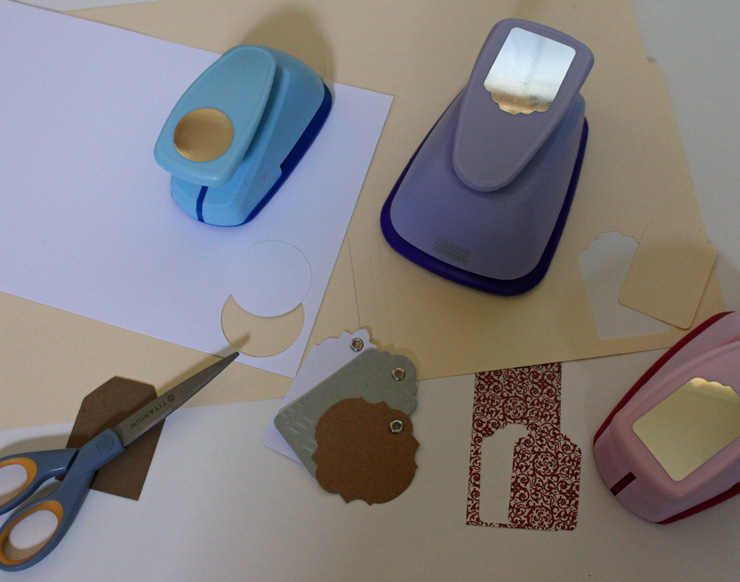
 You will need to cut out some tag shapes either with scissors or craft punches. Many of my gift tags were made from a basic rectangle shape that I added some corners to. The size I used was 2 1/4″ x 3 3/4″. I cut one corner first and then used that cut off piece as a guide to cut the other corner.
 I also have two different sized label punches and a circle punch comes in hand too!
 Now you can add some embellishments. I’ll start with stamping and then we’ll move on to some items from my sewing box.
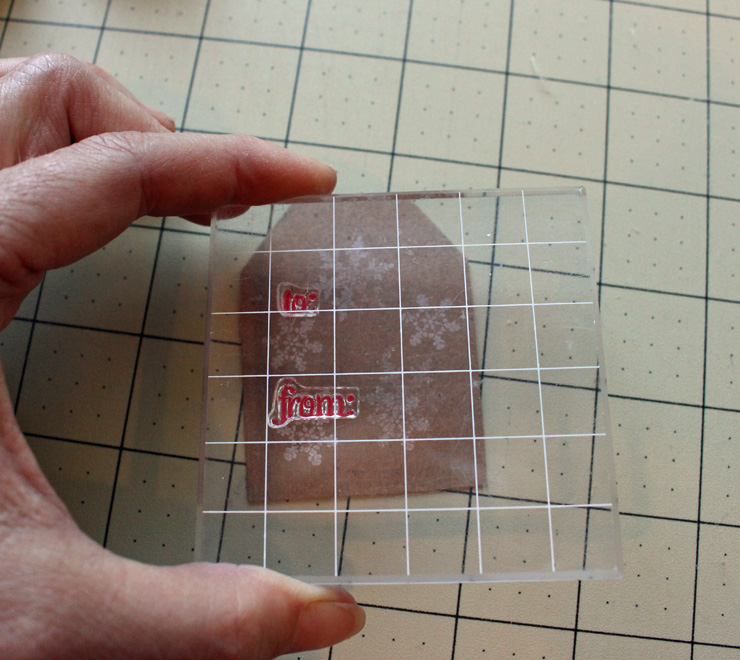
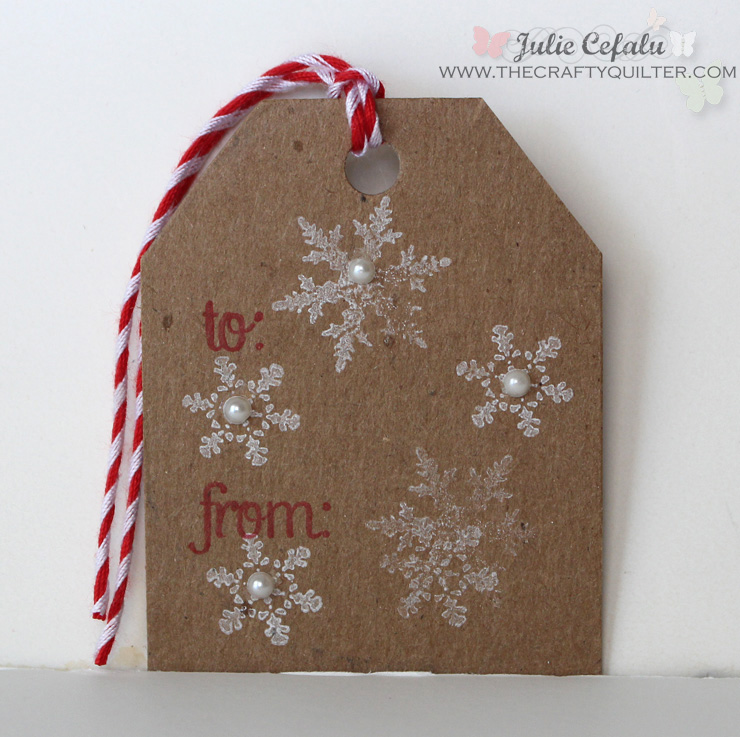
If you’re new to paper crafting, you’ll find the variety and types of stamps astonishing. Wooden stamps are common, but the clear stamps are becoming my favorite. They take up less space, they are easy to clean and you can see exactly where to position them. First, you need an acrylic block to adhere the clear stamp to. It sticks on very easily and it comes off just as easy. In the example below, I’m using “To” and “From” stamps. Then you add ink by tapping them on an ink pad.
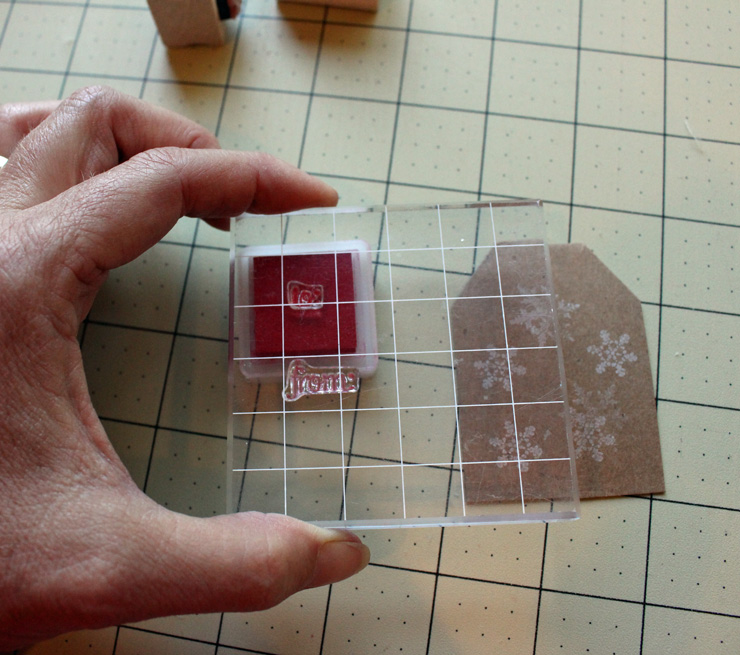 Position them where you want and stamp it down!
 I love how easy this is. You can clean your stamps with water or with baby wipes.
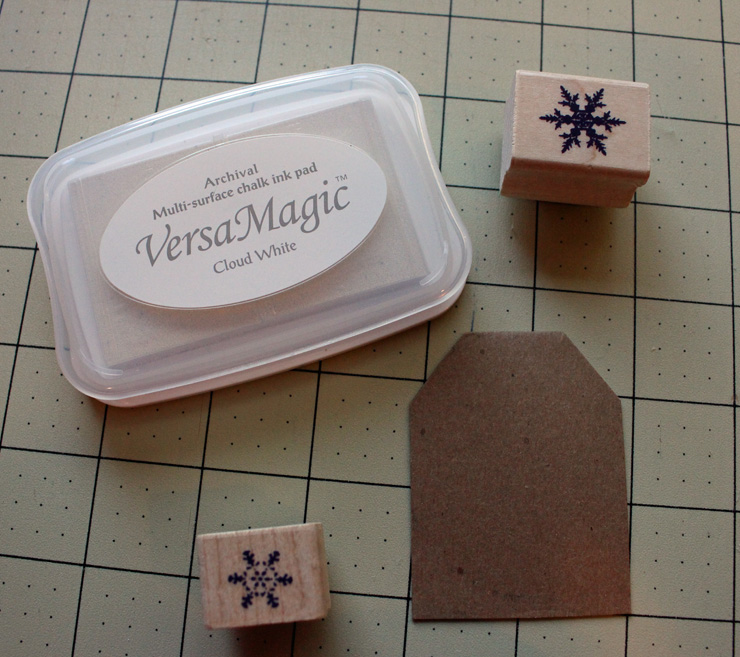
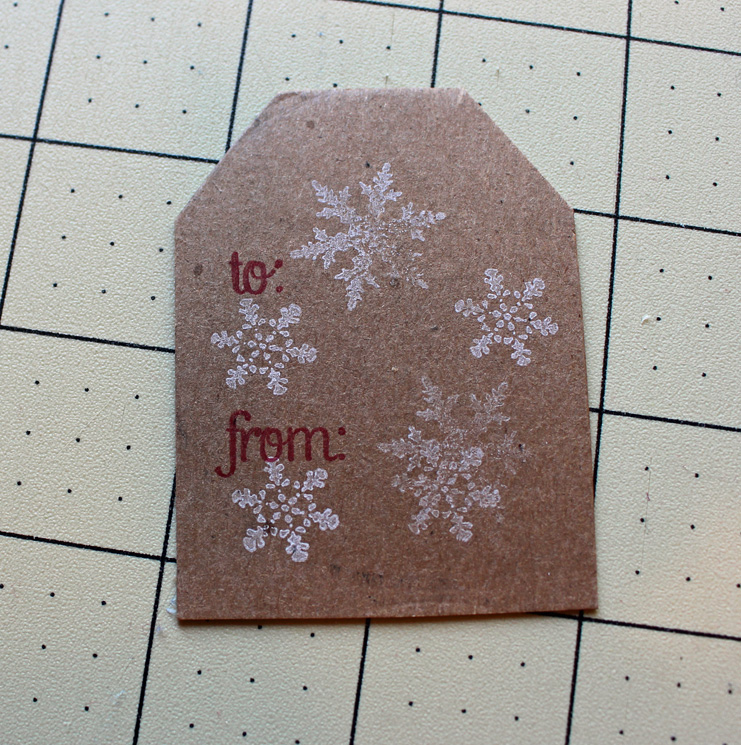 I used wooden stamps to make the snowflakes (first) and a white ink pad.
 Then I decided it needed something more, and I added little pearls (you can find them at the craft store). Use a hole punch to make a hole for the ribbon and you’re done!
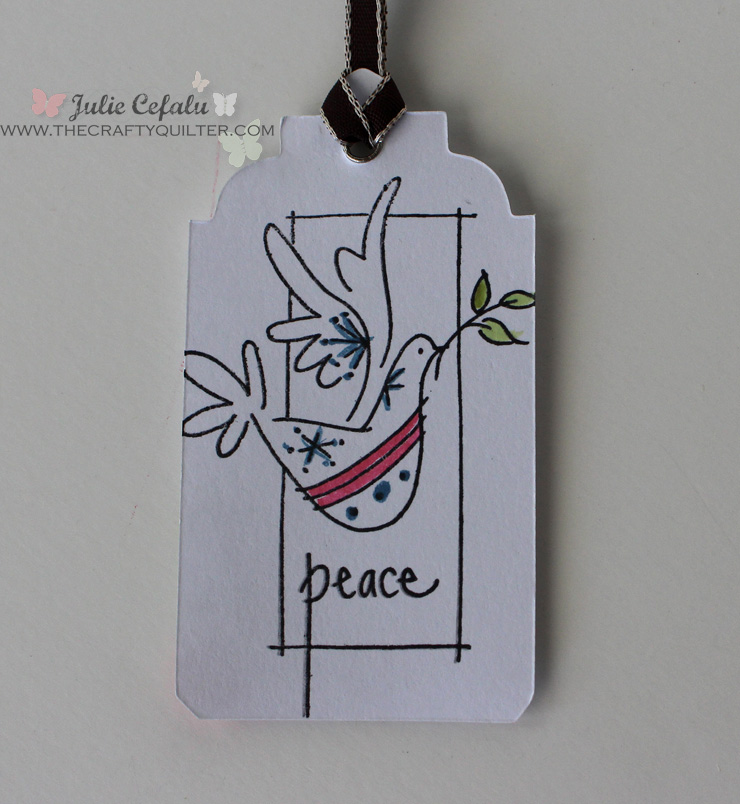
 Here is another one that I stamped and I used markers to color in the image:
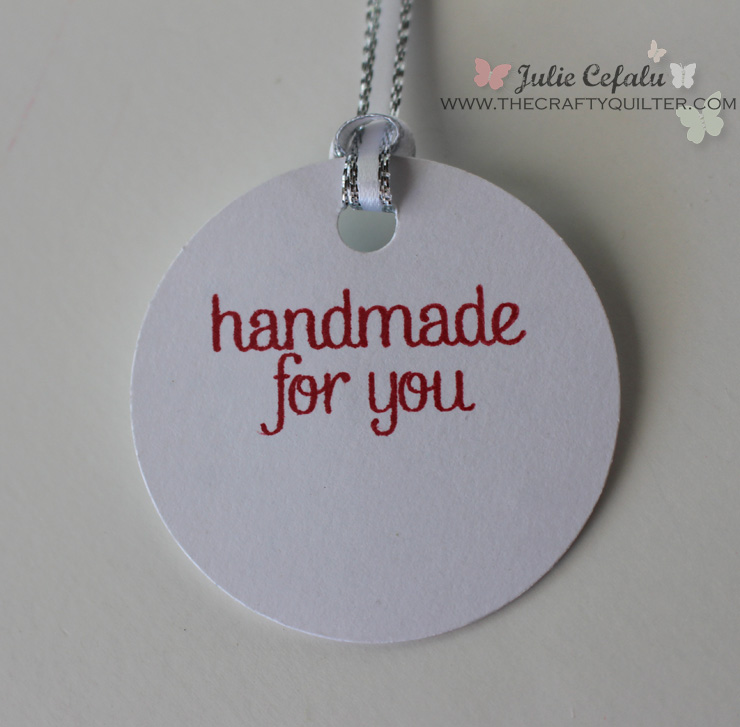
This next one has a snowflake on one side,
 with a sentiment on the other side:
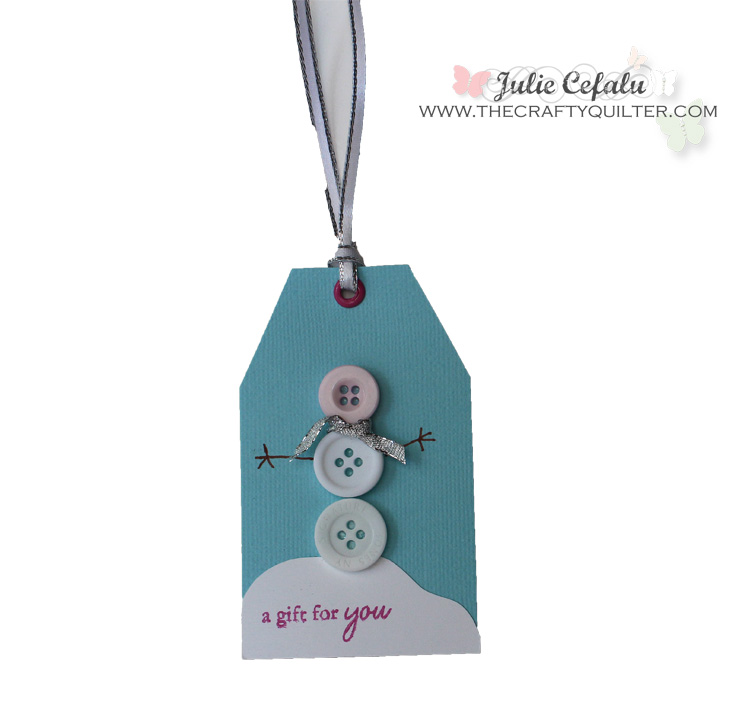
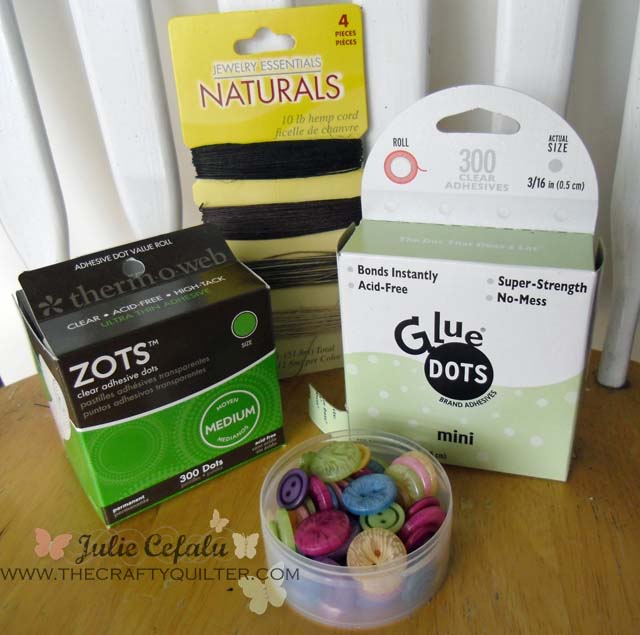
But you don’t need stamps to make most of these gift tags. Look in your sewing kit! Most of these are self-explanatory. If you have buttons, you can make a snowman:
 Or draw some strings and just add the ornaments:
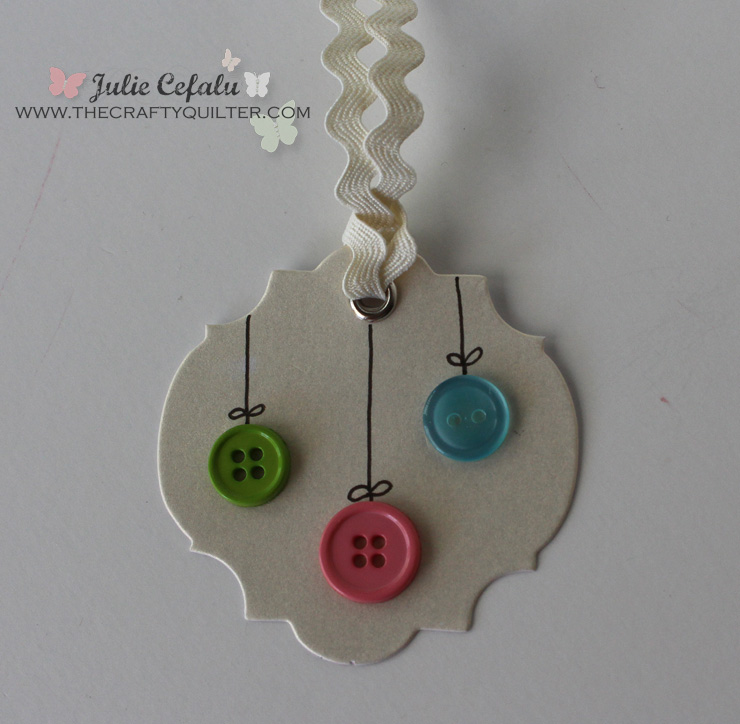 I used glue dots to adhere the buttons. It’s a really strong adhesive and the perfect size!
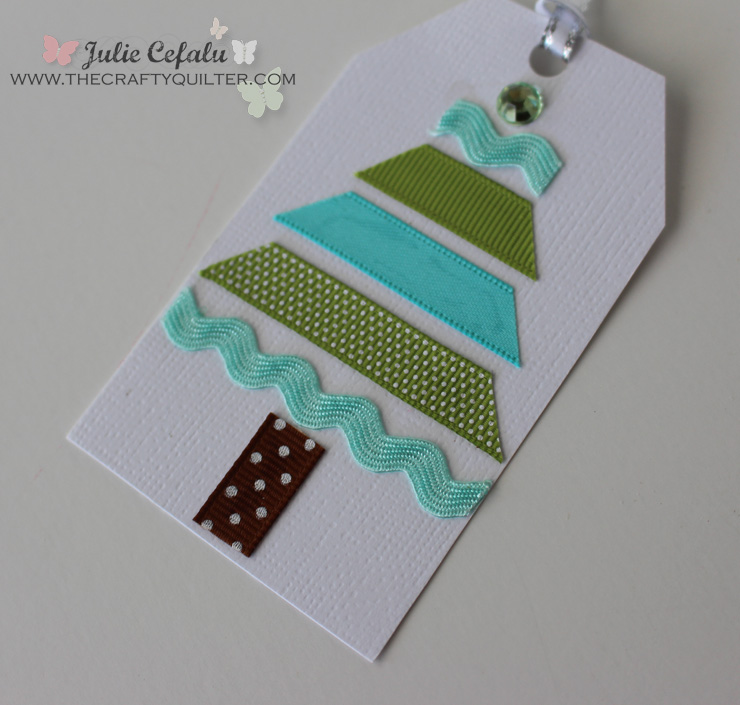
And I love ribbon and ric rak; it’s perfect for making Christmas trees!
 Did someone say fabric? Yes, of course! Let’s make one with fabric (and pinking shears), a few buttons and a ribbon trunk:
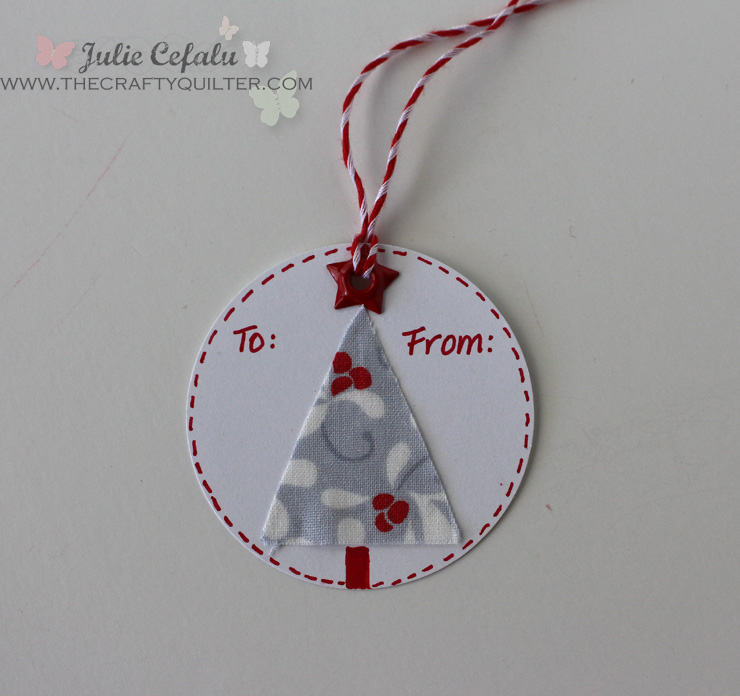
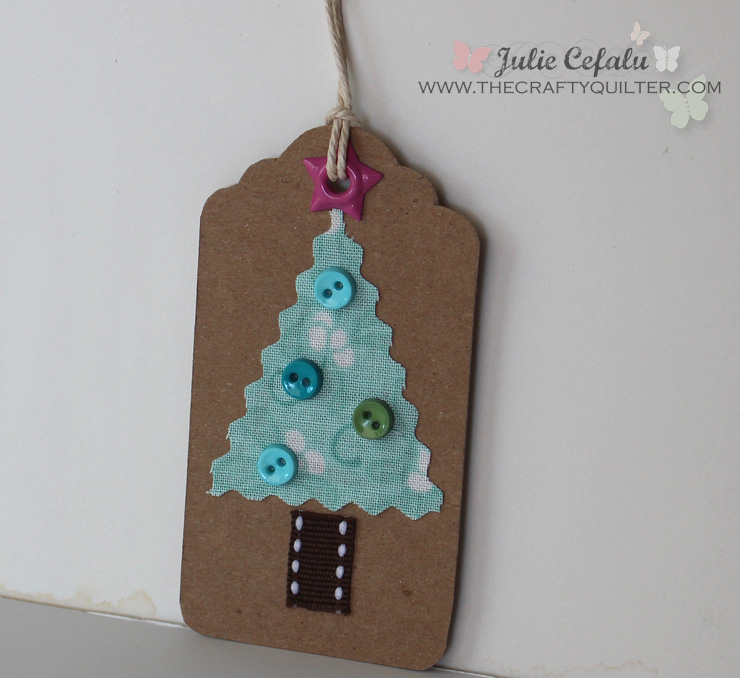 This next one is just a triangle of fabric and I used a marker to color in the trunk and I added faux stitching lines to outline the circle. The star on top is made from an eyelet and it also doubles as the hole for tying.
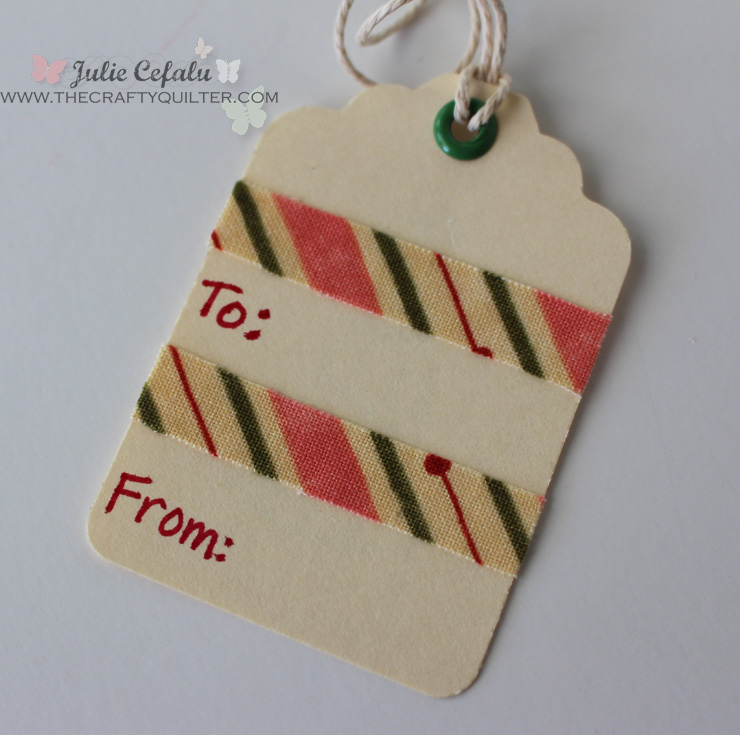
 And here’s another simple one with strips of stripes (say that 3 times)!
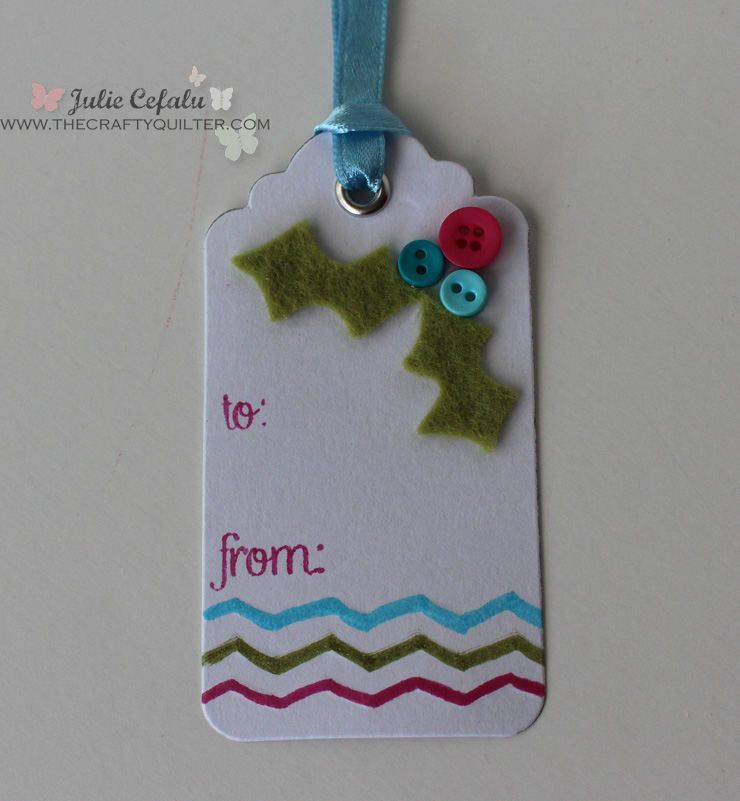
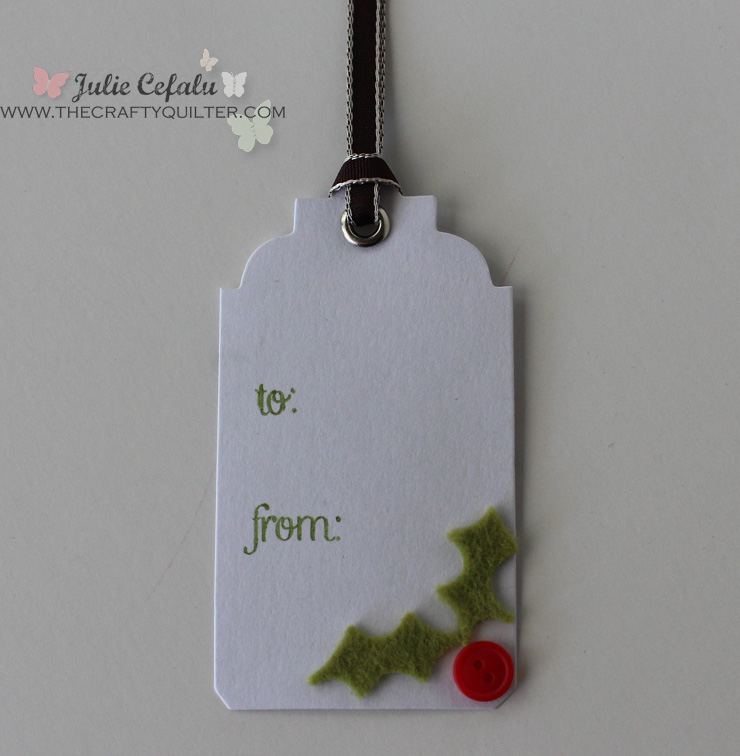
 If you have wool or felt, it’s easy to make holly and add a few buttons for berries:
 A package tied up with a handmade gift tag is a very special gift indeed!
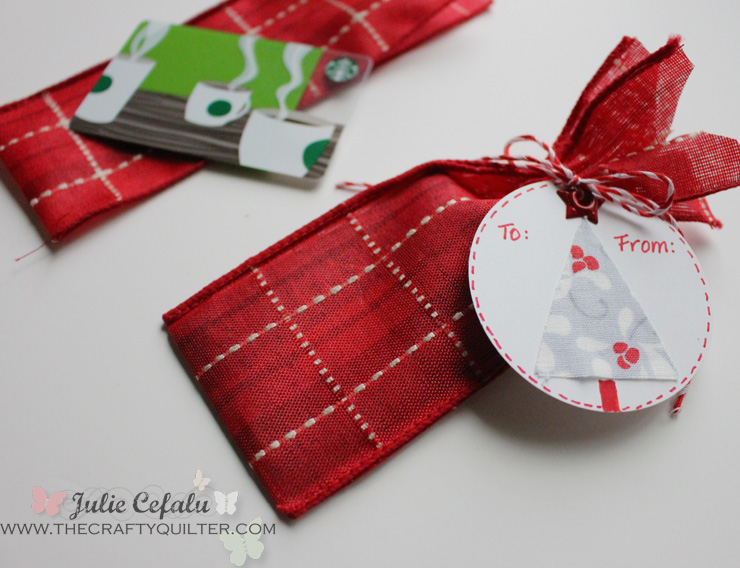
 If you like to give gift cards, I have a really cute and easy way to package them. You’ll need extra wide ribbon from the craft store. Cut a length of about 12 inches. Fold it in half and stitch along both sides starting at the bottom and continue up for about 4″.
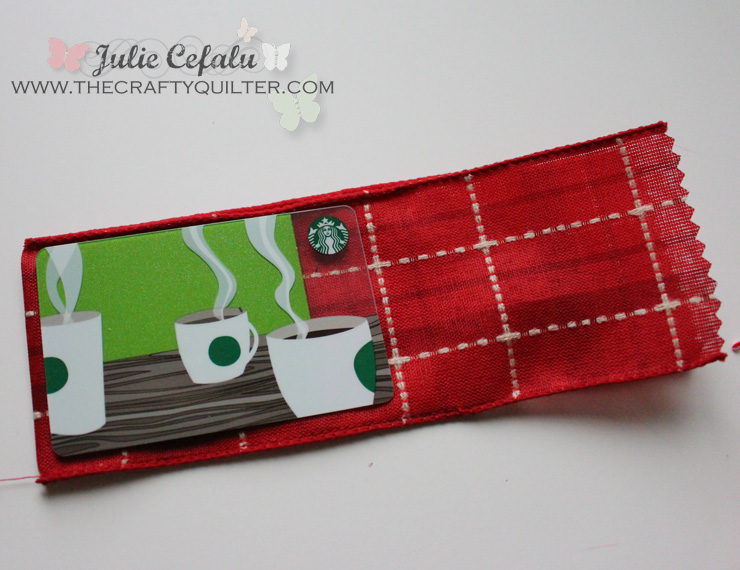 Insert the gift card and tie it off with a tag:
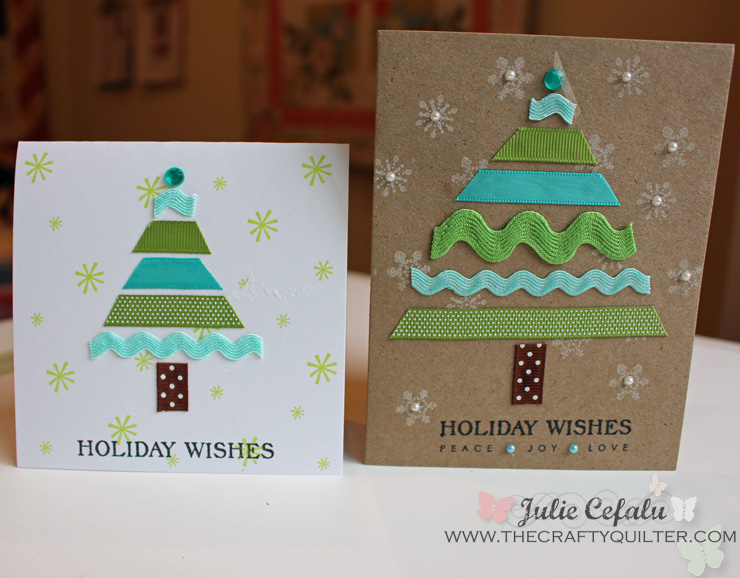
 And if you’re feeling really ambitious, I think some of these ideas would translate well into cute holiday cards. I tried out the ribbon Christmas tree and I made two sweet cards:
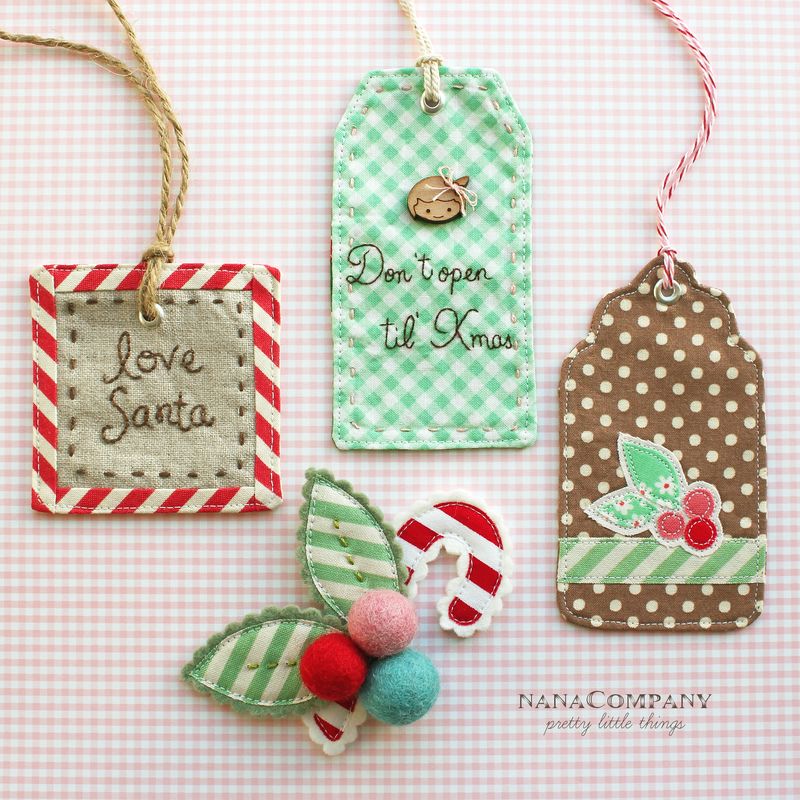
It’s so fun to play and create beautiful things with a practical purpose! If you want more gift tag inspiration, check out these ideas I found from previous years:
![Red-and-Green-Ornaments2_thumb[9]](http://thecraftyquilter.com/wp-content/uploads/2013/09/Red-and-Green-Ornaments2_thumb9.jpg)
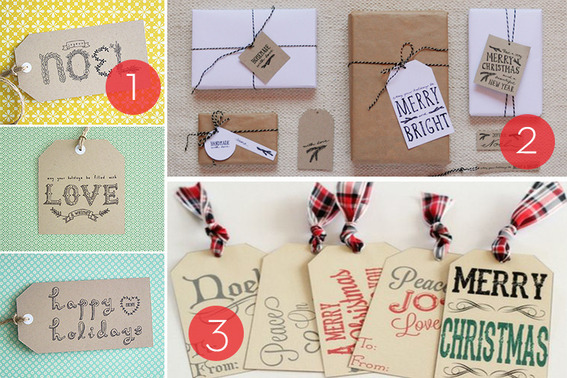
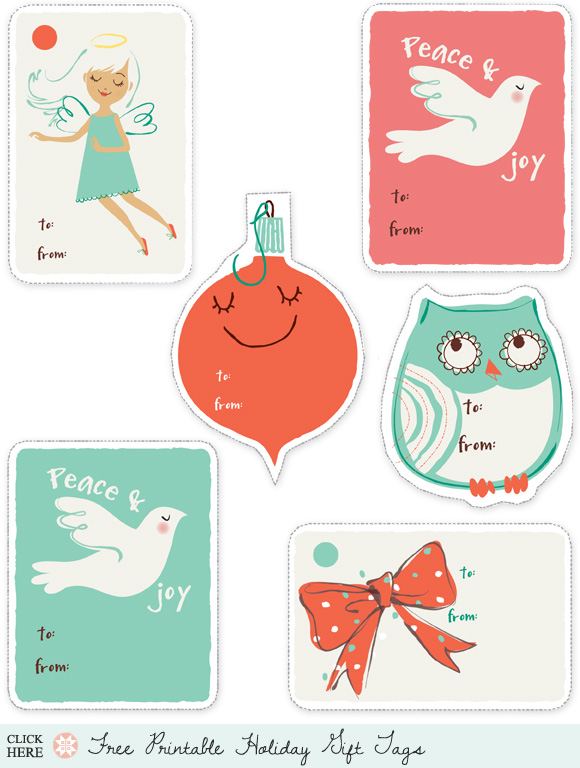
Maybe you just want to print out your own and be done? Here’s a few links for the quick and easy route:

Don’t procrastinate! Make a crafty date with a few friends or your kids and make some gift tags! It’s one more thing to cross off your list, and I know you’ll have a good time!


Discover more from The Crafty Quilter
Subscribe to get the latest posts sent to your email.

I love your posts and really love your free tutorials and patterns.
I really get inspired when I see all the ideas you post. Thanks so much for sharing. Lucy
Thankyou for the patterns I have printed and all your great ideas .
These are so cute. I’m going to get these going before next Christmas. I always wait until the last minute! I wish their were all occasion ones as well. Your ideas are amazing. I’m 70 and not that creative anymore. To many senior moments these days lol.
Julie, your tags are so pretty, crafty and creative I can’ decide which I like best?! Great job! Also great for scrap paper and ribbons. Love them!
What absolutely gorgeous tags and I love the tree cards. They are so pretty. Beautiful work!
KC
Some lovely ideas for Christmas. Now it’s suddenly autumn, Christmas isn’t that far away now. Thanks for sharing
Love your gift tags! Thanks for the tutorial!
OH, I can’t stand how gorgeous this entire post is! I was formulating my comment right from the start, to tell you that the snowflake stamped one is my favorite. I guess it is, but by the end of the post, I had replaced my current favorite every time I saw the next one. So much to love…and then you topped it all off with the ribbon gift card holder. Stop, please…I’m having heart palpitations over here! :0)
These tags are great. So many good ideas! Thanks for the inspiration.
These are too cute for words! Thank you for inspiring me
They are so pretty! Good to get these made early !
So many great ideas! You’ve inspired me. Thanks for sharing.