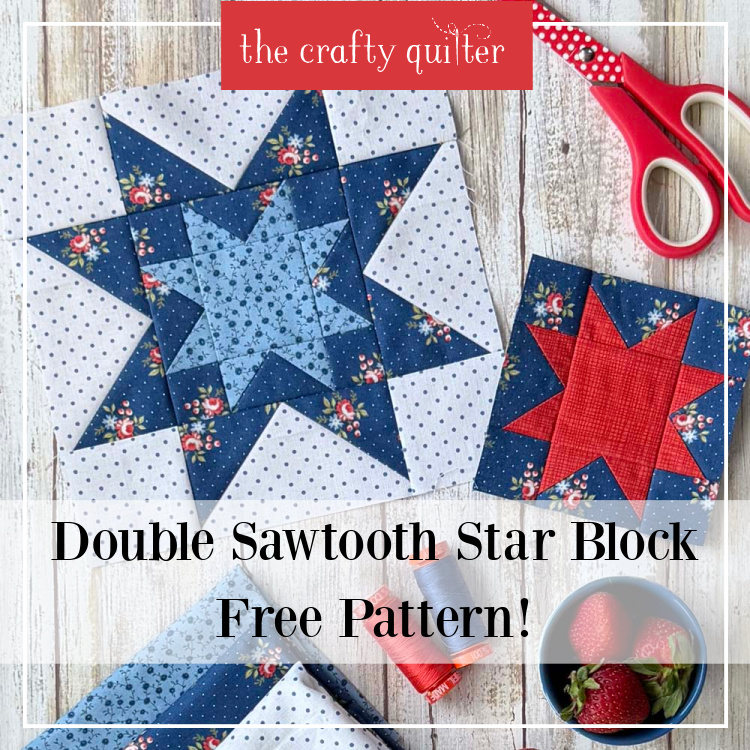
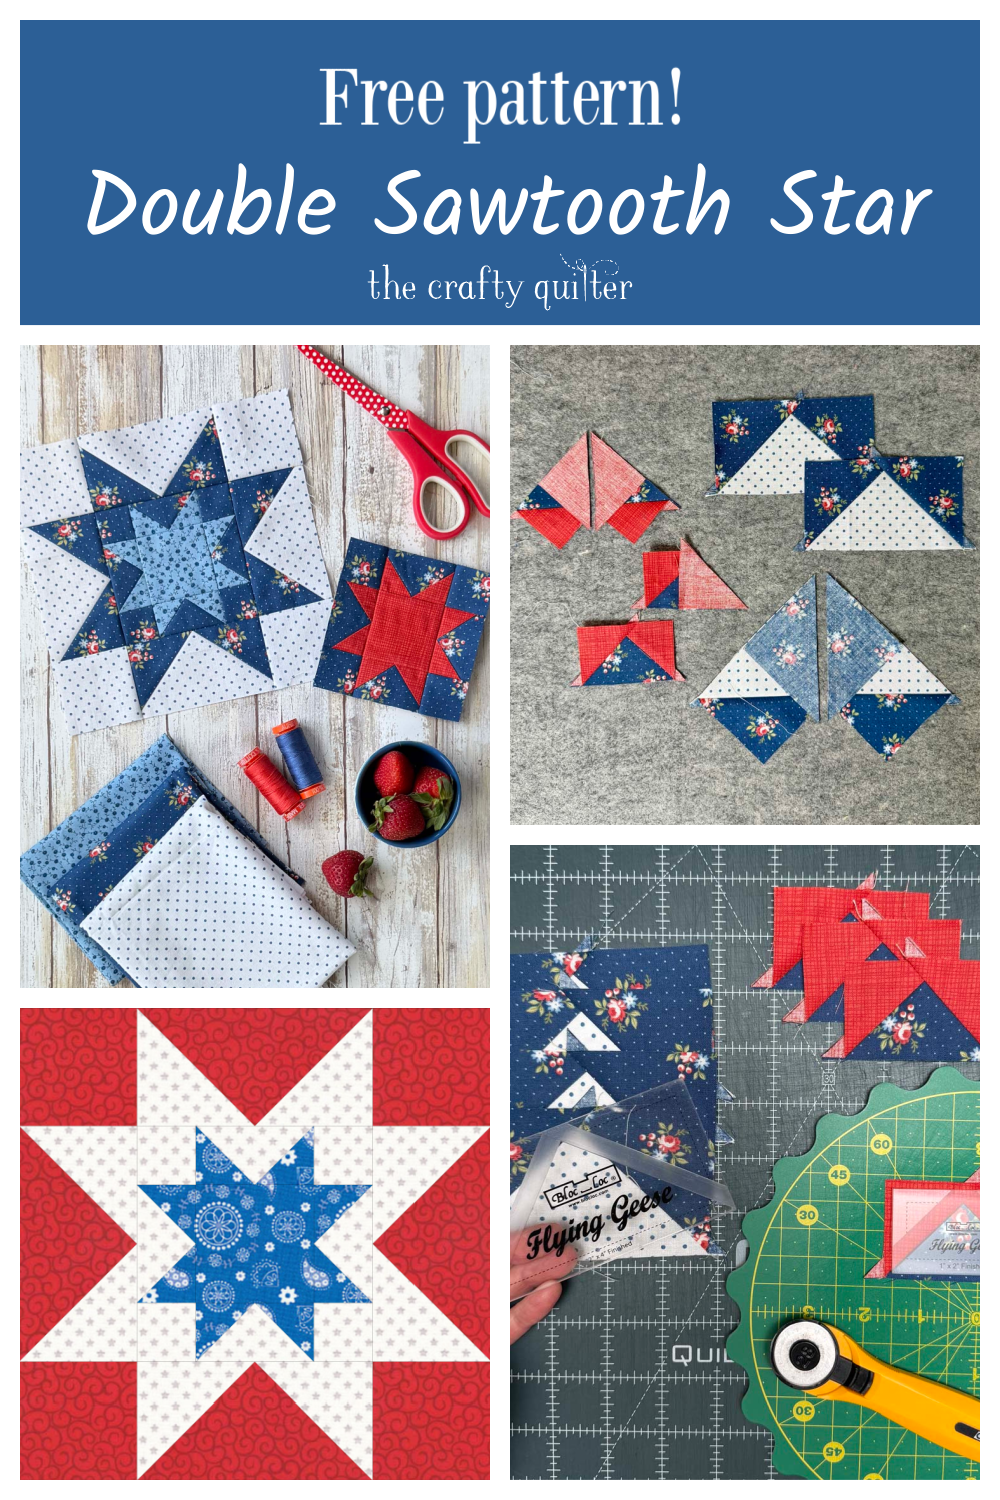
Double Sawtooth Star Quilt Block Tips + Free Pattern
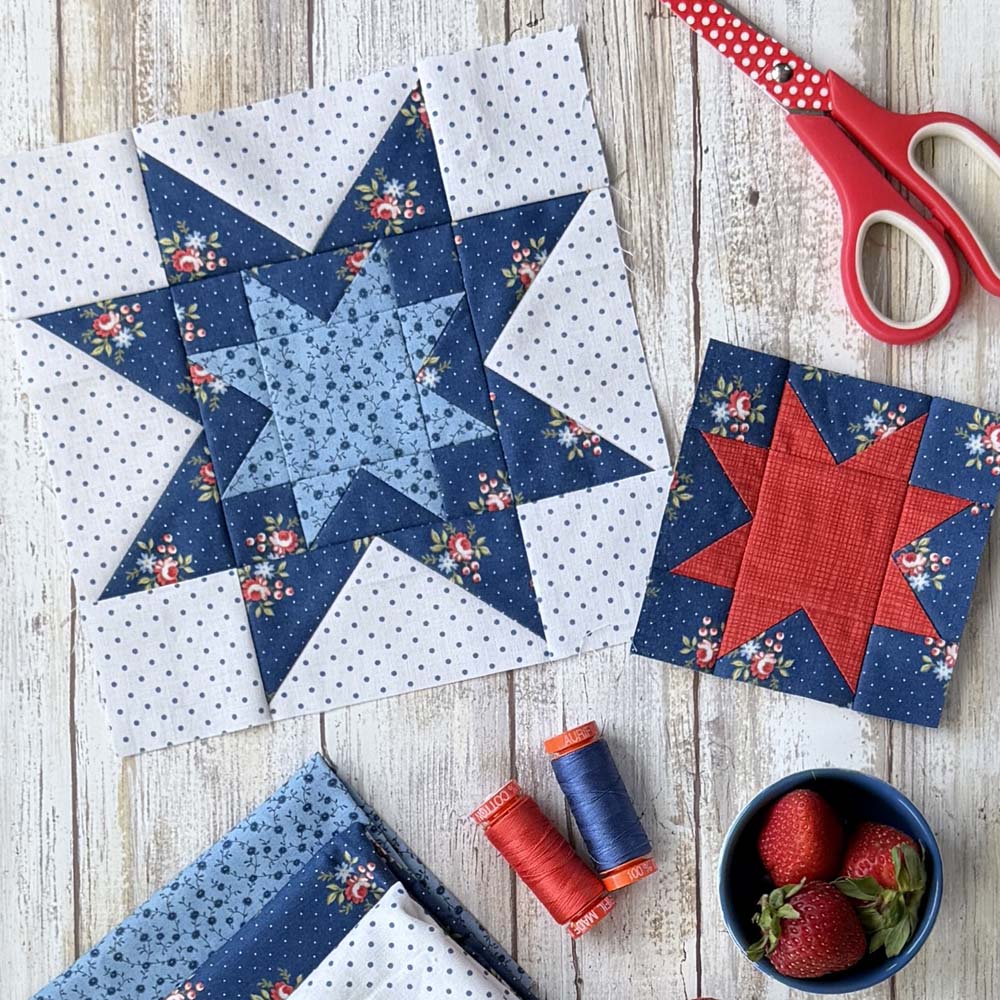
If there’s one thing quilters can agree on, it’s that star quilt blocks never go out of style! With so many beautiful variations to choose from, there’s always another star to add to your quilting bucket list. Today, I’m sharing one of my favorites, the Double Sawtooth Star quilt block. It can be made with either flying geese units or half-square triangles, but I’ve recently been making them with flying geese because it means fewer seams and a quicker finish. I’ve even created a free PDF pattern that you can download so you can try it for yourself!
What is a Double Sawtooth Star Quilt Block?
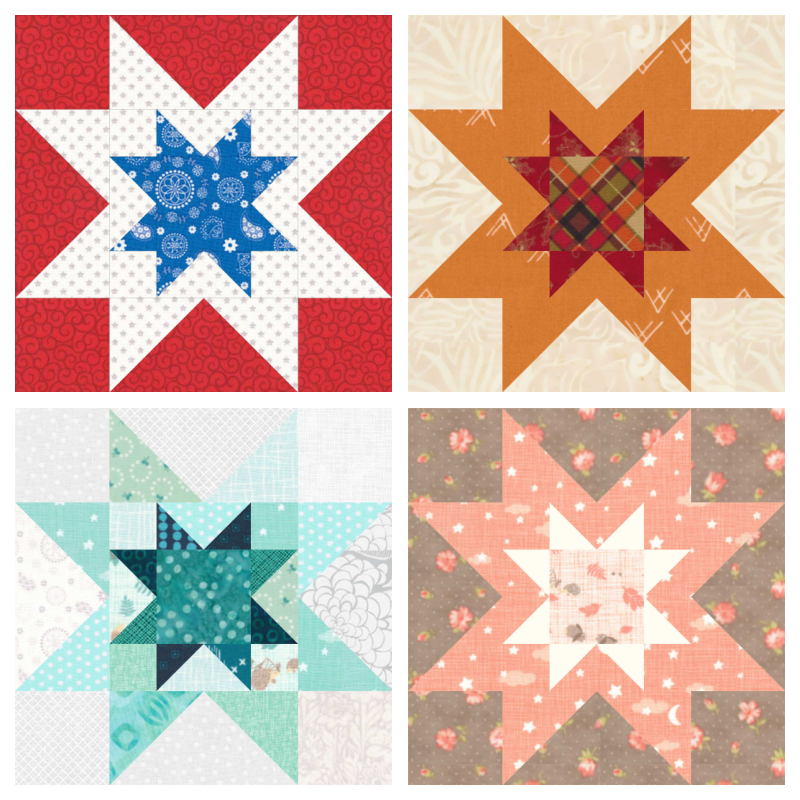
The Double Sawtooth Star is a striking variation of the traditional Sawtooth Star block. Instead of a single star surrounded by flying geese units, this version features a second, larger sawtooth star that frames the first. The result is a layered star-within-a-star design that creates extra movement and gives the block a more intricate appearance.
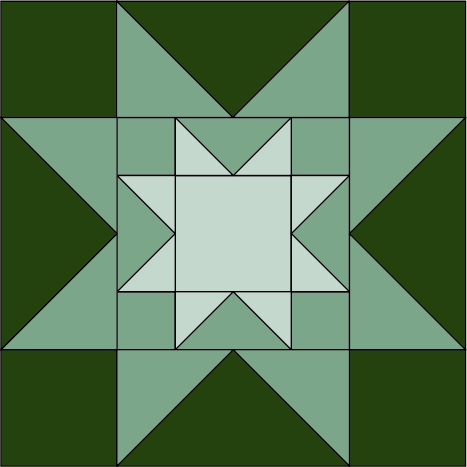
Although it looks complicated, the Double Sawtooth Star is simply made by combining basic patchwork units. It’s a versatile block that looks beautiful in patriotic, holiday, modern, or scrappy fabric collections, depending on the colors you choose.
Why You’ll Love This Block
- It looks impressive but it’s made from familiar units.
- Great skill-building project.
- Works well as a single block or pillow, as well as a wall hanging or quilt.
- It lends itself to holiday or special occasion projects.
- Easy to showcase favorite fabrics.
Anatomy of the Block
The Double Sawtooth Star is one of the oldest quilt blocks and it has definitely stood the test of time. It’s made from a Sawtooth Star inside of another Sawtooth Star, thus the name.
This block typically contains flying geese, but half square triangles can also be used. You can see in the image comparison below, how it can be broken up into the smaller components of HST’s.
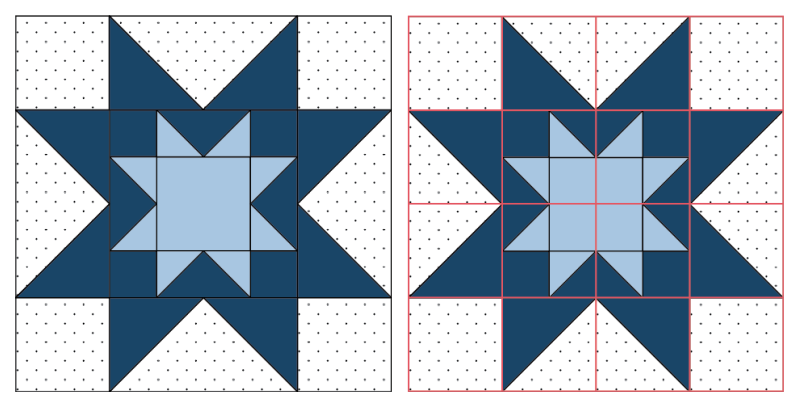
You can even combine flying geese and HST’s when making a Double Sawtooth Star – giving you more design possibilities. I’ve done this with my latest pattern Star Spangled Heart. In order to make the stripes run through the star and to create the upper heart shape, HST’s were required.

Tips for Success
Even though this quilt block is made up of basic units, there are a few tips that will make it come together easily.
- Use an accurate ¼” seam allowance.
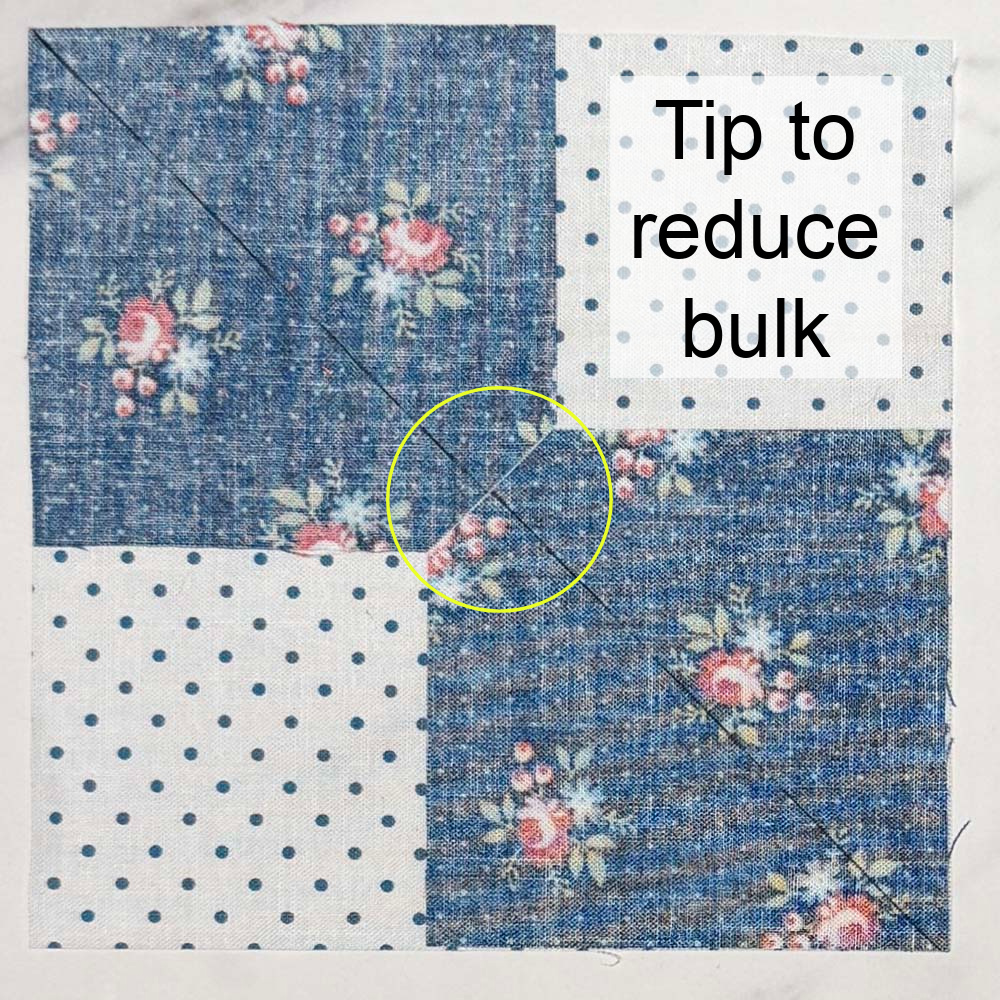
- Press carefully to reduce bulk.
- Trim flying geese and HSTs to the correct size before assembly.
- Lay out all the units before sewing rows together.
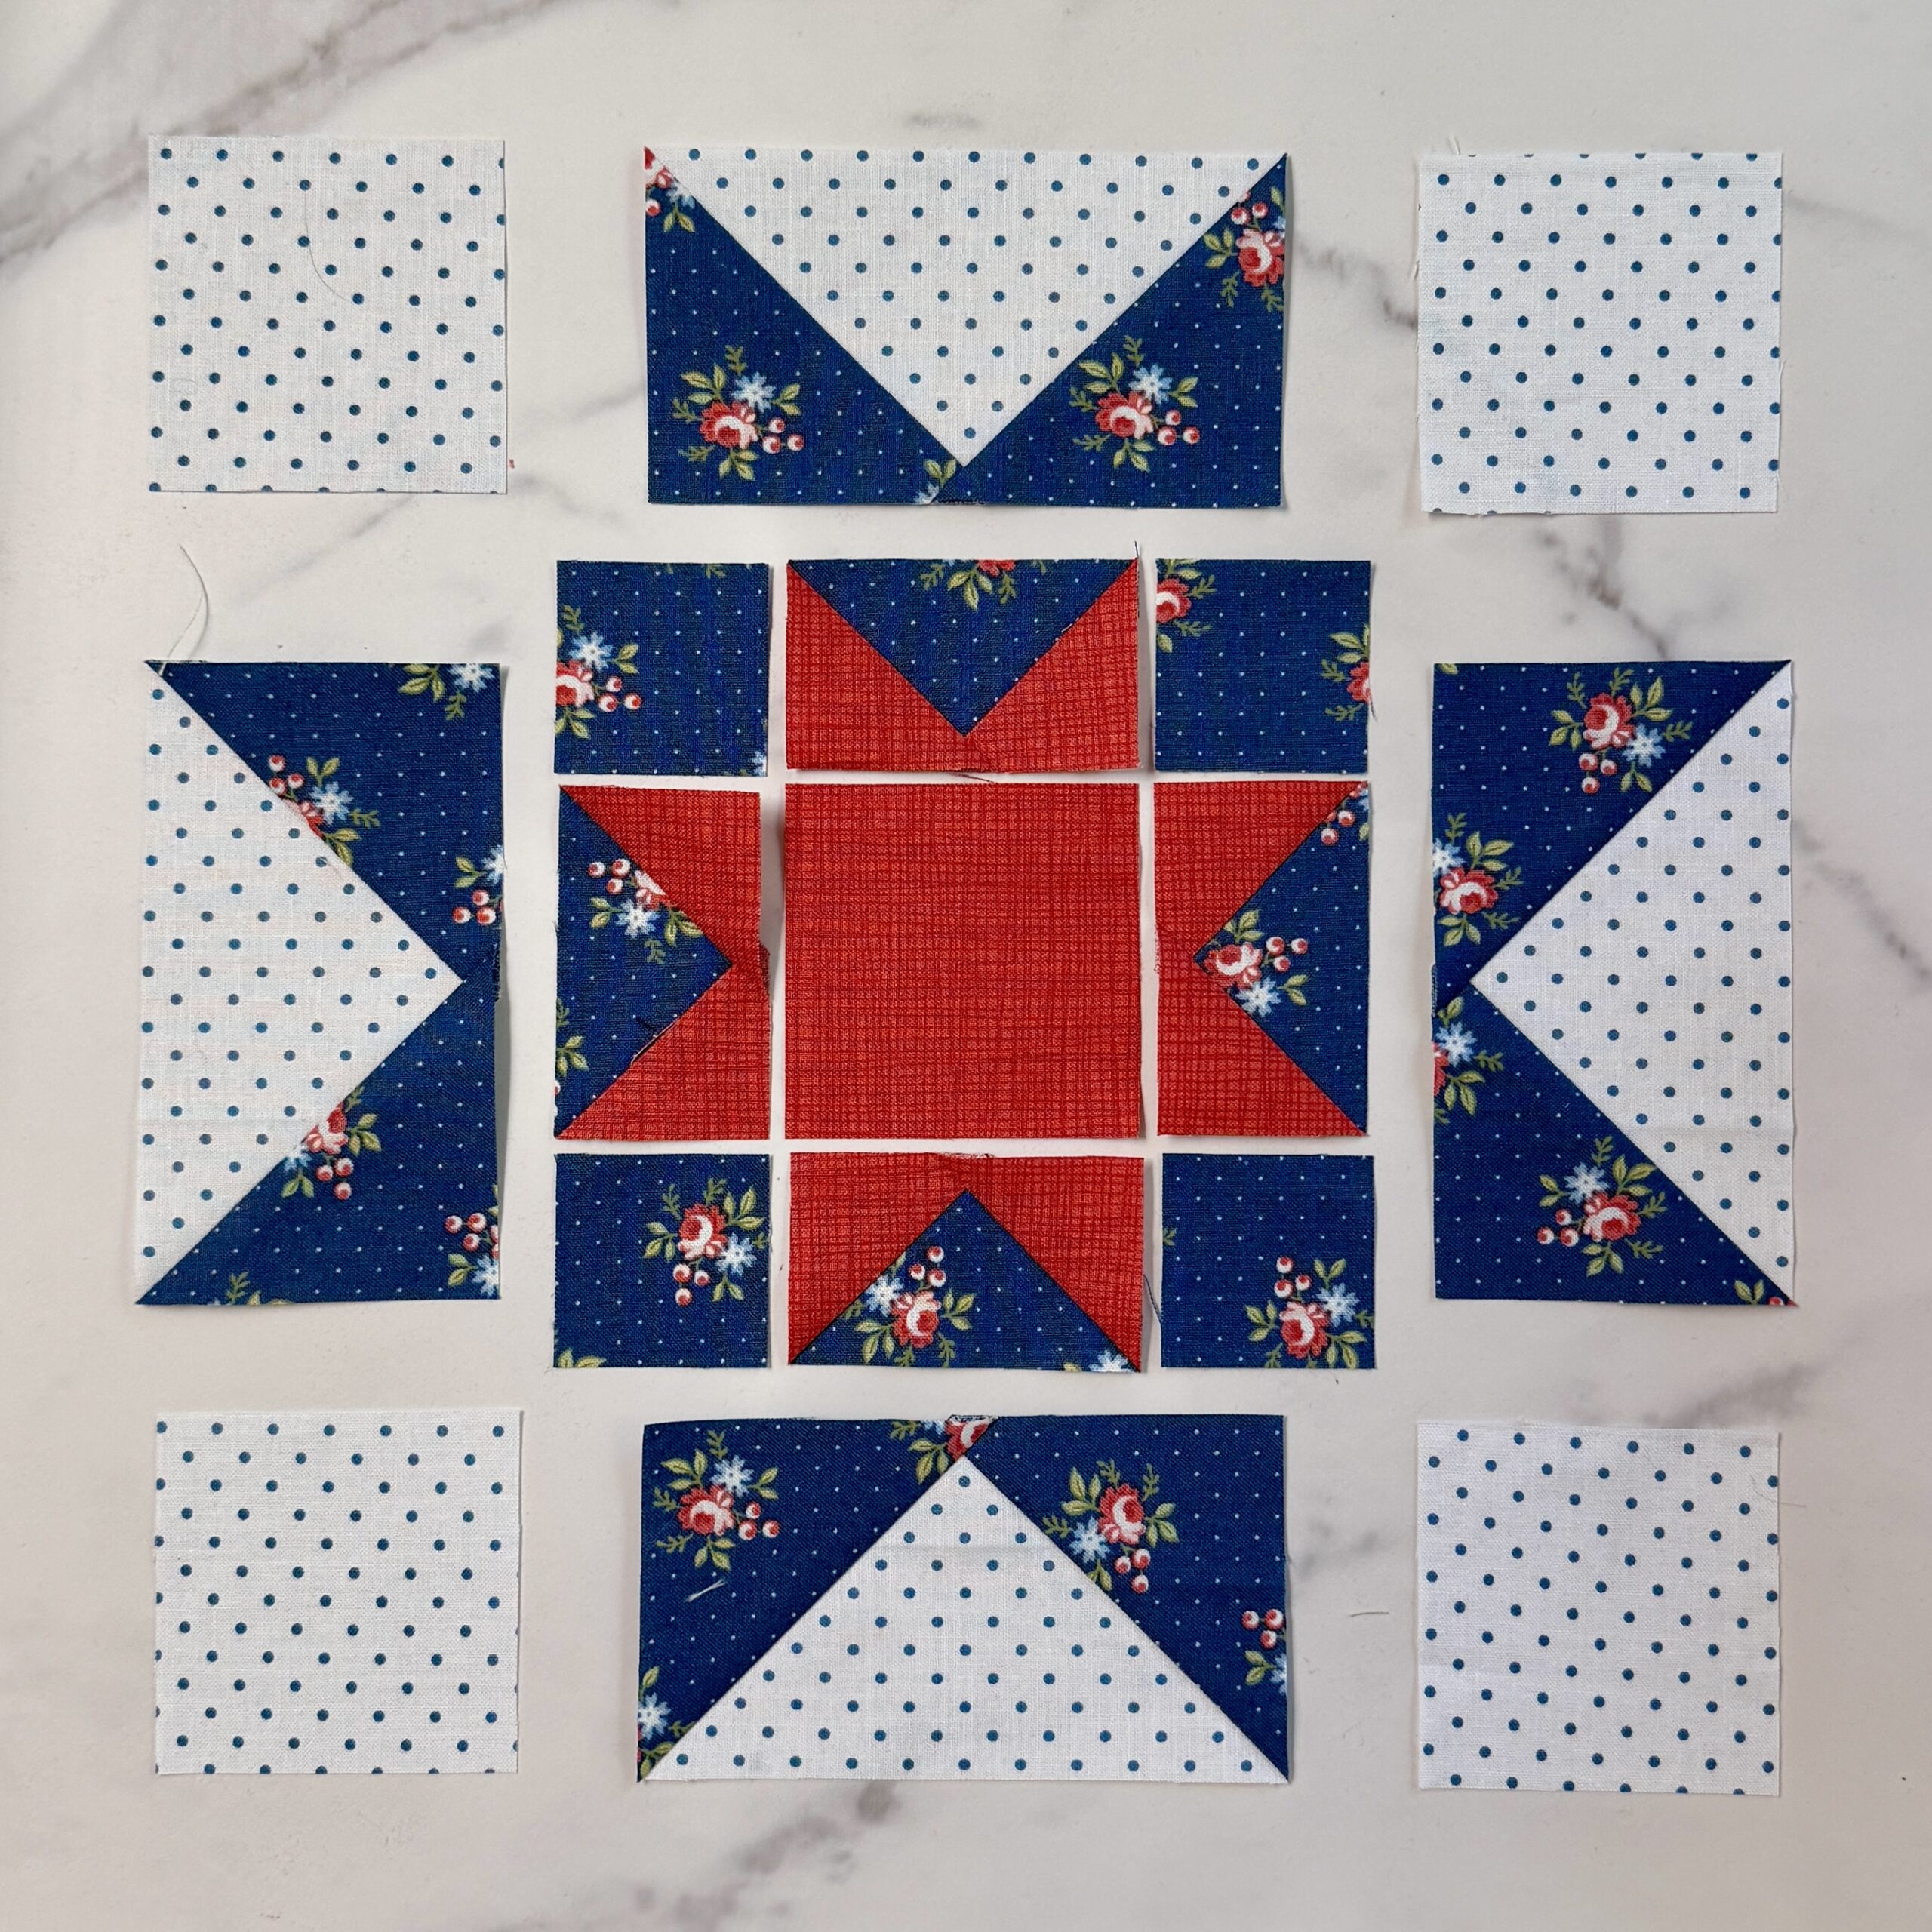
Flying Geese Tips
- 4-at-a-time – Since you need four flying geese units in two different sizes, I like to make them with the 4-at-a-time method. If you’ve never tried that method, you’ll love how fast and efficient it is. I also make them oversized so I can trim them down perfectly.

- Reduce Bulk – One of my favorite ways to reduce the bulk in flying geese units is to cut away the overlapped pieces on the first step. You can find a full blog post on how I do that here.
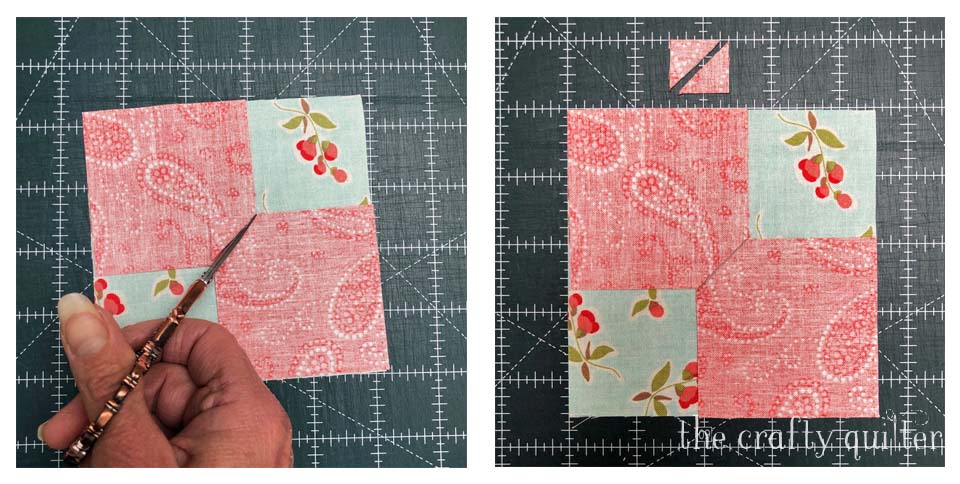
- Trimming oversized flying geese – if you’re making lots of flying geese, I recommend a Bloc Loc ruler for flying geese. They have a groove in the back that slides into place along the diagonal seams making it fast and easy to position and trim.
- Don’t fret if you don’t have a “fancy” ruler. A square ruler can be just as effective. Step 1: Make sure the “V” seam is at the 1/4″ line of the ruler and at the center measurement for the size you’re trimming to (1 3/4″ in this example). Also make sure the bottom diagonal seams are lined up with the cut measurements for the size you’re trimming to ( 2″ and 3 1/2″) for this example. Step 2: Rotate the block and place the previously cut edges on the size you’re trimming to. The diagonal line of the ruler should line up with the diagonal seam of the FG.

Color Placement Ideas
This might be my favorite part of making the Double Sawtooth Star – color placement! As with most quilt blocks, color plays a huge role in the final look. Here are a few ideas to get you started.
- High contrast for crisp stars
- Tone-on-tone for a softer look
- Scrappy fabrics (one of my favorites)
- Holiday colors
- Patriotic red, white, and blue
- Seasonal palettes

Free Double Sawtooth Star PDF
Ready to make your own Double Sawtooth Star? I’ve created a free downloadable PDF that includes two block sizes: 8″ and 12″ finished. You’ll find cutting instructions, step-by-step assembly diagrams, and everything you need to make the block. Just click on the button below!
Be sure to save this tutorial to your favorite quilting Pinterest board so you can easily find it when you’re ready to make your own Double Sawtooth Star!


Discover more from The Crafty Quilter
Subscribe to get the latest posts sent to your email.


Thanks for this great (and free) Double Sawtooth Star block pattern. I love the looks of it. Wish I had gotten it before the 4th of July so I could have made a celebratory quilt with it since it was the 250th birthday of the USA on the 4th! However, it’s not too late to still do one for 2026. I think everyone loves a star block/quilt. Thanks again, Karen PS: Love your blog!
Thank you!! I love it! Gives me new inspiration !!
Thank you for the tips and the time to show how to make this beautiful star, I will definitely be making this. You are a wonderful teacher
Julie,
Thank you for the time and effort you put into the pattern and tutorial! I definitely appreciate you!
Thank you for the printable pattern for this. It’s one of my favorite blocks, and since I’m in the middle of making a flag quilt, I’ll add this to the back corner with my label. Have a happy 4th of July! Deb / N. Calif.