How to bind an inside corner
I have an easy method for binding an inside (inverted) corner to share with you today.

Since my next project for the Christmas Once a Month series has inside corners that can be a bit puzzling at first, I thought I would show you how easy it can be!
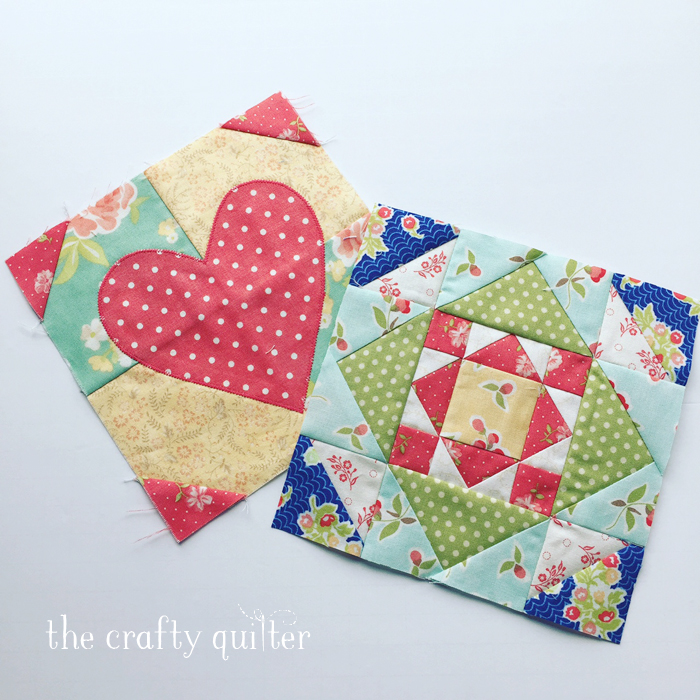
Here is a peek at the non-Christmas version of this project (although, now that I look at it, it could pass for Christmas). It’s a table topper that has a little bit of applique, but it’s really easy to make.

I’ll have the full tutorial for you on June 15, but for now let me show you how to bind the inside corners (which there are 8 of).
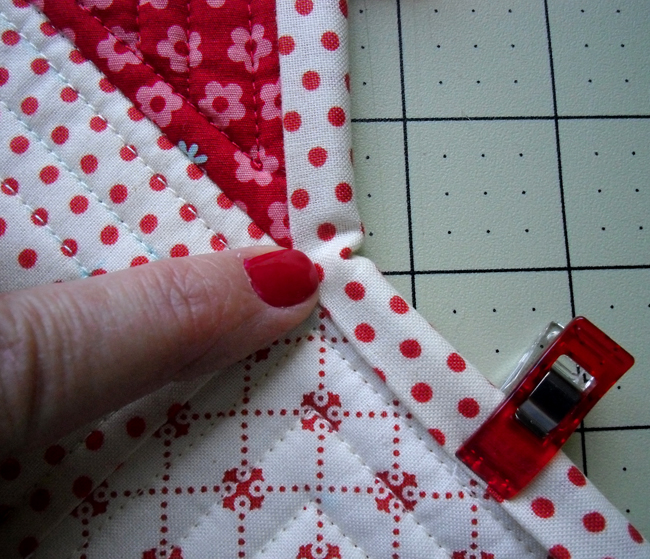
Step 1. At each inside corner, clip a very scant 1/4″ into the angle with small scissors. This is going to allow you to pull the edges of the quilt straight in steps 6 and 7.

Step 2. As you come to each inside corner, draw a 1/4″ line from the raw edge of your binding strip that is even with the incoming edge as shown:
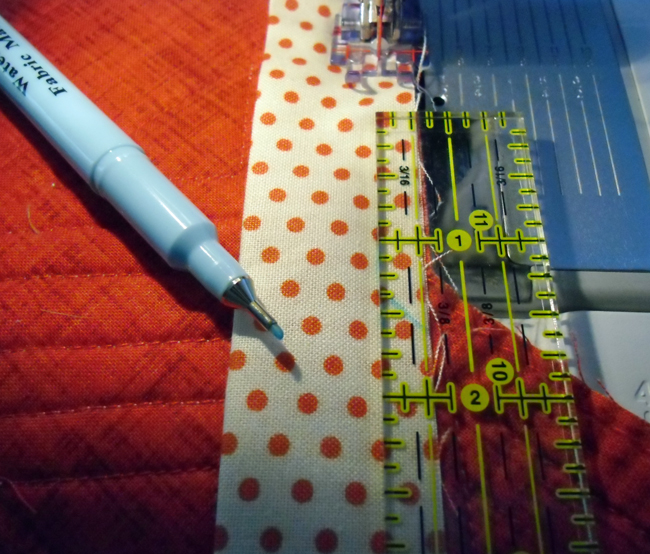
Step 3. Draw a line on your binding strip that is 1/4″ from the raw edge of the outgoing edge as shown and intersects with the previous drawn line:

Step 4. Your drawn lines will create a pivot point like this:

Step 5. As you’re stitching the binding, stop with the needle down at this pivot point.
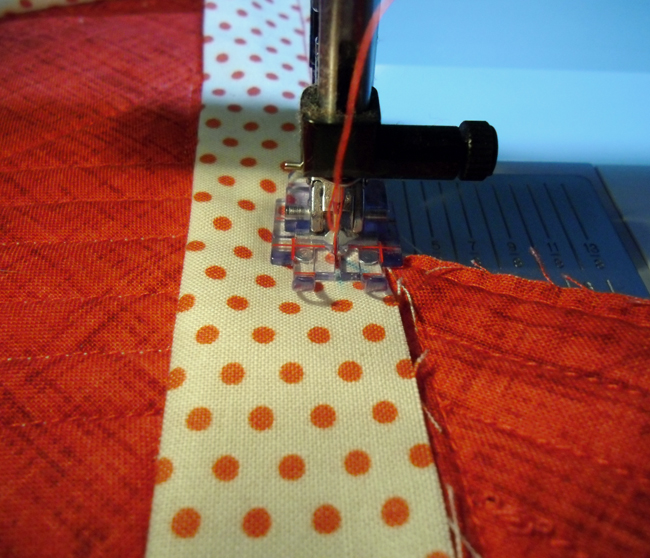
Step 6. Pull the edge of the quilt in front of the needle so that it is straight and even with the edge of your presser foot.

Step 7. Pull the edge of the quilt in back of the needle so that it is straight also, forming a long, straight line from front to back.
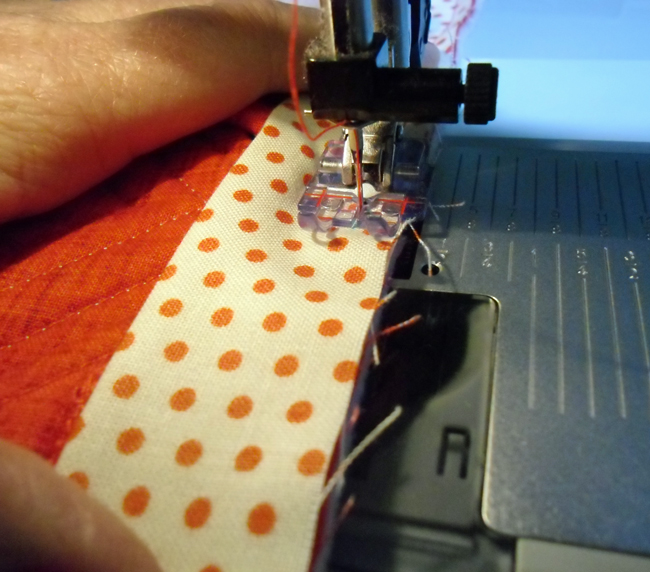
Step 8. Continue stitching until you reach the next corner.
That’s it! The trick is clipping the seam allowance and pivoting at the correct spot.
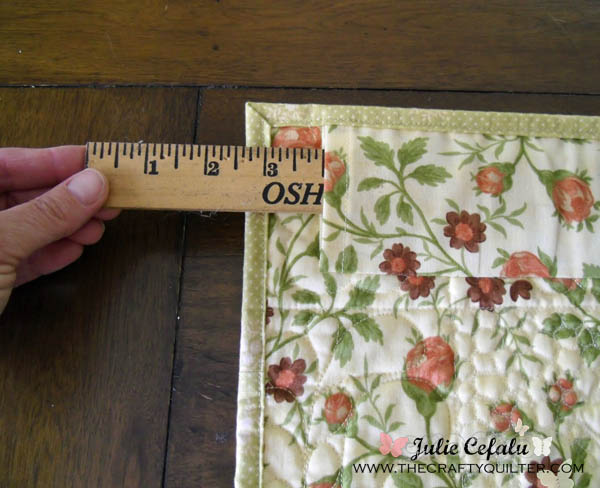
For this particular project, I have stitched my binding onto the back of the quilt and then wrapped it around to the front. Here is what the back side will look like:
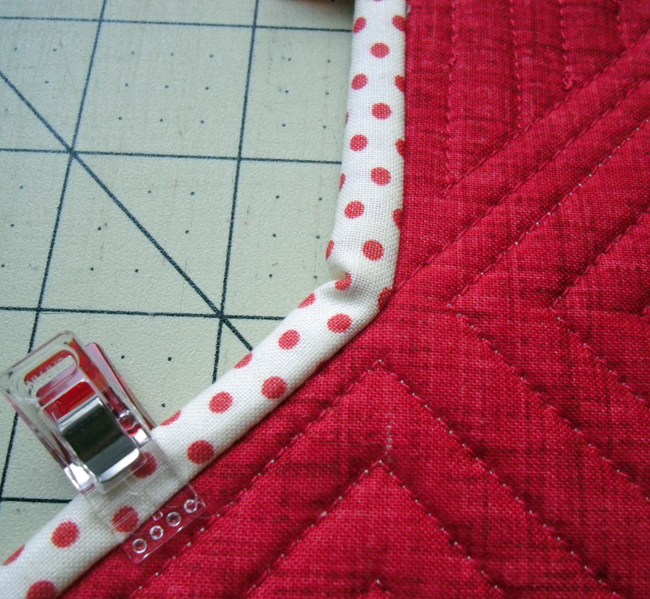
You don’t get an actual “pleat” or “tuck” as you would at a right angled corner. Just an ease that allows the corner to bend and lie flat. This is what the front side will look like:
I finished my binding by machine. I stitch as close to the fold as I can and the stitching on the back is barely noticeable (with matching thread).

I do a lot of bindings this way: stitch onto the back, wrap to the front and stitch by machine. Quick and easy!
And just for my own satisfaction, I have to show you a picture of my fingernails.
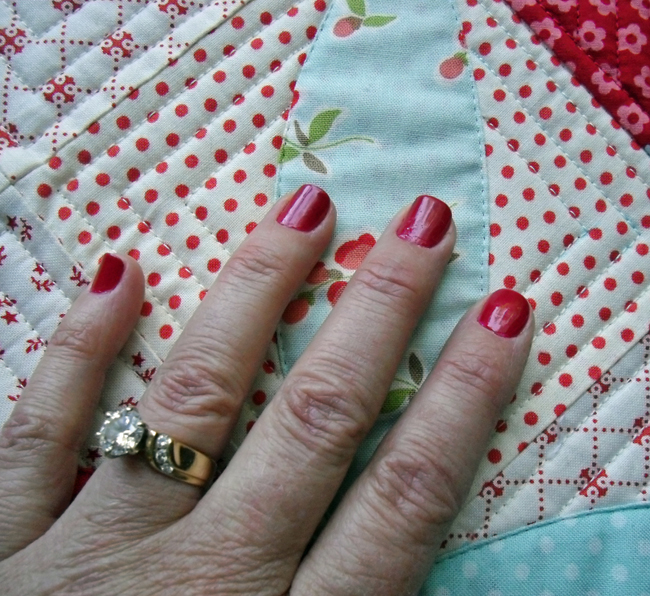
I’m always using pictures that show awful looking hands and fingernails. Who has the time to get their nails done when they could be sewing? Well, I treated myself for my birthday so I had to show you! Ahhh, I wish they would stay this way.

Happy Quilting!

Discover more from The Crafty Quilter
Subscribe to get the latest posts sent to your email.


This is the best tutorial I’ve come across thank you
I realize that this is a really old post, but I have a question.
How/where did you join the ends of the binding? I normally do that on one of the long sides of a quilt, but there are only really short sides on this.
I am to the binding stage and suddenly realized that this is the one thing I don’t have a clue about.
Hi Gene,
That’s a great question. There’s not much you can do to avoid joining the tails on a short side, but it’s doable. As soon as you turn the last corner, take just a few stitches into that side. You might have to un-sew a few stitches from the beginning binding stitches to create the space you need to join the ends.
I hope that’s helpful.
Thank you so much… this was the easiest and clearest tutorial on the internet for this!!
I have done binding before but I find it easier to just lay front and back of your squared project wrong sides out then stitch all four sides and leave an opening and turn out. Do you think it is possible to do that with this?
Love your nails. Mine are always a mess. I guess I am used to them that way.
Julie, last year I took a beginning quilting class with you and completed a very nice beginning quilt. My sister Pat and her sister in law Liz also took the class at the same time. I really appreciated you teaching us an efficient, nice looking way to bind our new quilts.. You also told us what you considered was one of the best needles to hand sew binding and gave each of us one of them. Unfortunately, I broke my needle and I can’t remember the name of the needle. Can you provide me the name of the needle so I can buy a packet of them? Thanks for your help as well as your very informative class. I enjoyed it immensely!
So glad to have seen this video. Thank you very much.
Help! My granddaughter chose Joseph’s Coat pattern for me to do a queen size quilt for her. I would rather do the pattern featured in “How to do inside corners binding.” Can you tell me the pattern named? I would greatly appreciate it.
Hi… I would love to share this tutorial with a couple of the older members of my guild who do not use computers. Is this alright with you? I will give you full credit, as this is a fabulous tip and tutorial!
Hi Julie,
I am posting about your tutorial for binding an inside corner. I am using two of your photos.
Please let me know if you want me to remove your photos and I will.
Great tutorial!
Caryl
http://aboutquilts.wordpress.com
Is the binding cut straight grain or bias?
it looks like double fold cross grain binding to me (cut WOF)
Thank you. I have been afraid to do a project because of the corner. I am going to get right on it.
A belated Happy Birthday Julie–your nails are gorgeous–I am so envious.
Thank you for this tip–I can use it next week–again–thank you ever so much.
OH!!! Julie I have just finished a 3/4 bed Charity quilt, with points down both sides, oh how I wish I had ,had your Tutorial!!! before I finished it, will know next time.
Thank you for all the info you pass on.
Looking forward to next TUT
Thank You.
Excelente tutorial.Muchas gracias por compartir!
Thank you so much for this tutorial! Made finishing my project a snap, I can’t believe how easy you made it!
This looks awesome, I am only a beginner at all this . Your tutorial will really help me do it right. Thank You. Happy belated Birthday.
In the tut for this table topper, you say you used a narrow zigzag to sew the appliques…however, in the pictures here, it looks like a straight stitch very close to the edge. I truly intend to make this and thank you for the instructions.
BTW..Happy Birthday (belated)…every year counts. xoxo
The quilt does look christmasy and although I don’t think I’ll do that yet… it’s good to know how, thanks for the detailed pictures of the pen mark, very important! I am noticing that you quilted then appliqued. I have always wondered about that and done it wrong I am sure. : /
OMG!! Thank you for sharing this amazing tip with us. Please stop by our Brag About It Tuesday Party, http://bebetsy.com/2013/06/10/brag-about-it-tuesday-link-party-no-8/, and share more of your great ideas.
~~ Thanks, Sharon & Denise BeBetsy
What a great tutorial, very easy to follow. Thanks for sharing at Inspire Us Thursday at Organized 31.
First of all, I understand it was your birthday? Happy birthday Julie and always Happy Quilting!!! You know, my birthday is today, so I’m a little more closer to you!
Second, I had to do, some weeks ago such inside corner binding :). It was very difficult, but never is too late, good to know from now on. Thanks!
Happy Birthday Julie!! As a quilter, it is hard to find the time to treat your nails, so I like your special treat for your birthday! What you are making on your birthday is a pretty table top. I like Avalon fabrics, too;).
hahaha. I always LOVE reading your posts and usually am too lazy to comment because…well, I’m scatterbrained but had to put in the effort here! LOVE pale blue and red together, LOVE your info ALL the time and your candor, totally empathize with the nails – they take too long to dry anyway and will get on the fabric, or I’m just going to garden/do dishes/laundry, whatever and mess them up anyway. and my Lord, look at that ring….there’s a Craftsman house somewhere missing a doorknob, lady! hahaha. give your man a hug for that one! Have a great day and please keep up your work, I love it sooo much. 😀
Happy Birthday, Julie! Pretty hands, pretty table topper, beautiful heart! Enjoy…
Hi Julie! That is just beautiful. Your stitches always look so perfect. I have never stitched my binding on by machine but I think I just might have to try this. Thanks for the awesome tip on sewing the inside corners. Your nails look great too. I have such ugly hands that I would never even think about posting a picture of them. EEK! I would scare everyone.
Wow – so beautiful!!! Is that made from Avalon prints? I think I recognize the little cherries – my fave! Can’t WAIT for the full tutorial. And your nails are so glam!!! Happy Birthday to you!