Christmas in August: Pinwheel Star Table Runner, Placemats, and more!
 Welcome to Christmas Once A Month for August! We’re on the back half of 2013, and amazingly enough, I have been keeping up with my Christmas “To Do” list. How about you guys? Ready for some more inspiration for the holidays?
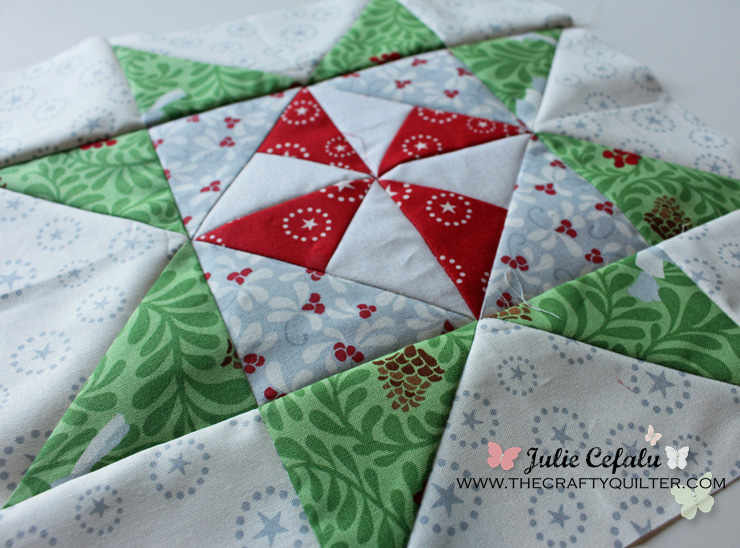
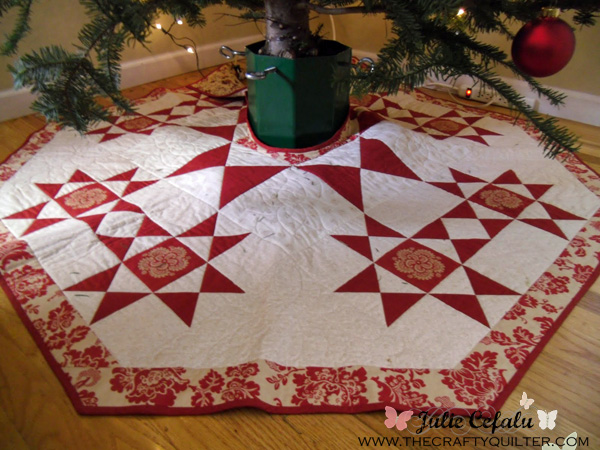
After making the pinwheel star blocks from my last post, I thought they would be perfect for a few Christmas projects. So, I made some placemats, a table runner and a tree skirt. O.K. not the tree skirt, but I had good overzealous intentions! At the end of this post, I do have a great {free} tree skirt pattern to share with you that would work great with the pinwheel star blocks.
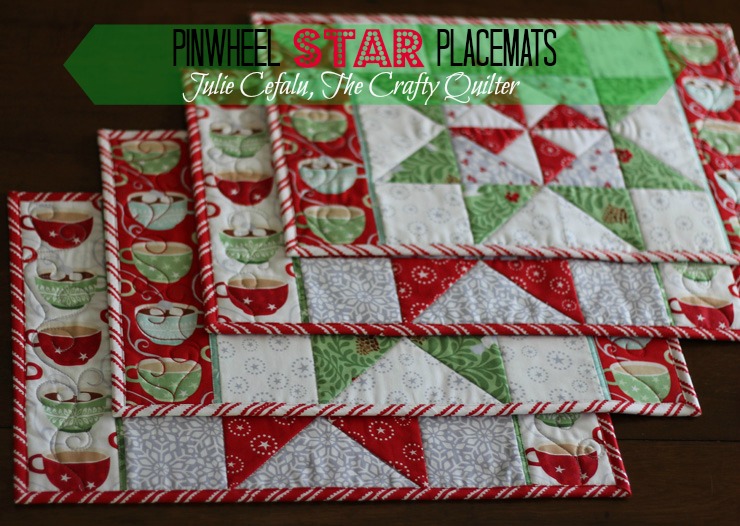
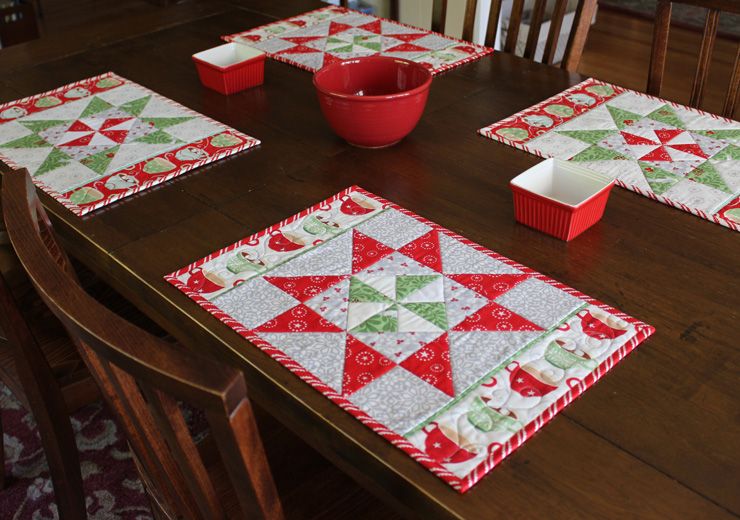
Pinwheel Star Placemats
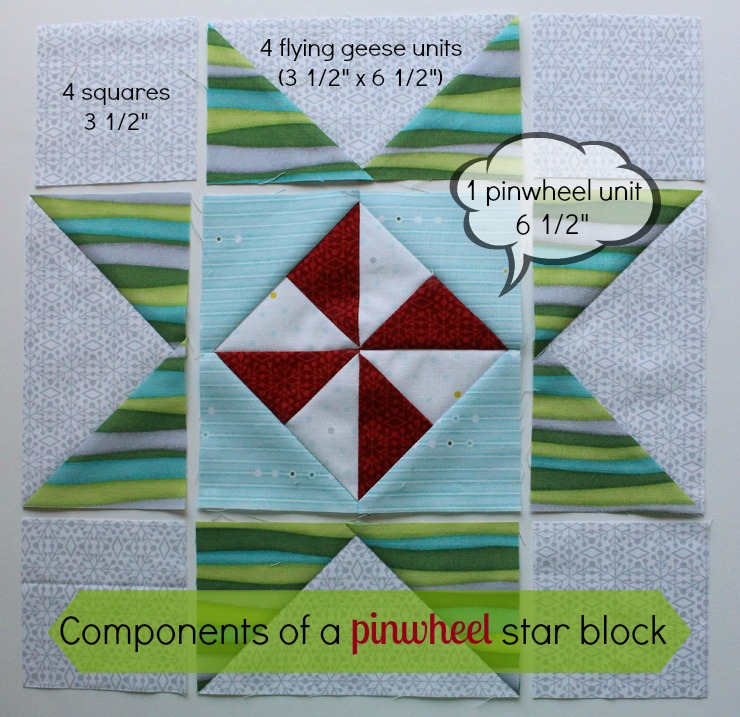
You will need to refer to the tutorial for pinwheel star blocks here. As a quick summary, you will be making a 12 1/2″ unfinished block with the following components:
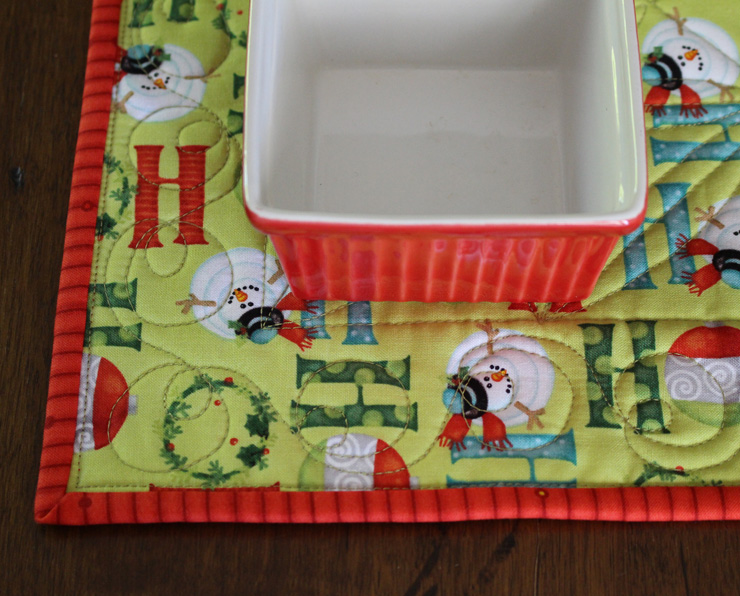
Let’s get started with the placemats. These are made with In From the Cold by Kate Spain for Moda. The hot cocoa fabric is just perfect for any table setting! For a set of 6 placemats you will need 6 pinwheel star blocks and some coordinating fabrics for the side panels, backing and binding.
Supplies for 6 Pinwheel Star Placemats:
- 1/2 yard star background fabric
- 1/4 yard star points fabric
- 1/8 yard each red and white pinwheel fabric
- 1/4 yard teal triangle fabric
- 1/2 yard side panel fabric
- 1/8 yard flange (optional)
- 1 1/2 yard backing fabric
- 3/4 yard binding fabric
Assembly:
For each placemat, you will need one (12 1/2″) pinwheel star block and two (3 1/2″ x 12 1/2″) side panels. Remember that the cutting instructions for the pinwheel star blocks can be found here.

You can add a flange (accent strip) to the side panels if you want. I thought I needed a color pop there, so I went with a flange. You can find my tutorial for adding flanges here. You can see the flange below before it was sewn on.

I used Thermolam for the batting which is my usual choice for table runners and placemats. I like the thickness and stiffness of it and it has some heat protection for my tables. Plus it shows off your quilting well!
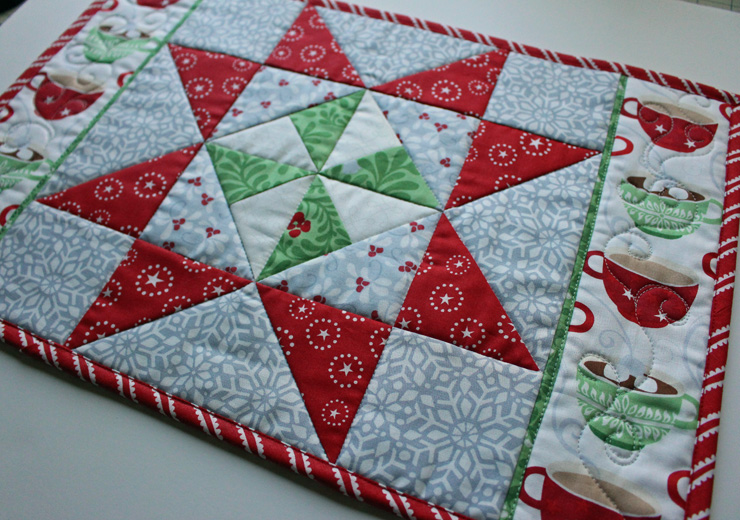
And I love the red and white stripe binding! I cut it on the bias to get the candy cane effect.

I’m ready to set the table!
Pinwheel Stars Tablerunner
For the table runner, I used Ho Ho Ho Let it Snow, by Nancy Halvorsen for Benartex. I love this line of fabric – it’s bright and whimsical.
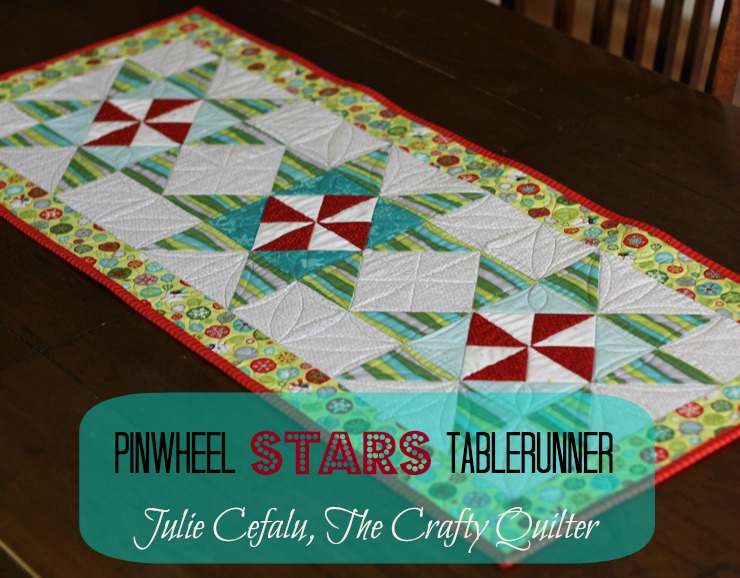
I used 3 pinwheel star blocks and added a border. Easy peasy! Remember, you need to go to my original Pinwheel Star Block Tutorial for cutting and assembly instructions for each pinwheel star block.

Supplies for Pinwheel Star Tablerunner:
- 1/3 yard background fabric
- 1/4 yard star point fabric
- 1/8 yard ea. of red and white pinwheel fabric
- 1/8 yard of teal pinwheel fabric
- 1/4 yard border fabric
- 1/4 yard binding
- 1/2 yard backing
Assembly: Lay out the 3 pinwheel star blocks side by side. Stitch together, matching seams. Press seams open.

The borders are 2 1/2″ wide (unfinished). You will need (2) 2 1/2″ x 36 1/2″ rectangles and (2) 2 1/2″ x 16 1/2″ rectangles.
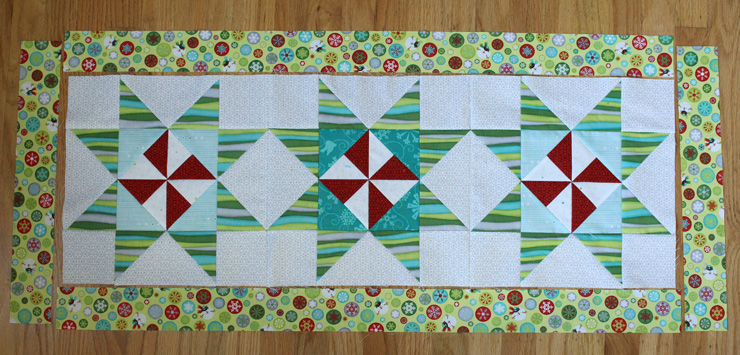
Stitch the two side (long) borders on first followed by the two ends. Press towards the border.

The fabric that I used for the back is from the same line and it’s so cute with the red binding!
And if you’re feeling really crazy enthusiastic, you might want to try this Christmas tree skirt pattern by Darlene Zimmerman. It’s a free pattern that I found several years ago. You can download the pattern here: Stars All Around Tree Skirt pattern.

I made the same version as above, using a slightly different technique for constructing the blocks.
I had a very red and white Christmas last year. It is one of my favorite color combos for quilts!
I hope you enjoyed Christmas in August!


Discover more from The Crafty Quilter
Subscribe to get the latest posts sent to your email.

What a delightful way to celebrate Christmas in August! I love the idea of getting a head start on holiday projects. Your pinwheel star placemats and table runner are absolutely charming! The fabrics you chose are so festive and fun. Can’t wait to try out those patterns myself! Thanks for sharing your creativity and inspiration!
Thank you so much for all the wonderful patterns and ideas. I prefer the square block as I can always add if I want to make a long pillow! Thank you again!
I think the yardage for the star points is incorrect….I only had enough to cut out 24 squares
So many beautiful inspirations, don’t know where to start, everyone is nice, thank U so much Julie
Very nice story that came after the list of what is needed for the project, but where are the instructions? Are we supposed to guess what size pieces are needed? Get real
How do I get the pattern for the Stars All Around Christmas tree skirt?
Hi Mary,
I have updated the link to the Stars All Around Tree Skirt pattern. It will take you directly to the pdf.
How can I get the pattern for stars around the world tree skirt. I had it I made 8 for my kids but now I need 2 more my twins have grown up an on their own.
I made your Christmas pinwheel star block placemat today and it went together perfectly. Your instructions were very clear – thank you.
It’s me again. I meant to ask specifically about the tea fabrics and the snowmen etc.! Thanks!
Your fabrics are fabulous! Can you tell me the name/where you got them. I live in Canada and I haven’t seen these fabrics and am travelling to the U.S. at the end of the month and hope to buy some fabrics while there. (Myrtle Beach, S.C.) Thanks for your wonderful ideas.
I love your patterns and tutorials! So, glad I found you!
Would you be able to email me the Stars All Around The Tree pattern? I can’t seem to access it and I would love
to make it! Thank you so much! Mary Stockman
I love, love, love these placemats. I have made several placemats from your site and get so many compliments.Thanks for sharing these I can’t wait to make them
hello, do you still have the christmas tree skirt pattern? the link is dead…. I would really love to make it!
greetings from Holland!
I love the placemats and tablerunner and can’t wait to make them. Can you please let me know the width of the material used so I can calculate how much fabric to buy? Thanks a lot.
I made the Ho Ho Ho Let it Snow (large quilt in Nancy’s book) and I have a lot of fabric left over. I was thinking of making the table runner. Could you tell me the dimensions of the table runner and and what size pinwheel squares and star squares you started with to make the pinwheel/stars. Thanks! Colleen
Hi Julie- I love the Christmas placemats! How did you quilt them? Thanks, Cindy
Just found your site and love it! I am fairly new to quilting and am already so hooked! Your placements and table runners are so adorable! Looking forward to using your tutorials!
Love the pinwheel star placemat
Just found your blog, love it.
Awesome , I will love to try this. You did a great job!!
Wonderful blog and ideas
Hi! I’ve been searching for the perfect Christmas placemats pattern to make for my mother-in-law for Christmas and I’ve found it! I just have a quick question as a newbie in quilting, did you use a charm pack, layer cake or fat quarter from the kate spain line to make these?
Thanks, Bre
Thanks for the cute runner and placemat patterns, I just love the fabric you used in your placemats!!
I think you are another one of the ‘gems’ in blogland. Love your work and the pinwheels fit right in with the Across the Pond sew-along this month. Brilliant patterns – thank you.
Wow – these are incredible! I love Christmas placemats and fabric – thank you for linking up to TGIFF!
These are “sew” fun!
Awesome runner and the projects and as always luscious fabrics!
I love the eye you hava for fabrics and would love to go shopping with you.Have a fun weekend.
Love these ideas! Now, I just have to get busy.
The placemats are gorgeous – I love them. Now, we’ll see if I can get some anywhere near as beautiful as yours. Thank you for sharing.
Hi Julie, I just love the table mats! The fabric is so fresh and cheerful. The back side of the table runner is my absolute favourite of the HO HO HO range and is really shown to its best advantage there by not being cut into smaller pieces, absolutely two runners for one there!
Pretty tree skirt too……thanks for the patterns and tutorial:-)
Thank you for posting, the placemats are darling. The fabrics are so appropriate.
Thank you again.
LOVE the placemats. In From The Cold is on top of my list of ‘fabrics I covet’. 🙂
Thanks so much for the tutorial!
Wow – Santa will want you in his workshop, as a department head! You’ve been so busy! I love all of this stuff, but particularly the placemats are melting my heart. That binding…super sweet…sigh!!!