Adding a flange to your quilt
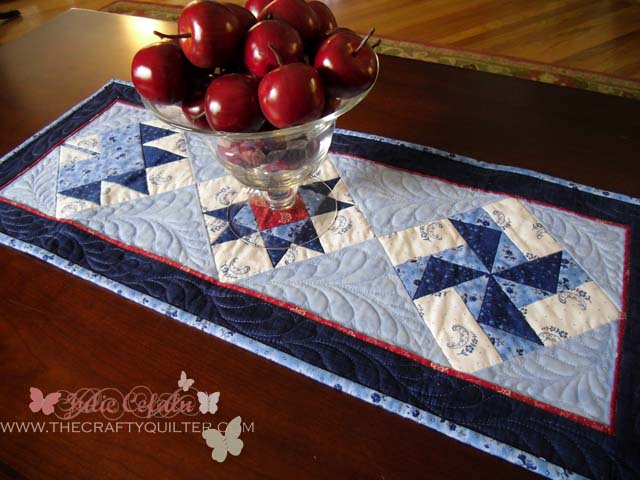
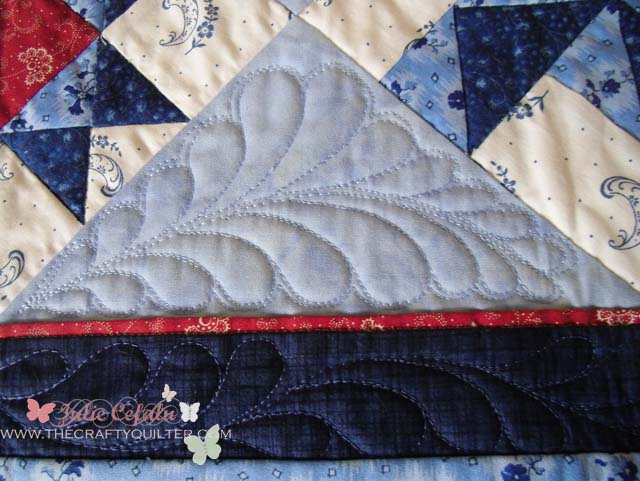
When I want just an accent of color without adding another border, I like to add a flange to my quilt top. In the table runner above, I wanted to add a little more red around the outside and the flange was just what I needed.
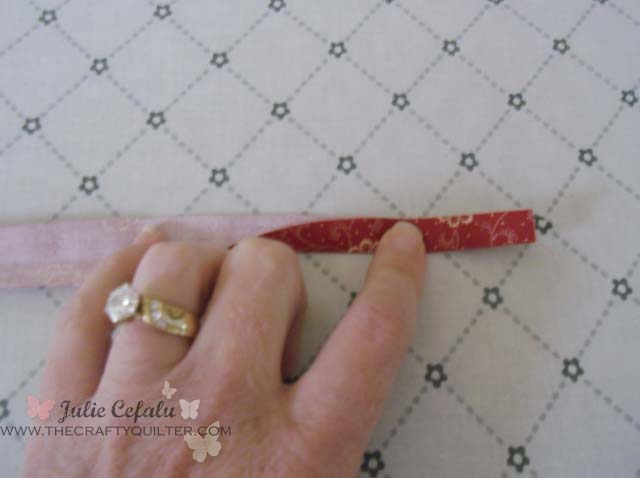
Adding a flange is really easy. I like to start with a strip of fabric that is 3/4″ to 7/8″ wide. I used 7/8″ in this example. Make it as long as needed, piecing together strips if necessary to get the correct length. You will fold the strip in half along the length with wrong sides together. Press.
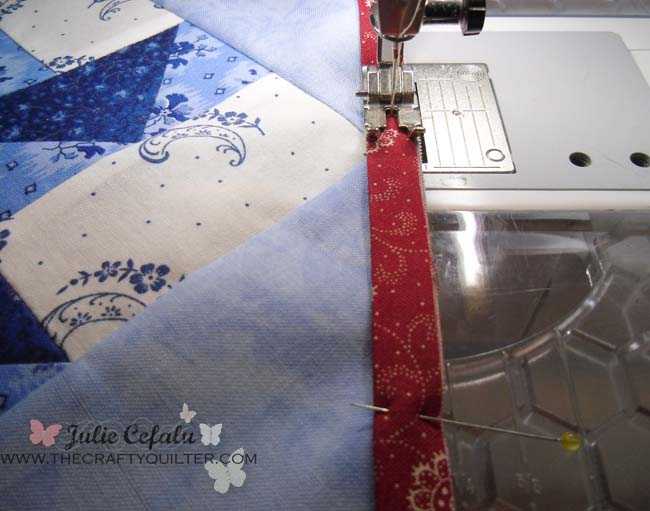
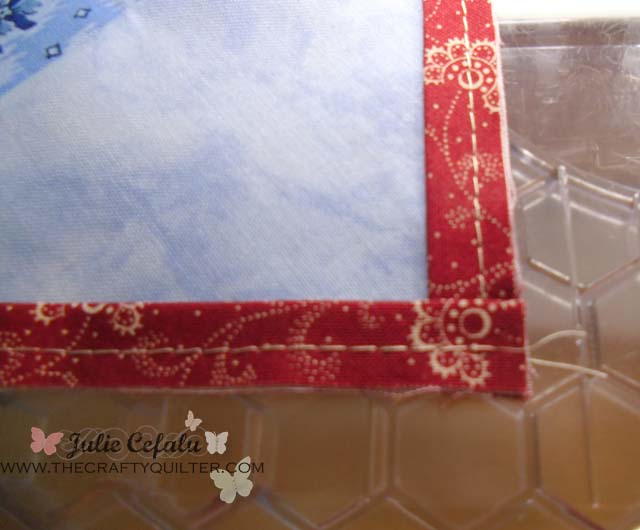
Next, you will pin this to the edge of you quilt top with raw edges even and the fold facing the middle of the quilt. Using a basting stitch (long stitch length of 4.0 – 5.0) sew a very scant 1/4″ seam as shown below.
Repeat this on the opposite side. Next you will do the same thing for the top and bottom, overlapping the flange at the corners.
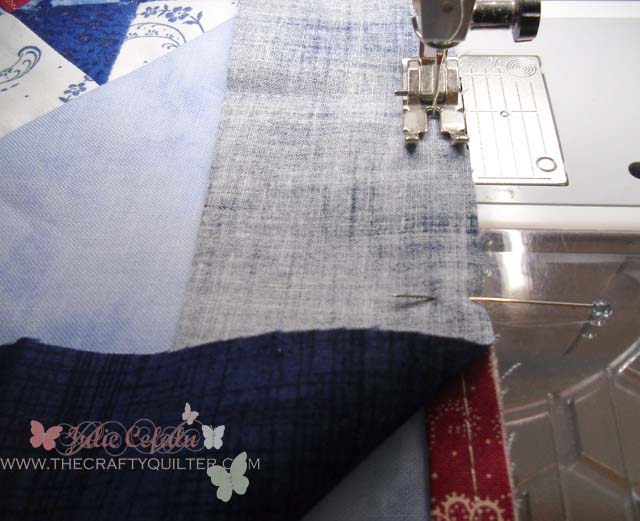
Now you add the next border as you normally would, matching raw edges and stitch using a 1/4″ seam. You might want to use a walking foot for this step since you’re sewing through so many layers. (I didn’t use one in this picture, but I often do).
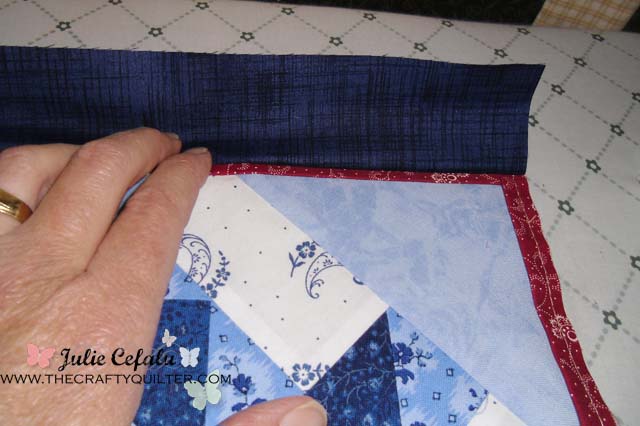
Press the border strip towards the border, making sure that the flange remains flat.
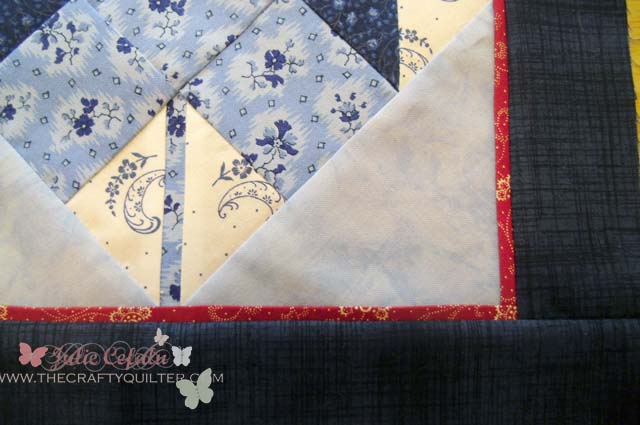
To make your flange really effective, it’s important that you have good contrast between the flange and both sides of the quilt that it touches. I will often use a flange as a bridge between two borders that need the extra pop of color to make them stand out. It’s also a nice way to add a “border” without growing your quilt – it doesn’t add any width or length to the finished size.
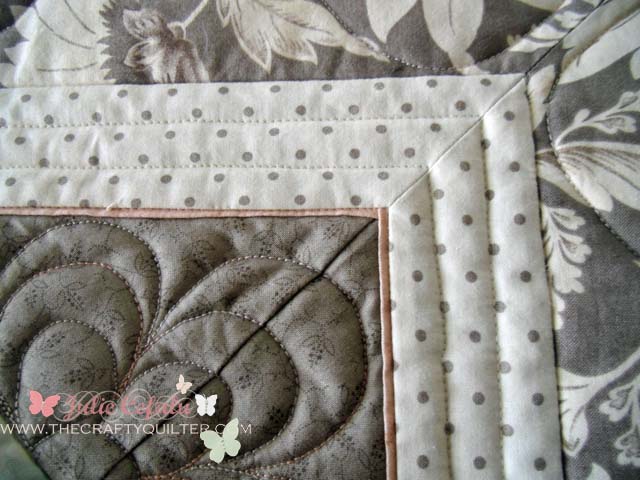
Here, I have added a small (I started with a 3/4″ wide strip) flange between two grey toned borders and I wanted just a bit of pink to show up.
Flange is very similar to piping, but much easier. With piping, you enclose cording in the center of your strip of fabric to make it rounder and fuller. It has a very tailored look to it, but it does involve an additional step that requires more time. I typically don’t have the extra time – I’m ready to move on to the next project!
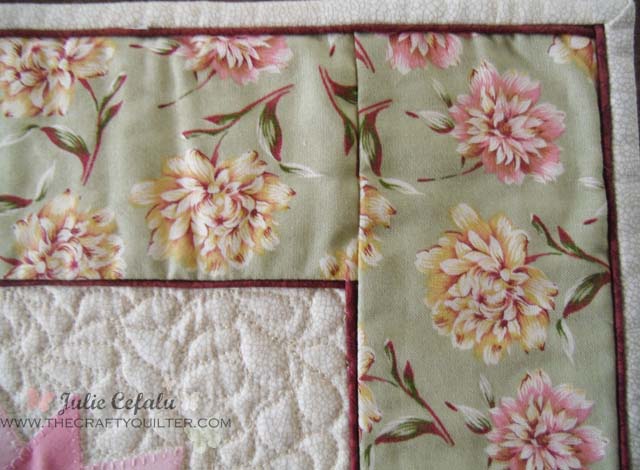
You can also use a flange between your border and binding. In the following picture I have added a flange (piping actually!) between both: two borders and the border/binding.
Next time you’re wanting to add a little “pop” to your quilt, think about adding a flange!




It is always good to learn something new. Thank you for the clear instructions.
Your instructions were great. Would it work to sew it on with the last border, rather than having to stitch all the way around twice?
This is what I do Judy and it works out great. You just have to sew slow and make sure everything is lined up as you go. Saves a step and a bit of time. 🙂
Thank-you for the informative instruction. This clarifies a a process that had my brain in a knot! Thanks again!!!
Thank you for your very clear and precise instructions. I have made several quilts but this is my first with a flang!
Love this instruction. Do you have a pattern for the table runner that is used in this example? It would be a great project for a second quilting class.
Thank you so much! Fantastic instructions – wanted to try this, but wasn’t confident that I could do it without details, now I can wait to do this!
I agree with you. this is a good reminder how to do something simple to make a great look. thanks……
Re:folded border
I have read your great instructions and all the comments and I have one “stupid” question. Does this “flange”, “folded border” stick up from the quilt? If it does, I would assume it should be by a very little. My pattern for a quarter log cabin by Eleanor Burns calls for 1 1/4″ strip then folded in half. If my math is correct it would be raised by 1/2″. That seems a lot.
This is perfect for what I need. Thanks!
thank you very much for the information.. very helpful.
I needed to add a flange and wasn’t sure how to go about it. Great instructions made the task easy
Thank you! This is the third time this year that I am returning to your site, amongst all the Internet offerings, to review flange making.
Your tutorials are great as I am a new quilter and this helps so much on my learning. Can’t wait to try them. Thanks for sharing!
This is such a wonderful addition to the border for adding a pop of color. Your tut is clear and the photos are excellent. I have used this technique several times and I am so thrilled with how great it looks.
Thank you so much for this information. I have a quilt that just a little something and I thought of a flange, and now I know how to put in onto my quilt.
I was looking at a quilt pattern and it had a “flange” which I had never heard of. I’ve been quilting a number of years, strange I hadn’t run into it before. Thanks for explaining and showing how to do it. Good suggesting s for using it also appreciated. Thanks jan frost
How nice –
Putting a flange on small item – first time – and not quite getting it, so I googled putting flange on and got a familiar person as the top result. And the flange worked.
Jan
Thanks for the idea.I have used piping when sewing but so glad to learn @ the use of flanges. I would like to see how to finish a flange for mitered corners.
I didn’t know what a flange was, until I read this great tutorial. I use this technique on dresses, but have always called it uncorded piping or piping without a cord.
I love how the flange makes the project “pop” with color. Did you cut the strips on the bias or just straight? Would save a lot of time if you don’t cut on the bias.
Hi Carol, You can cut them on the straight of grain. Yes, it’s a real time saver!
I did not cut on bias and it looked great, will definitely try this next time I really want a little used color to pop.
I am having to add 10″ on each side of a quilt for the big mattress on king size. To big for my quilt frame! Was looking for help on adding piping for a tailored look and this has helped. A senior that just didn’t remember the way. Thanks
Hi. I saw your post on the crafty quilter about having to add 10″ to your quilt. I’m having to do the same thing. How did it work? I’m a new quilter so this is all new to me.
Great help in learning how to do a flange on a quilt – but how do you do the corners
Perfect tutorial – thank you! I’m off to add a flange to a mini quilt/wall hanging!!!
Just what I was looking for! I’m making a little Christmas quilt, which called for a flange, but didn’t explain it well. Your tutorial explained it very well! Thanks
Thanks for the tut (found it from your Dots blog hop post). Just the info I was needing and not sure how to find.
I love this idea. I finished a quilt and I was trying to transition to the border fabric, but didn’t know how. You have solved my problem. Thanks for you tutorials as well.
I also LOVE this idea! Your detailed photos are wonderful!
I love this idea!!!!! I will have to try on my next quilt!!! =-)