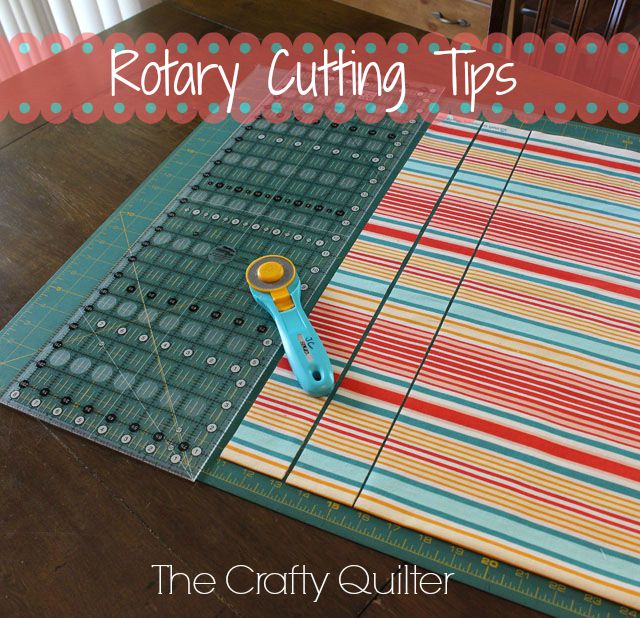
Rotary Cutting Tips
Today I’d like to offer you some rotary cutting tips. You may know that I have a little “classroom” on The Quilt Show where you can find weekly tips and tricks videos. The video from a few weeks ago was about rotary cutting basics. I thought this would be a great opportunity to piggyback some of those videos with photos and tutorials here on my blog.
Rotary cutting is something we all do as quilters, and I think we all do it a little differently! I’m going to show you my process and give you a few tips as well.
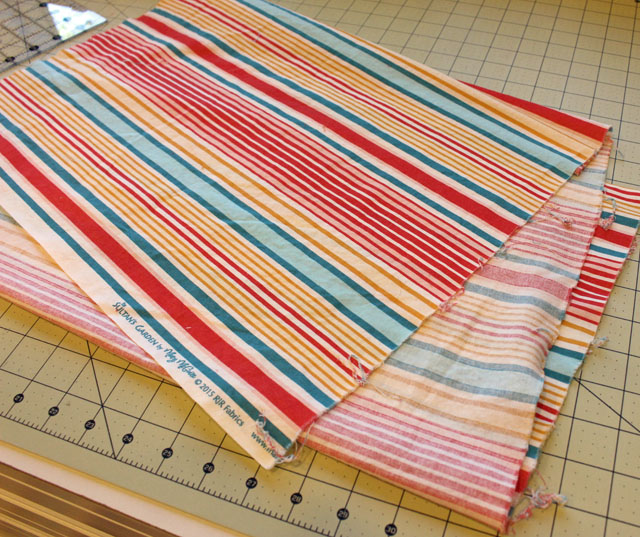
Let’s start with the fabric. I don’t usually prewash my fabric, but in this case I did. The fabric is going to be used for the binding on a baby quilt which includes flannels and minky, so everything got washed ahead of time.
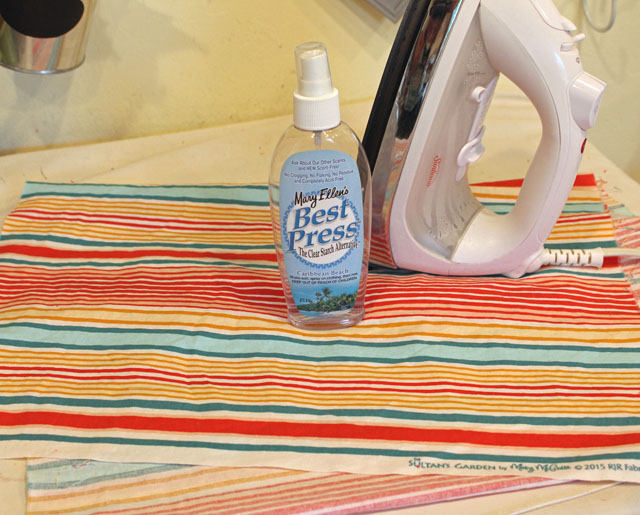
I LOVE to use spray starch when I press my fabric (whether or not I’ve prewashed it). It gives your fabric more stability when cutting and it gives you more control in the piecing process. Any kind of starch will work, but my current favorite is Mary Ellen’s Best Press. I like that it’s non-aerosol and it doesn’t leave a flaky white residue on my fabric.
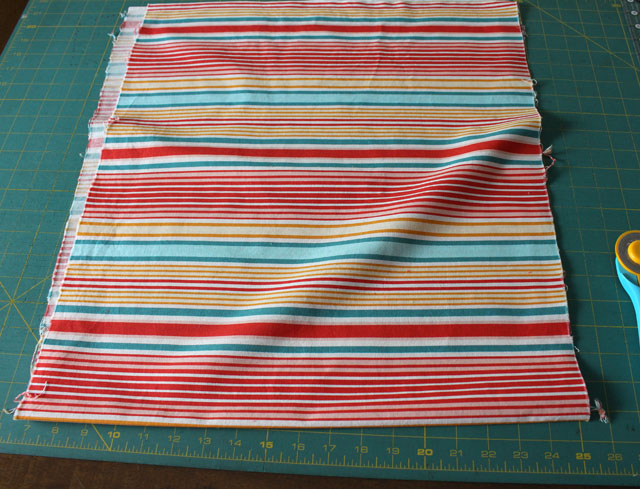
Once my fabric is pressed and starched, I fold it in half, matching the selvages. If you’re working with fabric right off the bolt, I suggest you still do this. Fabric isn’t always folded and wrapped “on grain” at the factory so it’s worth doing this step. You want to make sure it hangs and drapes smoothly. If you see a bubble or wrinkle, adjust the selvages by sliding one side of the fabric over to create a smooth sheath of fabric. It should NOT look like this:
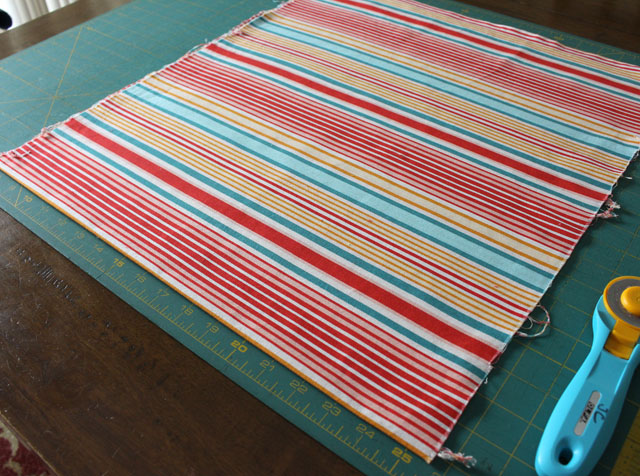
Lay the fabric down on your cutting mat with the fold closest to you. With the fabric I’m using, you can really see how the stripe travels along the fold evenly. (That’s another sign that I’ve folded it straight).
The #1 (and most important) tip I have for you is do NOT line up your fabric with the lines of the cutting mat. This step is unnecessary (with a few exceptions) because:
- It’s not consistent and exact.
- It takes too much time to make sure everything is lined up.
The only thing you need to worry about is the relationship between the ruler and the fabric unless one of these two conditions exists:
- The cut you need to make is wider than your ruler.
- The fabric is longer than your ruler.
Also, make sure you have a sharp blade in your rotary cutter and always lock your rotary cutter when you’re not using it!
Step 1. Make a clean-up cut. Because your fabric is folded in half, every cut needs to be at a right angle to that fold. Otherwise, you’ll end up with a “V” at the fold. The clean-up cut establishes a correct baseline for the next, measured cuts. I’m right-handed, so all of the photos are shown with that orientation.
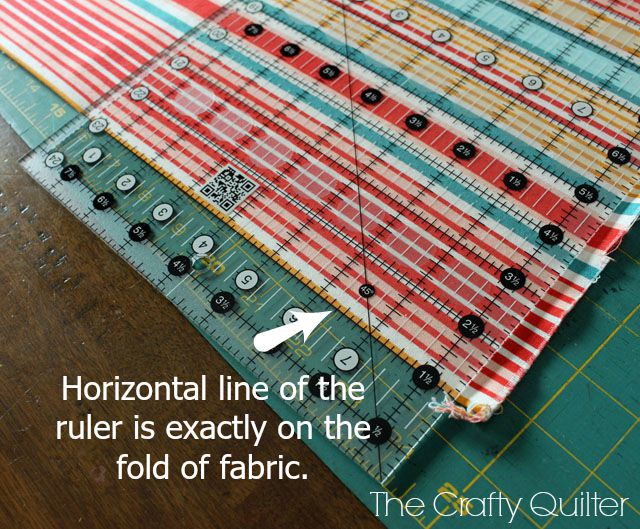
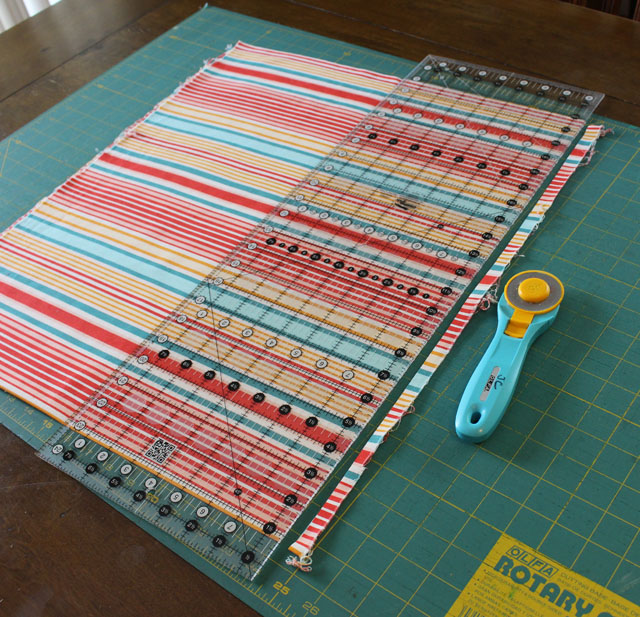
With the fabric folded in half, and the fold closest to you, place your ruler so that one of the horizontal lines of the ruler lies directly on the fold. Remember, we’re not concerned about the lines on the cutting mat. To illustrate that point, I’ve purposely placed my fabric on the mat so that it does NOT track any of the lines. If the reverse side of my cutting mat weren’t so dirty, I would use that because it has no lines to distract me.
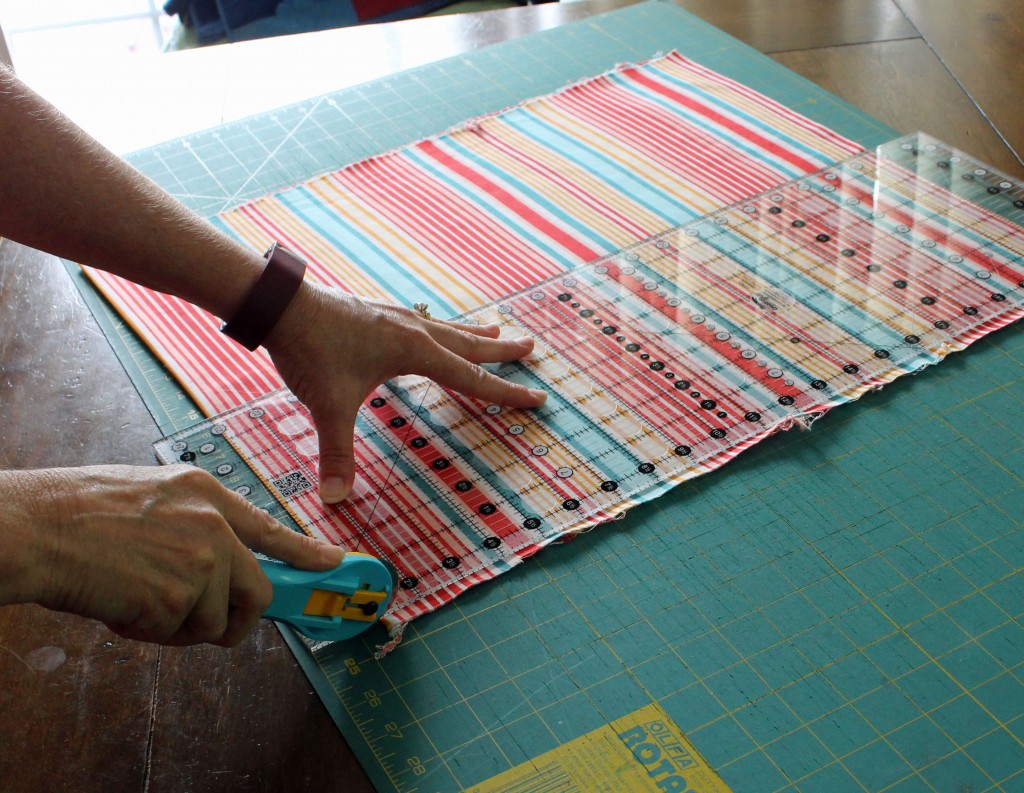
Start with the rotary cutter positioned against the edge of the ruler, BELOW the fabric, and hold the rotary cutter at a 45 degree angle. The hand holding the ruler should be placed at the lower third of the ruler.
As your rotary cutter gets beyond the hand that is holding the ruler, stop. Don’t lift or move the rotary cutter. Inch the ruler-hand up (without lifting it off the ruler), so that it is adjacent to the rotary cutter. Continue cutting until the rotary cutter gets beyond the ruler-hand again and reposition the ruler-hand. This will help keep the ruler from shifting as you’re cutting.
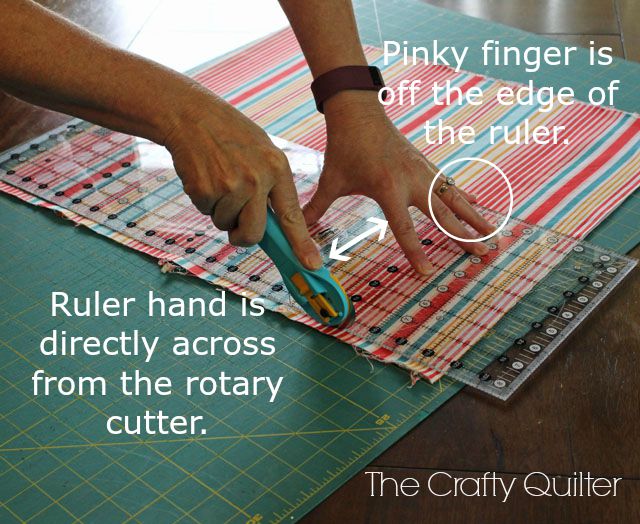
TIP: Place your pinky finger off the edge of the ruler. This will help control any movement or slippage of the ruler. Also, keep the ruler-hand directly across from the rotary cutter.
As you get more comfortable and practiced with rotary cutting, you may not need to keep your pinky off the edge of the ruler and you may not need to adjust your ruler-hand position as often.
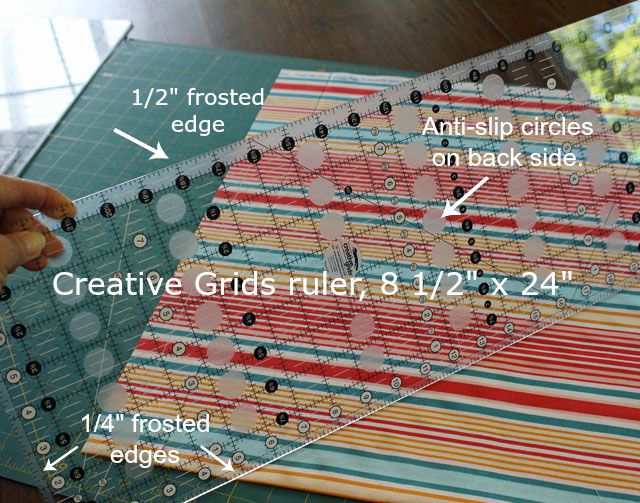
TIP: Using a good ruler can make all of the difference in the world. My favorite brand of ruler is by Creative Grids. Their rulers have anti-slip circles on the back that grip the fabric and help prevent it from shifting. I also appreciate the frosted 1/4″ and 1/2″ edges on the ruler which are great for trimming up pieced units. You can find these rulers at most local quilt shops.
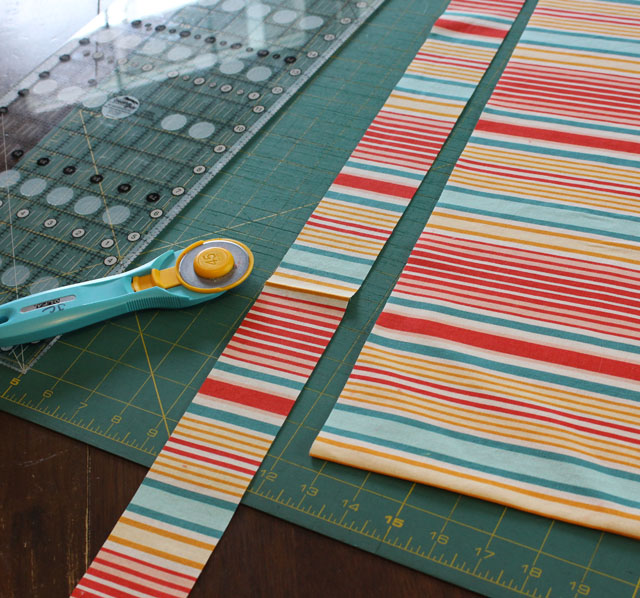
Let’s get back to the clean-up cut. Make sure you’ve cut through all of the threads before you remove the ruler. You should now have a perfectly cut edge that is perpendicular to the fold. Notice that we didn’t have to line anything up with the cutting mat.
Step 2. Cut the strips. First, turn your fabric over (carefully) so that the clean edge is on the left side (right side if you’re left-handed). If you have a small mat, you can rotate the entire mat around. You still don’t need to match your fabric with the lines of the mat.
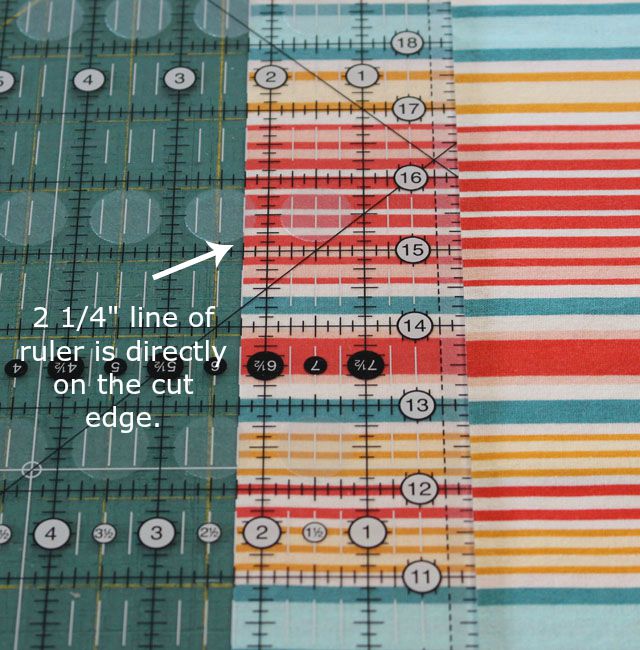
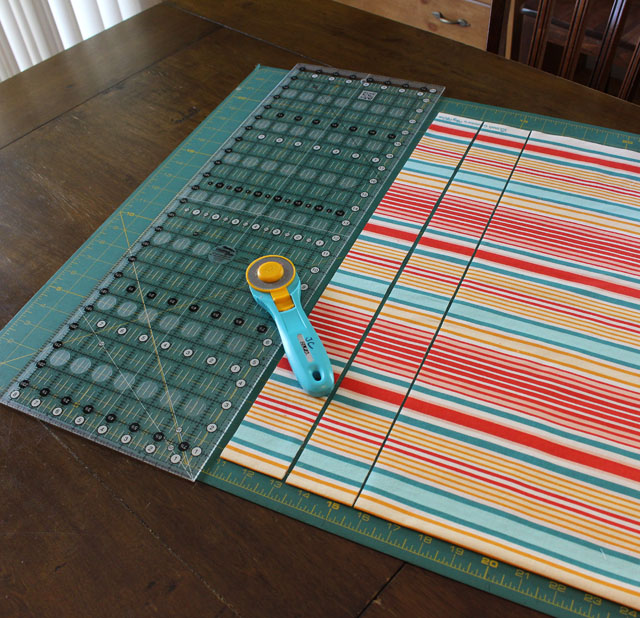
In this example, I’m cutting 2 1/4″ wide strips for the binding on a quilt. Place the 2 1/4″ line of the ruler exactly on the cut edge. The line should be ON the cut edge (or straddling it). Not next to the cut edge or all the way on the fabric.
Make your first strip-cut using the same technique as the clean-up cut.
When you open up your strip, you should see a nice, straight edge at the fold. No bends in this elbow!
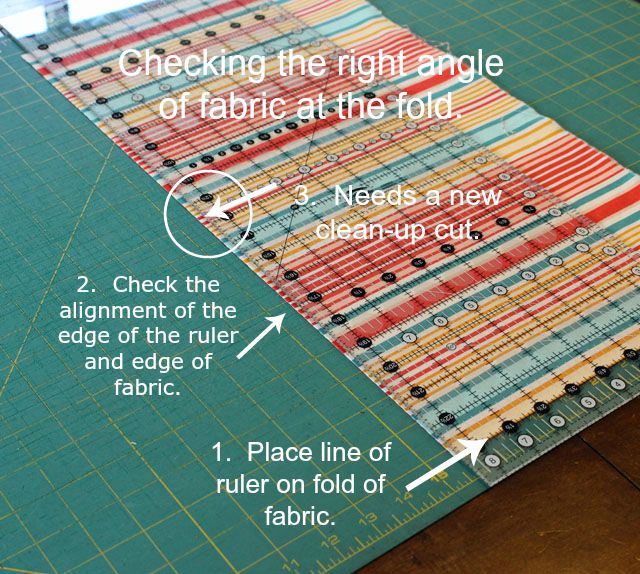
Step 3. Check the right angle of the fabric at the fold. Continue cutting as many strips as you need, AND, occasionally check to make sure that your clean, starting edge is still perpendicular to the fold. You can do this easily by placing your ruler on the fabric so that one of its horizontal lines is resting on the fold. See what’s happening with the edge of the ruler and the edge of the fabric. If the angle is more than 1/8″ off, then you’ll need to make a new clean-up cut.
To make the new clean-up cut, turn the fabric around so that it’s on the right side again (left side if your left-handed) and repeat the first step. Then turn it back around to begin cutting strips.
Occasionally, you may need to cut a fabric strip that is wider than your ruler. In that case, you can use the lines of your cutting mat to measure the wider cut. Another way to do this (and my preferred method) is to use TWO rulers.
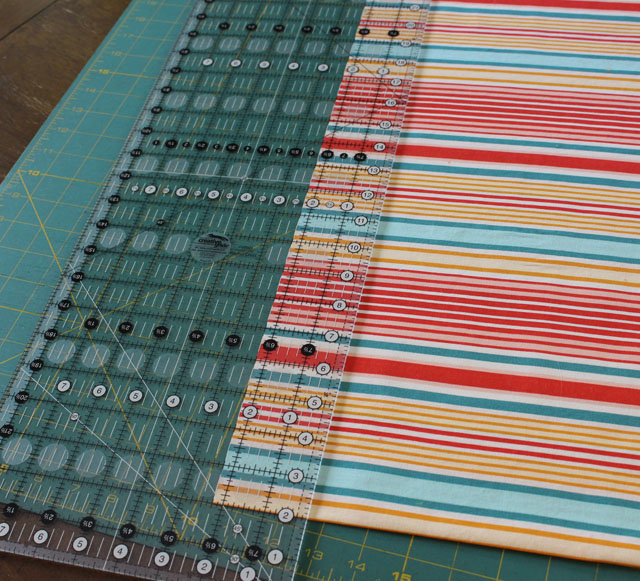
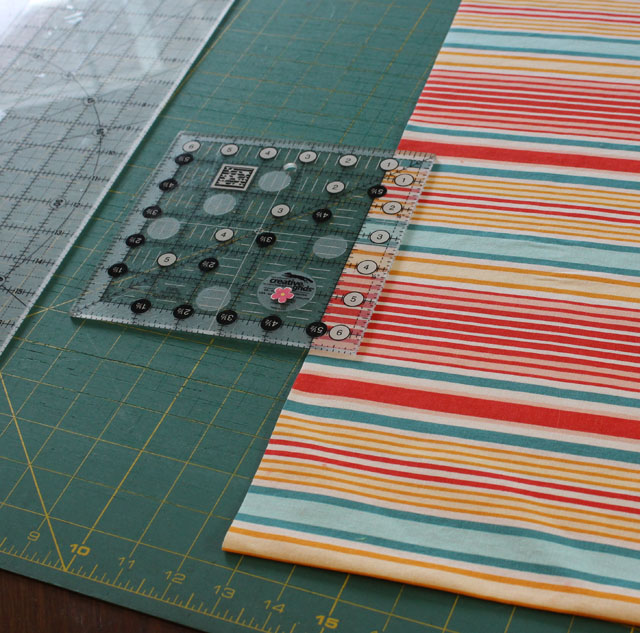
For example, if I need to cut a strip of fabric that is 7″ wide and my ruler is only 6″ wide, I can make up that extra inch with a second ruler. I place the 1″ line of my second ruler (this can be most any size ruler) on the cut edge of my fabric.
Then I butt the first ruler against this one, and that gives me my total width of 7″. Now I can make my cut. I use this method most of the time.
Cutting strip sets. When I have a strip-set to cut, the process is very similar. I make a clean-up cut on the right edge (left edge if you’re left handed) of the strip-set.
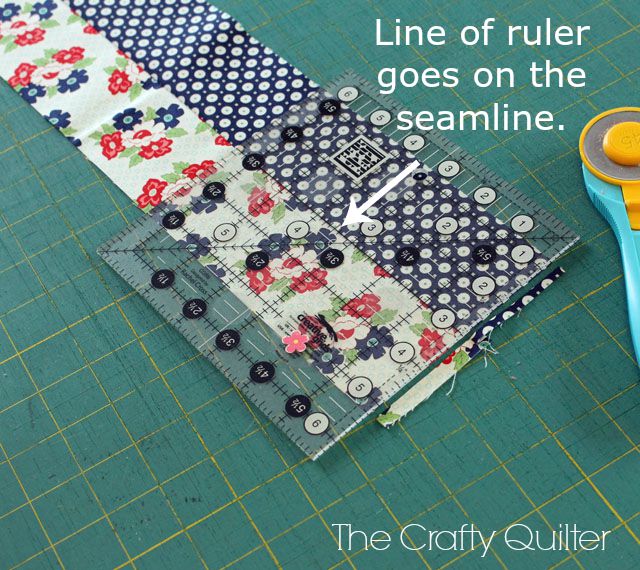
TIP: Align one of the lines of the ruler with the seam of the strip-set rather than the raw edges of the fabric, to make your clean-up cut. This seam is more important and usually more consistent than the outside edges of the strip-set.
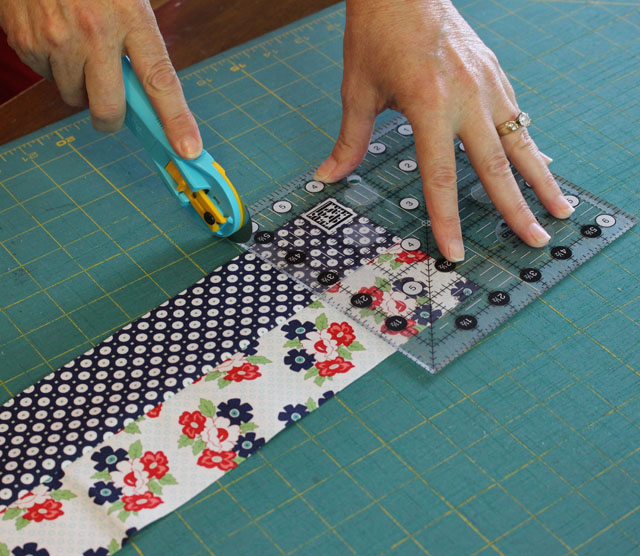
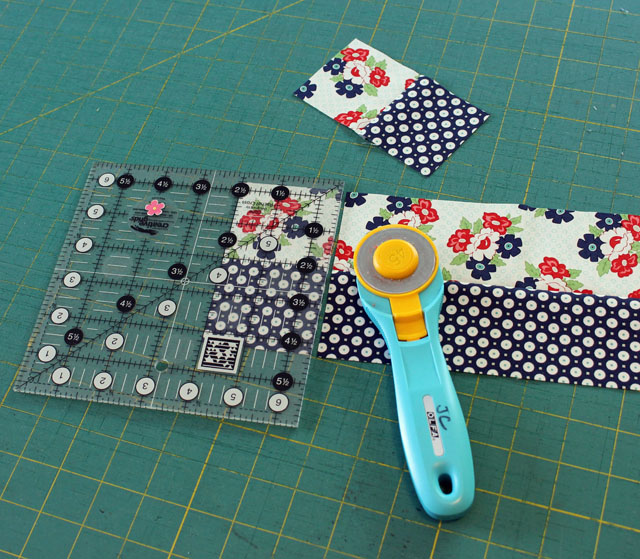
Turn the strip-set around so that the clean edge is on the left side (right side if you’re left-handed). Place the desired line of the ruler on the cut edge and make your sub-cut. You can also continue to place a line of the ruler on the seamline, too.
Continue making sub-cuts and checking the last cut edge with the seam line. It’s important that they’re perpendicular (at a right angle) to each other. You may need to make a new clean-up cut if they’re not.
And notice, I’m still not using the lines of my mat to measure anything. Do you think I’ve beat that point to death, yet?
A few more things to mention: I don’t double fold my fabric when I’m rotary cutting. It’s the way I teach my beginning students for two reasons: (1) it’s easier to cut through two layers of fabric than four layers, and (2) you only have one fabric fold to worry about rather than two.
Be safe! Always cut away from yourself. Don’t expose the blade of your rotary cutter until it’s in your hand and you’re ready to cut. Always lock it when you’re done cutting.
I don’t cut the selvages off of my fabric until I absolutely have to. The selvage gives me important information about my fabric and it makes it easy to orient the fabric’s lengthwise and crosswise grain. The downside is that I don’t have cute strips of selvages to save and make into another project.
If you want one more tip, you’ll have to watch the video to see an efficient way of cutting multiple strips of fabric. Teaser, I know.
I hope you’ve learned something new today. Remember, this is the way I do things, but it’s not the only way. I realize there are many ways of rotary cutting and one way might work better for you than another. If you’d like to share what works for you, please leave a comment. I think we can always learn from each other!






Oh my! Thank you for the tips. I’ve only been quilting for 2 years. I wouldn’t have “gotten” it until I had more experience to understand the “whys”. Definitely will use your amazing tips!
Hi, My name is Grace and I am a beginner in quilting……I am looking for my first rotary cutting set…..
Have any ideas……………? I would like to receive information from you…..
Thank you for putting this together. So helpful! The other thing I see is you are starting your cuts from the fold side and not the selvage side. Rather than flip my fabric over, I’m fortunate to have room to cut from the other side of the table my mat is on. I also wish someone had shown me the pinky trick ages ago! So many great tips! Again thank you!
I enjoy your tips and patterns very much. I too, like the way sprayed fabric handles. Herein is the but…why advocate re-positioning of the fabric that could potentially lead to error when re-positioning the mat or the body to the other side would/could prevent that occurring?
Julie,
Thanks so much for this post and the wonderful video. I have been so discouraged with my strip cutting, because the strips were always “bent”. I can’t wait to put your lessons to use. I have learned so much from your lesson, and am so grateful to you for taking the time to put together the lesson and video. You are a superb teacher!
Cut straight lines or freehold curves. Good quality heavy dute rotary cutter bought to you by a well known brand Impex.
Thank you for your lesson. I do use a lot of your method, but am always glad of a few more tips. I lack self confidence, and rely on my friend a lot. She was a rep for a bedding company for many years and has a natural instinct of what would go with what.
Thank you for the wonderful tips! Very helpful. I think the cut is almost the most important part. If the cut is wrong, then everything is off.
Thank you very much for these wonderful tips. I learned some valuable tricks from your post and I am truly grateful. Creative Sewing Bliss…
Wow! This was fabulous, Julie. I learned more about rotary cutting than I ever knew before. I will put some of your practices into effect. Thanks so much. Karen O’
Excellent and informative post, Julie. You’re a doll for taking the time to put it together.
Hi Julie, thanks for your very helpful and informative tutorial today. I do have a problem with cutting on which I hope you can advise me, although it’s probably just me being too heavy-handed. When I have placed my ruler on the fabric and ready to cut I then place my left hand on the ruler in the appropriate place but sometimes when I start cutting I find that in ensuring that I keep the blade close to the edge of the ruler, I somehow manage to push the ruler and then I have to stop and reposition the ruler on the fabric. Is this because I’m pressing the blade too hard against the ruler or am I holding the blade at the wrong angle? Thanks for any tips you may have and I look forward to hearing from you. Kind regards, Jennifer
Hi Jennifer, That’s a common problem that I see in my classes. It’s most likely because you’re pushing too hard against the ruler. Try to think of moving the rotary cutter in a forward motion rather than a pushing, sideways motion. Make sure that your body position is correct. You shouldn’t be leaning forward too much. You want your body weight shifted to the side that’s holding the ruler in place so that you can press down on the ruler. Be patient; it will get easier with practice!
such a clear video, must use my pinky. Sometimes although I line up the selvages the fabric does not form a proper fold but is squiffy and I have to tug it about not good is that a bad quality fabric I wonder?
Thanks so much for the tutorial and great tips on cutting fabric. I never get tired of reading
Useful and helpful information. Thank you for taking the time to do this.
I bought some Best Press but have not used yet, but have been using the Niagra spray starch with the gold lid. I have read on spraying fabric and waiting till it dries before pressing or not to use starch or not to use steam as it shrinks your fabric. Personally no matter what i spray or don’t stray..i use a ruler and cut by the ruler but my blocks aren’t always perfect in the end sometimes. 🙁 IDK how this happens but I am still working on perfecting…
To do the initial clean cut, I place one of my shorter rulers along the fold but on the left side (I’m right-handed), then butt my long ruler to the left side of the shorter ruler, remove the shorter ruler and make the clean cut. I don’t have to reposition the fabric, just start making cuts from the left.
My problem with Mary Ellen’s Best Press is that it builds up on the ironing board cover leaving a big brown mess. I’ve stopped using it for that reason.
If you use a piece of muslin or other fabric on top of your ironing board cover, it is easy to throw that in the wash when the starch gets built up on it.
That’s a great idea, Linda. I do that, too!
Hi Pat, Thanks for sharing! That’s a good technique as well and it saves you the hassle of turning your fabric around each time.
Thank you. Seeing this made such a difference. The written word is good but the video made it so simple.
“The #1 (and most important) tip I have for you is do NOT line up your fabric with the lines of the cutting mat.”
WELL SAID!!!