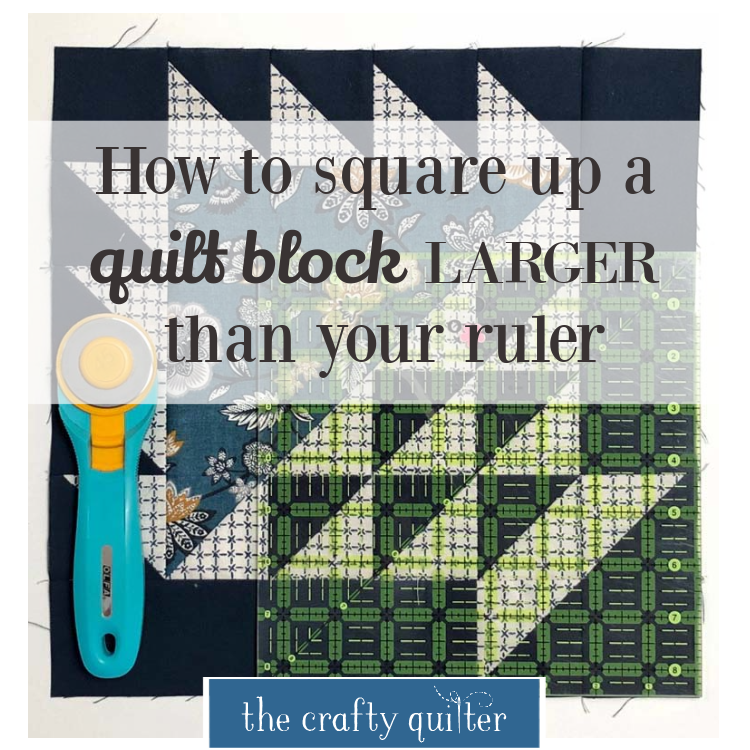
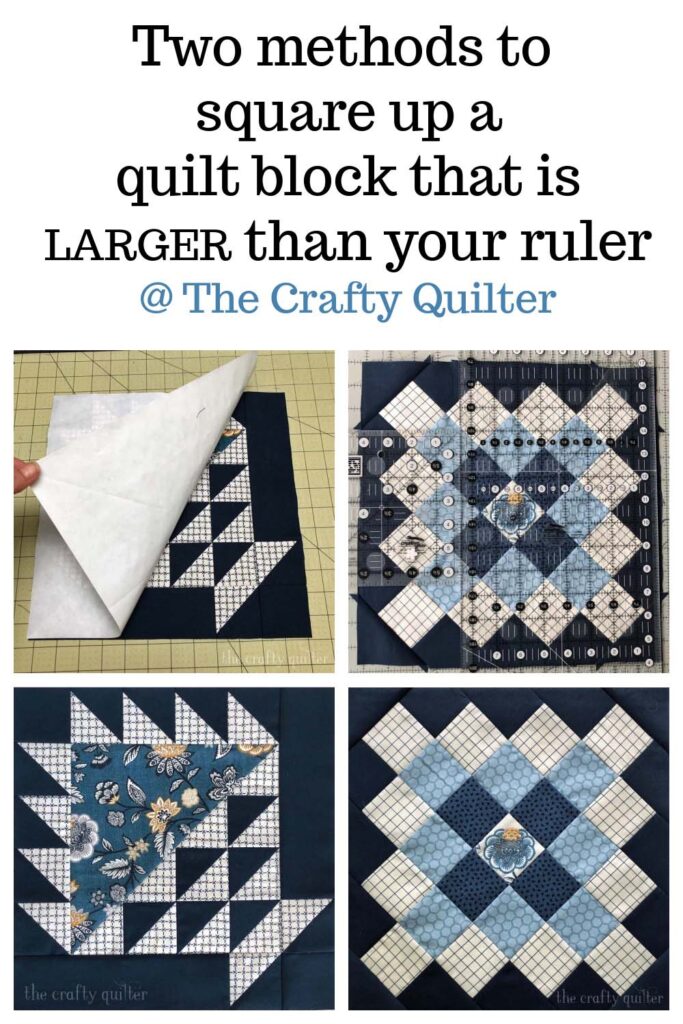
How to square up a quilt block
After every quilt block I make, I check to make sure it’s the correct size – usually with a square ruler that is the same size I want the quilt block to be. But how to square up a quilt block that is larger than your ruler? We don’t all have a square ruler in every size available (wouldn’t that be nice). I have a simple solution to share with you, plus another option that works well too.
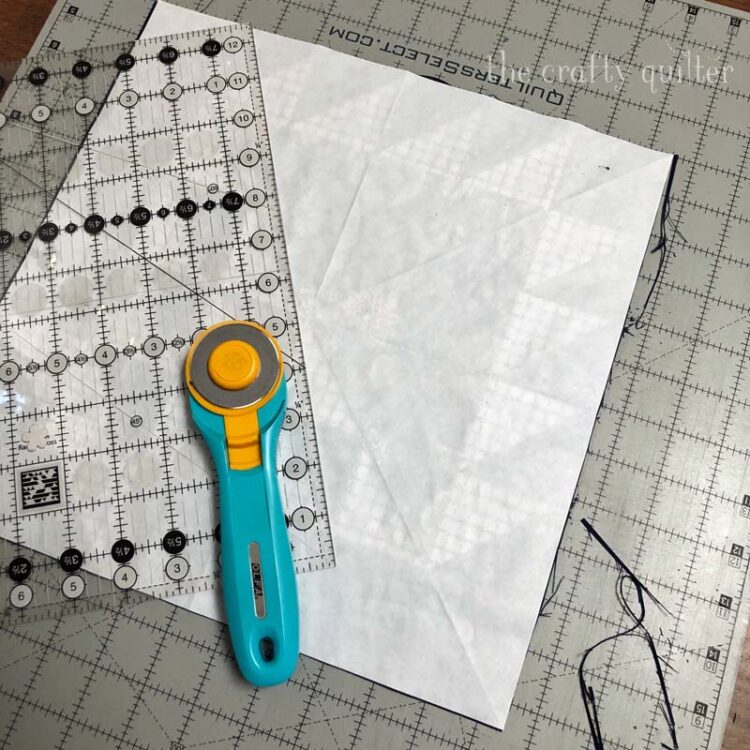
You’re going to need some freezer paper and a square ruler that is at least half the size of your desired block size. I’ve been making lots of 12 1/2″ square blocks lately, so I’m going to use a 6 1/2″ square ruler in this example.
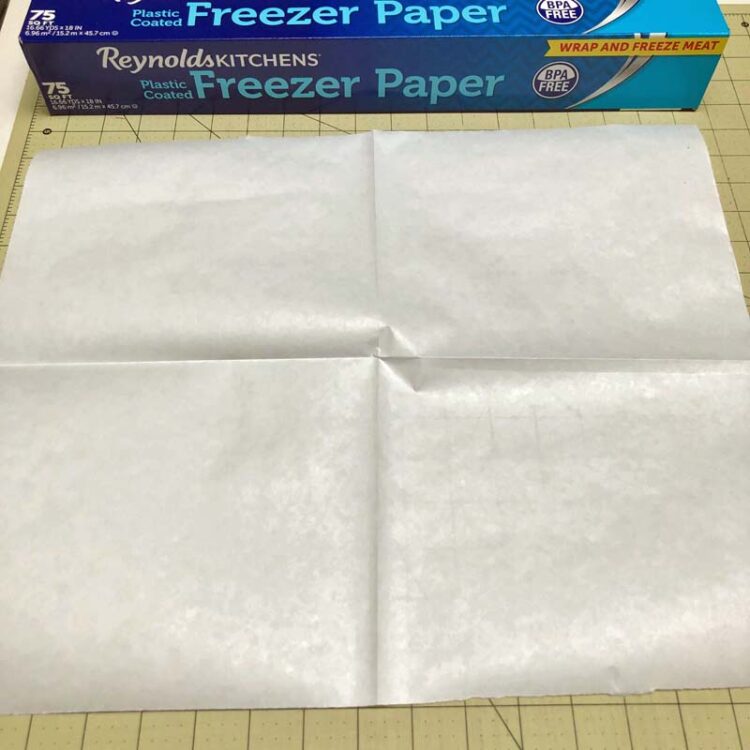
- Cut a piece of freezer paper that is larger than your desired quilt block. Note: Some freezer paper can shrink slightly. You can iron it flat (always iron the paper side) to “preshrink” it before going on to the next step.
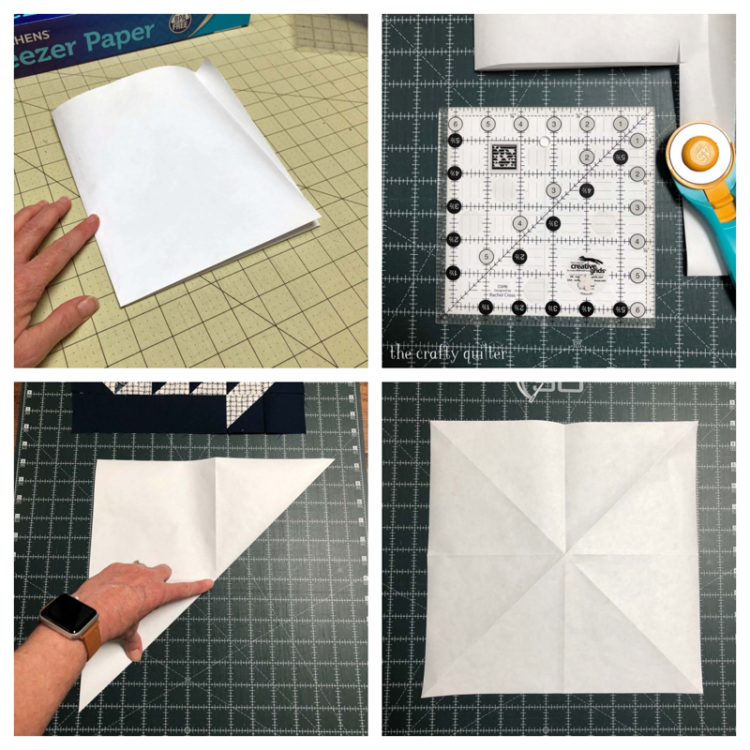
- Fold the freezer paper in half and then in half again.
- Place the square ruler so that the 6 1/4″ lines of the ruler are on the two folded sides of the freezer paper. To calculate where to place the ruler for any size quilt block, you divide the desired square size by 2, so 12 1/2 divided by 2 = 6 1/4.
- Using a rotary cutter, cut on the two sides of the ruler. Unfold the freezer paper and you have created a 12 1/2″ square.
- Fold this square diagonally, from corner to corner, twice. This creates additional centering guidelines.
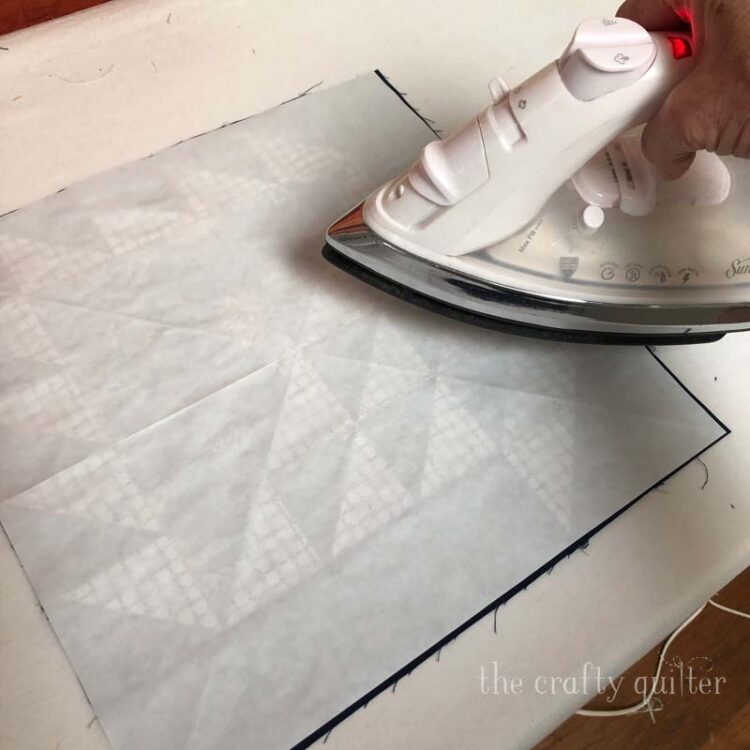
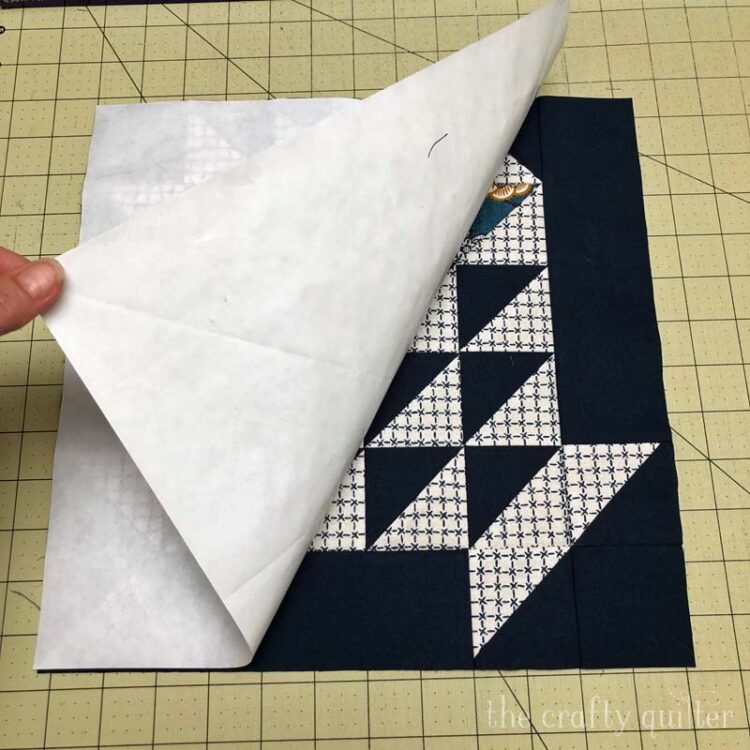
Iron the freezer paper (shiny side down) onto the right side of the quilt block, using the folded guidelines of the freezer paper as a centering guide. You could also fold your quilt block on both diagonals, press it, and match the creases of the fabric to the paper. Check to make sure everything looks straight and lined up.
Transfer the quilt block to a cutting mat. Place a long ruler even with one side of the freezer paper and trim. Repeat for the remaining sides.
Peel off the freezer paper and admire your beautiful block! You can re-use the freezer paper many times, so don’t throw it away.
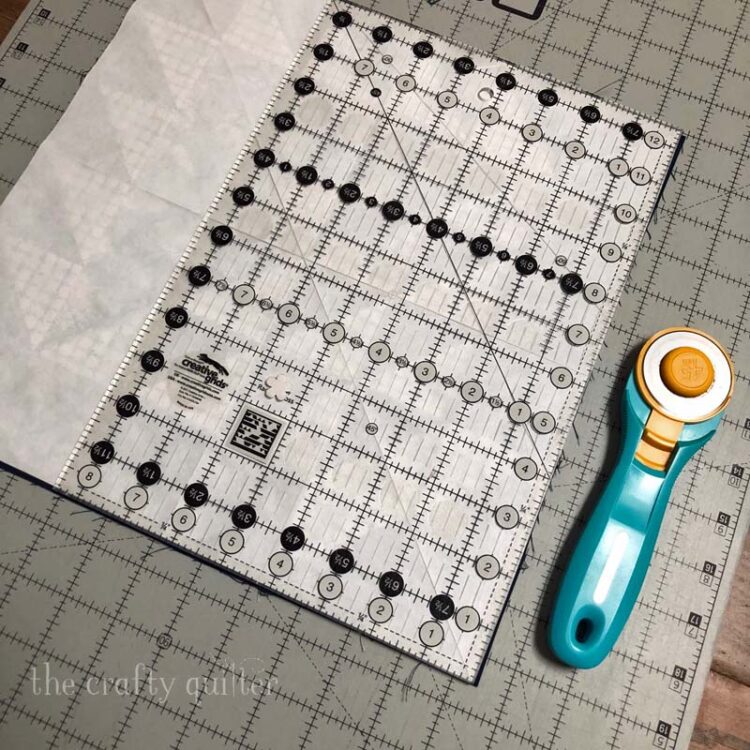
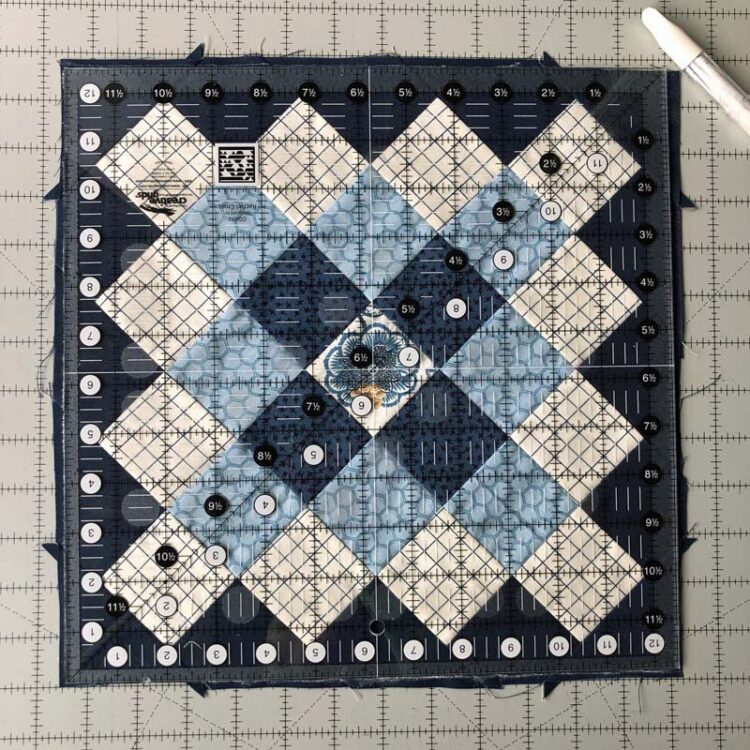
The second method of squaring up a quilt block that is bigger than your ruler, is to use two rulers and a cutting mat. Within this method there are several ways to go about it. I typically don’t like to use the lines on a cutting mat to measure and/or place my rulers, but it works in a pinch.
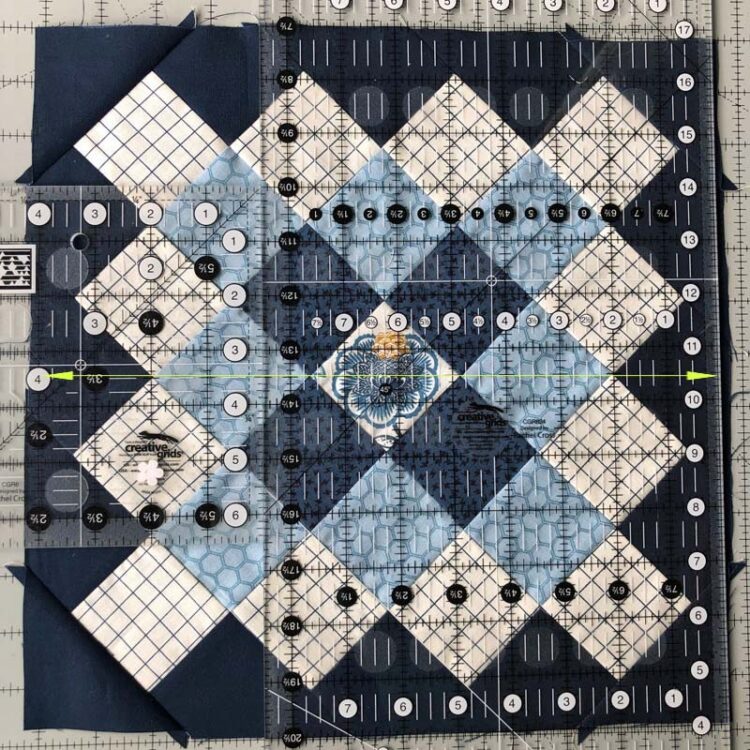
Place your block on the cutting mat. If you have a long ruler that is at least 6 1/2″ wide, you can place the 6 1/4″ line of the ruler down the center of your quilt block. Depending on the construction of the block, you might have some seams or points that would be considered the center of your block and will subsequently guide the placement of the 6 1/4″ line of the ruler. If not, then you can fold the block in half in both directions and make a crease to use as the placement guide.
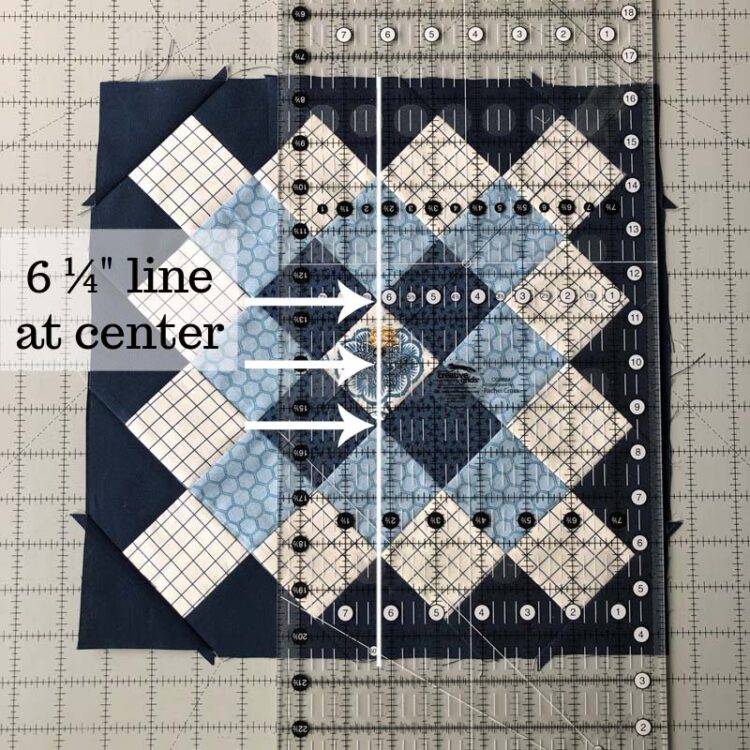
If you don’t have a ruler that is wide enough, you could use two rulers. In my example below, I have a 6″ x 12″ wide ruler, so I placed the 1/4″ line of my 6 1/2″ square ruler at the center of my block and butted my larger ruler next to it to give me the full 6 1/4″ (from center) width.
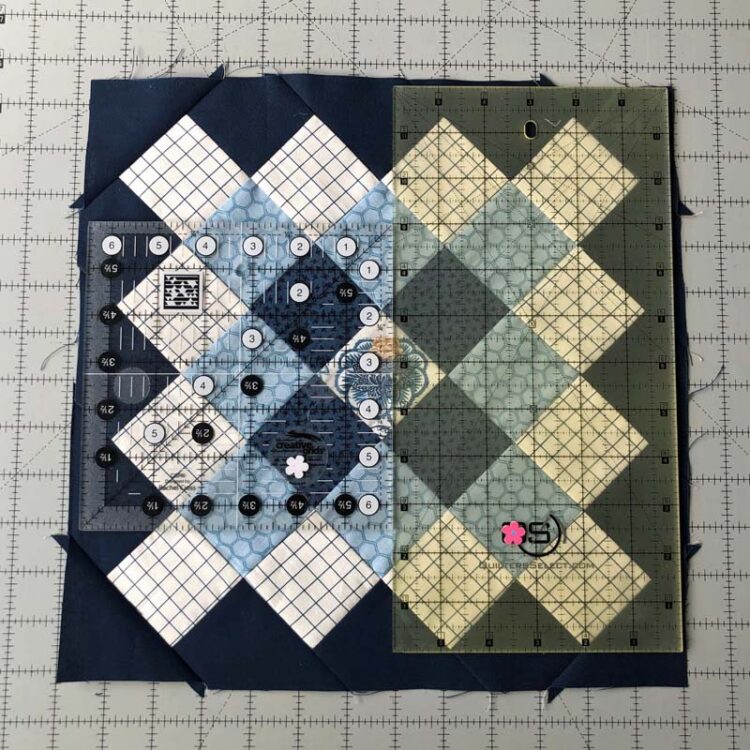
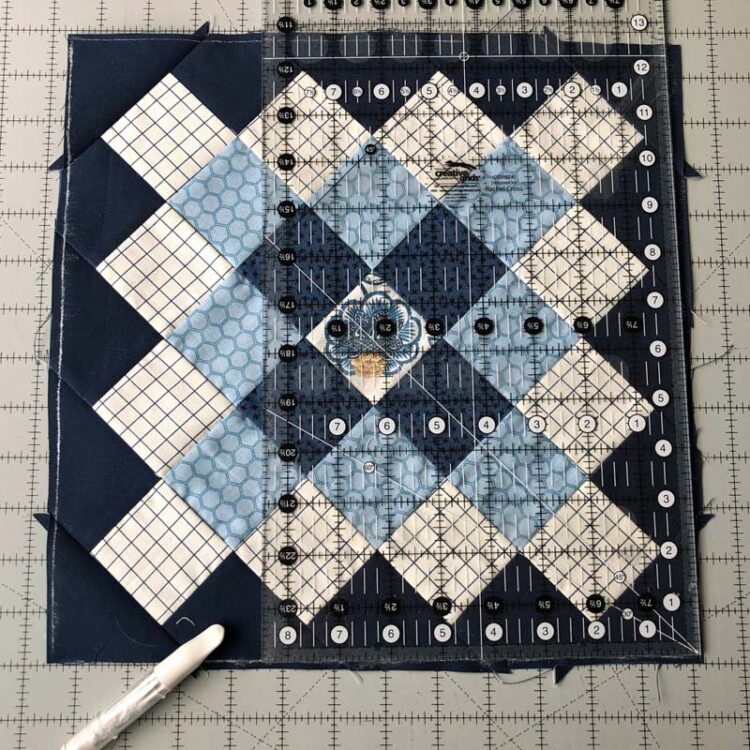
At this point you can trim that one side, but I would first place another ruler next to the one already there and make sure there is enough width so the opposite side can be trimmed without losing any points, etc.
For an additional “safety net”, you could draw the cutting lines with chalk on all four sides before cutting anything. Once it looks okay, then trim inside those lines (my chalk is thick and cutting on the line would make my block too big).
Since I have a 12 1/2″ square ruler, I decided to check my chalk lines and they were accurate.
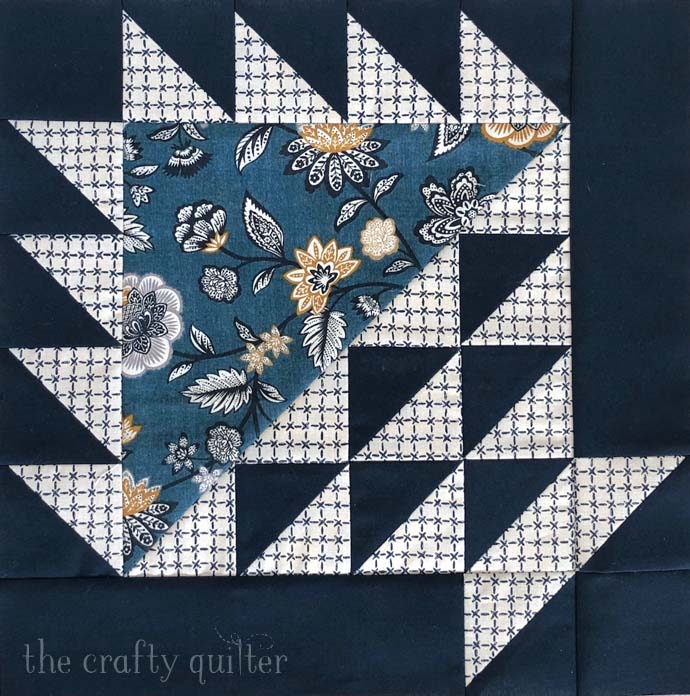
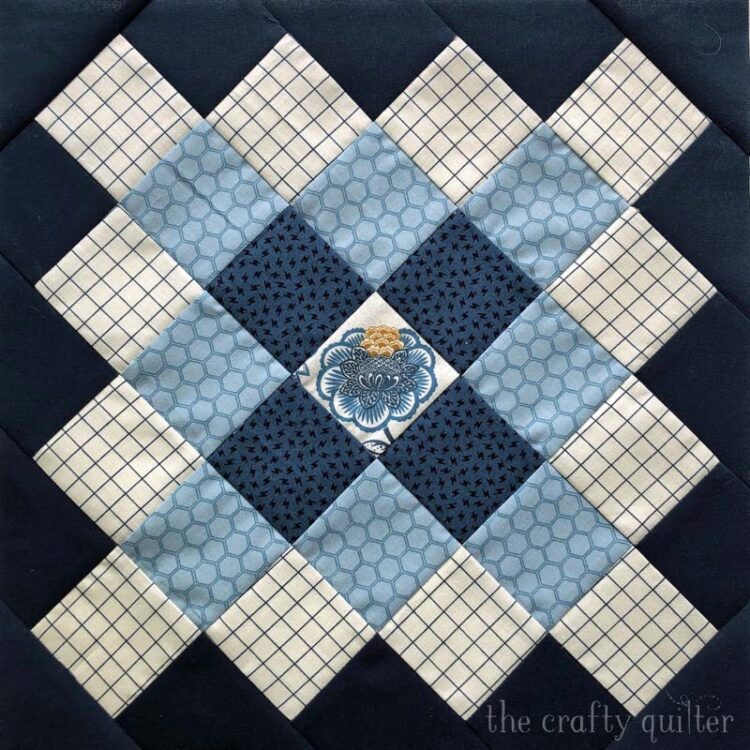
Now I have a nicely trimmed “Groovy Granny” square. This pattern is free and available at Moda Fabrics here for their October Stitch Pink Sew Along to raise breast cancer awareness. The basket block at the beginning of this blog post is also from the Stitch Pink Sew Along. The full archive of free Stitch Pink patterns can be found here.
Just remember, that both of these methods can be used to square up most any size quilt block. I’ve used it on a 16 1/2″ quilt block that needed trimming, and it was really easy with the freezer paper method. I hope you give this a try next time you need to square up a quilt block that is larger than your ruler.

Discover more from The Crafty Quilter
Subscribe to get the latest posts sent to your email.

I get the concept but here is what I don’t understand.
The blocks I am working with start out between 2-3/4 and 3 inches and I’m to square to 2-1/2 inches. I am cutting off both ends where I have tacked so I now have to tack my seams again or risk my seams unraveling. I can guess where I am going to cut and tack there before squaring but chances are, I’m going to miss. This seems like unnecessary double work. I notice you didn’t mention this nor does anyone in all the tutorials I have come across. HELP!!!
Genius idea about the freezer paper. Thanks Julie!
Great info. There’s always another way!
Thanks for linking up!
Julie,
Such brilliant advice! Thank you – you are such a good teacher!
Anne
The freezer paper idea is awesome. Ironing before cutting is a good idea. You can still link this up to tips/tutes….its a great one!
That’s a really clever idea using the freezer paper ! I’m going to try that next time I need to trim a large block to improve accuracy. Thanks so much for sharing the tip.
Love the navy blocks for Quilt Pink, so great and well done. And I really like the methods you shared, for squaring up, never used the freezer paper method before. Very helpful. Kathy
These are both great tips, but I especially like the freezer paper method.
The freezer paper method is brilliant! Thank you!
I always enjoy your posts, but this one is one of the best! Why didn’t I think about the freezer paper trick??? Thank you for the excellent explanation!
Thank you for that wonderful explanation on squaring up a larger block. I had no idea that freezer paper would be so useful. Love receiving your emails and reading about your busy life in quilting.
Thanks. I love the freezer paper suggestion
Thank You for this helpful tip!!
Never thought of the freezer paper–aren’t you clever !! I usually use my rulers that fit the block, or my 12 1/2″ ruler or my 20 1/2″ ruler, or 2 rulers. I’ve been printing the Stitch Pink blocks, not to use all together (I really don’t like “sampler” quilts) but to pick and choose for 1 block quilts and seeing the secondary pattern, or as 2 block quilts.
Never considered the freezer paper method of squaring up the block. Always like learning from you!
Freezer paper! I had always wondered, this is fantastic! Thank you for educating me, I will carry on with a new set of skills!
this is SO helpful, thank you!
This was very helpful. Thank you!
Your freezer paper method is brilliant. Thanks for a great tip
I too like making 12 1/2” blocks. I have never used the freezer paper method. I always try squaring up my blocks with a 121/2” ruler. But I am eager to try the freezer paper method. Thanks for the suggestion. I love your designs too. Keep up the good work the world’s quilters.
Thank you, Julie! I always learn a lot from you!
-Jean❤️
I really like the freezer paper idea, thanks a lot for showing us about it. I have used rulers, but will try freezer paper the next time.