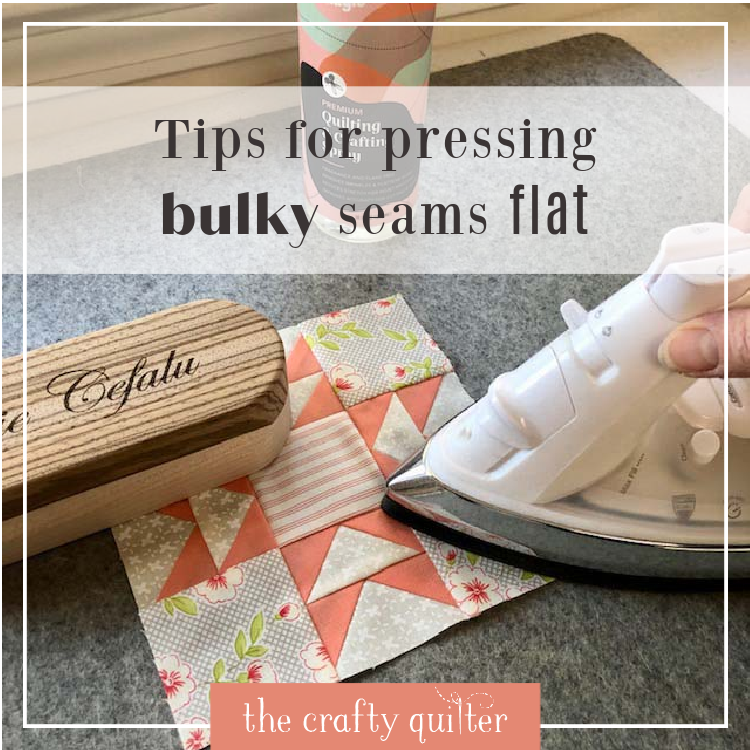
How to press bulky seams flat
Certain quilt blocks produce seams that are bulky and seem impossible to get flat. Today I have some tips that you are going to love for pressing bulky seams flat! These pressing tips are helpful for all seams and they’re easy to do. The results are flat, crisp seams that will make you a happy quilter!
What is a bulky seam?
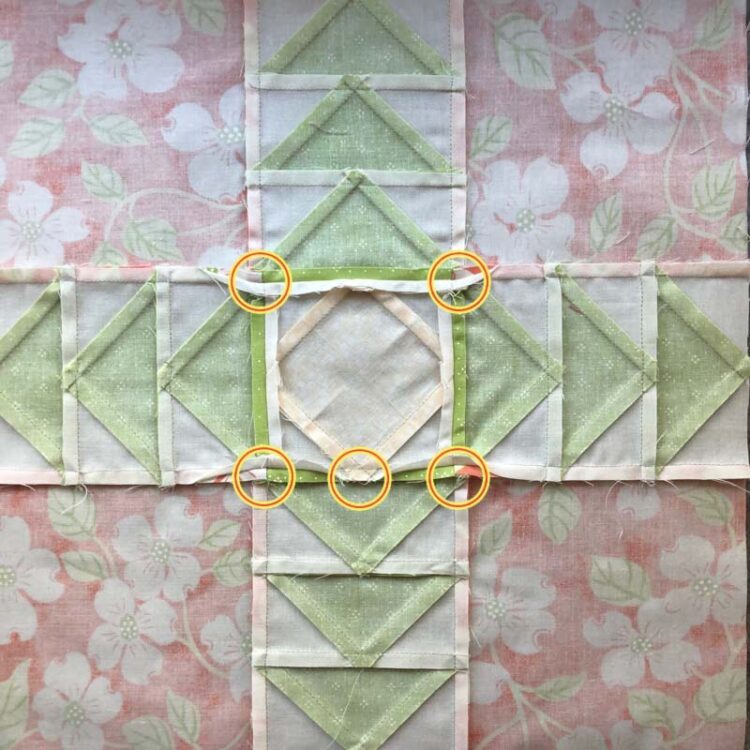
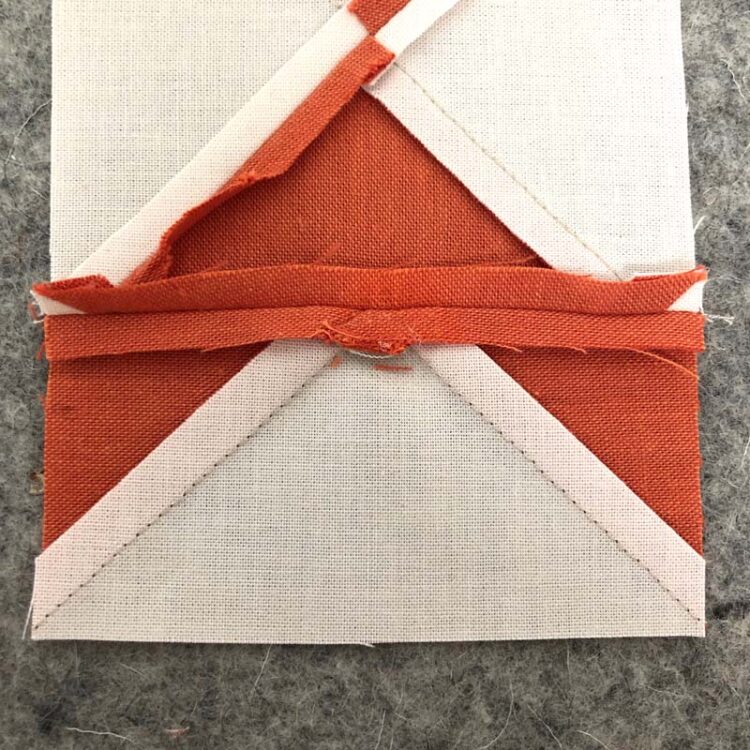
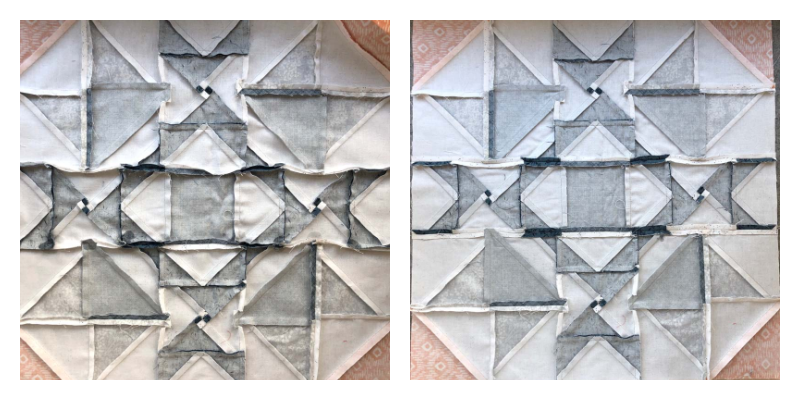
Bulky seams are created when there are more than four layers of fabric coming together in a seam intersection. An example would be the point of a flying geese unit, especially when it needs to be pressed toward itself. In the example below, there are seven layers of fabric in this one seam intersection!
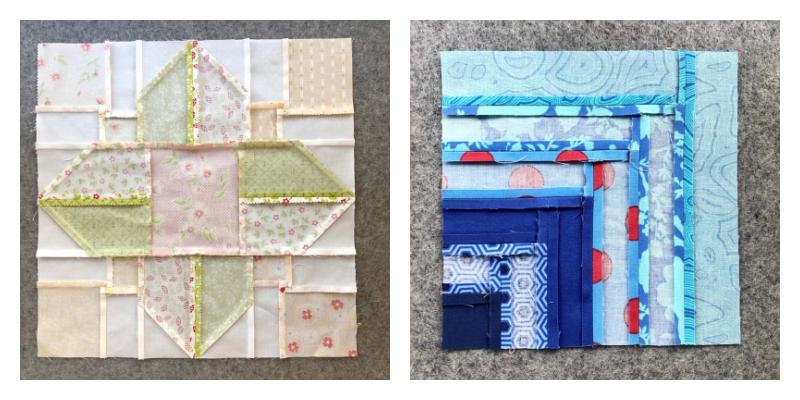
Here’s another example of flying geese and a square-in-a-square (center) unit. You can see the seam had a mind of its own when it came to pressing, and I think I eventually gave up trying.
Tips for pressing bulky seams flat
Out of necessity, I’ve become a bit of an expert at getting bulky seams to lay flat. Some of my quilt blocks lately have been “buggers” with those seams. So, I’ve tried some things that work really well for me and thought I would share them here.
Sometimes pressing any seam can be difficult to get perfectly flat. When I press seams open, they never stay flat. All of these tips will work for those seams, too!
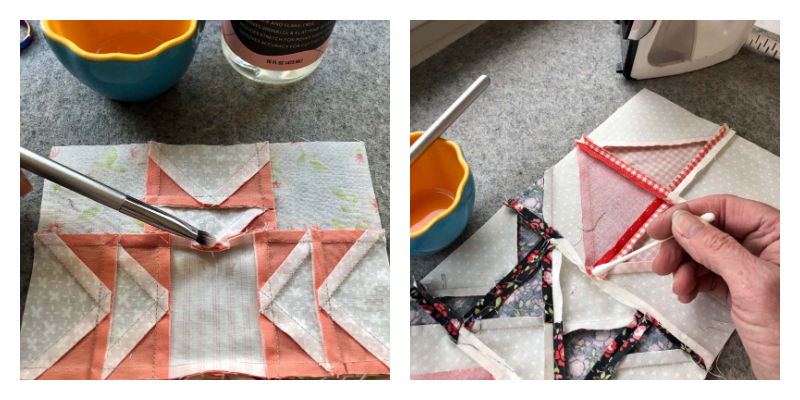
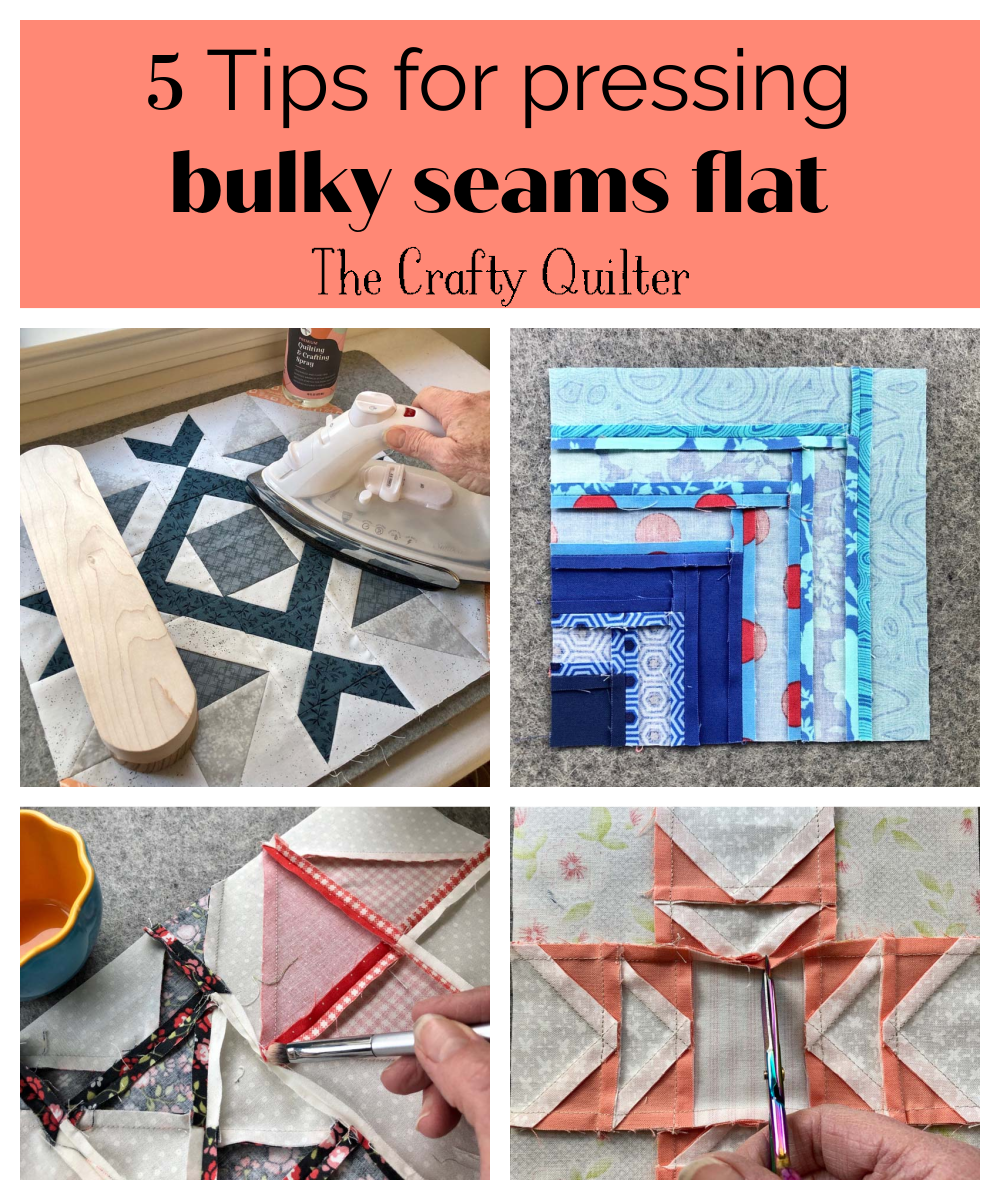
Use a pressing pen or a paintbrush dipped in starch.
This little trick is my number one tip for getting bulky seams to lay flat. Trust me, it works! The idea is to saturate the seam without having to saturate the whole block with starch. It prevents distortion and gets right into the seam allowance. This is really effective in getting the seam to relax and then you can press it the way you want with an iron.
One of my favorite pressing pens is the Easy Press Pen. This pen is filled with a pressing solution and has a hard nib (tip) that is used to apply the solution to a seam. Then you press it flat! It’s always ready to use and it’s refillable.
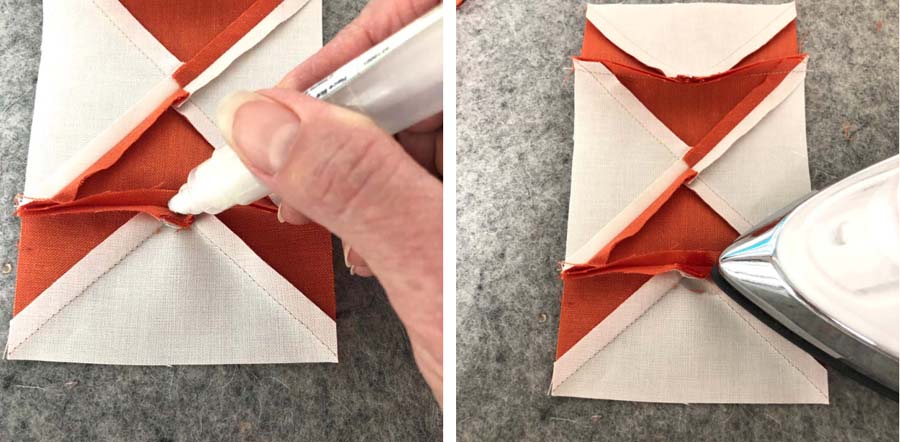
You could also use a paintbrush or a Q-tip that is dipped in liquid starch to “paint” the bulky seam intersection. I’ve even used an unused makeup brush which works well, too. Any liquid starch will do; if you’re using an aerosol starch, you can spray it in a cup and it will dissolve into a liquid.
Use a wool pressing mat.
Wool pressing mats are wonderful for pressing your blocks and getting your seams to lay flat. The wool absorbs the heat from the iron which helps to press the fabric from both sides at the same time! It’s also good at keeping your fabric from shifting as you press. I absolutely love mine and I have two of them in different sizes. Plus, the smaller ones are portable and great for taking to classes.

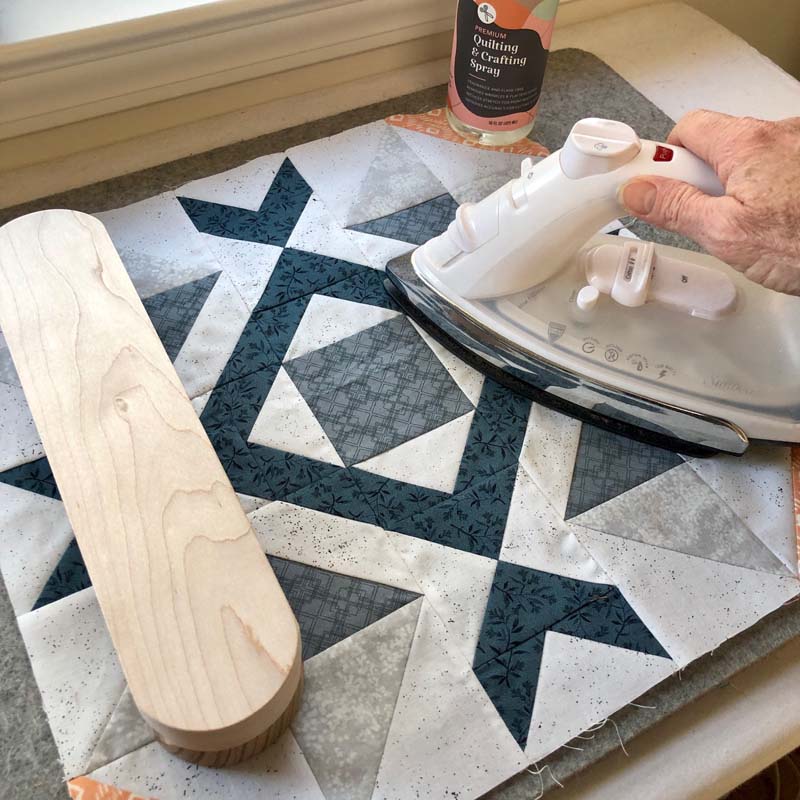
Use a tailor’s clapper.
Tailor’s clappers have been around since Grandma’s time, and we quilters have discovered how useful they are to get a seam to lay flat. I use them to set all of my seams after I press them with an iron. They work especially well if you have used starch or steam because the wood from the clapper absorbs the moisture and maintains the heat from the just-pressed seam. This results in a really flat, crisp seam.
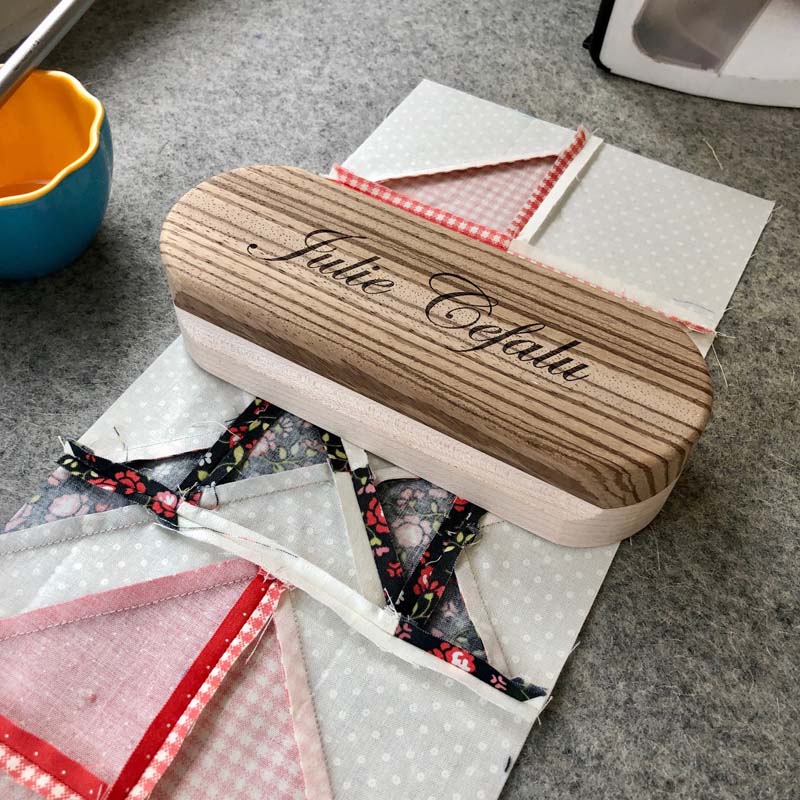
Sometimes I’ll repeat this process on the right side of a finished block to give it a final press. This is helpful for blocks that have really bulky seams such as the Arrow Stone block below.
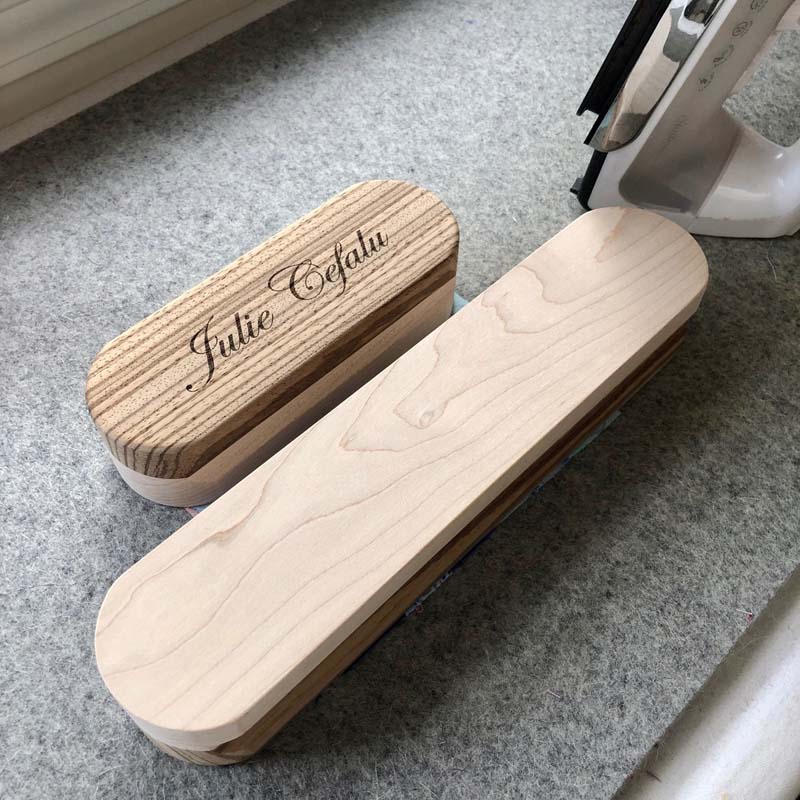
Tailor’s clappers come in different sizes and shapes, most of them rectangular, and are usually made of a hardwood such as maple. I was gifted a beautiful set by my SIL – one of them came with my name engraved on it. You can find similar clappers on Etsy here.
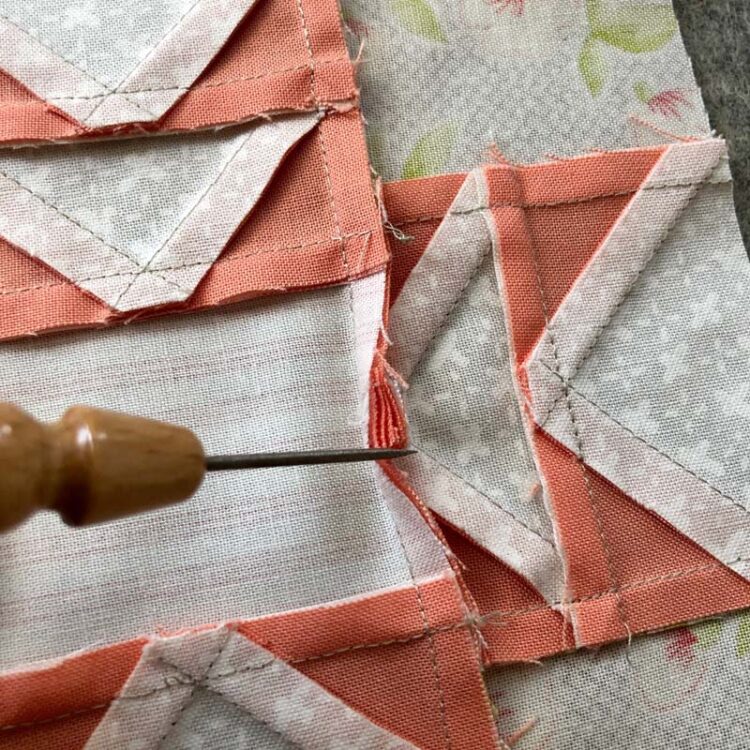
Clip into the seam allowance.
There are times when drastic measures are called for. Sometimes a bulky seam can be stubborn and does not want to be pressed in the direction needed. That’s when I turn to clipping into the seam allowance. This is a last resort kind of thing, but very effective.
Using sharp scissors (I love these by Tula Pink) clip just shy of the seam on both sides of the bulky intersection. You don’t want to compromise the strength of the seam, so be careful with this. Now that section of the seam can be pressed in the direction it wants and the rest of the seam can be pressed in the direction YOU want.
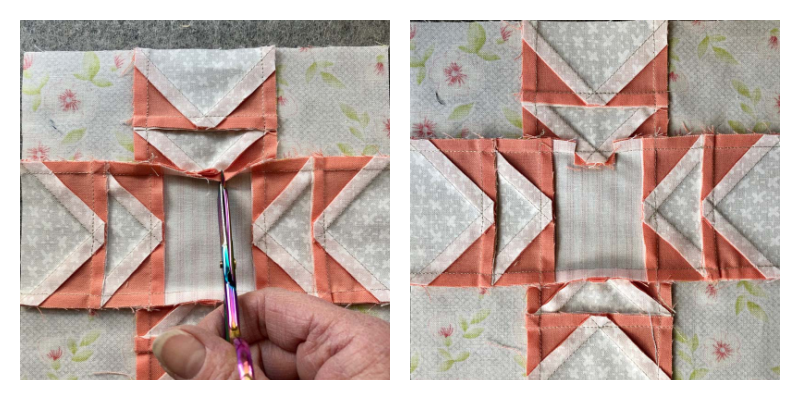
I also used a dab of starch with a pressing pen on that intersection and it turned out to be a beautiful, crisp seam.
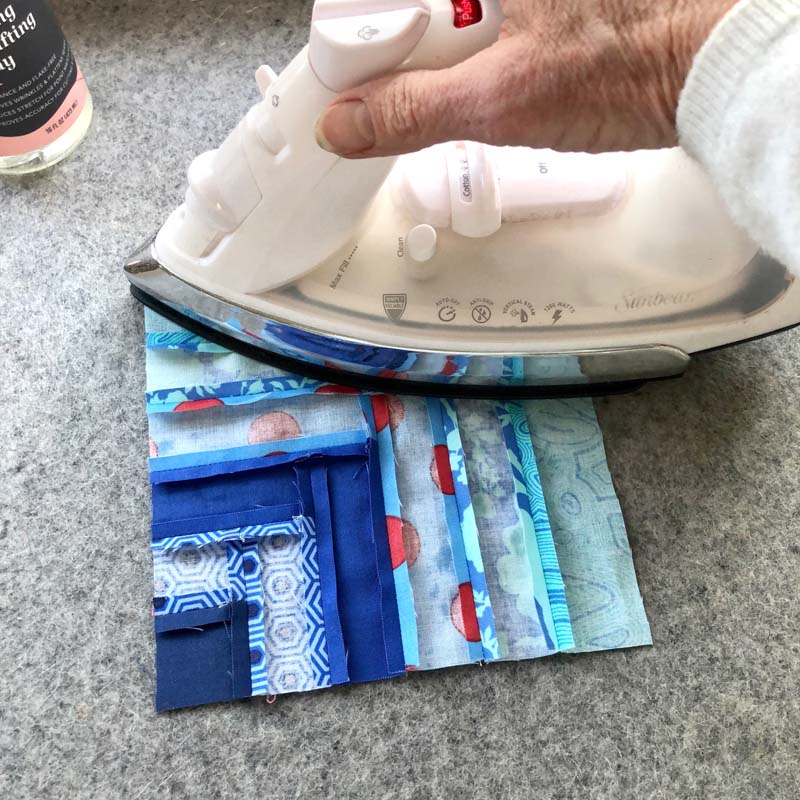
Place a heavy object on top
This tip is great for all seams and blocks. When you’re done pressing, place something heavy (such as a stack of magazines or books) on top of the block and let it rest over night. This reminds me of pressing flowers in the pages of large encyclopedias back in the day. It’s simple yet effective!
If you try just one or all of these tips for pressing bulky seams flat, you’ll find your seams will be flatter and you’ll be happier!
You can find previous blogs posts about pressing seams open vs. to the side here, and you can find more pressing tips here. If you’re curious, I prefer to press to the side, but sometimes pressing seams open works best. I do what works for me and each block/quilt is different!
Thanks for reading and feel free to add your pressing tips in the comments!

Discover more from The Crafty Quilter
Subscribe to get the latest posts sent to your email.

I use a 30″×30″ wool pad that goes under a horse saddle, placed atop an old card table, for a large ironing surface.
Thank you. These are very helpful. I’ve got to get comfortable with thinking outside the box more often.
I made a cover of 100% wool for my ironing board – it’s 2 layers thick. Then I made a cotton cover that goes over that. I no longer need to use my wool mats as the wool fabric does so well. I’ve found I rarely even need to use my clapper anymore.
What a great idea! I am going to try that. I have an old grey wool blanket that has been in my husband’s family for years. We used to take it camping! It is a bit moth eaten now, still very warm, but not nice enough to put on your bed. I had cut some squares of it and use that as a pressing mat, but your idea is so much better, thanks for a great tip! Loraine. X
Julie, as ever, you are SO generous in sharing your acquired knowledge, a mentor to so many of us 🙂
I use a frying pan that has another pot inside it to make it heavy. I don’t use any liquids, just a dry iron. After I press the block/s I put my heavy pans on top. Next day, each block in that stack is nice and flat. The most difficult part is lifting my heavy pans.
Good tips! I use a water paintbrush filled with half starch, half water. If you search Amazon for “water paintbrush,” you’ll see what I mean. It’s easy to fill it with a syringe, but even a straw with your finger on the top would work.
Thanks for this idea. So easy and inexpensive. Great!
Great ideas! Thank you.
Thanks for all the great information. I never thought of using starch to open up seams but will give that a try. Looks like your iron is smaller than the usual. What is the name of it and can it be purchased online? I always enjoy your wonderful tips to help us achieve better looking projects.
Great tips! Because I am a starcher my wool mat has overspray on it. Do you you ant cleaning tips? Do you think I can wash the mat in the tub?
I love your articles!
You can gently swish a mat around in warm water and a gentle baby shampoo. Be careful not to scrub it too much or the pile will rise. Rinse well but don’t wring it out, wrap it in a towel with something heavy on top to press out the water. Then it will take quite some time to dry so don’t let it get mildewy – run a fan on it. And be aware it won’t have the same stiffness or flatness after you’ve washed it.
Or you could just make a pillow case to fit over it and pin the opening shut. That way you can wash the case when it gets gunky or make a new one.
Julie, as ever, you are SO generous in sharing your acquired knowledge, a mentor to so many of us ‘newbies’ thank-you 🙂
As always, excellent information. I’ve avoided intricate blocks because my seams always give me problems. You never fail to inspire, Julie!
Excellent info as usual! I will try the painting with starch technique. Unfortunately I gave up my clapper when I stopped tailoring and garment sewing.
Thanks for the tips on bulky seams. I will definitely try some of them. su************@***co.net
Thank you. These are wonderful suggestions. Will look for that pen.
Thank you, Julie. This was a timely blog. It spoke to some of the difficulties my friend and I have been having. We’ll give it a try.
Wonderful suggestions, Julie! Thanks a bunch! I hadn’t heard of that pen. Will check it out.