How to add a faced binding to a quilt
Today, I’m going to show you how to add a faced binding to a quilt. I’ve been making smaller quilts lately that I didn’t want to finish with a traditional binding. This is when a faced binding is the perfect solution. It’s also known as invisible binding because you can’t see it from the front of the quilt.
The sample shown is a free motion quilting project that I made for a class I’m going to teach. I’ve used a large scale print from the Echinacea fabric collection by Anna Maria Horner for Free Spirit Fabrics. It’s a great way to practice FMQ by following the design of the motif. This was also a great opportunity to add a faced binding and take photos for a tutorial. So, here we are!

What is faced binding?
Faced or invisible binding is just that. It’s invisible from the front of the quilt, but it’s very visible from the back. It encloses the raw edges of the quilt in a seam that is hidden by the facing when it’s turned to the back of the quilt. Facing is often used when making garments, but it works very well for quilts, too.
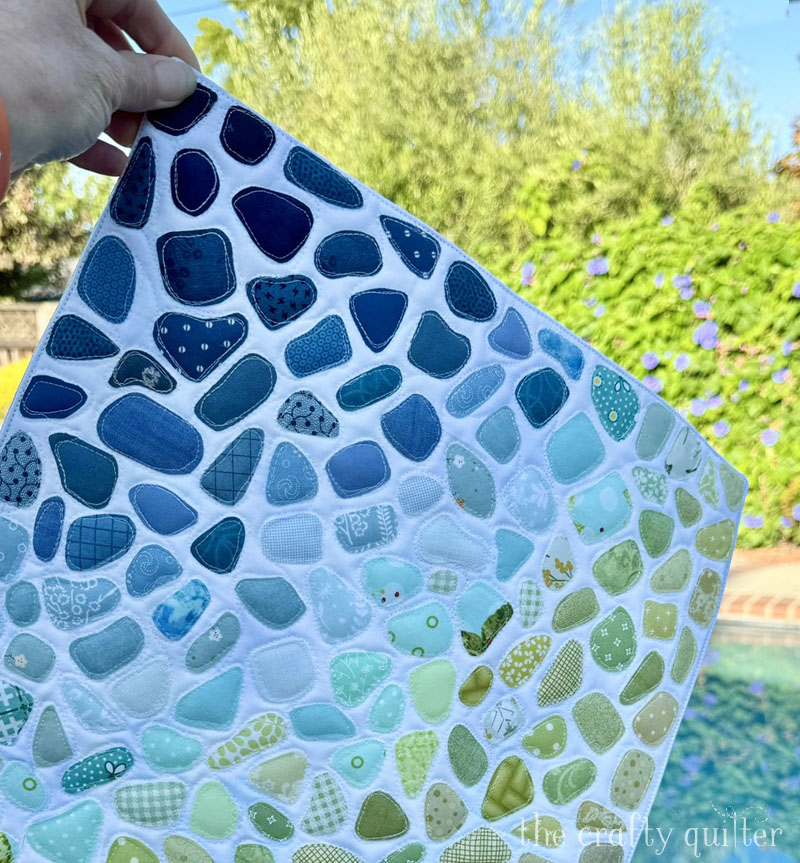
There are a few categories of quilts that work best with a faced binding. Art quilts, modern quilts, mini quilts and some wall hangings fall into this category. In these cases, you want the quilt design to extend all the way to the edge of the quilt. This gives the quilt a clean edge without the distraction of a traditional binding. My Beach Treasures quilt (sea glass quilt) is a great example.
Just as there are many ways to attach traditional binding, there are several ways to go about adding a faced binding as well. I’ll be showing you two methods today. The first method has facing corners that overlap and are squared. The second method has facing with corner triangles on the back.
Supplies needed
- Quilt
- Facing fabric, also referred to as binding fabric
- Clover Wonder Clips or pins
- Walking foot (helpful but not necessary)
- Thread to match the binding fabric
- Hand sewing needle such as embroidery or straw
Steps to add a faced binding with squared corners
The steps to create a faced binding are surprisingly easy. I’ve used several different methods for this, and I’m sharing what I like best. I’ll show another variation at the end that uses a pocket triangle in the corners.
Note: I cut my facing (binding) strips 2 1/2″ wide. I’ve seen some tutorials that use 2″ or 2 1/4″ wide strips. Any of these will work just fine. Use what you feel most comfortable with.
The sample I made for this tutorial is very simple. I used a large scale print on the front and I free motion quilted around all of the motifs. It measures 17″ x 20″.

- Trim the quilt edges on all four sides. There will be a full 1/4″ seam used for the facing, so add 1/4″ of space beyond the design if you feels it’s necessary.
- Cut the binding strips 2 1/2″ wide by the following: Measure the width of the quilt and cut two strips to that exact length. Measure the length of the quilt and subtract 1″; cut two strips that length. For my quilt sample, I cut two strips 2 1/2″ x 20″ (the width measurement) and two strips 2 1/2″ x 16″ (length 17″ – 1″ = 16″). If needed, join binding strips with a diagonal seam to get the correct length.
- Press the binding strips in half along the length, wrong sides together just as you would regular binding. (Not pictured).
- Use pins or clips and attach the top and bottom binding strips to the front of the quilt. The raw edges of the quilt and binding should be even and the folded edge will be towards the quilt center. (Not pictured).
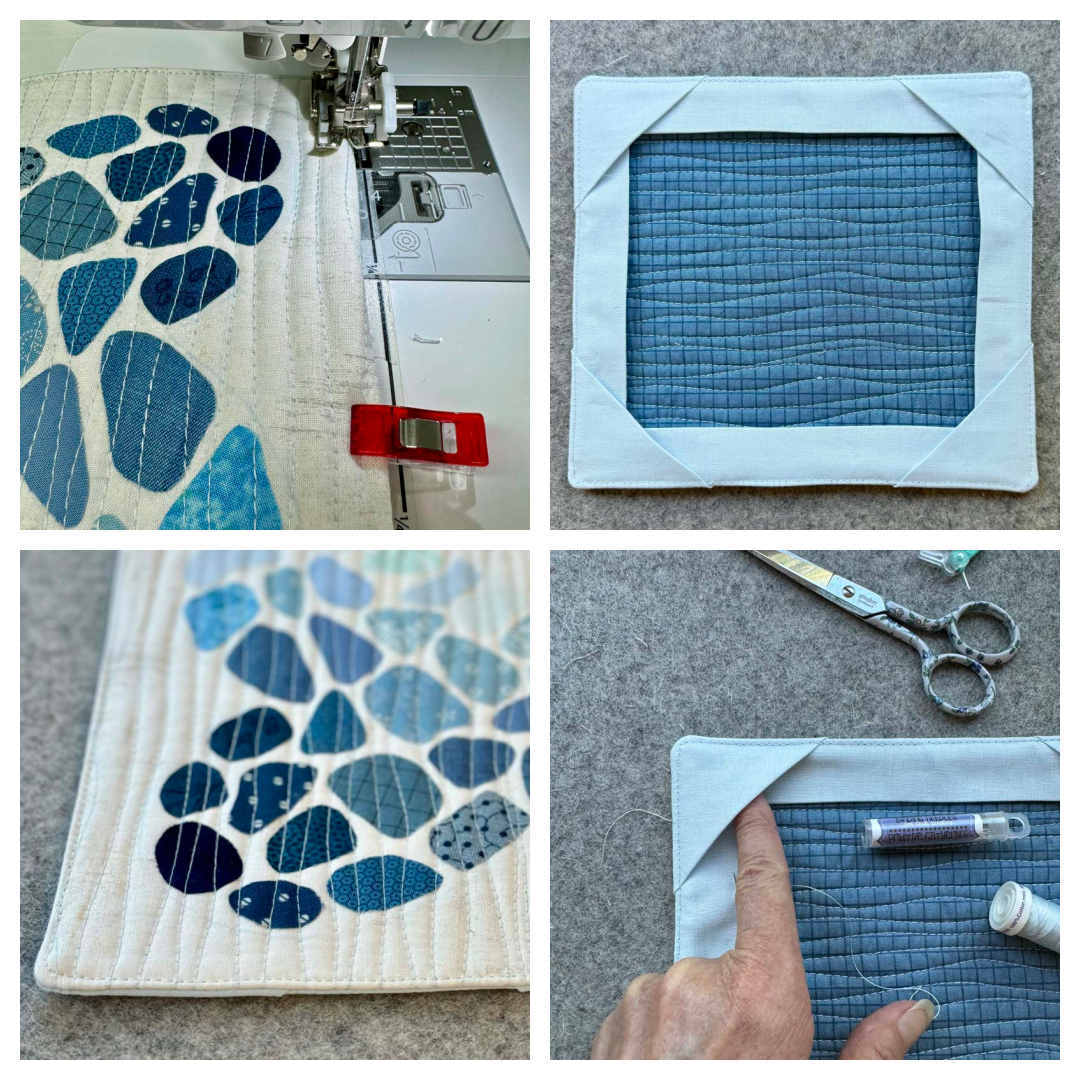
- Stitch in place with a full 1/4″ seam allowance. I like to use a walking foot for this step, but it’s not necessary.
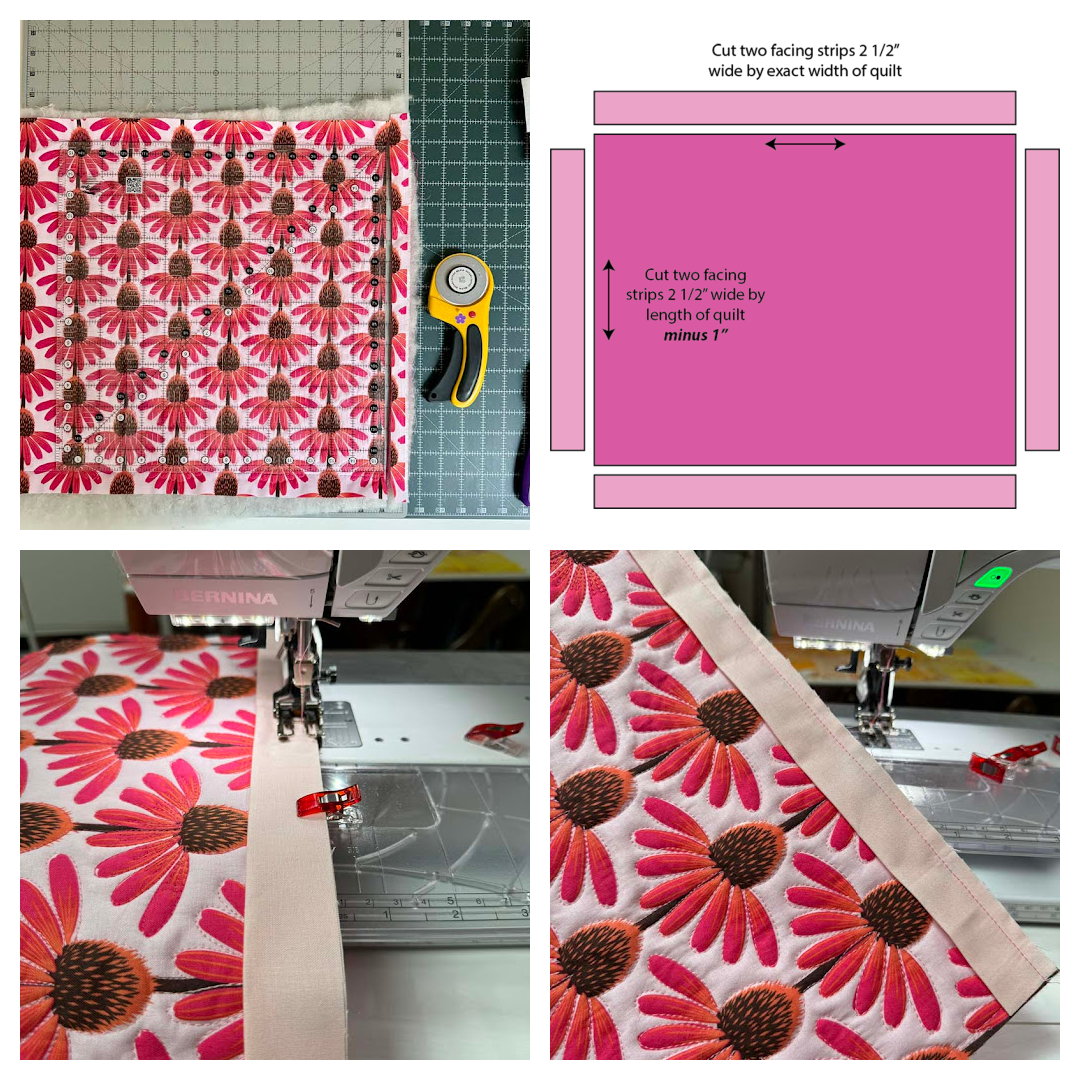
- Attach the remaining two facing strips to the other edges of the quilt top. They should NOT overlap the previous facing seam. Clip or pin in place.
- Stitch as before, using a full 1/4″ seam allowance.
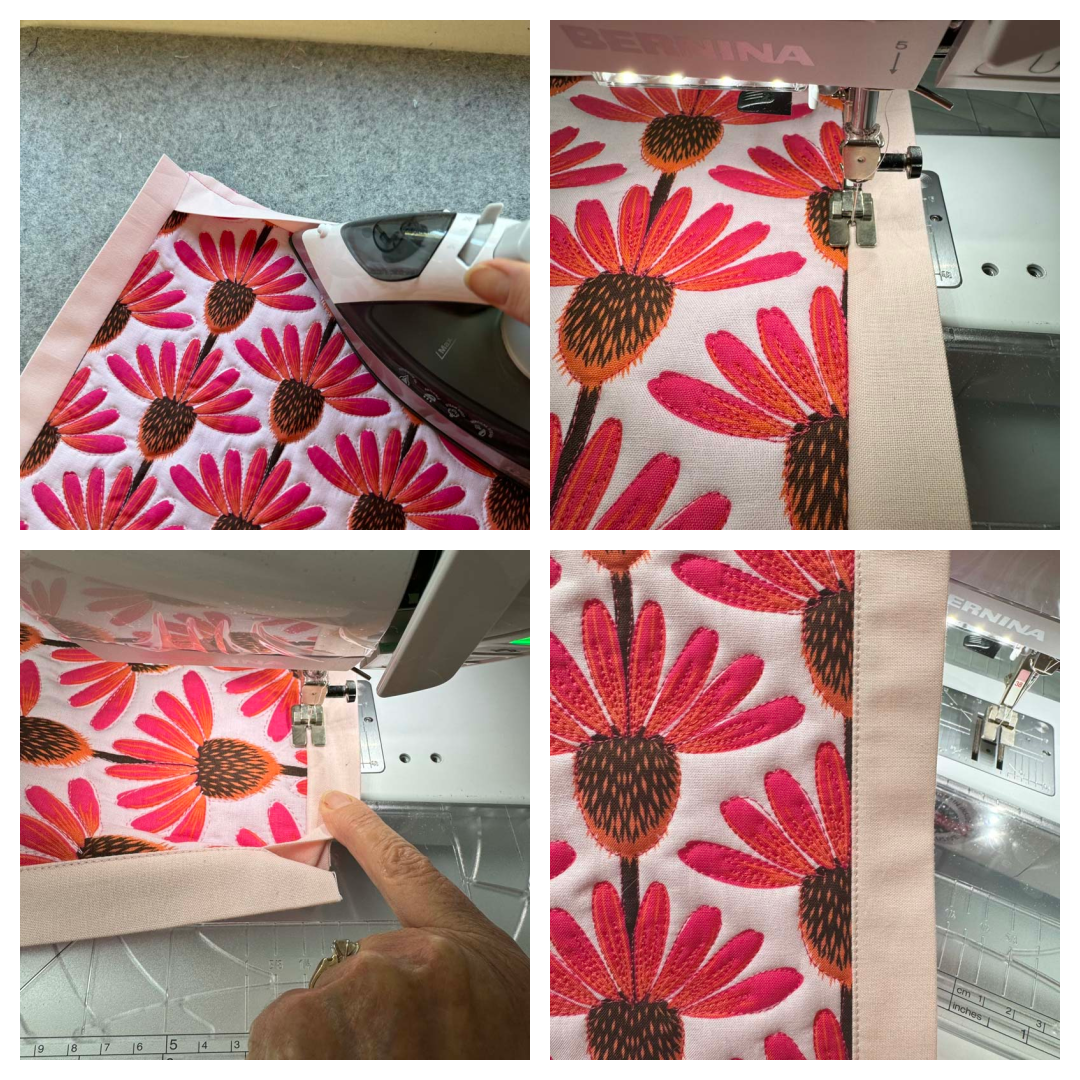
- Trim the corners to remove the excess bulk. I’ve seen some methods that stitch across the corners (inside the seam allowance) at a 45 degree angle to reinforce the corners before trimming. I did not do that, but might try it in the future.

- Press the facing away from the quilt top.
- Understitch the facing to the seam allowance, close to the seam. The stitches won’t show on the quilt front. This step is optional, but I find it helps to pull the facing to the back of the quilt leaving a cleaner edge. I used a piping foot (#38 on Bernina) because it has a beveled edge that helps keeps the stitches straight and close to the seam. You can also use an understitch foot, but, any foot will work for this step.
- The facing sides that were sewn to the quilt first will be a little tricky to understitch at the corners because the second facing is overlapping it. Just start and end as close to the corners as possible.
- Turn the facing to the back.
- You’ll need a turning tool for the corners that isn’t too sharp. Carefully push the corners out.
- Finger press the facing to the back of the quilt.
- Press the quilt edge with an iron, making sure the facing can’t be seen from the front.

Note: Unlike most binding techniques, hand stitching a faced binding down to the backside is necessary because machine stitching will show on the front of the quilt.
- Use Clover Mini Clips to hold the binding in place.
- Hand stitch the edge of the facing to the back of the quilt, using a ladder stitch or blind hem stitch.
- Stitch into the corners where it overlaps.

And you’ve done it! You have a lovely finished quilt with a clean edge. You can’t see any binding from the front!

Faced binding with triangle corners
This method is very similar to the one above, but we’re changing the corners a bit. It will look exactly the same on the front of the quilt, but the back will have folded triangle pockets in each corner. These allow you to insert a dowel into two corners for hanging. The supplies are the same.
This sample is very small (10″ x 11″) and it’s known as a sea glass quilt. It lends itself very well to a faced binding.

Steps for facing with triangle corners
- Trim the quilt edges on all four sides. There will be a full 1/4″ seam used for the facing, so add 1/4″ of space beyond the design if you feels it’s necessary. (Not pictured)
- Cut the facing (binding) strips 2 1/2″ wide. You’ll need one strip for each side that measures 1 1/2″ – 2″ shorter than the side measurement. Press each strip in half along the length, wrong sides together.
- Cut (4) 3 1/2″ squares for the corner triangles. Fold each square in half, diagonally, wrong sides together and press.
- Use pins or clips and attach the corner triangles. The raw edges of the quilt and triangle should be even and the folded edge will be towards the quilt center.
- Baste in place with a 1/8″ seam allowance. I like to use a walking foot for this step, but it’s not necessary.
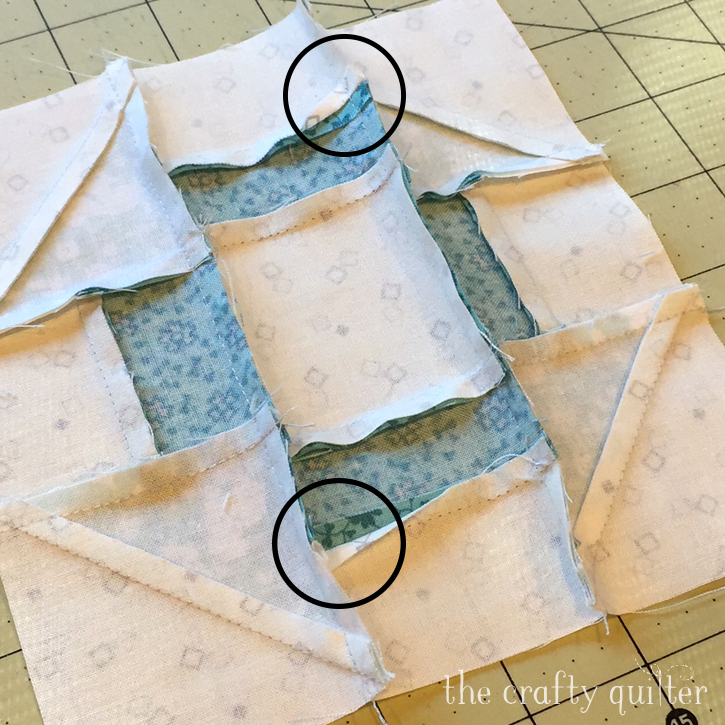
- Place the facing strips onto each side of the quilt top and pin or clip in place. They will NOT meet or overlap at the corners. This is important; the corner will be too bulky otherwise.

- Stitch the facing and triangle corners with a full 1/4″ seam allowance. Pivot at each corner and continue until you’ve sewn all the way around.
- Trim the corners to remove the excess bulk. I’ve seen some methods that stitch across the corners (inside the seam allowance) at a 45 degree angle to reinforce the corners before trimming. I did not do that, but might try it in the future.
- Press the facing away from the quilt top.
- OPTIONAL: You could understitch the facing from the back onto the seam allowance as I showed in the first method. I didn’t do that here simply because I didn’t think of it. The next section shows what I ended up doing instead.

- Turn the facing strips and corner triangles to the back of the quilt.
- Carefully push out the corners with your fingers. A turning tool that isn’t too sharp helps to get the corner points out.
- Press the facing from the back and then the front making sure the facing doesn’t show from the front.

- Topstitch close to the edge along the quilt front. This isn’t necessary and you may not want it on your particular project. It does help to keep the facing edge in place. This is different than what I did in the previous method where I understitched in the seam allowance from the back.
- Hand stitch the facing in place using a blind hem stitch or ladder stitch.
- It’s not necessary to stitch the triangle corners down. When left open, they can be used to insert a dowel for hanging.

Conclusion
If you’ve never tried a faced binding, I hope you’ll consider it for a future project. It’s a great way to finish the edge of a modern quilt, wall hanging or home décor item. I might even try it on the next table runner I make.
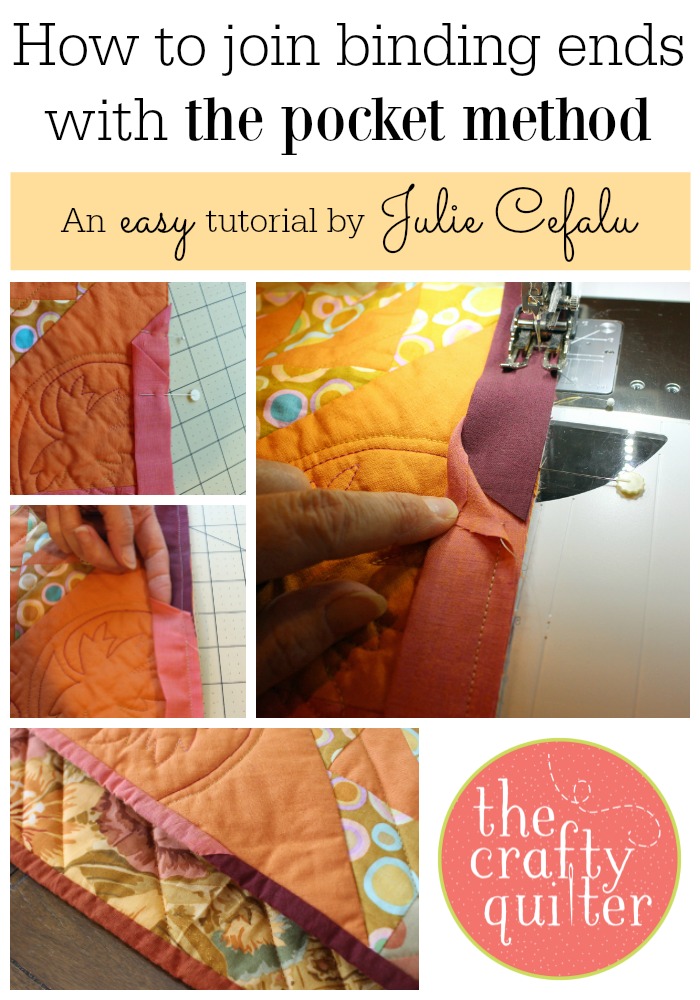
Make sure to pin the image below so you can find this tutorial later. Thanks for reading!


Discover more from The Crafty Quilter
Subscribe to get the latest posts sent to your email.


Thank you for sharing this very clear tutorial. It’s a good addition to my bag of tricks for finishing a quilt.
Hi Julie
I have been quilting for a few years now, but I have never encountered these methods.
Thank you for sharing. I am going to do this on a baby quilt that I am making!
Regards
Rina
This was perfect timing! Our guild did a round robin and I wanted to face the quilt to make the front be the star. I have done faced quilts, but I just sewed the backing to the front, then quilted on my domestic. This never turned out great since there was some bunching of the batting, but they were small enough that I wasn’t too worried – but this round robin is large (50″ square) and I really wanted to make it correctly. Great writing, photos, and explanations of WHY and any tricky parts. Thanks so much!! I will be sharing this post link with our guild.
I am inspired to try these, especially the triangle corners! You are the best. Thank you for the detailed instructions. Cheers!
Thanks so much for sharing, Julie! Great tutorial! You make it easy! 🙂
Great tutorial! I’ve heard of quilt facings, but never knew how to do them. This will be great for so many projects. Thanks for sharing.
Thats very interesting. Haven’t heard of this before.I like all of it but the hand stitching, Im not very good at it
Thank you Julie for sharing this, so often on small projects this is the perfect solution, I have done projects and doing a regular binding just doesn’t seem to work as well. Will be doing this
technique on my next holiday projects.