How to Spray Baste Your Quilt

Once you have finished a quilt top, you need to make a quilt sandwich using the finished top, batting (for the middle) and backing fabric. Then you need to baste these layers together before you can start quilting.
My absolute favorite way to baste a quilt together is by using temporary spray adhesive. Here’s what I like about it:
- Super fast!
- No pins to avoid while quilting
- Doesn’t add additional weight to the quilt
- It’s temporary! Will wash out when you’re finished
- Did I mention how fast it is?
I’ll be honest. There are a few cons too:
- It can gum up your needle while quilting (clean w/ an alcohol swab or lick your finger and swipe clean!)
- It has a fume to it (open a window, wear a mask)
- The over-spray can get surrounding area sticky (don’t be lazy, clean with a rag)

How to Spray Baste a Quilt
You will need a few items in order to get started. Temporary spray adhesive (I highly recommend 505 Spray and Fix), painters tape or other masking tape, safety pins and something to clean up the over-spray with (I use De-Solv-it).
1. To get started, you will need to lay your backing right side down on a smooth surface. I use my kitchen table for smaller quilts and my hardwood floor for larger quilts. You want to smooth your backing out and tape the middle of one side and then the opposite side. Do the same thing to the remaining two sides. Now secure the corners with tape. Depending on the size of your backing, you will need to add tape in between (about 12″ apart) the corners and sides. Always smooth from the center out to the edges. You want the backing to be smooth and flat, but not tight.See the before and after pictures below.

2. Next you will lay your batting on top of the backing and smooth it out. They should both be about the same size (which should be 2 – 3 inches larger all the way around your quilt top).

3. Peel back half of the batting and spray the batting with temporary spray adhesive. Hold the can about 12 inches away and spray an even layer. Optimally you want to use as little adhesive as possible to do the job. I gauge this by the type of batting I use.
- For 100% cotton batting, use spray sparingly.
- For cotton blends and wool, use a little more.
- For other types of batting, you’ll need to test for adhesion. Try a little, then add more if needed.
- Some fabrics that have not been prewashed may not adhere well because of the sizing used in the manufacturing process. Again, check to make sure it’s sticking well.

4. Lift the batting that just got sprayed and smooth it down over the backing as it touches the backing fabric. Since it’s temporary and re-positionable, you can readjust if any wrinkles form while doing this. This is easier to do with two people – one holding each corner of the batting. However, I usually do this on my own, so I work with one corner/side at a time (as you can see from the following picture).

Actually, I’m holding the camera with the one hand that is supposed to be holding the corner of the batting. So this isn’t exactly how it’s supposed to look.
5. Repeat steps 3 and 4 for the other half of the batting.

6. Lay the quilt top over the batting/backing layer and smooth it out. I try to smooth it out on the fabric grain so that nothing stretches or distorts.

7. Peel back half of the quilt top and spray the exposed batting side using the same method as before. You will always be spraying the batting rather than the fabric. This gives you a more even spray and better adhesion since you don’t have seam allowances and thread getting in the way.

8. Carefully lay the quilt top over the sprayed batting. Make sure you don’t pull the corners or edges as you’re smoothing it down. This can distort the quilt top. Use one hand to hold the corner up and the other hand to smooth the quilt top from the center out to the sides. If you’re working alone, repeat with the other corner/side.

9. Repeat steps 7 and 8 for the other half of the quilt.

10. You’re almost done! Now, I like to baste the edges of the quilt top with safety pins or using my machine (walking foot attached). This gives added stability to the outside edges which tend to get manipulated a bunch during the quilting process.
The first method involves pinning along the edges about 3 – 4 inches apart and 1/4″ in from the edge.

The other way to secure the edges is to use your sewing machine. You will have to un-tape your quilt backing from the table or floor before you do this. Make sure you have a walking foot attached to your machine and set your stitch length to a long stitch (5.0 on computerized machines and about 6 stitches per inch on “vintage” models). Stitch within 1/4″ from the outside edge, through all layers.

You can also tell how efficient your walking foot is at this point. Believe me, not all walking feet are created equal! When you return to your starting point (usually a corner), you should not have any puckers or tucks at the end. Everything should be smooth and even.

It looks like there is a little hill there, but it didn’t develop into a tuck. Everything matched up at the corner. If you do end up with a tuck, you can try adjusting the presser foot pressure dial (if your machine has one). Try lowering it or increasing it and see what happens. You might also see if your walking foot is the correct one for your machine and not a generic brand.

When I first had my Viking sewing machine I unknowingly purchased a generic walking foot and kept getting puckers and tucks in my quilts. After about six months of this, I took it back to the store and told them what had been happening. They noticed that my walking foot did not half the Viking Husqvarna insignia on it and that I needed to purchase the “real deal”. So I did (of course it was $50 more than my original!) but I no longer had issues with quilting, so it was worth it to me.
So that’s spray basting in a nut shell! I use this method on every quilt I make and it never fails me. I do it on larger quilts too, as you can see in this picture:

I’m working on my kitchen hardwood floor and I’m bare-footed. On large quilts, I often have to step on the quilt to get to the other side, so it’s clean feet or socks for me!

I hope you try this method for yourself. If you want to see other interpretations of spray basting, try this You Tube video by Patsy Thompson and for those of you with carpeting and no hardwood floors try this tutorial by Film in The Fridge. Also, if you have a pieced backing that needs to match up with the quilt top, try this tutorial here.
And as I mentioned in a previous post, “Basted But Not Quilted”, I’ve had quilts basted for years using this method and it’s still sticking!

Discover more from The Crafty Quilter
Subscribe to get the latest posts sent to your email.


Thank you for this tutorial, I used for a king sized quilt. It has turned quiet well. Will definitely be using this method of basting again.
I accidentally bought a can of 202 instead of 505. Can 202 be used to sandwich quilts???
I think you really need the 505!
I’ve used 505 temporary spray basting on small projects, ie: table runners and pot holders. The projects did not come out stiff, but then again I used sparingly. Will be doing a small infant’s quilt and don’t anticipate a problem. I also spread newspaper around perimeter of project and had minimal cleanup with Pinesol.
Hello, This is a very nicely done tutorial on spray basting. I just have 1 question, I’m making the type of quilt that you use 4 layers. They consist of flannel backing, cotton top piece and 2 pieces of flannel for the “batting” layer. It will all be stitched inside out and then turned. There won’t be any binding needed. I’ve already sprayed the layers but I’m a bit worried that when I try to turn the quilt right sides out, I may have a problem.
Do you have any recommendations for me?
Thank you in advanced for your wisdom.
🙂
I try to be as environmentally responsible as I can, so I do not use spray basting. But if you do, please do NOT spray this on your quilt that is placed on your good hardwood floor. or a good table. That is one quick way to potentially ruin those surfaces. (I have heard more than one horror story about this in quilt shops and guild meetings over the years.) It will accumulate and it will do damage. Also, the fumes are pretty nasty. If you must spray baste, it is best to do it outside. If you must do it inside, ventilation is key (and don’t forget to take into consideration your sensitive pets including cats, dogs and birds) and spray over a protected surface. 🙂
I tried a sample and the 505 spray glue does not wash out, just becomes less tacky. On their website they say it “disappears into the fibers of the fabric… leaving toxic chemicals in the fabric. The new less toxic Sulky even says it doesn’t wash out. I love the process, just can no longer rationalize making and gifting toxic laden quilts…seems a contradiction…toxic comfy.
Hi Julie, thank you for your instructions. I bought my first can of 505 today. I plan to use silk batting from Hobbs. It has 10% polyester in it also. Have you had any experience with using 505 on silk batting?
Thank you, Cathy
I too have found that the first sandwich I made with the pink can of spray adhesive is VERY stiff. I have washed it twice, letting it soak in warm water for at least an hour both times. No change.
I just made another sandwich yesterday and used only a very small amount of adhesive. I haven’t finished quilting it yet, but I am hoping it will not be so stiff. Although right now it is.
I am wondering why no one else seems to have this problem. I haven’t seen it mentioned many places.
Do other quilters like stiff quilts.
I am considering rolling and then jumping on it to break the bonds of the adhesive. That is how bad it is!
Spray basted quilt with 505 spray. Quilt seems stiff. Does this soften when quilting( I hand quilt) or do you wash to soften. I used warm & gentle needled cotton. Help!
I’ve soray basted my full sized quilt. It worked well, but now quilt seems stuff. Will this soften as I quilt it or what about washing? I used warm & natural needle punched cotton. Help!
mine always soften when after I wash it “)
I also put a a lite iron to it after spray basting the quilt sandwich.
I was just wondering if you needed to wait a certain amount of time before quilting the quilt after spray basting it?
I was just wondering if you need to wait a certain amount of time before quilting the quilt once you have sprayed basted it?
Thank you very much for this very clear and concise tutorial with clear photos showing this method. It was very helpful!
Way cool! Soome exrremely valid points! I appreciate you writing this write-up and the
rest of the website is also rwally good.
I linked to your tutorial on my blog! Thanks for the great tutorial!
http://bigcitybackwoods.blogspot.com/
I started spray basting all of my quilts a while back. I became very tired of crawling around on my hardwood floor and putting safety pins in to baste them! I make a lot of large quilts, usually full to queen size, and spray basting works wonders. I did want to say, though, that you mention overspray. I found one “lazy” way to deal with it that works really well. I lay a painter’s tarp on the floor first. Something with a bit of body and thickness to it (at least 2 mil) so I can tape it down. It is good for multiple uses and keeps the spray off the floor and surrounding areas. For smaller quilts and items, I use a trash bag under them.
Your instructions and comments are just what I need to go ahead with ‘basting’ the largest (full size) quilt I’ve ever made. It’s for my son’s graduation from college (I gave him the completed top on the big day, but have been procrastinating the quilting and all.) Thanks so much.
Where do you purchase your De-Solv-It? Is it safe for your wood floor? I have a laminate floor but I would hate to ruin the finish. I like the idea of not having anything under my quilt to bunch up. I have just begun using this method. I love quilting without pins in my way! Your tutorial was great. Thanks!
Hi Peggy. I purchased the De-Solv-it at The Container Store. I have also seen it at home improvement centers (Home Depot, OSH). It hasn’t damaged my hardwood floor at all. It says that it’s not recommended for use on acrylic and some plastics, suede and leather. It’s a citrus based, 100% organic product. I know of other people that just use soap and water to clean up the basting spray. Since it’s a temporary adhesive, it seems easy to remove from most surfaces. Thanks for the great question and for visiting! – Julie
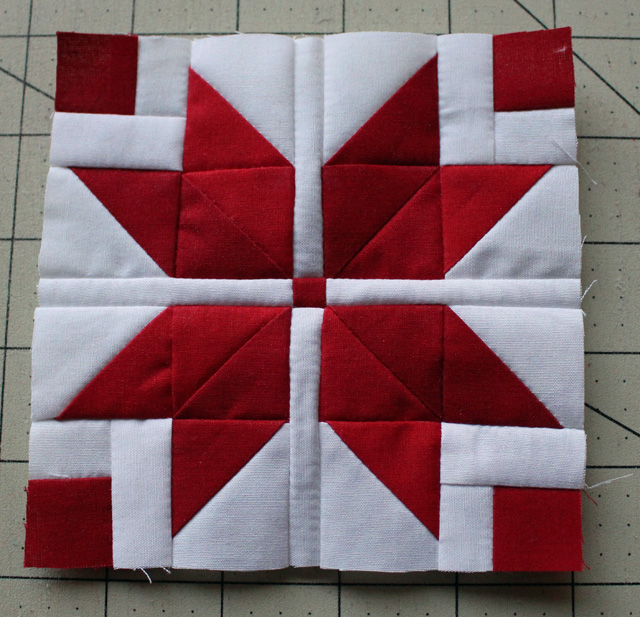
Could I buy the pattern for the quilt that you have on the 3-13-12 Tip and Technigues. I want to make Memory Quilts for my granddaughters and this pattern would work.
Thanks for this easy tutorial on basting spray! I am a out to make a simple baby quilt and am definitely going to use your method.
I’m a novice though and have a question. I won’t be doing full quilting on it – just machine tacking every 2-3 inches, so I’m wondering about that top stitching; can I use a pretty decorative stitch for it or does it need to be a more secure stitch?
Hi Alyson! If you mean that you’ll be using a decorative stitch for the tacking, then I think that would work well and it will be pretty too. Most decorative stitches seem to be fairly secure on their own, but make sure to pick something that has that element (of secureness) to it.
I am making a polka dot quilt using upside down yo yos applied to a solid black background. (I am trying to use up some of my stash.) Could I use this adhesive to attach the yo yos (temporarily) before I hand stitch them on? (This would be fabric to fabric, not batting to fabric)
I plan to do this in small sections (45 x 20 inches or so)and then sew these blocks together (machine) and then hand quilt around each yo yo.
Do you think this will work?
Hi Jane,
I think it would be worth a try. I’ve never tried it myself, but here are my thoughts: The spray works best on even surfaces and since a yo yo (especially the gathered side) is very uneven, you most likely won’t get a good hold.
I would suggest using a basting glue to hold them in place. My favorite is Roxanne’s Glue Baste It and I like the smaller travel size – it’s easier to work with. I use it for applique a lot and it doesn’t take much to get a good “stick”. And it’s temporary so it can be washed out.
Good luck with your project – it sounds cute as ever!
I am so happy to have discovered your sight. I started just a few weeks ago with some quilts for the Grandkids for Christmas. It is really close and I was panicked. This has worked great and I won’t disappoint anyone. Thanks so much.
OK. I’ll try it… I have wood floors. And a huge Airedale. And an incredibly nosy cat. And children. Everybody likes to help.
I HATE basting a large quilt. I hate basting any quilt (maybe it’s all the help). So I’ve been thinking of quilting a block at a time, then attaching the blocks. I can machine join the top, which will look fine.
I’m accustomed to that big swath of uncut fabric, so I wonder how the backing will look.
Has anyone tried this? Does it look tacky and all patched up? What do you think?
Jane Elizabeth
Can we use craft glue spray also ? The ingredients seem to be the same.
Thanks.
Pallavi
I have never used craft glue to spray baste with, so I can’t say for sure. I would imagine that the consistency might be different, making your project stiffer. You would also need to make sure that it will wash out.
I love spray baste! I did a snafu today though….I basted the right sides of a cotton weave to a minky dot to sew, flip right side out (birth method) and top stitch for a baby throw. I think I sprayed too heavy so now I have gunky spots after washing. Should I keep washing or? A solvent? Of course the baby shower is in 2 days! Lol. Murphy’s law, right?
I think it would be safe to try washing it again in the washing machine. I’m assuming gunky spots means that it’s still sticking together rather than visual discolor? I hope it turns out o.k.!
It was gunky like when left-behind sticker glue gets gunky plus had some lint mixed in! I tried two of my Bio-Kleen products to remove it before I remembered a friend in theater telling me how they spray costumes with rubbing alcohol between changes. So I dipped a toothbrush in a cup of alcohol and spot cleaned the gunky lint. The alcohol dissolved the goo without damage. I don’t think 5 more washes would have done what the alcohol and toothbrush did so quickly. Thank you for your help and knowledge-share. Very much appreciated.
Thank you for this information.
Is it possible to use fleece as a backing using this method?
Yes, fleece works great with this technique as does minkie fabric which is also very popular to use as a backing.
So I made a runner and just basted it. On the floor next to an open door blockaded so the pets didn’t flee. Worked great – now some quilting and then I break out the easy mitre tool! Thanks Julie for great instructions!
Thank you so much. I love your method and think it will work for me. I am a true novice and love tips that are simple and easy to incorporate. I was taught to spray the insides of the quilt top and bottom, not the batting. I will give this a try tho. Thanks! Wools
It is important to protect yourself by wearing a mask when using this product. This advice is mentioned but not followed in the tutorial but perhaps the window was open instead. The visible material seen spraying from the can is particulate adhesive and would be VERY bad to inhale, even though it appears to be a small amount. I am sure it is cumulative since one droplet would bind with the next and the next… it’s adhesive after all. Eventually a film of adhesive on the inner-most surfaces of the lungs’ would form. I would think that would have the same effect as a bad asthma attack but not be reversible with drugs. I hope everyone using this or similar products will always wear a mask or spray outdoors. And anyone with a preexisting lung condition should stay away — stick with another form of basting. When you can’t breathe, nothing else matters.
There are 11 lines of danger warnings on the can, such as “Avoid prolonged breathing of vapors.” and “NEVER use in confined areas with little or no air movement.”
Can’t wait for the binding instructions. Mine are better but not great.
I have saved this for when I make my first quilt, great instructions – thanks!
So glad this is on your blog. Took beginning quilting with Julie and now I can refresh my memory ! It is the easiest and smoothest way.
It’s nice to have a visual reminder, isn’t it? Glad you agree that it’s the greatest way to baste a quilt, Annie!