Spring Petals QAL week 1
Welcome to the first week of the Spring Petals Quilt Along! Thank you for your patience and understanding to my late start to week 1. I truly appreciate your words of support and caring. The online quilting community is beyond gracious.
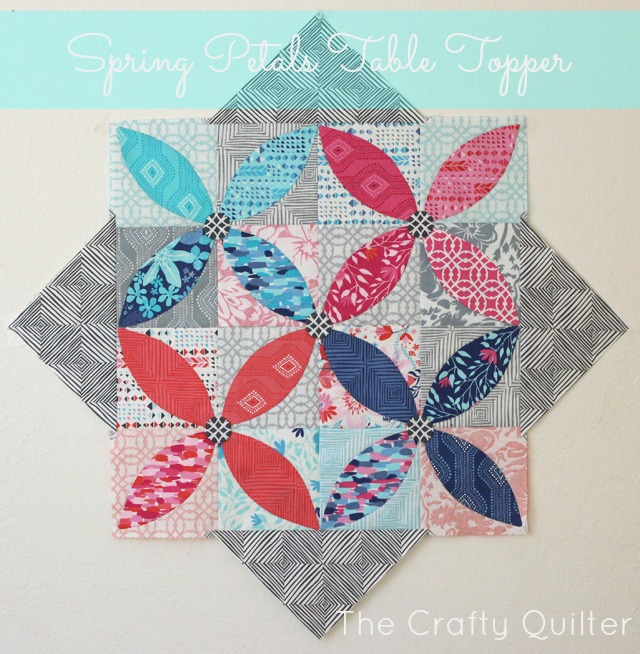
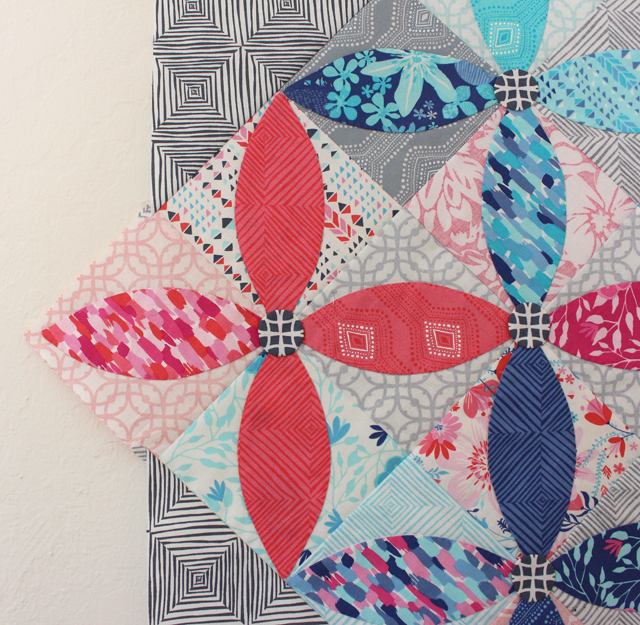
This table topper is fun to make and will give you practice with some simple applique and easy piecing. I made the original table topper over a year ago as a Christmas project. It was a tutorial that I called Winter Seeds, and I thought it would be perfect for Spring, too. The structure is the same; I’ve just changed the colors and added a circle into each group of four-petals, creating a flower.
You can find the free, updated pattern here: Spring Petals Table Topper
Here is what the table topper looks like:
Fabric Selection
Lesson 1: Fabric Selection
For this first week, let’s start thinking about fabric choices. That’s my favorite part of the process! Do you guys get as excited as I do when you start a new project and it involves shopping for new fabric? Even pulling from my own stash is fun!
Here are the fabric requirements for this project:
1 pkg. charm squares (5″ squares) OR you can use the following:
- 1 fat eighth (9″ x 21″) each of 4 light fabrics for background, or scraps of 5” squares
- Fabric scraps of blue and pink (or your own color choice) fabric for the petal applique. You’ll need approximately one 5″ square for each petal.
Plus you’ll need:
1 fat eighth (9” x 21”) for side triangles
1/4 yard binding
7/8 yard backing
If you’ve never heard of a fat-eighth of fabric before, let me explain. It is a fat-quarter that has been cut in half, yielding a 9″ x 21″ piece of fabric. A fat-quarter is a half-yard of fabric that has been cut in half across the width (not the length), yielding an 18″ x 21″ piece of fabric.
For the sample shown at the beginning of this post, I picked out a charm pack (5″ squares) and some yardage of Paradiso by Kate Spain for Moda. A charm pack will work perfectly for this project. You’ll be using 32 of the 5″ squares. I used the lighter ones as the background squares and the darker ones became the petals.
After arranging the background squares together, I realized that they were too intense in color. I wanted a softer and lighter palette to put my petals onto. So, I flipped the majority of the squares over and used the wrong side of the fabric instead. This is a great way to get more mileage out of your fabrics.
In the picture below, the squares on the left are what my background looks like from the right side (using the wrong sides of fabric) and the view on the right is what it looks like when I flip it over to the wrong side. You can really see a difference in the intensity.
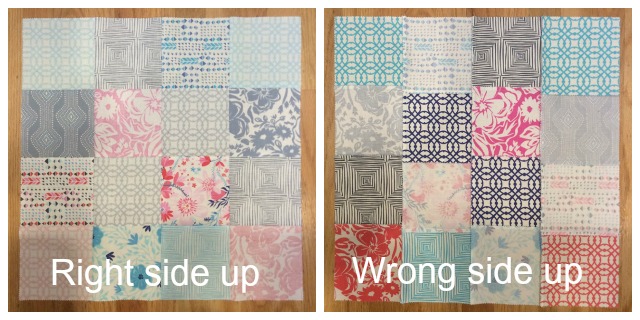
It’s perfectly o.k. to work with the wrong side of a fabric as if it were the right side. I don’t do it often, but it can really work to your advantage in some situations.
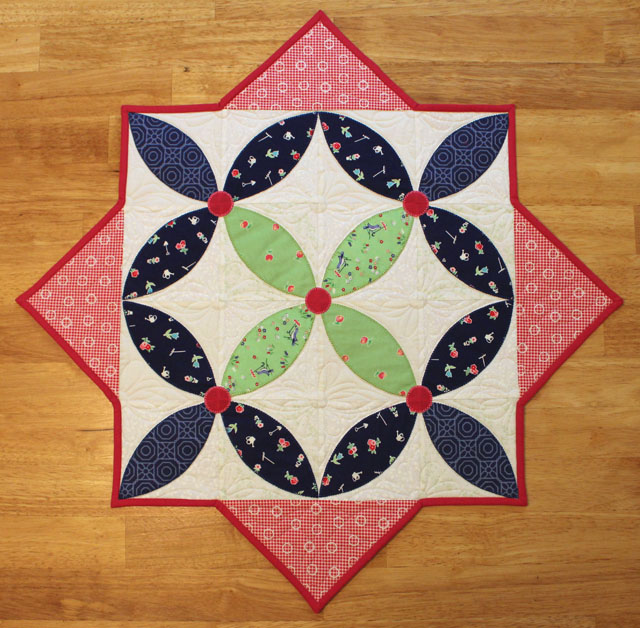
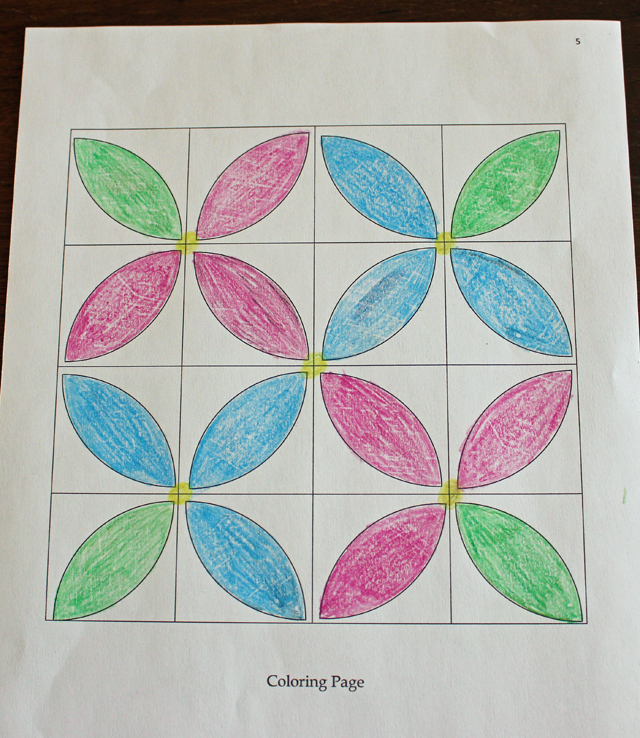
I’ve provided a coloring page on the last page of the pdf pattern, so you can experiment with different color combinations for the petals. The picture below is what I was playing with yesterday. I thought the green petals in the corners might represent flower stems leading to a 3-petaled flower. I think a yellow circle in the center of each flower might work, too.
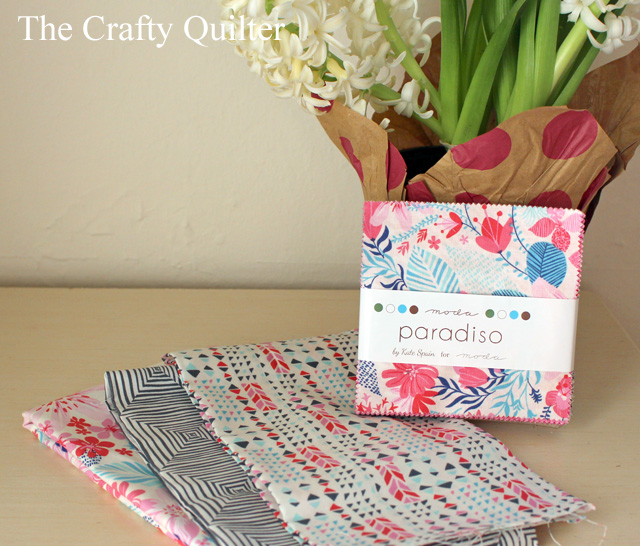
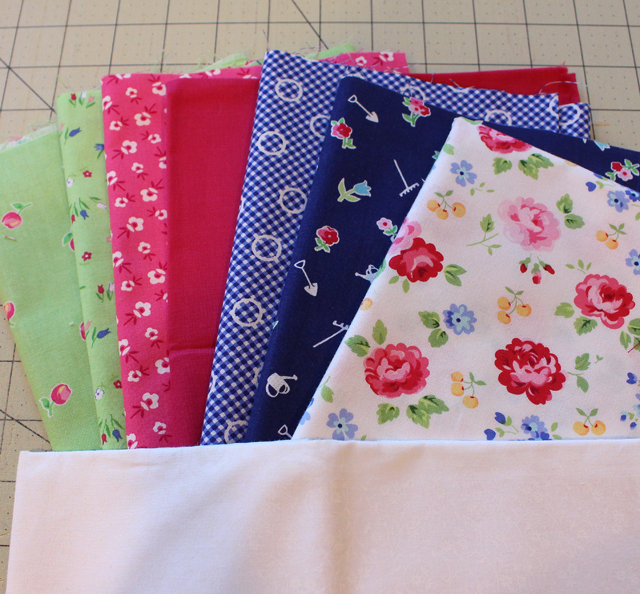
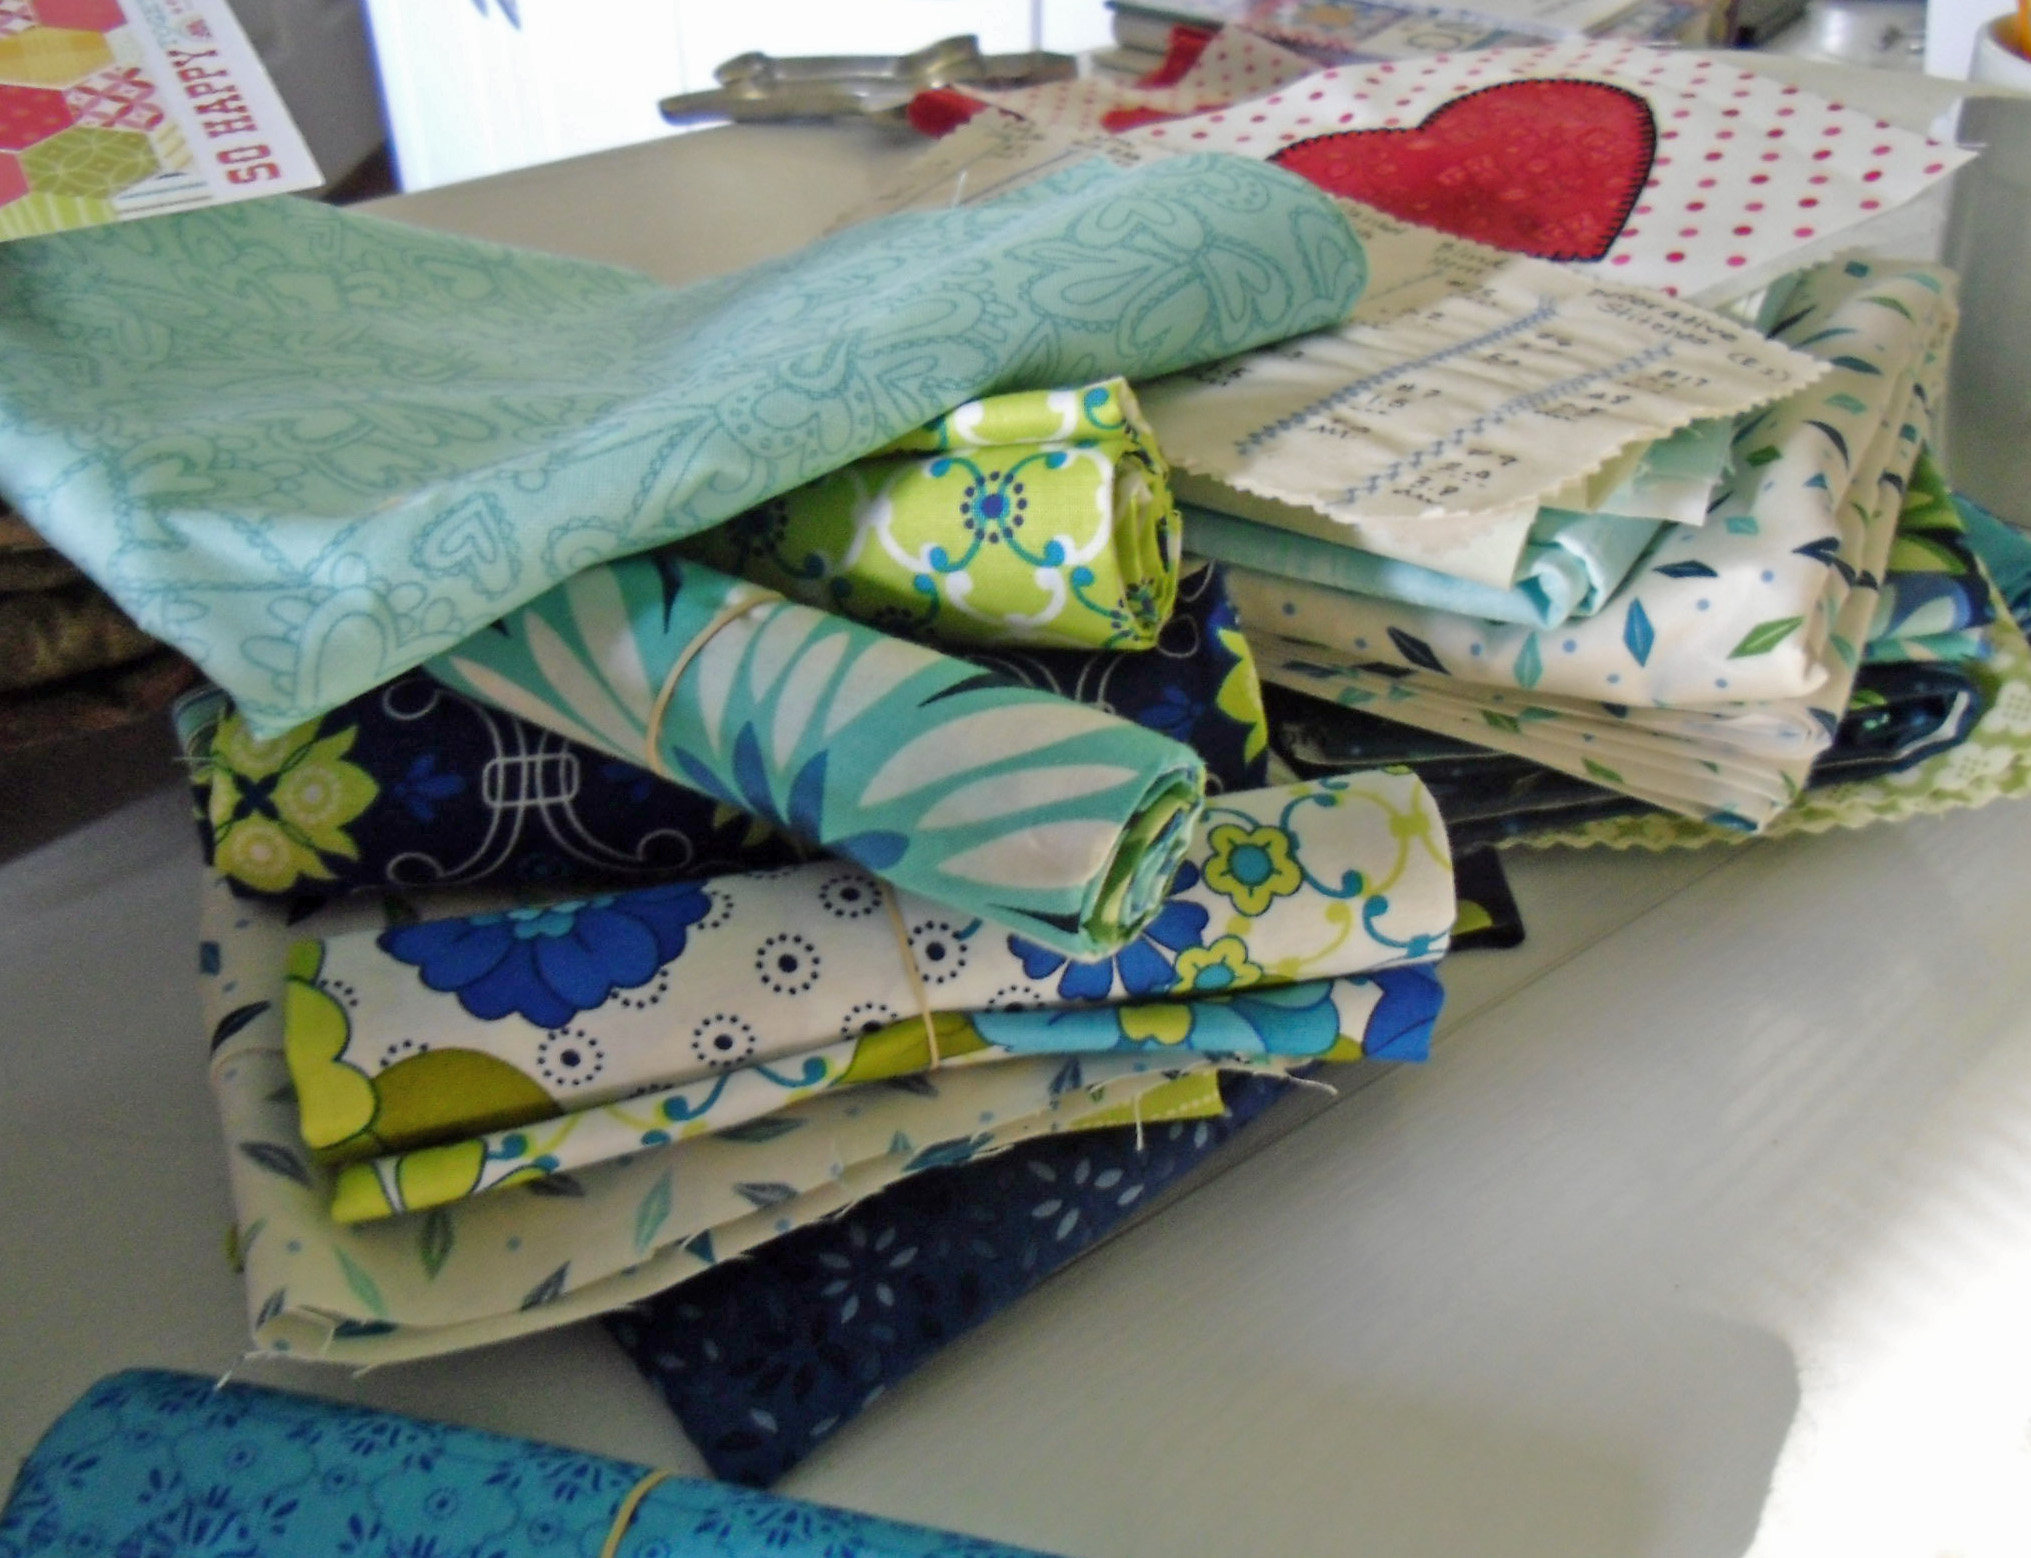
I recently did some shopping with spring petals in mind and this is what I purchased:
These are 1/4 yard cuts of Pam Kitty Garden by Pam Kitty Morning for Lakehouse Dry Goods. The floral fabric on top is from her previous line, Pam Kitty Picnic. I’m going to use some white fabric from my stash for the background squares. This is what I’ll be using for the lessons each week.
Each “flower” can be made up of 4 different fabrics as in the sample I made (show below), or they can be made from one fabric or two fabrics, etc. Whatever rings your bell!

I like variety (and an excuse to buy more fabric), so I’m going to use two fabrics in the same color family for each flower and two different greens for the “stem”.
In addition, all of your flowers could be the same color or you could have four different colored flowers.
 So based on my selection of fabric in the picture above, I’ll have two different colored flowers (blue and pink) each made with two different fabrics in the same color family. I’ll use the green fabrics for the stems. It will look similar to the one I colored in on the coloring page.
The side triangles which create the corners of the table topper can be made from a solid or a print. I think I’m going to use the floral print with the white background for mine. But I might change my mind if it’s too busy.
The sample I made from the Paradiso line of fabric turned out a little too busy in my opinion. I can tone it down two ways: (1) by using white (or other solid) fabric for the background squares, and/or (2) by using a solid color for the side triangles.
You have one week to get your fabrics planned and purchased (if you’re not using your stash). If you have any questions, please ask them in the comment section. I will answer them there, too, so other people can see. No question is too silly. I want this to be a positive experience for everyone, so ask away!
Here is the schedule for the quilt along:
- April 4 (Week 1) Pattern available as a free pdf; pick out your fabrics (you are here)
- April 10 (Week 2) Cutting and piecing
- April 17 (Week 3) Applique
- April 24 (Week 4) Basting and quilting
- May 1 (Week 5) Binding
- May 8 Final thoughts and Linky Party
- June 7 Giveaway winners announced
Notice the extra dates? I’ve decided it would be great fun to see everyone’s finished table topper, so I’m adding a linky party at the end. You’ll have one month beyond the last lesson to finish your project and link up a picture. I’ll accept photos of tops that haven’t been quilted yet. You don’t need to have a blog to enter. Just a picture!
And what’s a party without prizes? I’ll pick two winners on June 7 for a prize package (as yet to be determined, but it will be really good). Nothing like dangling a carrot in front of you, eh? Motivation is sometimes the ticket to getting things done!
Remember, you don’t have to sign up to take part in the quilt along. If you’re a follower of my blog, you’ll get the updates delivered to your email or RSS feed automatically. The weekly lessons will always be available. I’ve created a separate Spring Petals QAL tab at the top of my blog for easy reference. You can always go there to see all of the lessons. See the links in the QAL Schedule above.
Thanks for joining me this week! Happy quilting!

I just finished putting together my background using left over charm squares. I am not sure yet what I will use for the petals. I will post about this on my blog today to encourage others to join in.
I’m a bit late getting started, but have started pulling fabrics to see what else I might need to get tomorrow. Just so happens local quilt stores are having Wildflowers All Around and Bluebonnets Shop Hops now! Looking forward to seeing all the beautiful projects.
I’m using “he loves me not” charm pack I got awhile back as a daily deal. and a light purple for sides. but I also am one of those who work ahead. ahhemm. sorry. I am waiting now.
What fun and how sweet. Now, if I was smart, I would see that this lends itself very nicely to becoming the handwork I need for my travels, and I would take some time this week to set myself up!
What fun to be picking our fabrics now! I love spring projects.
Thanks for the lovely pattern!
I can’t wait to see the different toppers made by everyone!
Thank you so much for sharing your time and wonderful creativity to my inbox in Norfolk, UK. With all good wishes and many thanks, Nik 🙂
Hi Julie, I have read all the instructions and your tutorial for appliqué. Can freezer paper be used? I bought some recently as it was mentioned in all the quilters’ blogs I was reading. I haven’t used it yet.
Yes, Fabienne, you can use freezer paper, although I won’t be able to cover that type of applique technique in this quilt along. I will provide links to some tutorials that use freezer paper applique if that will help you. Thanks for asking!
That’s no problem Julie, I’ll look for the right fusible. I’d rather follow things correctly for my first time.
Thanks for the wonderful pattern. Can’t wait to get started. Will look through my stash to see what I can use that will be bright and cheery for my round kitchen table.
I have a charm pack called Helen’s Garden which seems appropriate. There aren’t many light squares to add up to the needed 16 but I’m not sure about using the “wrong” side of fabric either. I still want to use the pack and will try to get the contrast with light appliques on the darker squares. I’m looking forward to participating…this will be my first QAL although I have done some BOMs. Do those count?
Looks like fun. Love any excuse to sort through (and fondle lovingly) my stash.I do love my fabric. Is that too many loves connected to fabric?
This looks like fun and I’m looking forward to seeing the different variations. Thanks!
I follow your blog closely, but this is my first time participating. I’m going to have fun pulling from my stash for this. I’ve never bound inside corners so I’m looking forward to the challenge. Best wishes resolving your family crisis.
Such a beautiful pattern…thank you!! Hoping your family situation is better.
Have just the right fabric in my stash. Can’t wait to get started sounds like a fun project. TY
I have posted a message to my fellow quilt guild with a link to your blog, hoping some of them will join me. Have my pattern saved and hope to be able to keep up with your sew along. On my way to search for some fabrics, must be from stash. Happy Easter and Happy Sewing.
Sweet! Our guild show is coming up, so probably won’t be able to keep up, but I’ll be watching. Gathering the fabric is my favorite part in starting a project. It’s the finishing the project that is the hard part :-/ Thanks!
I have chosen my fabrics – I will be going for a scrappy look using up fabric scraps for my petals – cream background fabrics with pink and green petals. I love your suggestion for using the wrong side of fabric – I wouldn’t have thought of it but it makes such good sense. Thank you.
Looks great, I’m in, but will draft a border that let’s me wind up with a 30″ square quilt to put on top of my circular glass dining table. Do you have an Instagram name to which to link up steps by steps?