Christmas Once a Month: Winter Seeds Table Topper
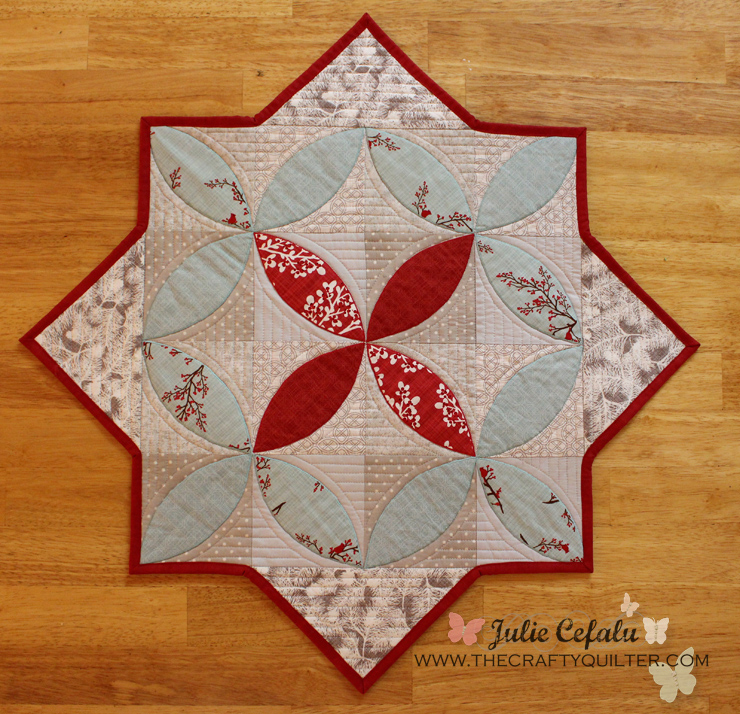
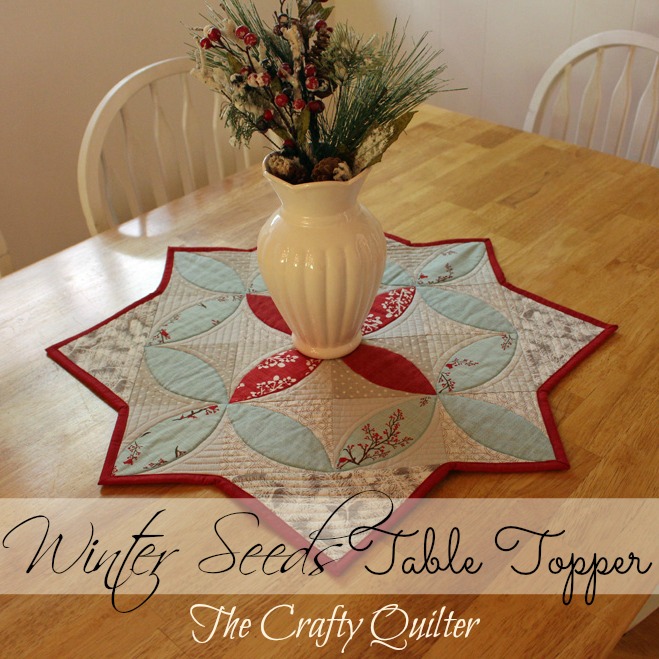
Welcome to the June edition of Christmas Once a Month! I have a quick and easy table topper to share with you that would make a great hostess gift or an added holiday touch to any table!
I have always wanted to do something with the melon (or pumpkin seed) block and this little table topper fit the bill. It has some simple applique and some fun angles to keep it fresh.
I used fabric from the Winter’s Lane Collection by Kate and Birdie Paper Co for Moda. This is one of my favorite holiday lines and I have a fat quarter of each piece in the collection!
Finished Size: 27 1/2″ wide
Here is how you can make this table topper for yourself (or a friend):
Supplies:
- 1 pkg. charm squares OR the following:
- 1 fat 1/8 (9″ x 21″) each of 5 light fabrics for background
- 1 fat 1/8 (9″ x 21″) each of 2 aqua fabrics for seed applique
- Fabric scraps of red fabric for seed applique
- 1/4 yard binding
- 7/8 yard backing
Cutting Instructions:
- Side Triangles: From one of the light background fabrics, cut (2) 7 1/4″ squares, then cut in half once diagonally.
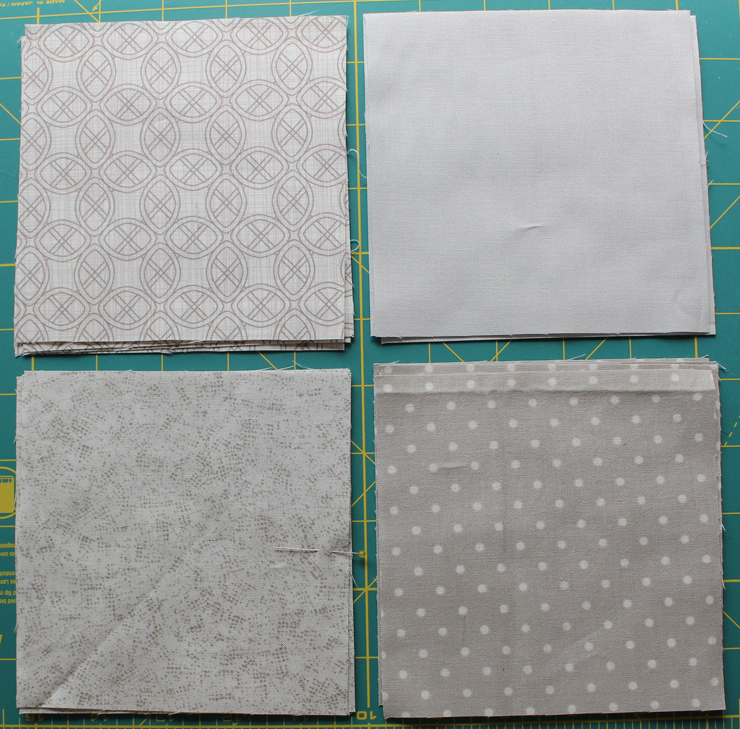
- Center Squares: From each of the four remaining background fabrics, cut (4) 5″ squares each.
Assembly Instructions:
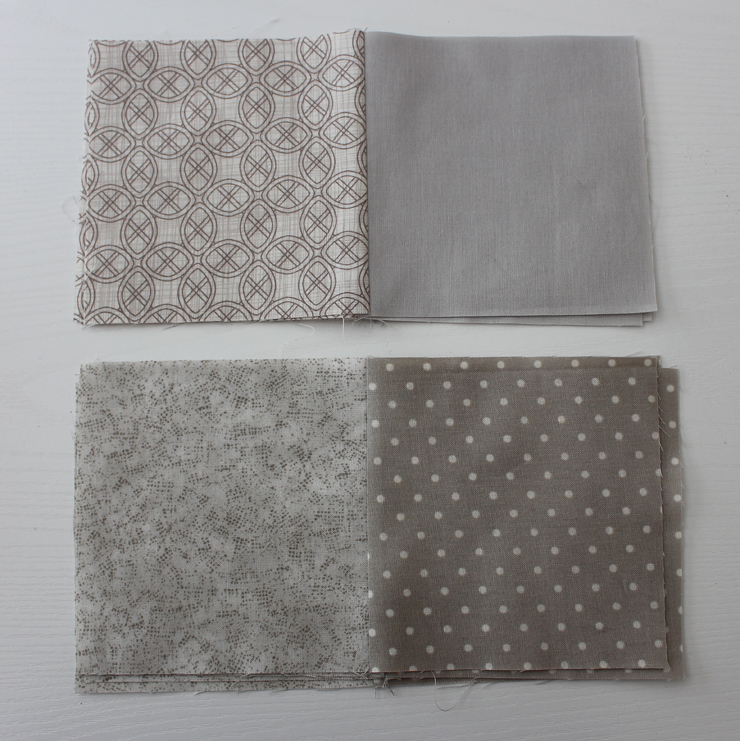
Table Topper Background: Make 4-patch units from the 5″ background squares. Lay out your squares so that you have one of each fabric in the 4-patch.
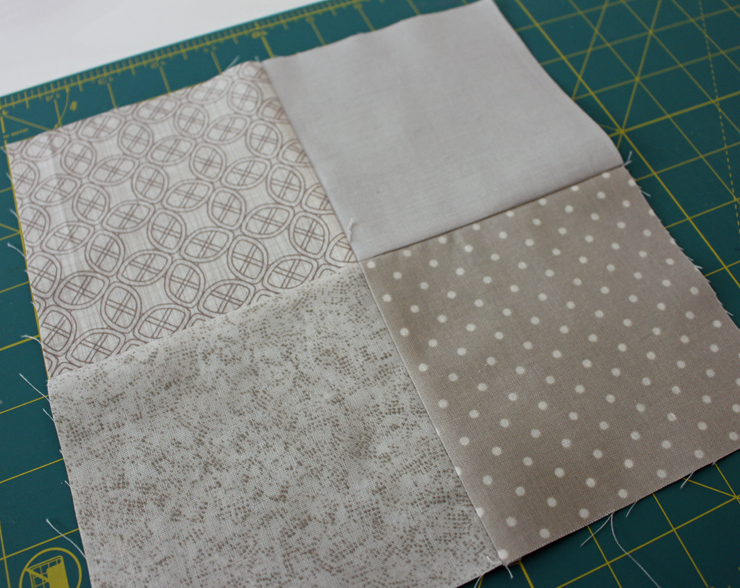
Sew them into pairs. Press top and bottom pairs to one side so that they are opposing each other.
Sew the pairs together and press. The resulting 4-patch unit should measure 9 1/2″ square.
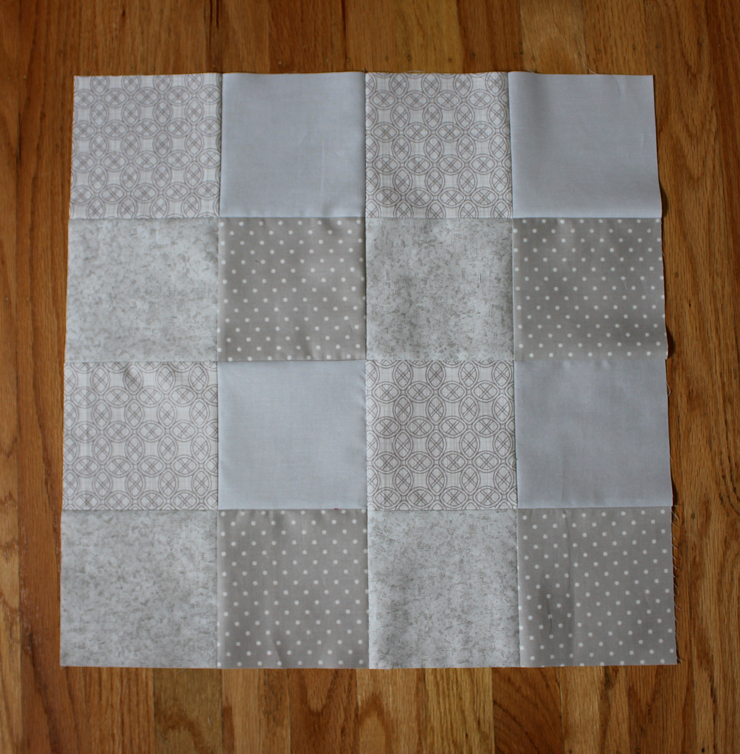
Stitch the (4) four-patch units together to create the center of the table topper:
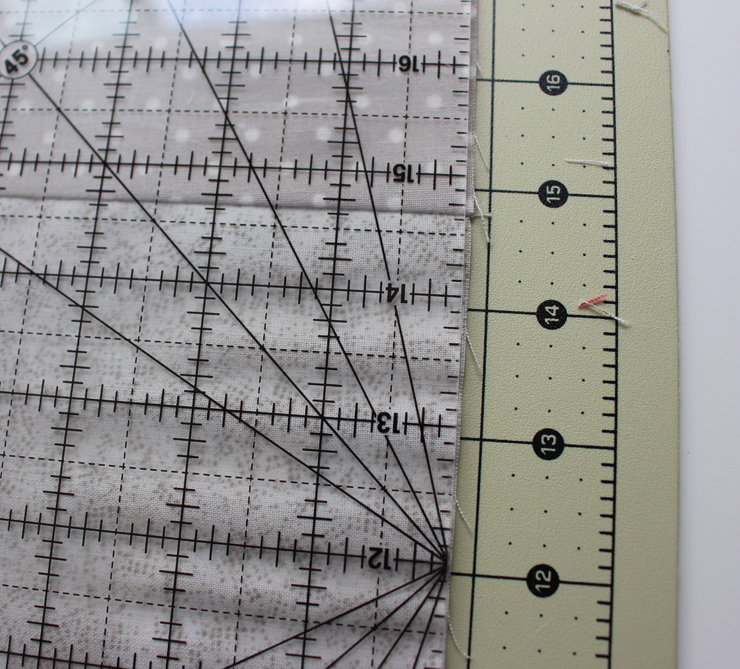
Trim the edges if necessary to make it “square”.
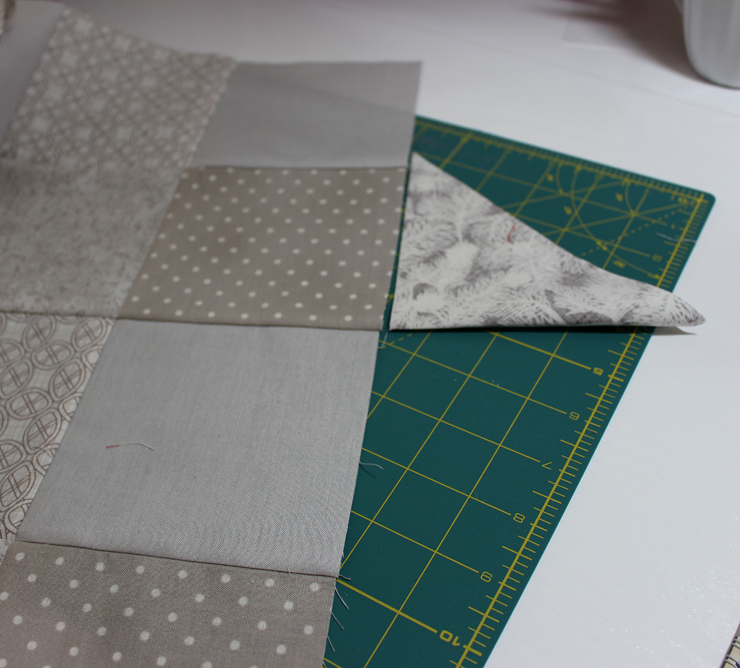
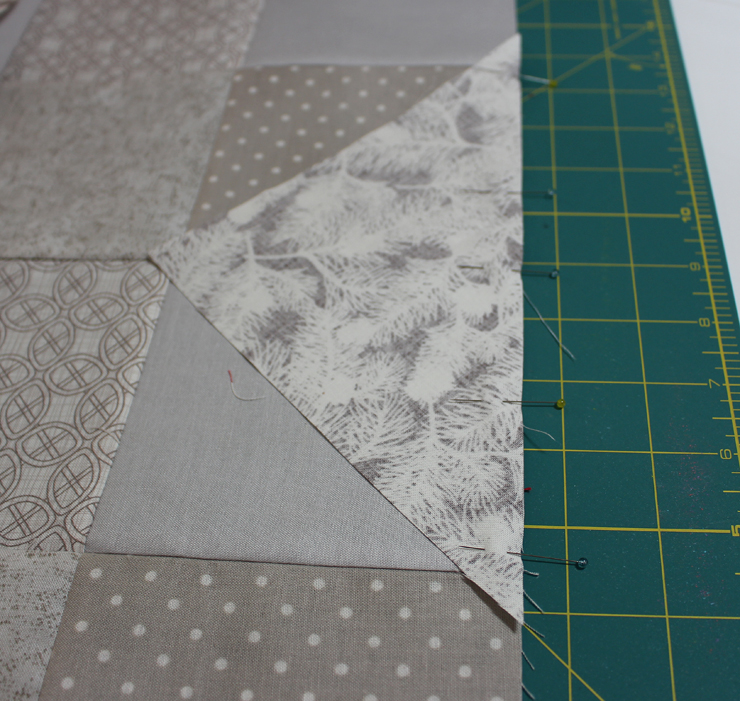
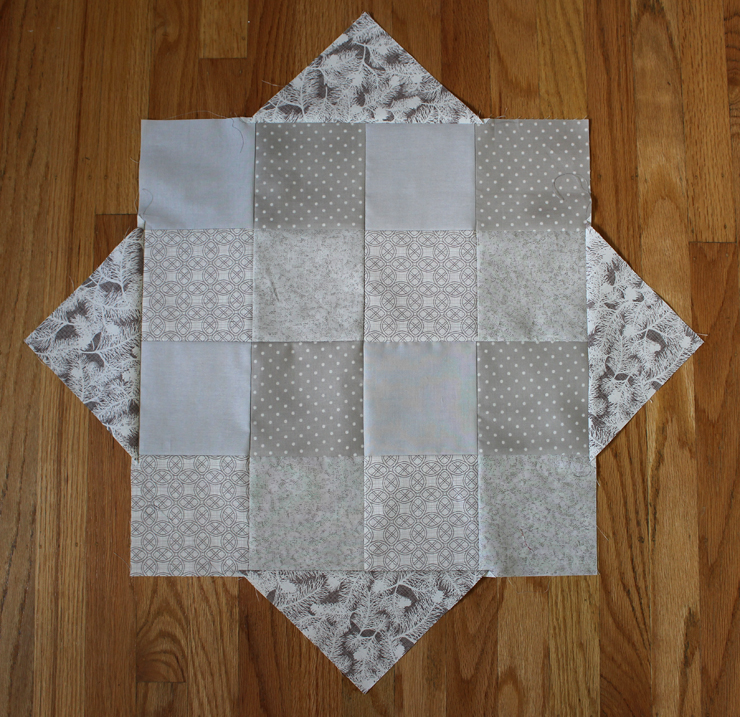
Add corner triangles. Find the center of the triangles by folding them in half and marking with a pin.
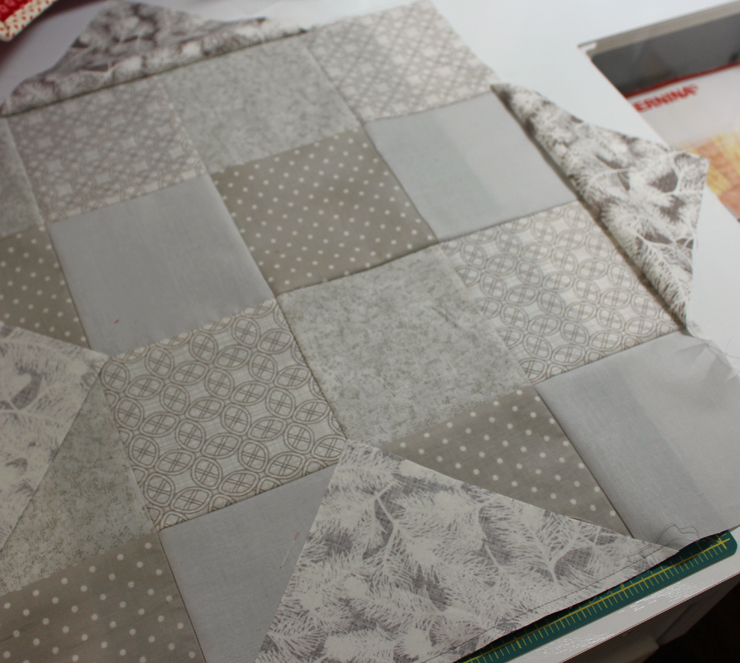
Match the center of the triangles to the center of the sides and pin. Stitch in place.
Press towards the triangle.
Applique Instructions:
For this project, I used machine applique with fusible web. You can find my tutorial with very detailed instructions for machine applique here. Let me give you a brief description of the steps I used:
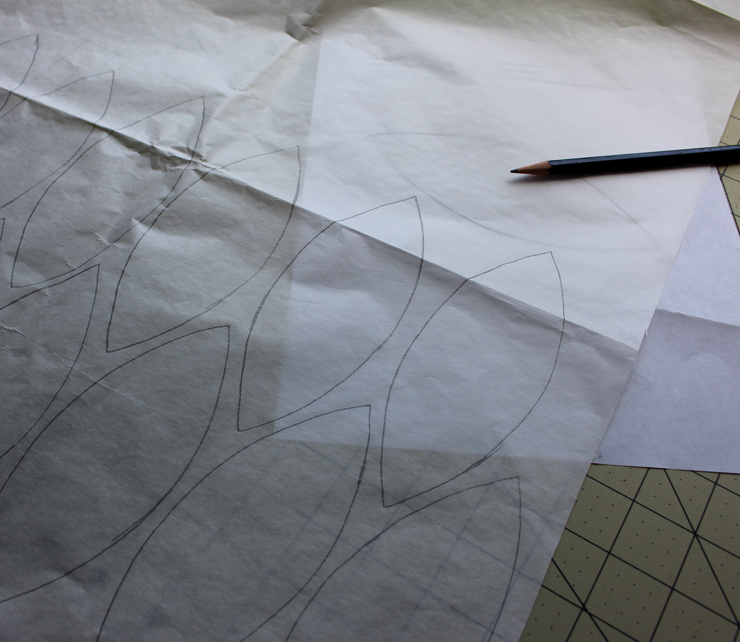
1. Print out the Winter Seed Template pdf file. Make sure to print it out at actual size (no scaling).
2. Before continuing, check the fit of one seed shape on your table topper background. The tip of each seed should reach the corners of each background square. Make adjustments if necessary.
3. Trace seed pattern onto paper side of fusible web.
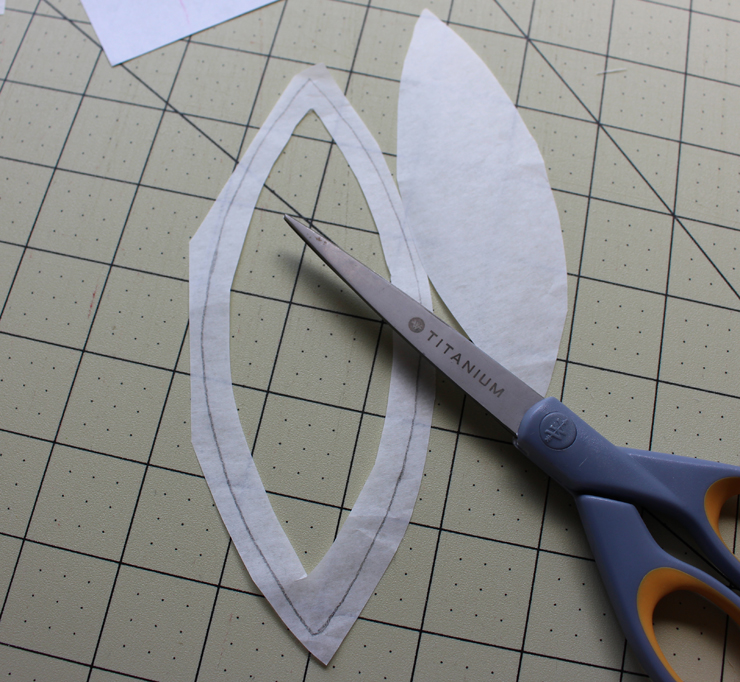
4. Roughly cut out shapes. I like to cut out the center of each “seed” leaving 1/4″ around the edges.
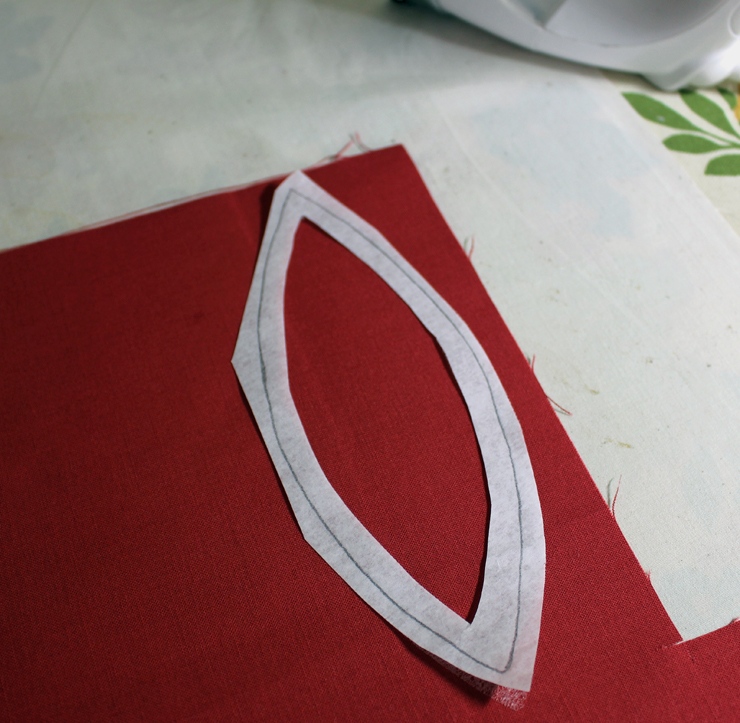
5. Press fusible shape to wrong side of aqua and red fabric. You need 4 red seeds and 12 aqua seeds.
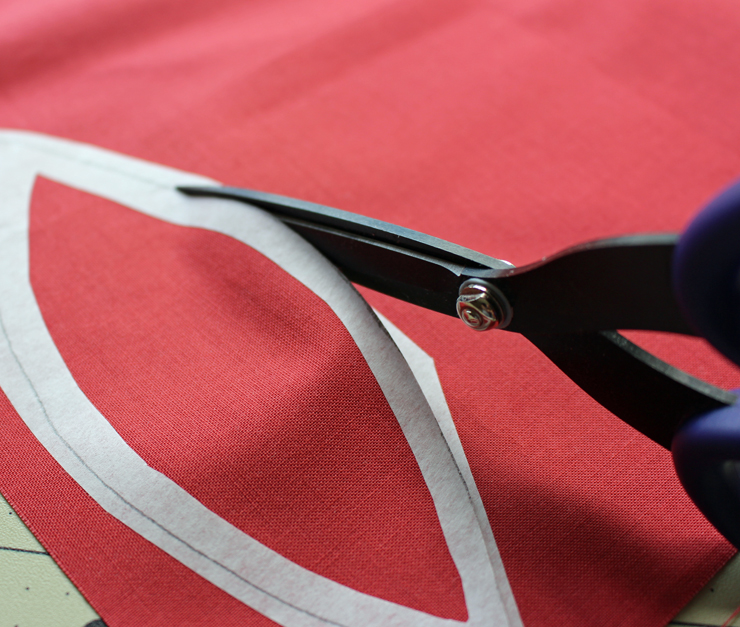
6. Cut out on drawn lines.
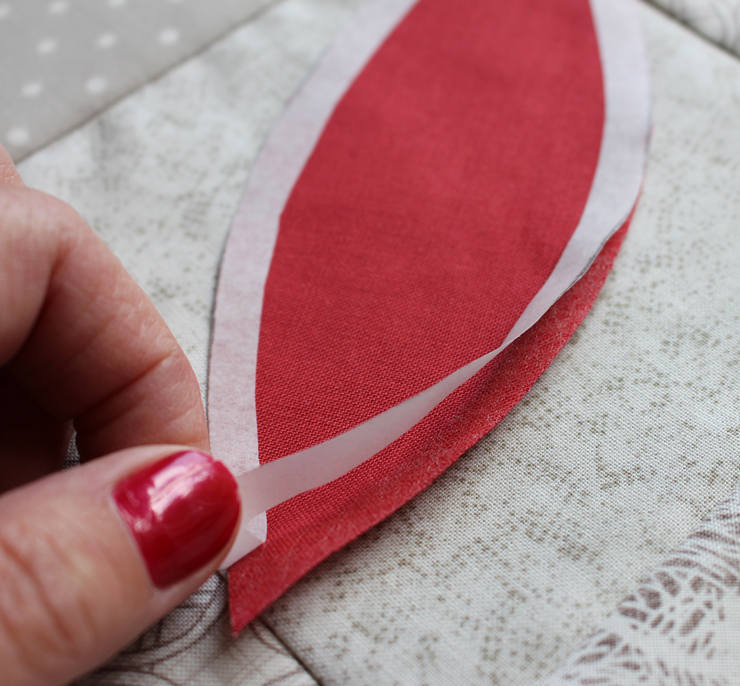
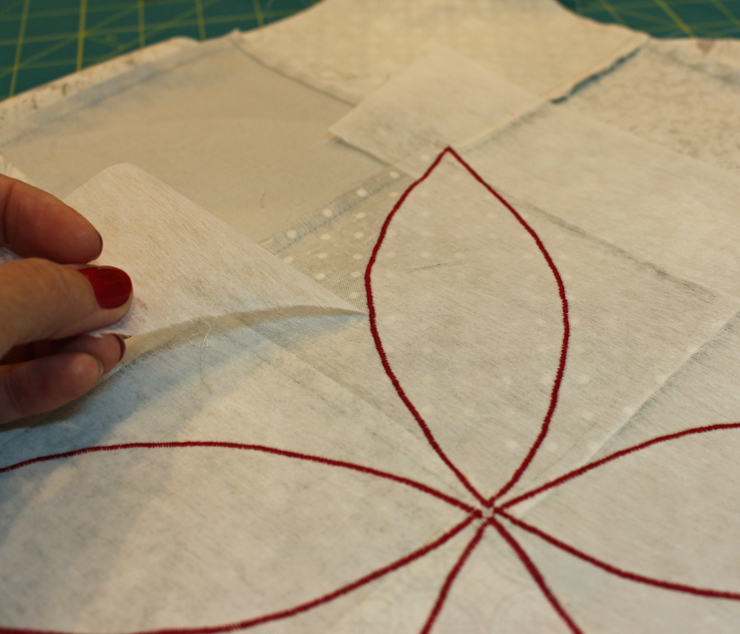
7. Remove paper from applique.
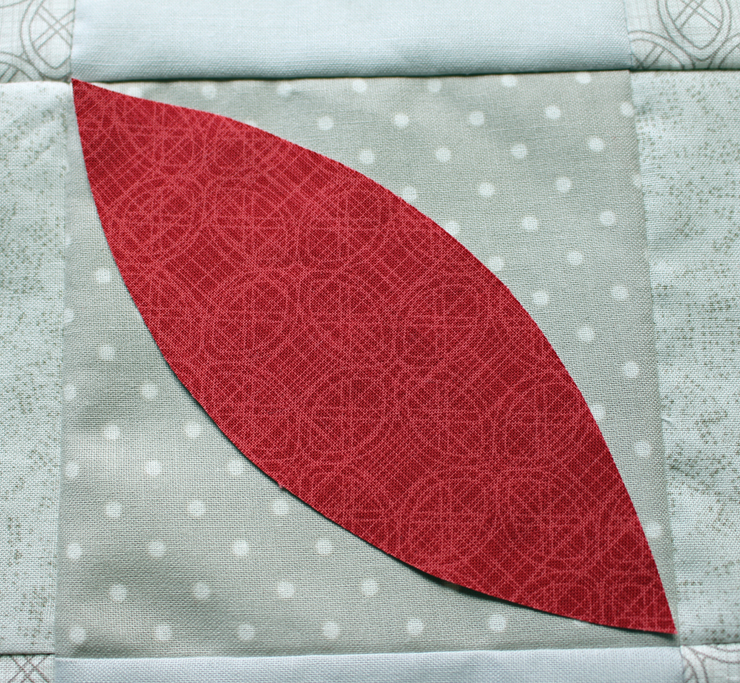
8. Press in place as shown:
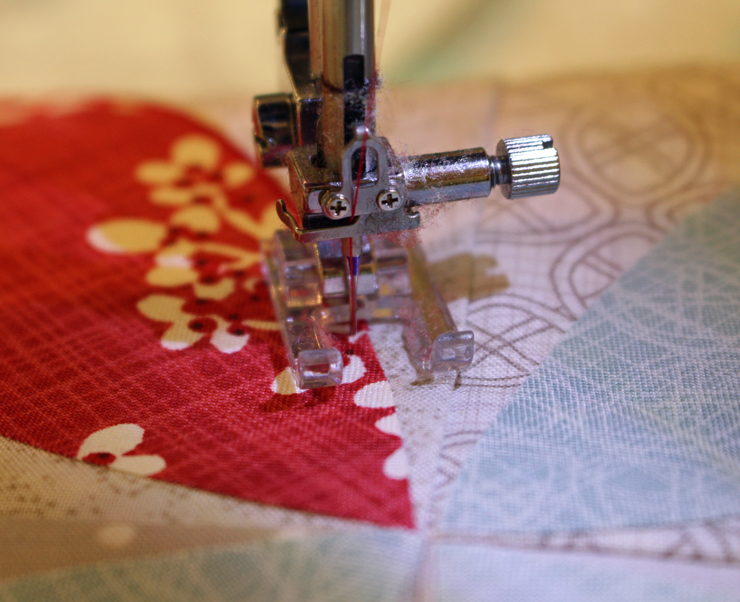
9. Stitch raw edges. I used a narrow zig zag stitch and I used a stabilizer underneath to keep the applique flat and stable.

Finishing Instructions:
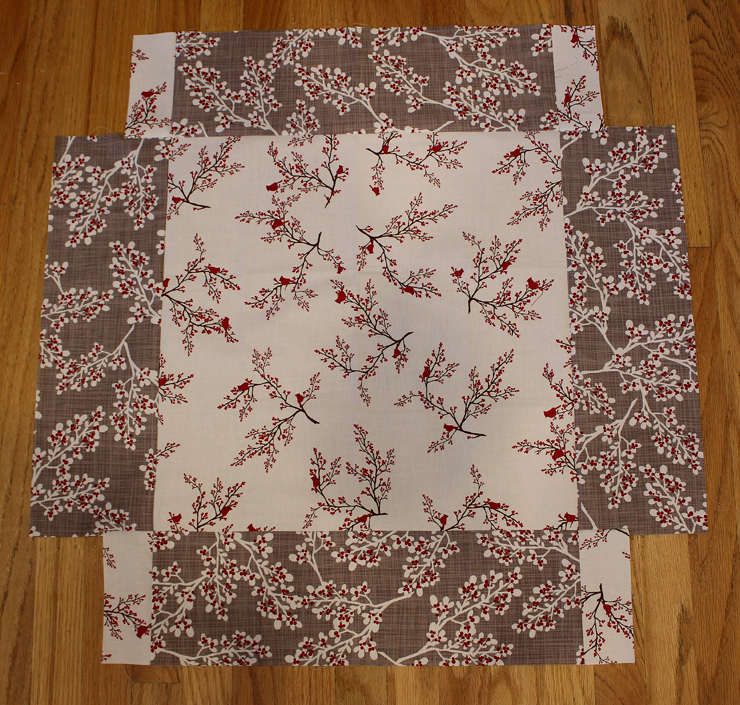
I pieced my backing because I used fat quarters. Here’s how I pieced it: I used one 17 1/2″ center square, (4) 5 1/2″ x 17 1/2″ side rectangles and (4) 2 1/2″ x 5 1/2″ corner rectangles. It’s an odd shape, but it works for this project.
I used Pellon Thermolam for the batting. It’s a dense polyester and I like the way it lays really flat and it won’t shrink (so it looks the same after washing).
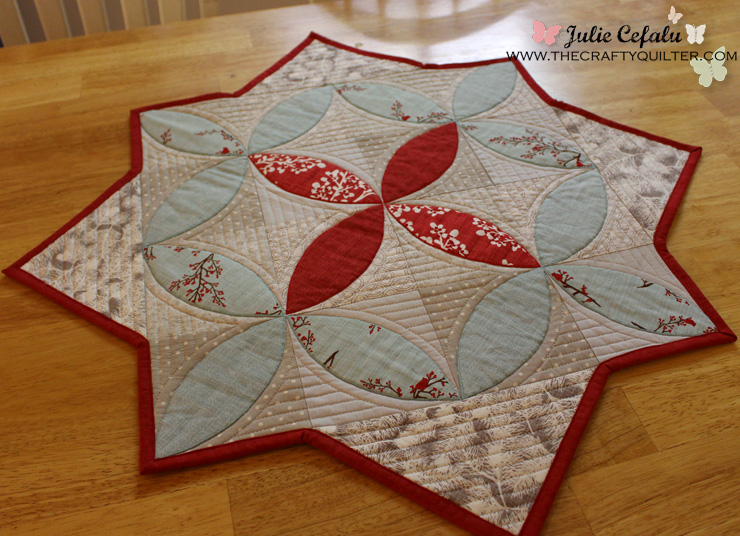
I used lots of straight line quilting and I left an open channel to echo the curves of the seeds.
You can find instructions for binding this table topper at a previous post here. There are a few easy tips for the inside corners that you’ll want to check out.
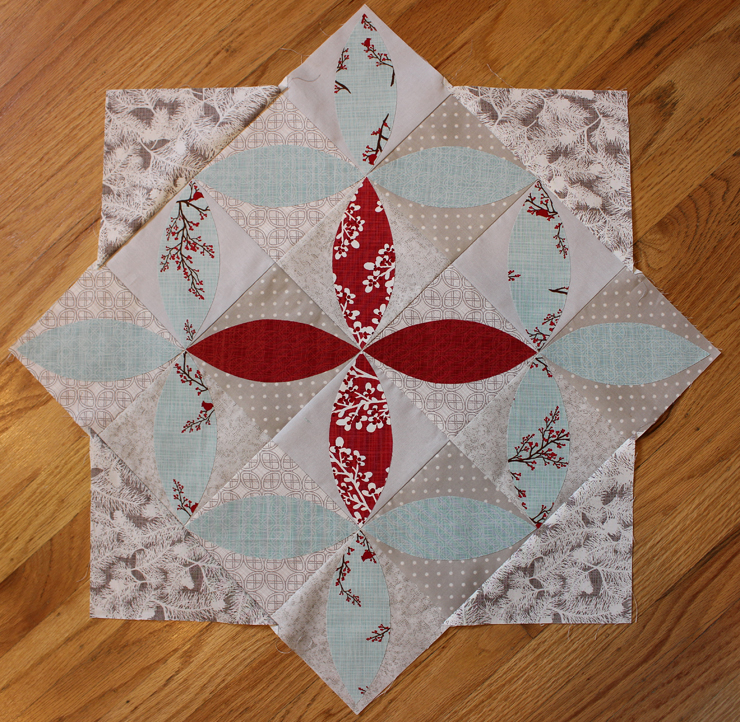
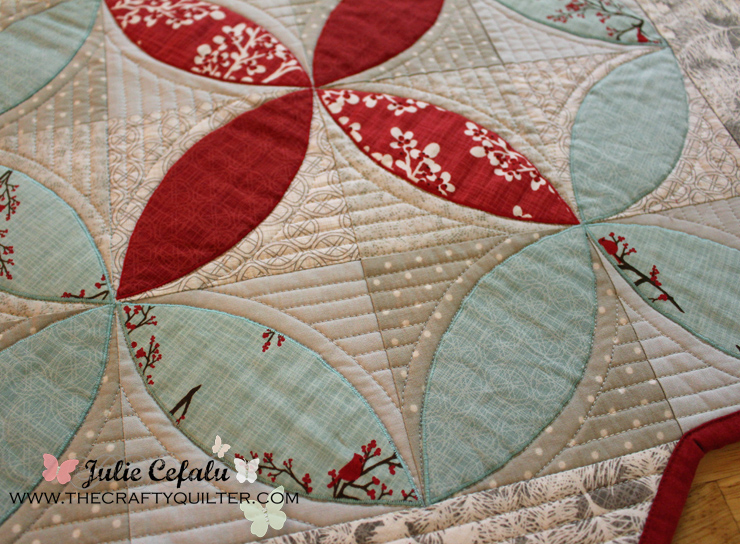
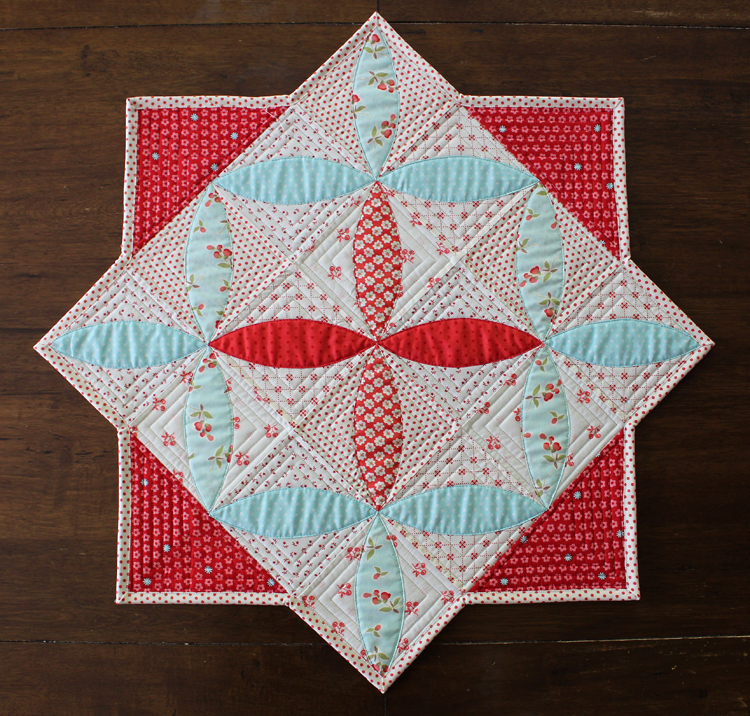
You can make this table topper for any occasion, depending on the fabric you choose. It looks great in cherry reds and happy aquas:
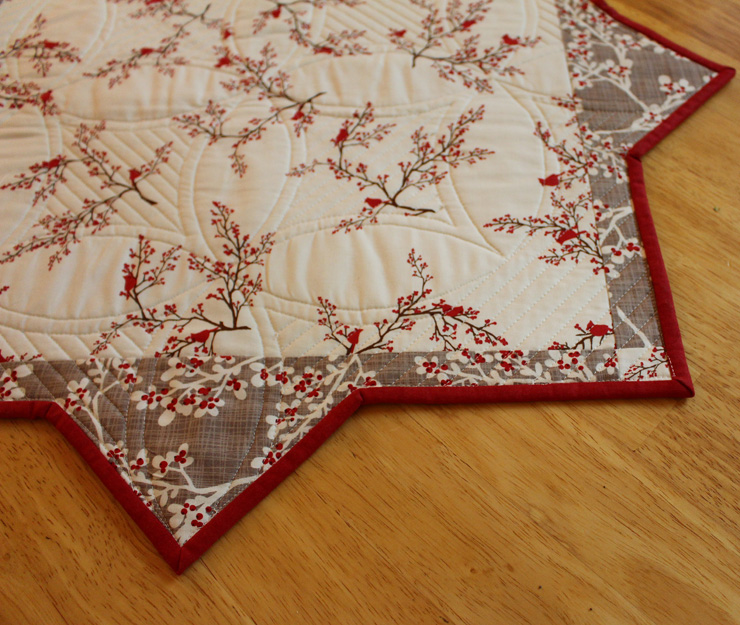
But I love the “cool” winter version too!


Thank you very much from Greece
Hi
I simplu love this! I have ordered a charm pack, and receved it today, but the grey pieces are not the same as yours. What are your grey pieces?
Best Regards from Sweden
Thanks Julie. I made this with some charm squares I was given as a freebie. Really clear instructions and it looks lovely on my little Christmas table.
So excited to make this project to give as a gift. I just prepared my seeds on fusible! Since this will be a gift, I am using neutral tans for the background with batiks for the “seeds.”
Thank you very much from Spain.
I truly relish your
written content. The post has really speaks my interest.
I am aiming to bookmark your website furthermore as keep checking for brand spanking new info.
I love this pattern of Winter Seeds Table Topper and am itching to make several as gifts for friends. However, to print the pattern, I would have to print all the comments underneath too – would it be possible for you to make it a printer friendly version, so only the pattern prints? That would be so very much appreciated, thank you!
I too would like to know if you had a printable version the most I could get it down to was 22 pages cause the print is so large Thank you so much I can’t wait to make this I love it I just finished the Starta star
Really nice! Thank you Julie!
This table topper is so elegant. I wish that I could just sit down and sew until completion, but this does not happen for me. Your tutorial is easy to read. Maybe I will give it a try.
So many wonderful ideas. I love this table topper. Lots of style in a small package. Thank you for sharing this sweet project.
Thank you Julie – I’m hooked. I have a Winter’s Lane charm and FQ collection too — NOW I know how to use it. Very thankful! Karen
I was compelled to check out all your tutorials because today’s tutorial was so well done. I’m so glad I did. I just love this table topper and have already put it on my list for gifts this year. Thank you so much! ~karen
Hi,so happy to find your Blog!
Love your Tabletopper+the tutorial;will be saving this and would like to make one or more similar. Thank You for posting!
Thanks for finally writing about > Christmas Once a Month:
Winter Seeds Table Topper – The Crafty Quilter < Liked it!
Hello there! Do you know if they make any plugins to
help with SEO? I’m trying to get my blog to rank for some targeted keywords but I’m not seeing very good success.
If you know of any please share. Kudos!
Hi, I made this beautiful table topper for gifts for Christmas, they turned out amazing. Thanks for such a wonderful tutorial. My first time doing appliqué too, and it was so much fun. 🙂
I am always on the look out for tips and methods to use my tools for quilting, especially my silhouette machine. When I saw this pattern, I knew it was perfect to learn how to cut out fabric applique shapes with the quarter inch fusible on the back. I figured out a two-step process in which I was able to cut out all 18 pieces in a matter of minutes. Thereby allowing me to spend more time quilting. Thank you the family loves it on our table!
love the topper, am going to make this but not until next year. Thank you.
LOVE IT !! thanks for sharing.
I cheat on applique . I sew the fusible interfacing onto the pieces sticking side in.. then make a small slit in the interfacing , turn the piece right side out & fuse into place. doing so turns the edges & gives me a clean edge to sew around 🙂
I love her table topper, but was confused why to trim around the sticky so it is only sticking down the edges. Why not stick the entire “seed” piece down – as you have described.
Just came across your on Pat Salon’s page. LOVE your table topper and am adding it to my to do list. Super cute.
All I can say is as a designer I just love this and yes I am going to make this. I normally try others designs when time allows but this is just outstanding and it is GORGEOUS!!!! Thank you so much for sharing!!!
Lindo!!! parabéns! e obrigada pelo tutorial. Vou fazer uma peça desta para mim… 🙂
Beijo
Silvia
Adorei o seu trabalho!! Lindo!!
Obrigada por compartilhar seu projeto.
Quero fazer.
Um abraço.
Glória Luz
Adorei o seu trabalho!! Lindo!!
Obrigada por compartilhar seu projeto.
Quero fazer.
Um abraço
Glória Luz
super travail, merci pour ce beau tuto
amcialement
I’ve featured your table topper tutorial at PatternPile.com – I love it! Thanks!
Avec le lien, c’est mieux : http://charlie51400.canalblog.com/archives/2013/11/01/28334290.html
😉
Vace le lien, c’est mieux : http://charlie51400.canalblog.com/archives/2013/11/01/28334290.html
😉
Bonjour,
J’ai réalisé ce joli quilt, avec trois amies, voici le lien vers mon blog avec les photos 🙂
Merci pour tout !
Charlie
j’aime!!!!j’aime!! violette23
Thank’s for the quick help. I’ve never worked with anything other than straight yardage and I was just unsure.
Hello! I just love this table topper and I’m ready to make two versions of it- one for Christmas and one for the rest of the year! I’ve never done anything like this before and I have just one question. Do you need extra yardage for the triangles? I can’t see how just a Charm Pack would be large enough? ThanK you!
Donna
Sorry for the confusion, Donna. You need 1 fat quarter for the side triangles. I will change the instructions to make it clear when I return from vacation.
beautiful pattern, thank you so much for sharing, I have made 8 in different colors they are all beautiful. thanks again.
Edith
I have been considering what I am going to make as Xmas gifts, then I found your site. I am going to make my first table topper today with Xmas fabrics on hand, but your choice of fabrics is simply gorgeous. Thank you, Julie!! You’re a gift!
I love your winter seeds table topper but for some reason I am unable to open the pdf file for the seed template. Would it be possible to email it to me. thanks so much. I love your site.
I love your winter seeds table topper but for some reason I am unable to open the pdf file for the see template. Would it be possible to email it to me. thanks so much. I love your site.
Lovely pattern…can’t wait to make a couple for the holidays!!!!
That is a beautiful piece. I am not very good at piecing though. I think I might have to try it if I ever get through the summer and grand children : )
I love it! Thanks for sharing. Wonderful tutorial!
This topper is outstanding! Thank you for the tutorial!
TODO ESTA PRECIOSO BELLO HERMOSO YO QUIERO APRENDER TODO ASI DE BELLO
I am curious as to the progression of your quilting on the Seed Christmas table topper. Did you do the echo around the seeds first of the lines? Was this free motion quilting? I wonder how many stops in the quilting or if a path to do continuous line quilting to avoid tying many loose ends. I may not be describing this well and trust you will have time to enlightened me as really adore this design. Thank you kindly and sew many hugs.
Thanks for this tutorial! I’m gonna make one for my living room.
lindo, olhando parece difícil, mas com sua explicação facilitou muito ….
parabens e obrigada
This is so cute and seems simple to accomplish. I’m going to try it.
Karen
Beautiful! I like BOTH version. 🙂
merci magnifique travail !!!
félicitations
Wonderful pattern just love the colors that you used and a friend plus myself will be making this for our tables this ear….appreciate it.
Thankyou, I have just completed this as a hostess gift for my friend. We are celebrating Christmas in July on Saturday, it is perfect, although I have used fabric from my stash it still looks great. You can see mine on my blog.
Love the table topper, will for sure have to give this one a try, thanks for the tutorial. I just found your blog today and I look forward to getting e-mail updates from you.
Thanks so much for this sweet tutorial and pattern. It’s sweet. I’m going to make one for me and one for my sister as my Christmas in July project.
Very sweet topper! Thank you for the tutorial!
Thanks for a lovely project 🙂
ABSOLUTELY WONDERFUL. YOU MAKE IT LOOK SO EASY… GUESS WHAT MY FAMILY AND FRIENDS ARE HAVING FOR PREZEES THIS YEAR. THANKS.
love it Julie,can’t wait to make it,also show it to all my quilting friends
Julie O love how you did this and the tutorial was wonderful Thank you so very much for sharing and showing all,,Great Job HUGS Cheers Jeanne Marie
What a great tutorial!! Thanks for sharing.
This is so beautiful! Thank you for the tutorial…I’m on my iPad and I need to figure out how to pin it to my Pinterest board “Cool Tutes”! Lovely in both color schemes!
I am it love with this pattern! Will definitely be bookmarking it. I have always wanted to do something with the melon block too. This looks like the perfect project. Thanks for the great pics. Glad I found you!
This is amazing! I have not ability to do this sort of craft and I’m amazed at those who do. Beautiful!
I’m visiting today from CRAFT. I hope you get the chance to visit my blog, linkup and leave a comment, too!
~ Megin of VMG206
Link Up Sat thru Friday @ DIY Showcase Link Party
Love, Love, Love this !!!
Going to get together with a friend and make one soon !!!
Looking forward to the next project.
Oh wow! This is a gorgeous table topper! Your tutorial is perfect…thank you!
Your table topper is beautiful! Thanks for sharing the how-to.
Beautiful table topper! It’s going on my “to-do” list, thanks for the great instructions 🙂
This is beautiful. I haven’t tried quilting, but I am going to
try this out.
Thank you so much.
Wow. What a beautiful table topper. Great job. Thank you for the wonderful instructions.
Yep – I’m always into the Christmas Spirit. I love your topper. I love the shape and your instructions seem so thorough. Love how you did the backing; very unique. Thanks.
Just found a charm pack in my stash. I can’t wait to “build” this beautiful table topper. You have given me great food for thought! Happy sewing, Julie!
Oh, Julie – I literally gasped when I saw this beauty!!! Are you wiretapping my brain??? I’ve got a similar but different idea dancing in my head about an applique project that I hope to try out soon. These table toppers are awesome! BTW…I just WON a fat quarter set of Winter’s Lane and cannot wait to try something amazing with it. This may be just what I’m looking for!
Wowza Julie! It looks gorgeous!!! But out of my comfort zone, altho’ you did an amazing job of making it look so easy. Maybe I’ll try it one day when I get my nerve up!
Tanya
Oh… I quite like this! Printing it off right now!
This is a gorgeous table topper! Your fabric choices are just perfect for the design!
And it is an awesome tutorial! Oh I hope I have time to make one for the holidays! I love proects this size, because it makes it so much more “do-abe” for me right now!
Susie
Thank you so much Julie for the wonderful tutorial on making this adorable “Winter Seeds” table topper! Just the project I need to make to go with my Sunflower quilt (which also uses the seed pattern). Love to make small toppers to go on tables to hold a small lamp or candle.
You make all your projects look so easy-peasy!
Regards,
Nettie
Hello, Could you indicate the measures centimêtre.Merci fabrics and good day