Applique Part 3 – Machine Applique Stitches
This is the third part in a series of machine applique tutorials and today we will be focusing on the various stitches used on our sewing machines to stitch applique in place. This might get lengthy, so grab a cup of tea!
Here is where you can find the other lessons in this series:
Applique Part 2 – Machine Applique with Fusibles.
Once you have fused your applique pieces in place, it’s time to stitch them down so that they become more permanent. We don’t want any loose or floppy edges in our project!
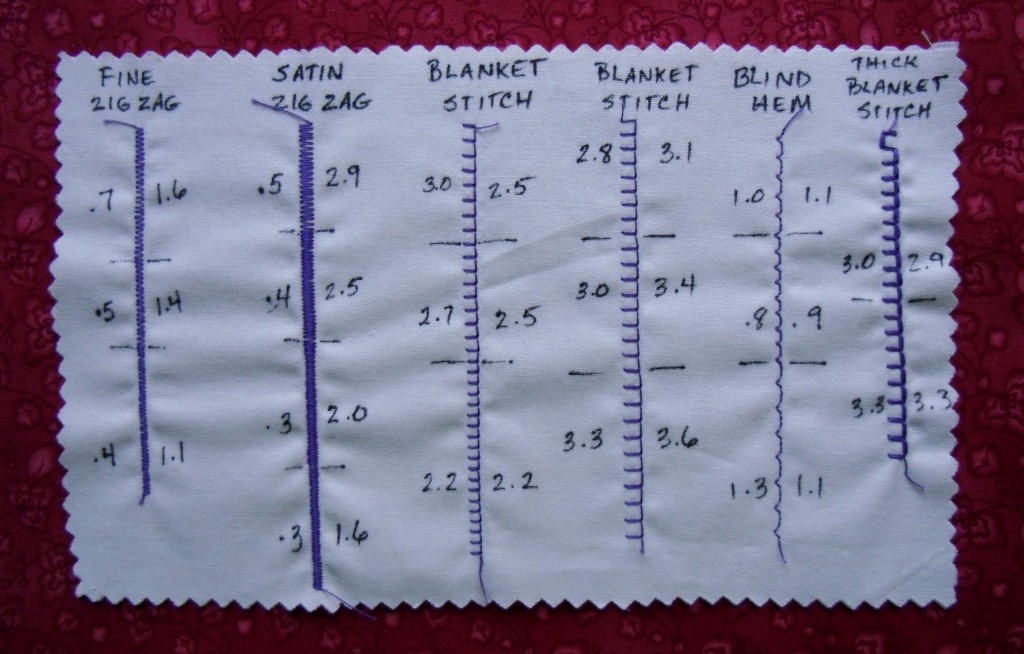
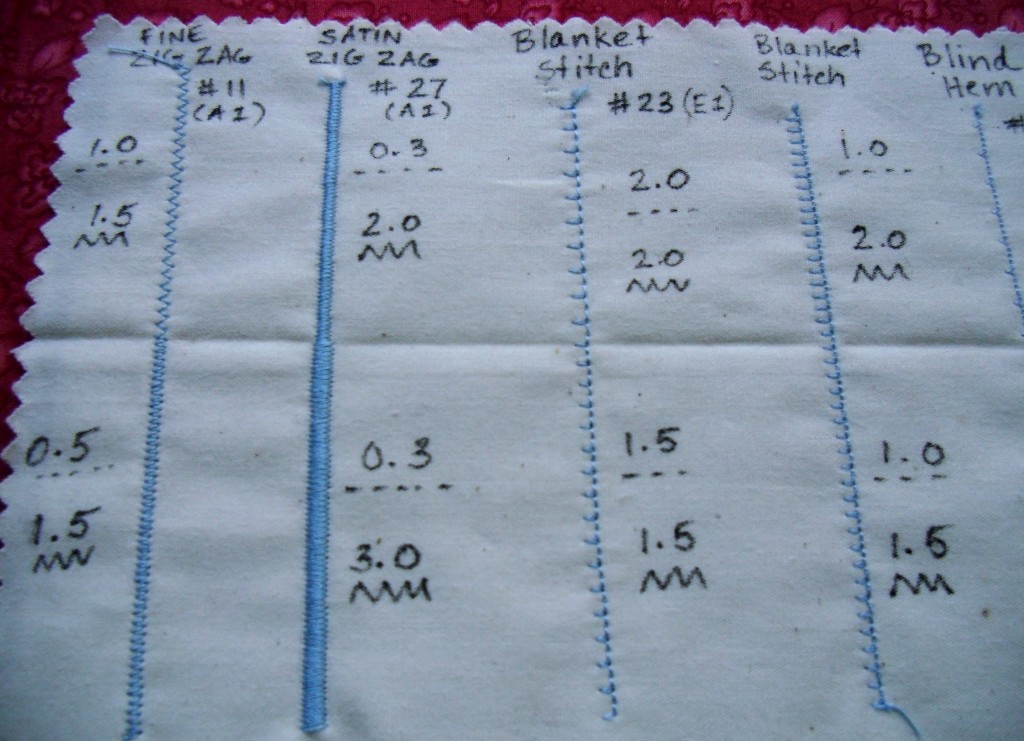
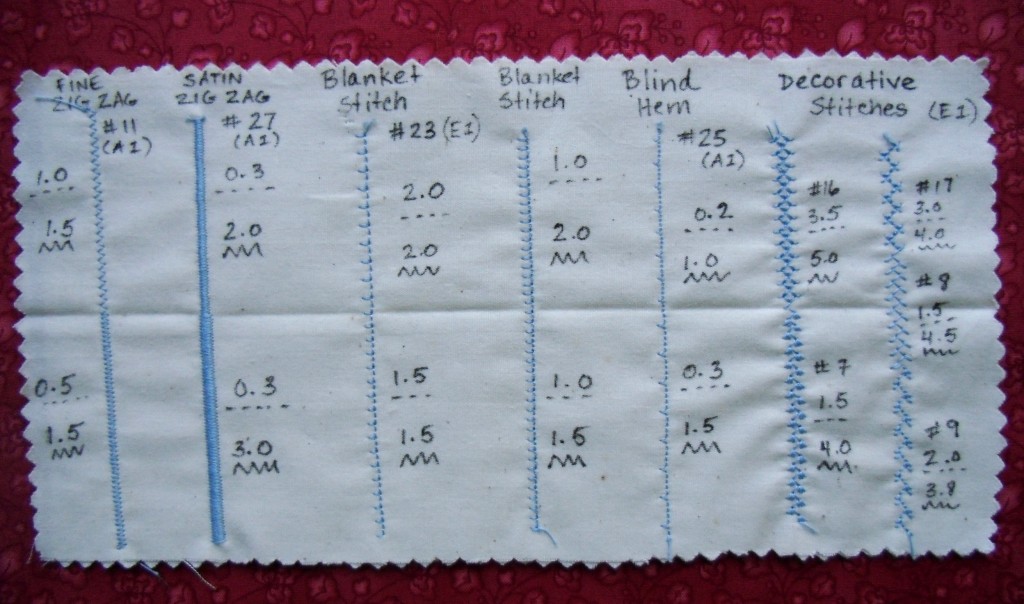
So let’s talk stitches. The most common stitches used with fusible applique are the zig zag stitch (satin or narrow), the blanket stitch and a straight stitch. The first thing we are going to do today is play with our machines and make a little stitch sampler “card” that we can use as a reference tool for future projects. It will look something like this:
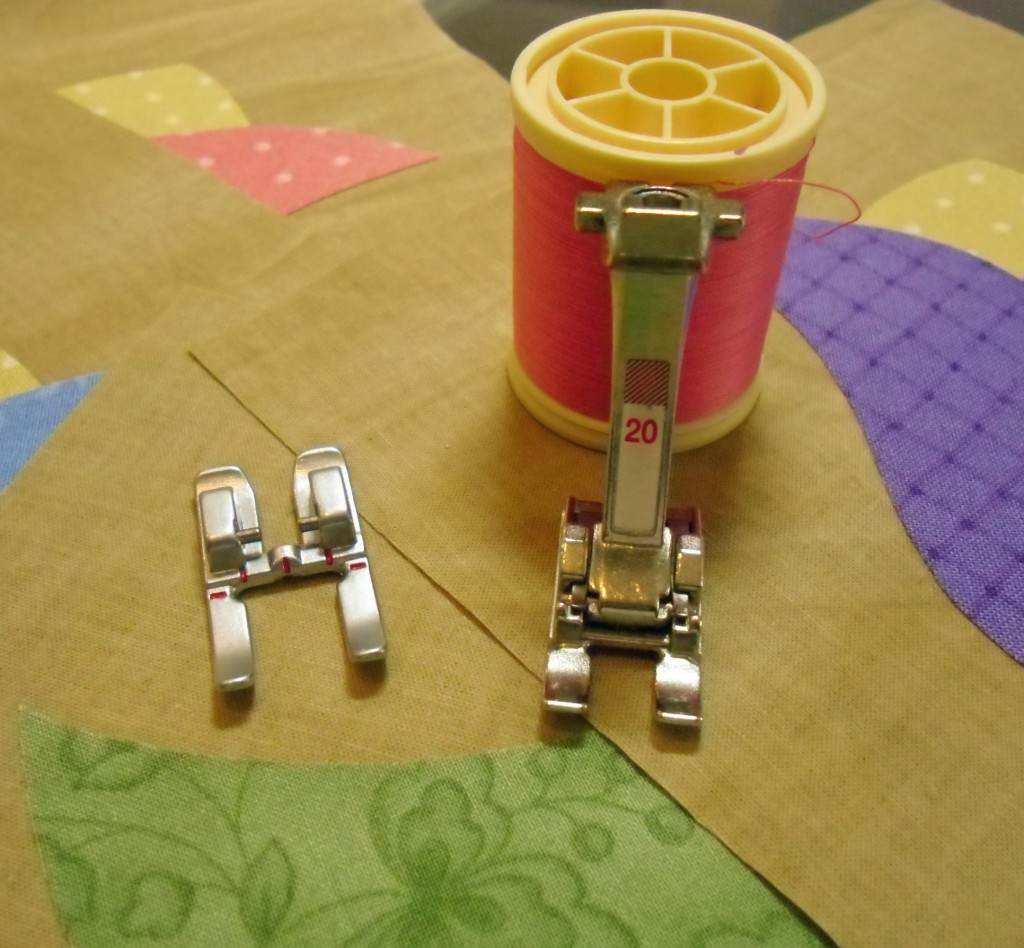
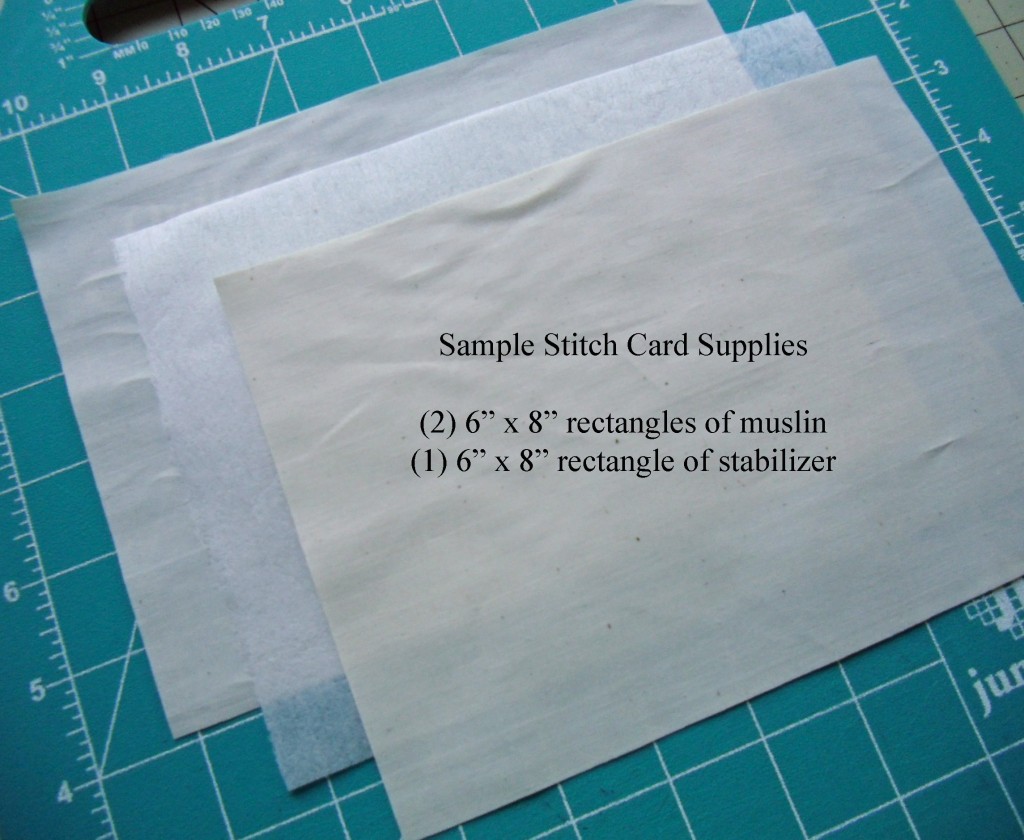
Supplies: You will need two pieces of muslin or solid fabric cut into rectangles that are about 6″ x 8″, and a piece of stabilizer cut into the same size as the fabric. Choose a thread that will contrast well with your solid fabric so that you can really see your stitches. An open toe applique foot. This foot doesn’t have a metal bar or clear plastic in front of the needle so that you can really see where you’re going as you stitch.
Set Up: Layer your pieces so that you have a sandwich of fabric, stabilizer and fabric. The stabilizer helps to keep your stitches flat and gives extra stability to your project. You will want a permanent pen nearby to write on your stitch sampler. I like to work in columns, each one having a different type of stitch. Label your column with the stitch you’re working on.
Zig Zag Stitch. This is a fairly common stitch, but some machines give more than one option for a zig zag. You can get two very different looking stitches with the zig zag depending on the settings used on your machine. One will be a satin zig zag and the other will be a narrow zig zag.
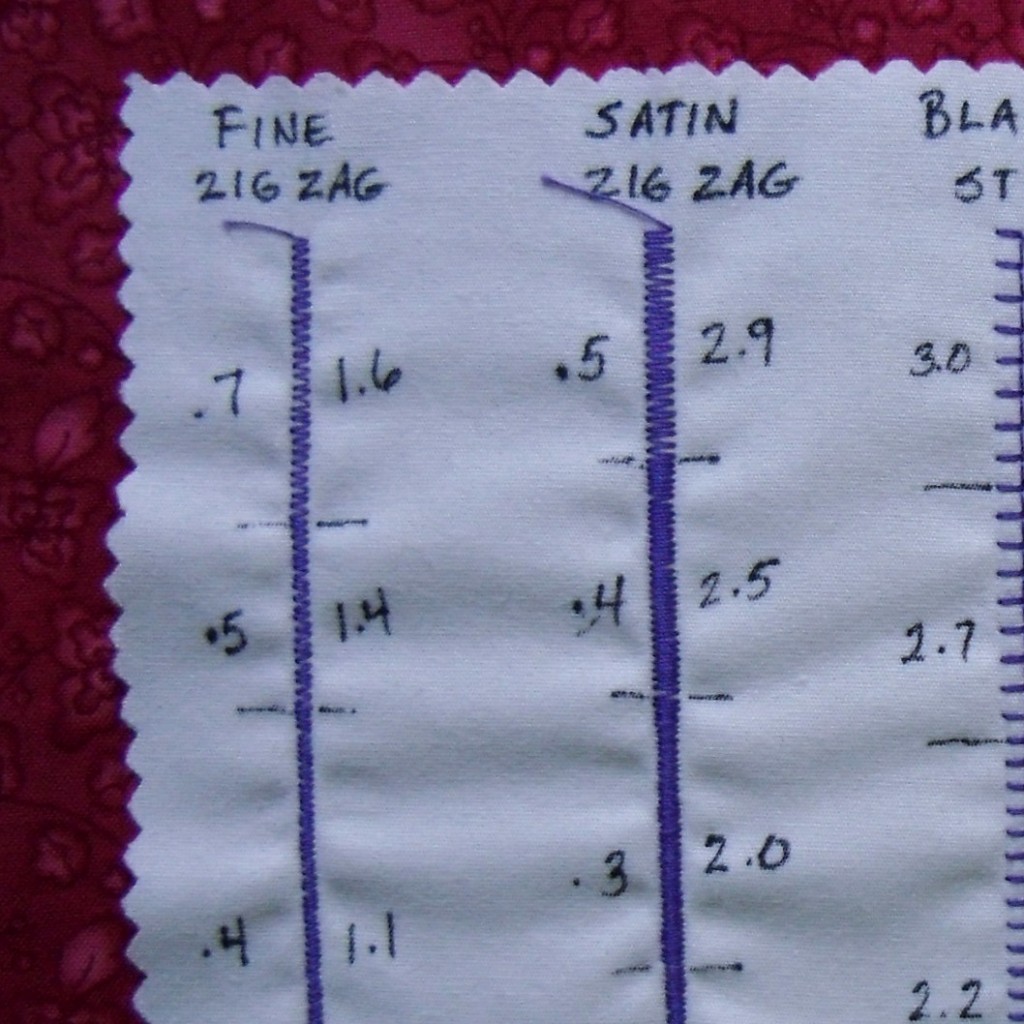
Satin Zig Zag: This stitch got its name because it resembles a piece of satin. It is usually made up of very thick and dense zig zags that are so close together you can’t see any background fabric between the stitches, just solid thread. Some machines have a separate button for the satin stitch. Once you have selected the stitch, your machine will show default settings. You will want to change the stitch length to .2 – .5 range and the width to 2.0 – 4.0 range. Stitch a section at one setting and write down those numbers. Then change to a different length and width and see what that looks like. Make sure to write down the setting next to your stitches with a permanent pen.
Narrow (Fine) Zig Zag: This stitch is not so loud and showy as the satin stitch. It can even be considered invisible (almost). It won’t show up as a solid line of thread, but it will do the job of securing the applique edges. The stitch settings will be a longer stitch length, between .5 and 1.5, and a narrower stitch width, between .7 and 1.5. I set my machine (Bernina 440) to .8 length and 1.1 width. Again, try out a few different settings and write them down.
Blanket Stitch: This is a popular method of stitching applique and it’s formed with a straight stitch along the outside edge of the applique followed by a perpendicular stitch into the applique shape. Depending on your sewing machine, you may find more than one blanket stitch option, possibly up to five! Or you might not have any. First, make sure the “bite” of the perpendicular stitch is going to the left of the straight stitch. Many machines have a similar stitch with the bite going to the right and that’s not going to work for us. There may be a blanket stitch that looks darker or thicker and that is meant to mimic the look of a hand-stitched blanket stitch. It will give a double thickness stitch by going back and forth each component of the blanket stitch.
Play with the various stitch width and length settings. You could start with a 2.0 wide and 2.0 long stitch and go up (or down) from there. I generally like mine to be around 2.5 wide and 2.5 long. This is a little on the small side, but I like it to blend in more and it’s just a personal preference. This stitch sample card was the first one I made about ten years ago. I used to make very small blanket stitches!
Straight Stitch. This is simple enough and you probably don’t need to make this a part of your stitch sampler. It’s up to you.
Other stitches. You should have room on your stitch sampler to play with other stitches and their settings. I would recommend you try out a blind hem stitch in case you ever want to try invisible machine applique (you can find my tutorial for that here) and maybe some of the decorative stitches like a scalloped satin stitch which could also be used for applique.
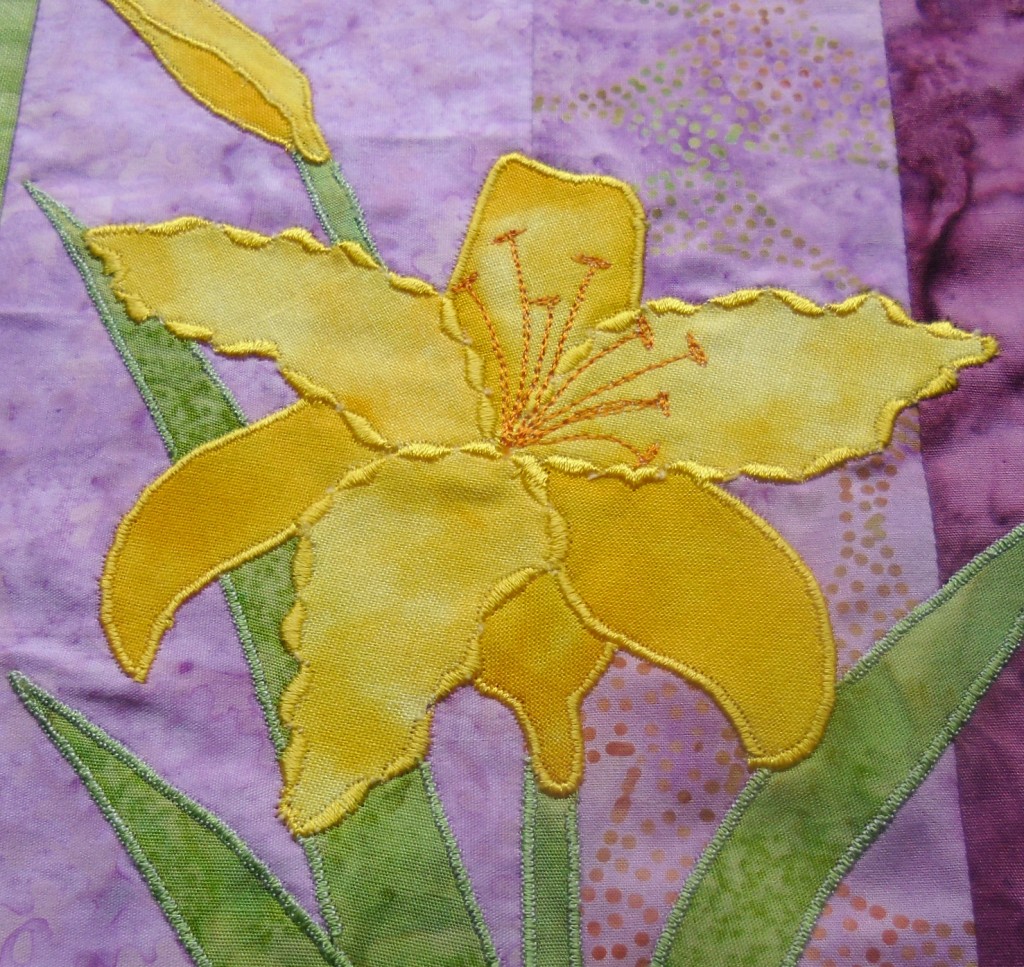
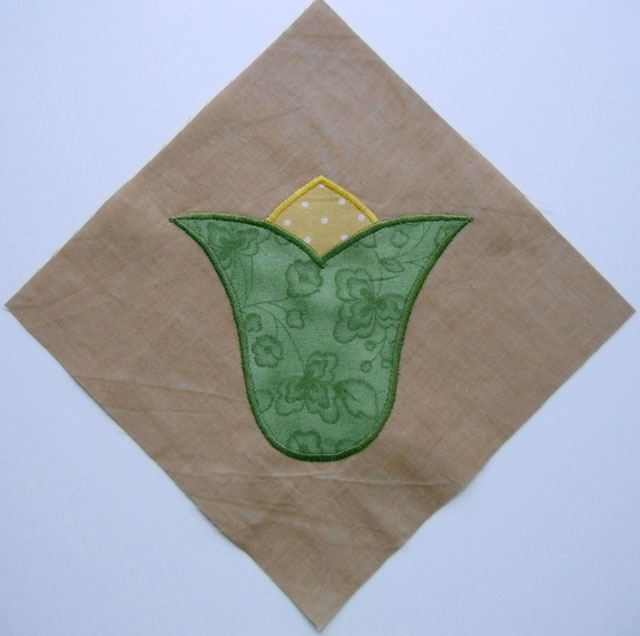
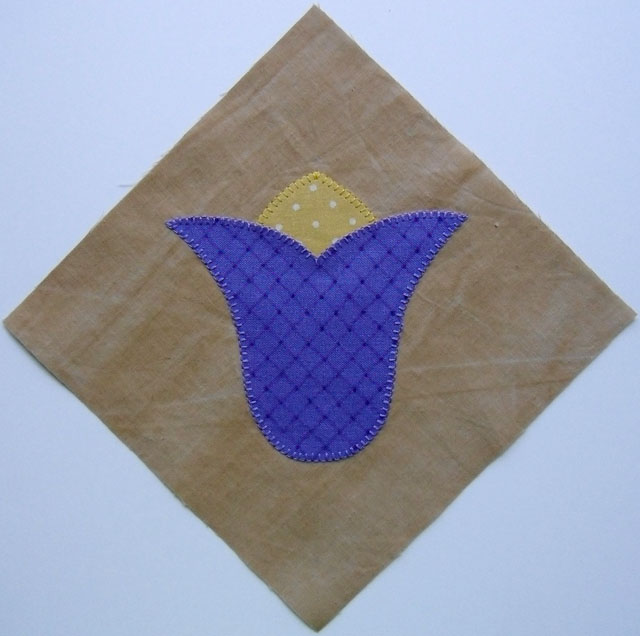
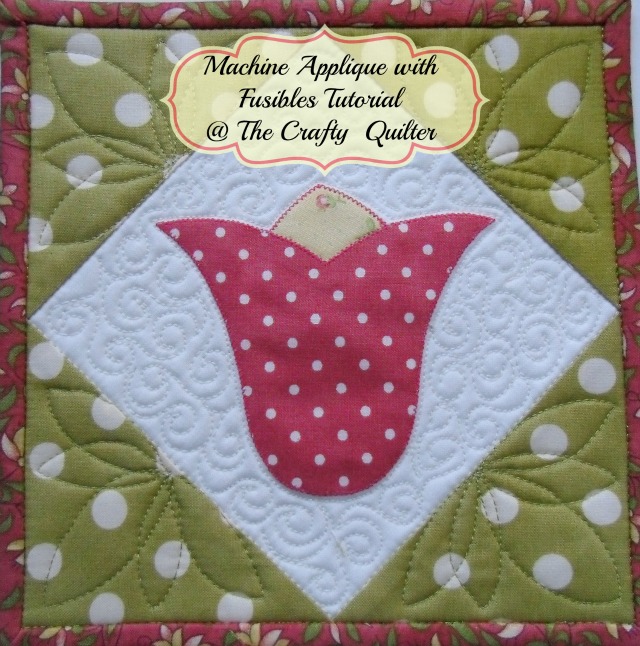
Now you can practice on some real samples. Let’s start with the tulip from my previous lesson on machine applique using fusibles. Make four tulips on separate fabric square backgrounds. We’ll stitch one with a blanket stitch, one with a satin stitch, one with a narrow zig zag stitch and one with your choice (straight stitch or decorative). You’ll also need thread and stabilizer. Let’s talk a little more about those.
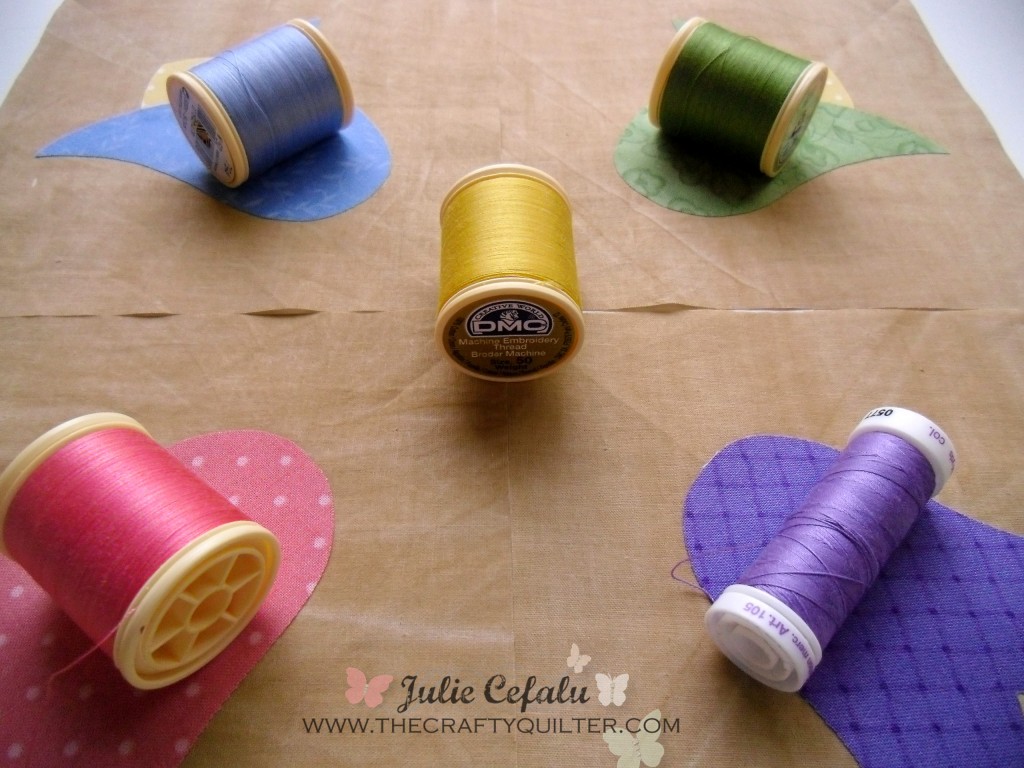
Thread comes in all shapes, sizes and colors. You’ll want to focus on the weight and ply of your thread first. The average weight for a thread is 50 wt. and most threads are made up of 3-plys. You will find some 2-ply threads that will be a little thinner and work great, especially for hand applique. I really like using DMC machine embroidery thread which is a 50 wt, 3-ply cotton and not to be confused with DMC embroidery floss. It doesn’t bunch up when I’m doing a satin stitch and it looks nice on my blanket stitches too. You could also use a polyester or rayon thread to give your applique more shine and pop. You’ll get a different look depending on the type and size of thread you use. Make sure you use a needle that works well with your thread type and weight.
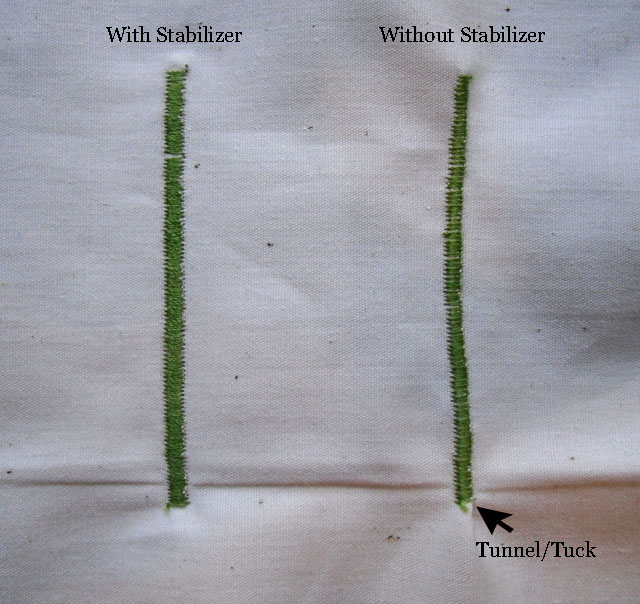
Stabilizers are really important when you’re using a zig zag stitch, especially the satin stitch. Tunneling will occur if you don’t have a stabilizer underneath your project. It looks something like this (though this isn’t the greatest illustration):
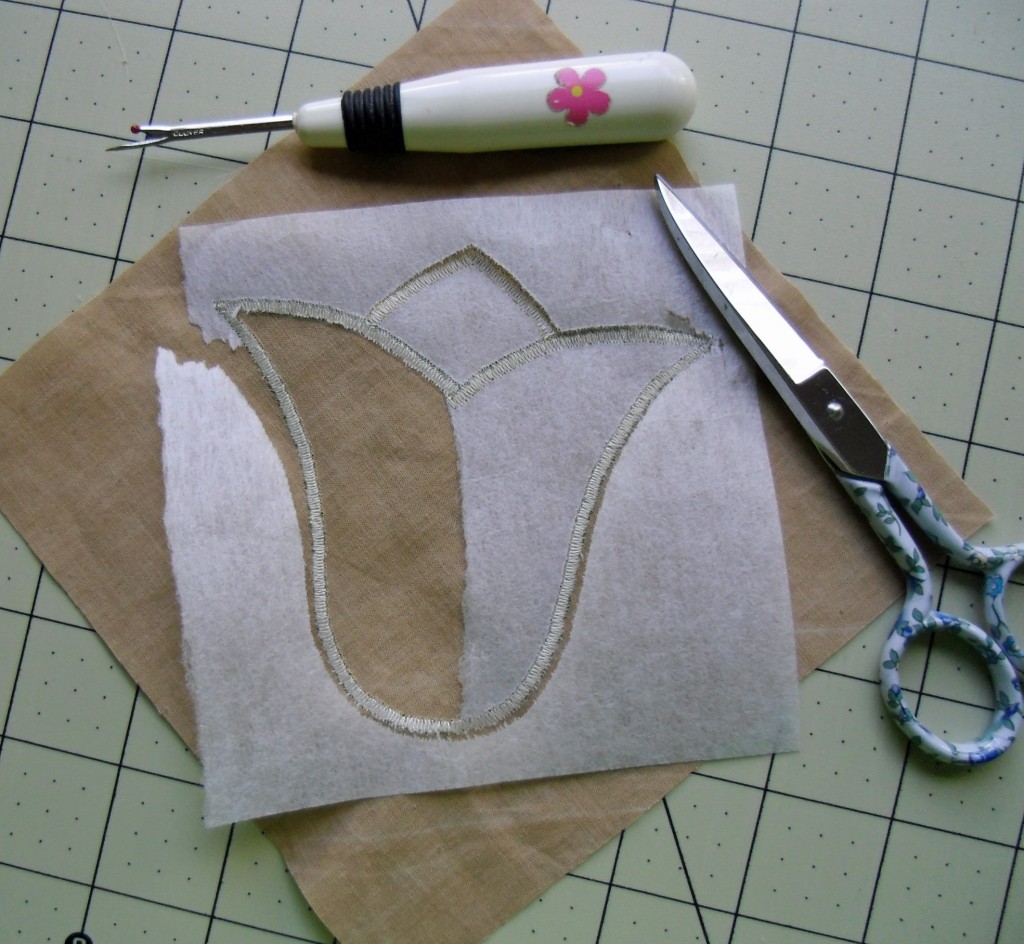
The sides of the background fabric pull into the center and a tunnel forms. The stitches can also be more irregular. Not pretty! I use stabilizers on almost all of my applique no matter what the stitch is to prevent distortion. You’ll want to make sure that the stabilizer you use can easily be removed when you’re done. I use Pellon Stitch and Tear frequently which tears away fairly easily.
Steps for machine applique stitching:
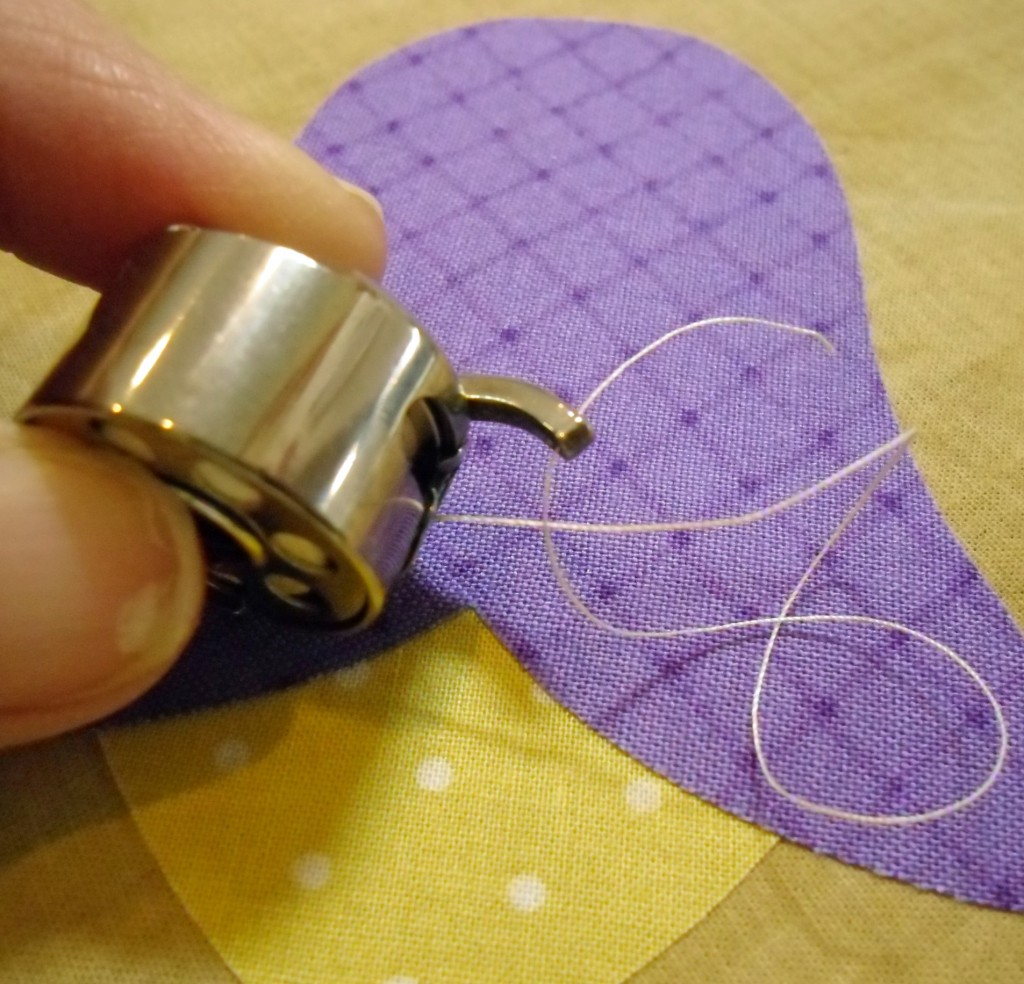
1. Set up your machine. Attach the open toe applique foot and insert the thread of your choice. You may have to play with the tension settings as well. You don’t want to see any bobbin dots on the top of your applique. If you can’t get good tension, you should use the same color thread in top and bobbin. On my Bernina, I’m able to pull my bobbin thread through the bobbin hook to add tension to the bobbin. This prevents any bobbin thread from showing up on top and I can use a neutral color for all of my applique. Choose your stitch and adjust the stitch settings if necessary.
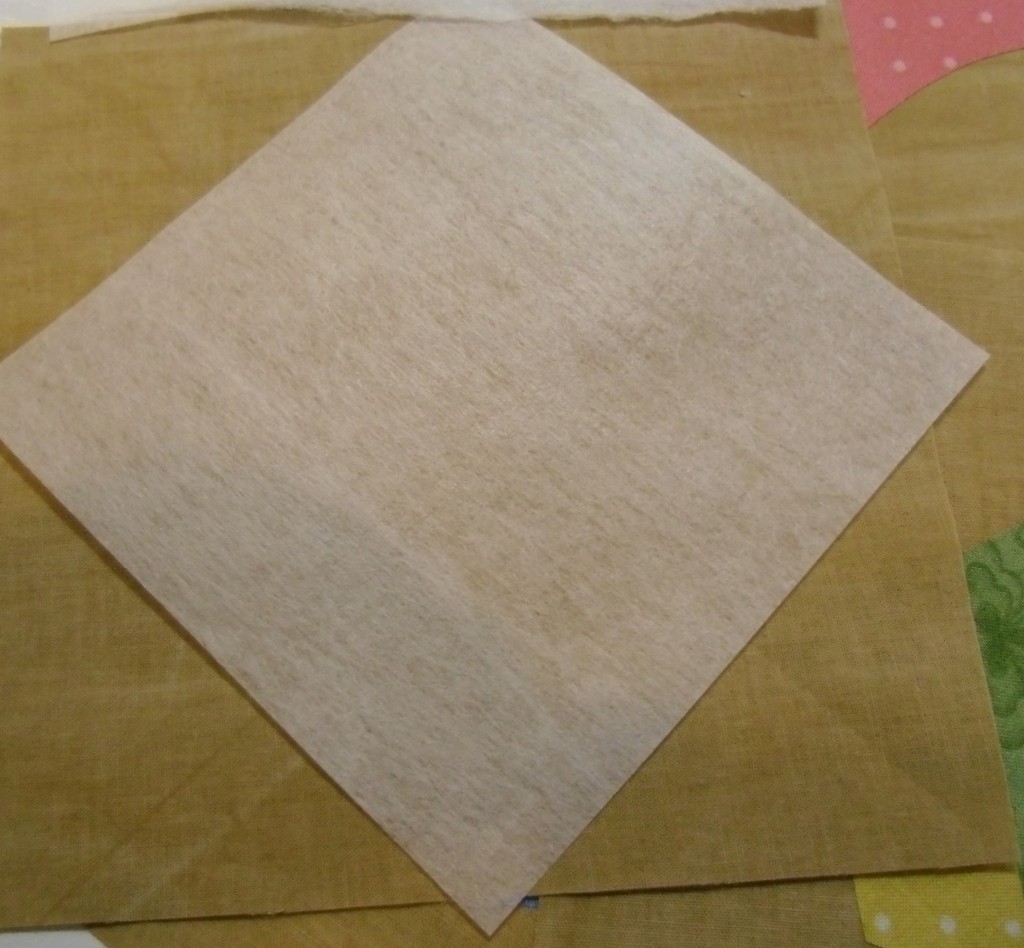
2. Set up your applique. Create your applique using the Tulip Applique pdf and your preferred fusible web product. See my previous lesson on using fusibles with applique for more instructions. Attach a piece of stabilizer to the wrong side of your project.
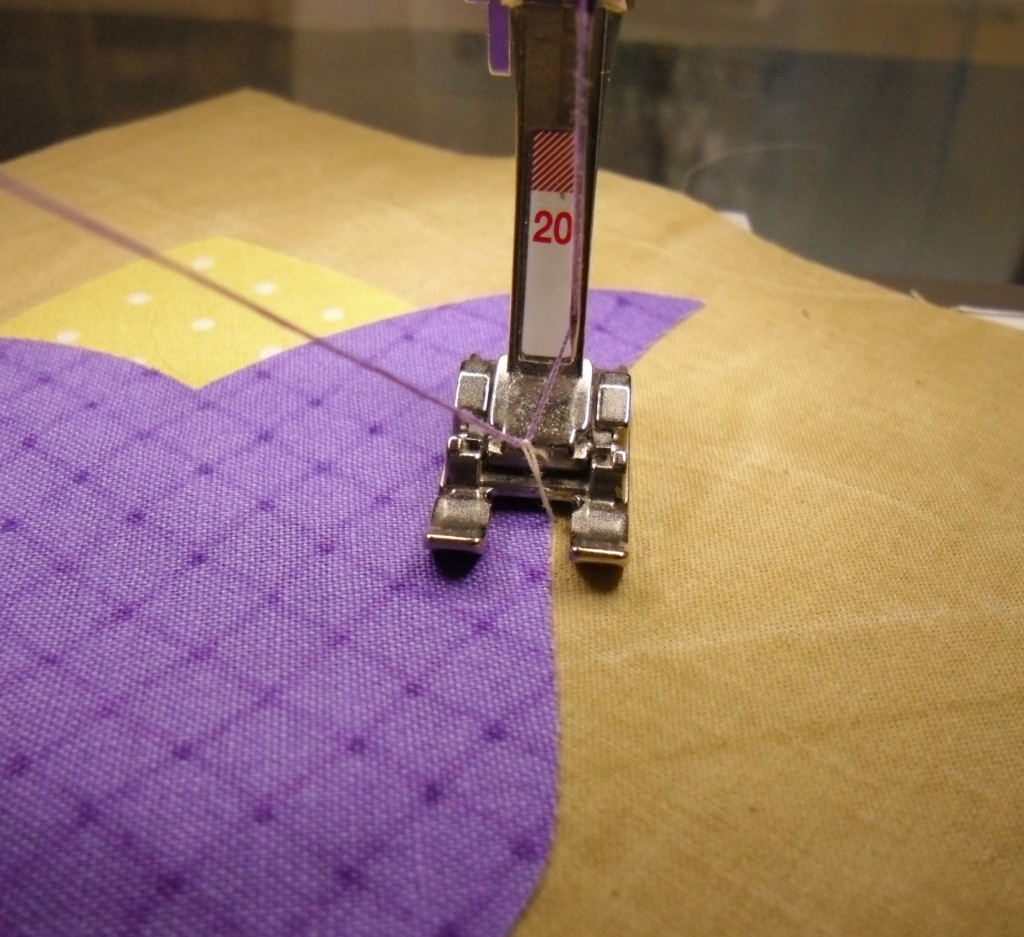
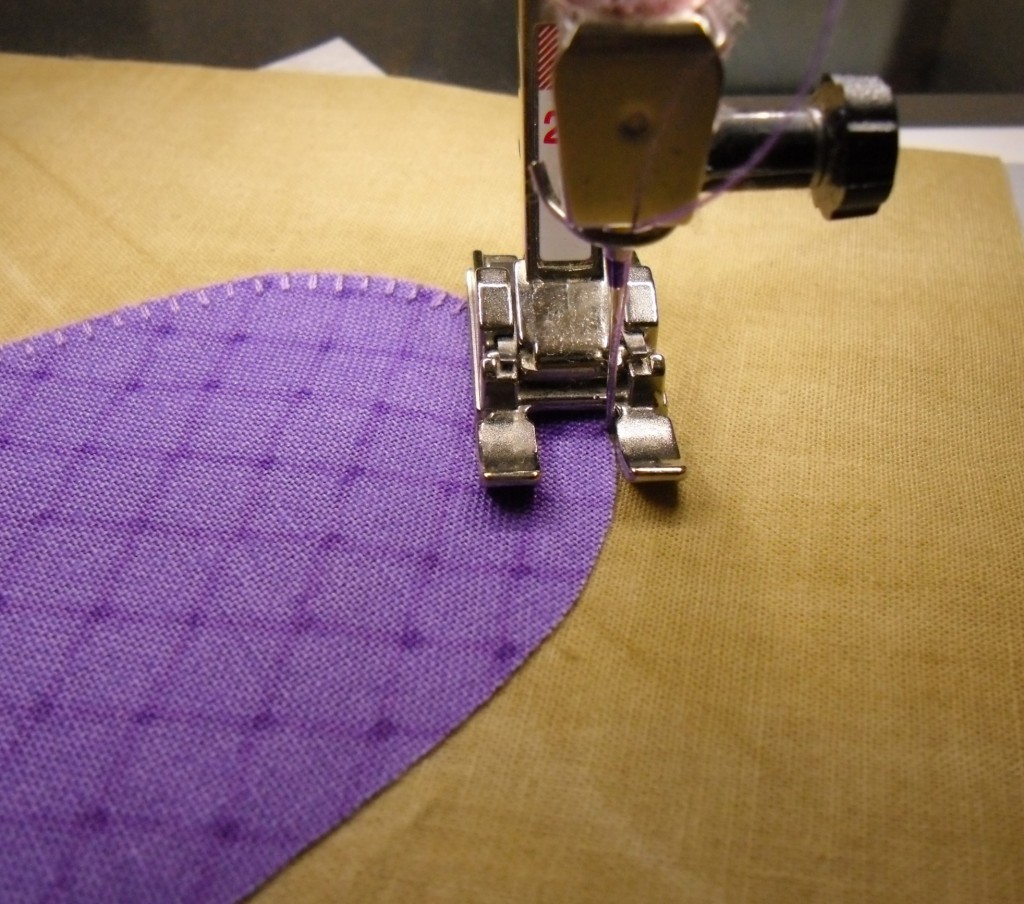
3. Get ready to stitch! Find a straight edge to start on. We’re going to pull the bobbin thread up to the top first. This will prevent a thread nest from occurring on the underside because you’ll be holding onto the thread tails as you take your first stitches. This extra tension prevents the thread nest from forming. To do this, take one stitch into the background fabric right next to your applique edge. Pull the top thread up and at an angle. The bobbin thread will loop up to the top and then you can pull it all the way through.
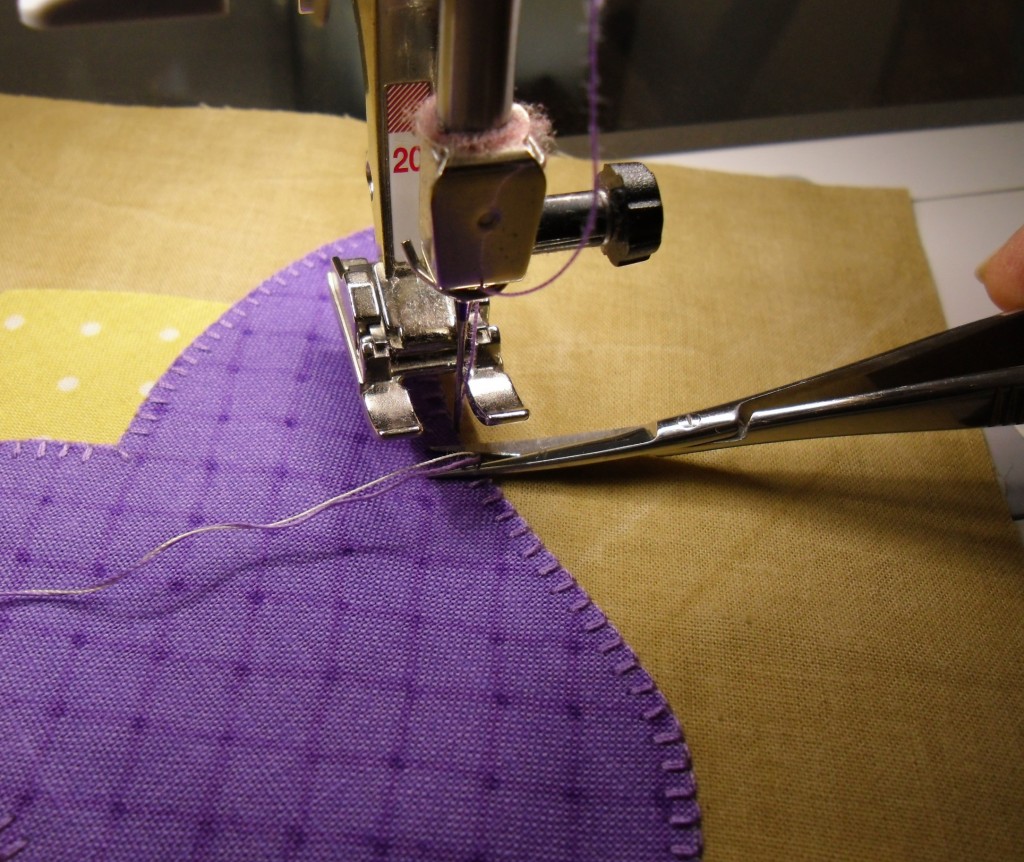
Anchor your beginning stitches. You can use a pre-set locking stitch if your machine has one. I like to take several real short, straight stitches (.3 to .4 length) to lock mine in place. These will eventually be hidden by the applique stitch. Cut your thread tails once you’re far enough away (or before you forget and reach the beginning as shown).
4. Stitching. Let me break each stitch down for you.
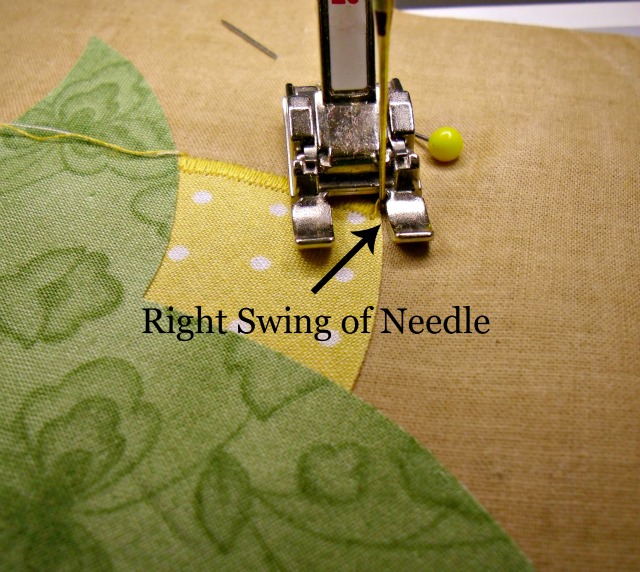
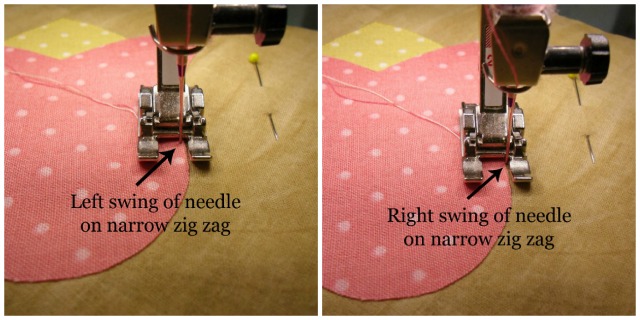
Satin Stitch: You’ll want the majority of your stitch to fall on the applique shape itself. The right swing of the needle should go into the background fabric just next to the edge of the applique shape. The left swing of the needle will be going as far into the applique as your stitch width allows.
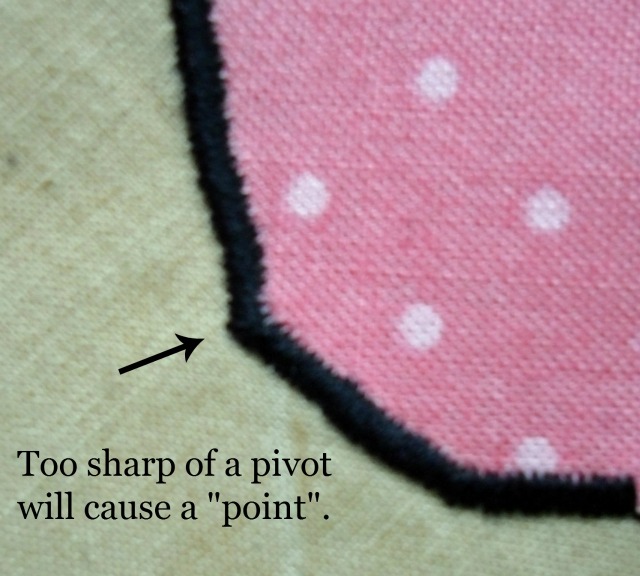
You’ll want your stitches to be at a right angle to the edge of the applique shape. So you’ll need to pivot as your go around curves. If you pivot too sharply, you’ll end up with a jagged point in your stitching. So frequent pivoting is better.
On an outside curve, you’ll want to pivot when the needle is on the right swing. On an inside curve, you want to pivot on the left swing. This will prevent any gaps in your stitches from occurring.
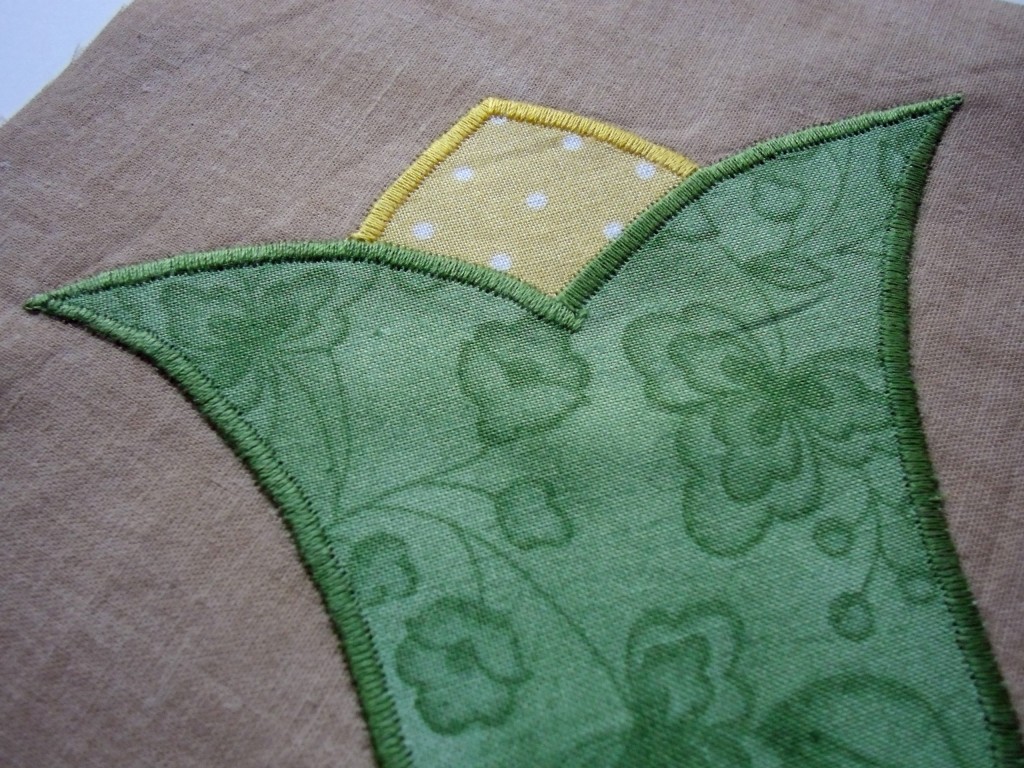
When you come to the outside points of the tulip, you may need to narrow your stitches otherwise they will cross over the tip of the shape and you’ll end up with a boxy point. I gradually decrease my stitch width as a approach these points and then gradually increase it back again as I move away. You can see how the stitches are tapered at the points of the tulip below:
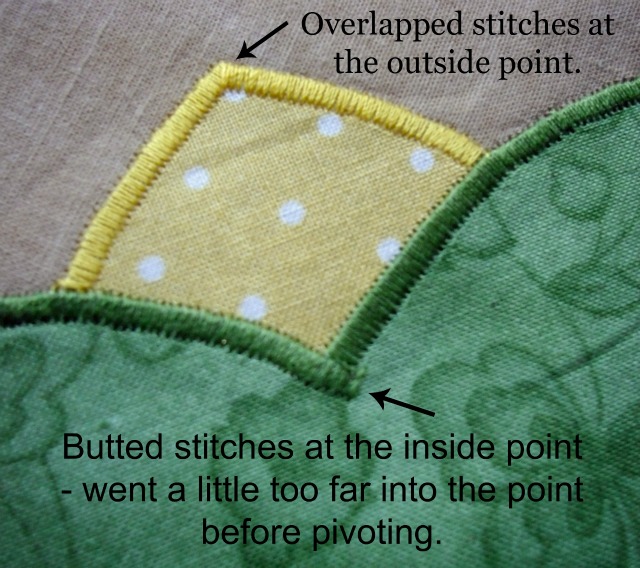
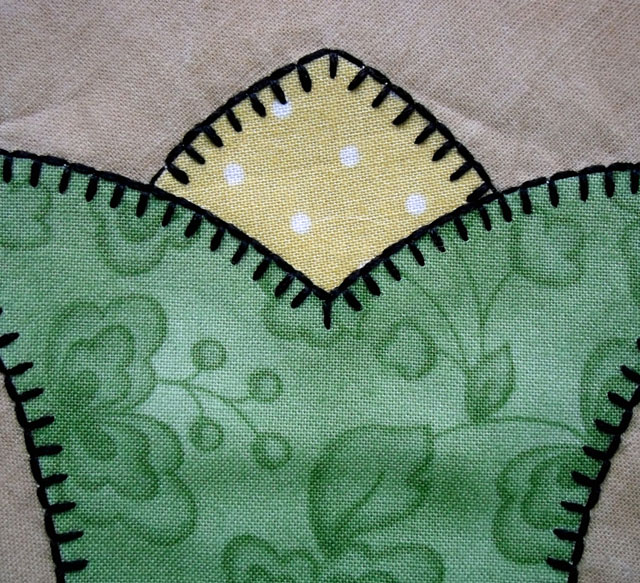
The top inner point of the tulip is almost at a right angle. You can choose to butt your stitches at this point or overlap them or even miter them. In order to butt the two angles together, you need to stitch farther into the point and then pivot and continue on the other side. I guessed wrong on the inside point and went a little too far in before pivoting:
Narrow Zig Zag Stitch. This stitch takes a little bit more practice and skill because the room for error is much smaller. You still want the right swing of the needle to fall in the background fabric just next to the applique, but the left swing will go just inside of the applique shape. There isn’t a big jump between the right and left swing of the needle, so you’ll need to take your time and follow the edge of your applique.
One of the easy things about this stitch is the corners and points are simpler to deal with. No need to increase or decrease stitches. Overlapping is easy at the points. Errors don’t shout so loudly either (hurray!).
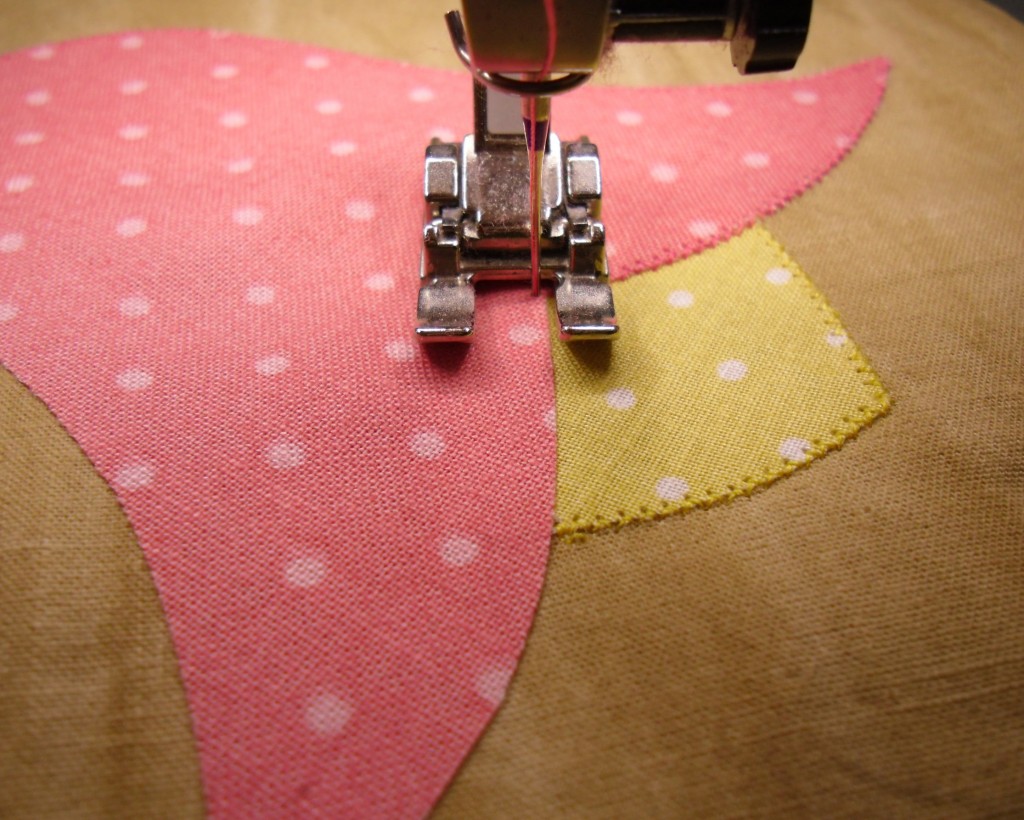
If you want your applique stitching to be more invisible, try using monofilament thread. This will create the look of hand applique and your stitches will hardly show. The holes made from the needle do show, but should soften over time and once it’s quilted.
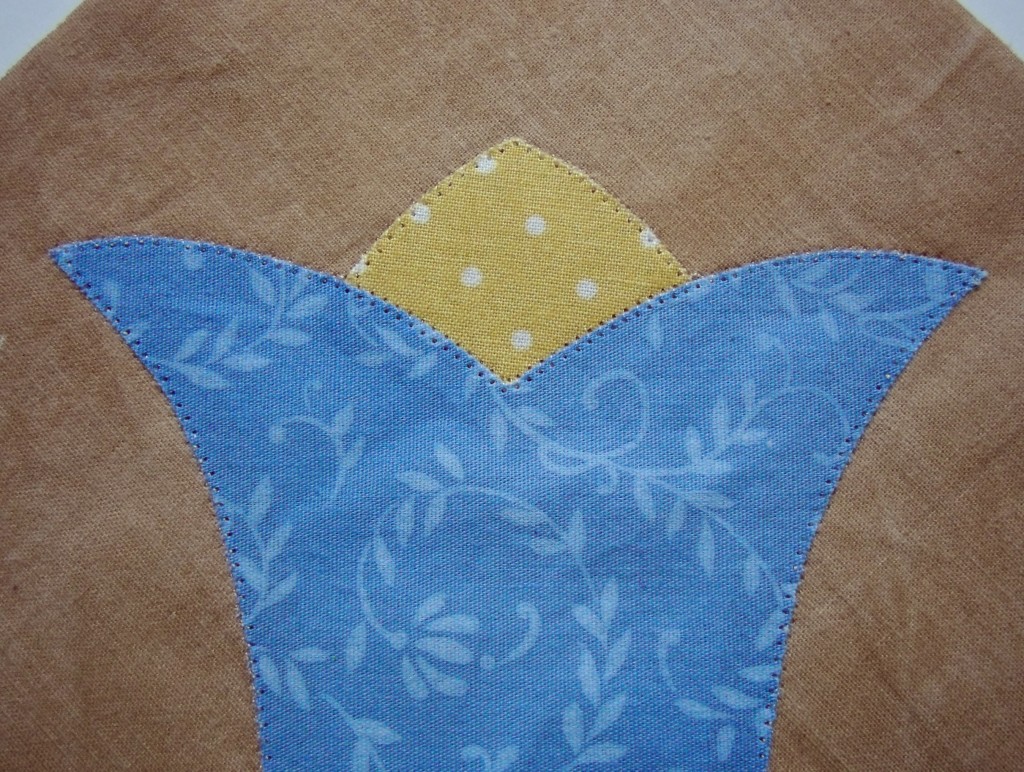
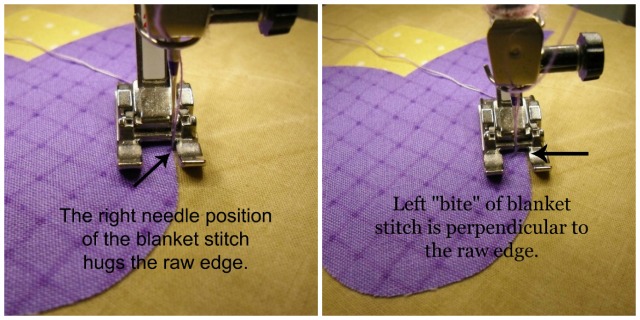
Blanket Stitch. The straight stitch of the blanket will hug the edge of your applique. So your needle should be piercing the background fabric, but just grazing the applique shape. The bite should be perpendicular to the edge of the applique and go straight into it. This takes a little practice to get the timing and rhythm down.
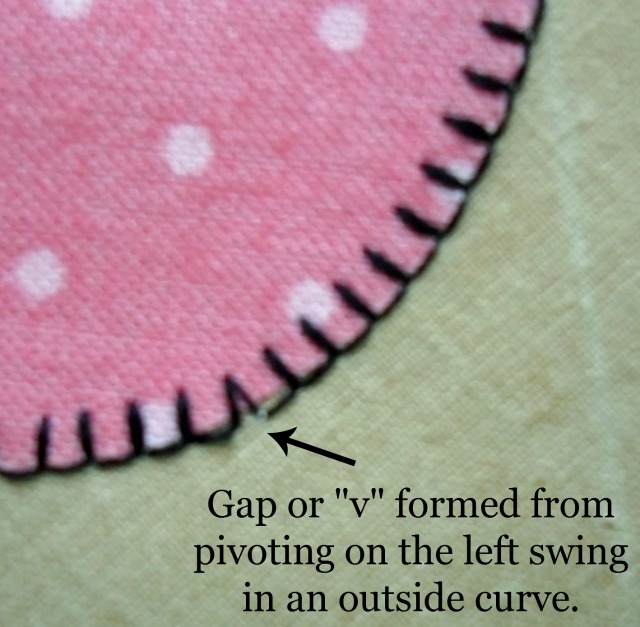
You will need to pivot around the curves. On an outside or inside curve, pivot either before or after taking the straight stitch. Don’t pivot when your needle is on the left swing and already taken the “bite”. This will prevent a “V” stitch instead of a straight blanket stitch.
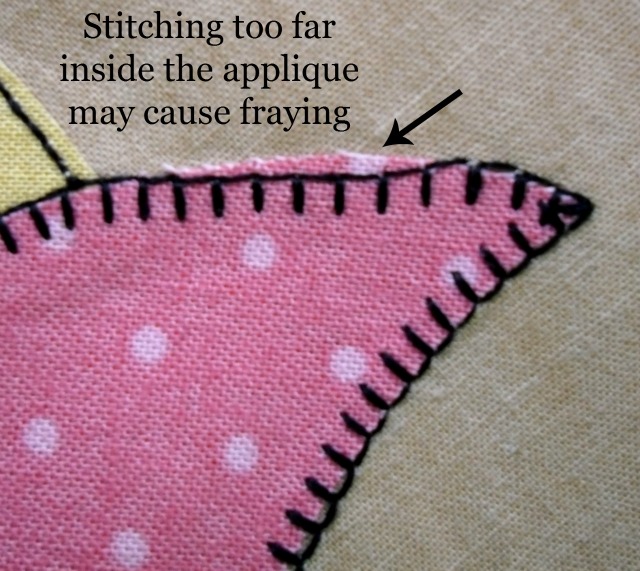
Always try to get the straight stitch component of to fall just next to the edge of the applique shape. If you’re not careful, it’s easy for your stitches to go inside the applique shape and you have potential for fraying to occur.
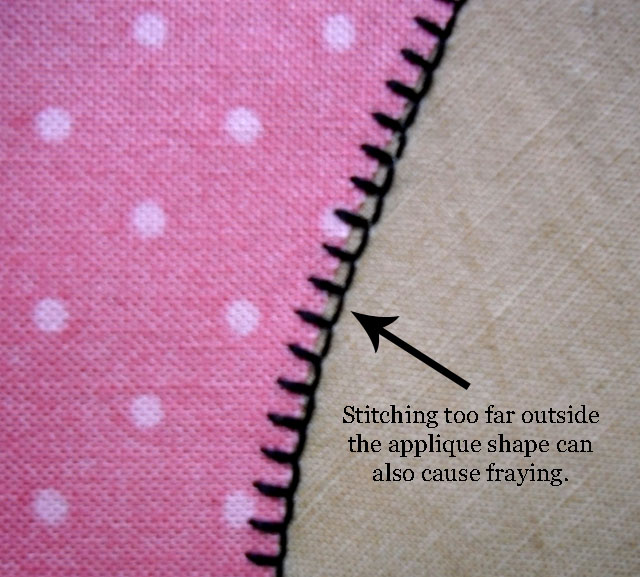
The same thing can happen if you go to far outside of the shape:
When you come to an outside point or an inside “V” on an applique shape, it’s nice when the stitch happens to land right at the tip, but this rarely happens. Depending on the spacing, you might have to adjust the next stitch by raising the presser foot and manually placing the needle where you want it, or by adjusting the stitch length. This is how it should look when done correctly:
Once you have your needle placed right at the point (or “V”), you will pivot so that the bite of the blanket stitch goes straight into the center of the applique. You can see that illustrated in the above picture. I also like to keep the spacing the same after I take that center stitch. So if I had to make my stitch longer to get there, I’ll keep it long on the next stitch going away and then go back to the normal spacing. This takes practice, but you’ll quickly get the hang of it!
Straight Stitch. I rarely use this stitch because of the potential fraying that can occur along the edges of the applique. If it’s a piece that won’t be washed or you’re going for a primitive look, then it will work fine. It’s definitely quicker and easier than the other stitches. Make sure that your stitches are inside the applique and far enough in from the edge so that they don’t shred the raw edge.
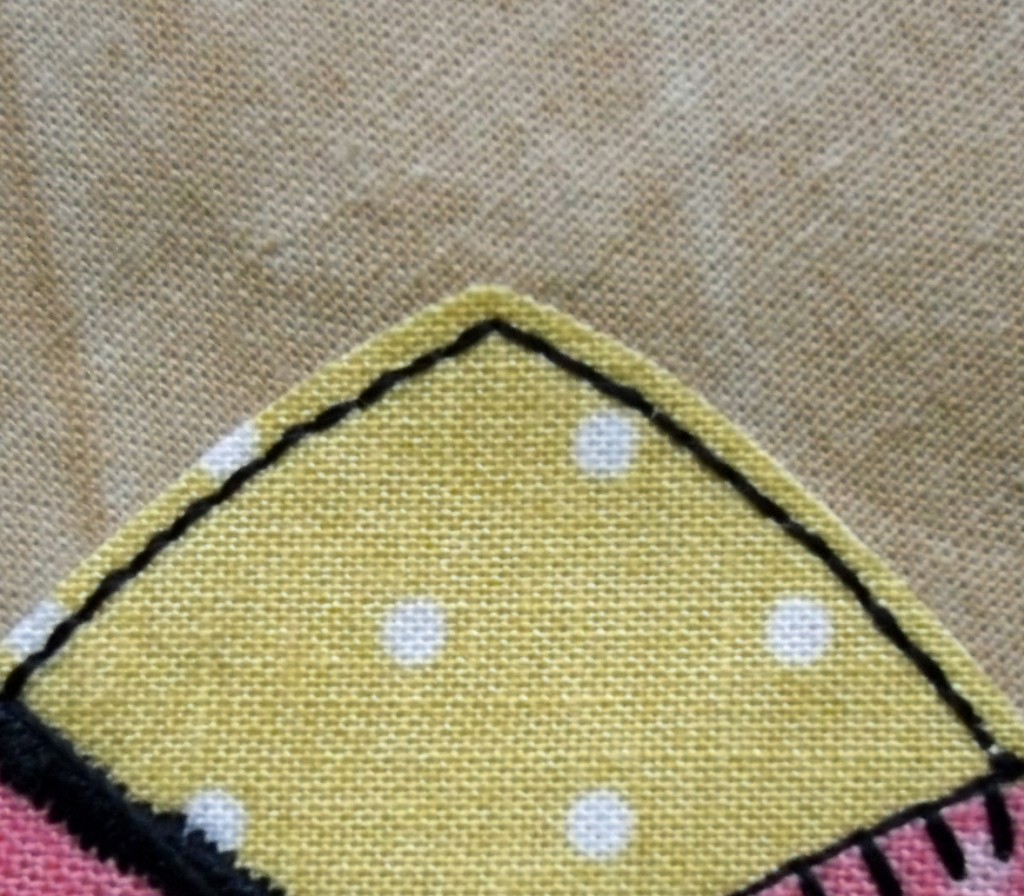
The type of stitch you choose for your applique projects will depend on the look you’re going for and the intended use of the quilt. For baby quilts that will be washed often, I want the applique to hang tight and have little or no fraying. So I would probably choose a zig zag stitch. For wall hangings or decorative pieces, I have more options.
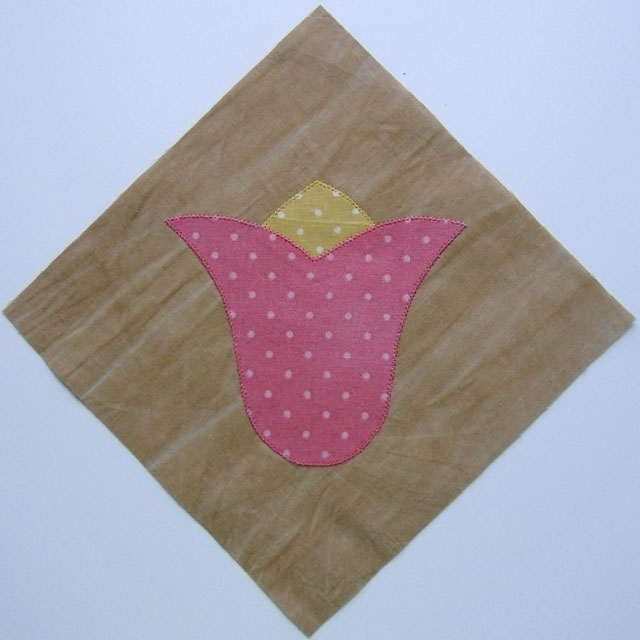
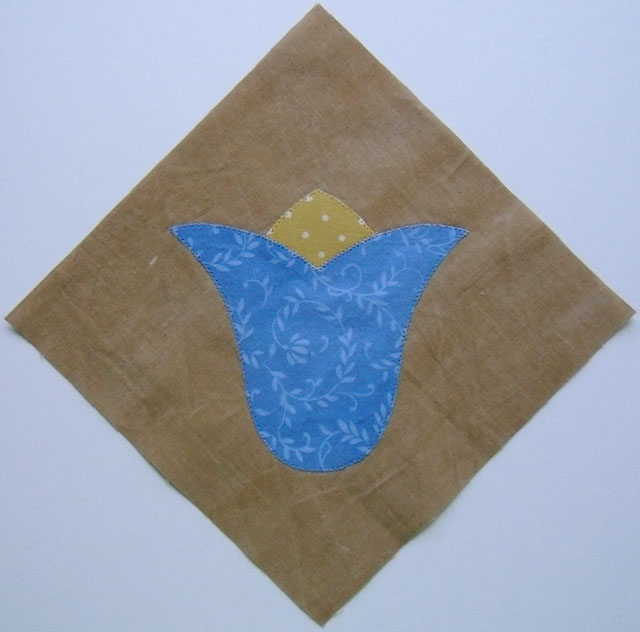
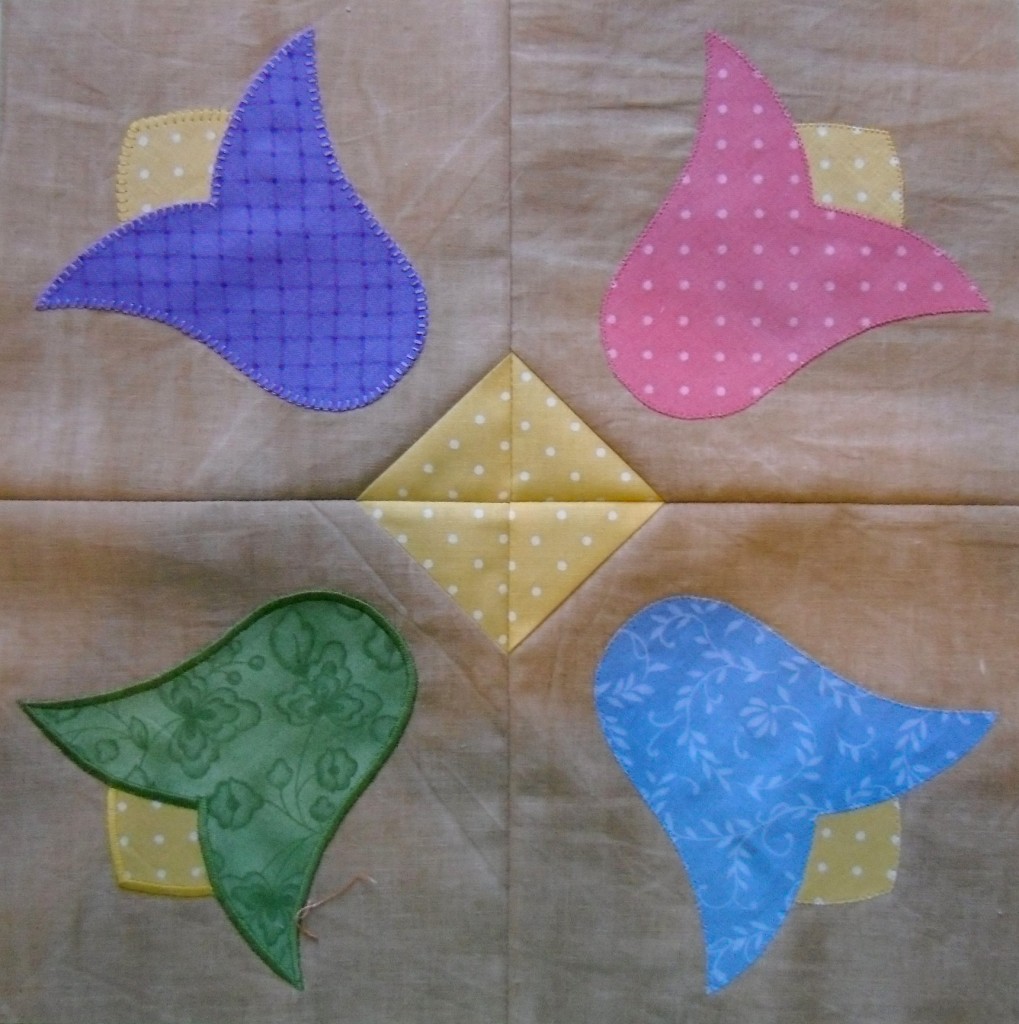
Here are my applique samples sewn together with a little triangle in each middle corner:
I might have a new spring pillow in the making! Notice how dramatic the satin stitching looks and how the narrow zig zag is hardly noticeable. I like the blanket stitch too – not too showy but a nice effect.
I hope you’ll give it a try and have fun with it! Applique can add so much to your quilting and sewing projects!
For additional resources, I recommend these books on applique:
Applique the Basics and Beyond, by Janet Pittman
Mastering Machine Applique, by Harriet Hargrave
If you missed the first two lessons, please visit Applique Part 1 – Terminology and Applique Part 2 – Machine Applique with Fusibles.
And soon I’ll have a table runner tutorial using my tulip blocks to share with you!




Wonderful ! We are so impressed with this comprehensive guide; it’s the perfect resource for anyone who wants to enhance their machine appliqué skills. The article is not just a simple list, but a detailed explanation of each stitch, along with clear instructions and helpful tips on when to use them for the best results. This kind of in-depth information is invaluable for crafters of all levels, and it provides a solid foundation for achieving those beautiful, professional-looking appliqué finishes.
Ab hindiblogadvice.com par main kaam nahi kar rhaa hu, main abhi hindifiles.com pr kaam kar rhaa hu, Rohit Bhai thodi list edit kr dijiye.
Thanks for Sharing this amazing and useful Blog. I always read your Articles. I really like it. And I’m looking for the next article, Hope you will write about Jacket Back Digitizing Service.
EMDigitizer has made embroidery services more efficient and productive. In the beginning, digitizing was done manually but with the passage of time, this has now become a digital process.
I’ve done fusible applique in the past but never on a whole cloth for my grandson’s airplane quilt. This was a great refresher tutorial with many informative details that I might have skipped. Thank you!
Thank you for the informative and clear post! It is so helpful with the images.
This is such a well explained, useful tutorial to a beginner like myself. Thank you.
We provide the highest quality custom embroidery digitizing service. Our beatable and cheapest price starts at only $1 (for stitch per thousand packages only). Digi provides the best quality embroidery digitizing in a quick turnaround. Normally our turnaround is from 1 to 24 hours for normal files. And 24 to 48 hours for big and difficult files. Also, we can treat it as very urgent if our client asks. Feel free to contact us by sending a message from the contact page for quotes or queries.
Services That We Provide:
# Custom Embroidery Digitizing Service.
# Convert Image to Embroidery File
# Raster Image to Vector File
# Vector Logo
# Sequin Embroidery Digitizing
# Applique, 3D, Puff, Chenille, Cording, Taping, Magic sequin, etc embroidery digitizing service.
No need to pay if you are not satisfied with Digi Embroidery.
This is very helpful, thank you much.
This is a really informative article for readers and you have provided an excellent details in your post APPRECIATED!!!. Get Online embroidery digitizing service by https://www.crystaldigitizing.com/ with quality assurance.
I am about to start to applique the Frenchie Pop blanket.. it says to use the straight stitch.. but not the length of it.. would you use that stitch or the blanket stitch.. some of the pieces are very small.. eg. eyes.
Love all of the details in this post. Thank you so much; it was very helpful!
Just found your site…. I am new to applique and this was extremely helpful. Thanks so much!!
This information is very helpful. Since I don’t do this very often, now I can make sure that I do it correctly.
I’ve just started to teach myself machine applique decorative stitches. I’m making a mini quilt as a gift for a friend. I’ve been practicing with the blanket stitch. It’s one that I really love. My attempts are less than perfect. I feel I have to jump in and do the stitch on her gift. But, truly it’s SCARY. I’m remembering when I first learned to quilt and had to cut material for the very first time. SCARY. I actually called the quilt store for support! Well, all I had to do was just do it. And, I did. I’ve been cutting ever since. So, I guess I just have to jump in and applique those blanket stitches. But … it’s SCARY 🙂 This is a great tutorial. Very thorough. And, very helpful. Thank you.
Great tutorial. Thanks much for presenting everything that needs to start a project for a beginners. Much appreciate again!!.
What a great tutorial. Thanks for sharing. Do you have any tips for stitching down really small pieces? Right now I’m straight stitching the edges as best I can with thread the same colour as the fabric.
Great tutorial!! But the one thing I always find missing in applique tutorials is how to end your stitches so that they look nice and stay put even after washing and drying. You mention about starting by pulling up your bobbin thread and taking a few close stitches, but how do you end your blanket and zig-zag stitches to secure them while still looking nice? Thanks so much! I appreciate your help. 🙂
This was great I’m fairly new to quilting and I love the appliqué but I haven’t tried different stitches so I will give this a go thank you the instructions and very good to follow
Hi Karen
I love your tutorial. I know you probably don’t get asked this question very much. But I am looking for a machine that sews as beautiful as yours. My expensive ones do not make a clean nice applique stitch. Can you please let me know which machine you used ?
Julie I’m sorry for calling you karen. Just love all your tips
What thread do you use in the bobbin when you are using DMC embroidery thread for the top thread, when doing machine applique? Thanks for your GREAT site and assistance! Karen
Hi Karen, I generally use a cotton thread such as Aurafil 50 wt. If I have good tension, I can use a neutral colored thread in the bobbin. Sometimes I prefer to use a matching color thread. I’ve also had success with Mettler cotton thread in the bobbin as well.
This is really GREAT thankyou so much.
Fantastic tutorial, great pictures and very clear instructions.
NIZZZZZZZZZZE
Great tutorial
Thank you this has helped so much. I was worried about the hole marks that were left but I see that it is normal and that makes me feel better. It was a great lessons and on the same machine I have. Thanks again.
A very good tutorial for machine applique. It explained everything really well, both explanation and photos for visual insight. Thanks a lot, your hardwork has proved very beneficial to me, in approaching machine applique with more confidence.
Awesome tutorial. Just the thing I wanted to know when I started my machine applique.
Fantastic photos and explanations!!
What a great tutorial!! I have been sewing on and off for years but finding out I will be a grandmother sparked both my creativity and curiosity about quilting and appliquéing.
Having your guidance and direction will definitely help me give my projects a more professional and beautiful finish.
I love the picture sequence and how you explain everything step by step.
Thank you!!! I am sure I will be returning often!!
In my country crafting is not appreciated at all. I learn all the sewing by reading blogs. Recently i am trying to learn machine applique and you give me the best gift ,this tutorial.It’s awesome, fabulous, fantastic.Thanks a lot.
I have been looking all morning for a tutorial on machine applique with really clear big pictures, I will be back to follow you from lesson 1. Thank you for taking so much trouble to be clear with the methods. I just bought a new Pfaff and am about to finish my first sampler quilt started on 2nd January 14. I would like to find a good inkjet printable iron-on bonding material, any reccomendations? I have some heat n’bond but can’t print on it.
Try Sulkys Solvy – there are several Solvy’s but they have one that is printable with ink jets.
Hoq do you deal with very zigzaggy edges. Like Mckenna Ryans evergreen trees?
This is the best tutorial that I have found. So through and with great advice and perfect pictures. I have done some applique but your tutorial will really improve the results.
thank you so much – I have not had much success with applique and am now working on a quilt that has a combination of piecing and applique. I feel that if it isn’t right, it could ruin the whole look, so I need to do it properly. You have given us several options with which to play….hopefully I can do one of them justice and add some real punch to the quilt….thanks again
Thank you. This is very helpful.
レンズ
glamorscene
レンズ
You have composed the best tutorial I have ever read on the internet on any subject. It is clear, concise, organized yet has a human touch to it. You are an excellent teacher. Thank you for the information and lesson on applique, but also for renewing my faith in our society and individuals for the ability to communicate effectively. I will be following your tutorials.
Penni
One of the things I never see referred to is thread color for your applique. I looked at yours and you had some lighter thread and some darker on your pieces. How do you determine this? Thank you in advance.
Thank you so very much! Easy to follow because it is so very explicit.
Wonderful tutorial. I don’t normally do applique, but wanted to add a cut out motif to an open area in one of my wall hangings. I found plenty of books on applique, but none of them said much of anything about the stitching – just suggested some possible stitch types and that was it. Thanks so much for this. It’s exactly what I needed.
Thank you! I’m thrilled I found your very well explained, picture detailed article on stitching appliques! I’ve included a link in today’s article on my blog! http://lanettascreations.blogspot.com/2013/09/applique-tunnel-vision.html
レイバン rb3183
Thank you very much Julie. You have helped so much.
Do you do posts often?
Fantastic tutorial! I just did my first appliqué, and your tutorial was extremely helpful. Keep up the great tutorials, okay?
Hi Julie,
Thank you for this most informative tutorial,
I am teaching my sisterinlaw to use her machine, and only friday I was telling her how we used to give FREE lessons when we sold a new machine a few yrs ago.
We always went through the stitches, making the samples like you have just shown.
It gives them ideas how and where to use them, otherwise they never use them.
Also it is an oportunity to sell extra feet and assecories.
Keep up the good work. I love yoursite.
Am forwarding it on to my sister in law
Now there seems to be only paid lessons, or the Bernina Club, which working girls cant attend.
You are so right! When I bought my Bernina 930 back in 1982, I got the same training on my machine you were describing. But when I purchased my new Bernina 440 QE, I got a 2 hour class, and if I needed to learn more, they charge extra. Not to mention it is NOT the machine my 930 is.
What a comprehensive and well-written series! Thank you!
This is the most informative tutorial I have seen on machine quilting. I love the suggestions to make a reference stitch cloth. Sure saves a lot of diddling around.
I have been doing applique for a long time but no one has ever told me how to do it right. I have never used stabilizer but I will now. I am so glad I found your tutorial. Now I think all my blocks will look better. Thank you so much.
Great tutorial and fantastic photos! Thanks for sharing.
Freemotion by the River Linky Party Tuesday
FANTASTIC POST!!! Thank you so much for linking it up with my Tips And Tricks Tuesdays!!!
What an awesome resource. Your applique work is beautiful. Thanks for linking this up to Monday Funday!
I am glad to have found this. I was looking for a way to salvage blocks from a quilt top my grandmother had made that was damaged by fire. I didn’t want to cover up her hand done buttonhole stitches. I think the monofilament would work and leave her work showing. Thanks for the tutorial.
Wow, thank you! I don’t do much applique, but this is soooooo helpful! I appreciate that you took the time to work on this tutorial. I will definitely be marking it, in case I come to a place of need. =) Have a great day.
Thanks for the great tutorial. I really appreciate it. I’ve never used a stabilizer before but I can see the difference here and I’m going to see about getting the one you suggest.
What a wipnderful tutorial. Is a resource for keeps! Thank you very very much!
This is an AWESOME tutorial! Best I’ve ever seen on applique!
Julie, this is a great tutorial. I will definitely be coming back to this one. Thanks for showing all the mistakes, isn’t that how we learn? 😉
And I thought I knew everything about sewing applique! Thanks for this complete tutorial. Helps me a lot, especially now, in the flowering season!
Thank you so much for your applique tutorial.
You always have excellent tutorials and do such
beautiful, professional work.
Great tutorial with excellent close-up photos. I am new to quilting, going on one year now, and I’m eager to start machine applique. Thank you for sharing and clearly showing how it should be done. I just got a new Bernina and I’m going to do a stitch reference card exactly like you’ve shown! I’ll be referring back to this tutorial often. (Also, I love your 2012 Fat Quarter Shop BOM! I might have to do that too.)