Product Review – Quick Easy Mitered-Binding Tool
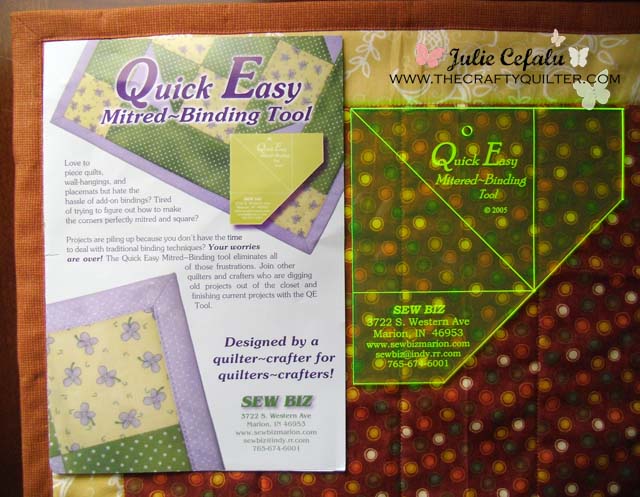
I have recently discovered a great tool for making mitered binding. It’s called the Quick Easy Mitered Binding Tool by Sew Biz. It’s designed to use the backing fabric to wrap around to the front of your project and form a binding; rather than a separate piece of binding that is added the more traditional way.
How to use the Quick Easy Mitered Binding Tool
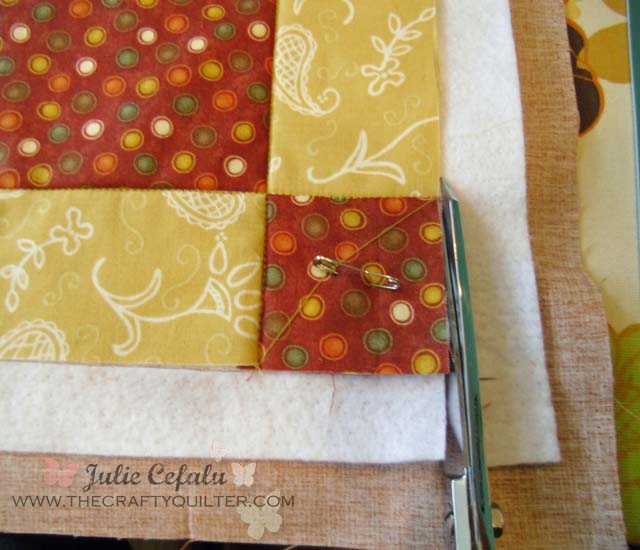
1. Once you have basted and quilted a quilt or other project (a placemat in my example), you will trim the batting even with the quilt top as shown:
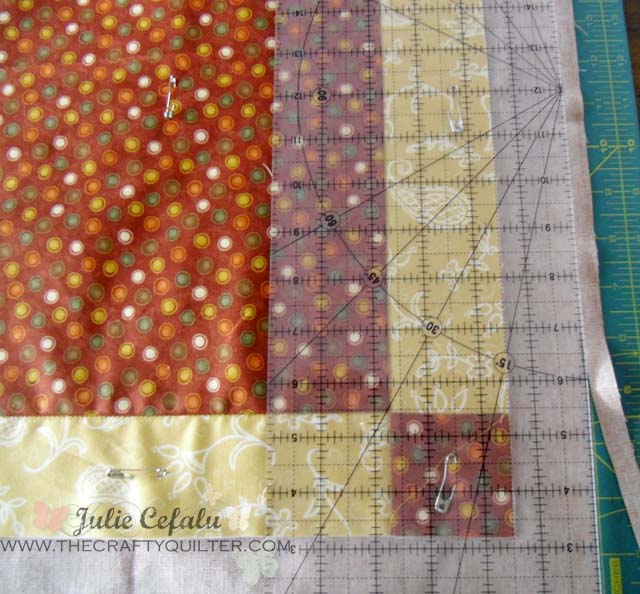
2. Determine how wide your finished binding will be. Trim the backing twice the width of that. In my example, I wanted my binding to be 3/4″ wide, so I trimmed the backing to 1 1/2 inches.
3. Press the backing so that it meets the edge of the quilt top/batting. Repeat on all four sides.
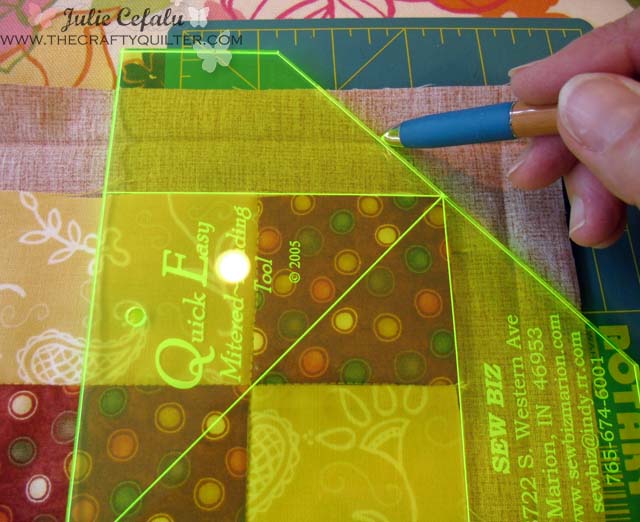
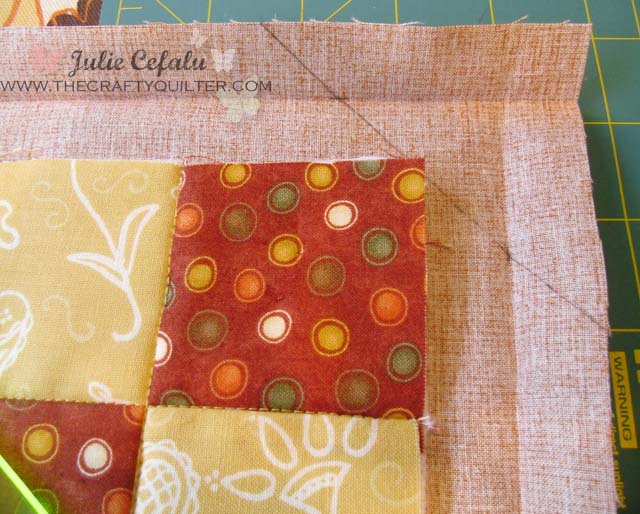
4. Place the mitered binding tool in the corner, matching up the lines on the ruler with the quilt top corner and draw a line along the top edge as shown:
5. Draw a line where the previous line intersects with the crease that was formed during pressing. This will form a slanted “X” at the intersection.
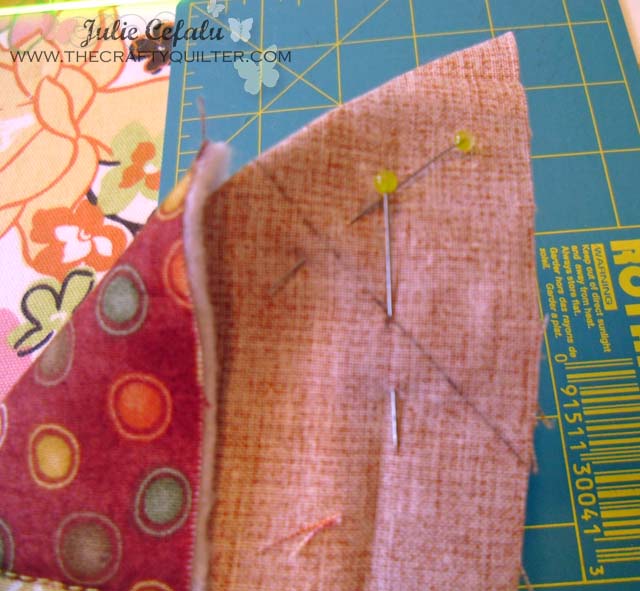
6. Fold the corner back on itself with right sides together and pin. Make sure the pin goes through both “X’s” that were formed previously to ensure that the lines match up.
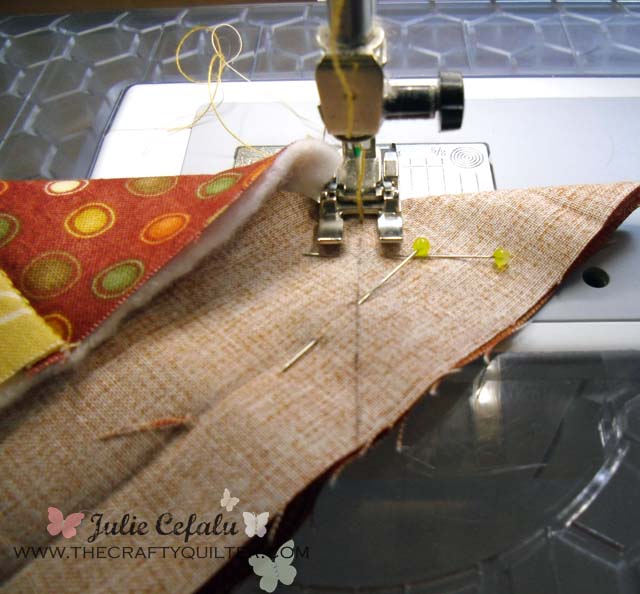
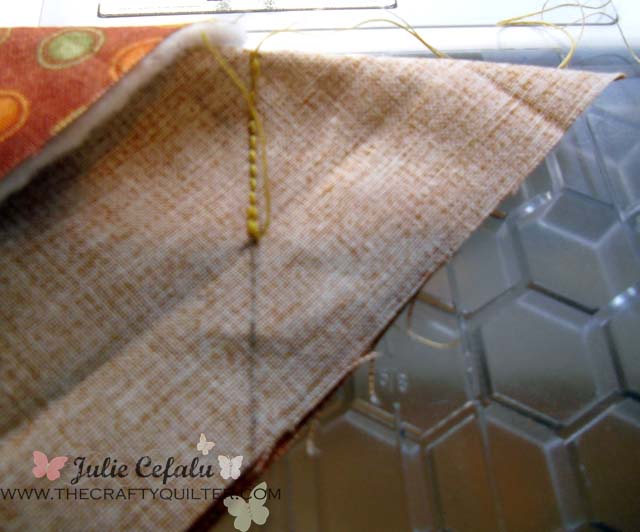
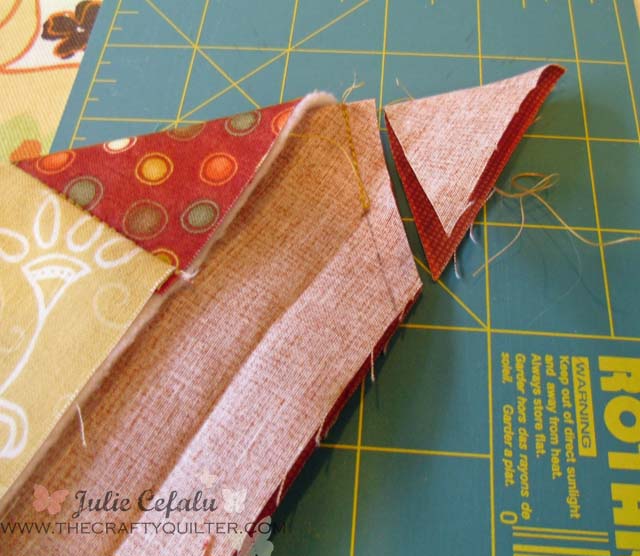
7. Stitch on the drawn line from fold to the crease, backstitching at beginning and end.
8. Trim seam allowance 1/4″ from stitching.
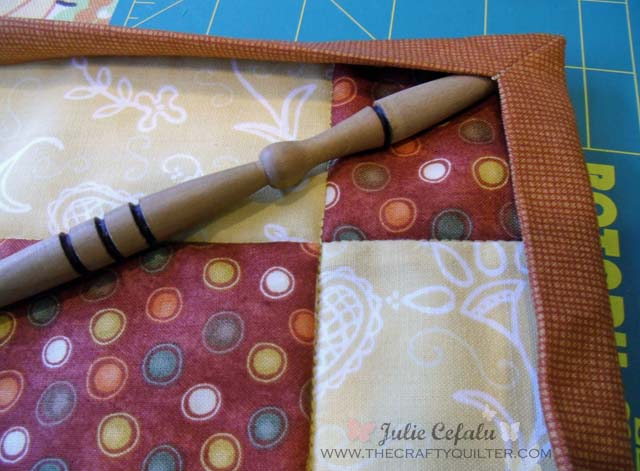
9. Turn the stitched corner to the inside so that a miter is formed. Use a long tool such as a point turner to push the corner out to a sharp point. Repeat steps 4 – 9 on all four corners.
10. Press the binding over the quilt top and stitch along folded edge. Make sure to stitch as close to edge as possible, otherwise a flap will form and it won’t lay flat.
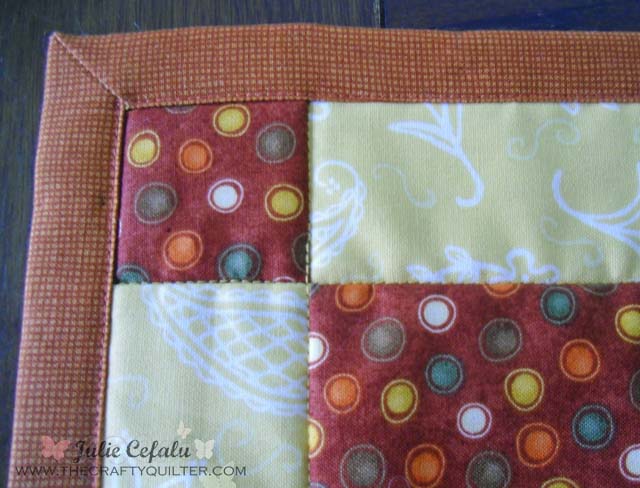
The mitered corners are beautiful and they have perfect points!
I’ll be sharing a tutorial on my placemats soon. Update: The Easy Fat Quarter Placemat tutorial is available here. Here’s a peek of the corners:
I highly recommend the Quick Easy Mitered Binding Tool! I think it would work great on so many things like baby blankets, placemats, and quilts. Give it try!
Happy Quilting!





A good remainder to finish the borders thanks
This technique works really well – the only thing that didn’t work out was my piece planned for 1/4″ seam for sewing on a binding (which is common). when I made my binding wider than 1/4″, I lost my shapes around the perimeter of the piece – e.g. my corner squares were no longer squares and the ‘X’ quilting inside of it was no longer an ‘X’. It’s just something I will keep in mind for future use. Thank you for all you share!
I really love this Mitered Binding Tool and your explanation and photos are great and very helpful. Now to get the supplies and get started. Thank You
Making some snackmats/rugmugs. Not happy with binding technique and found this. Awesome! Remembered my grandma did her quilts this way. Perfect. May need that took, too!! D.
Oh my, I knew there must be a way to finish corners of this type binding like this. I just make a baby quilt today and finished it with the backing instead of attaching separate binding, this tool would have been handy.
I don’t know why, but I have never seen that ruler before! I JUST ORDERED IT!
Thank you for sharing it on here…This is going to make my binding life so much easier!!!!! Oh, just found this site too!!!! LOVE IT!
Thanks for a “new trick” for my quilting projects. It is nice to have something quick when you are in a hurry to finish a project.
Please don’t bind a quilt by simply folding the back over the front. It produces a much weaker binding that will wear out significantly faster. Use the French binding method of creating a separate binding, folded in half and then sewn to the quilt. Your quilt will last much longer.
Most of my quilts have the traditional double-fold binding. This technique is a nice alternative for small projects (such as placemats) that I don’t intend to keep forever.
I agree that this technique is a nice alternative for small projects, but you didn’t say that in the tutorial. It’s an excellent choice for placemats, but as you stated “most of my quilts have the traditional double-fold binding.” Since a lot of newer, beginner quilters look to you for great instructions, would it not be in their best interest to include this caveat?
Hi, Does this tool only make a 3/4 in border or does it allow you to make a larger border?
Hi Janet. Great question! You can make any size border/binding with this tool. Just double the width that you want your finished binding to be and cut your backing to that measurement.
So what does this do that a 45 degree ruler will do?
It’s not as cumbersome as a 45 degree ruler?
I’ve never seen this tool before and you make it look so easy! I will have to order one soon!!
Thanks!
Tanya
Perfect Mitered Corners! Tool is a must have! Thanks.
I saw this tool on a quilting show so searched and ordered one on-line. I LOVE the miter binding tool!!! It works for neatly mitered corners on baby receiving blankets too.
Great tool, thanks for sharing. I always struggle with getting my points “pointy” enough. I’ll have to look for this tool!
Can’t wait for the placemats tutorial. You are so talented and this tutorial is very helpful.
Another must have – thanks! Looking forward to the placemats too!
Great tutorial/review! I haven’t seen this yet – another goodie to add to my collection!
This is great – particularly since I have a set of placemats to finish.