Nordic Mini QAL, Row 2
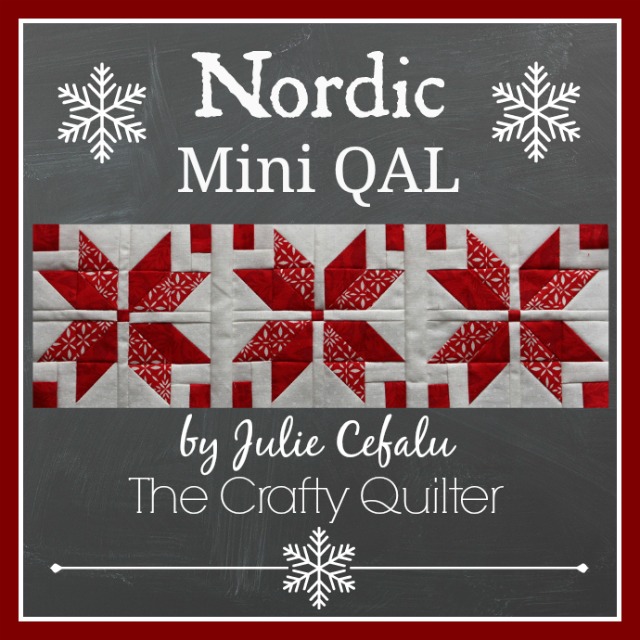
Are you ready for row 2 of the Nordic Mini QAL? I’m so glad that many of you have decided to join me for this project. It’s much more fun to sew with friends! If you’re just finding out about this quilt along, you can find all of the details for row 1 here.
Row 2 is going to be much simpler than the first row. We’re making flying geese this week to create a zig zag to add to our mini quilt.
These flying geese measure 1 1/2″ x 2 1/2″ unfinished. You’re going to need a total of 14 flying geese, seven in each color combo.
Cutting instructions:
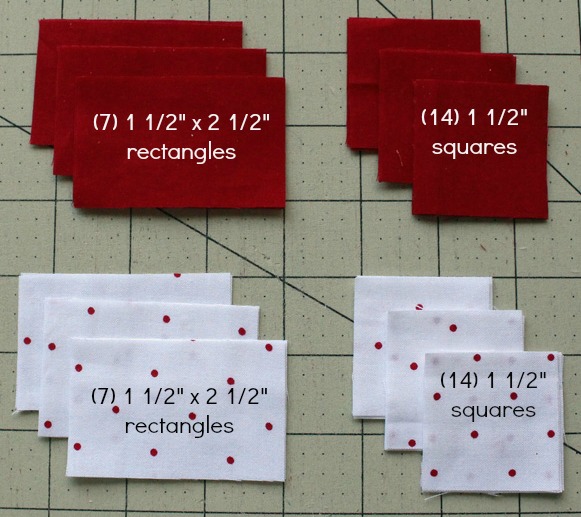
- Red: (7) 1 1/2″ x 2 1/2″ rectangles, and (14) 1 1/2″ squares
- White: (7) 1 1/2″ x 2 1/2″ rectangles, and (14) 1 1/2″ squares
Make Flying Geese Units:
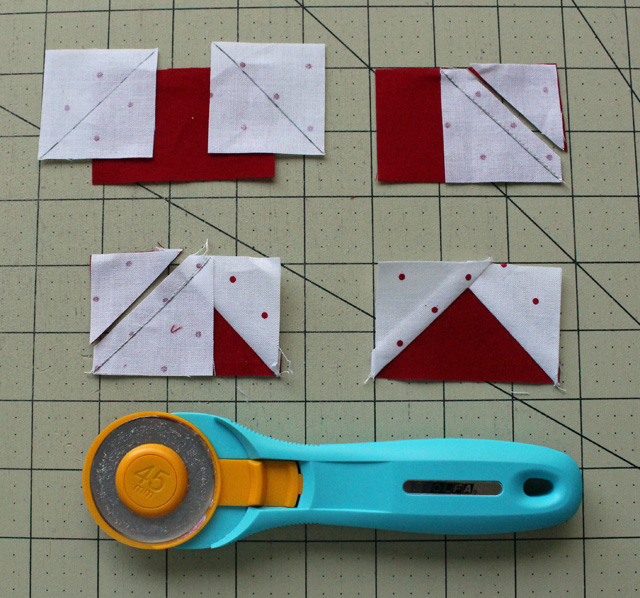
- Draw a diagonal line on all 1 1/2″ squares.
- Place a white 1 1/2″ square (right sides together) on the red 1 1/2″ x 2 1/2″ rectangle, matching raw edges. Stitch on the diagonal line.
- Trim and press corner out.
- Repeat for the opposite side. The flying geese unit should measure 1 1/2″ x 2 1/2″.
- Make 7 red with white triangles, and 7 white with red triangles.
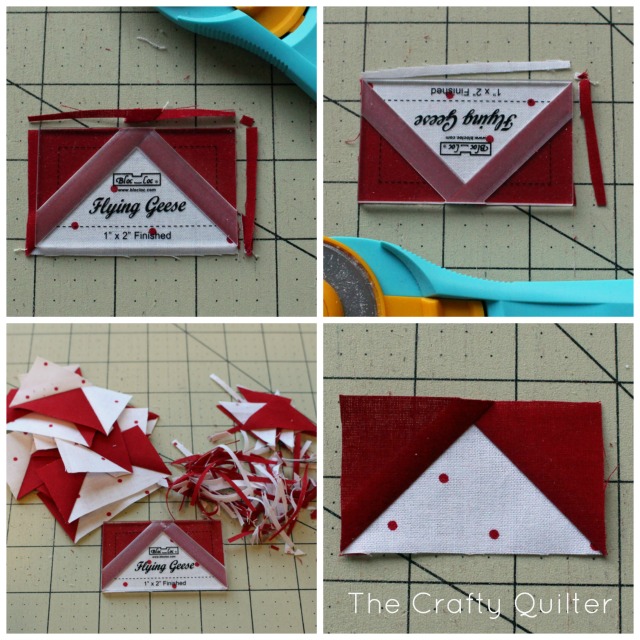
Just a note about flying geese units. There are many different ways to make them. Use whatever way works best for you, but you may need to change the cutting instructions depending on your method. I happen to have a Bloc_Loc ruler for this size flying geese unit, so that’s what I used. I cut the pieces slightly larger (1 3/4″ x 2 3/4″ rectangles and 1 3/4″ squares) and assemble the same way. Then I trim them down using the ruler:
Assembly Instructions:
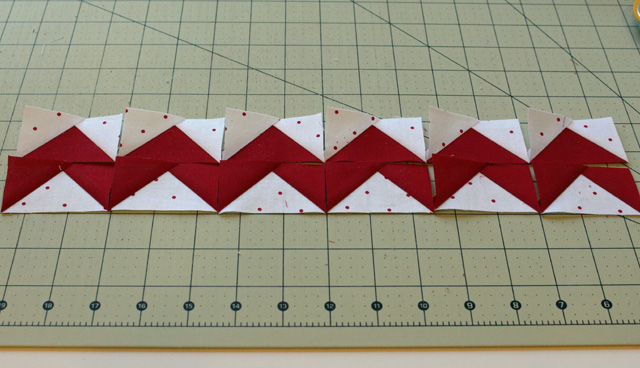
To create the zig zag, arrange your flying geese units as shown below:
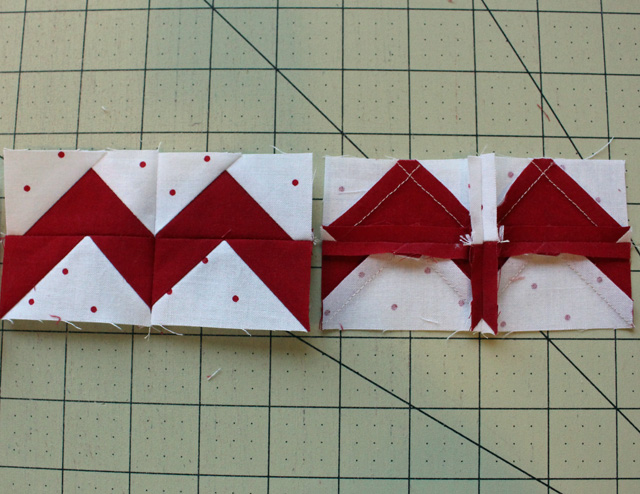
I found it easiest to sew them into pairs and then sew the pairs together. I also pressed the seams open:
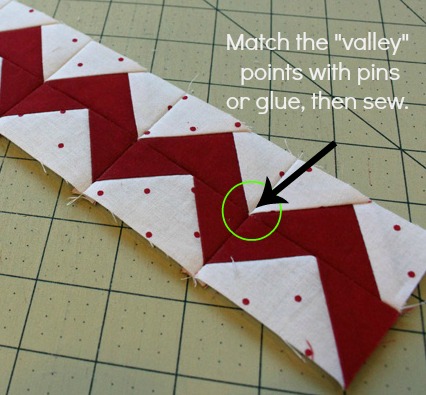
Pay attention to where the triangles come together at the “valleys” and pin carefully before stitching. You could also use washable glue to baste this section first.
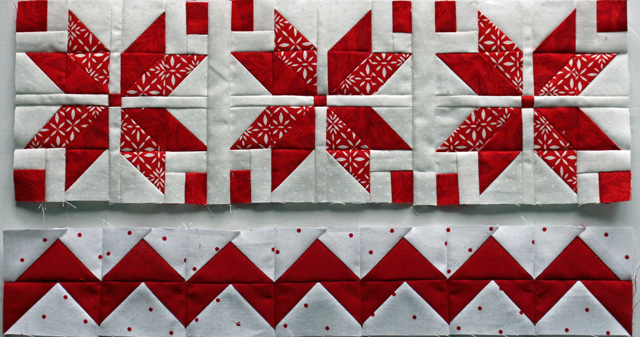
Once all of your flying geese units are sewn together, your row should measure 2 1/2″ x 14 1/2″ (unfinished). Don’t they look nice together?
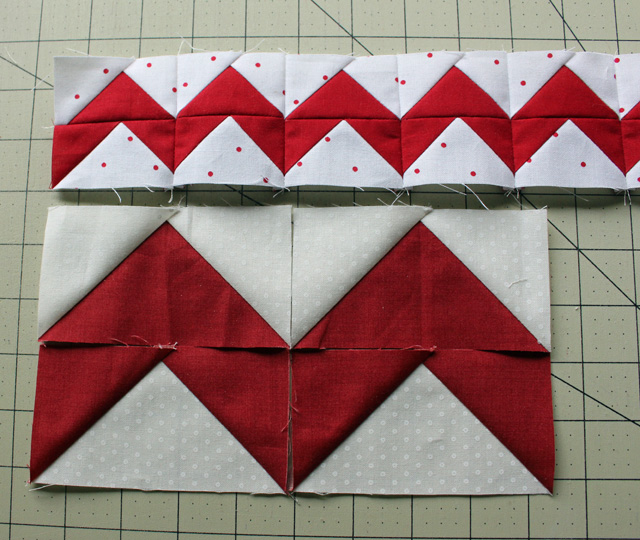
I have also made the flying geese units into a larger size, for those of you who are not ready to join the “mini” club. (Don’t worry, you’ll come around eventually). To make 2″ x 4″ finished flying geese, you’ll need to cut (1) 2 1/2″ x 4 1/2″ rectangle and (2) 2 1/2″ squares for EACH flying geese unit. The assembly method is the same, but you may not need as many (depending on how you use them). Here is how the two sizes compare:
Please note: I don’t have a solid plan for these larger blocks. I’m just giving them to you as an extra option. If you have any ideas, please share! I am considering a square layout of two blocks x two blocks. These larger flying geese may end up being a border around the quilt.
The rest of the QAL schedule looks like this: Row 3, November 26 and Row 4, November 29. Remember, if you’re on Instagram use the hashtag #nordicminiqal and show us your progress. Does Flickr use hashtags too? If so, same for Flickr!
Thanks for joining me today and enjoy your weekend!



What size bloc-loc did you actually use???? Thanks so much…the red and white is just darling!!
I love sewing miniatures! I finished row one yesterday and last night I found row two ready for sewing. I’ll be working on it while my husband watches football all afternoon. Thanks so much for sharing!
Ooh good – there are four rows to this QAL – I thought there were only three – more fun – love it. I also love your tutorials and your patterns – so clear and clever.
I just love how these little blocks and rows look! I finished the first row yesterday and I’m excited to get the second one done now. Thanks so much for sharing this with us!
I love having a small quilt along to fit in with my major, hectic projects. Your projectws are always lovely and your instructions clear and complete. Thanks so much!
Yum! I can’t join you right now, but when I resettle for the winter, I hope to be able to play catch-up!
I love this idea of a Quilt along! And it’s so nice of you to share the patterns with us! Love the red and white but bet it’d be cute in other colors as well! 🙂
Julie, I just love this. I,m a lover of red and white
and these are just beautiful!!! Thanks so much for sharing
your talent.
Regards,
Elaine
Very cute row! I won’t be able to make mine til Tuesday, but I will!!
I love the white with red polka dot fabric !