Nordic Mini QAL, Row 4 and Finishing
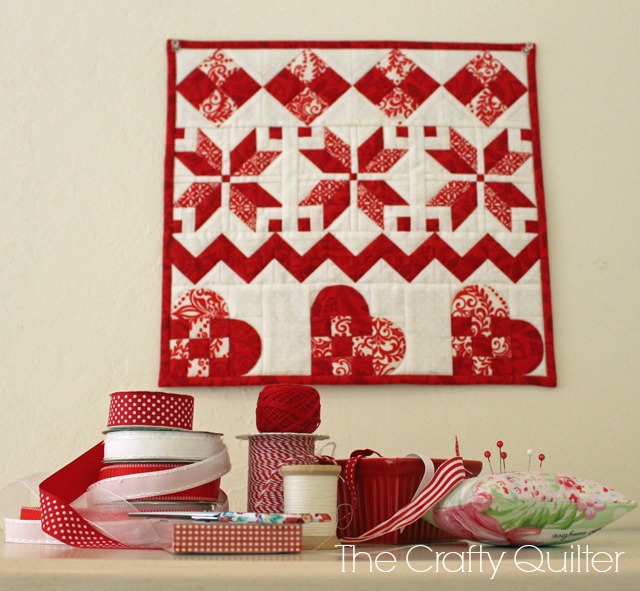
We’re on to Row 4 (the last row) of the Nordic Mini QAL and I have some finishing instructions for you, too.
You can find links for the other rows below:
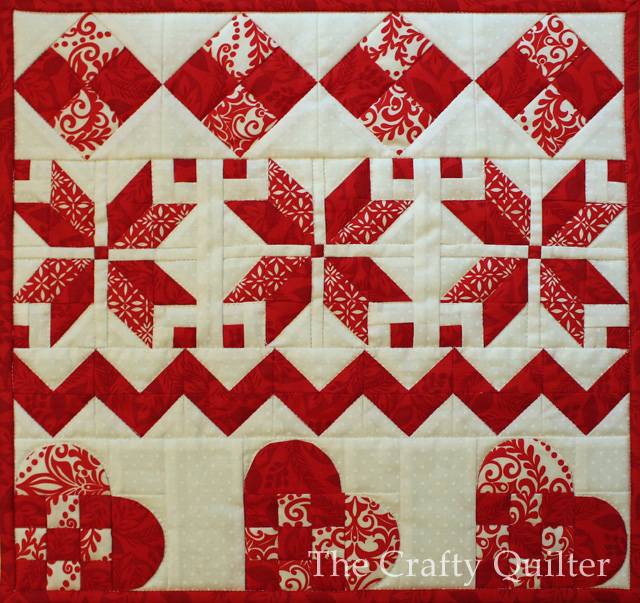
This last row consists of three Nordic heart blocks. In Nordic tradition (at least in Norway), the basket weave heart is called a ‘flettet julekurv’. Flettet=woven, jule=Christmas,and kurv=basket. Traditionally they are made as a 3D version in paper or felt, often red and white, and hung on the Christmas tree. (Thanks to my friend from Norway, Edith, for that information). So even though it might seem more appropriate for Valentine’s Day (in America) I think these hearts are the perfect symbol for this holiday project. Plus you’ll be able to keep your mini quilt hanging through the month of February!
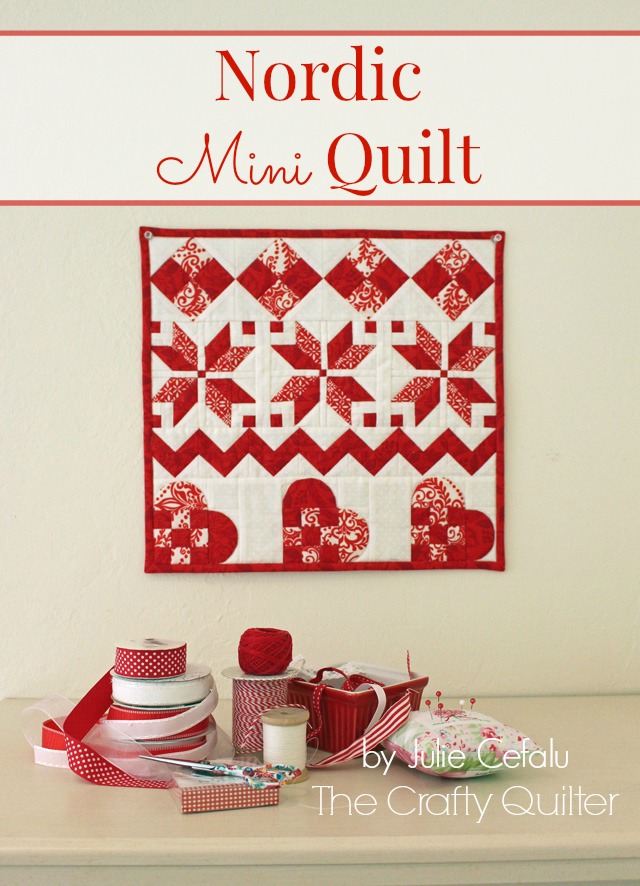
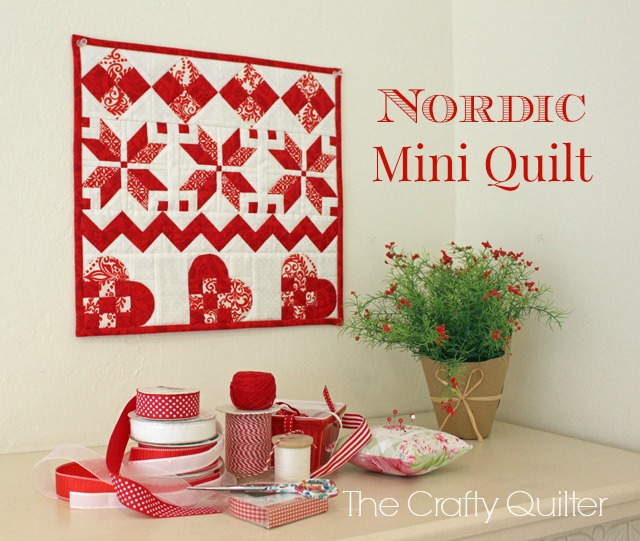
And once you’ve made your Nordic hearts, you can put all of the rows together. Here is the Nordic Mini Quilt all finished:
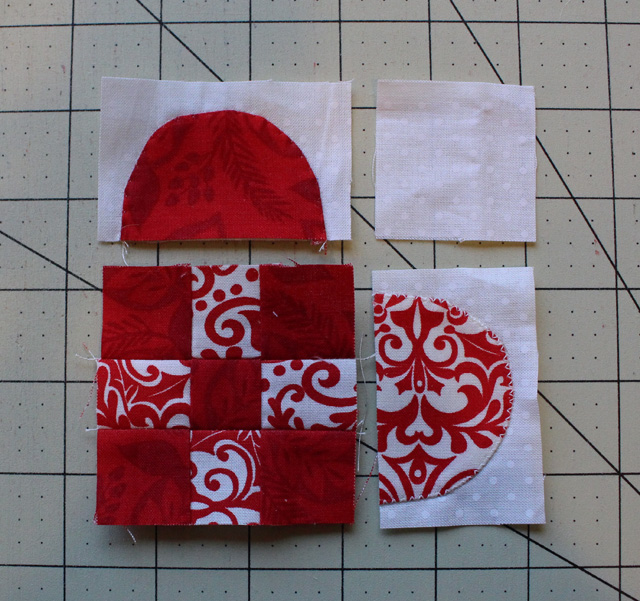
Each heart consists of a 9-patch and two appliqued half circles. I know that the applique might be a deal-breaker for some of you. It’s like when I see paper piecing, I run in the other direction! I have a cool applique technique that you’ll like, and you should think of it as “just more sewing”. The hardest part is that you will need to print out the Nordic Heart Templates (at full scale) which are patterns for the half-circles.
So let’s get to it!
Cutting Instructions: (corrected 12/2/14)
- Red: (2) 1 1/4” x 9” rectangles, (1) 1 1/4” x 9” rectangle, (3) 2” x 3” rectangles
- Red/white print: (1) 1 1/4” x 9” rectangle, (2) 1 1/4” x 9” rectangles, (3) 2” x 3” rectangles
- White: (6) 2” x 3” rectangles, (3) 1 3/4” squares, (2) 2 1/4” x 4” rectangles
- Fusible Interfacing: (6) 2″ x 3″ rectangles
Assembly Instructions:
1. Make (3) 9-patch units.
- Stitch red and red/white print strips together as shown below. Press towards red.
- Sub-cut into 1 1/4” segments. Join segments together to create a 9-patch unit.
- It should measure 2 3/4” square.
2. Make heart half-circles. I’m using a turned edge method of applique for this tutorial. You can use whatever method of applique you choose. For more applique stitching information, you can visit my tutorial on raw edge applique and turned edge applique.
- Print out the Nordic Heart Templates at full scale. Check the 1″ box for accuracy.
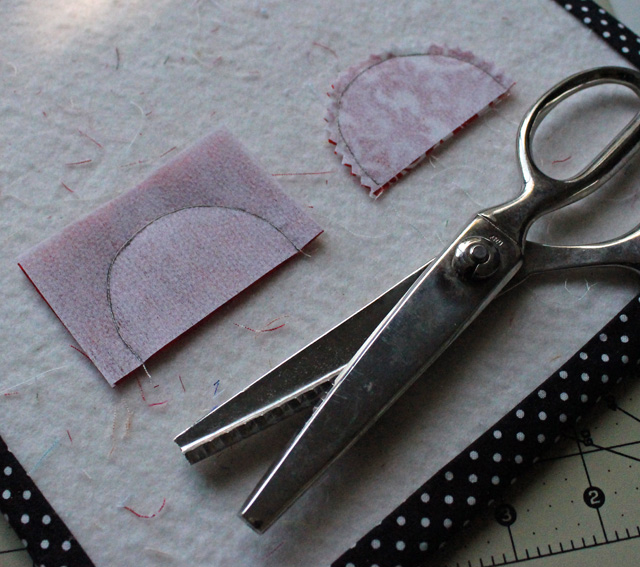
- Trace the small half-circle shape onto the smooth side of the 2″ x 3″ rectangles of fusible interfacing (I used a Frixion pen). Make sure the raw edge of the interfacing is even with the solid bottom edge of the template.
- Layer the interfacing onto each of the 2″ x 3″ rectangles of red and red/white print, fusible side to right side of fabric.
- Stitch on the drawn line using a short stitch length of 1.5.
- Trim 1/8″ away from stitching – I like to use pinking shears for this.
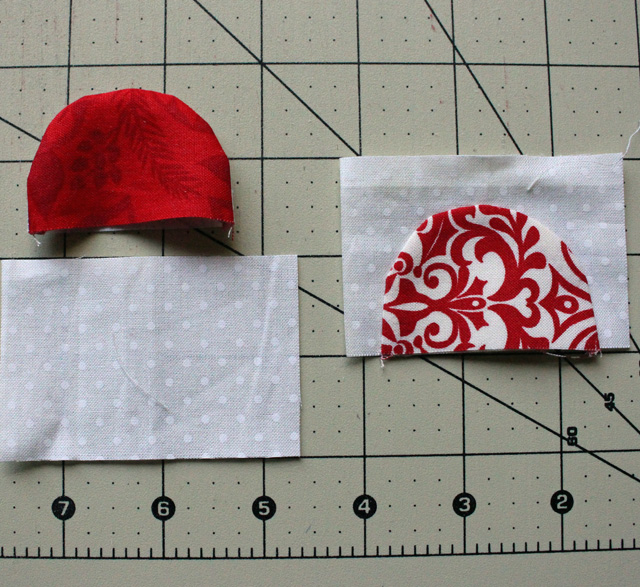
- Turn shape right side out and finger press shape so that it has a smooth curve.
- Center on top of 2″ x 3″ white rectangles and press in place. Make sure that bottom raw edges are aligned.
Stitch along the turned edge of each half circle. I used Monopoly, invisible monofilament thread by Superior and a blind hem stitch. Alternatively, you could hand-stitch this or you could use a zig zag or blanket stitch with matching thread.
Trim the appliqued rectangles to 1 3/4″ x 2 3/4″. Make sure that you leave 1/4″ between the raw edges and the half-circle.
3. Assemble the Nordic heart block.
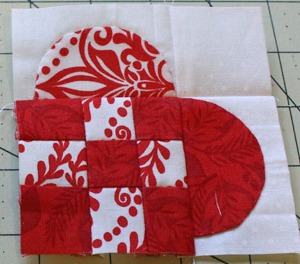
- Join the 9-patch unit, half-circle rectangles and 1 3/4″ square.
- Pay attention to the color placement of the half-circles. I alternated mine as shown below:
- Press seams away from half-circles (and be careful of the iron temperature if you used nylon invisible thread).
- The unit should measure 4″ square (unfinished).
4. Complete the row.
Join the Nordic hearts and the white 2 1/4″ x 4″ rectangles. Pay attention to the color placement of the heart half-circles (if you want to alternate them as I did). Your row should measure 14 1/2″ unfinished.
5. Finish the Quilt.
Now all of the rows can be joined together! The order of the rows is up to you. I chose this setting for mine:
I kept my quilting simple and stitched in the ditch for the main block components.
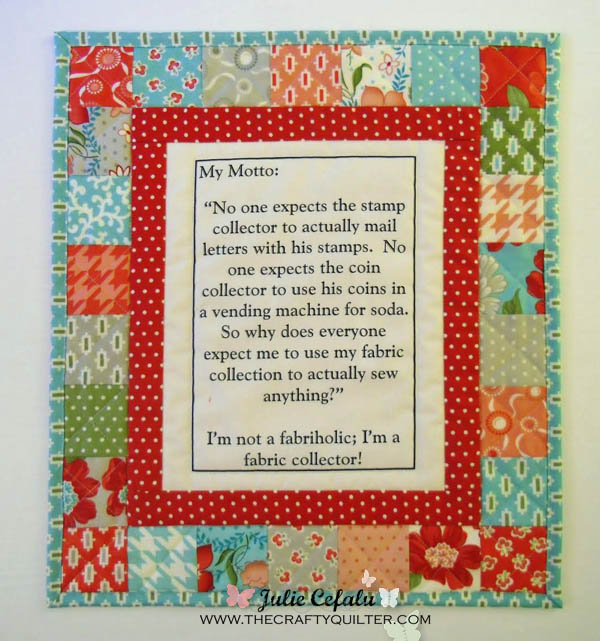
I chose a blue/white/red print for the backing (all of my fabric is from Solstice by Kate Spain for Moda). I added a quick and easy label to finish it up:
I’m so happy with this little quilt and I really enjoyed making it. Even though I’ve made it with the holidays in mind, it doesn’t scream Christmas unless you want it to.
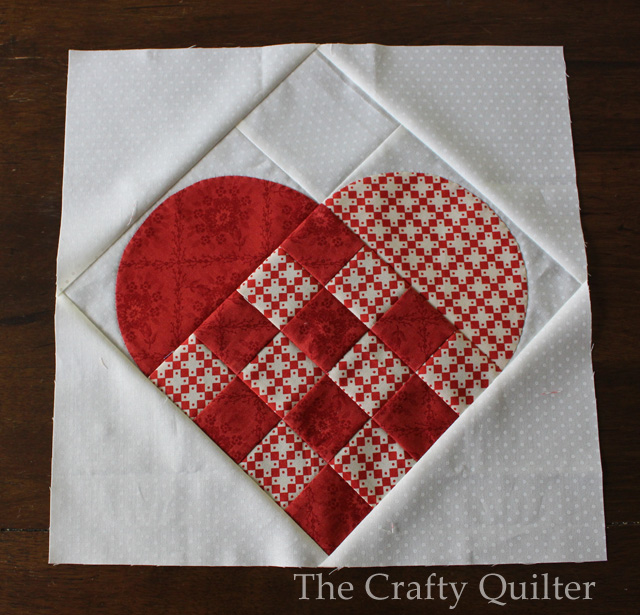
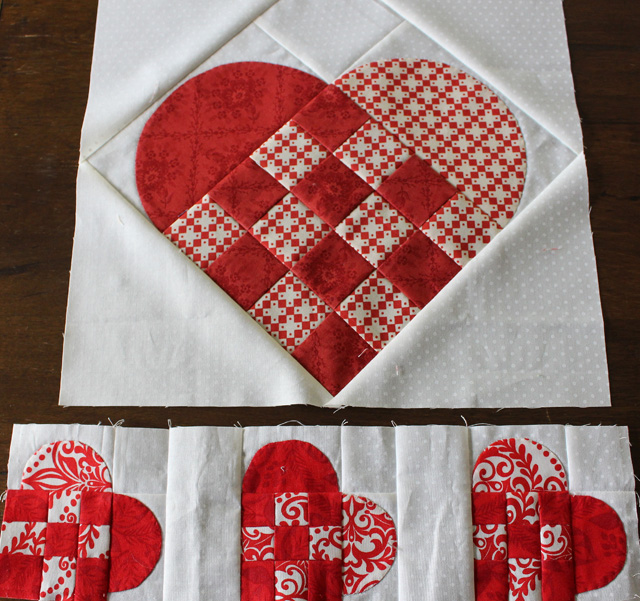
I’ve made the larger version of this heart at 9 1/2″ unfinished and then set it on-point with triangles. This gives you a 13″ unfinished block to go with the others from the previous rows.
I like the way it stands up straight in this setting. This is how the hearts compare in size:
For the larger heart you’ll need to cut:
- Red: (2) 2″ x 9″ rectangles, (1) 3 3/4″ x 6 3/4″ rectangle
- Red/white print: (2) 2″ x 9″ rectangles, (1) 3 3/4″ x 6 3/4″ rectangle
- White: (2) 3 3/4″ x 6 3/4″ rectangles, (1) 3 1/2″ square, (2) 7 1/2″ squares cut in half diagonally (setting triangles)
- Fusible Interfacing: (2) 3 3/4″ x 6 3/4″ rectangles
You will be following the same assembly instructions as the smaller hearts, except that the larger heart will have a 16-patch for the center that will measure 6 1/2″ square unfinished. So, you will stitch 4 strips of fabric together and sub-cut them into 2″ segments. Then sew these together to form the 16-patch. The half-circle rectangles should be trimmed down to 3 1/2″ x 6 1/2″.
The setting triangles are over-sized, so you will need to trim the entire square down to 13″ unfinished. You may be cutting close to the diagonal setting seams, but that’s o.k. as long as the fabric color is the same (as mine is). Just make sure that you leave 1/4″ seam allowance at the bottom point of the heart.
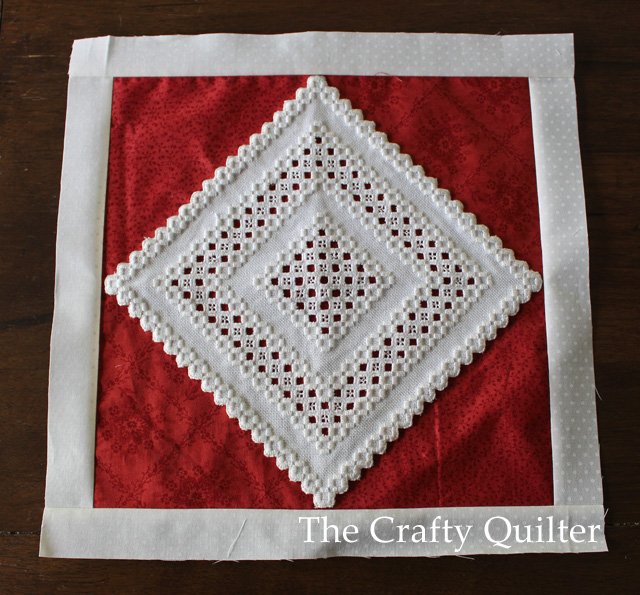
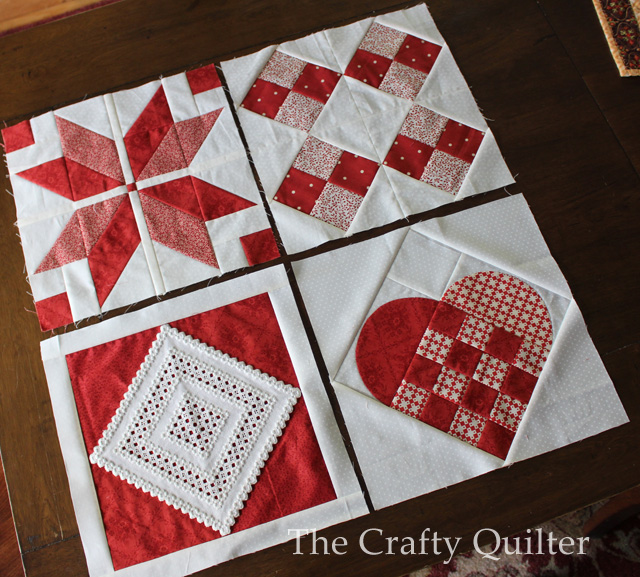
If you’ve been keeping track, I’ve given you directions for 3 larger blocks that measure 13″ unfinished (I’ve left out the larger flying geese units). I wanted to have 4 blocks to form a 2 square x 2 square setting. For my fourth block, I used a beautiful piece of Norwegian embroidery called Hardanger. It was handmade by a student of mine and she was kind enough to give it to me. It is perfect for this project! I set it on-point on top of a 4-patch of red squares and hand-stitched it into place. Then I bordered it with white fabric to balance out the color.
I love it and it means so much to me! The lady that gave it to me, Hilde, is German and she’s in her late 70’s. She is just now learning how to quilt and she has taken my beginning quilt class several times recently. She told me that she did all of the stitches by hand (about 10 years ago) and that it is a traditional Norwegian-style of embroidery. Did you know that my mother is 100% Norwegian? I’m thrilled to have such a gift (and now I’m looking into learning to do Hardanger myself- eek!). If you’re interested, a great Hardanger resource is Nordic Needle.
Maybe you could do something similar with an old doily or handkerchief. Or create your own block for this arrangement. Here are all four of my large blocks together:
I’m considering adding sashing between the blocks and maybe a small border. I’ll definitely show you pictures of it when I’m done.
I hope you’ve enjoyed this quilt along. I know many of you are busy and won’t get to it before the holidays. It might be a perfect project to work on in January or February especially if you’re keeping with the red and white color scheme. I’d love to see pictures, too! Remember to use the hashtag #nordicminiqal if you’re posting on Instagram.
Have a wonderful day!







Hi
I love the heart’s. I hope it’s ok to use the idea to make twin small hearts for the Great Western Hospital & Royal United Hospital. They have been requested for patients who have died of Covid19. The idea is to give one of the hearts to the family and the 2nd stays with the deceased person. It’s something that has touched my heart.
Hi! Great block! Thanks for sharing. I made the larger single version, and found that the curved pieces were not large enough so that when all finished, they met at the top of the 2 inch block. I have adjusted the half circles by 1/4 inch all around and am going to try again
Lovely! Thank you for sharing such a cute quilt.
Julie, I just ran across your heart block via Pinterest. It is just an adorable heart pattern. Would you be OK with me using this block to make a few table runners to sell in my Etsy shop?
Hi Julie!
I found your blog and this wonderful Nordic Mini tutorial series by way of a pin on Pinterest. I just want to thank you for sharing such a wonderful project! It’s got me itching to finish my autumn project so I can get a start on winter projects!
I’m wondering if you could put two drunkard’s path pieces together to make the semicircle part of the heart. I have an Accuquilt cutter, and I think that would work…of course, I also have some circle dies which I could just cut in half, too. The quilt is beautiful and very inspiring. I might try to make mug rugs with just the heart part.
Making this for my major at school 🙂
can someone please make the patterns and upload then?
were the pattern for the half circle for the big heart
hi i loce the pattern but could i get the pattern for the big heart
My mini top is finished! I still need to layer it and finish it up, but another project is calling that has to be in the mail tomorrow. It’s beautiful! Thanks so much!
I have my Nordic Christmas Star done and it is lovely. I enjoyed making the block. Thank you so much for sharing your creativity.
I would like to send you a picture but I am not on Instagram. Is there another way to send the picture?
beautiful quilt.
Thank you for sharing this beautiful quilt. I hope I can get some time to make it in time for Christmas.
Love it, love it. You’ve got my Nordic love for your work.
Uff da. I wish I was as talented as you. Thanks for the inspiration.
Hi, Julie! Cute, cute, cute quilt! Could you tell me how to make the “print friendly” one print without splitting the pictures between 2 pages? (Sorry- I know I should know it)
Hello Julie! I am visiting your site from The Patchsmith’s blog to see your instructions for this beautiful Nordic Quilt. Thank you for sharing it, it is beautiful!! I am not sure if I will have time to finish it now before Christmas but, I am going to keep the instructions for when I do have time… I really want to make this beautiful project! Thank you again!! 🙂 xx
I have really enjoyed this mini quilt-along. My Nordic mini quilt is awaiting binding and then I will find a special spot for it. It will look good all year round – not just for Christmas. Thank you for sharing.
Julie, How did you know that RED has always been my favorite color? I think it’s such an exciting color! I love the Nordic Mini you have done, and so generously shared with us. I haven’t had time to make it yet, but plan to soon. The hand-embroidered Norwegian block the woman sent to you is amazing. What a treasure and all the more special because of your heritage. I really enjoy your posts. I’m from Minnesota and it’s -0 this morning. A good day to inside and sew! Thank you for all you share!
Absolutely Beautiful. Must add it to my long list of someday sewing 🙂 Thanks for the great tutorial.
Absolutely stunning. And excellent tutorial/QAL. #Quiltlove
SewCalGal
http://www.sewcalgal.blogspot.com
Julie, I’m in love with this little mini! You designed a winner. It would be just as pretty in blue, or green…….thanks so much.
so delightful and being a hardanger fan (my favourite technique) love how you have added it to the big blocks
Great job. Love your larger blocks. The hardanger piece is beautiful.
I love love love these blocks!!! I can’t wait to start mine, I’ve been so busy, lots of guests….
What a fabulous design – this project is so sweet in both sizes! I’m going to make a commitment to myself to try this pattern. Thanks so much for sharing it!
Thank you for this awesome gift this season. May you be blessed for your generosity. Julie, would you please tell me what permanent pen you used on your label that gave you such great results? Also, did you use sandpaper or similar underneath the fabric when making your label? Thank you SEW much!
Merry Christmas,
Karla
Thanks you so much for a lovely quilt done small and large
will have to have a go at this.
We in the quilting world are so lucky to have people like yourself who give us inspiration.
Thanks again
have a lovely Xmas
It’s just fabulous! What a great Christmas gift for your quilting friends and so nice it is doubly festive for Valentine’s Day. Thanks so much!
Thank you so much for your generosity in sharing this pattern. It’s very pretty and I love it.
Warm hugs,
Ruthie
Your Mini Quilting is really nice and Lively.
Thank you for sharing it with us.
Carmen
(Spain)
Sorry: Lovely.
You are so generous to share!! This is a sweet one… thank you
OH my! It’s just adorable! I can’t wait to get to mine! Thank you SO much for sharing this pattern. The possibilities are endless using other colors too!
So lovely! You are amazing…
Love this!