Nordic Mini QAL, Row 3
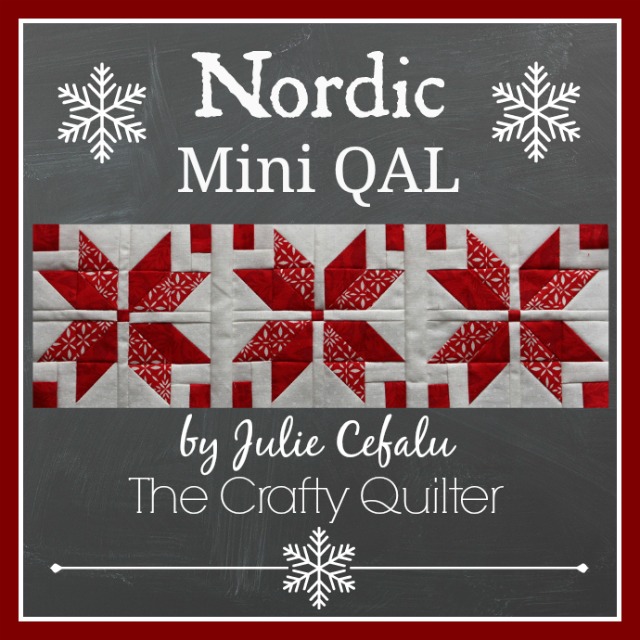
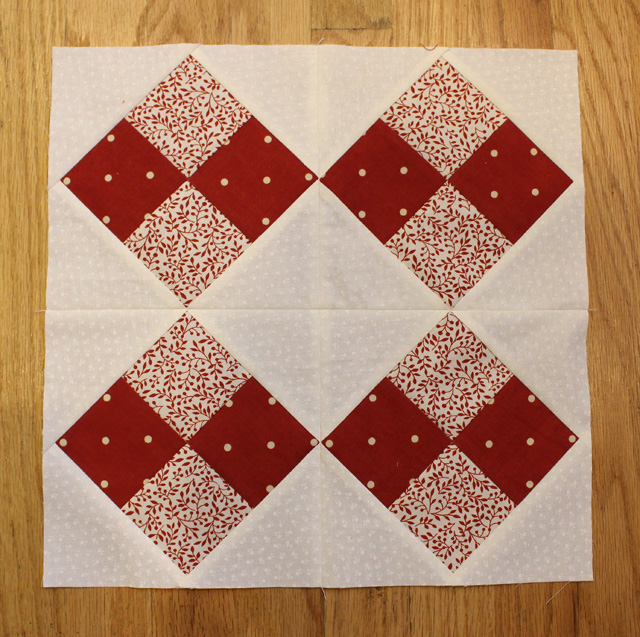
Alright friends, it’s time for the Nordic Mini QAL, Row 3! It’s a sweet little row of 4-patch blocks set on-point.

I just love how the dark red squares form a chain across the row. And I love how all three rows look together!

You’ll notice that row 3 is on top, so the order of the rows is really up to you. You may want to wait until you have all four rows completed before you sew them together.
For those of you that are still on Row 2, my friend Amanda at The Patchsmith has a great alternative way of making the flying geese. You can find her tutorial for 3D flying geese here. She used this method on her own Nordic mini and it looks great!
I know you all have a busy schedule, so let’s get started!
Cutting Instructions:
- Red: (1) 1 3/4″ x 15″ strip
- Red/white print: (1) 1 3/4″ x 15″ strip
- White: (8) 3″ squares, cut in half diagonally, once
Assembly Instructions:
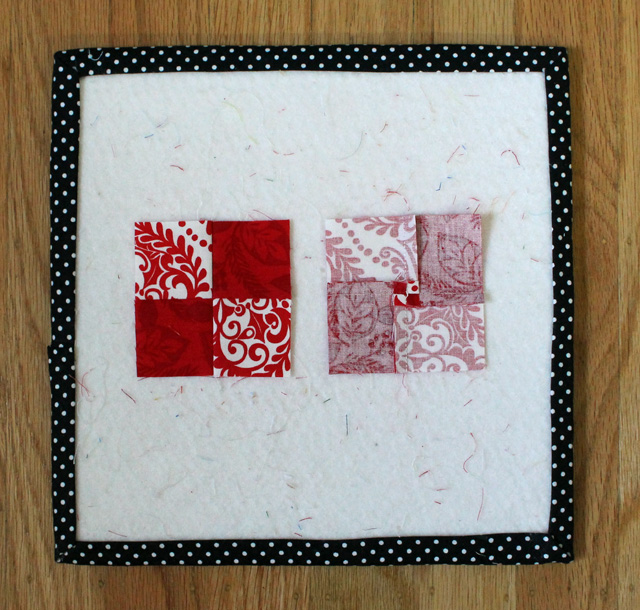
1. Make four 4-patch units.
- Sew the red and red/white print strips together; press towards the red.
- Sub-cut into 1 3/4″ units.
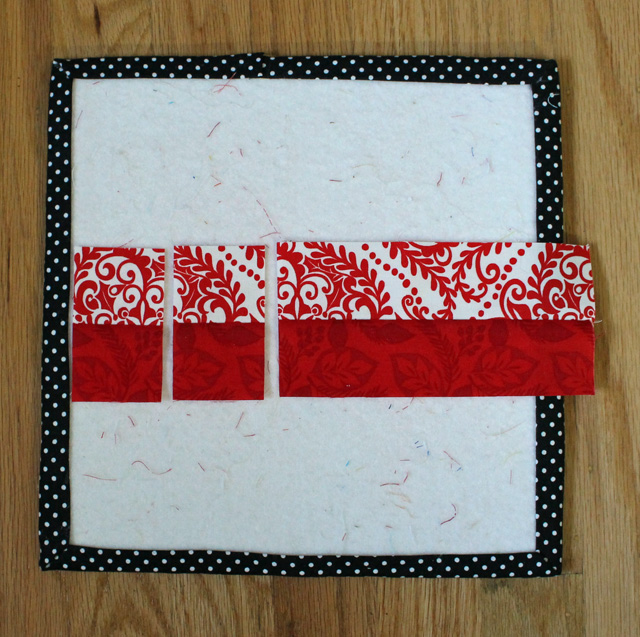
- Sew two of these units together to form the 4-patch. This should measure 3″ square unfinished (corrected),.2 1/2″ finished.
2. Make the 4-patch-in-a-square block.
- Stitch a triangle to each side of the 4-patch; press towards the triangle.
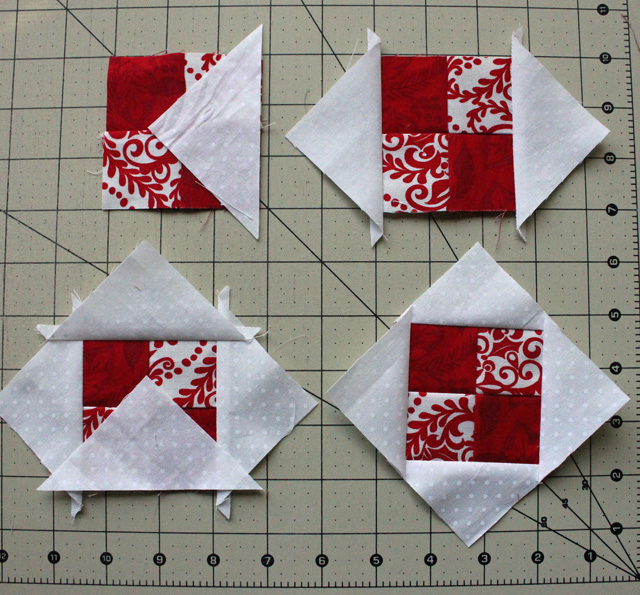
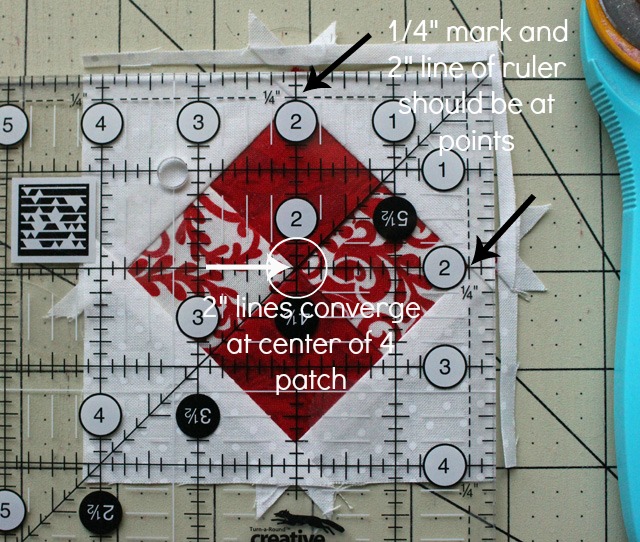
- Trim this unit so that it measures 4″ square. I like to use a square ruler that has a 45 degree line. To trim the first two sides, make sure that the 45 degree line is following the center 4-patch seam AND the 1/4″ line and the 2″ marks are at the points of the 4-patch. The 2″ lines should converge at the center of the 4-patch as well.
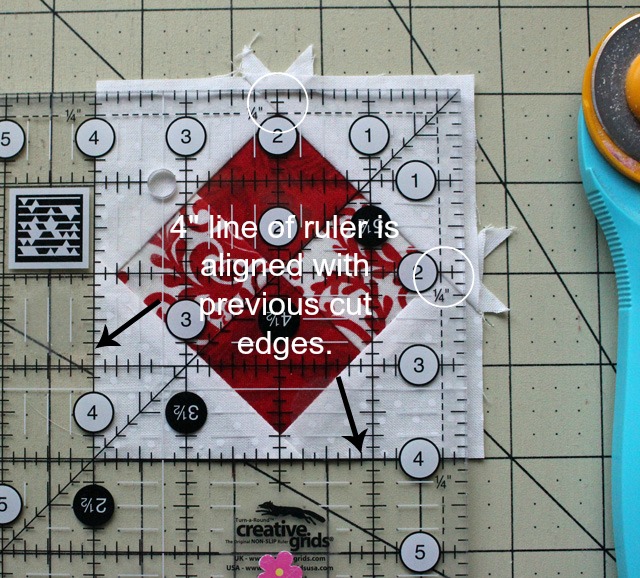
- To trim the final two sides, rotate the unit and match the 4″ lines of the ruler with the previous cut edges. You should also have the 1/4″ line and 2″ mark at the same spot as the previous step.
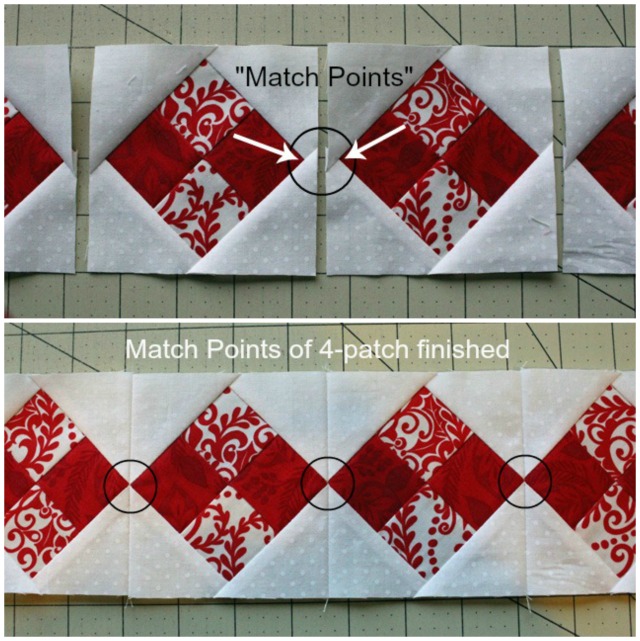
3. Complete the row.
- Join the 4-patch-in-a-square units together to form a row.
- Pay close attention to the “match point” where the points of the 4-patches line up.
- Press seams open.
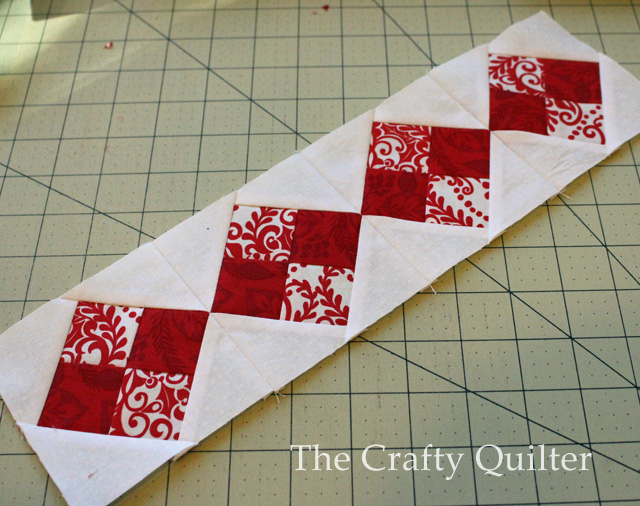
Your row is complete! It should measure 4″ x 14 1/2″.
As before, I’ve included an optional, larger version of this block. This one measures 6 3/4″ unfinished and you’ll need to make four of them. It’s a little bit of an odd size, but I’m trying to make the larger blocks fit together. Since the larger Nordic Star block measures 13″ unfinished, I need this one to measure the same. Here’s what it looks like:
Cutting instructions for the larger block:
- red: (1) 2 3/4″ x 23″
- red/white print: (1) 2 3/4″ x 23″
- white: (8) 4 1/2″ squares, cut in half diagonally, once
Assembly is the same as the smaller version. The center four patch should measure 5″ square (unfinished). Makes sure it’s not larger than 5″ (it can be a little bit shy of 5″, but not bigger). Trim the final 4-patch-in-a-square down to 6 3/4″. Sew 4 of them together to form a larger square that will measure 13″ unfinished.
There you go! Have fun and I’ll be back later this week (post Thanksgiving) with the last row.
Speaking of Thanksgiving, everyone who takes the time to read my blog gives me a reason to be thankful. You’re my friends, and I am so glad to be able to share this space with you. If you’re in the states, I wish you all a very Happy Thanksgiving!

Discover more from The Crafty Quilter
Subscribe to get the latest posts sent to your email.


Alas, I haven’t been able to start my mini yet but as soon as I finish my current project, This will be the next! Hope your Thanksgiving is full of blessings with family and friends. Thanks for all you do!
Oh, my goodness, it’s going to be SWEET when finished. I just completed the first leg of my journey south and it’s killing me that I won’t sit at a sewing machine again until mid-Dec! First up…get started on this beauty!!
I was just working on this row and in step 1. when you make the 4-patch, you say it should be a 2 1/2″ square, but it didn’t turn out right, so I’m wondering if it should be a 3″ square?
I have sent Julie an email Sheri, as I also noticed my 4-patch is 3″. But I think it should read 3″ and not 2 1/2″ as that then fits in to make a four square unit with a finished length of 14 1/2″.
Of course I mean a group of four units makes 14 1/2″ in length for row 3 of the mini quilt.
Thanks, Amanda. It should measure 3″ square unfinished. You guys make awesome pattern testers!
You are right, Sheri! It should measure 3″ square unfinished. Thanks for catching that. I’ve updated the instructions.
Your Nordic mini quilt is looking so good already. I love these little blocks. The stitch-and-slice method is such a quick and easy way to make the four blocks.
I love paper piecing so I paper pieced the flying geese. They turned out very nice! Eager to start on row 3.
this is going to be reaL beauty many thanks Juie
Thank you very much, Julie!
Your tutorial is really good.
Carmen
It looks wonderful!!! Thanks so much and Happy Thanksgiving!
Hi Julie…..and Happy Thanksgiving to you and your family. Always enjoy your blog.
I really like this pattern especially if you want something simple and quick to put together
I love all of the rows…am promising myself the gift of taking time to make this sweet little mini in 2015, for sure! The details for how to make these little blocks properly are so appreciated! I love the alternate method that The Patchsmith has shared, too!