Ombre heart quilt block tutorial
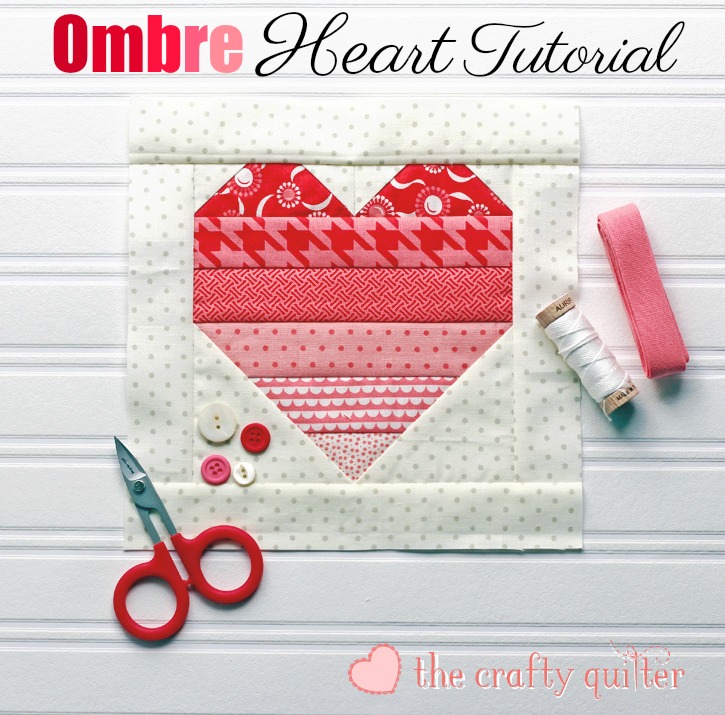
Today I have a quick Ombre Heart quilt block tutorial for you! It’s a great stash buster and I love the color gradations in this heart block.
The ombre heart quilt block finishes at 6″ square. I added 1 1/2″ (unfinished) borders to the block which makes it 8″ finished.
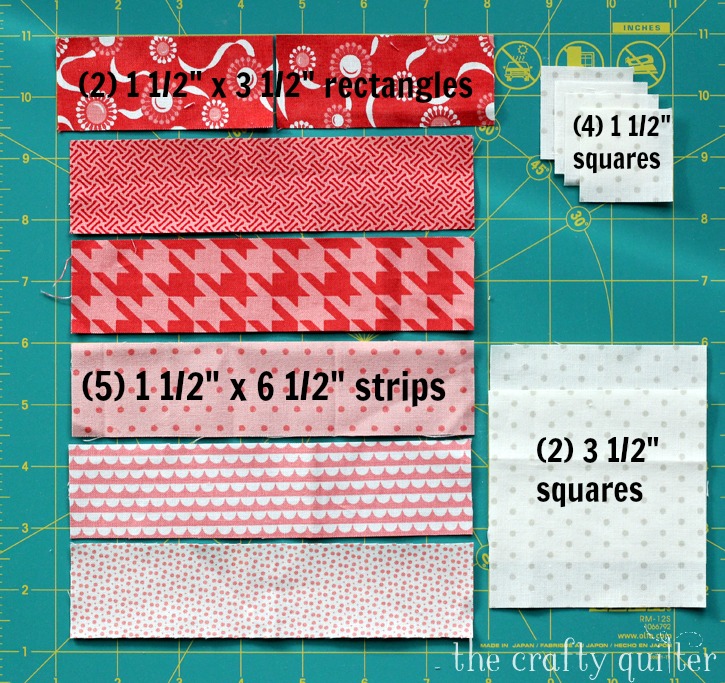
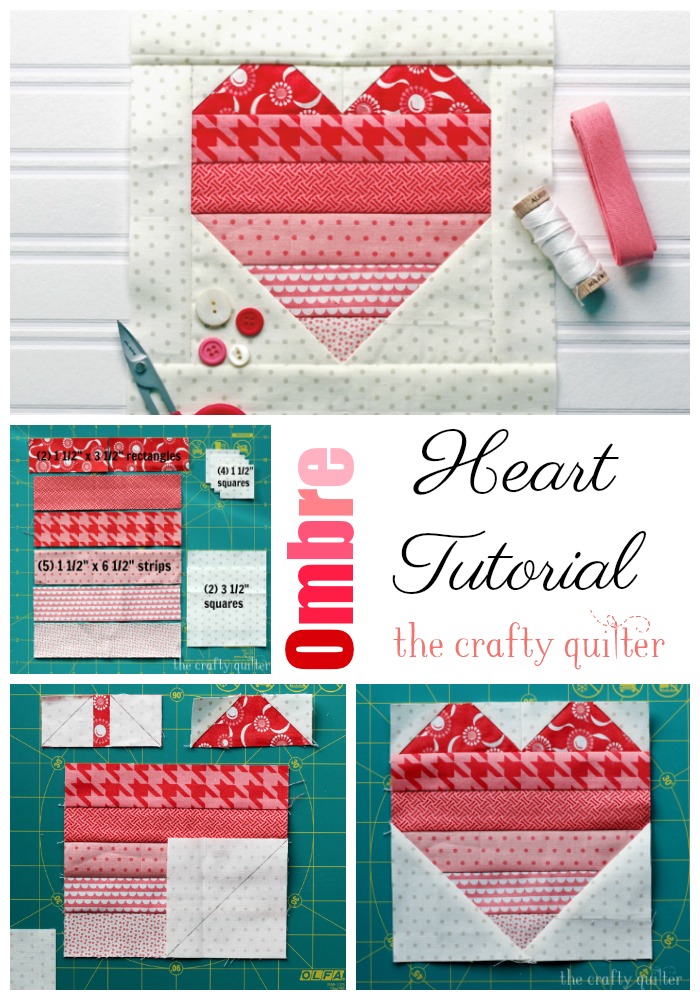
Here’s what you need to cut for one block (without borders):
- Background: (4) 1 1/2″ squares and (2) 3 1/2″ squares
- Darkest fabric: (2) 1 1/2″ x 3 1/2″ rectangles
- (5) 1 1/2″ x 6 1/2″ rectangles in light to dark color gradations
Quilt block assembly
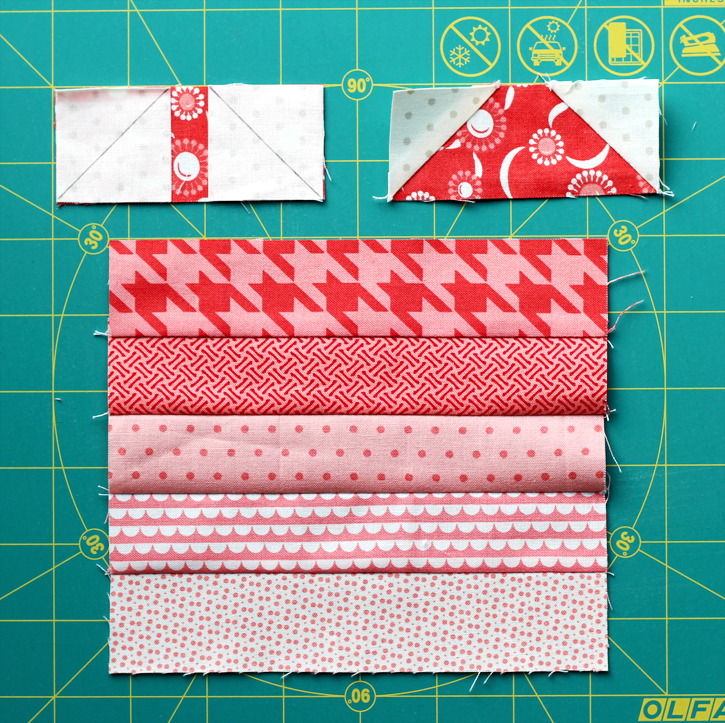
- Sew together the 1 1/2″ x 6 1/2″ rectangles in order of light to dark. Press towards the dark.
- Draw a diagonal line on each background 1 1/2″ square. Place one on each end of the dark 1 1/2″ x 3 1/2″ rectangles. Stitch on the diagonal line, trim and press.
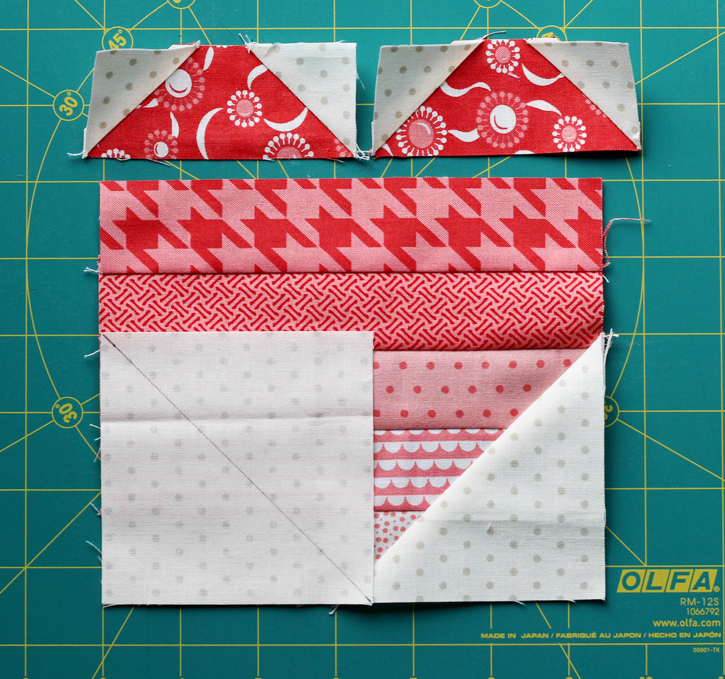
3. Draw a diagonal line on each background 3 1/2″ square. Place on the bottom corner of the strip set created in Step 1 and stitch on the diagonal line. Trim and press. Repeat for other corner.
4. Sew the two dark 1 1/2″ x 3 1/2″ units (from step 2) together along the short ends to create the top of the heart.
5. Sew the top and bottom of the heart together and press towards the bottom. The heart should measure 6 1/2″ square.
6. Optional: Sew (2) 1 1/2″ x 6 1/2″ rectangles to each side of the heart. Sew (2) 1 1/2″ x 8 1/2″ rectangles to the remaining sides.
Use your imagination to create all kinds of projects with this ombre heart. I can imagine a rainbow of different ombre hearts in one quilt.
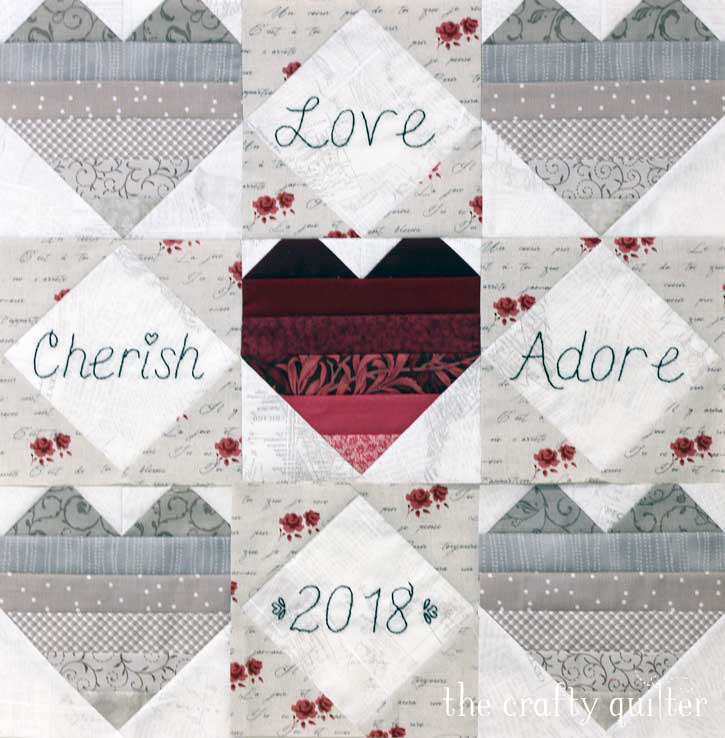
The project that started it all for me was this little wall hanging (still unquilted). I used a neutral color scheme with a red accent. The alternating square-in-a-square blocks created a space for some embroidery. The quilt measures 18 1/2″ square.
I hope you have fun with this tutorial. I would love to see what you make! If you’re on Instagram, use the hashtag #ombrehearts and/or #ombrequilt, and tag me @thecraftyquilter.
Have a heart-filled day of sewing!




Thank you so much for this pattern. I used it in yellows and blues for the Ukraine Flag. Who would have thought when you first posted this, that it would inspire this use!.. Someone in my guild is collecting 8 1/2 inch blocks to send for Ukraine charity quilts. This one was perfect. Thanks again!!
Really nice pattern! So many uses…thank you so very much!
How do you make the square in square block for the embroidery and where can I get the embroidery for the lettering? Thank You. Please message me.
I am wondering if you would provide the details for the square in a square block that is shown in the picture. If you would can you notify me?
What seam allowance do you use? Mine block came out a little tall and skinny.
Quarter inch
Oh, Julie!!!! My heart is full of joy for you the birth of your beautiful little Clara Grace, love the name! Where would we be without God’s grace? And, congratulations to the entire family! And, thanks for the heart tutorial! It is my favorite of all the heart patterns that I have collected!!!! Have a wonderful time with your babies!
I really like this! I have been looking for a simple heart block for quite some time and this fits the bill nicely! Will definitely give this a try. Thanks!
Thank you for the heart block pattern. I will probably make it into a mug rug. I wondered if there is Christmas Once a Month for the year 2018? Nancy
I loved this heart block! I spent all day Friday making the cutest table runner. I am posting pictures with a link to your tutorial on my blog Sisters Choice Quilts. The post will be up Monday morning. sisterschoice.typepad.com
Thank you, this was very fun to make, I love the way it came out and plan to use it on a lap quilt for our Veterans!
Wow! Super easy that even I can do it. Thank you for this tutorial. I love it!
Love your “ombre” heart! I think I will make some cute mug rugs with this design…..Thanks Julie, you are always coming up with neat ideas.
This was so much fun Julie! Thanks for sharing! I shared mine on my accounts and pointed people to you! 🙂
Hello Julie; I would love to have just a tiny smidgeon of your creativeness. Your heart block looks like a lot of fun to make and a great scrap buster also. I am going to PIN it and hopefully be able to make it soon. Thank you so much for designing and sharing all of the fabulous projects that you do! I hope that you have a fabulous evening!
Thank you for an adorable tutorial. It’s a sweet block. I pinned it.
Oh my gosh, I love this! I’m a ‘hearty’ gal so I’ll definitely be sewing up a few of these cuties. Thank you Julie!
SEWWWWWW Cute…not sure i will get to do something this year like this, but i have already made your stuffed hearts hanging on a lighted tree this year and am enjoying…working on the lavender sachets and hope to have done by next weekend! : ) Have a great day!
Hi Julie, Thanks for the tute. I’m going to use if for my strip scrapes. Thin this will cute for a baby quilt.
Thanks again so much for a great tutorial. I have done so many of your projects and they are so fun to make.
Another great heart block, thanks Julie!
Been a while since I have done heart blocks. Wish I had the time today or even this week. Shop hopping in IA and NE tomorrow and my personal maintenance today. But I love the use of strips in these blocks. Thank you.
Thanks for the tutorial. Love this cute heart block!!!!!!
Julie —love the mini quilt you are amazing! Thanks for the tutorial I will definitely one for myself!
Really cute!
Oh, thanks for that! I need to make a 6 1/2″ heart block for our guild meeting next week…this will be perfect! I have a whole drawer full of strips I can raid :-). Very fun!!
Printing it now :-D. I do have a question for your creatively sharp mind. I have 3 sons, two are 10 and 7, and my eldest is 22/23 by Valentines Day. What would you recommend for a) The two younger, b) the college guy, very blue collar, played football, floor hockey, very masculine, but high emotional IQ, and c) my husband, who is like my eldest son, just a bit wiser ;-). I am open to ideas from other creatives too .
Ooo I love this, thanks for the tutorial definitely going to give this one a go