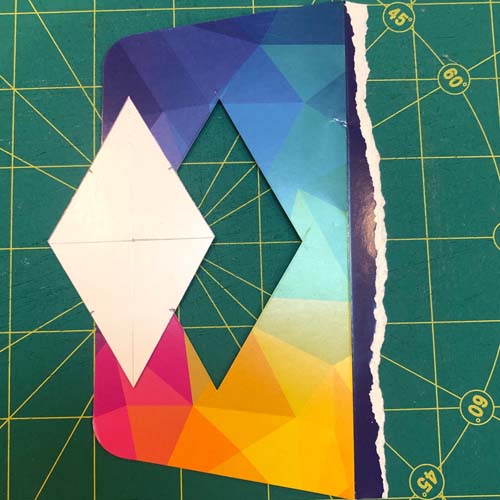
Easy cork fabric projects and tutorial
Christmas will be here before you know it, so I wanted to give you a quick gift option that you can sew up in a day. I’ve been wanting to make some easy cork fabric projects and I’ve come up with two! These Cork Coasters and Cork Mug Rug are perfect for that special handmade gift!

I am new to sewing with cork fabric, but I have to tell you it’s lovely! I did a little research first and found that cork is a great renewable resource and it’s naturally water, dust and stain resistant. You can read more about sewing with cork here. The cork I used for this tutorial, Cork Touch Pro, is applied to an upholstery grade backing material and comes in many colors. It’s easy to cut with scissors or a rotary cutter and it doesn’t fray (bonus)! I used it as applique for this project and it was very easy to stitch through.
I know we don’t all have cork fabric sitting in our stash. Alternative materials would be pleather (fake leather), Kraftex, wool, or any material that doesn’t fray. Just remember that it may need to be heat resistant if you’re going to use it with hot mugs.
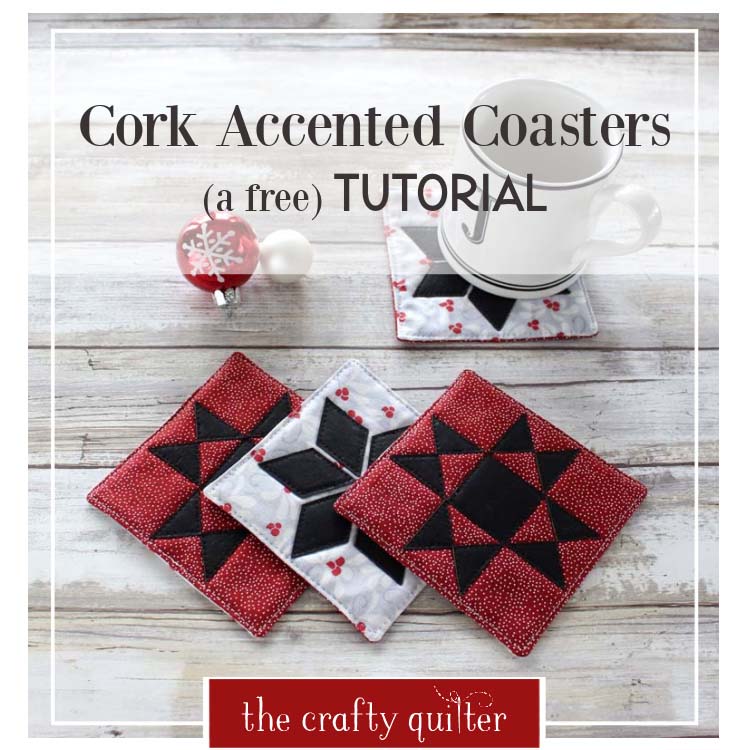
Cork Coasters
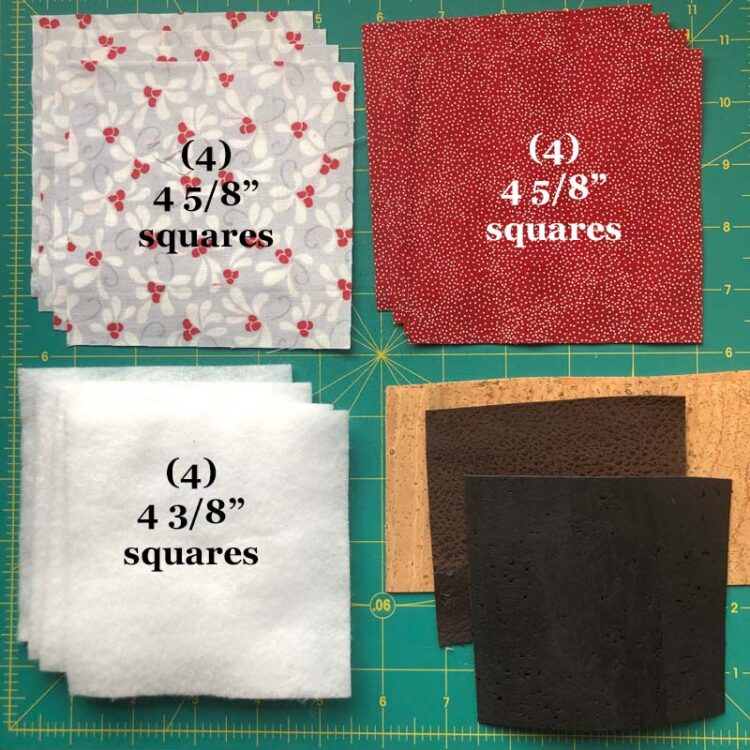
These cork coasters measure a little over 4″ square and are very simple to make. You’ll need scraps of cotton fabric for the front and back, batting scraps, cork fabric (or other) and water soluble glue – I like Roxanne’s Glue Baste It. Charm packs would work well for these.
To make four coasters, you’ll need to cut (4) 4 5/8″ squares of fabric for the front and for the back. I know that sounds like a strange measurement, but 4 1/2″ squares turned out just a tad too small. The batting should be cut 1/4″ smaller than the fabric, so 4 3/8″ squares. We’ll cut the cork fabric in a later step.
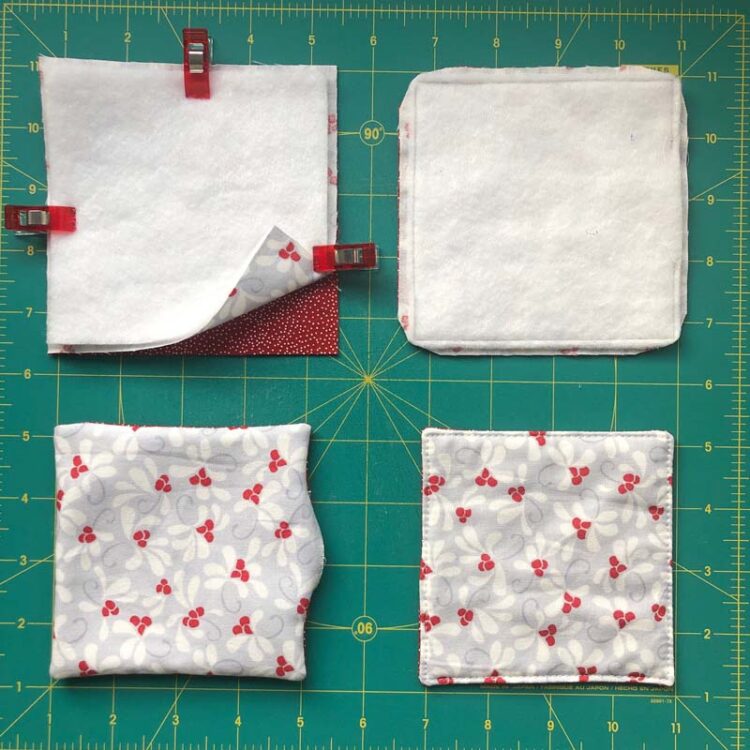
- Layer the top and bottom fabric squares, right sides together. Place the batting square, centered, on top. Clip or pin in place.
- Using a walking foot, stitch 1/4″ around all four sides, leaving a 2″ opening on one side for turning.
- Clip corners to reduce bulk and turn right side out.
- Press flat, turning the open seam allowances under.
- Edgestitch 1/8″ from the edges using a coordinating thread. This will close up the gap as well. I adjusted my stitch length to 2.7.
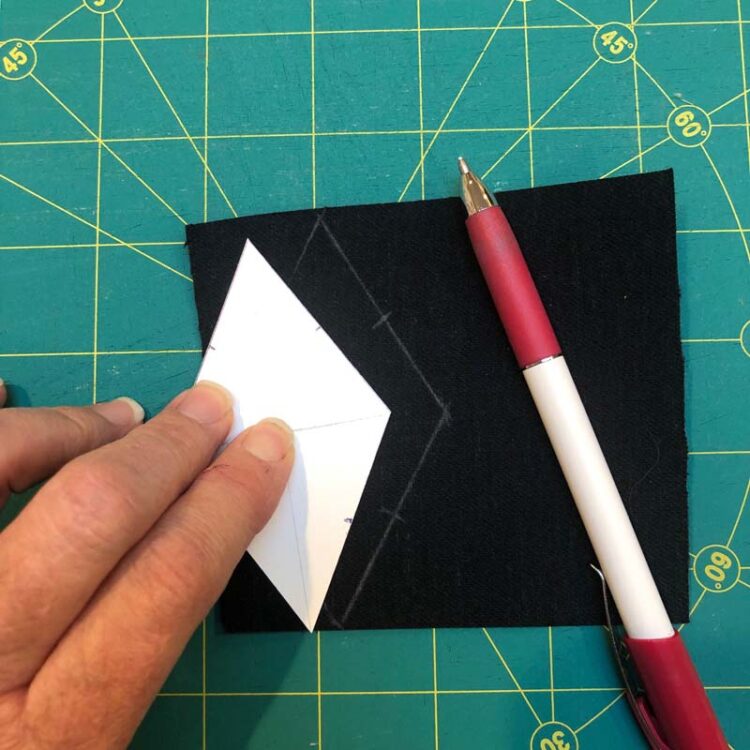
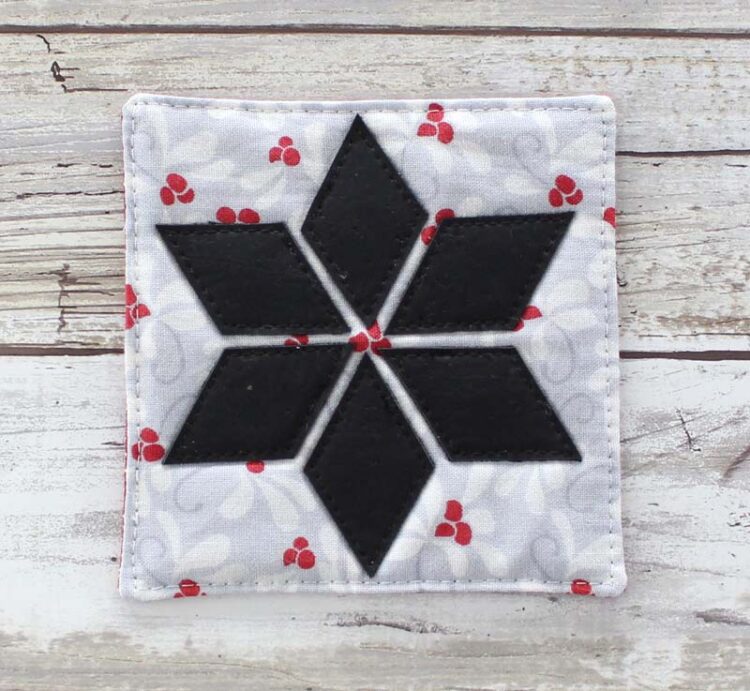
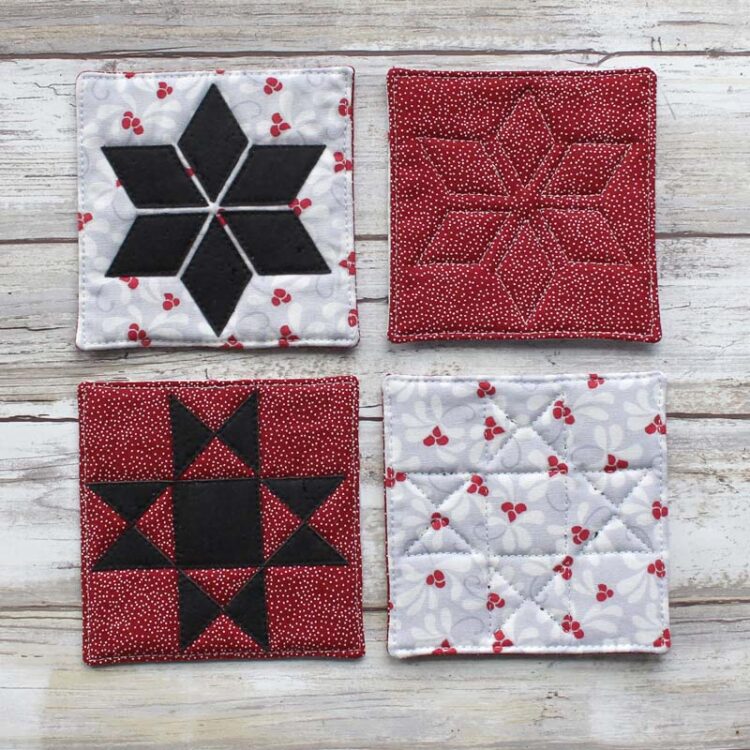
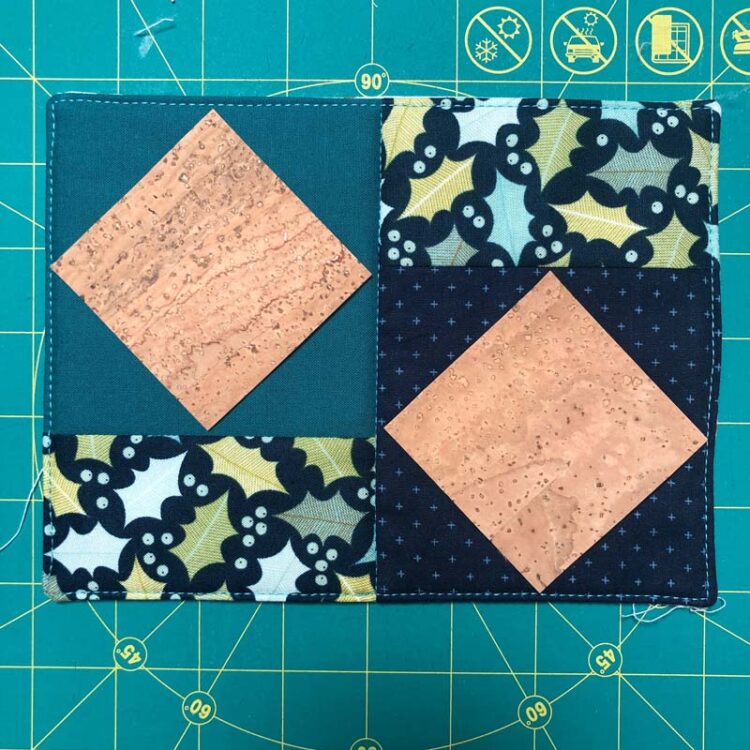
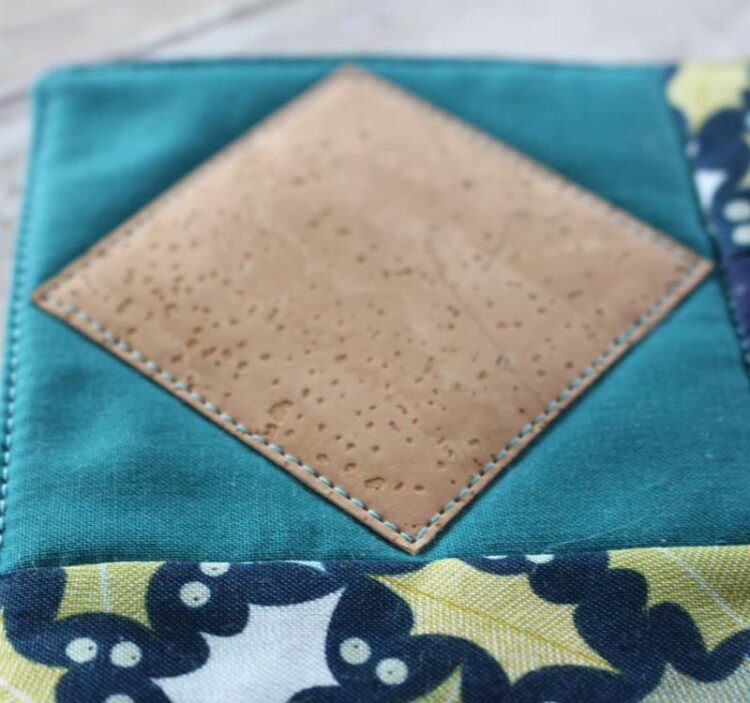
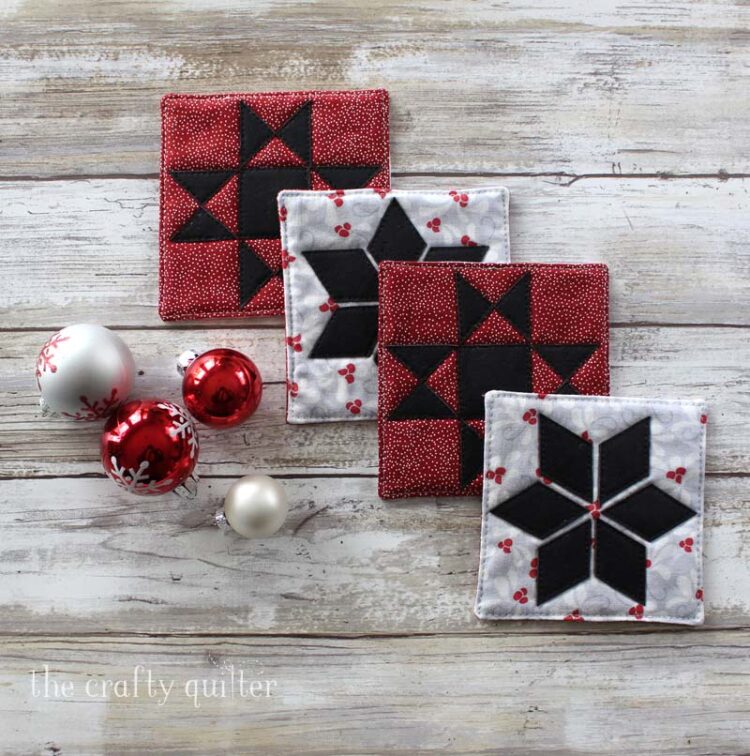
I made two different designs for the coasters. The first one is a Lemoyne Star. I made a template from a recycled card; you can also use cardstock or a file folder. Draw a 3 1/2″ vertical line. Bisect that line with a 2″ horizontal line (1 3/4″ down). Connect the ends of those lines on all four sides – they should measure 1 3/4″. This will be the main diamond shape, and it will eventually be cut into 4 smaller diamonds.
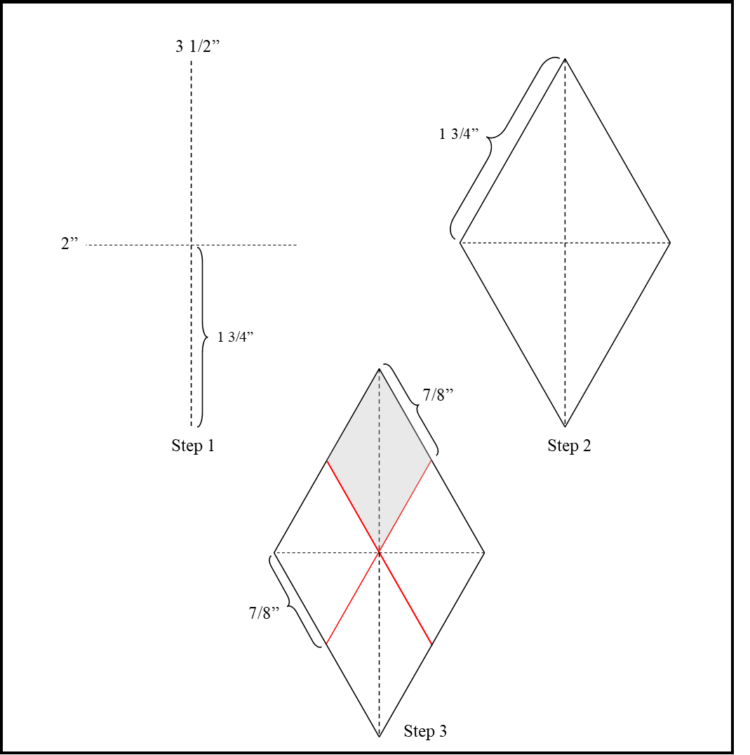
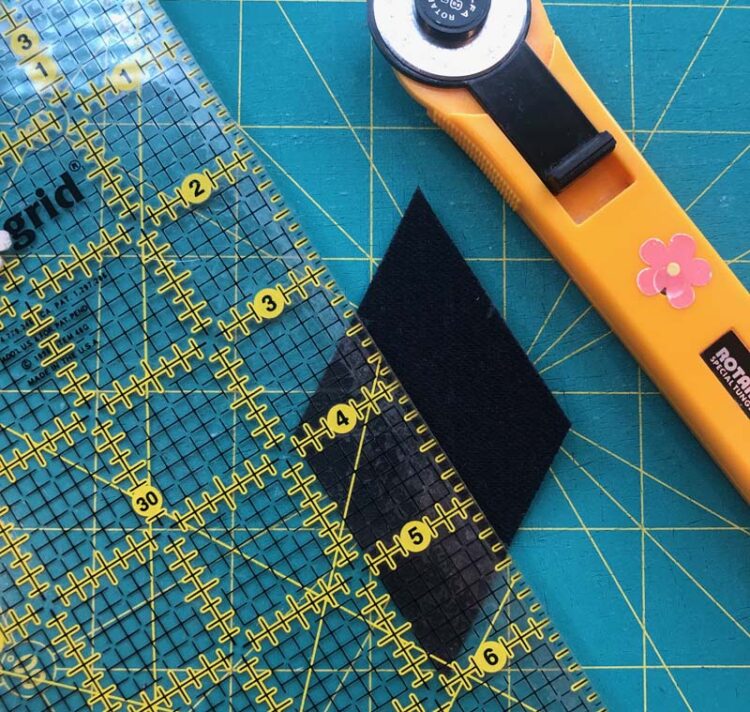
Trace the diamond template onto the back of the cork fabric. I added little registration marks on the center of each side of the diamond, but they’re not really necessary. Cut the diamond shape from the cork fabric and then cut it into quarters. The measurement on a ruler should be 7/8″ from the edge. Repeat to make 12 small diamonds.
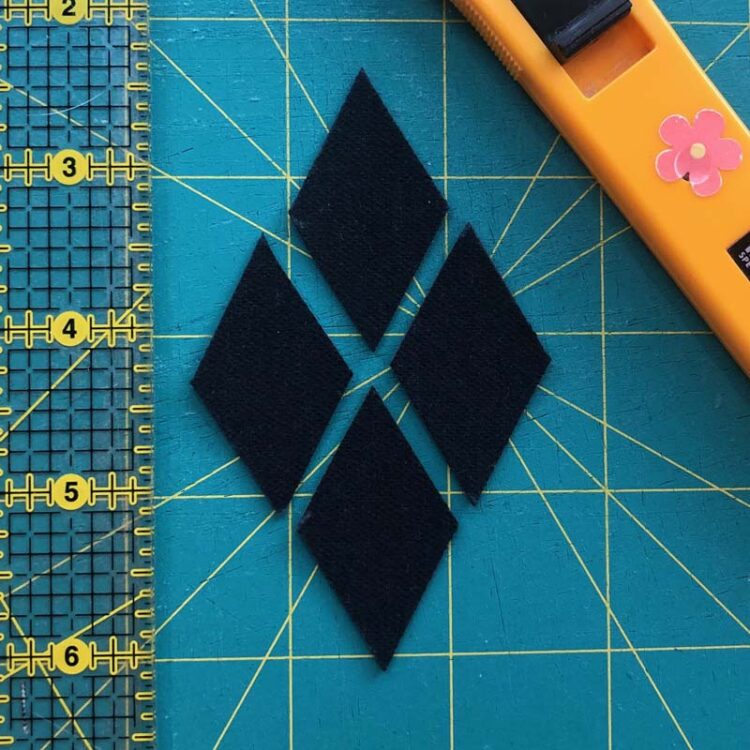
Arrange six diamond shapes on top of a coaster, leaving a little space in between. One at a time, apply water-soluble glue to the wrong side of each shape. Avoid getting glue close to the edges where you’ll be stitching. Press with a warm iron to help the glue dry.
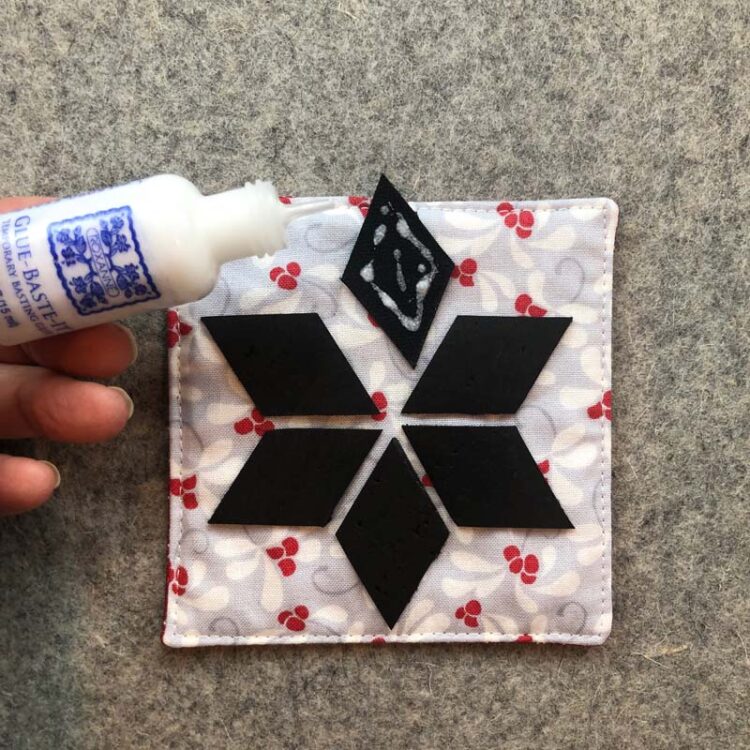
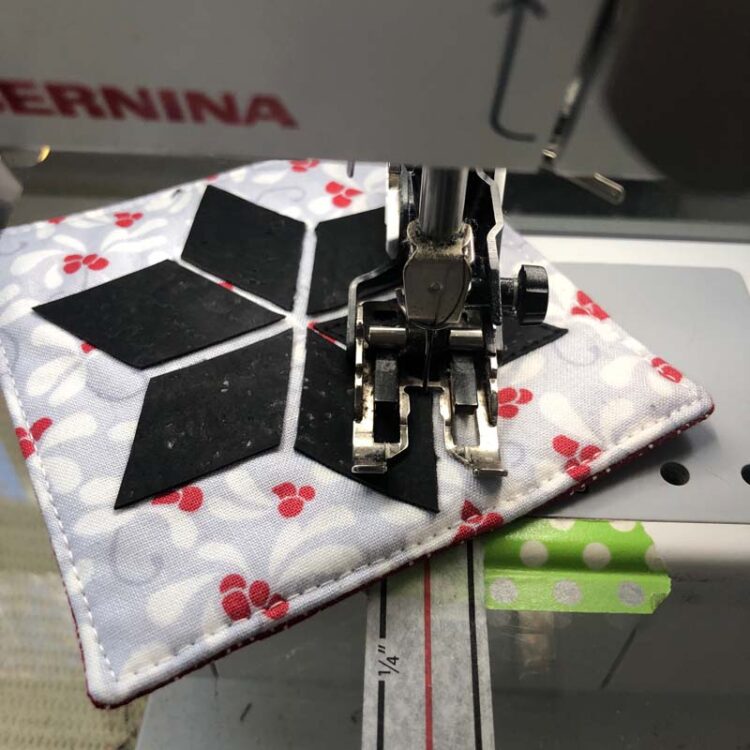
Edgestitch each diamond shape with matching thread and using a walking foot. I used a jeans/denim needle, size 90/14; you could also use a topstitch needle, size 80/12 or larger. The bobbin thread should match the back fabric.
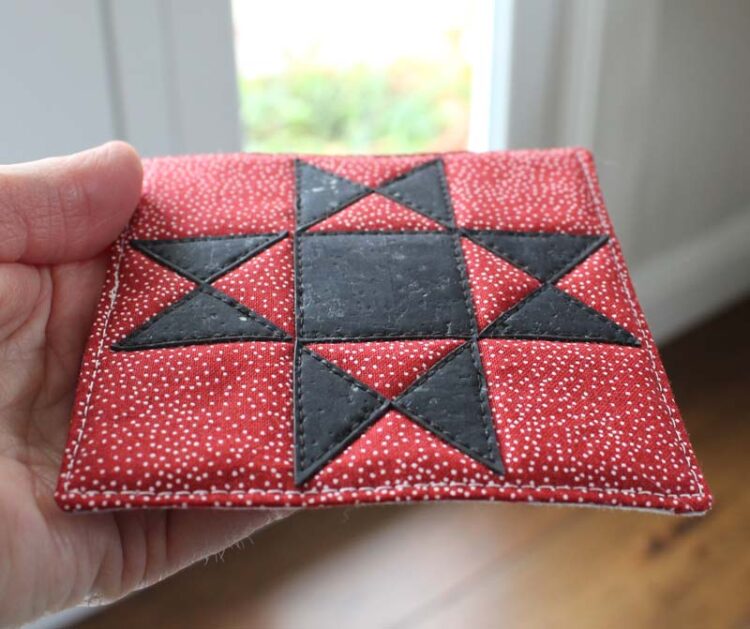
The other shape I used for my cork coasters was an Ohio Star. These are cut easily from 1 1/4″ squares. You’ll need to cut (1) 1 1/4″ square and (2) 1 1/4″ squares which are cut diagonally twice.
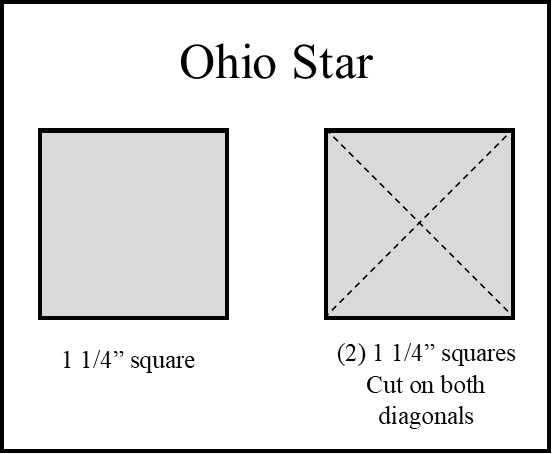
Arrange the square and triangles on the coasters and glue in place. Edgestitch as with the other coasters.
You can mix and match fabric colors or designs to make a really unique gift. Maybe consider a monogram out of cork, just remember that you’ll have to stitch around the shape. The simpler the shape, the easier to stitch!
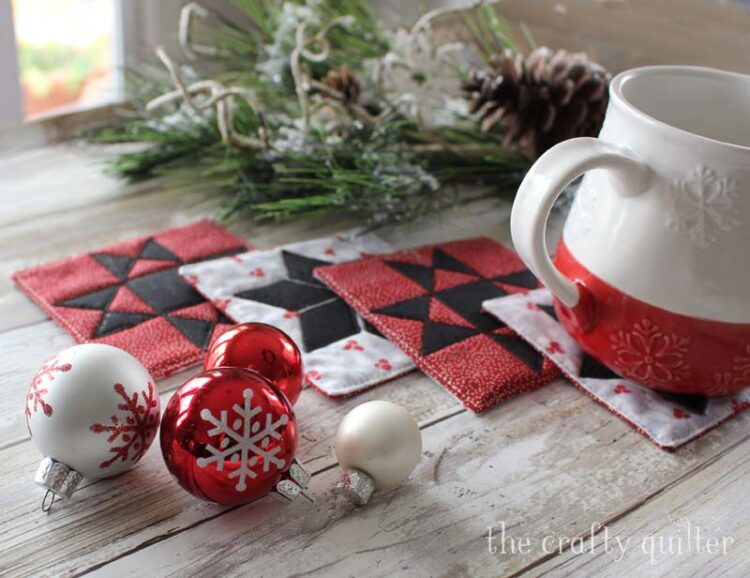
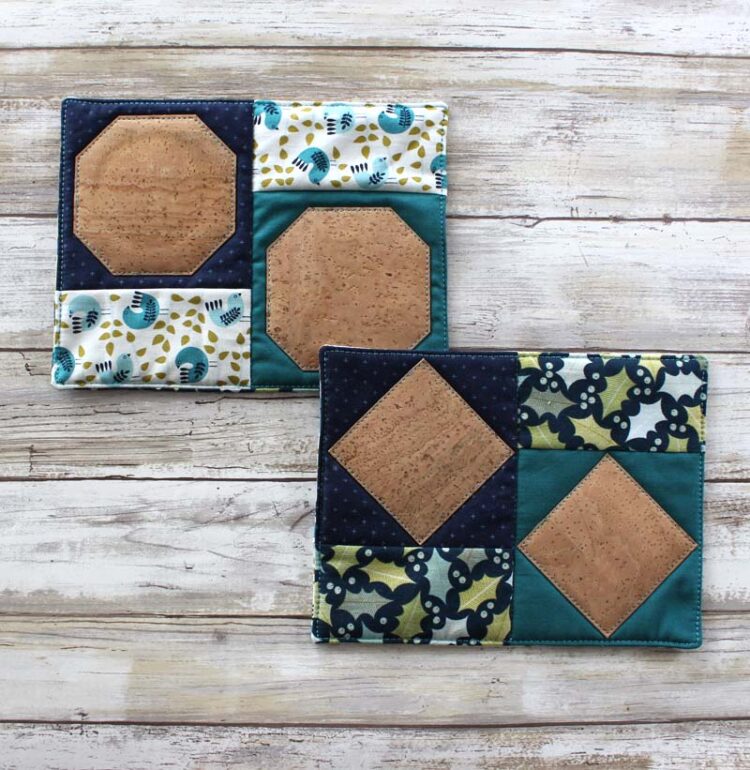
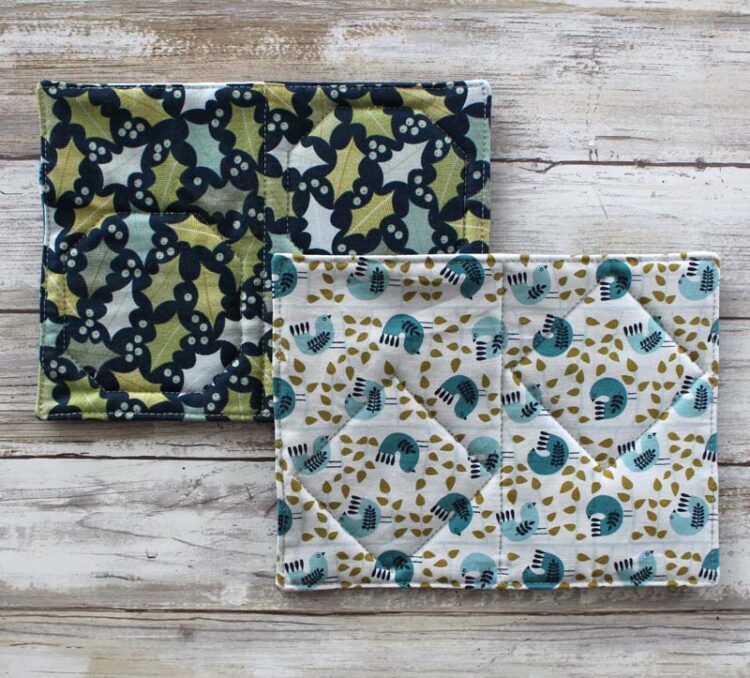
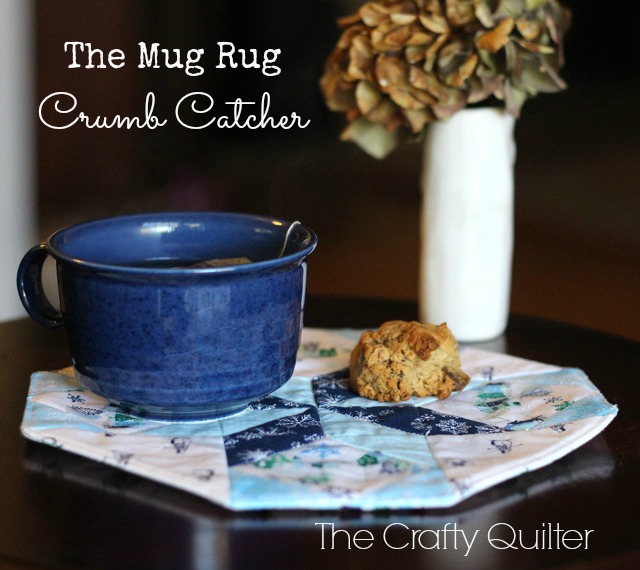
Cork Mug Rugs
Once I made the cork accented coasters, I knew I had to make some mug rugs with cork. I wanted a design that was simple, quick and easy, so I came up with these. I like that they can hold a mug and a treat!
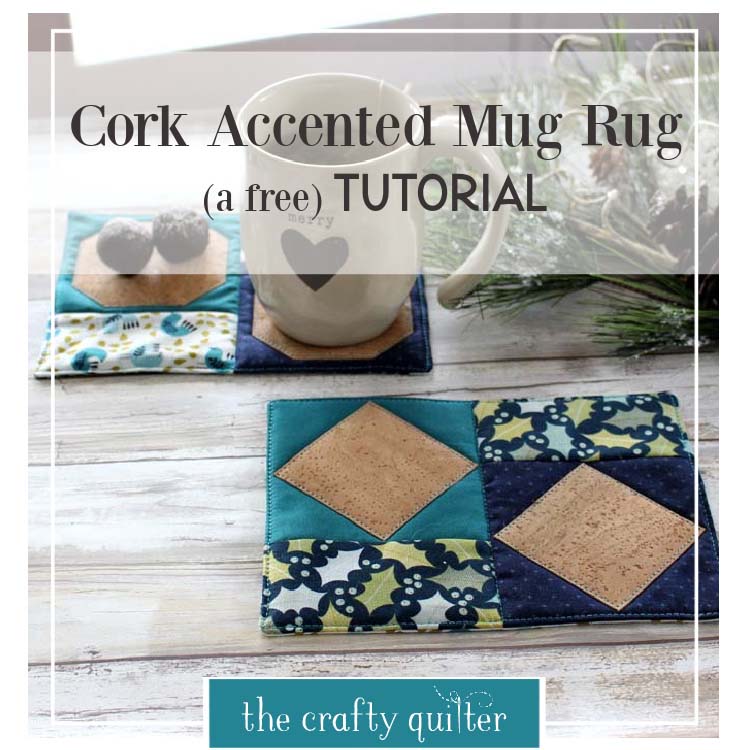
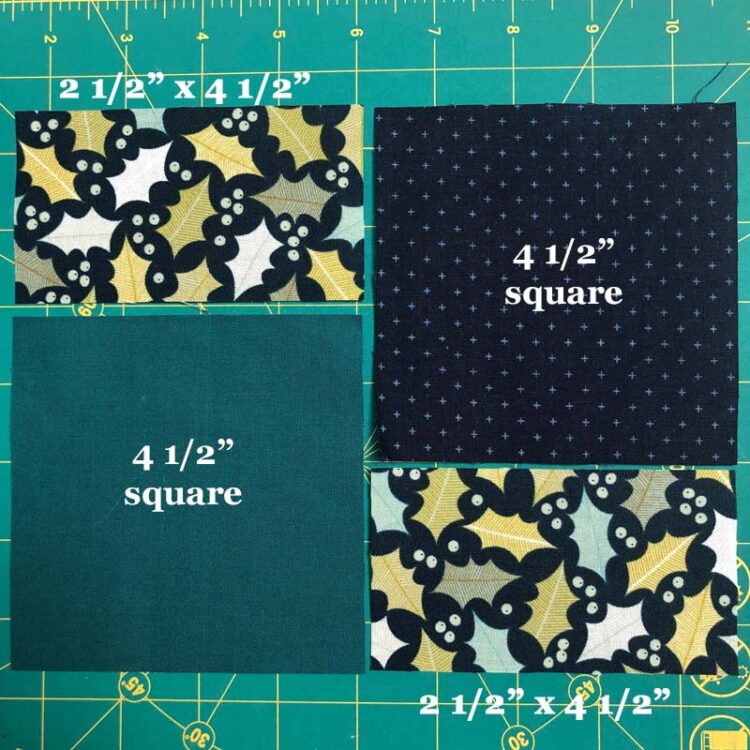
The finished size of these mug rugs is 6 1/4″ x 8 1/4″. You’ll need the following materials:
- (2) 4 1/2″ squares of coordinating fabric
- (2) 2 1/2″ x 4 1/2″ rectangles
- (1) 6 1/2″ x 8 1/2″ rectangle for the back
- (1) 6 1/4″ x 8 1/4″ rectangle batting
- (2) 2 3/4″ squares of cork fabric
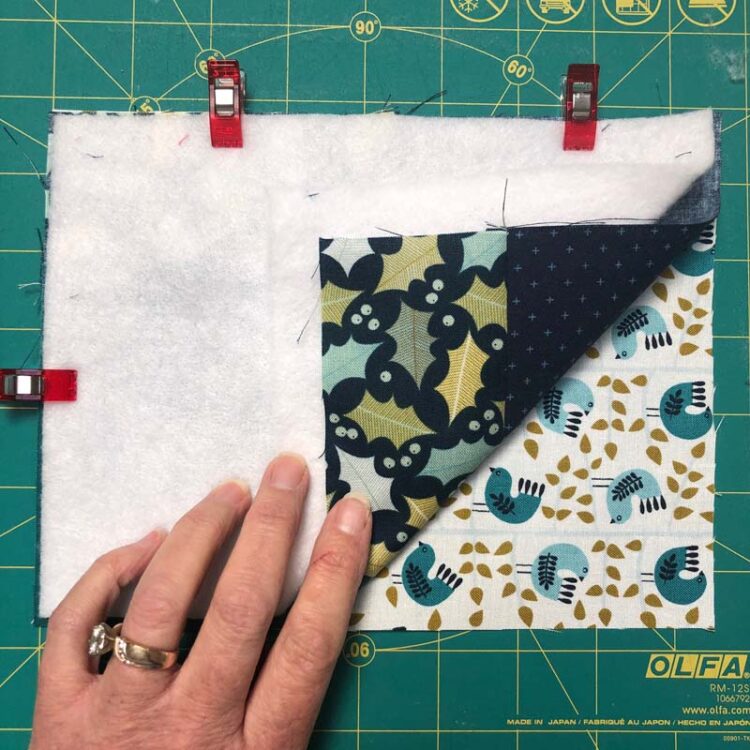
- Stitch the rectangles and squares together with a 1/4″ seam to make the mug rug top.
- Layer the mug rug top and bottom fabric, right sides together. Place the batting rectangle, centered, on top. Clip or pin in place.
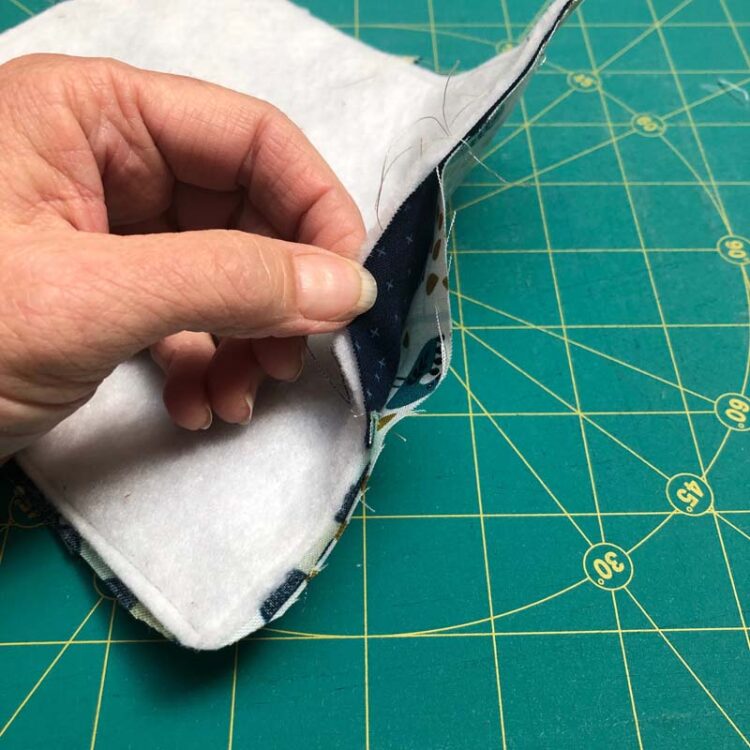
- Using a walking foot, stitch 1/4″ around all four sides, leaving a 2″-3″ opening on one side for turning.
- Clip corners to reduce bulk and turn right side out.
- Press flat, turning the open seam allowances under.
- Edgestitch 1/8″ from the edges using a coordinating thread. This will close up the gap as well. I adjusted my stitch length to 2.7.
- Quilt along the center seam (optional).
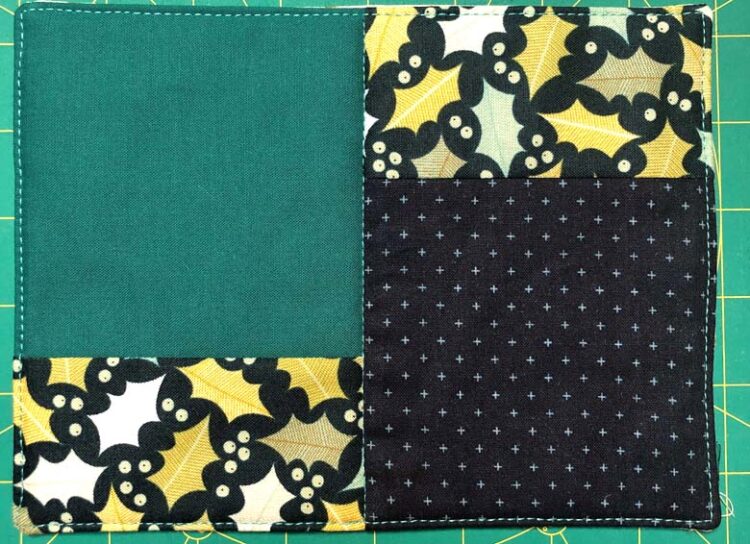
Apply water soluble glue to the back of the cork squares and press in place. Edgestitch around the sides using a walking foot and coordinating thread. I chose a contrasting thread for this and I like how it turned out.
You can definitely play with the cork shapes for this if you’d like. I wanted to keep it simple, so I clipped the corners on the second mug rug to make them into octagons. You could also repeat the designs from the coasters here.
The nice thing about all of these projects is there is no binding! It keeps the process quick and easy so you have time to get things done.

If you like mug rugs, check out my other mug rug tutorials:
I really enjoyed coming up with these cork fabric projects. I think I’ll be making more of these and it’s always nice to have extra gifts on hand, just in case! Time to put on my elf hat!


Discover more from The Crafty Quilter
Subscribe to get the latest posts sent to your email.
Iv’e seen the cork fabric and always wondered what to do with it. Thanks for the suggestion! Your e-mails are always so nice to receive. So fun and so much information! Thank you, thank you, thank you!!!
Thank you so much, this is so inspiring
Great look!
Question: Can I wash cork? It might be wipeable but the fabric may get something spilled on it.
Hi Christine,
I have read that cork fabric is washable by hand and by machine, but I haven’t tried it out myself. I think with a small project like this one, it would be safe to do either.
Julie
Thank you so very much for this idea. Your instructions are great too. I have cork but have not yet sewn with it. Good to try on a small project. Happy Holidays!
I have had cord for over a year but haven’t used it. This is a great pattern to start with! Thank you 🙂
Julie. what a great idea the applique, it works as quilting too. Kill 2 birds with one shot, Love it.
Never thought of it. Thank U.
Hug Susana
What an interesting and pretty project! It is great to see new materials demonstrated on sites like yours. Thank you!
Julie, these are terrific ideas! I will have to remember to make some of these. I have some cork, some projects planned, but the leftovers will be perfect for this.
I can always count on you to come up with the best projects! I love sewing with cork! I have loved it since our local quilt shop first introduced us to it a few years ago.
Thanks as always and Merry Christmas& Be well!
Super cute! I had never heard of cork fabric; thanks!
On my 2021 list ‘to do’! I never thought about coasters and do like sewing with cork so thank you!
Hi Julie, , the cork fabric coasters are really cute. May try to make some of these too
Thank you. That was interesting. I actually have a little cork in my stash so these ideas will work nicely for little gifts for co workers.